How to Unlock Double Jump | Faydown Cloak Location
★ Sea of Sorrow Free DLC Announced!
☆ Walkthrough
★ Best Crest Builds | Best Tools
☆ Full Interactive Map of Pharloom!
★ Mask Shards | Spool Fragments | Abilities
☆ Boss Guides: The Unravelled | First Sinner
Double Jump or Faydown Cloak is an unlockable Ancestral Art found at the peak of Mount Fay in Hollow Knight: Silksong. See how to perform a Double Jump and a walkthrough on how to climb Mount Fay to get the Faydown Cloak.
List of Contents
How to Unlock Double Jump (Faydown Cloak)
Climb to the Top of Mount Fay
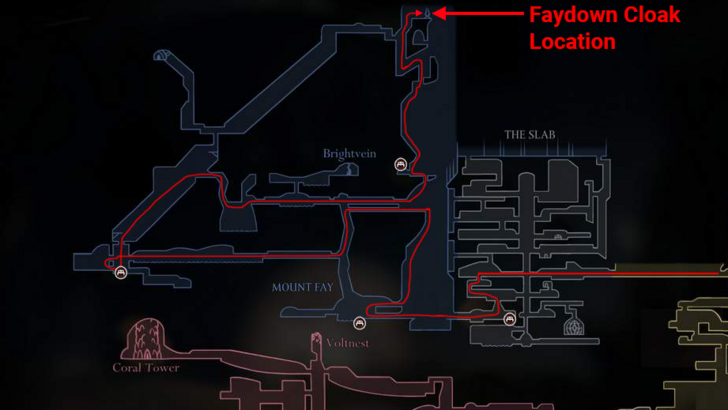
You can get the Double Jump ability when you get the Faydown Cloak at the top of Mount Fay. At the peak of the mountain, play the Needolin next to the ancient tuning mechanism to get the Ancestral Art.
You need the following prequisities before you can start climbing Mount Fay:
- Abilities such as Dash, Glide, grapple, Grapple, and Wall Jump.
- Get captured by Wardenflies to enter The Slab or enter from the leftmost section of Choral Chambers.
How to Get Faydown Cloak Walkthrough
| # | Walkthrough |
|---|---|
| 1 | 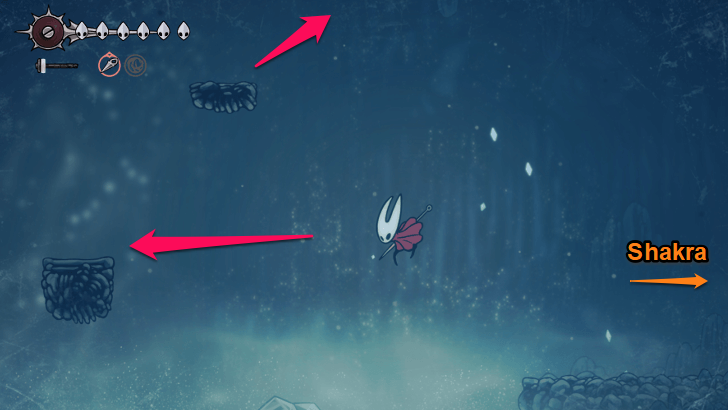 Head left from Shakra and climb up the platforms towards the upper right corridor. |
| 2 | 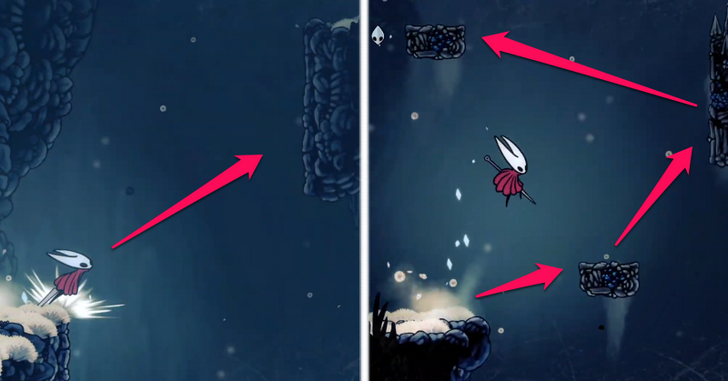 Perform a running jump to reach the rock on the right and wall jump upwards. Continue platforming towards the fragile wall to reach the upper left section. |
| 3 | 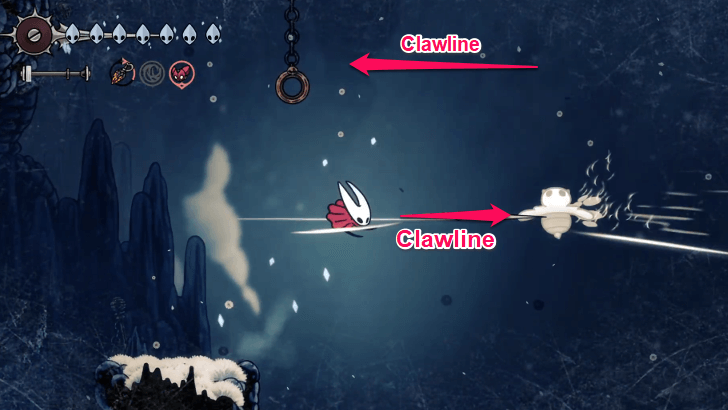 Use Clawline on the enemy, then perform another hookshot to latch onto the ring. |
| 4 | 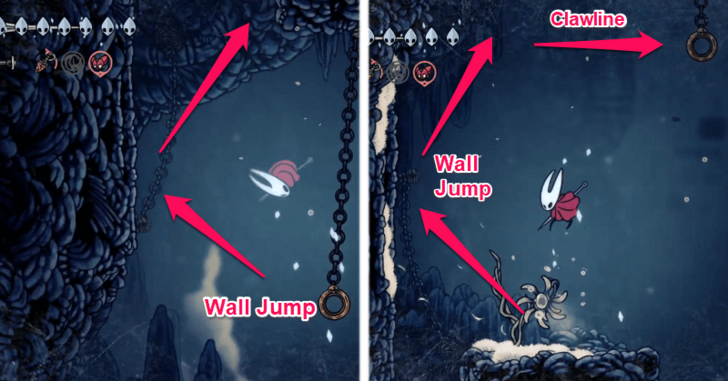 From the ring, hop over to the right wall and wall jump upwards. Wall jump again then Clawline towards the ring. |
| 5 |  Perform a wall jump then a Clawline to reach the ring, then perform another wall jump and clawline to reach the left wall. Reset the cold status on the platform, then head upwards to proceed. |
| 6 | 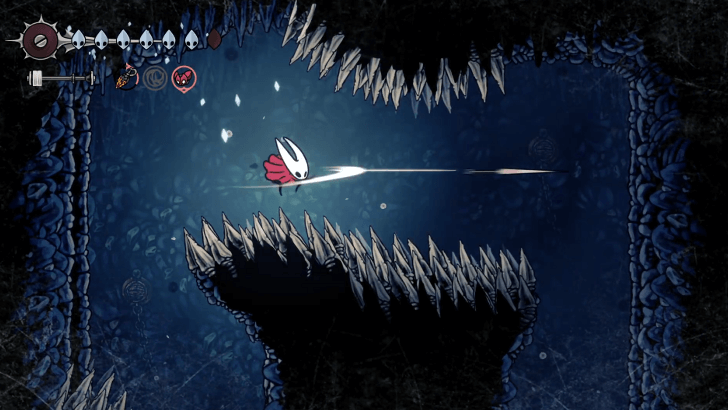 Proceed through the cavern while avoiding spikes. A zone to reset the cold status is available at the end of the path. |
| 7 | 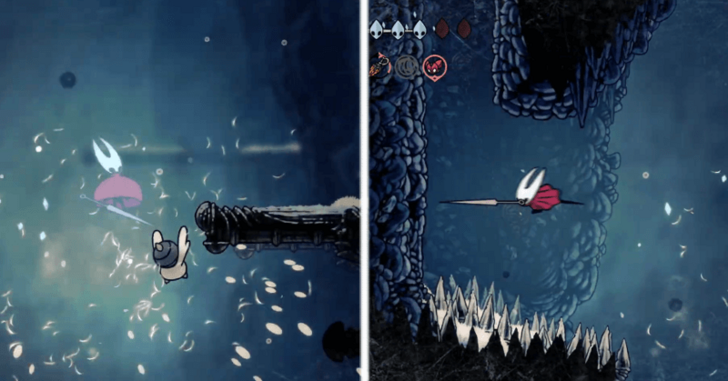 Perform a Clawline to bounce off the enemies and reach the rightmost wall. Jump up and perform Clawline again, reaching for the left wall with spikes underneath. Proceed upwards, then head left to continue. |
| 8 | 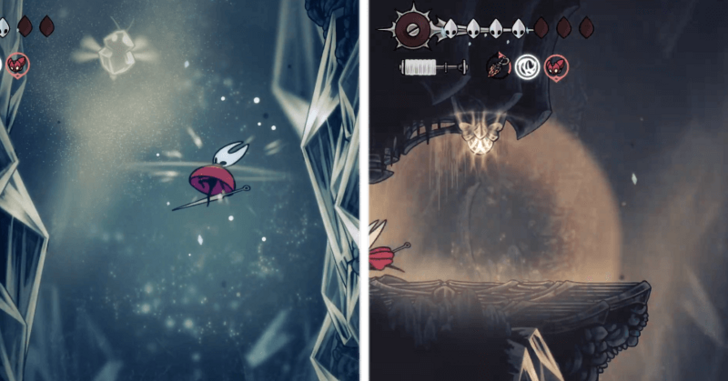 Float downwards with Drifter's Cloak, then enter the room on the left. |
| 9 | 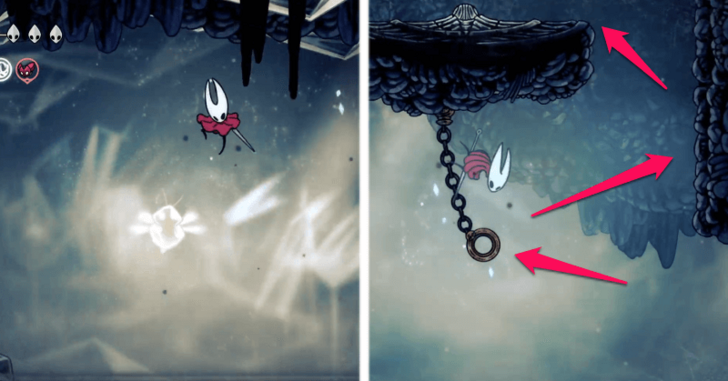 Pogo on the flying ice bugs, then Clawline onto the ring. Wall jump towards the right wall then jump onto the platform and reset the cold status. |
| 10 | 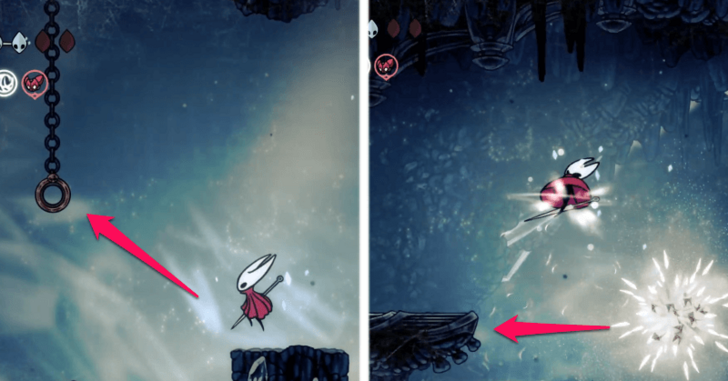 Float from the platform to drop onto the island. Clawline towards the ring, then pogo on the ice bugs to reach the next platform. |
| 11 | 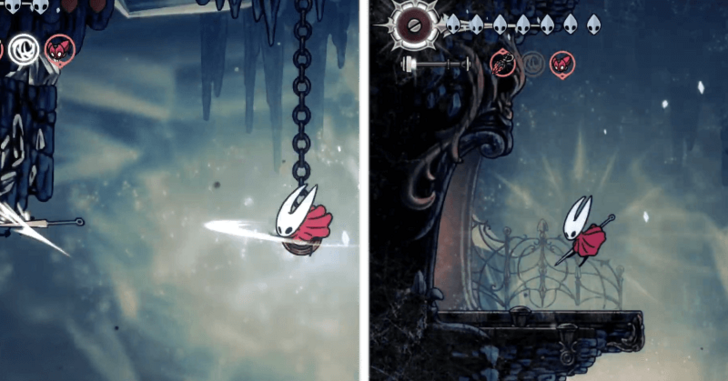 Clawline onto the ring, then hit the platform to drop it onto the water. Head towards the platform and pogo on the ice bug to reach the exit. |
| 12 | 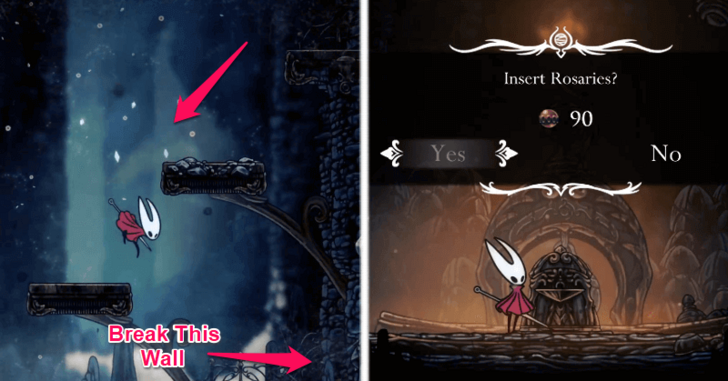 After exiting the room, drop down and break the wall on the bottom right. A bench can be activated inside for 90 Rosaries. A lever can be activated above to activate a shortcut. |
| 13 | 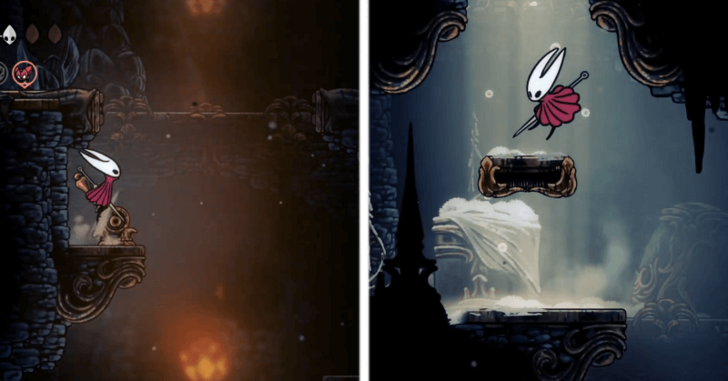 Activate the lever above the bench to unlock a shortcut. Continue heading upwards to reach the next area. |
| 14 | 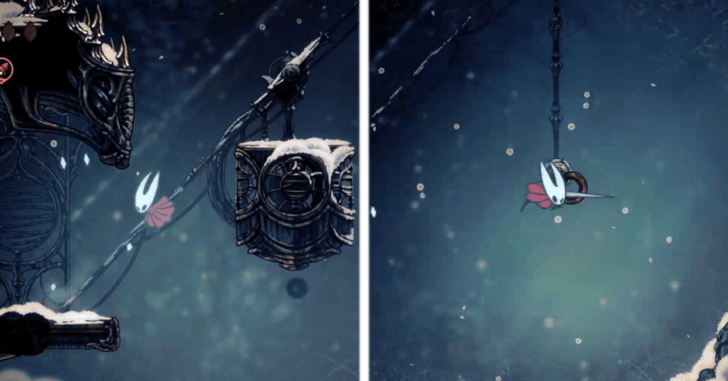 Head towards the heat source on the left, them climb up the wall. Follow the various rings and flying enemies with Clawline to proceed upwards. |
| 15 | 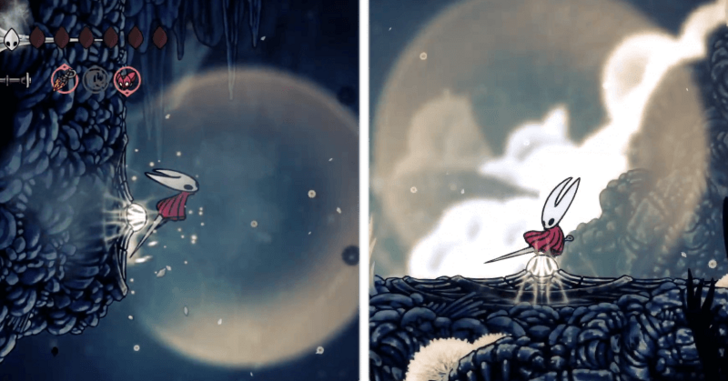 Upon reaching the wall that with the light that cleanses the cold status, climb up the opening until you reach the exit, avoiding the spikes. Use pogo or Clawline on the flying enemies to reach the other side, then enter the cavern on the right. |
| 16 | 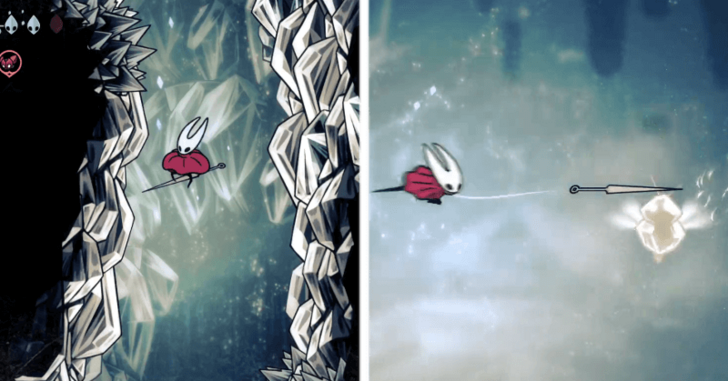 Float down the cavern, then head right after exiting. Use Clawline on the enemies and wall jump on the fragile walls, pathing upwards. Enter the room on the right after. |
| 17 | 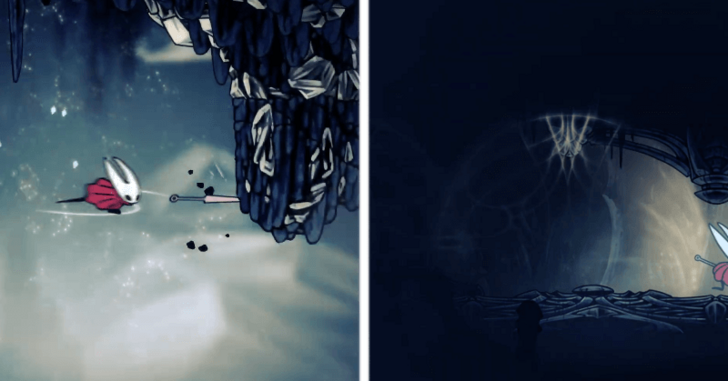 Clawline onto the rock formation above to drop it. Use the platform as base to pogo on the enemies towards the right exit. |
| 18 | 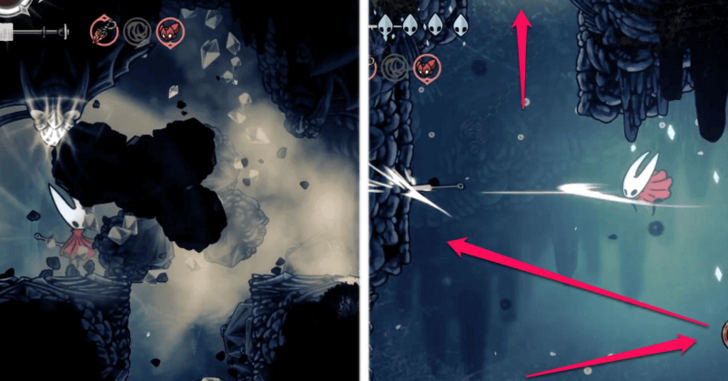 Jump over the first gap and continue until the next room. Break the wall, then use Clawline to reach the path located above. |
| 19 | 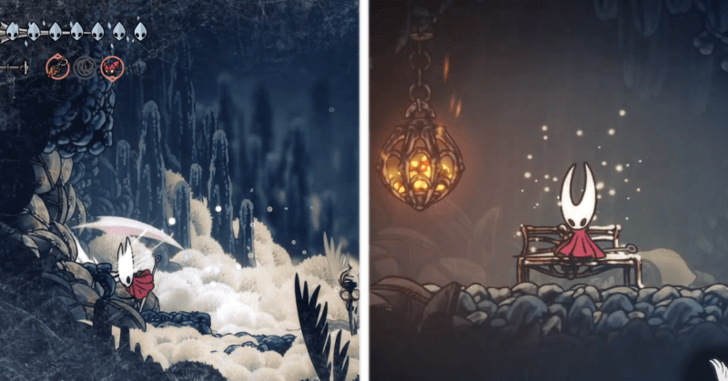 Turn left and break the wall. Rest at the bench inside as a checkpoint. |
| 20 | 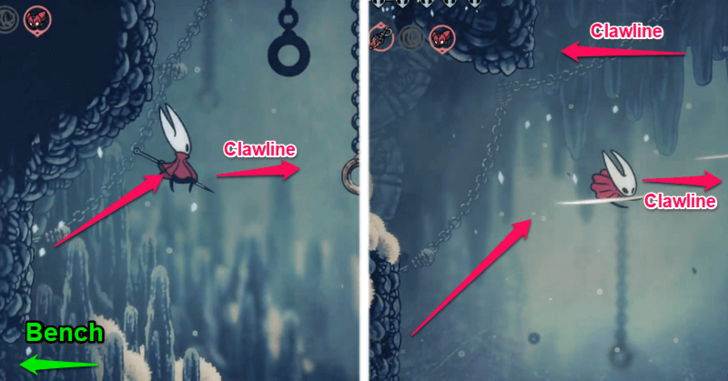 From the bench, Cling Grip onto the wall above the entrance then Clawline towards the ring. Path upwards with wall jump and Clawline until you reach a spiky cavern. |
| 21 | 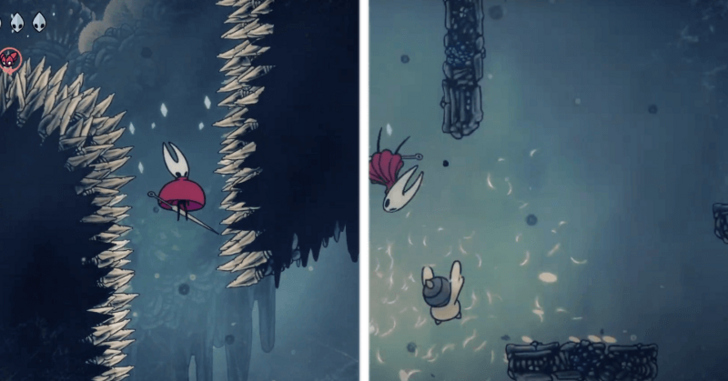 Pogo off the spikes and exit to the bottom right. Use Clawline onto the flying enemy and platform on the fragile footholds, then Cling Grip onto the left wall. |
| 22 | 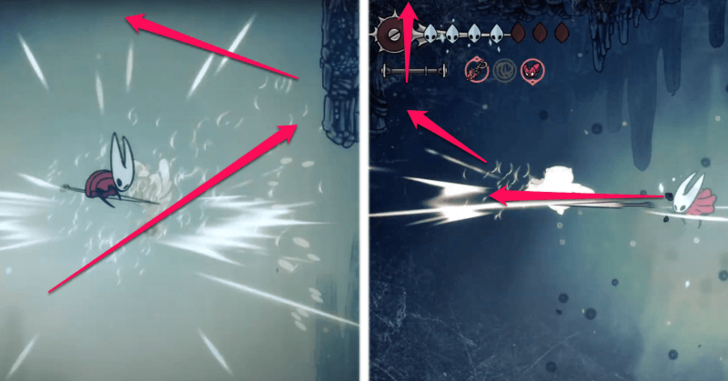 Climb up the platform then head left. Cling Grip onto the left wall and Clawline onto enemies, pathing upwards. Use the fragile platforms as footholds or places to wall jump from to reach the upper exit. |
| 23 | 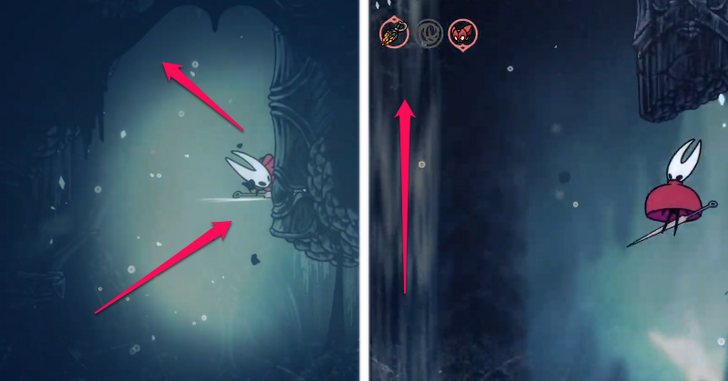 Wall jump upwards to reach the upper section. Reach the far left by using pogo on the spikes or Clawline, then use Drifter's Cloak to ride the updraft towards the peak of Mount Fay. |
| 24 | 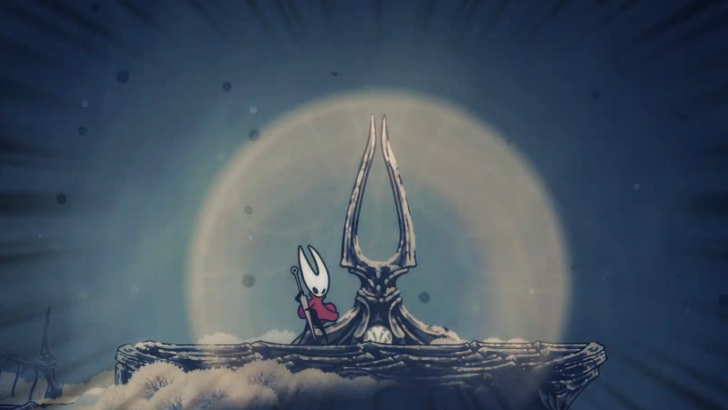 Play the Needolin next to the ancient tuning mechanism by the cliff to get Faydown Cloak. |
How to Double Jump
Tap the Jump Button in Midair
Double jump can be performed after tapping the jump button in midair, or performing a jump twice. This allows Hornet to reach higher altitudes and gain better midair mobility.
Previously, after acquiring Faydown Cloak, pressing the jump button twice will always result in a double jump, superseding Drifter's Cloak.
This was avoided by holding the down button on the second press of the jump key to skip the double jump and initiate float or glide. However, this workaround has been removed in Patch 1.0.28470.
Hollow Knight: Silksong Related Guides

All Ability Locations and Upgrades
All Abilities and Ancestral Arts
| Silksong Abilities | |
|---|---|
| Swift Step (Dash) |
Drifter's Cloak (Glide) |
| Cling Grip (Wall Jump) |
Needolin |
| Needle Strike (Charge Attack) |
Clawline (Grappling Hook) |
| Faydown Cloak (Double Jump) |
Silk Soar (Super Jump) |
| Sylphsong | - |
| Needolin Upgrades | |
| Beastling Call | Elegy of the Deep |
Author

How to Unlock Double Jump | Faydown Cloak Location
Rankings
- We could not find the message board you were looking for.
Gaming News

![Monster Hunter Stories 3 Review [First Impressions] | Simply Rejuvenating](https://img.game8.co/4438641/2a31b7702bd70e78ec8efd24661dacda.jpeg/show)
![The Liar Princess and the Blind Prince Review [PC] | Lovely to Look at but Tedious to Play](https://img.game8.co/4442586/8d95f5faf05780f1765ce7e0938bd825.jpeg/thumb)
![Marathon Cryo Archive Map Teased as [REDACTED] on Selection Screen](https://img.game8.co/4442236/6357203e58172f6de57f1991e7c39b22.png/thumb)

Popular Games

Genshin Impact Walkthrough & Guides Wiki
Umamusume: Pretty Derby Walkthrough & Guides Wiki
Pokemon Pokopia Walkthrough & Guides Wiki
Honkai: Star Rail Walkthrough & Guides Wiki
Monster Hunter Stories 3: Twisted Reflection Walkthrough & Guides Wiki
Arknights: Endfield Walkthrough & Guides Wiki
Wuthering Waves Walkthrough & Guides Wiki
Zenless Zone Zero Walkthrough & Guides Wiki
Pokemon TCG Pocket (PTCGP) Strategies & Guides Wiki
Monster Hunter Wilds Walkthrough & Guides Wiki


Recommended Games
Diablo 4: Vessel of Hatred Walkthrough & Guides Wiki
Cyberpunk 2077: Ultimate Edition Walkthrough & Guides Wiki
Fire Emblem Heroes (FEH) Walkthrough & Guides Wiki
Yu-Gi-Oh! Master Duel Walkthrough & Guides Wiki
Super Smash Bros. Ultimate Walkthrough & Guides Wiki
Pokemon Brilliant Diamond and Shining Pearl (BDSP) Walkthrough & Guides Wiki
Elden Ring Shadow of the Erdtree Walkthrough & Guides Wiki
Monster Hunter World Walkthrough & Guides Wiki
The Legend of Zelda: Tears of the Kingdom Walkthrough & Guides Wiki
Persona 3 Reload Walkthrough & Guides Wiki


All rights reserved
© 2025 Team Cherry
The copyrights of videos of games used in our content and other intellectual property rights belong to the provider of the game.
The contents we provide on this site were created personally by members of the Game8 editorial department.
We refuse the right to reuse or repost content taken without our permission such as data or images to other sites.
There's a small correction to be made about the cost of the bench unlocked with rosaries. As of writing this comment, the bench costs 60 rosaries, not 90.