All 20 Mask Shard Locations
★ Sea of Sorrow Free DLC Announced!
☆ Walkthrough
★ Best Crest Builds | Best Tools
☆ Full Interactive Map of Pharloom!
★ Mask Shards | Spool Fragments | Abilities
☆ Boss Guides: The Unravelled | First Sinner

Mask Shards are special items that increase Hornet's max health in Hollow Knight: Silksong. See the locations of all 20 Mask Shards and how to use them in this guide.
Mask Shard Interactive Map
Mask Shard Map Locations
| Silksong Collectibles | |
|---|---|
 Mask Shard Mask Shard |
 Silk Heart Silk Heart |
 Spool Fragment Spool Fragment |
 Memory Locket Memory Locket |
 Crest Crest
|
 Lost Flea Lost Flea
|
| Icon | How to Use |
|---|---|
 | Show Names This button reveals the Name of every icon currently shown. |
 | Show Pins This button will toggle between showing and hiding all the pins that you have already marked as acquired. |
 | Fullscreen This button will change the map display to fill the screen. |
 | Search Mode Toggle This button will display a search bar which you can use to search for an individual pin by its name. |
 | Icon Mode Toggle In Search Mode, this button will toggle you back to Icon Mode, removing the search bar and displaying the icons again. |
 | All Pins This button is shown along with the Icons on the right when there are over 6 types of pins. Click it for a full selection of all available pin types. |
 | Counter Tracks the number of pins you have of a certain type. The pin type shown is set to the page and currently cannot be changed; however, all pin type counters can be viewed by clicking the checklist icon on the right side. |
| View All Counters This icon is found on the right side of the Counter. When a map has more than one pin type, click this icon to see Counters for all pin types. |
All 20 Mask Shard Locations
- Moss Grotto
- Far Fields
- Deep Docks
- Wormways
- Bellhart
- Shellwood
- Weavenest Atla
- Blasted Steps
- Choral Chambers
- Cogwork Core
- The Slab
- Mount Fay
- Whispering Vaults
- Bilewater
- Wisp Thicket
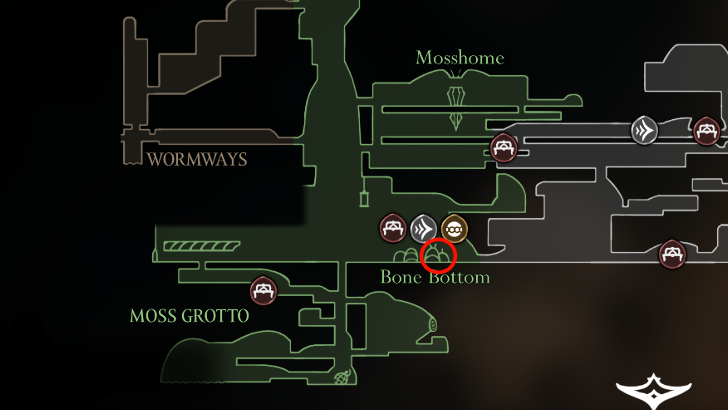
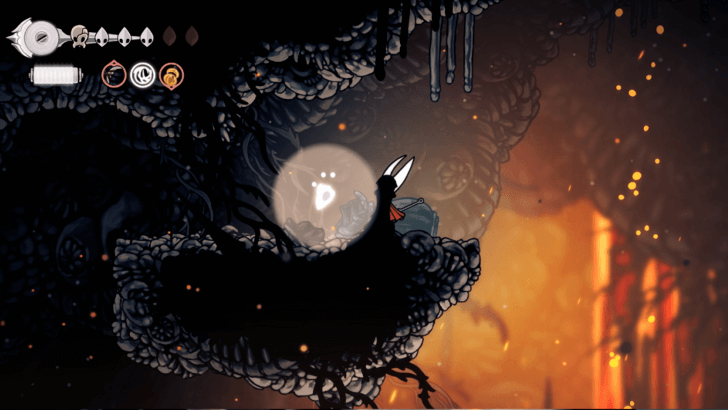
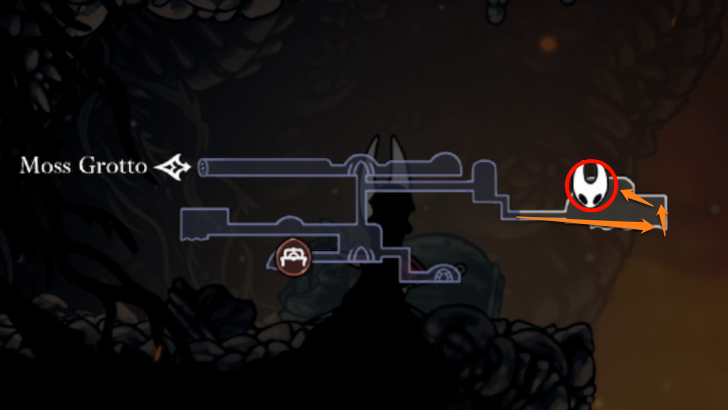
Moss Grotto Mask Shard
| Overworld View | Map Location | |
|---|---|---|
 |
 |
|
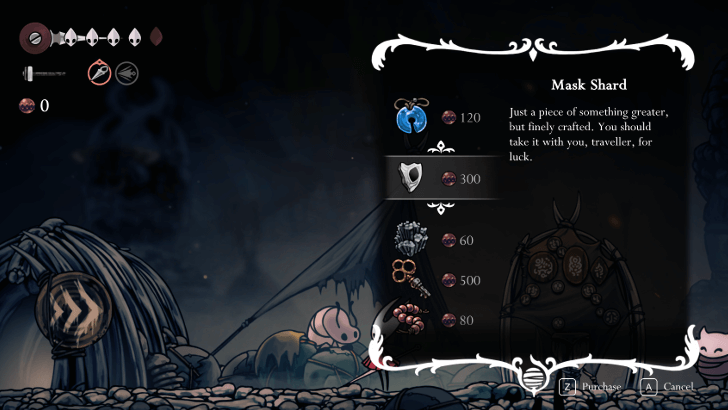
| Purchased from Pebb near The Marrow for 300 Rosaries. | ||
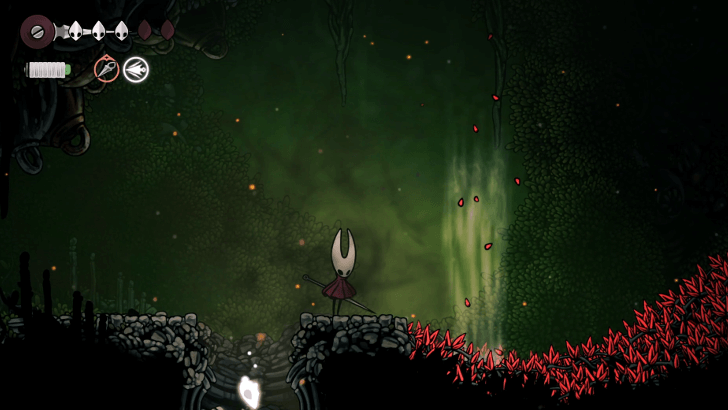
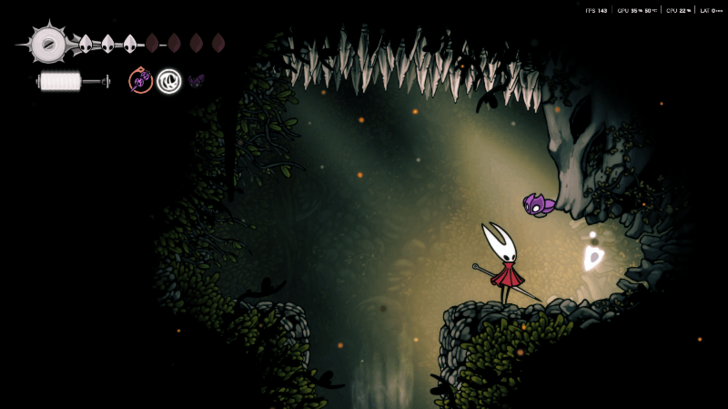
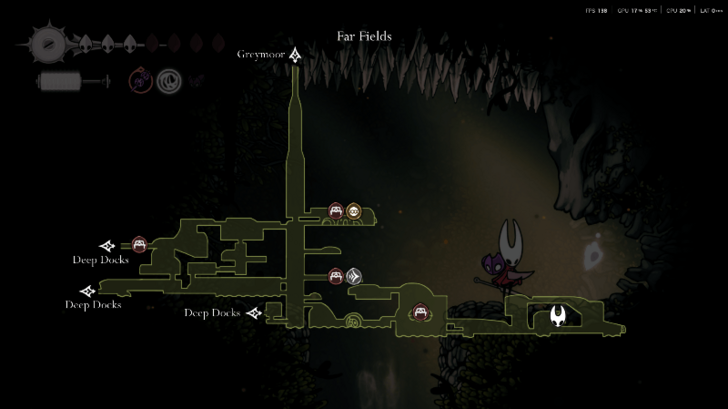
Far Fields Mask Shard
| Overworld View | Map Location | |
|---|---|---|
 |
 |
|
| Use the updraft and attack the bomb attached to the ceiling. Requires the Drifter's Cloak obtained from completing the Seamstress' wish. | ||
 |
 |
|
| Located on the bottom-right part of Far Fields where you can enter the giant skull. Requires having the Grappling Hook and completing the combat challenge to access the wind current that takes you up to the Mask Shard. | ||
 |
 |
|
| Complete the Fastest in Pharloom quest in Act 3 and speak with Sprintmaster Swift on the eastern corner of Far Fields to receive the Mask Shard. | ||
How to Unlock Glide: Drifter's Cloak Location
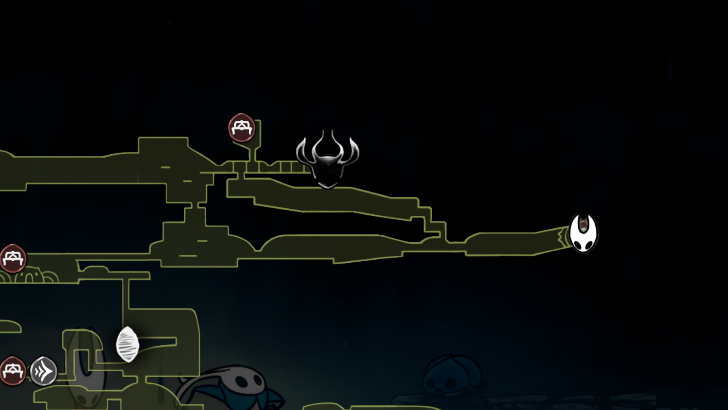
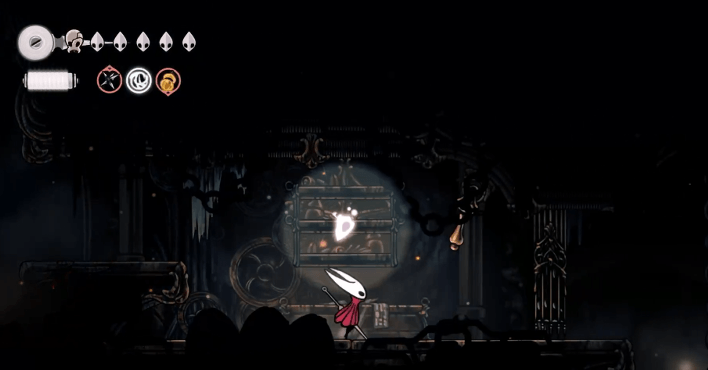
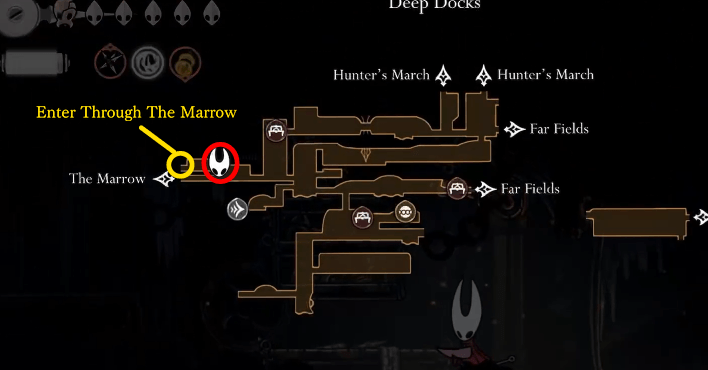
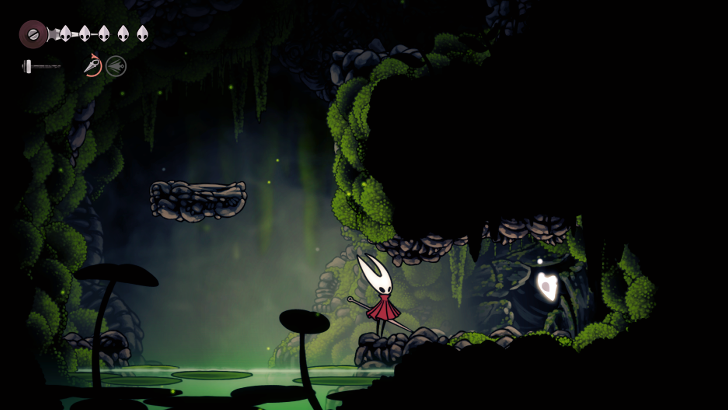
Deep Docks Mask Shard
| Overworld View | Map Location | |
|---|---|---|
 |
 |
|
| Found after beating an enemy-infested room found in the Deep Docks, accessed through The Marrow. Requires the skill, Cling Grip to access. | ||
How to Unlock Wall Jump: Cling Grip Location
Wormways Mask Shard
| Overworld View | Map Location | |
|---|---|---|
 |
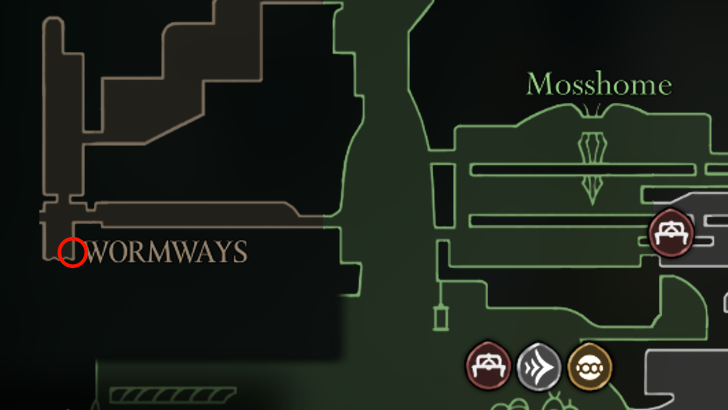 |
|
| After entering the room from Moss Grotto, head down and into the pit with water at the bottom. Destroy the wall on the right to find the Mask Shard. Requires Swift Step to reach the area. | ||
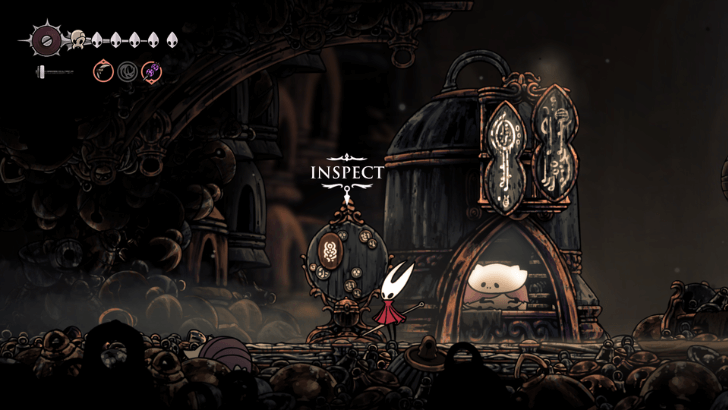
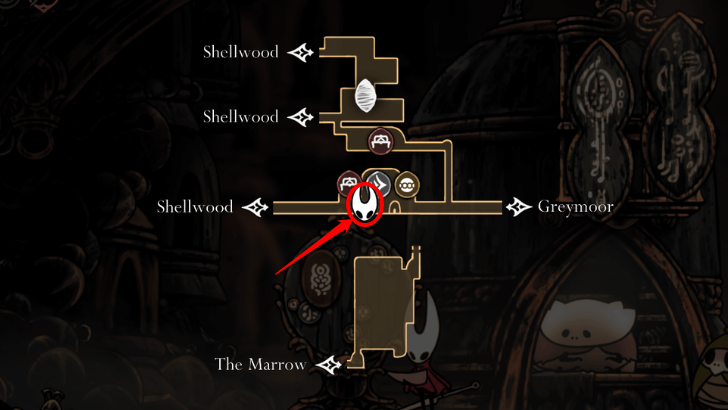
Bellhart Mask Shard
| Overworld View | Map Location | |
|---|---|---|
 |
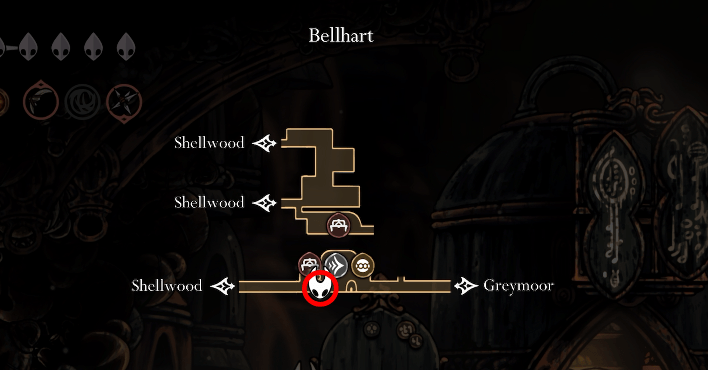 |
|
| Complete the wish, Grand Hunt Savage Beastfly, and return to Bellhart's Wishwall to claim your reward. | ||
 |
 |
|
| Complete The Hidden Hunter quest in Act 3 and return to Bellhart's Wishwall to claim the Mask Shard. | ||
|
|
|
| Complete the Dark Hearts quest in Act 3 and return to Bellhart's Wishwall to receive the Mask Shard. | ||
Grand Hunt Savage Beastfly Walkthrough
Shellwood Mask Shard
| Overworld View | Map Location | |
|---|---|---|
 |
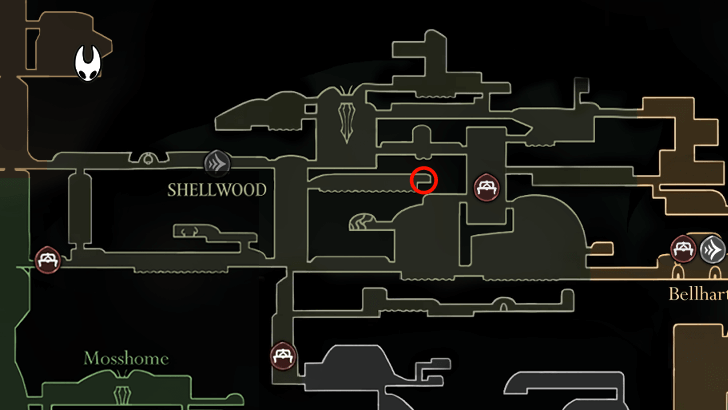 |
|
| Found at the rightmost section of the room. The Mask Shard is found behind the wall of vines at the end. Requires pogo to reach. | ||
Weavenest Atla Mask Shard
| Overworld View | Map Location | |
|---|---|---|
 |
 |
|
| Destroy the wall at the bottom right to reveal a hidden path. Jump down, glide to avoid the spikes, then enter the next room. Head to the far right, then wall jump to reach the platform. Use pogo to head upwards, wall jump on the right, then pogo again to reach the Mask Shard. Requires Swift Step, Cling Grip, and Drifter's Cloak to reach. | ||
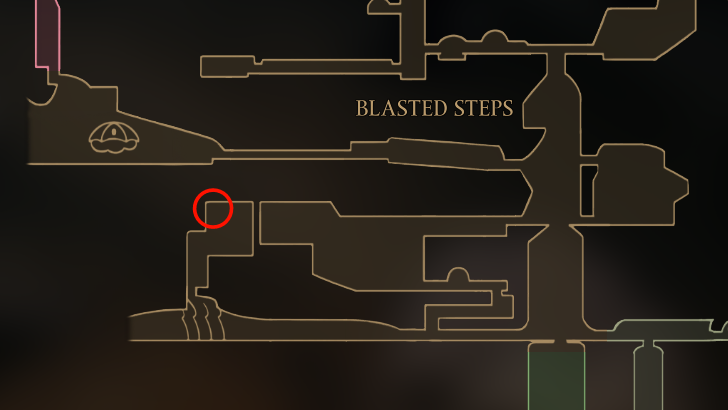
Blasted Steps Mask Shard
| Overworld View | Map Location | |
|---|---|---|
 |
 |
|
| From below, use Silk Soar to reach the upper platform then enter the room above. Head to the top left section of the room to find the Mask Shard. | ||
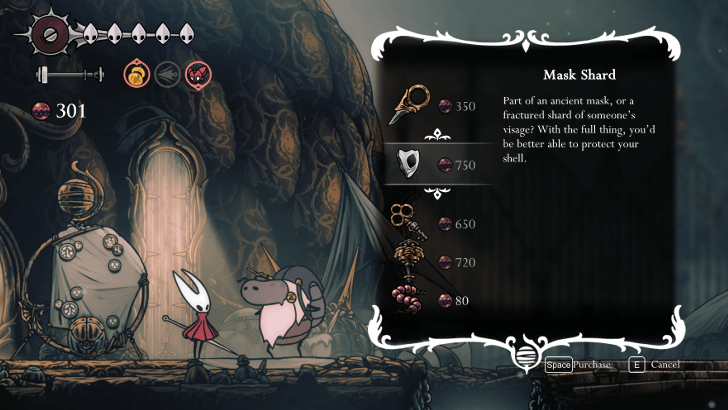
Choral Chambers Mask Shard
| Overworld View | Map Location | |
|---|---|---|
 |
 |
|
| Purchase from Jubilana for 750 Rosaries. Only available after completing The Wandering Merchant Wish. | ||
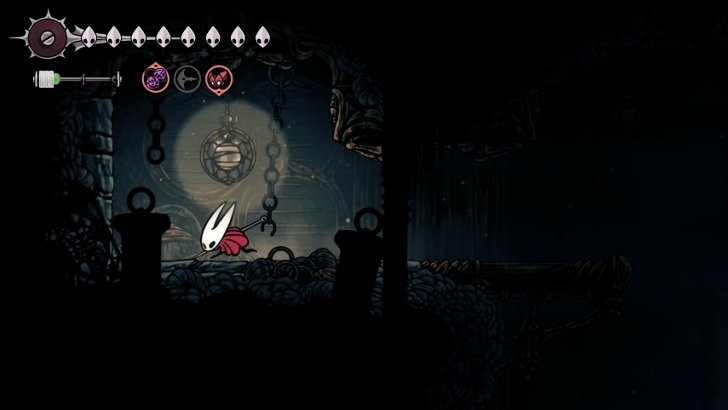
Cogwork Core Mask Shard
| Overworld View | Map Location | |
|---|---|---|
 |
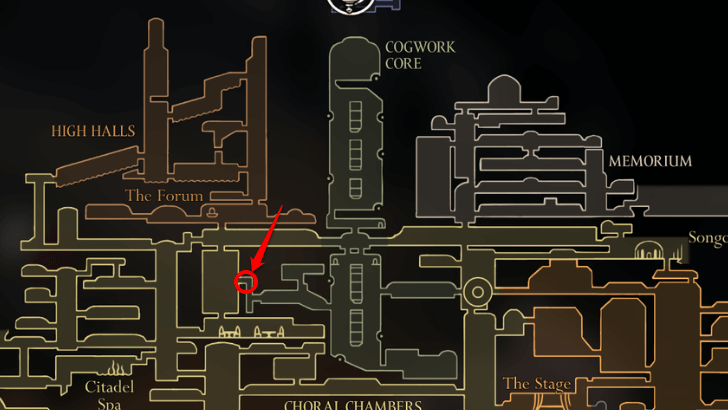 |
|
| Found in front of the shortcut connecting Choral Chambers and Cogwork Core. You will fight multiple waves of enemies in a closed room before gaining access to the area where the item is. | ||
The Slab Mask Shard
| Overworld View | Map Location | |
|---|---|---|
 |
 |
|
| Requires the Key of Apostate and Faydown Cloak. From the rightmost bench, head up the central room and unlock the room on the right. Activate the mechanism at the center and use pogo on the spike wheel to reach the top left platform. | ||
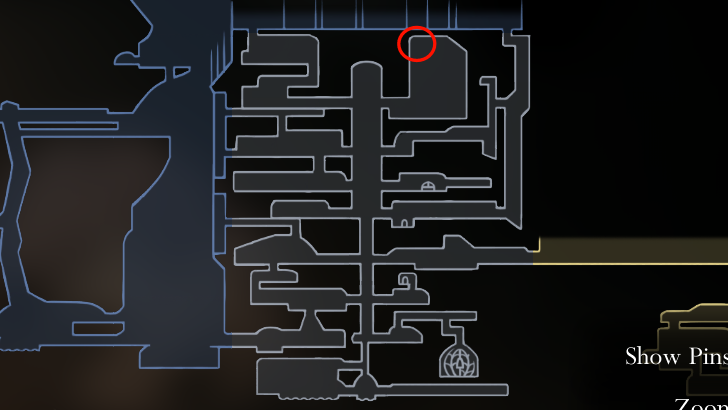
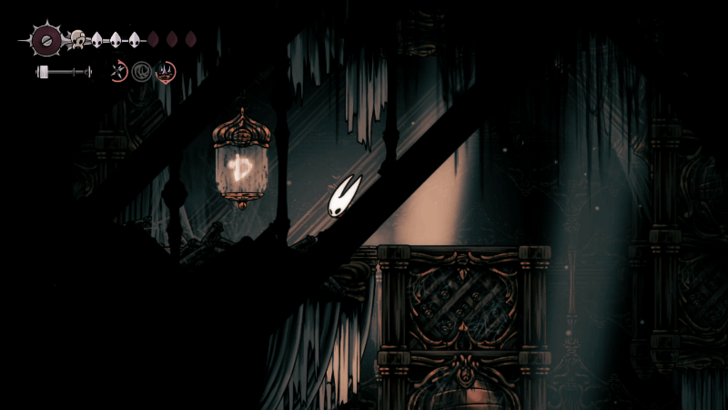
Mount Fay Mask Shard
| Overworld View | Map Location | |
|---|---|---|
 |
 |
|
| Located on the bottom-left corner of the map of Mount Fay. Jump on the foundation of the destroyed toward and double jump to reach the hollow remains of the tower above it. Wall jump to reach the Mask Shard at the top. | ||
 |
 |
|
| Can only be obtained after unlocking the Silk Soar Ability. Go to the hidden Brightvein area of Mount Fay using Silk Soar and reach the top of the room with the combination of your Abilities and pogos. At the top is a small room with a cocoon that contains the Mask Shard. | ||
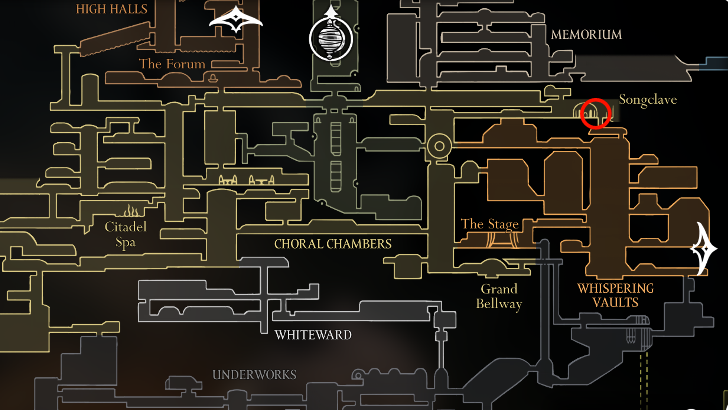
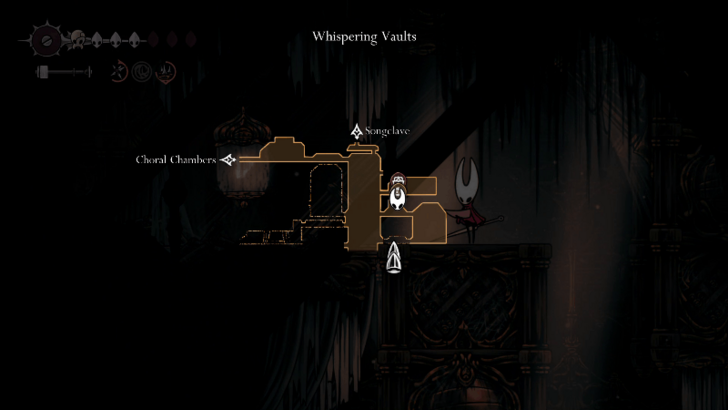
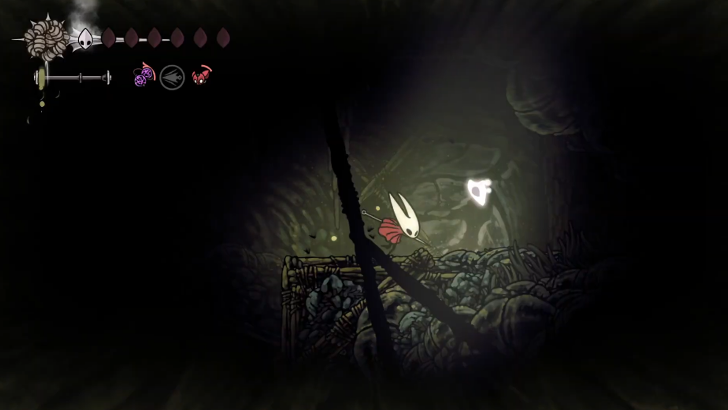
Whispering Vaults Mask Shard
| Overworld View | Map Location | |
|---|---|---|
 |
 |
|
| To get up here, you need to raise the platform from below. Head to the room directly below this one, then climb upward through the secret path in the middle, so you can strike the platform to raise it. | ||
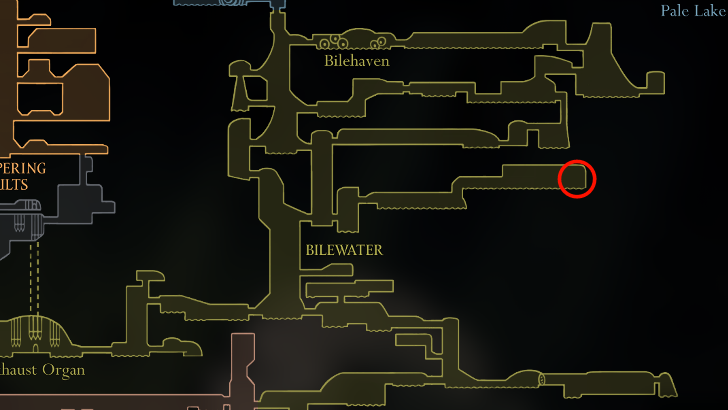
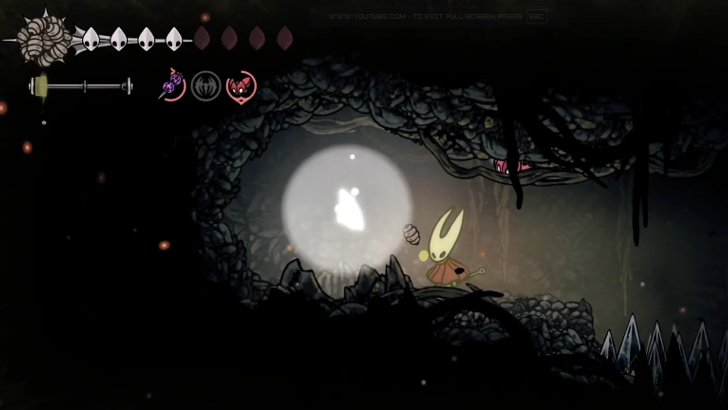
Bilewater Mask Shard
| Overworld View | Map Location | |
|---|---|---|
 |
 |
|
| Located on the center of the Bilewater area map. Head to the main tunnel and cross the spikes to continue to the path on the right. Wall climb the wooden structure at the top and head right. Reach the end of the path to the right, while avoiding the grubs, and wall climb up to reach the Mask Shard on the right. | ||
Wisp Thicket
| Overworld View | Map Location | |
|---|---|---|
 |
 |
|
| Located on the room on the right of the Bench in Wisp Thicket. Follow the path to the right until you reach a poison pool. Use double jump, wall climb, and Clawline to reach the upper left section to find the Mask Shard. | ||
How to Use Mask Shards
Collect 4 to Increase Max Health
While a single Mask Shard does not do anything by itself, collecting 4 of these completes a mask and increases Hornet's maximum health by 1.
A total of 20 Mask Shards are available to find in hidden areas, from merchant NPCs, and as rewards from specific quests. Collecting all Mask Shards gives you a total of 10 Life Points.
Hollow Knight: Silksong Related Guides

Hollow Knight: Silksong Wiki Top
Guides by Category
| List of Categories | |
|---|---|
 Walkthrough Walkthrough |
 Tips and Tricks Tips and Tricks |
 Bosses Bosses |
 Maps Maps |
 Wishes Wishes |
 Abilities Abilities |
 Crests Crests |
 Skills Skills |
 Tools Tools |
 NPCs NPCs |
 Items Items |
 Enemies Enemies |
 News and Updates News and Updates |
|
Recommended Guides
| Mask Shard Locations |
 Spool Fragment Locations Spool Fragment Locations |
 Trophy Guide Trophy Guide |
 Best Crest Builds Best Crest Builds |
 100% Checklist Guide 100% Checklist Guide |
 All Ventrica Station and Bellway Locations All Ventrica Station and Bellway Locations
|
 How to Get All Endings How to Get All Endings
|
- |
Comment
The mask shard in the Blasted steps can be accessed without silk soar with a little bit of movement. Go to the small elevation off the ground at the right of the lowest "step" (cannot be accessed with faydown cloack (double jump)), run, jump, clawline and use faydown cloack to reach this step, then it's just a matter of plateforming and doing the little gauntlet. This make you able to have 9 masks at the end of act 2 and gain a 10th one in act 3
Author

All 20 Mask Shard Locations
Rankings
- We could not find the message board you were looking for.
Gaming News

![Monster Hunter Stories 3 Review [First Impressions] | Simply Rejuvenating](https://img.game8.co/4438641/2a31b7702bd70e78ec8efd24661dacda.jpeg/show)
![The Seven Deadly Sins: Origin [First Impressions] | A Promising Start](https://img.game8.co/4440581/584e0bfb87908f12c4eab6e846eb1afd.png/thumb)
![The Liar Princess and the Blind Prince Review [PC] | Lovely to Look at but Tedious to Play](https://img.game8.co/4442586/8d95f5faf05780f1765ce7e0938bd825.jpeg/thumb)
![Marathon Cryo Archive Map Teased as [REDACTED] on Selection Screen](https://img.game8.co/4442236/6357203e58172f6de57f1991e7c39b22.png/thumb)
Popular Games

Genshin Impact Walkthrough & Guides Wiki
Umamusume: Pretty Derby Walkthrough & Guides Wiki
Pokemon Pokopia Walkthrough & Guides Wiki
Honkai: Star Rail Walkthrough & Guides Wiki
Monster Hunter Stories 3: Twisted Reflection Walkthrough & Guides Wiki
Arknights: Endfield Walkthrough & Guides Wiki
Wuthering Waves Walkthrough & Guides Wiki
Zenless Zone Zero Walkthrough & Guides Wiki
Pokemon TCG Pocket (PTCGP) Strategies & Guides Wiki
Monster Hunter Wilds Walkthrough & Guides Wiki


Recommended Games
Diablo 4: Vessel of Hatred Walkthrough & Guides Wiki
Cyberpunk 2077: Ultimate Edition Walkthrough & Guides Wiki
Fire Emblem Heroes (FEH) Walkthrough & Guides Wiki
Yu-Gi-Oh! Master Duel Walkthrough & Guides Wiki
Super Smash Bros. Ultimate Walkthrough & Guides Wiki
Pokemon Brilliant Diamond and Shining Pearl (BDSP) Walkthrough & Guides Wiki
Elden Ring Shadow of the Erdtree Walkthrough & Guides Wiki
Monster Hunter World Walkthrough & Guides Wiki
The Legend of Zelda: Tears of the Kingdom Walkthrough & Guides Wiki
Persona 3 Reload Walkthrough & Guides Wiki


All rights reserved
© 2025 Team Cherry
The copyrights of videos of games used in our content and other intellectual property rights belong to the provider of the game.
The contents we provide on this site were created personally by members of the Game8 editorial department.
We refuse the right to reuse or repost content taken without our permission such as data or images to other sites.
thank you! I had two left to get in Act 2 and I knew one was the rising lava bit and spent ages checking ones from this list that I *knew* I already had before I saw your comment