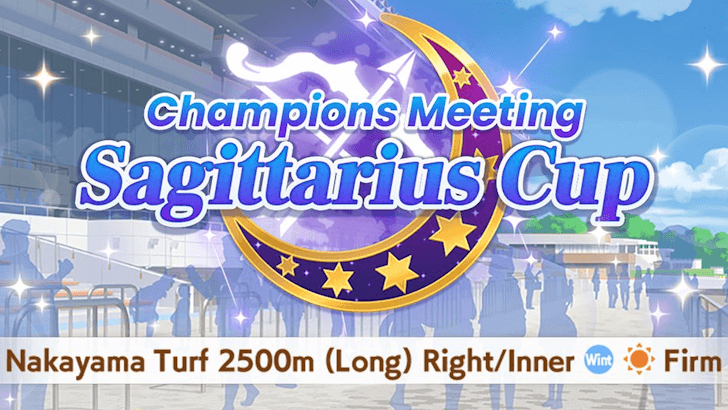
Sagittarius Cup Champions Meeting Guide
This is a guide to the Sagittarius Cup Champions Meeting in Umamusume: Pretty Derby! Learn about the details of the Sagittarius Cup, best characters, release date, race info, skills, and the best support cards for it.
List of Contents
Sagittarius Cup Race Info
 under the page's title to be notified of any updates!
Sagittarius Cup Event Release Date
 |
||
| Champions Meeting: Sagittarius Cup January 19 - 29, 2026 (UTC) Event has ended.
|
||
The Sagittarius Cup will start on January 19, 2026 (UTC) and run until January 29, 2026 (UTC). Like with previous Champions Meetings, the first few days will likely be for registration, with the actual races happening a few days later.
Sagittarius Cup Race Course Map
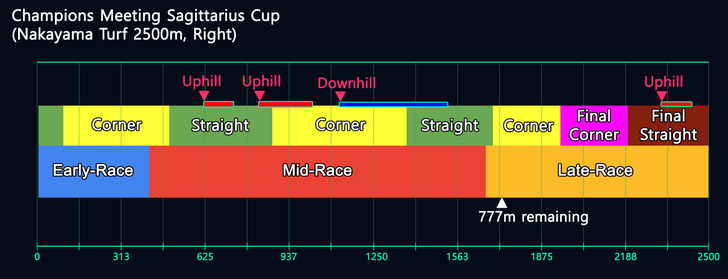 Race Conditions: Nakayama Turf 2,500m (Long), Right/Inner Similar Races: Arima Kinen |
|
| Course Notes | |
|---|---|
| ・Nakayama has 3 uphills and 1 downhill. None of them is useful for acceleration, so avoid Highlander and Straight Descent. However, they can be used for recovery like Restless and Go-Home Specialist.
・Late-race starts on a straight. Encroaching Shadow/Straightaway Spurt are some of the best skills for the race, making End Closers a strong style. It also makes No Stopping Me! more reliable since this is before they spread out. ・First late-race corner is close enough to the start of late-race. Angling and Scheming and Let's Pump Some Iron are still usable, but they're not as powerful compared to other tracks. Moving Past, and Beyond will have the same conditions as Let's Pump Some Iron and can be used together when inherited. ・Final corner is deep in late-race. This makes Red Shift/LP1211-M and Shooting for Victory! unusable for all styles since they will be at max speed at this point. |
|
Sagittarius Cup Best Characters
Sagittarius Cup Tier List
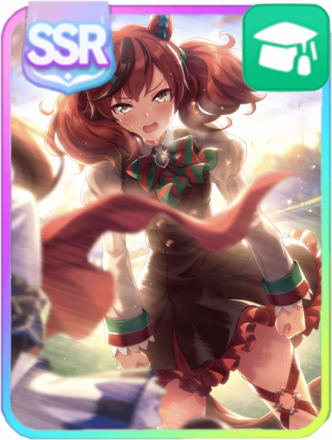
 Narita Taishin (Nevertheless)
  Oguri Cap (Ashen Miracle)
  Gold Ship (Red Strife)
  Mayano Top Gun (Scramble Zone)
  Mayano Top Gun (Sunlight Bouquet)
  Tamamo Cross (Fast as Lightning)
  Manhattan Cafe (Creeping Shadow)
  Symboli Rudolf (Emperor's Path)
  Narita Brian (Maverick)
  Oguri Cap (Starlight Beat)
  Mejiro Ryan (Down the Line)
  Special Week (Hopp'n♪Happy Heart)
  Special Week (Special Dreamer)
  Meisho Doto (Turbulent Blue)
  T.M. Opera O (O Sole Suo!)
  Mejiro McQueen (Frontline Elegance)
  Tokai Teio (Beyond the Horizon)
  Grass Wonder (Saintly Jade Cleric)
  Agnes Tachyon (Tach-nology)
  Grass Wonder (Stone-Piercing Blue)
  Hishi Amazon (Azure Amazon)
  Daiwa Scarlet (Peak Blue)
  Maruzensky (Hot☆Summer Night)
  Seiun Sky (Reeling in the Big One)
  Matikane Fukukitaru (Lucky Tidings)
  Biwa Hayahide (Rouge Caroler)
  Nice Nature (Poinsettia Ribbon)
  Super Creek (Murmuring Stream)
  Mejiro McQueen (End of the Skies)
  Fuji Kiseki (Shooting Star Revue)
  Symboli Rudolf (Archer by Moonlight)
  Biwa Hayahide (pf. Winning Equation...)
  Tokai Teio (Peak Joy)
  Tosen Jordan (Jokester ☆ Vibes)
  Gold City (Autumn Cosmos)
  Gold City (Authentic / 1928)
  Agnes Digital (Full-Color Fangirling)
  Eishin Flash (Meisterschaft)
  Rice Shower (Rosy Dreams)
  Mihono Bourbon (MB-19890425)
  El Condor Pasa (Kukulkan Warrior)
  Winning Ticket (Get to Winning!)
  Mejiro Dober (Off the Line)
  Rice Shower (Vampire Makeover!)
  Silence Suzuka (Innocent Silence)
  Fine Motion (Noble Seamair)
  El Condor Pasa (El Numero 1)
  Matikane Fukukitaru (Rising Fortune)
  Smart Falcon (LOVE☆4EVER)
  Taiki Shuttle (Wild Frontier)
  Maruzensky (Formula R)
  Vodka (Wild Top Gear)
  Curren Chan (Fille Éclair)
  Hishi Akebono (Buono☆Alla Moda)
  Sakura Bakushin O (Blossom in Learning)
  Air Groove (Empress Road)
  King Halo (King of Emeralds)
  Super Creek (Chiffon-Wrapped Mummy)
  Air Groove (Quercus Civilis)
  Kawakami Princess (Princess of Pink)
  Haru Urara (Bestest Prize)
 Sagittarius Cup Recommended Characters
| Champions Meeting | |
|---|---|

Sagittarius Cup is a Long Race, so Stamina is the most important stat to consider if you want your aces to win. Runners with an innate recovery skill should have a slight advantage, as it frees up some Support Cards for them.
Use Narita Taishin for Encroaching Shadow
Narita Taishin is currently the only Umamusume with access to Encroaching Shadow, the upgraded version of Straightaway Spurt. This skill alone makes her one of, if not the best, End Closers in the game right now. If you have Narita Taishin, consider training her to become one of your Sagittarius Cup aces.
Other End Closers and Late Surgers are Great
Even if you do not own Narita Taishin, running End Closers and Late Surgers are still recommended, as you can take advantage of their burst of speed in the late race to quickly overtake your opponents. Good options include Gold Ship, as well as Manhattan Cafe and Symboli Rudolf with enough End Sparks. Tamamo Cross can also be a good End Closer.
Oguri Cap (Christmas) is a Strong Option
| Oguri Cap (Christmas) Recommended Stats | ||||||||||||||
|---|---|---|---|---|---|---|---|---|---|---|---|---|---|---|
| 1200 | 750 | 800 | 400 | 600+ | ||||||||||
| Sample Speed-Wit Flex Setup (End Closer) | ||||||||||||||
 Kitasan Black Fire at My Heels Rarity: SSR Type: Speed  Sweep Tosho Lamplit Training of a Witch-to-be Rarity: SR Type: Speed  Fine Motion Wave of Gratitude Rarity: SSR Type: Wit  Daiwa Scarlet Nothing Hard Work Can't Solve! Rarity: SR Type: Wit  Rice Shower Happiness Just around the Bend Rarity: SSR Type: Power  Riko Kashimoto Planned Perfection Rarity: SSR Type: Pal You can replace Rice Shower with a different Power, Stamina, or Wit card based on what you have and what stat you have trouble raising. |
||||||||||||||
| Recommended Skills | ||||||||||||||
|
or |
||||||||||||||
Oguri Cap (Christmas) a stronger version of the original Oguri Cap thanks to her Unique Skill, Festive Miracle, that provides acceleration, velocity, and recovery. Due to the amount of recovery gained from her skills, you do not have to aim for gold recovery.
When building her, she's a different case to the usual Speed-Stamina-Power build; Christmas Oguri Cap will still want some Stamina, but she wants as much Wit as possible to increase the chances of all her recoveries activating. She's best used as an End Closer and she will require 3 recovery skills to activate her unique.
Oguri Cap (Ashen Miracle) Build Guide
Tamamo Cross is Another Possible Ace
Tamamo Cross is now available as of January 22, 2026, so she can participate in Round 1. She can serve as a strong Ace in the Sagittarius cup thanks to her Unique Skill, which increases here speed and acceleration during the second half of the race. This is especially useful if you run her as a Late Surger or End Closer, as it allows you to easily move up the ranks.
Tamamo Cross (Fast as Lightning) Build Guide
Sagittarius Cup Stat Guidelines
| Sagittarius Cup Baselines (2025) | 2500m, Long | |||||
|---|---|---|---|---|---|
| 1200 | 1000 | 900 | 400 | 600+ | |
| Sagittarius Cup Minimum Stats (2025) | |||||
| 1000+ | 900+ | 650 | 400 | 400 | |
| Distance | Track | Style | |||
| Long S Prio: ★★★ |
Turf S Prio: ★★ |
Any S Prio: ★ |
|||
| Blue Sparks Init. Stats |
9★ STA, 9★ PWR
(+63 STA, +63 PWR) 9★ STA, 9★ STA (+126 STA) |
||||
As a Long race, Stamina is the most important stat to ensure your runners don't slow down during the late-race. Aim for at least 900 Stamina to survive, but pushing it to around 1000 Stamina is best to improve your chances of winning. You'll also need sufficient Power to overcome the three uphills in the race. If you're struggling to hit the Power requirement, aim for at least 600 Power, but still try to increase it as much as you can. For Wit, at least 600 is ideal, but having 400 Wit should be enough to activate skills reliably.
Must Learn Recovery Skills
| Stamina Baseline | ||||
|---|---|---|---|---|
| ✕ | ||||
| 1000 | ||||
The values above assume 400 Guts.
Getting at least 1 Gold Recovery Skill alongside 900 to 1000 Stamina is the baseline to help your Aces perform well during the Champions Meet. Getting two rare Recovery Skills will help lower the Stamina requirement even further, but you will have less skill points for other important skills. If you're able to reach the baseline and get high enough Speed, you can push stamina higher to ensure your aces can maximize their performance in the last spurt, potentially allowing them to overtake those with less stamina.
The Rice Shower Power SSR is a good Support Card to bring, as it can give both Swinging Maestro and Cooldown when training in Unity Cup.
Best to Train in Unity Cup Scenario

The best scenario to train for the Sagittarius Cup is the Unity Cup. While you can still train in the URA Finale Scenario, the Unity Cup offers higher stats and gives easy access to No Stopping Me!, making it the ideal way to train your aces.
Unity Cup (Aoharu Hai) Scenario Guide
Sagittarius Cup Recommended Skills
| Green Skills | Speed/Accel Skills |
| Recovery Skills | Red Skills |
Sagittarius Cup Green Skills
| Green Skills |
|---|
|
Track-based Conditionals:
Racer-based Conditionals (Suggested): ・
・
|
Green Skill Sources
Support Cards above only cover SR and SSR above to save space.
For Green Skills, we recommend training parents with Yukino Bijin support cards since they already come with Winter Runner and Nakayama Racecourse. The Wit card (Hometown Cheers) is also notable for having No Stopping Me! if you don't want to pick Team Carrots in Unity Cup.
Stats boosted by these Green Skills are hinted at in their skill icons. For example, Right-Handed shows boots, which means it boosts the Speed stat, Firm Conditions buffs Power, and Front Runner Savvy improves Wit. Aim for these skills to further increase your stats.
Sagittarius Cup Speed and Acceleration Skills
| Yellow Skills | |
|---|---|
| All Styles |
ⓘ Note that Tail Held High needs 3 skills to activate in the mid-race to proc. ⓘ No Stopping Me is best used by Pace, Lates, and Ends on this course. It's potentially usable by Fronts, as it can activate before Angling and Scheming. However, this requires another runner in front of the NSM user. |
|
・
・
ⓘ Note that Groundwork needs 3 skills to activate in the early-race to proc. Having 3 passive (green) skills activate in the beginning will guarantee this, although skills like Early Lead will work as well.
|
|
|
・
・
|
|
|
・
|
|
|
・
Rarity: R ・
Rarity: SSR ・
|
For all styles, acceleration skills that activate as soon as the late-race begins are good. Straightaway Spurt/Encroaching Shadow will hit this often for End Closers, making it a must if you're running this style. No Stopping Me! is another strong skill that you can get easily in the Unity Cup by choosing Team Carrots as your team name. Although this will prevent you from getting Cooldown from the Scenario, the impact of No Stopping Me! on races more than makes up for it.
Both Angling and Scheming for Front Runners and Let's Pump Some Iron for Late Surgers and End Closers are still good picks, but they will not be as powerful compared to other tracks. Moving Past, and Beyond can be paired with Let's Pump Some Iron as well to gain a lot of acceleration in the late-race.
As usual for Front Runners, strong early-race acceleration, such as Groundwork and three green skills or Early Lead/Taking the Lead are a must to secure the lead immediately. Having the skill Concentration/Focus is also good to reduce the effects of Late Starts.
Pace Chasers don't have a lot of good acceleration options for this race and are expected to be weaker. They will have to rely on No Stopping Me!, which can be a gamble, or Head-On for acceleration.
Sagittarius Cup Blue Skills
| Blue Skills |
|---|
|
・
・
・
・
・
・
|
Recovery skills are a must if you're to survive the entire length of the race without slowing down. Aim to have at least one rare recovery skill, going for 2 gold recovery skills if you can't push your stats high enough. As mentioned earlier, bringing Rice Shower's Power SSR can already give you two gold skills that apply to the race. Remember to pick Blue Bloom in Unity Cup if you have the support card equipped to get Cooldown.
If you want to get No Stopping Me! from Unity Cup instead, you can learn the other gold recoveries listed above, depending on their style.
Christmas Oguri Cap Recoveries
|
・
・
・
|
Due to the conditions of Christmas Oguri Cap's unique skill, we highly recommend going with 3 white recoveries for her rather than 1 Gold recovery. She can lower her Stamina requirement to around 750, but we suggest aiming for slightly above 900, if possible. What's important is that Triple 7s activates last, as it's in a good position for the race. Try to get as much Wit as possible to ensure the recoveries activate. You can try a deck with at least 2 Wit cards since her Stamina requirement is more relaxed.
Sagittarius Cup Red Skills
| Red Skills |
|---|
Stamina debuffs are potentially good for Sagittarius Cup, but are somewhat limited, as Mystifying Murmur can't activate here. Dominator is also unusable, as it only works in Medium courses. Of note is Stamina Eater, as well as its upgraded version Stamina Siphon that Manhattan Cafe has access to.
Another good debuff skill is Sharp Gaze, as well as its upgraded version All-Seeing Eyes.
Sagittarius Cup Support Cards
| Recommended Support Cards | Sample Deck Setups |
Recommended Support Cards


Support Cards above have been categorized based on what role they can supplement in the Sagittarius Cup.
Above are our recommendations for Support Cards to build your Umamusume for the Sagittarius Cup Champions Meeting. These are chosen based on their skills and stats.
This time around, you can focus on maximizing Speed and Stamina while maintaining a good amount of Power.
Sample Deck Setups
| ⓘ Note that the sample decks below may be subject to changes and improvements! |
Above are sample deck setups you can try for training your Umamusume for the Sagittarius Cup. Remember to swap cards if they conflict with your trainee, and note that the randomized nature of Career runs means you'll have to make multiple runs until you get a desirable career result.
For the Stamina decks, you can replace one of the SSRs if you're able to get a gold recovery skill from your trainee's innate skills. For the Power decks, Rice Shower SSR is almost mandatory, as it's the main source of rare recovery skills. Riko Kashimoto (both SSR and R) is also a powerful card that can essentially replace a Stamina card when used in Unity Cup.
Also aim to hit at least 34 race bonus, as this maximizes stat gains during career races. If you can't hit this, try to use high or max uncapped cards instead, as these will provide better stats overall.
Parent Deck Setups


If you want to prepare parents for your aces so they can run better cards, you can try the decks above. Try to aim for at least 600 of the stat you want to pass down for a chance to get a 3 Star stat spark. You may also use other versions of the same character (such as the R version) if you're only after the random skill hints and not the skills from the career events.
For Sagittarius Cup, Yukino Bijin Guts SSR is recommended for its two green skills (Winter Runner and Nakayama Racecourse) and for Playtime's Over!. You may replace it with a card like Matikane Fukukitaru (Fate's Forecast) if you're aiming for Right-Handed instead.
Sagittarius Cup Champions Meeting Rewards
Champions Meeting Rewards
Graded League Rewards

| | |
|---|---|
| | |
| | |
| | |
| | |
| | |
| Rewards | Group A | Group B |
|---|---|---|
| | | |
| | | |
| | | |
| | | |
| | | |
| | | |
| Rewards | Group A | Group B |
|---|---|---|
| | Epithets: ・(Cup Name) Platinum ・(Cup Name) Gold ・(Cup Name) Silver ・(Cup Name) Bronze | Epithets: ・(Cup Name) Gold ・(Cup Name) Silver ・(Cup Name) Bronze |
| | Epithets: ・(Cup Name) Gold ・(Cup Name) Silver ・(Cup Name) Bronze | Epithets: ・(Cup Name) Silver ・(Cup Name) Bronze |
| | Epithets: ・(Cup Name) Silver ・(Cup Name) Bronze | Epithets: ・(Cup Name) Bronze |
Open League Rewards

| | |
|---|---|
| | |
| | |
| | |
| | |
| | |
| Rewards | Group A | Group B |
|---|---|---|
| | | |
| | | |
| | | |
| | | |
| | | |
| | | |
| Rewards | Group A | Group B |
|---|---|---|
| | Epithets: ・(Cup Name) Silver ・(Cup Name) Bronze | Epithets: ・(Cup Name) Bronze |
| | Epithets: ・(Cup Name) Bronze | |
| | Epithets: ・(Cup Name) Bronze | |
Prior to the Gemini Cup, only 1st place Finals winners earned profile Epithets.
Umamusume: Pretty Derby Related Guides

Pisces Cup Guides
| Guides | |
|---|---|
| Pisces Cup Guide | |
Aquarius Cup Guides
| Guides | |
|---|---|
| Aquarius Cup Guide | |
Capricorn Cup Guides
| Guides | |
|---|---|
| Capricorn Cup Guide | |
Sagittarius Cup Guides
| Guides | |
|---|---|
| Sagittarius Cup Guide | |
Scorpio Cup Guides
| Guides | |
|---|---|
| Scorpio Cup Guide | |
Libra Cup Guides
| Guides | |
|---|---|
| Libra Cup Guide | |
Virgo Cup Guides
| Guides | |
|---|---|
| Virgo Cup Guide | |
Leo Cup Guides
| Guides | |
|---|---|
| Leo Cup Guide | |
| Builds | |
| Summer Maruzensky Front Runner Build | Leo Cup General Debuffer Build Guide |
Cancer Cup Guides
| Guides | |
|---|---|
| Cancer Cup Guide | |
| Builds | |
| Seiun Sky Front Runner Build | El Condor Pasa Pace Chaser Build |
| Smart Falcon Front Runner Build | - |
Gemini Cup Guides
| Guides | |
|---|---|
| Gemini Cup Guide | Gemini Cup Release Date |
| Builds | |
| Gold Ship End Closer Build | Narita Taishin End Closer Build |
Taurus Cup Guides
Comment
Why is anime Teio so low rated, when she has a recommended ulti, access to head-on, and a built in golden stamina skill?
Author

Sagittarius Cup Champions Meeting Guide
Premium Articles


Rankings
- We could not find the message board you were looking for.

Gaming News


Popular Games

Genshin Impact Walkthrough & Guides Wiki
Umamusume: Pretty Derby Walkthrough & Guides Wiki
Crimson Desert Walkthrough & Guides Wiki
Monster Hunter Stories 3: Twisted Reflection Walkthrough & Guides Wiki
Honkai: Star Rail Walkthrough & Guides Wiki
Pokemon Pokopia Walkthrough & Guides Wiki
The Seven Deadly Sins: Origin Walkthrough & Guides Wiki
Wuthering Waves Walkthrough & Guides Wiki
Zenless Zone Zero Walkthrough & Guides Wiki
Arknights: Endfield Walkthrough & Guides Wiki


Recommended Games
Fire Emblem Heroes (FEH) Walkthrough & Guides Wiki
Diablo 4: Vessel of Hatred Walkthrough & Guides Wiki
Cyberpunk 2077: Ultimate Edition Walkthrough & Guides Wiki
Yu-Gi-Oh! Master Duel Walkthrough & Guides Wiki
Super Smash Bros. Ultimate Walkthrough & Guides Wiki
Pokemon Brilliant Diamond and Shining Pearl (BDSP) Walkthrough & Guides Wiki
Elden Ring Shadow of the Erdtree Walkthrough & Guides Wiki
Monster Hunter World Walkthrough & Guides Wiki
The Legend of Zelda: Tears of the Kingdom Walkthrough & Guides Wiki
Persona 3 Reload Walkthrough & Guides Wiki


All rights reserved
© Cygames, Inc.
The copyrights of videos of games used in our content and other intellectual property rights belong to the provider of the game.
The contents we provide on this site were created personally by members of the Game8 editorial department.
We refuse the right to reuse or repost content taken without our permission such as data or images to other sites.
Thank you for the inquiry! On recent re-evaluation with your points considered, we have decided to update Tokai Teio (Beyond the Horizon) from A to S.