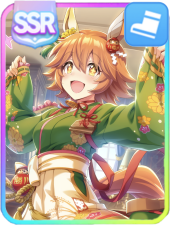
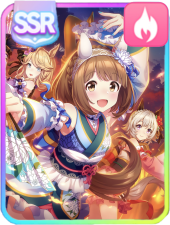
Special Week (Hopp'n♪Happy Heart) Build Guide and Character Info
This is a build guide for Special Week (Hopp'n♪Happy Heart), also known as Summer Special Week, in Umamusume: Pretty Derby. Find out how to build Summer Special Week, her preferred tracks, distances, and style, as well as her basic character information, here!
| Special Week Related Guides | |
|---|---|
|
|
|
List of Contents
Special Week (Hopp'n♪Happy Heart) Character Info
Special Week Stats
| Special Week (Hopp'n♪Happy Heart) | |||||||||||||||||||
|---|---|---|---|---|---|---|---|---|---|---|---|---|---|---|---|---|---|---|---|

|
|||||||||||||||||||
| Overall | Ease (TB) | T.Trials | CM11 | ||||||||||||||||
|
|
|
|
| ||||||||||||||||
| Track Aptitude | |||||||||||||||||||
| Turf: A | Dirt: G | ||||||||||||||||||
| Distance Aptitude | |||||||||||||||||||
| Sprint: F | Mile: C | Med: A | Long: A | ||||||||||||||||
| Pace Aptitude | |||||||||||||||||||
| Front: G | Pace: A | Late: A | End: C | ||||||||||||||||
| Stat Growth | |||||||||||||||||||
| SPD: 0% | STA: 10% | POW: 10% | GUT: 10% | WIT: 0% | |||||||||||||||
Special Week (Hopp'n♪Happy Heart) Unique Skill
|
|
Recover endurance by relaxing after activating 2 skills when positioned midpack mid-race. |
|---|
Dazzl'n ♪ Diver is as strong as a unique recovery skill like Swinging Maestro that activates in the mid-race when meeting the following conditions:
- 2 skills have activated in the mid-race.
- User is in the mid-pack (70% of the pack). 2nd-6th in 9-gate (CM) or 2nd-8th in 12-gate (TT).
Skills of any type can contribute to the unique skill's trigger, as long as they activate in the mid-race. Fast and Furious and It's On are two examples of Special Week's potential kit that can trigger Dazzl'n ♪ Diver in the mid-race.
For Special Week herself, this is effectively 1 gold recovery skill already. If the skill is passed down as an inheritance, it will be as strong as a white recovery skill.
Special Week (Hopp'n♪Happy Heart) Innate Skills
| All Innate Skills |
|---|
Special Week (Hopp'n♪Happy Heart) Potential Skills
| Skill Per Potential Level |
|---|
| Potential 2: Potential 3: Potential 4: Potential 5: |
Special Week (Hopp'n♪Happy Heart) Career Skills
| All Career Event Skills |
|---|
Is Special Week (Hopp'n♪Happy Heart) Worth It?
Viable Long Late Surger
Special Week (Hopp'n♪Happy Heart) is a good Late Surger primarily trained for Long races but can alternatively work with Medium distance. Her unique skill recovers her stamina, similar to a rare Recovery Skill, making her a more suitable candidate for surviving Longs.
Her having an easy-to-use recovery unique skill means you can allocate Skill points for other relevant skills, such as the gold skills in her potential kit Fast & Furious and It's On!
In the competitive environment, unique speed skills (or hybrids like Festive Miracle) typically outclass unique recoveries, since gold recovery options are usually given through support cards anyway. Lacking her own native speed option, Special Week will have to look further for options to get her into the lead, such as No Stopping Me! and On Your Left! for her usual Late style.
Special Week (Hopp'n♪Happy Heart) Career Training Tips
| Training Tips |
|---|
|
|
Train in the Trackblazer (MANT) Scenario
When training Special Week, use the brand new Trackblazer (MANT) scenario, as this will allow you to get higher stats than before. Try to participate in 30 to 35 races during your career runs while making sure to prioritize winning G1 races.
Special Week's C aptitude for Mile races will allow rivals to appear in them. We recommend getting at least 1 Mile spark to increase her aptitude to B, improving her chances of winning in them. You can also get 4 Mile sparks if you want to entirely remove the Speed penalty.
Trackblazer (Make a New Track) Scenario Guide
Run Her as a Late Surger
Unlike her original counterpart, Special Week should be run as a Late Surger thanks to her access to various Late Surger skills, as well as skills that synergize well with the running style.
Make sure to get Late Surger Sparks to improve her aptitude for the running style.
Raise Her Aptitude for Long Races
For Team Trial and Champions Meeting purposes, maximizing her Long aptitude is usually the best choice since her unique skill is suitable for helping her survive Long races, which require a lot of stamina.
Raising Her Mile Aptitude Can Help
Raising Special Week's Mile Aptitude from C to B can help with Special Week's first career race, and only requires one Mile Spark to do. This is not required as she only has one Mile race, but doing so will help you accomplish the goal with ease. This will also help if you are training in the Trackblazer scenario.
Mid-Race Skills Are Required
Special Week's Unique Skill requires her to use two skills mid-race before it can activate. As such, learning at least two mid-race skills is required to make sure that she can use her Unique Skill. To increase your chances of activating a skill, make sure to train Special Week's Wit.
Examples of good mid-race skills include Ramp Up and Position Pilfer, as well as their upgraded forms It's On! and Fast & Furious respectively. All four skills are available to Special Week as Innate Skills (base) and Awakening Skills (upgraded). Other generic skills can also work as long as they activate mid-race.
Try to Get Acceleration Skills
Special Week has access to numerous velocity skills (including her Unique Skill), with Fighter as her only acceleration skill. To complement this, make sure to get acceleration skills from either Support Cards or as inherited skills from Legacies and Sparks.
Special Week (Hopp'n♪Happy Heart) Build
Recommended Stats
| 1200 | 1000 | 1000 | 500 | 800 |
As a Late Surger for your Long Team in Team Trials, Special Week will need Speed and Power to help her get to the front in the later parts of the race, as well as enough Stamina to survive her Long Races. Try to get one other Gold Recovery Skill to go along with her Unique Skill Dazzl'n ♪ Diver.
When training Special Week, make sure to have at least 400 stamina before the Kikuka Sho on Classic Year Late October, and at least 500 stamina before the Tenno Sho (Spring) on Senior Year Late April to help you win both races.
If you are only planning to clear a career run with Special Week, then you can aim for lower stat numbers, as the stats above are for Team Trials.
Recommended Support Cards
Trackblazer (MANT) Build


For Special Week, we recommend running a mixed deck consisting of 2 Speed, 1 Stamina, 2 Wit, and 1 Race Bonus card. This will help Special Week get the stats that she needs as a Late Surger in her Long races, as well as get a high Race Bonus, which will help when training in the Trackblazer (MANT) Scenario.
If you are having trouble reaching the recommended Stamina, you can swap Admire Vega for Manhattan Cafe (My Solo Drawn to Raindrop Drums). This should, however, not be that big of a problem thanks to Special Week's 10% Stamina growth.
Budget Build


This deck consists mostly of SR cards and is meant for players who do not have many SSR Support Cards. Despite the lower rarity, this deck can still hold up and perform well in the latest scenario. Take advantage of the game's borrowing feature to borrow strong MLB SSR cards, like Super Creek (Piece of Mind).
Alternative Support Cards


These cards will help Special Week level her needed Stats (especially with Rainbow/Friendship Training), as well as provide some needed skills. Try to prioritize cards with a high Race Bonus, as you want at least 50% Race Bonus in your deck.
Previous Scenario Builds
Unity Cup Build


If you plan to run the Unity Cup, we recommend using either a Speed-Power deck or a Speed-Stamina deck to help Special Week get the stats she needs.
Unity Cup (Aoharu Hai) Scenario Guide
URA Build

If you plan to run the URA Finale, we recommend using either a Speed-Stamina or a Speed-Power deck to help Special Week get the stats she needs.
Recommended Legacy Sparks
| Recommended | |
|---|---|
| 9★ Stamina 9★ Power |
|
| 3★ Long 3★ Turf 3★ Late Surger |
For Legacy Sparks, we recommend trying to find Stamina and Power sparks to help with Special Week's races. As for running style and race length aptitudes, get Late Surger to improve her running style, as well as Long Sparks to potentially improve them to S aptitude. You can also get a Mile Spark to improve your Mile aptitude to B and make your first race easier.
If you are training in the Trackblazer scenario, we recommend getting 1-4 Mile sparks so Special Week can participate and win in even more races.
You can use either your own Veterans, or borrow the ones from your friends. If you do not have Veterans with full sparks, you can go with whatever you have access to.
Recommended Skills
 Long Corners ◯
 Nimble Navigator
 Professor of Curvature
 On Your Left!
 Swinging Maestro
As a Late Surger in Long Races, Special Week will want a good mix of velocity and acceleration skills. Mid-race skills are especially important because they help activate her Unique Skill. Good mid-race skills include the corner skills Professor of Curvature and Long and Late Surger Corners, as well as positional skills like It's On!, Uma Stan, and Fast and Furious.
Once in the late race, acceleration skills like On Your Left! and Nimble Navigator will help you accelerate to the front and take the win. As for recovery skill, getting a Gold Recovery Skill like Swinging Maestro is enough, as Special Week's Unique Skill counts as a Gold Recovery Skill.
If you cannot get the recommended skills, you can replace them with similar skills that you have access to. You will just need to make sure that Special Week can activate said skills in a race.
Special Week (Hopp'n♪Happy Heart) Events
Meet My Other Mom
| Choice | Outcome |
|---|---|
| Choice 1 |
・ Practice Perfect ◯ (random) ・ Fighter +2 Skill Hint |
| Choice 2 |
・ 20 Guts ・ Practice Perfect ◯ (random) |
Swimsuit Power Unlocked!
| Choice | Outcome |
|---|---|
| Choice 1 |
・ 10 Speed ・ 15 Skill Pts |
| Choice 2 | ・ 20 Wit |
The Best Summer Ever!
| Choice | Outcome |
|---|---|
| Choice 1 |
・ 10 Stamina ・ 10 Power |
| Choice 2 |
・ 10 Energy ・ 2 All Stats |
A Place I Want to Take You
| Choice | Outcome |
|---|---|
| Choice 1 | ・ 10 Wit |
| Choice 2 | ・ 10 Stamina |
Because It's Special
| Choice | Outcome |
|---|---|
|
Choice 1
(Where do you usually go with your mom?) |
・ 10 Stamina |
|
Choice 2
(Where do you usually go with your friends?) |
・ 10 Speed |
Just a Little More (Special Week)
| Choice | Outcome |
|---|---|
|
Choice 1
(Let's work on your finishing dashes.) |
・ Homestretch Haste Skill Hint |
|
Choice 2
(Let's work on your cornering.) |
・ Corner Adept ◯ Skill Hint |
Research Fanatic
| Choice | Outcome |
|---|---|
| Choice 1 | ・ Tokyo Racecourse ◯ Skill Hint |
| Choice 2 | ・ Nakayama Racecourse Skill Hint |
Someone I Respect
| Choice | Outcome |
|---|---|
| Choice 1 | ・ 30 Skill Pts |
| Choice 2 |
・ 5 Stamina ・ 5 Guts |
| Choice 3 |
・ 5 Speed ・ 5 Power |
A Beautiful Day for Tennis
| Choice | Outcome |
|---|---|
|
Choice 1
(Trust your reflexes and take the front position!) |
・ 10 Speed |
|
Choice 2
(Trust your stamina and take the back position!) |
・ 10 Stamina |
Dance Lesson (Special Week)
| Choice | Outcome |
|---|---|
|
Choice 1
(The most important thing is to fully express yourself when you dance.) |
・ 10 Guts |
|
Choice 2
(It's crucial to move to the beat.) |
・ 10 Stamina |
Early Afternoon Payback
| Choice | Outcome |
|---|---|
|
Choice 1
(Just have fun eating!) |
・ 5 Energy ・ 5 Wit |
|
Choice 2
(I'm afraid I've got nothing!) |
・ Pace Strategy Skill Hint |
Karaoke Connoisseur ♪
| Choice | Outcome |
|---|---|
|
Choice 1
(For everyone's sake and for your own, get some energy!) |
・ 10 Energy |
|
Choice 2
(For everyone's sake and for your own, strengthen your resolve!) |
・ 10 Power |
Putting It Away at the Cafeteria
| Choice | Outcome |
|---|---|
|
Choice 1
(It's important for your meals to be balanced right now!) |
・ 10 Energy ・ 5 Skill Pts |
|
Choice 2
(Success)
(You'll be fine as long as you exercise afterward!) |
・ 30 Energy ・ 10 Skill Pts |
|
Choice 2
(Fail)
(You'll be fine as long as you exercise afterward!) |
・ 30 Energy ・ -5 Speed ・ 5 Power ・ 10 Skill Pts ・ Slow Metabolism |
Special Week's Alter Ego
| Choice | Outcome |
|---|---|
| Choice 1 (Success) |
・ 30 Energy ・ 10 Power ・ 10 Skill Pts |
| Choice 1 (Fail) |
・ 30 Energy ・ -5 Speed ・ 15 Power ・ 10 Skill Pts ・ Slow Metabolism |
| Choice 2 |
・ 10 Energy ・ 5 Power ・ 5 Skill Pts |
| Choice 3 (Success) | ・ 100 Energy |
| Choice 3 (Fail) |
・ 100 Energy ・ -5 Speed ・ Slow Metabolism |
At Summer Camp (Year 2) (Special Week)
| Choice | Outcome |
|---|---|
|
Choice 1
(You need to get stronger.) |
・ 10 Power |
|
Choice 2
(You need to strengthen your resolve.) |
・ 10 Guts |
New Year's Resolutions (Special Week)
| Choice | Outcome |
|---|---|
|
Choice 1
(Let's work on improving your strong points!) |
・ 10 Stamina |
|
Choice 2
(You should be mindful of your health!) |
・ 20 Energy |
|
Choice 3
(You should learn the top techniques in Japan!) |
・ 20 Skill Pts |
New Year's Shrine Visit (Special Week)
| Choice | Outcome |
|---|---|
|
Choice 1
(To get stronger!) |
・ 30 Energy |
|
Choice 2
(To elevate your abilities!) |
・ 5 All Stats |
|
Choice 3
(To learn a variety of skills!) |
・ 35 Skill Pts |
Don't Over Do it! (Special Week)
| Choice | Outcome |
|---|---|
| Choice 1 |
・ 10 Energy ・ -2 Mood ・ Last trained stat and two other random stat -10 ・ Practice Poor (random) |
| Choice 2 (Success) | ・ Practice Perfect ◯ |
| Choice 2 (Fail) |
・ -3 Mood ・ 3 Random stat -10 ・ Practice Poor |
Extra Training (Special Week)
| Choice | Outcome |
|---|---|
|
Choice 1
(Got it! Then let's do some more laps until you're satisfied!) |
・ -5 Energy ・ Last trained stat +5 ・ 5 Friendship with Director |
|
Choice 2
(Don't get too excited, or you might overdo it.) |
・ 5 Energy |
Get Well Soon! (Special Week)
| Choice | Outcome |
|---|---|
| Choice 1 |
・ -1 Mood ・ Last trained stat -5 ・ Practice Poor (random) |
| Choice 2 (Success) | ・ Practice Perfect ◯ |
| Choice 2 (Fail) |
・ -1 Mood ・ Last trained stat -10 ・ Practice Poor (random) |
Defeat (G1) (Special Week)
| Choice | Outcome |
|---|---|
| Choice 1 |
・ -25 Energy ・ 25 Skill Pts ・ Random Stat +4 |
| Choice 2 (Success) |
・ -15 Energy ・ 25 Skill Pts ・ Random Stat +4 |
| Choice 2 (Fail) |
・ -35 Energy ・ 25 Skill Pts ・ Random Stat +4 |
Defeat (G2) (Special Week)
| Choice | Outcome |
|---|---|
| Choice 1 |
・ -25 Energy ・ 20 Skill Pts ・ Random Stat +3 |
| Choice 2 (Success) |
・ -15 Energy ・ 20 Skill Pts ・ Random Stat +3 |
| Choice 2 (Fail) |
・ -35 Energy ・ 20 Skill Pts ・ Random Stat +3 |
Defeat (G3) (Special Week)
| Choice | Outcome |
|---|---|
| Choice 1 |
・ -25 Energy ・ 20 Skill Pts ・ Random Stat +3 |
| Choice 2 (Success) |
・ -15 Energy ・ 20 Skill Pts ・ Random Stat +3 |
| Choice 2 (Fail) |
・ -35 Energy ・ 20 Skill Pts ・ Random Stat +3 |
Defeat (OP and Pre-OP) (Special Week)
| Choice | Outcome |
|---|---|
| Choice 1 |
・ -25 Energy ・ 10 Skill Pts |
| Choice 2 (Success) |
・ -15 Energy ・ 10 Skill Pts |
| Choice 2 (Fail) |
・ -35 Energy ・ 10 Skill Pts |
Solid Showing (G1) (Special Week)
| Choice | Outcome |
|---|---|
| Choice 1 |
・ -20 Energy ・ 45 Skill Pts ・ Random Stat +8 |
| Choice 2 (Success) |
・ -10 Energy ・ 45 Skill Pts ・ Random Stat +8 |
| Choice 2 (Fail) |
・ -30 Energy ・ 45 Skill Pts ・ Random Stat +8 |
Solid Showing (G2) (Special Week)
| Choice | Outcome |
|---|---|
| Choice 1 |
・ -20 Energy ・ 35 Skill Pts ・ Random Stat +5 |
| Choice 2 (Success) |
・ -10 Energy ・ 35 Skill Pts ・ Random Stat +5 |
| Choice 2 (Fail) |
・ -30 Energy ・ 35 Skill Pts ・ Random Stat +5 |
Solid Showing (G3) (Special Week)
| Choice | Outcome |
|---|---|
| Choice 1 |
・ -20 Energy ・ 35 Skill Pts ・ Random Stat +5 |
| Choice 2 (Success) |
・ -10 Energy ・ 35 Skill Pts ・ Random Stat +5 |
| Choice 2 (Fail) |
・ -30 Energy ・ 35 Skill Pts ・ Random Stat +5 |
Solid Showing (OP and Pre-OP) (Special Week)
| Choice | Outcome |
|---|---|
| Choice 1 |
・ -20 Energy ・ 30 Skill Pts ・ Random Stat +3 |
| Choice 2 (Success) |
・ -10 Energy ・ 30 Skill Pts ・ Random Stat +3 |
| Choice 2 (Fail) |
・ -30 Energy ・ 30 Skill Pts ・ Random Stat +3 |
Victory! (G1) (Special Week)
| Choice | Outcome |
|---|---|
| Choice 1 |
・ -15 Energy ・ 45 Skill Pts ・ Random Stat +10 |
| Choice 2 (Success) |
・ -5 Energy ・ 45 Skill Pts ・ Random Stat +10 |
| Choice 2 (Fail) |
・ -20 Energy ・ 45 Skill Pts ・ Random Stat +10 |
Victory! (G2) (Special Week)
| Choice | Outcome |
|---|---|
| Choice 1 |
・ -15 Energy ・ 35 Skill Pts ・ Random Stat +8 |
| Choice 2 (Success) |
・ -5 Energy ・ 35 Skill Pts ・ Random Stat +8 |
| Choice 2 (Fail) |
・ -20 Energy ・ 35 Skill Pts ・ Random Stat +8 |
Victory! (G3) (Special Week)
| Choice | Outcome |
|---|---|
| Choice 1 |
・ -15 Energy ・ 35 Skill Pts ・ Random Stat +8 |
| Choice 2 (Success) |
・ -5 Energy ・ 35 Skill Pts ・ Random Stat +8 |
| Choice 2 (Fail) |
・ -20 Energy ・ 35 Skill Pts ・ Random Stat +8 |
Victory! (OP and Pre-OP) (Special Week)
| Choice | Outcome |
|---|---|
| Choice 1 |
・ -15 Energy ・ 30 Skill Pts ・ Random Stat +5 |
| Choice 2 (Success) |
・ -5 Energy ・ 30 Skill Pts ・ Random Stat +5 |
| Choice 2 (Fail) |
・ -20 Energy ・ 30 Skill Pts ・ Random Stat +5 |
Special Week (Hopp'n♪Happy Heart) Hidden Events
| Notes on Hidden Events |
|---|
|
The Hidden Event rewards listed below are the base values, and can increase based on your Race Bonus. Hidden Events do not occur in the following scenarios: ・Trackblazer (Make a New Track) |
Rivals in Arms
| Condition | Win the Satsuki Sho, Kikuka Sho, Japan Cup (Classic), Takarazuka Kinen (Senior), Arima Kinen (Senior) |
|---|---|
| Event Time | Senior Year Late Dec |
| Event Rewards |
・ Speed +30 ・ Power +30 ・ Stamina to Spare +2 ・ Slick Surge +2 |
Special Week's secret event Rivals in Arms requires her to win five specific races: the Satsuki Sho, Kikuka Sho, Japan Cup (Classic), Takarazuka Kinen (Senior), and the Arima Kinen (Senior).
Doing so provides Speed and Power, as well as Skill hints for Stamina to Spare and Slick Surge.
Special Week (Hopp'n♪Happy Heart) Career Goals
| Goal | Race/Goal |
|---|---|
| Run in Junior Make Debut | Junior Make Debut |
| Place top 5 in Kisaragi Sho |
 Kisaragi Sho Kisaragi Sho
(Mile - 1800m) Classic Year Early Feb |
| Place top 5 in Japenese Derby |
 Japanese Derby (Tokyo Yushun) Japanese Derby (Tokyo Yushun)
(Medium - 2400m) Classic Year Late May |
| Place top 3 in Kikuka Sho |
 Kikuka Sho Kikuka Sho
(Long - 3000m) Classic Year Late Oct |
| Place top 3 in Tenno Sho (Spring) |
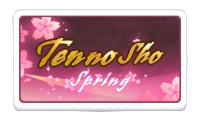 Tenno Sho (Spring) Tenno Sho (Spring)
(Long - 3200m) Senior Year Late Apr |
| Place top 2 in Japan C. |
 Japan Cup Japan Cup
(Medium - 2400m) Senior Year Late Nov |
| Place 1st in Arima Kinen |
 Arima Kinen Arima Kinen
(Long - 2500m) Senior Year Late Dec |
Special Week Profile
Basic Information
 Special Week Special Week"I gotta make my moms proud! I'll become the top Umamusume in all of Japan!" | Voice Actress | Azumi Waki |
|---|---|---|
| Height | 158cm / 5'2" | |
| Weight | Slight decrease (pre-race nerves) | |
| Birthday | May 2 | |
| Three Sizes | B 81 | W 56 | H 81 | |
| Born in Hokkaido, Special Week is a bright and cheery, hardworking Umamusume. After losing her birth mother, Special Week was raised by her mother's friend. Now, she hopes to make both her moms proud by fulfilling her promise of becoming Japan's top racer. Though she may falter along the way, her indomitable spirit ensures that she runs ever forward. | ||
Umamusume: Pretty Derby Related Guides

Character Guides
| Height and Weight | Voice Actors | Three Sizes | List of Birthdays |
Characters (Trainees) by Rarity
| 3-Star Characters | 2-Star Characters | 1-Star Characters |
Current Uma Musume Characters (Trainees)
 Matikane Tannhauser (Clippety Tippety Clop)
 Kitasan Black (Gilded Shrine to Glory)
 Admire Vega (Starry Nocturne)
 Mejiro Ardan (Crystalline)
 Eishin Flash (Precise Chocolatier)
 Mihono Bourbon (CODE: ICING)
 Sakura Chiyono O (Strength in Full Bloom)
 T.M. Opera O (New Year, Same Radiance!)
 Haru Urara (New Year ♪ New Urara!)
 Tamamo Cross (Fast as Lightning)
 Fine Motion (Noble Seamair)
 Biwa Hayahide (Rouge Caroler)
 Oguri Cap (Ashen Miracle)
 Mejiro Dober (Off the Line)
 Tosen Jordan (Jokester ☆ Vibes)
 Gold City (Autumn Cosmos)
 Symboli Rudolf (Archer by Moonlight)
 Manhattan Cafe (Creeping Shadow)
 Kawakami Princess (Princess of Pink)
 Super Creek (Chiffon-Wrapped Mummy)
 Rice Shower (Vampire Makeover!)
 Agnes Digital (Full-Color Fangirling)
 Hishi Akebono (Buono☆Alla Moda)
 Matikane Fukukitaru (Lucky Tidings)
 Eishin Flash (Meisterschaft)
 Meisho Doto (Turbulent Blue)
 Maruzensky (Hot☆Summer Night)
 Gold City (Authentic / 1928)
 Fuji Kiseki (Shooting Star Revue)
 Grass Wonder (Saintly Jade Cleric)
 El Condor Pasa (Kukulkan Warrior)
 Hishi Amazon (Azure Amazon)
 Seiun Sky (Reeling in the Big One)
 Air Groove (Quercus Civilis)
 Mayano Top Gun (Sunlight Bouquet)
 Narita Brian (Maverick)
 Smart Falcon (LOVE☆4EVER)
 Narita Taishin (Nevertheless)
 Curren Chan (Fille Éclair)
 Tokai Teio (Beyond the Horizon)
 Mejiro McQueen (End of the Skies)
 Biwa Hayahide (pf. Winning Equation...)
 Mihono Bourbon (MB-19890425)
 T.M. Opera O (O Sole Suo!)
 Rice Shower (Rosy Dreams)
 Symboli Rudolf (Emperor's Path)
 Mejiro McQueen (Frontline Elegance)
 Taiki Shuttle (Wild Frontier)
 Oguri Cap (Starlight Beat)
 Maruzensky (Formula R)
 Tokai Teio (Peak Joy)
 Silence Suzuka (Innocent Silence)
 Special Week (Special Dreamer)
 Super Creek (Murmuring Stream)
 Mayano Top Gun (Scramble Zone)
 Air Groove (Empress Road)
 El Condor Pasa (El Numero 1)
 Grass Wonder (Stone-Piercing Blue)
 Daiwa Scarlet (Peak Blue)
 Vodka (Wild Top Gear)
 Gold Ship (Red Strife)
 King Halo (King of Emeralds)
 Nice Nature (Poinsettia Ribbon)
 Matikane Fukukitaru (Rising Fortune)
 Haru Urara (Bestest Prize)
 Sakura Bakushin O (Blossom in Learning)
 Winning Ticket (Get to Winning!)
 Agnes Tachyon (Tach-nology)
 Mejiro Ryan (Down the Line)
 Satono Diamond
Comment
Author

Special Week (Hopp'n♪Happy Heart) Build Guide and Character Info
Premium Articles


Rankings
- We could not find the message board you were looking for.

Gaming News


Popular Games

Genshin Impact Walkthrough & Guides Wiki
Umamusume: Pretty Derby Walkthrough & Guides Wiki
Crimson Desert Walkthrough & Guides Wiki
Monster Hunter Stories 3: Twisted Reflection Walkthrough & Guides Wiki
Honkai: Star Rail Walkthrough & Guides Wiki
Pokemon Pokopia Walkthrough & Guides Wiki
The Seven Deadly Sins: Origin Walkthrough & Guides Wiki
Wuthering Waves Walkthrough & Guides Wiki
Zenless Zone Zero Walkthrough & Guides Wiki
Arknights: Endfield Walkthrough & Guides Wiki


Recommended Games
Fire Emblem Heroes (FEH) Walkthrough & Guides Wiki
Diablo 4: Vessel of Hatred Walkthrough & Guides Wiki
Cyberpunk 2077: Ultimate Edition Walkthrough & Guides Wiki
Yu-Gi-Oh! Master Duel Walkthrough & Guides Wiki
Super Smash Bros. Ultimate Walkthrough & Guides Wiki
Pokemon Brilliant Diamond and Shining Pearl (BDSP) Walkthrough & Guides Wiki
Elden Ring Shadow of the Erdtree Walkthrough & Guides Wiki
Monster Hunter World Walkthrough & Guides Wiki
The Legend of Zelda: Tears of the Kingdom Walkthrough & Guides Wiki
Persona 3 Reload Walkthrough & Guides Wiki


All rights reserved
© Cygames, Inc.
The copyrights of videos of games used in our content and other intellectual property rights belong to the provider of the game.
The contents we provide on this site were created personally by members of the Game8 editorial department.
We refuse the right to reuse or repost content taken without our permission such as data or images to other sites.