Best M13B Build for Warzone 2.0
☆ Camo Challenges | List of Blueprints
★ DMZ Key Locations and Map
☆ Ashika Island: DMZ Keys | Weapon Cases | Map Guide
★ How to Get Weapon Cases
The M13B has the potential to be the best AR to wield in Warzone 2.0 with its impressive range, time-to-kill, and accuracy. Read on to learn more about the best M13B build to use in Battle Royale including a complete breakdown of the best secondaries, equipment loadouts, perks, and attachments to use with it.
List of Contents
Best M13B Build
| Jump to a Section! | ||
|---|---|---|
| Weapons & Equipment | Perk Package | Attachment Setup |
Best M13B Weapon & Equipment Loadout
| Weapon Loadout | |
|---|---|
| Primary | M13B |
| Secondary | Basilisk |
| Tactical | Stun Grenade / Flash Grenade |
| Lethal | Frag Grenade |
The M13B assault rifle shines in mid to long range engagements, making the Basilisk a perfect long range secondary weapon. Pull out the Basilisk every once in a while to finish off damaged or downed enemies to save bullets for your M13B.
Players can opt to equip either a Stun Grenade or Flash Grenade to immobilize enemies inside buildings or houses before pushing their locations. If there are multiple enemies in a location you want to clear out you can cook up a Frag Grenade to eliminate them more efficiently, taking as little damage as possible.
Best M13B Perk Package
| Recon Package | |
|---|---|
| Base Perk 1 | Double Time |
| Base Perk 2 | Tracker |
| Bonus Perk | Focus |
| Ultimate Perk | Bird's Eye |
Players running this build are recommended to be more tactical by choosing favorable gunfights from mid to long range. The Recon Package consists of perks that prioritizes survivability by providing valuable intel to the player.
While the Double Time and Focus perks boosts the survivability of the player in terms of gunfights, the Tracker and Bird's Eye Ultimate Perk informs the player of enemy whereabouts.
Best Perks and Perk Packages
Best M13B Attachment Setup
| Muzzle |
Harbinger D20
Raise the STB 556 to Level 18 |
|---|---|
| Optic |
VLK 4.0 Optic
Raise the Kastov 762 to Level 4 |
| Magazine |
60 Round Mag
Raise the M4 to Level 17 |
| Underbarrel |
FTac Ripper 56
Raise the Lachmann-762 to Level 6 |
| Ammunition |
5.56 High Velocity
Raise the STB 556 to Level 7 |
This attachments setup for the M13B has the potential to make it the best assault rifle to wield in Warzone 2.0. With its impressive range, time-to-kill, and overall accuracy, players running this build will find it easy to take down enemies in any combat scenario.
The Harbinger D20 muzzle and 5.56 High Velocity ammunition accounts for the improved range and damage output of the M13B, making it a deadly force against enemy combatants. The addition of the 60 Round Mag is also essential given the above average fire rate of the M13B.
To ensure more accurate shots and recoil stabilization in long range encounters, the VLK 4.0 Optic and FTac Ripper 56 are also attached. It is recommended for players to be passive and patient with this build as it ensures easy kills in gunfights where the player lands the first shot.
How to Play the M13B
|
|
Choose Favorable Gunfights
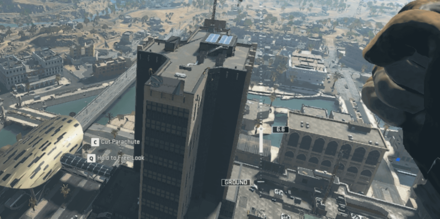
Although this M13B loadout is powerful enough to take on enemies from any range, it is still recommended to take on gunfights where enemies would be at a disadvantage. Given the amount of intel-gathering perks that you have equipped, it would be wise to secure guaranteed kills rather than take on gunfights on equal footing.
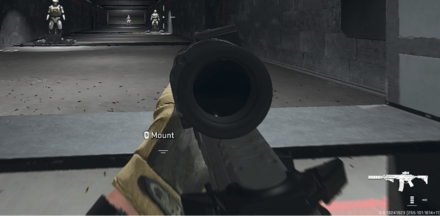
Players are recommended to take the high ground by going on top of buildings to gain a better field of view of the surroundings. Mounting your M13B can also improve your chances of winning gunfights, especially in long range encounters.
Post Up Inside Buildings
As earlier mentioned, playing passively and choosing your gunfights is the best way of playing with this M13B build. Coincidentally, it's also an effective way of remaining alive in Battle Royale for extended periods.
Posting up inside of buildings is an effective way of tracking enemy activity without revealing your location. It is also helpful that loot can be generally found in these drop spots.
Use Semi-Auto Mode in Long Range Gunfights
While most are accustomed to using the automatic mode of the M13B, make it a habit to switch to the semi-auto mode when engaging enemies from long range. This lessens recoil and results in more accurate shots so make sure to practice controlling that trigger finger.
Warzone 2.0 Related Guides
Warzone 2.0 Tips and Tricks
Battle Royale Guides
DMZ Guides
Author
Call of Duty: Modern Warfare 2 (MW2) Walkthrough & Guides Wiki
Best M13B Build for Warzone 2.0
Rankings
- We could not find the message board you were looking for.
Gaming News
![Neverness to Everness (NTE) Review [Beta Co-Ex Test] | Rolling the Dice on Something Special](https://img.game8.co/4414628/dd3192c8f1f074ea788451a11eb862a7.jpeg/show)


Popular Games

Genshin Impact Walkthrough & Guides Wiki
Honkai: Star Rail Walkthrough & Guides Wiki
Arknights: Endfield Walkthrough & Guides Wiki
Umamusume: Pretty Derby Walkthrough & Guides Wiki
Wuthering Waves Walkthrough & Guides Wiki
Pokemon TCG Pocket (PTCGP) Strategies & Guides Wiki
Abyss Walkthrough & Guides Wiki
Zenless Zone Zero Walkthrough & Guides Wiki
Digimon Story: Time Stranger Walkthrough & Guides Wiki
Clair Obscur: Expedition 33 Walkthrough & Guides Wiki


Recommended Games
Fire Emblem Heroes (FEH) Walkthrough & Guides Wiki
Pokemon Brilliant Diamond and Shining Pearl (BDSP) Walkthrough & Guides Wiki
Diablo 4: Vessel of Hatred Walkthrough & Guides Wiki
Super Smash Bros. Ultimate Walkthrough & Guides Wiki
Yu-Gi-Oh! Master Duel Walkthrough & Guides Wiki
Elden Ring Shadow of the Erdtree Walkthrough & Guides Wiki
Monster Hunter World Walkthrough & Guides Wiki
The Legend of Zelda: Tears of the Kingdom Walkthrough & Guides Wiki
Persona 3 Reload Walkthrough & Guides Wiki
Cyberpunk 2077: Ultimate Edition Walkthrough & Guides Wiki


All rights reserved
© 2021-2022 Activision Publishing, Inc. ACTIVISION, CALL OF DUTY, CALL OF DUTY VANGUARD, CALL OF DUTY WARZONE, WARZONE, and RICOCHET ANTI-CHEAT are trademarks of Activision Publishing, Inc. All other trademarks and trade names are the property of their respective owners.
The copyrights of videos of games used in our content and other intellectual property rights belong to the provider of the game.
The contents we provide on this site were created personally by members of the Game8 editorial department.
We refuse the right to reuse or repost content taken without our permission such as data or images to other sites.