How to Beat Orgodemir
☆ 100% Walkthrough Guide
★ Best Vocations | Best Party | Best Characters
☆ Find all Mini Medals and Tablet Fragments!
★ Farm Guides: EXP | Gold | Vocation Prof.
☆ List of Missables and Cut Content
★ Post-Game Guide
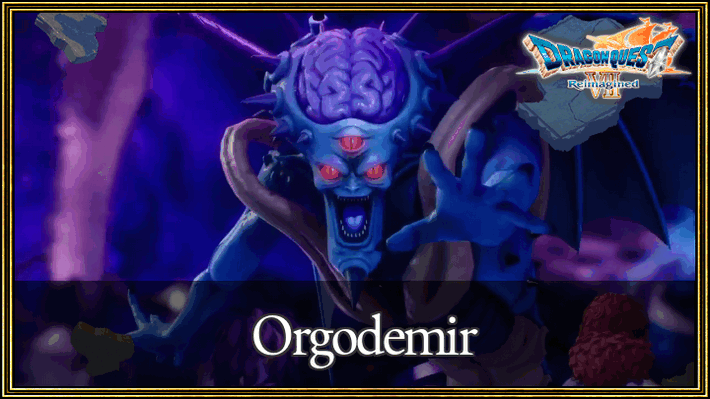
Orgodemir is the final boss encountered in Dragon Quest 7 Reimagined (DQ7). See how to beat this boss, recommended equipment for the fight, and the boss' information here.
List of Contents
 Warning! Warning! |
This page contains spoilers for Dragon Quest 7 Reimagined! If you wish to continue reading on, you have been warned. |
|---|
How to Beat Orgodemir (First Fight)
Equip Skill Resist Equipment
Orgodemir primarily deals damage using elemental attacks, making Equipment that provide resistances to Elemental Skills effective against Orgodemir.
Look into equipping armor pieces that provide resistance to Fire or Ice Skills, to dampen Orgodemir's firepower as much as possible.
Use Support Skills Often
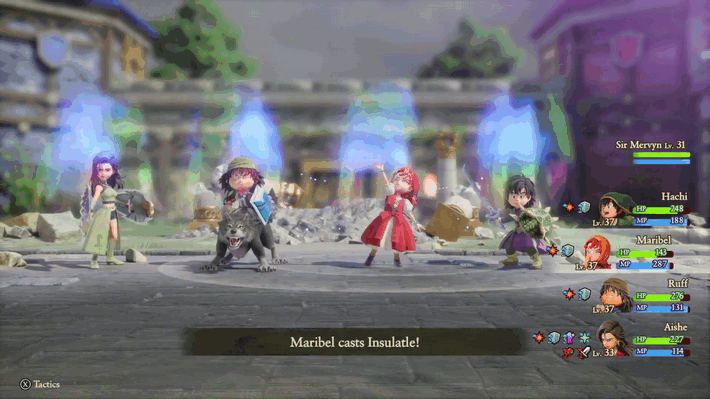
Due to Orgodemir' high damage, multi-target skills, and relatively high defence, it is important to stack buffs on your team to buff your team both offensively and defensively.
Aishe has access to a variety of buffs when played as a Dancer and Destiny's Dancer, but other Vocations also have access to reliable buffs if you play Aishe as a damage dealer instead.
Aishe Best Vocations and Build
Bring 2 Healer Characters
During Orgodemir's second phase, it will use high damage multi-target skills consecutively, dealing damage to all party members continously.
Make sure to bring at least 2 Healers during this fight with Multi-Target healing to ensure that the entire party survives.
What Does the HP Stat Do and How to Heal
How to Beat Orgodemir (Final Boss)
Stack Multi-Target Buffs
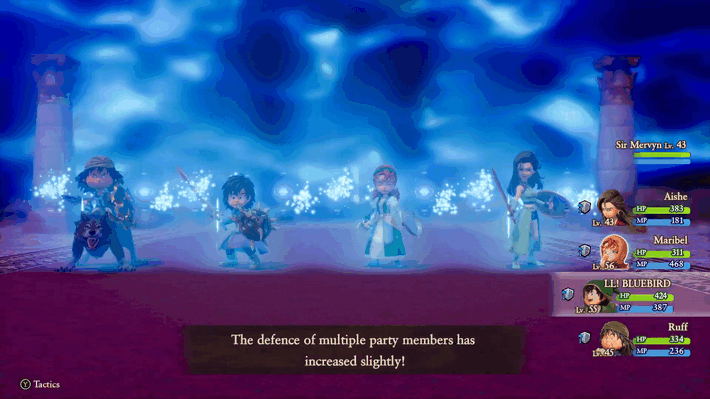
Against the first two phases of Orgodemir, make sure to Stack party-wide buffs to dampen his attacks.
This becomes especially useful if a party member becomes feared or confused, allowing you to worry about them less since they have multiple defensive buffs on them.
Bring a Priest Character
During Orgodemir's third phase, he can inflict a curse to the party members, reducing their Max HP to half while afflicted.
For this reason, make sure to bring a Priest character to gain access to Benediction, allowing you to dispel the curse as needed.
How to Learn Benediction and Effects
Bring an Armamentalist Character

Against all of Orgodemir's phases, he will use multi-target skills that deal high amounts of damage to the entire party. The Armamentalist's Magic Barrier becomes extremely useful in this fight, since it reduces the damage received from skills for the entire party.
This skill becomes even more important during Orgodemir's final phase, allowing you to defend against his All Out, which can quickly knock out party members with its very high skill damage.
Orgodemir Boss Moveset
Orgodemir (First Fight) Skills and Abilities
| Skill / Ability | Effect |
|---|---|
| Normal Attack | Orgodemir attack one target, dealing damage. |
| Let Loose | 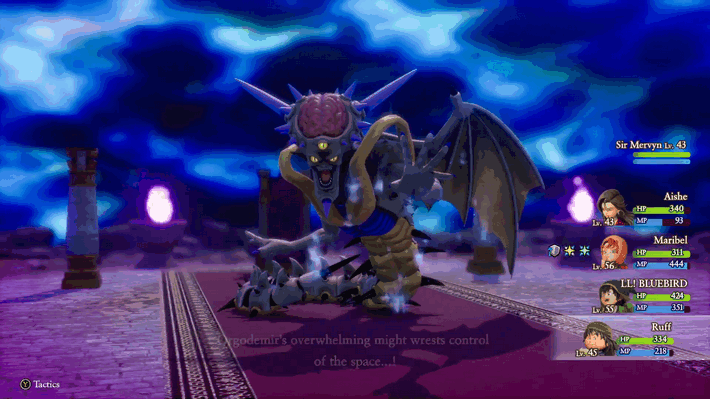 Orgodemir Lets Loose, raising Attack by two stages, but lowering Defence by two stages as well. |
Orgodemir (Final Fight) Skills and Abilities
| Skill / Ability | Effect |
|---|---|
| Normal Attack | 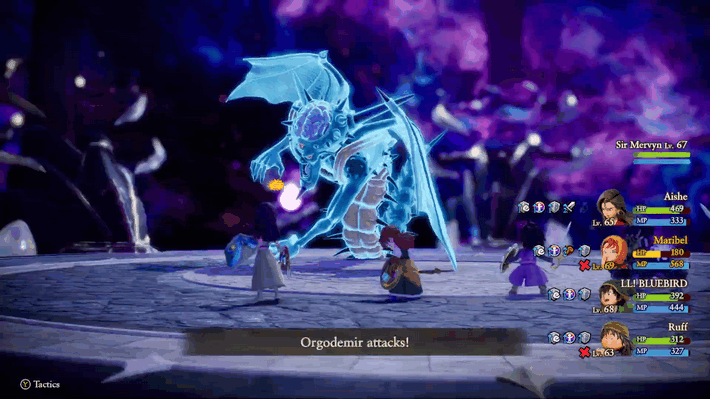 Orgodemir attack one target, dealing damage. |
| Roar | 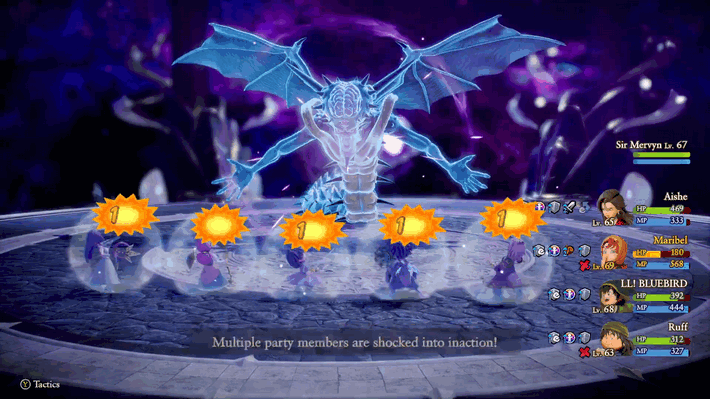 Orgodemir roars, dealing damage to the entire party, with a chance to inflict fear. |
| Tail Spike | 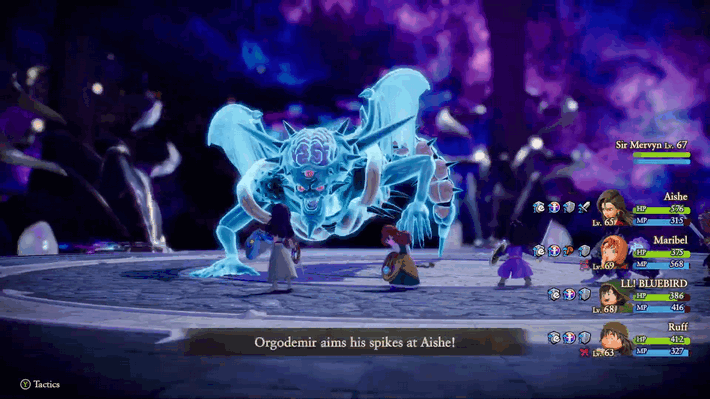 Orgodemir attacks with its tail, dealing damage to a single target. |
| Focus | 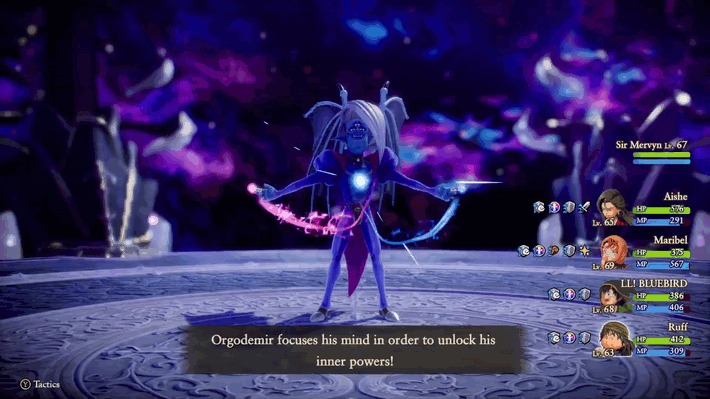 Orgodemir focuses, raising both Magical Mending and Magical Might. |
| Kafrizz | 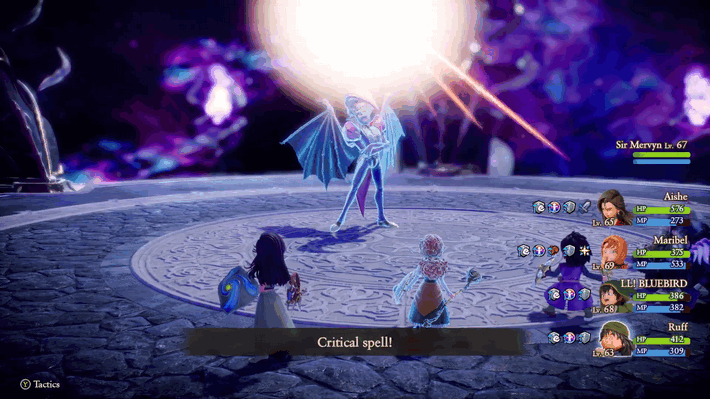 Orgodemir casts Kafrizz, launching a fireball at a single target. |
| Kaboom | Orgodemir casts Kaboom, dealing damage to the entire party. |
| Normal Attack | 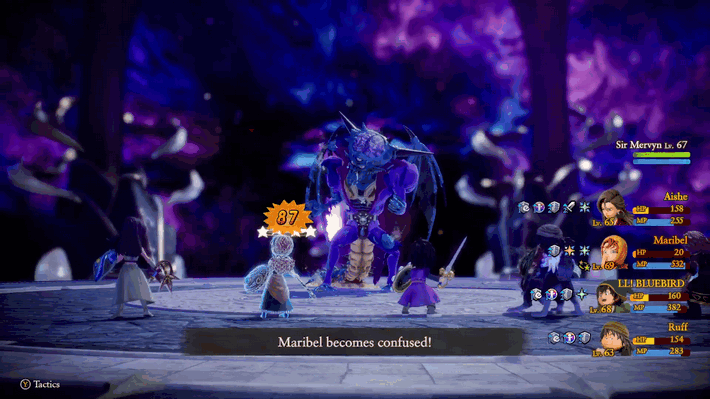 Orgodemir's Third Form attacks, dealing damage with a chance to inflict Confusion. |
| Disruptive Wave | 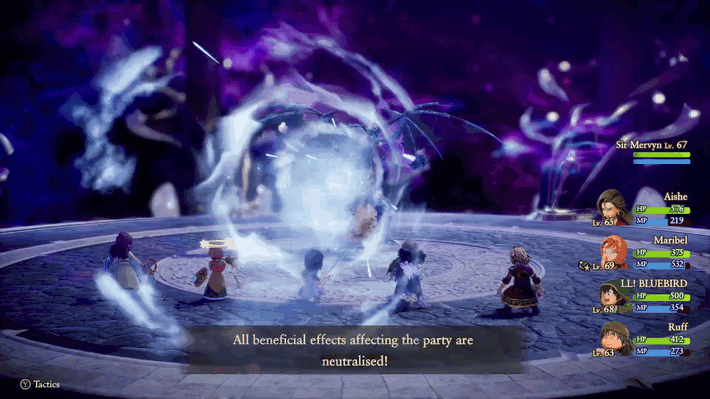 Orgodemir roars, dispelling all positive buffs from the party. |
| Summon Magma |  Orgodemir summons Magma below the party, dealing damage to all party members. |
| Magic Barrier | 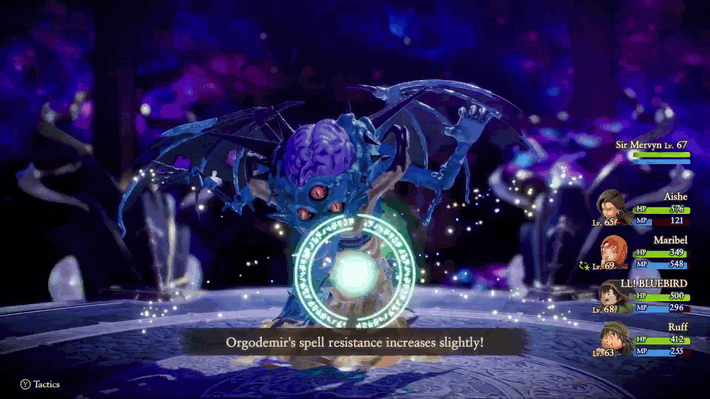 Orgodemir casts Magic Barrier, increasing Spell Resistance for a few turns. |
| Drain Magic | 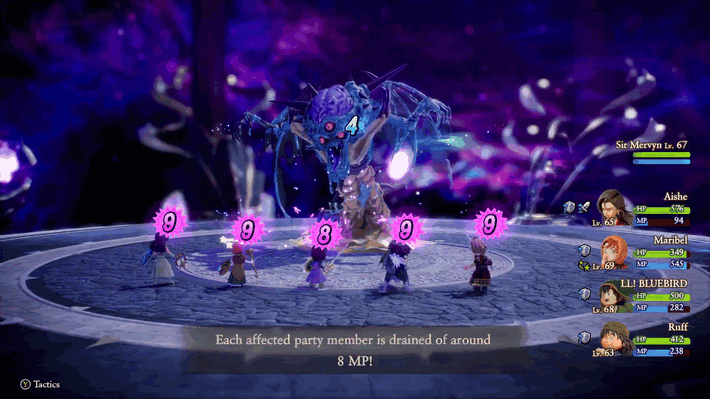 Orgodemir casts Drain Magic, stealing MP from the entire party. |
| All Out | 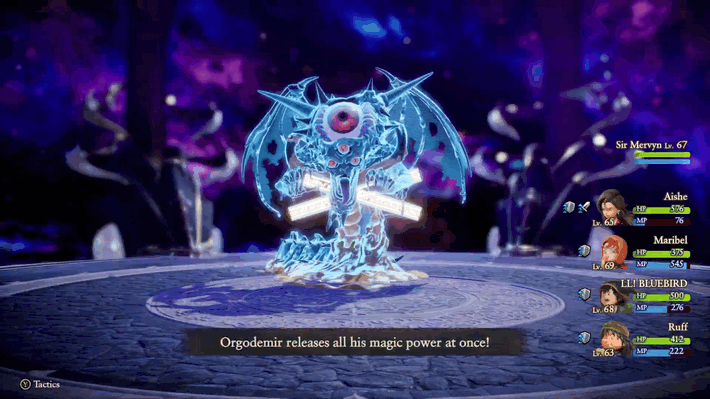 Orgodemir releases all his magic power, dealing heavy damage to the entire party. |
Best Vocations to Beat Orgodemir
Recommended Character Level and Vocations (First Fight)
| Character | Level | Vocation |
|---|---|---|
 Hero Hero
|
35 | Primary:
Gladiator Flashback: Abandons all attempts at defence in order to dramatically increase the power of physical attacks. Warrior Art of Chivalry: Provides cover for the ally with the lowest HP and then delivers a counter-attack. |
 Sir Mervyn Sir Mervyn
|
37 | Primary:
Paladin Knight Watch: Adopts a knightly stance that reduces damage taken while increasing the likelihood of blocking attacks to its absolute maximum. Gladiator Flashback: Abandons all attempts at defence in order to dramatically increase the power of physical attacks. |
 Maribel Maribel
|
35 | Primary:
Sage Twocus Pocus: Allows spells that are cast to also unleash echoes of themselves. Mage Mage's Rage: Guarantees that all of the user's spells will land critical hits for a few turns. |
 Aishe Aishe
|
35 | Primary:
Luminary Showtime!: Makes it easier for all allies besides the user to get worked up. Troubadour Encore: A potent performance that temporarily reduces all allies' MP costs to 0. |
Recommended Character Level and Vocations (Final Fight)
| Character | Level | Vocation |
|---|---|---|
|
Hero
|
65 | Primary:
Champion Divide: Creates a pair of doppelgangers of the user, ensuring that the next attacking ability hits with three times the manpower! Armamentalist Elementary: Makes use of a mastery of the elements to significantly increase elemental attack power and elemental resistance. |
 Ruff Ruff
|
65 | Primary:
Champion Divide: Creates a pair of doppelgangers of the user, ensuring that the next attacking ability hits with three times the manpower! Priest Born Again: Restores all allies' HP, removes any status ailments and revives any unconscious allies with a 100% success rate. |
|
Maribel
|
65 | Primary:
Druid That Special Summon: Summons a powerful spirit at the start of each turn for the next four turns. Sage Twocus Pocus: Allows spells that are cast to also unleash echoes of themselves. |
|
Aishe
|
65 | Primary:
Luminary Showtime!: Makes it easier for all allies besides the user to get worked up. Hero Mark of the Hero: Allows the user to perform special abilities that are off-limits to anyone but true heroes. |
Orgodemir Boss Information
Orgodemir First Fight Details
| EXP | 0 | ||
|---|---|---|---|
| Gold | 0 | ||
| Drops | None | ||
| Locations | Malign Shrine (Past) | ||
| Description | |||
| The Demon King, self-proclaimed strongest being in all creation. Frazzled by his fracas with the Almighty, he wasn't able to maintain his original appearance any longer. | |||
| EXP | 0 | ||
|---|---|---|---|
| Gold | 0 | ||
| Drops | None | ||
| Locations | Malign Shrine (Past) | ||
| Description | |||
| The true form of Orgodemir, confronted in the Malign Shrine. Drawing his power directly from the dark, his malevolence is still unmatched, despite the serious wounds sustained in a past battle. | |||
Orgodemir Final Boss Details
| EXP | 0 | ||
|---|---|---|---|
| Gold | 0 | ||
| Drops | None | ||
| Locations | Cathedral of Blight (Present) | ||
| Description | |||
| The Demon King who not only conquered the world, but divvied it up and locked each piece away. Resurrected in the present day, he has finally achieved living godhood. | |||
| EXP | 0 | ||
|---|---|---|---|
| Gold | 0 | ||
| Drops | None | ||
| Locations | Cathedral of Blight (Present) | ||
| Description | |||
| The Demon King, looking decidedly human. Down to the finest details, this is his unadulterated and uncompromised aesthetic ideal. | |||
| EXP | 0 | ||
|---|---|---|---|
| Gold | 0 | ||
| Drops | None | ||
| Locations | Cathedral of Blight (Present) | ||
| Description | |||
| The Demon King after unleashing dark power during a clash which pushed him to his limit. The might of his magic can't be contained by his body, which has begun to crumble. | |||
| EXP | 0 | ||
|---|---|---|---|
| Gold | 0 | ||
| Drops | None | ||
| Locations | Cathedral of Blight (Present) | ||
| Description | |||
| The collapsing flesh of the Demon King after enduring myriad wounds. His breath might be ragged, but he rages on with immense power. | |||
Fought in Malign Shrine (First Fight)
Orgodemir is first fought in the Throne Room of Malign Shrine.
Orgodemir is fought at the end of the Malign Shrine storyline, after the Time Being boss fight.
Malign Shrine Walkthrough Guide
Fought in Cathedral of Blight (Final Fight)
The final boss fight against Orgodemir is fought at the Cathedral of Blight.
This Boss fight serves as the Final Boss of the game, which opens up various Post-Game content upon completion.
Cathedral of Blight Walkthrough Guide
Dragon Quest 7 Reimagined (DQ7) Related Guides

List of All Bosses
 Tribulators
 Golem
Golem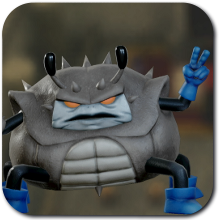 Crabble-Rouser
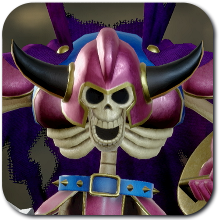 Maeve
Maeve Glowering Inferno
 Hackrobat
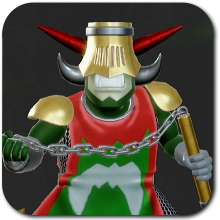 The Tinpot Dictator
 Slaughtomaton
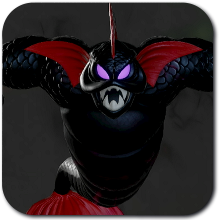 Florin
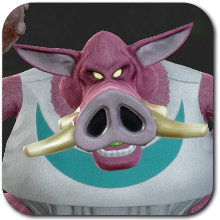 Rashers & Stripes
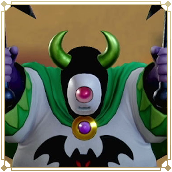 Numpton's Numpties
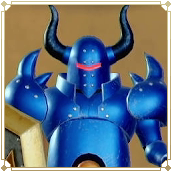 Bronson and the Bristles
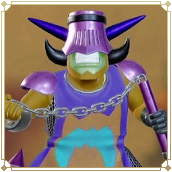 Hans and the Hands
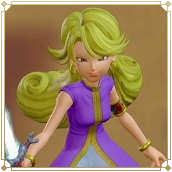 Nava's Knaves
 Cardinal Sin
 The Mild Bunch
 The Mighty Pip
 The Skeleton Squire
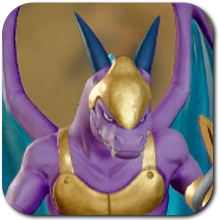 Setesh the Punisher
 Guardians of the Roamers
 Sunken Spirits
 Gracos
 King Slime
 Ethereal Serpent
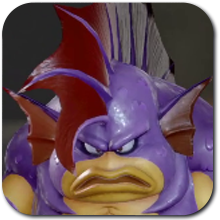 Gracos V
 Rainiac
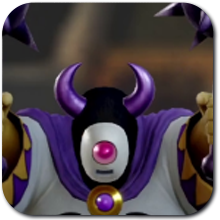 The Envoy
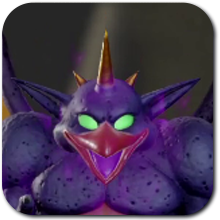 Hybris
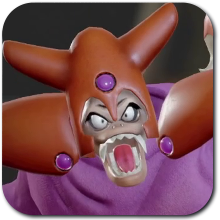 Gasputin
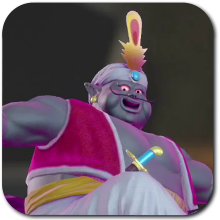 Vaipur
 Cumulus Vex
 Togrus Maximus
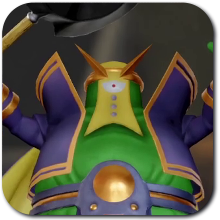 The Time Being
 Orgodemir
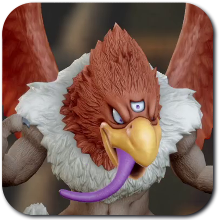 Smothers
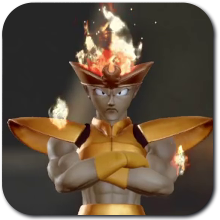 Fire Spirit
 Macho Picchu
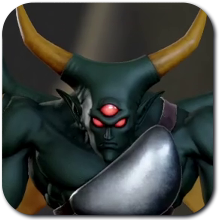 Lourgh and Disorder
 Moostapha
 Malign Vine
 The Almighty
 Xenlon
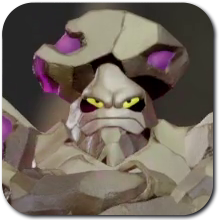 The Four Spirits
Comment
Author
How to Beat Orgodemir
Rankings
- We could not find the message board you were looking for.
Gaming News


![Death Stranding 2: On The Beach Review [PC] | A Port That Delivers](https://img.game8.co/4447392/15310a0c9aa1b6843bb713b2ea216930.jpeg/thumb)


Popular Games

Genshin Impact Walkthrough & Guides Wiki
Umamusume: Pretty Derby Walkthrough & Guides Wiki
Crimson Desert Walkthrough & Guides Wiki
Monster Hunter Stories 3: Twisted Reflection Walkthrough & Guides Wiki
Honkai: Star Rail Walkthrough & Guides Wiki
Pokemon Pokopia Walkthrough & Guides Wiki
The Seven Deadly Sins: Origin Walkthrough & Guides Wiki
Wuthering Waves Walkthrough & Guides Wiki
Zenless Zone Zero Walkthrough & Guides Wiki
Arknights: Endfield Walkthrough & Guides Wiki


Recommended Games
Fire Emblem Heroes (FEH) Walkthrough & Guides Wiki
Diablo 4: Vessel of Hatred Walkthrough & Guides Wiki
Cyberpunk 2077: Ultimate Edition Walkthrough & Guides Wiki
Yu-Gi-Oh! Master Duel Walkthrough & Guides Wiki
Super Smash Bros. Ultimate Walkthrough & Guides Wiki
Pokemon Brilliant Diamond and Shining Pearl (BDSP) Walkthrough & Guides Wiki
Elden Ring Shadow of the Erdtree Walkthrough & Guides Wiki
Monster Hunter World Walkthrough & Guides Wiki
The Legend of Zelda: Tears of the Kingdom Walkthrough & Guides Wiki
Persona 3 Reload Walkthrough & Guides Wiki


All rights reserved
© ARMOR PROJECT/BIRD STUDIO/SQUARE ENIX
© SUGIYAMA KOBO ℗ SUGIYAMA KOBO
The copyrights of videos of games used in our content and other intellectual property rights belong to the provider of the game.
The contents we provide on this site were created personally by members of the Game8 editorial department.
We refuse the right to reuse or repost content taken without our permission such as data or images to other sites.