100% Walkthrough Guide
☆ 100% Walkthrough Guide
★ Best Vocations | Best Party | Best Characters
☆ Find all Mini Medals and Tablet Fragments!
★ Farm Guides: EXP | Gold | Vocation Prof.
☆ List of Missables and Cut Content
★ Post-Game Guide
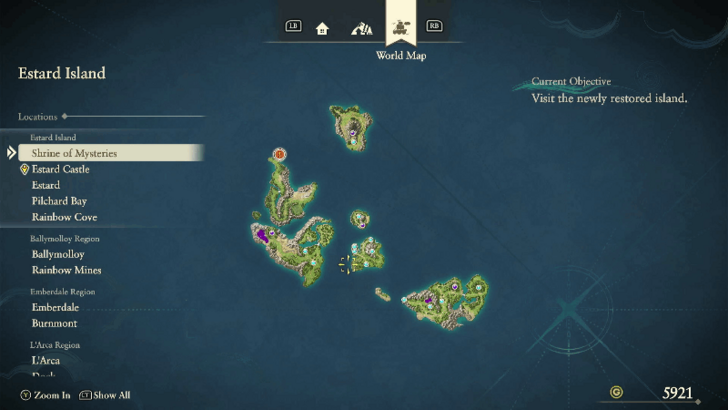
This is a 100% walkthrough guide for Dragon Quest 7 Reimagined (DQ7). See a step-by-step guide on how to obtain fragments to unlock new islands, tips to defeat bosses, and all main story trophies you can obtain here.
List of Contents
 Warning! Warning! |
This page contains spoilers for Dragon Quest 7 Reimagined! If you wish to continue reading on, you have been warned. |
|---|
List of All Story Walkthroughs
All Island and Region Walkthroughs
| All Main Story Walkthroughs | ||||
|---|---|---|---|---|
| 1 | Prologue | 2 | Ballymolloy | |
| 3 | Emberdale | 4 | L'Arca | |
| 5 | Regenstein | 6 | Frobisher | |
| 7 | Roamer Encampment | 8 | Alltrades Abbey | |
| 9 | Al-Balad | 10 | Roamer Encampment (Present) | |
| 11 | Hardlypool | 12 | The Tallest Tower | |
| 13 | Hubble | 14 | Aeolus Vale | |
| 15 | Buccanham | 16 | Pool of Piety | |
| 17 | Malign Shrine | 18 | Cathedral of Light | |
| 19 | Awakening the Fire Spirit | 20 | Awakening the Earth Spirit | |
| 21 | Awakening the Wind Spirit | 22 | Curious Tablet | |
| 23 | Cathedral of Blight | |||
| All Optional Side Stories | ||||
| 1 | Greenthumb Gardens | 2 | Vogograd | |
| 3 | Nottagen | |||
| All Post-Game Content | ||||
| 1 | Another World | 2 | Yet Another World | |
Dragon Quest 7 Reimagined's main story progresses by collecting fragments in order to unlock and enter a region from the past. Each region has a questline that ends with a boss that you need to defeat to head back to the present time.
Once you head back to the present, you can explore the island and collect more fragments to unlock new regions.
Prologue Walkthrough Guide
| Jump to a Section | ||
|---|---|---|
| Prologue | Yellow Tablets | Red Tablets |
| Green Tablets | Grey Tablets | Blue Tablets |
| Endgame | ||
| All Prologue Sections | ||
| Pilchard Bay | Estard | Yellow Fragments |
Pilchard Bay
| 1 | Start by creating a new save and inputting your name and preferred settings. Just remember that once you've selected the Hero's name, it cannot be changed. |
|---|---|
| 2 | 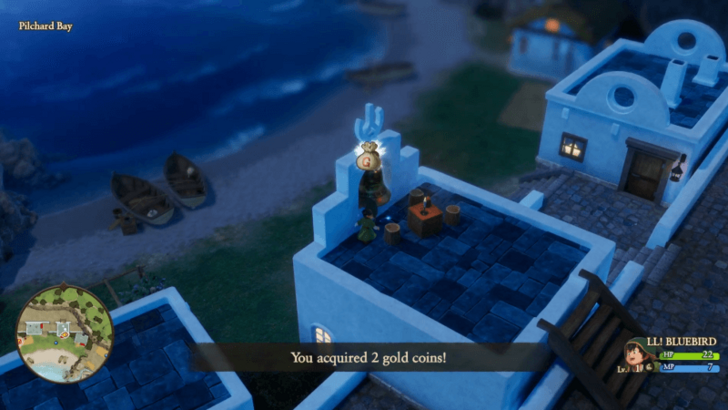 Once you have control of your character, you can explore Pilchard Bay for items you can use or sell later on. As a note, whenever you enter a new area, it's recommended to fully explore the surroundings first for anything useful, like treasure chests and Mini Medals. |
| 3 | 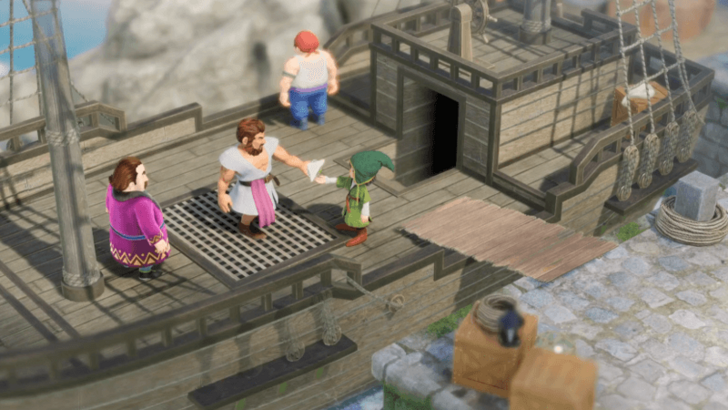 When you're ready, head back to your home and sleep. Once you wake up, head to the east side of the village and board the ship to give the sandwich to your dad. |
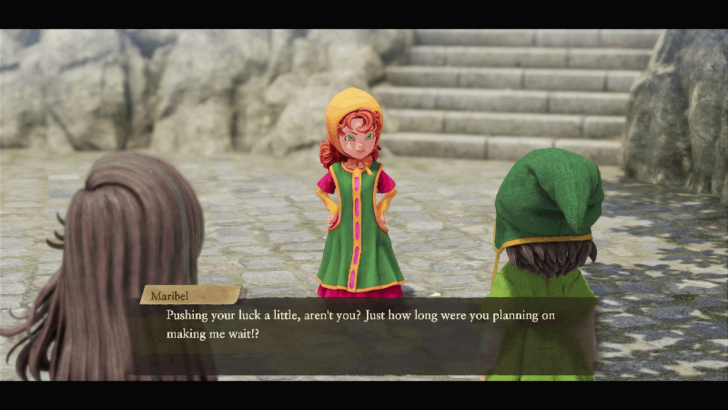
| 4 | 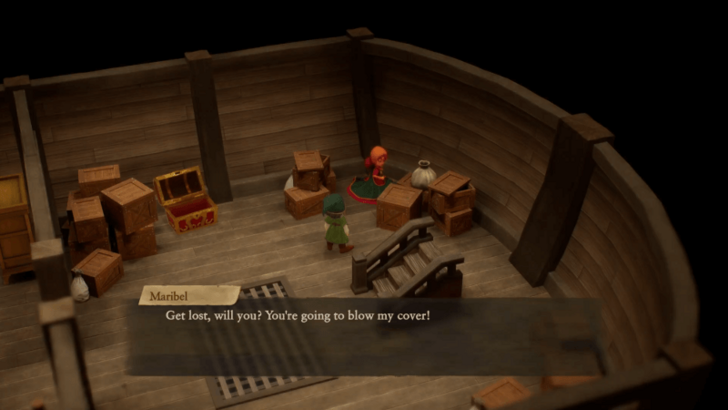 Head inside the ship and talk to Maribel, then go back outside to continue the story. |
Estard
| 1 | 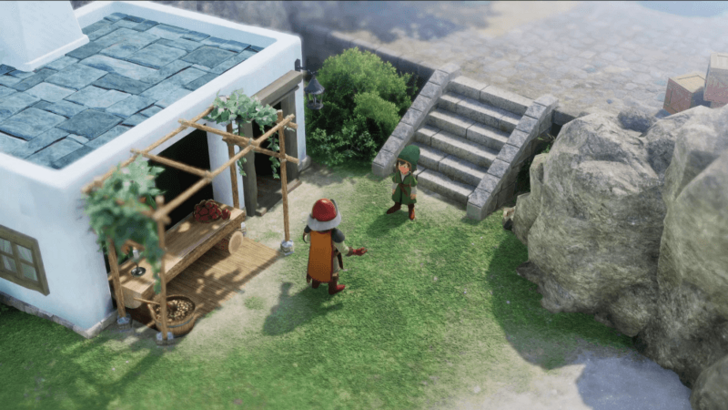 Go back towards the west, and a short cutscene will play where you'll be summoned to Estard Castle. |
|---|---|
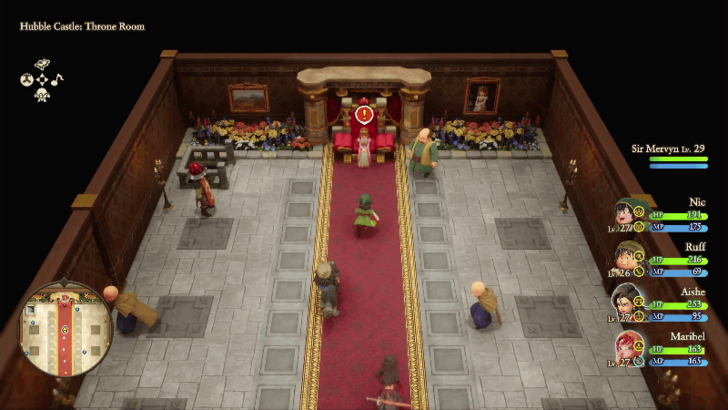
| 2 | 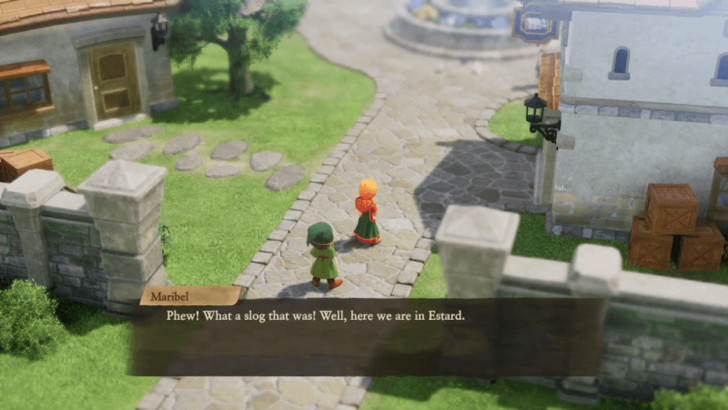 When you're ready, head to Estard and explore the town before continuing to the castle. Once inside, head up to the throne room before you start exploring the castle itself. |
| 3 | 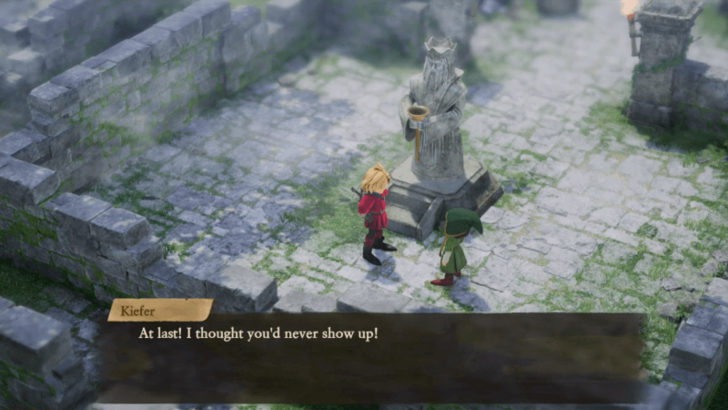 After you're done, head out towards the east side of the island to get to the Shrine of Mysteries. There's not much you can do here yet, so talk to Kiefer and progress the story to recruit your first party member. |
Collecting Yellow Tablet Fragments
| 1 | 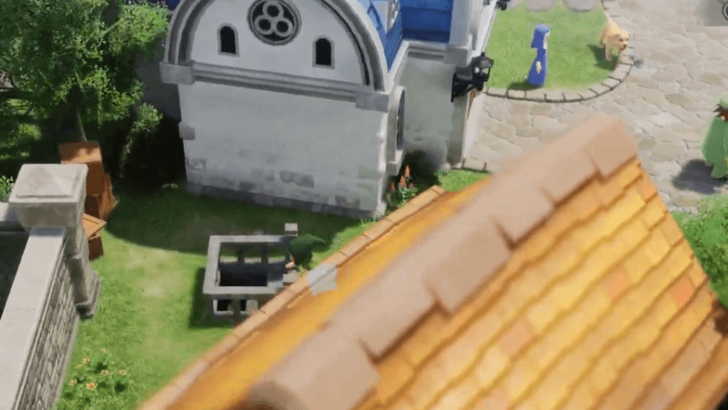 To open up the way to the Shrine of Mysteries, you will need to collect three more Yellow Tablet Fragments. Start by heading back to Estard and going down the stairs near the church to get to Dermot. |
|---|---|
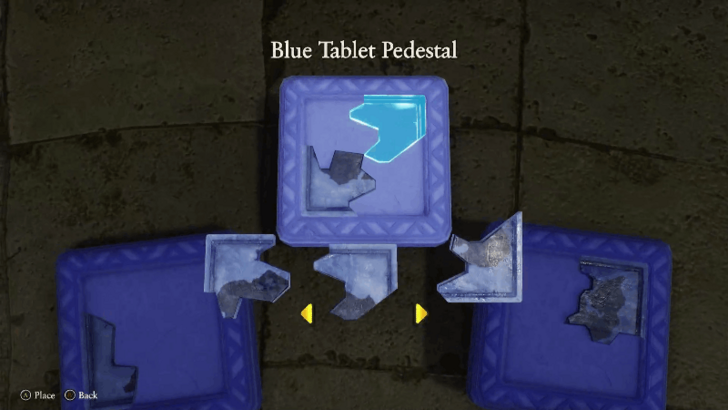
| 2 | 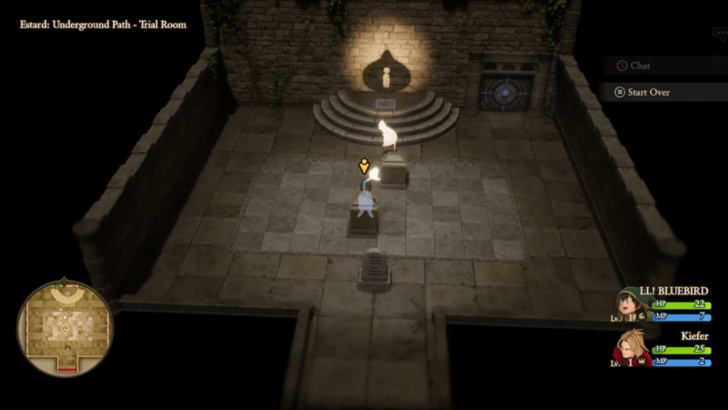 After talking to him, you will get a key that opens up the way to the trial room that houses the fragment. To solve the puzzle, you will need to align the two pieces to match the symbol on the wall and stand on the square at the top of the steps. |
| 3 | 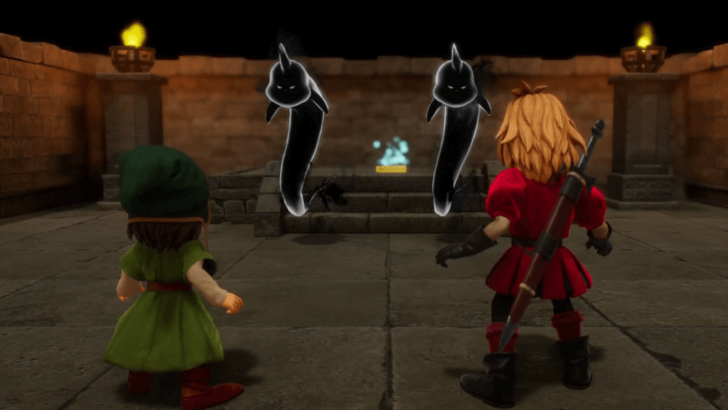 With that done, the way to the Yellow Tablet Fragment will open up. Just be ready since approaching the fragment will start a fight against two Tribulators. This acts as the tutorial boss for the game, and it's almost impossible to lose. However, if you do get low on HP, make sure to use some Medicinal Herbs to heal up. |
| 4 | 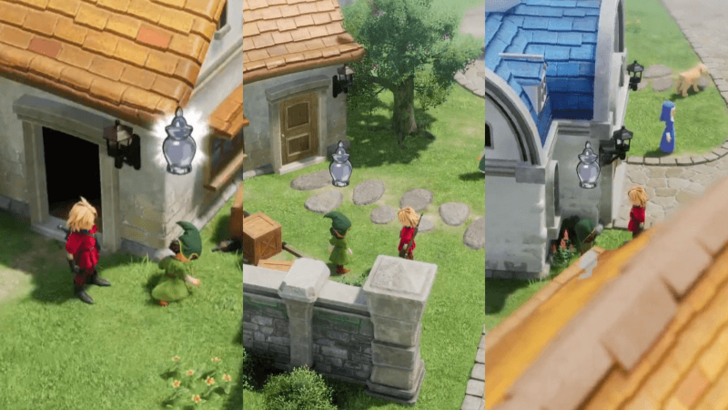 Now that you have one fragment, head back out to Estard and go inside the house behind the Item Shop. Talk to Pike, and you will need to grab three empty bottles around town, which are marked by a yellow sparkly spot. You can find the bottles outside of Pike's house, near the town's entrance, and beside the church's doors. |
| 5 | 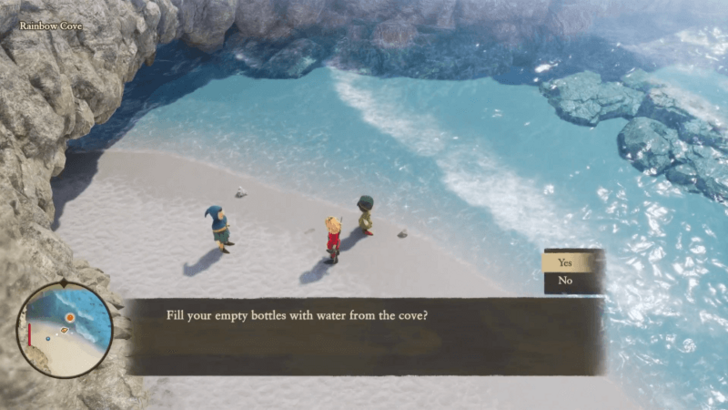 Once you're done collecting the bottles, head out of the town and go north to Rainbow Cove. Here, you will need to talk to Pike again and fill up the bottles with water to unlock the next trial room. |
| 6 | 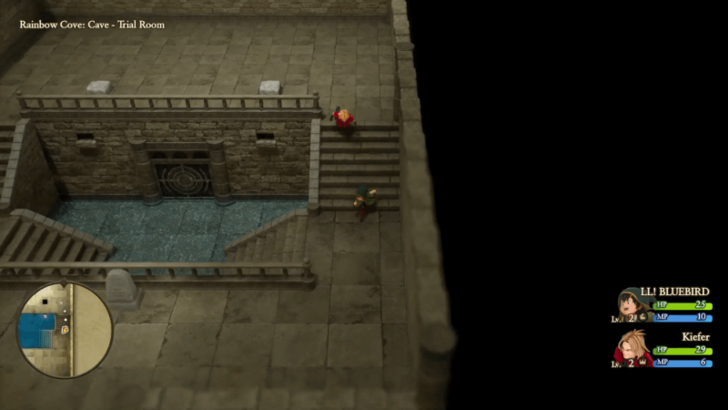 The way to the fragment is blocked off by water, and you'll need to push the pillars into the hole to block off the waterfalls. From there, the water will subside, and you can enter the room to get the fragment. |
| 7 | 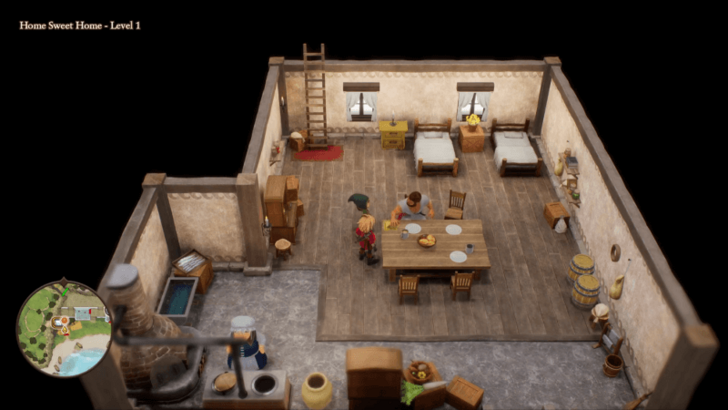 To get the last fragment, head back to Pilchard Bay and talk to your dad. Afterwards, return to the Shrine of Mysteries. |
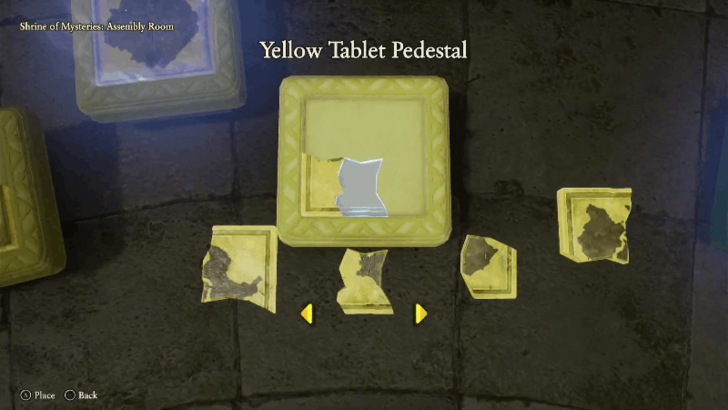
| 8 | 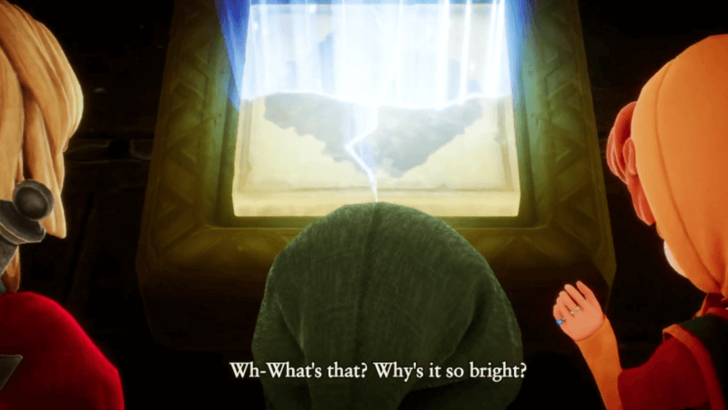 Interact with the statue to start a cutscene, and Maribel will join your party afterwards. Head inside, and after talking with The Caretaker, you can access your first island, Ballymolloy, via the top Yellow Tablet Pedestal. ▶︎ Jump to Ballymolloy Walkthrough |
Yellow Tablet Walkthroughs
| Jump to a Section | ||
|---|---|---|
| Prologue | Yellow Tablets | Red Tablets |
| Green Tablets | Grey Tablets | Blue Tablets |
| Endgame | ||
| All Yellow Tablet Islands | ||
| Ballymolloy | Roamer Encampment | Al-Balad |
| Roamer Encampment Region (Present) | - | - |
Ballymolloy Region
| Jump to a Section | ||
|---|---|---|
| Ballymolloy | Rainbow Mines | The Tower |
| Unlocking the Next Island | ||
| Back to the Top | ||
Ballymolloy
| 1 |  After the cutscene ends, you will appear in a mysterious forest called The Oddwoods. Head north to find Maribel and start a fight against some Slimes. |
|---|---|
| 2 | 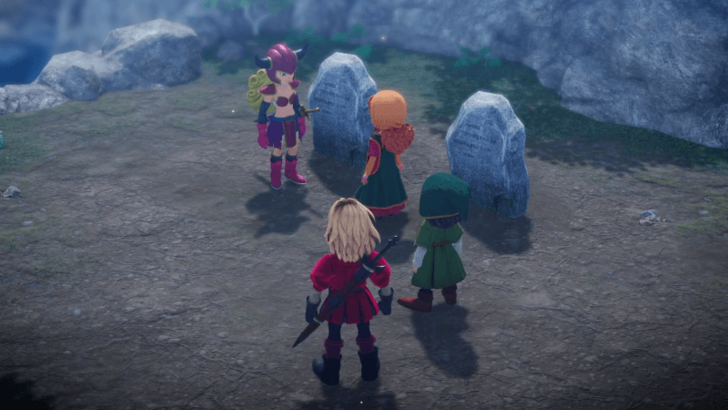 Once the enemies have been defeated, follow the path forward until you come across Maeve and some graves. She will join you as a temporary party member, and you will now be free to leave the forest. |
| 3 | 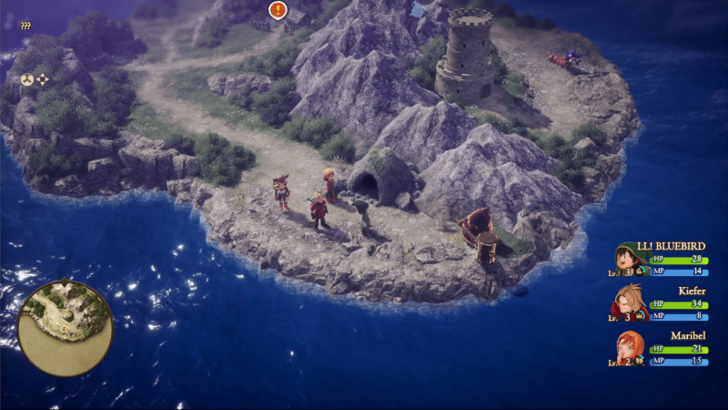 Before going in to the village, it's recommended to head east towards the cave first to fight the Vicious Hammerhood. This is a Menacing Monster, which is a more powerful version of a normal monster, and they will drop a Monster Heart once defeated. Alternatively, you can enter the village first so you can save, rest at an inn, and grind EXP before the fight. However, entering Ballymolloy will make Maeve leave the party, and she won't be able to help you in the fight. |
| 4 |  After the Vicious Hammerhood has been defeated, you can head into the village of Ballymolloy. Explore the town first for any new items and equipment you may need, and head to the northernmost house to meet Patrick. |
| 5 | When you're ready, head south back towards the cave, where the Vicious Hammerhood was, to get to the Rainbow Mines. |
Rainbow Mines
| 1 | 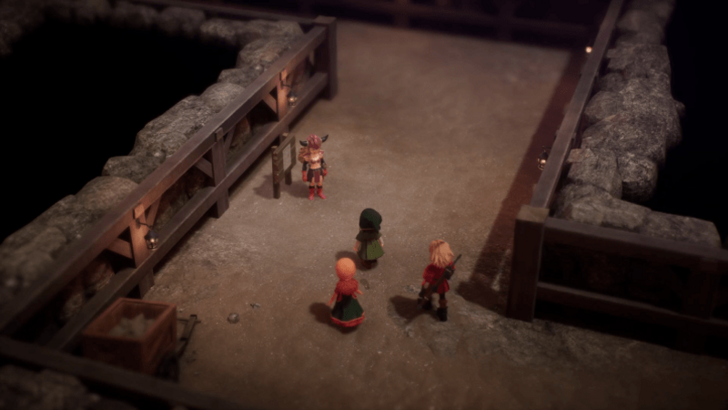 Go inside the cave and take the stairs to the right first to get a treasure chest. Afterwards, head back up and follow the path north to meet up with Maeve again, where she'll rejoin your party. |
|---|---|
| 2 | 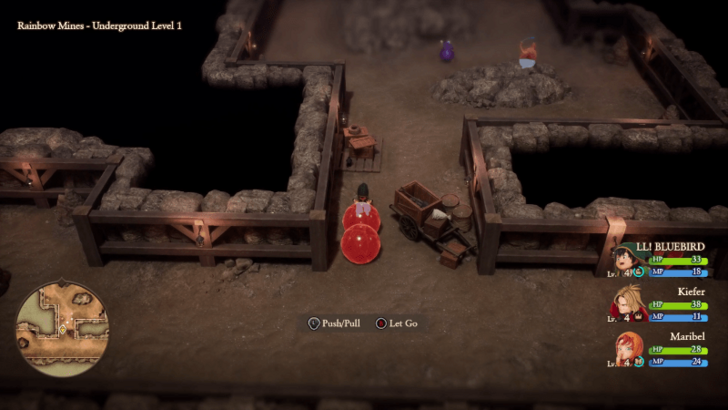 Before going down the stairs to the right, head left first for a chest. From there, head down and follow the path down until you run into two red rocks. The gimmick for this dungeon is that you will need to bump two same coloured rocks together to destroy them and open up the way forwards. |
| 3 | 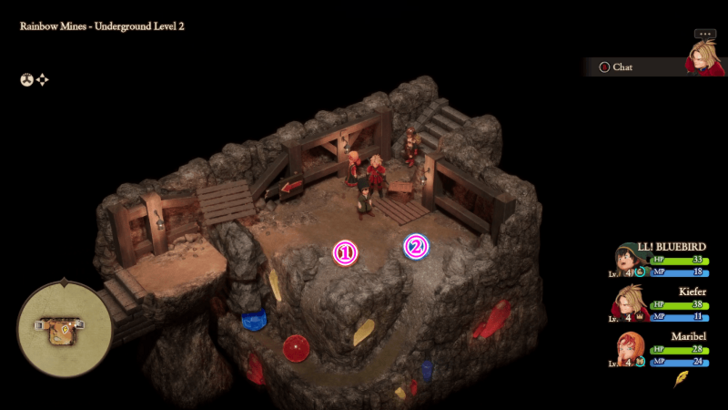 Continue following the path down until you come across a puzzle room. To move on, you will need to push the red rock first, followed by the blue one. |
| 4 | 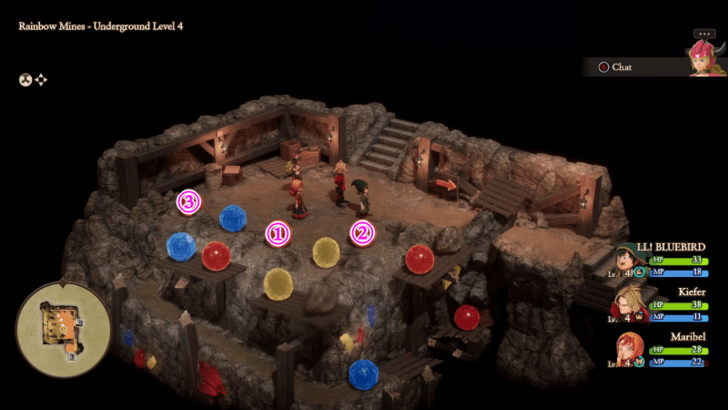 Head down to the 4th floor for another puzzle room. For this one, you will need to push all the red rocks in the order of middle, right, then left. |
| 5 | 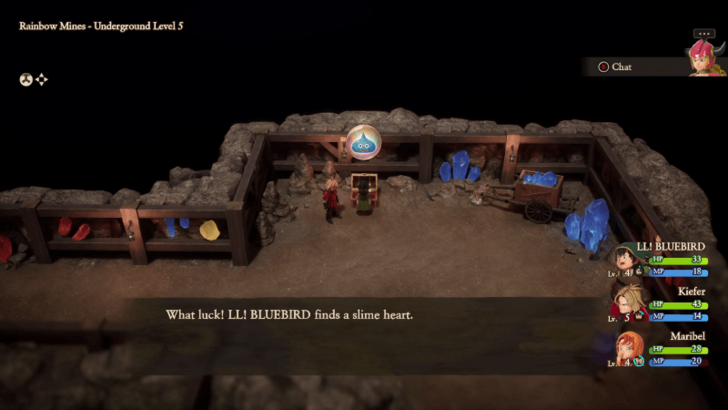 Go down the stairs and you will arrive at the room with the green gem. Before approaching the rock, head to the top right part of the room first to get a treasure chest. |
| 6 | 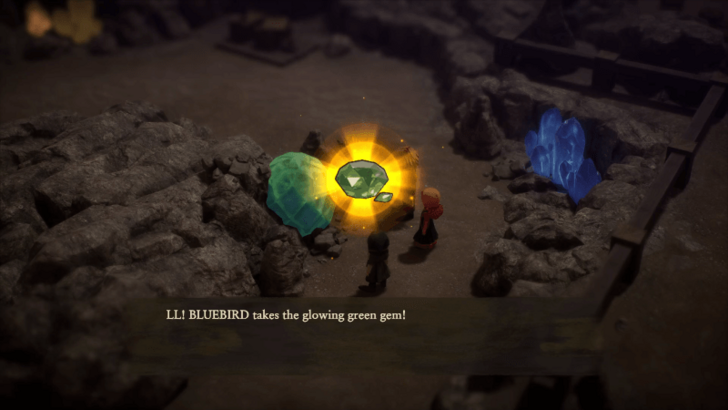 When you're ready, approach the green rock for a cutscene. You will then be teleported out of the dungeon, and Maeve will gift you a doll to give Patrick before you leave the area. |
| 7 |  Head back to Ballymolloy and give the gem to Patrick. After a series of cutscenes, you will wake up the next day and be asked to give the doll to Patrick. Make sure that you give it to him for a bonus reward and help with a boss later on. |
| 8 | The next part of the story will have you head around the path north to The Tower, so make sure to level up if you need to before heading over there. |
The Tower
| 1 | Once you arrive at The Tower, head through the doors at the bottom first. The stairs to the left will lead to a chest with gold, while the one on the right leads to some pots with a MP Phial. |
|---|---|
| 2 | 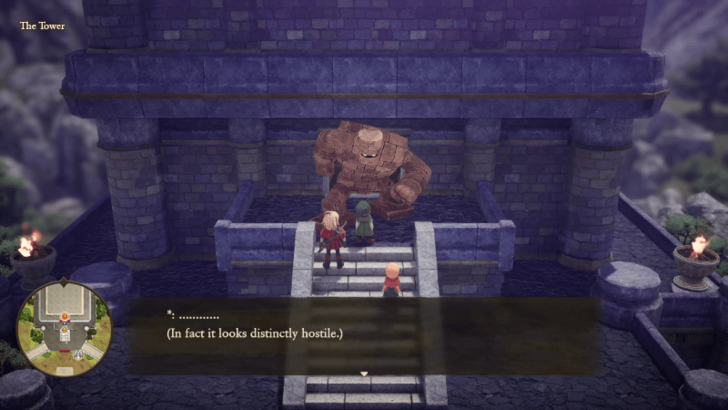 When you're ready, heal and save at the statue outside before approaching the Golem blocking the doorway. This boss only uses physical attacks, so make sure to use the Hero's Buff spell to increase everyone's defenses. |
| 3 | After the boss has been defeated, heal at the statue before proceeding to the upper floors of the tower. There aren't any puzzles here, so feel free to explore before facing the boss of this area. |
| 4 | 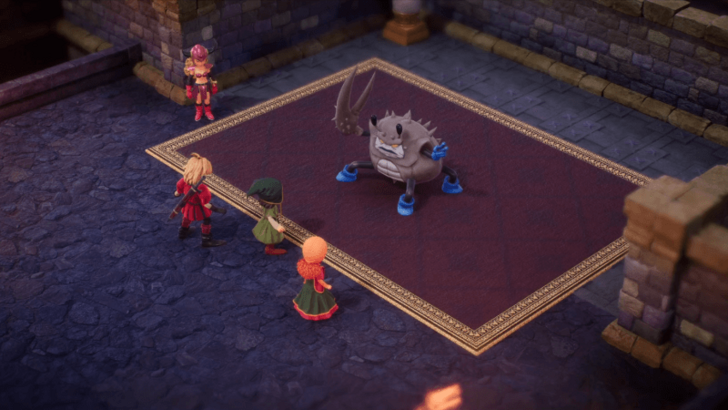 When you get to the statue room with the chest and tablet fragment piece, you'll want to prepare yourself to face two bosses. The first fight will be against the mini-boss Crabble-Rouser, who's reliant on physical attacks and is weak to Fire. Make sure to Dazzle them and exploit their weakness to quickly take them down. |
| 5 | 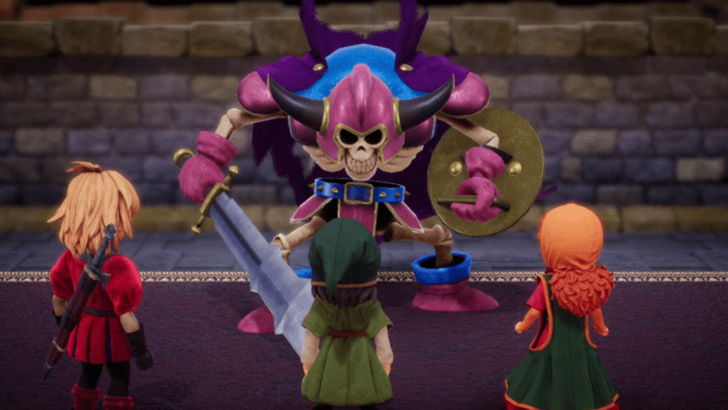 After they go down, you will face the big boss of this region, Maeve. Similar to the previous fight, she's reliant on physical attacks and weak to Fire, but she can't be Dazzled. Make sure to increase the party's defenses with Buff before you let the Hero go on the offensive. |
| 6 | 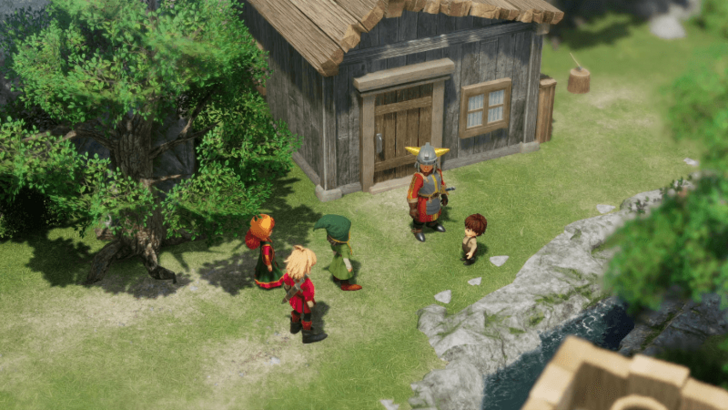 Once Maeve's been defeated, you will return to Ballymolloy with the island being saved. Talk to Patrick and head to The Oddwoods after the cutscene ends. |
| 7 | 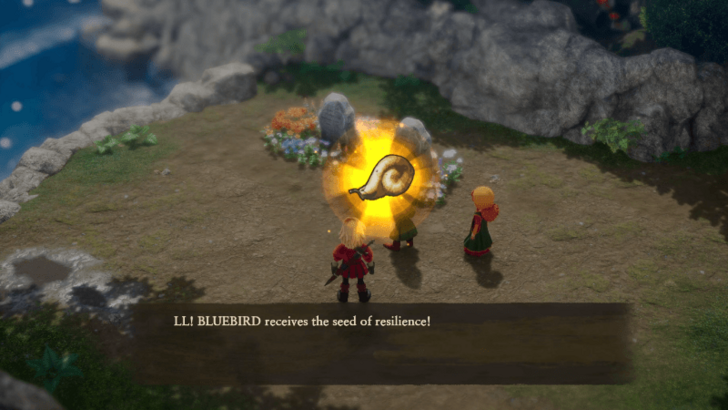 Talk to Patrick again in the forest and make sure to not take the doll from him. This will reward with you with a Seed of Resilience, which you wouldn't be able to get otherwise. |
| 8 | 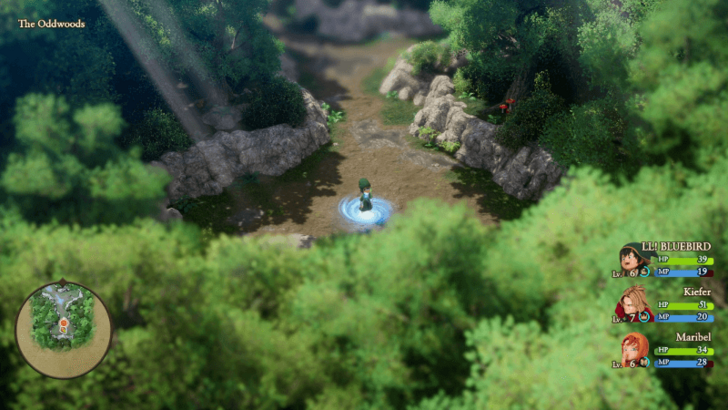 Now that the events at Ballymolloy are over, you'll be free to return to the present via the portal at the south end of The Oddwoods. |
Unlocking the Next Island
| 1 |  Exit the shrine and head back to Pilchard Bay. After talking to your mom, head west to the cave from the start of the game to talk to Kiefer and Maribel. |
|---|---|
| 2 | 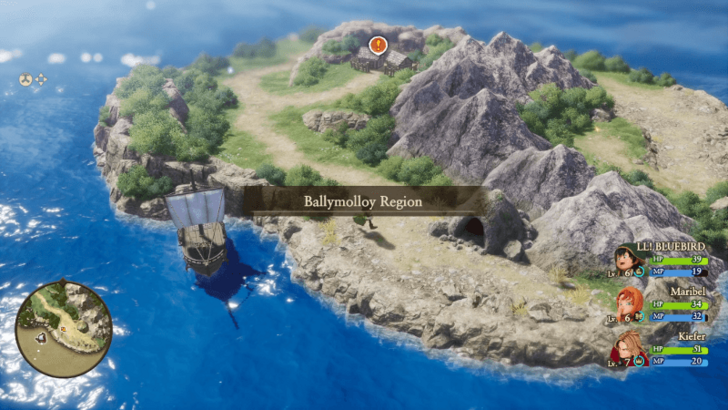 Once the cutscene's over, you will now have access to the ship. Since there's only two islands to visit at the moment, sail over to Ballymolloy to see what's different in the present. |
| 3 | As a note, you can take some time to farm the new enemies encountered while sailing so you can level up some more. |
| 4 | 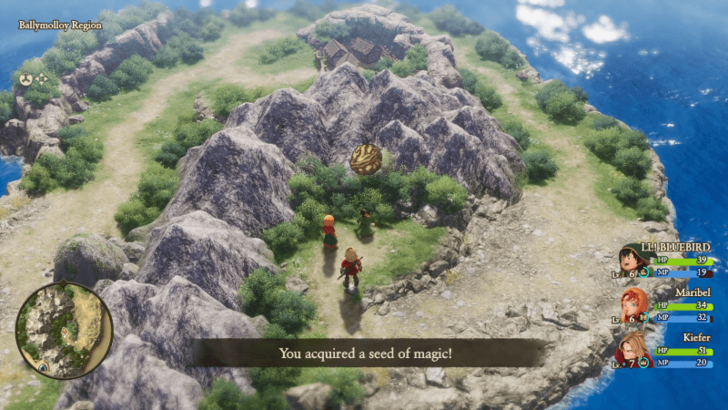 When you arrive at the Ballymolloy Region, make sure to head to the Sparkly Spot where The Tower was to get a Seed of Magic. Afterwards, you can head to Ballymolloy Village itself. |
| 5 | 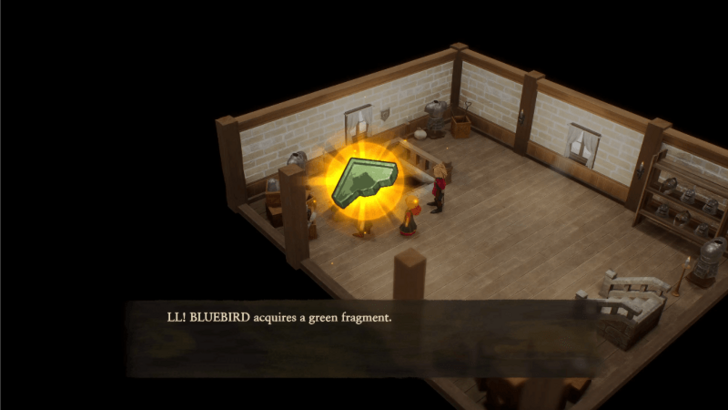 Explore the town first, and when you're done, head to the big Watchtower in the middle to talk to the man on the 2nd floor and select "No" for the dialogue option. He will give you a Green Tablet Fragment and the password to get into the Rainbow Mines. |
| 6 | 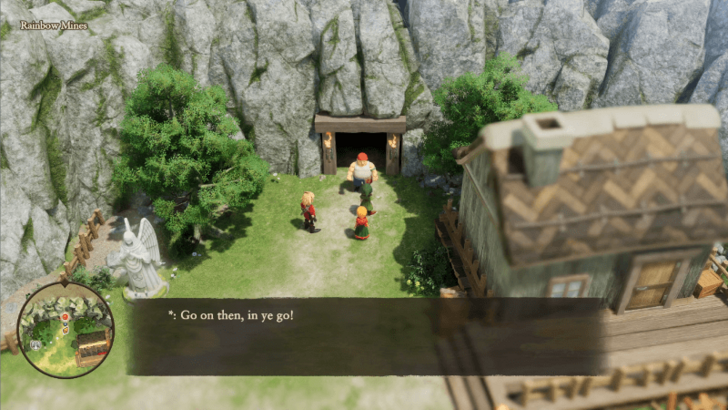 Once you're done in the town, head to the Rainbow Mines and talk to the man guarding the entrance to get in. The layout of the dungeon is slightly different, but there are no more puzzles you need to worry about. |
| 7 | 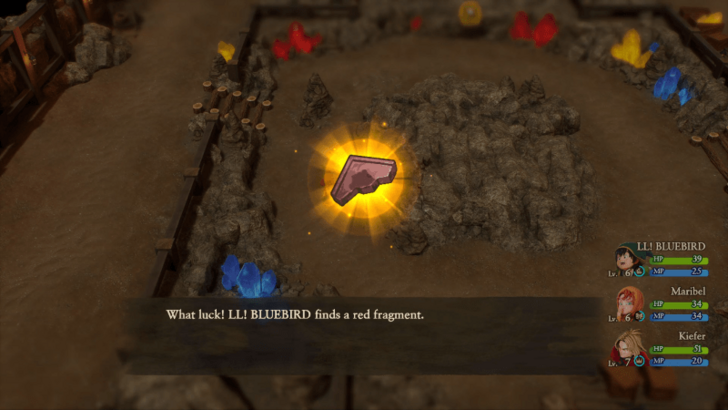 Follow the path down until you get to the room where the Green Gem was. Make sure to also grab the chest at the top right before getting the Red Tablet Fragment in the middle of the room. |
| 8 | 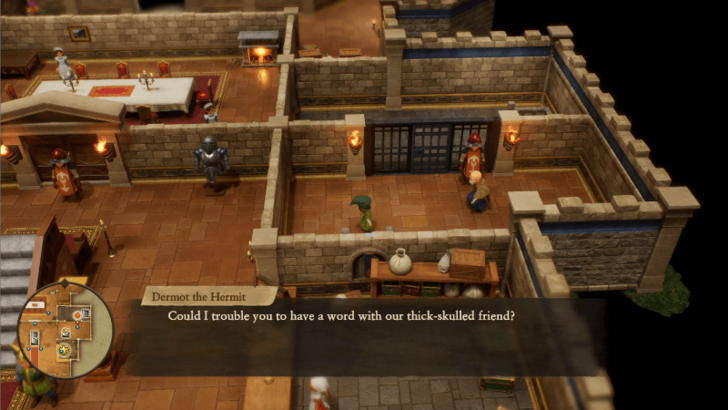 Now that you're done exploring the Ballymolloy Region, head back to Estard Castle to unlock the gate north of the Mini Medal desk. To get there, you will need to go to out from the second floor and head down the stairs in the rightmost tower. |
| 9 | 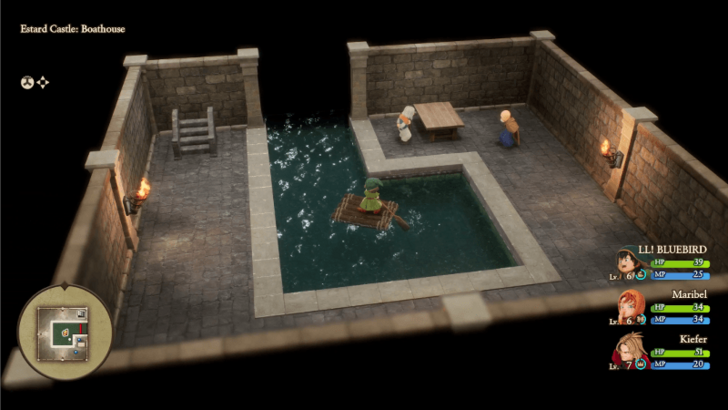 After talking to the guard and heading down with Dermot, you will gain access to a raft that lets you traverse the castle's moat. |
| 10 | 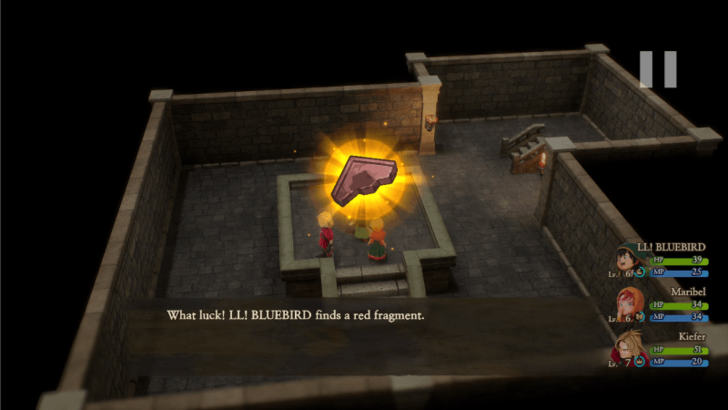 Navigate your way to the staircase on the west side of the castle and head through the back entrance. From there, head down the stairs to get a Red Tablet Fragment. |
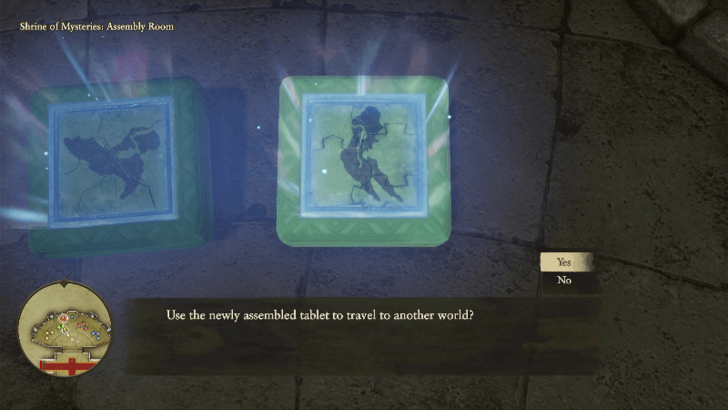
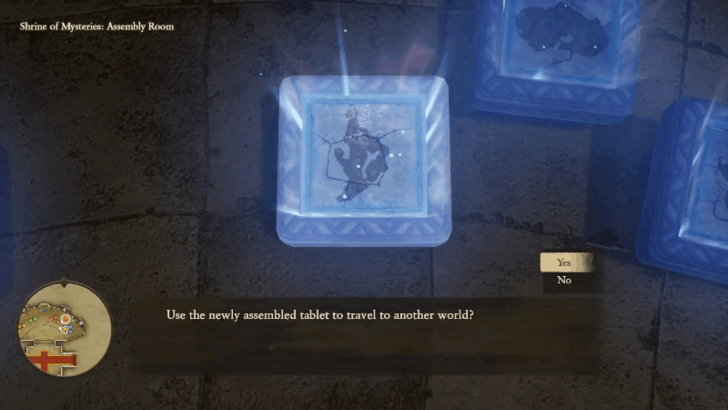
| 11 | 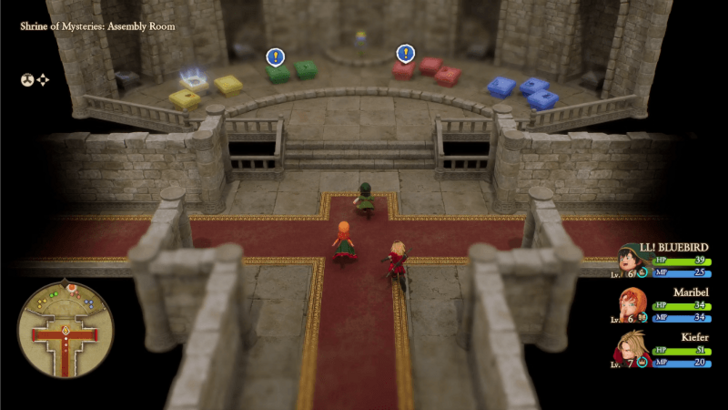 Now that you have enough pieces to assemble a new tablet, head back to the Shrine of Mysteries to assemble them. Interact with the red table to assemble the Red Tablet to travel to the second island, Emberdale. ▶︎ Jump to Emberdale |
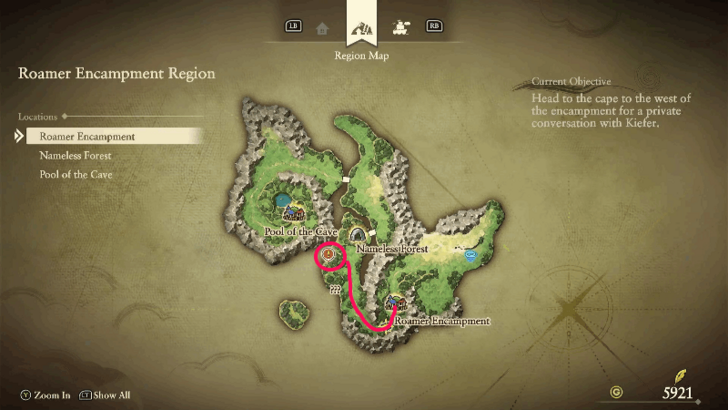
Roamer Encampment Region
| Jump to a Section | ||
|---|---|---|
| Roamer Encampment | Nameless Forest | Pool of the Cave |
| Poolside Cave | Roamer Encampment (Part 2) | Unlocking the Next Island |
| Back to the Top | ||
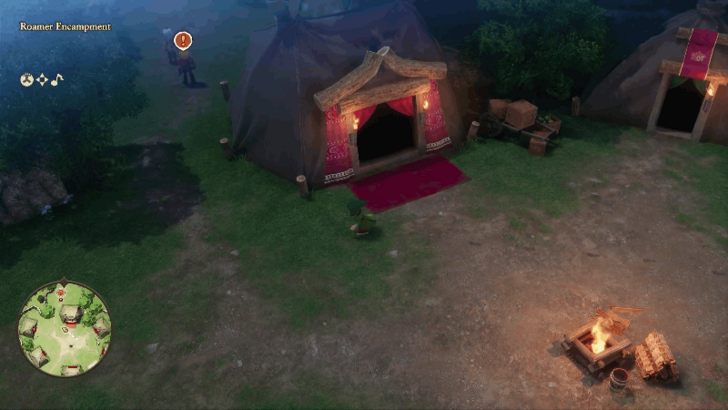
Roamer Encampment
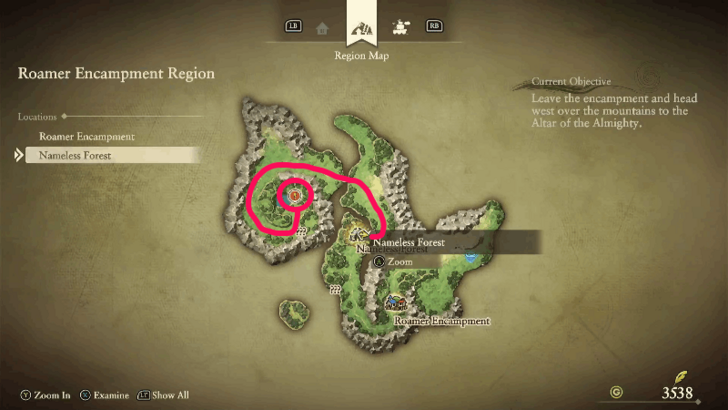
| 1 |
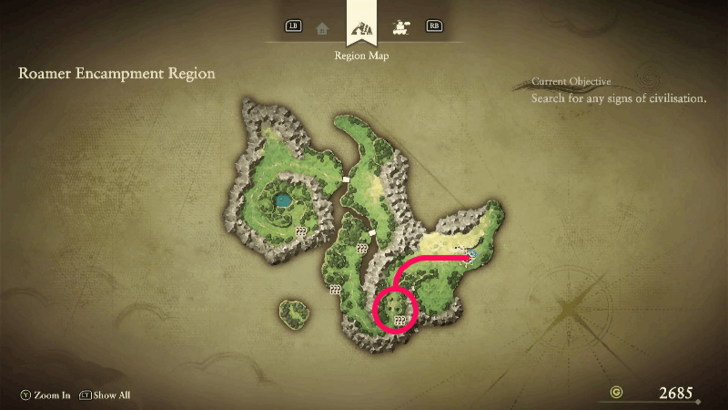 Head west and then south to reach the Roamer Encampment tent. |
|---|---|
| 2 |
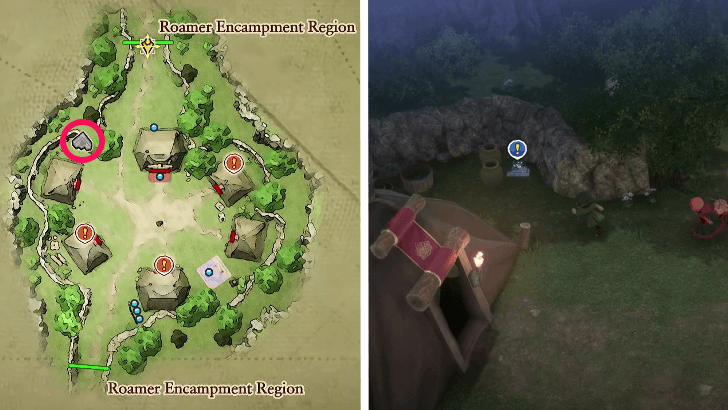 Pick up the Gray Fragment at the west side of the encampment. |
| 3 |
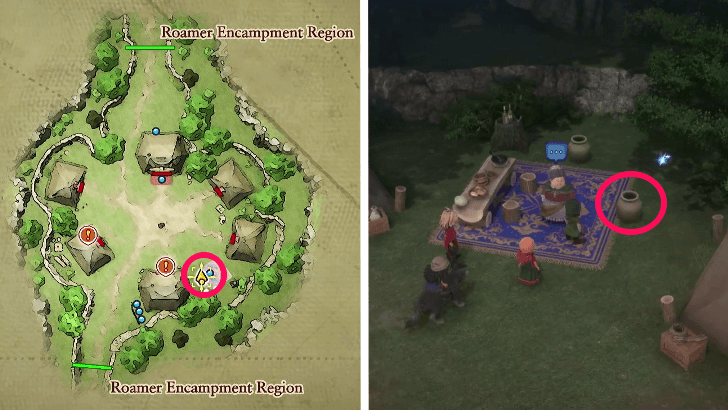 Break the vase next to the woman on the blue carpet at southeast side of the area to get a Mini Medal. |
| 4 |
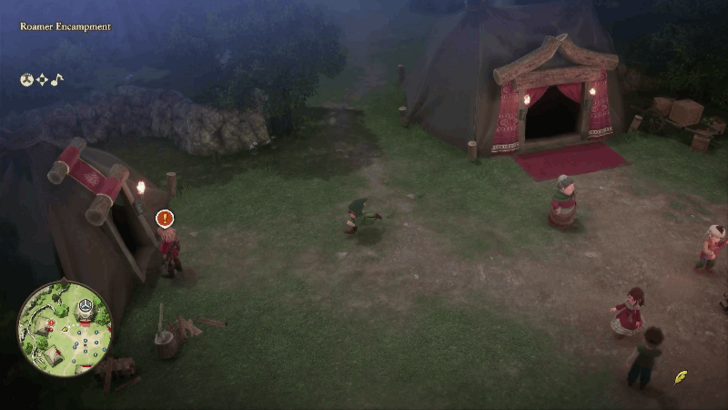
 Speak with the three people that have exclamation points on their heads. Then, talk to the man in front of the north tent to progress the objective. |
| 5 |
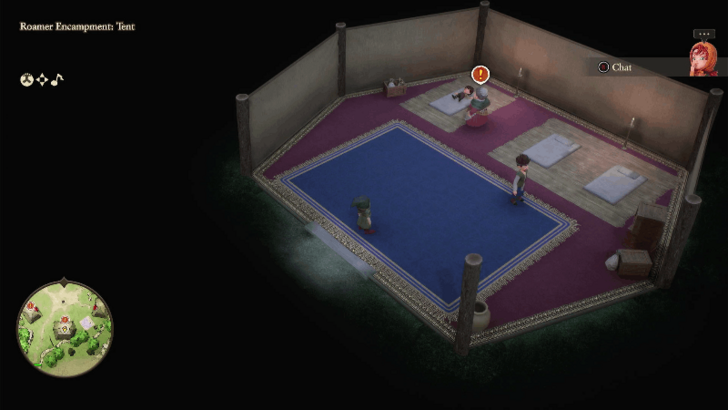
 Once the cutscene ends, speak with Kiefer in front of the tent at the west side. Talk to the woman on the blue carpet at the southeast side to get the Spirit of the Dance and return to Kiefer. |
| 6 |
 Enter the tent and talk to Lala inside. After the cutscene ends, attempt to exit the tent for another cutscene. |
| 7 |
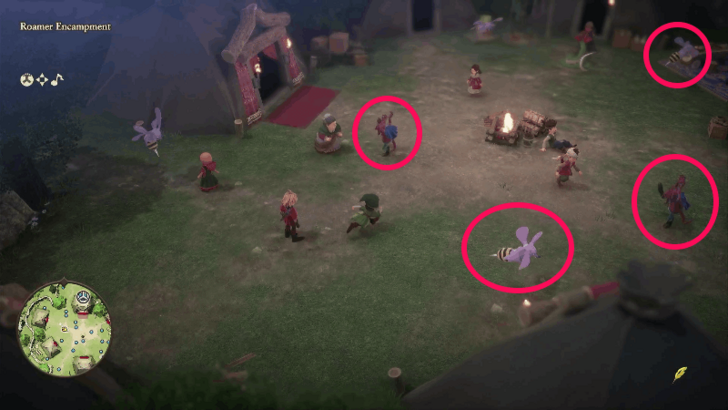 Interact with the 2 Mousenaps and 2 Dancing Devils at the area and defeat them in battle. |
| 8 |
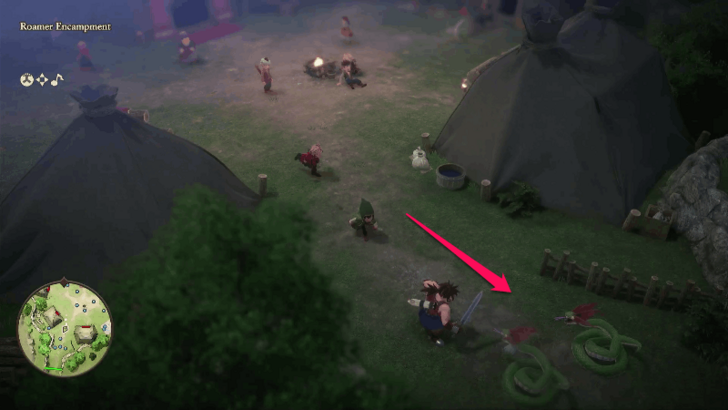 Head to the south part of the area and help Boldo defeat the Crested Vipers in battle. |
Nameless Forest
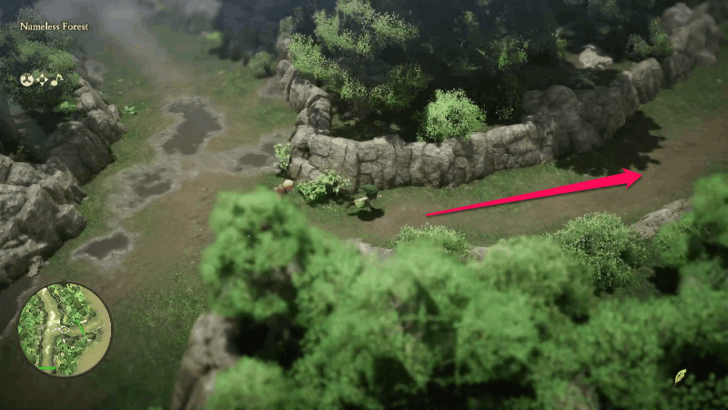
| 1 |
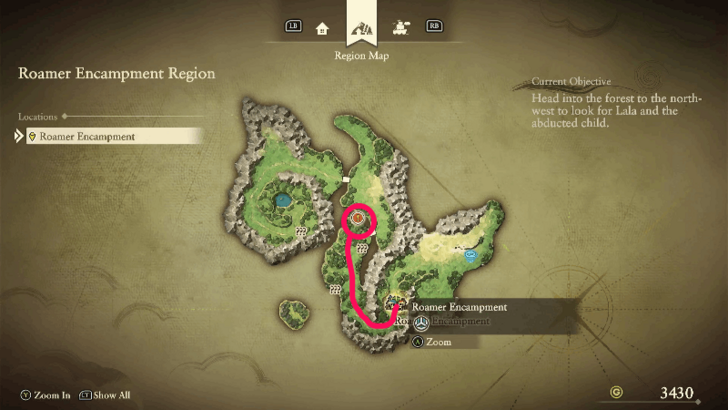 Travel northwest to reach the Nameless Forest. |
|---|---|
| 2 |
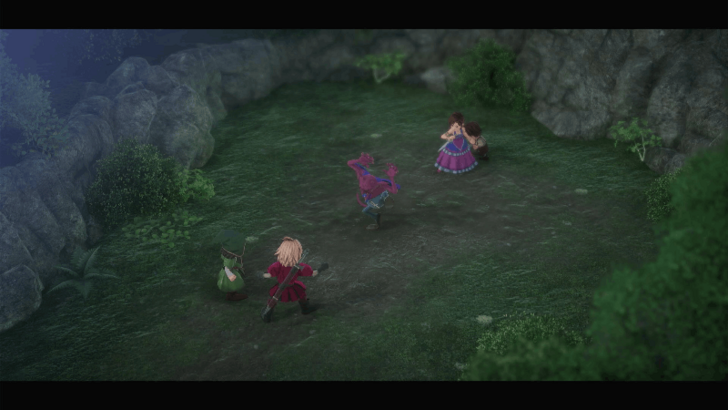 Ignore the path at the east side and head north to find Lala. Defeat the Dancing Devil in battle. You will teleport back to the Roamer Encampment after the cutscenes end. |
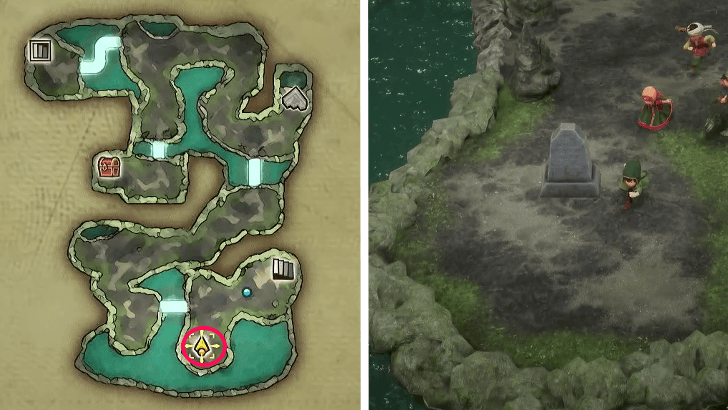
Pool of the Cave
| 1 |
 Cast Zoom to fast travel to the Nameless Forest. Head to the path east to enter the overworld from the bridge side. |
|---|---|
| 2 |
 Head north and then cross the bridge west to reach the next area. |
| 3 |
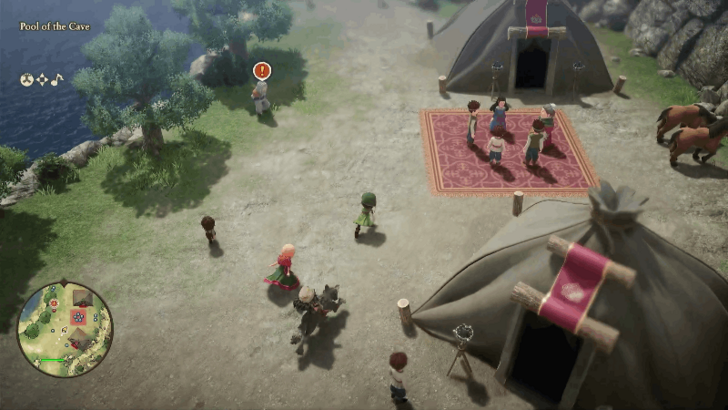 Talk to the old man with the exclamation point above him and then rest inside the nearby tent after. Exit the tent to activate a cutscene. |
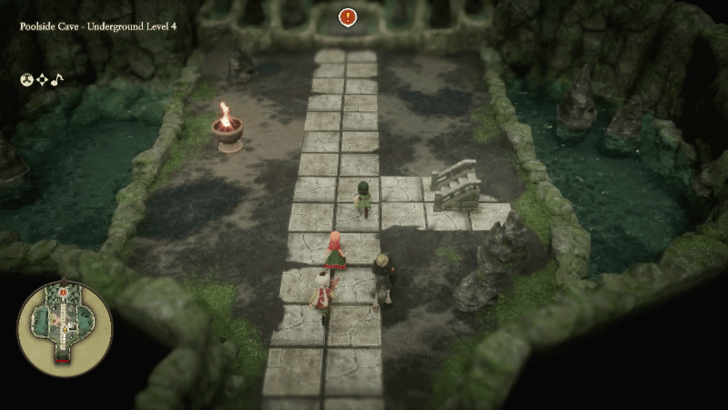
Poolside Cave
| 1 |
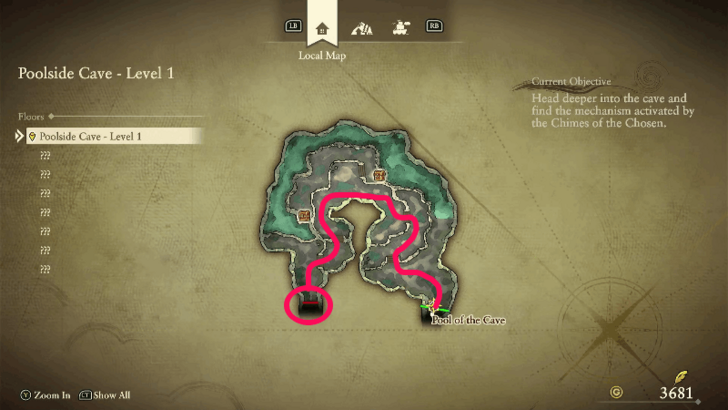 The chests at Level 1 do not contain anything, so ignore them and proceed with heading to the path west. |
|---|---|
| 2 |
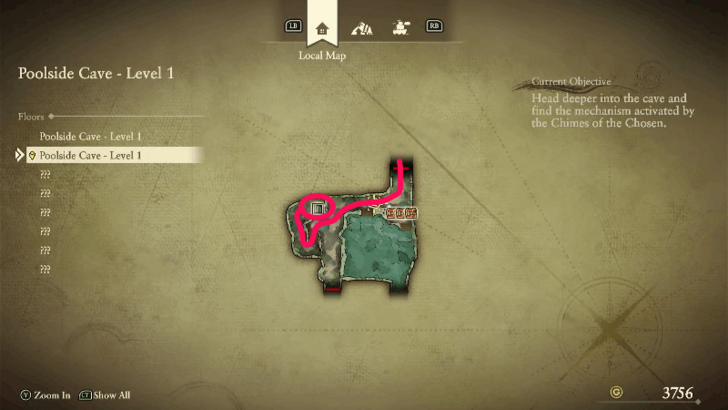 The three treasure chests in the room are inaccessible at this point, so proceed with heading west to reach the staircase. |
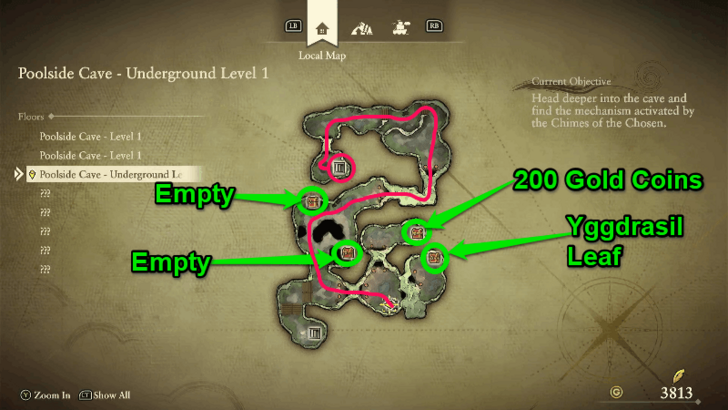
| 3 |
 Head to the stairs north to reach the next area. Open the two treasure chests on the northeastern side to get 200 Gold Coins and an Yggdrasil Leaf. Be careful when crossing the area with the pits northwest as you will fall to Underground Level 2 when doing so. |
| 4 |
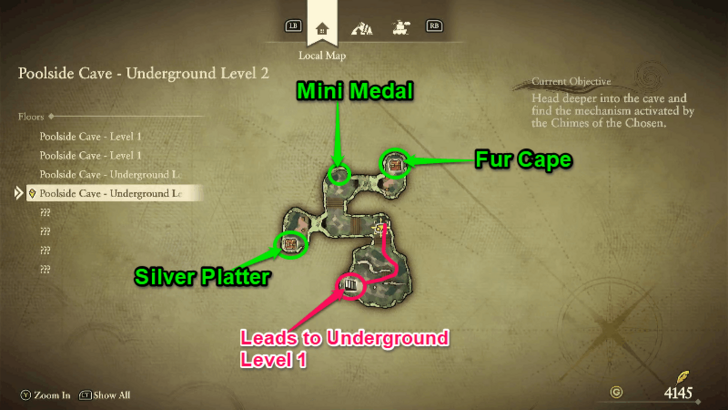 If you fall from the pits, you will reach Underground Level 2. Head to the northern corner and interact with the orange shiny spot to get a Mini Medal. Open the two treasure chests to get a Fur Cape and a Silver Platter. Head south towards the stairs to head back up to Underground Level 1. |
| 5 |
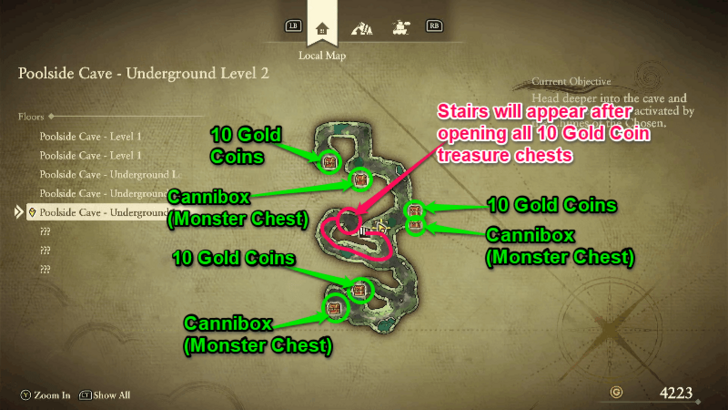 At Underground Level 2, open all the treasure chests that contain 10 Gold Coins in order to spawn the staircase that leads to the next area. The remaining treasure chests are Canniboxes (Monster Chests). |
| 6 |
 Interact with the stone at Underground Level 3 to activate light bridges that allow you to cross the paths that lead to the next area. Pick up the Yellow Fragment at the northeastern corner and open the treasure chest to get Magic Water. |
| 7 |
 Head north to activate the mechanism that opens the wall on the southside of the area. Head to the newly opened area leading to Underground Level 4. Head north again to reach Level 1. |
| 8 |
 The eastern part of Level 1 is now accessible. Cross the stairs and open the three treasure chests to get a Prayer Ring, a Stellar Fan, and a Seed of Resilience. Head south to exit leading to the altar area of the Pool of the Cave. |
| 9 |
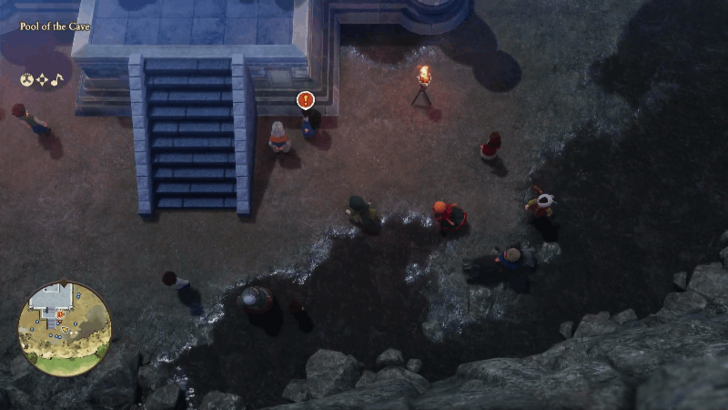 Save your progress at the angel statue and speak with the lady wearing a blue dress at the altar. The door in the altar will appear after the cutscene. Head inside and follow the path leading north. |
| 10 |
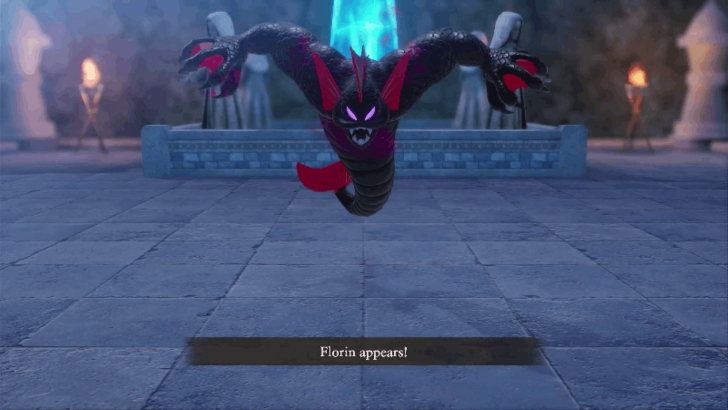 Use Maribel's Crack skill and Kiefer's Lightning Slash skill to exploit Florin's elemental weaknesses. Use Ruff to attack normally or use his Skills if he still has MP. Have the Hero Heal when needed and use Buff to raise the party's defenses as soon as possible as Florin can use multi-attack moves that also inflict status ailments. |
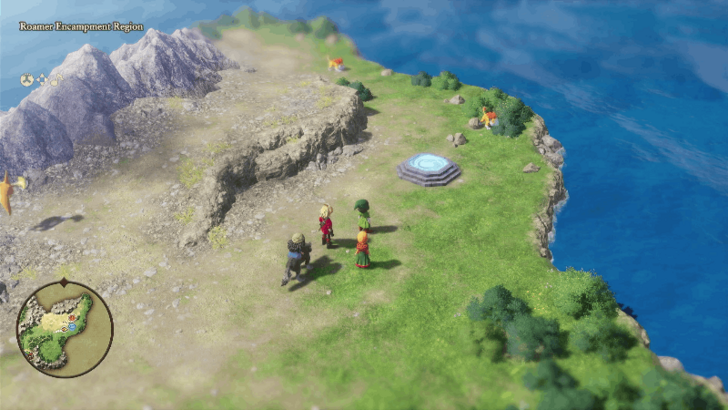
Roamer Encampment (Part 2)
| 1 |
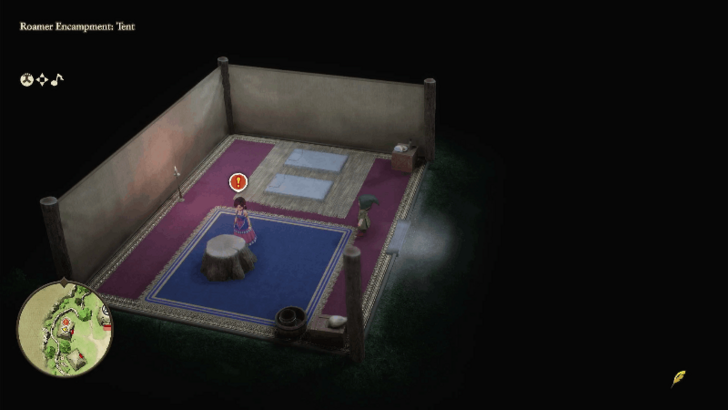
 After the boss fight is over, you will teleport back at the Roamer Encampment. Find Kiefer at the north side of the tent. |
|---|---|
| 2 |
 Head to the overworld and travel to the cape west of the encampment. Once the cutscene ends, exit the tent and approach Kiefer in the middle of the area. |
| 3 |
 Head to the teleporter east of the encampment to return to the present era. Make sure to unequip Kiefer before entering the teleporter, as he will leave the party permanently at this point. |
Unlocking the Next Island
| 1 |
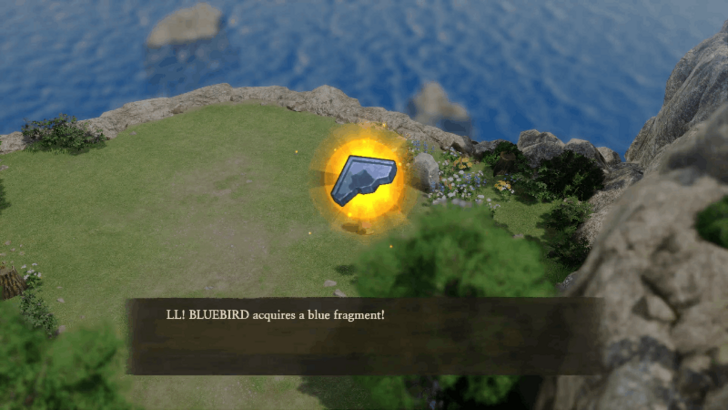
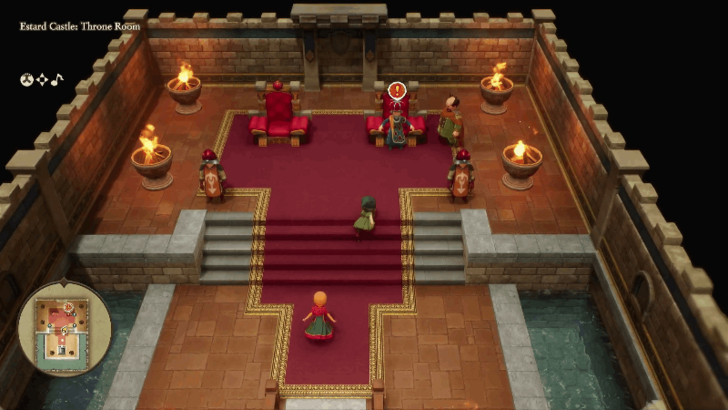 Head to the throne room of Estard Castle and deliver Kiefer's note to King Donald. He will give you a Blue Fragment in return. |
|---|---|
| 2 |
 Set sail to the island northwest of Estard to reach the Roamer Encampment region in the present era. |
| 3 |
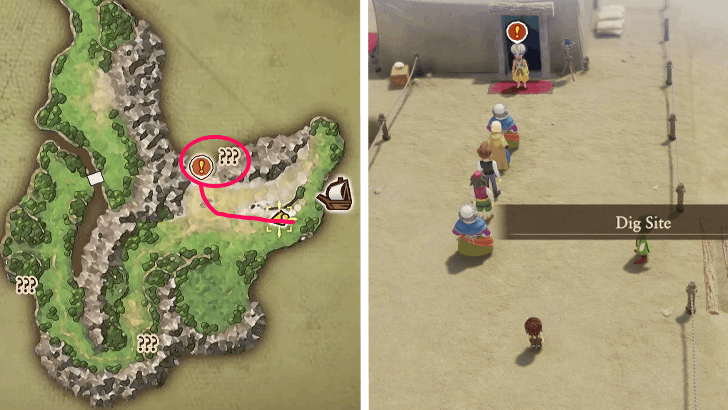 Head to the area north to reach the Dig Site. Talk to the man in front of the tent and pay him 5 Gold Coins to allow access to the dig site. |
| 4 |
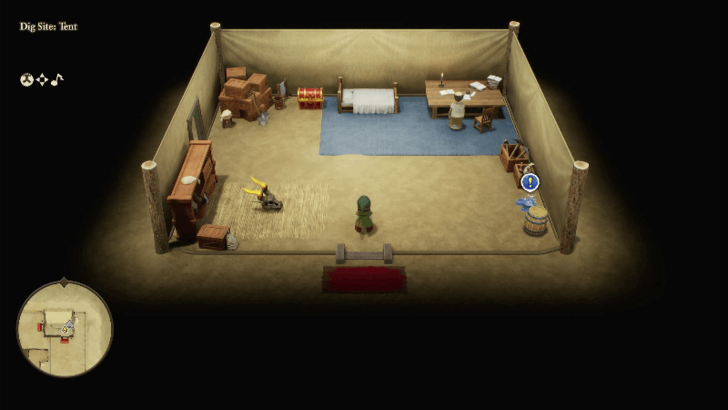 Pick up the Blue Fragment inside the tent and exit to the west side. |
| 5 |
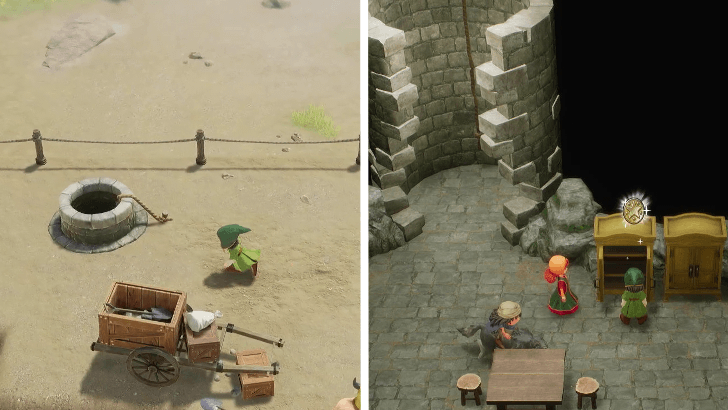 Enter the well and open the drawer near the table to get a Mini Medal. |
| 6 |
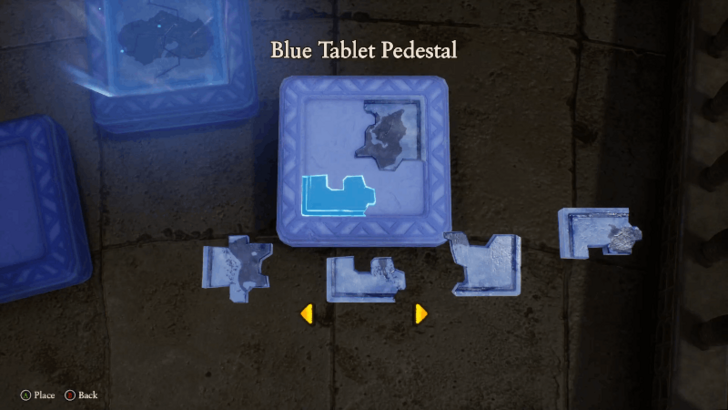
 From this point, you can fast travel back to the Shrine of Mysteries. Assemble the Blue Fragments to piece together a Blue Tablet that transports you to the seventh island, Alltrades Abbey. ▶︎ Alltrades Abbey Walkthrough |
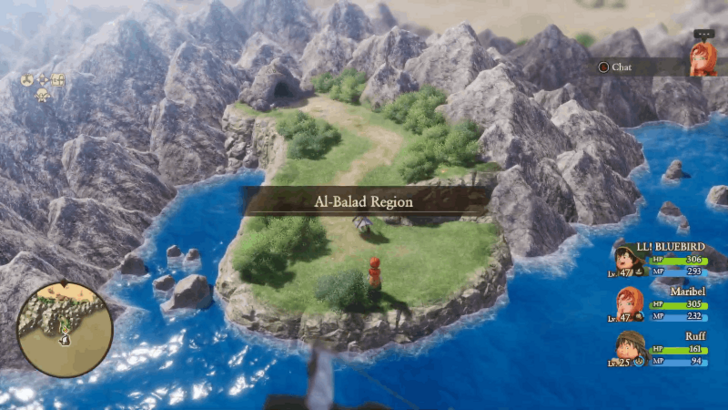
Al-Balad Region
| Jump to a Section | ||
|---|---|---|
| Temple Palace | Al-Balad | Banks of the Nihil |
| Dig Site (Present) | Al-Balad (Part 2) | Banks of the Nihil (Part 2) |
| Likeness of Great Evil | Al-Balad Region (Present) | - |
| Back to the Top | ||
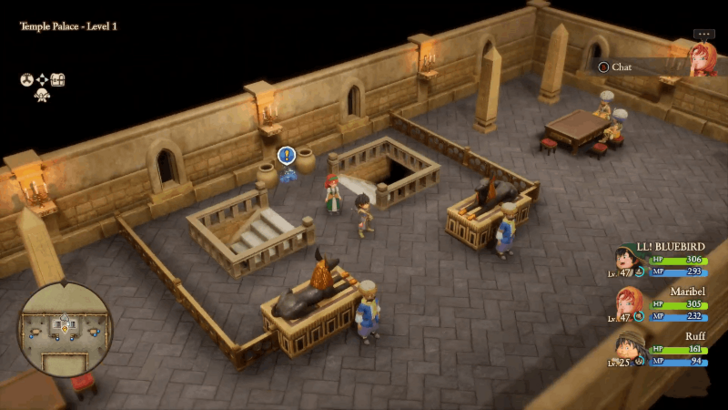
Temple Palace
| 1 |
 Head north to enter the palace. |
|---|---|
| 2 |
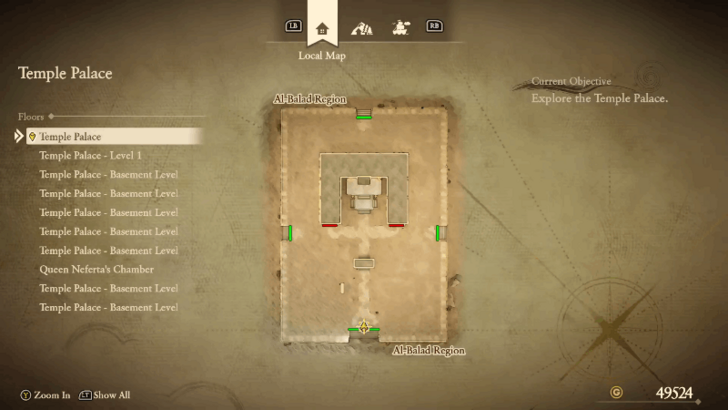 Enter the palace from either the left or right doors. |
| 3 |
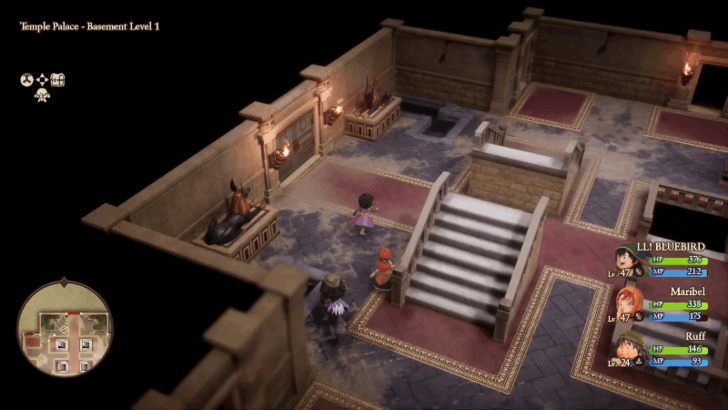 Once you reach Basement Level 1, enter the northern door. Go to the door on the right side of the bedroom. |
| 4 |
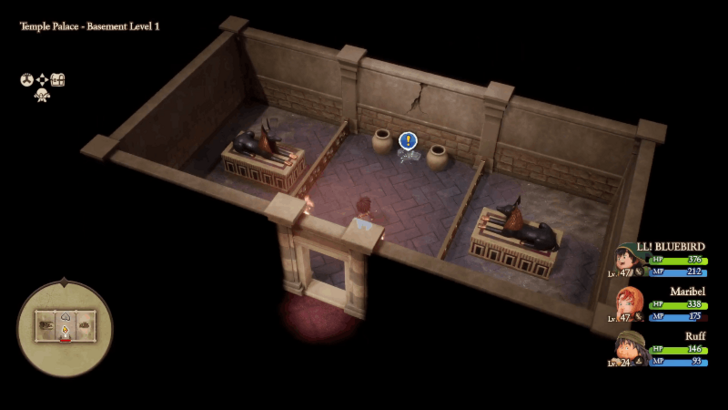 Pick up the Grey Fragment in the room. |
| 5 |
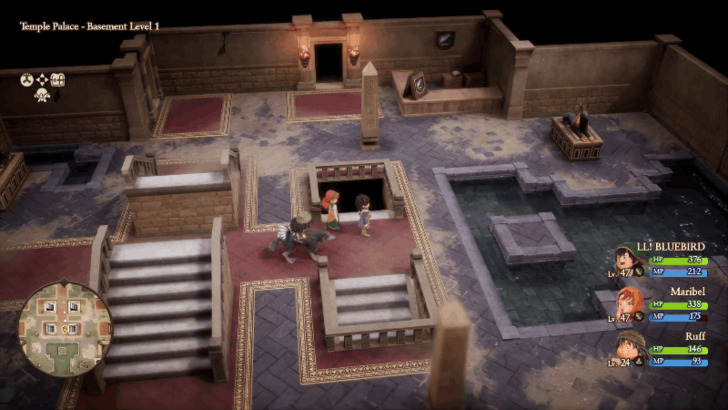 Backtrack to Basement Level 1 and go down the central stairs leading to Basement Level 2. |
| 6 |
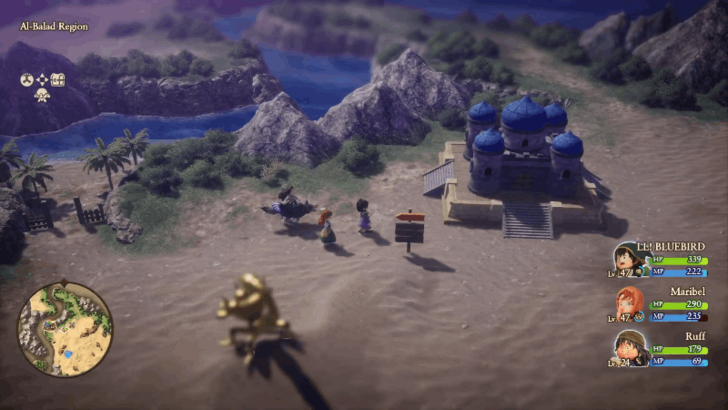
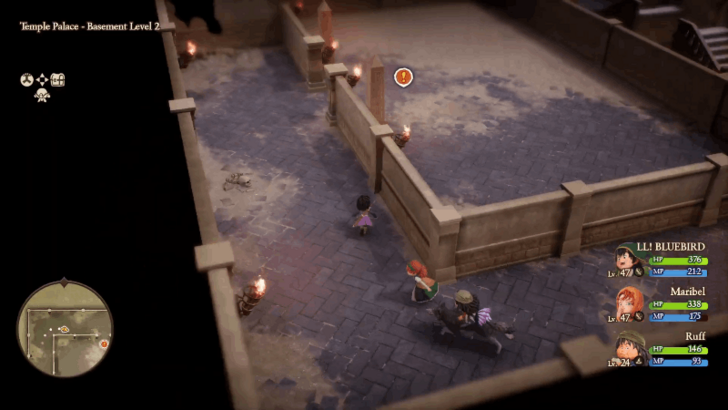 Enter the northern room in Basement Level 2 to activate a cutscene. Once the cutscene ends, exit the Temple Palace and head southeast to Al-Balad. |
Al-Balad
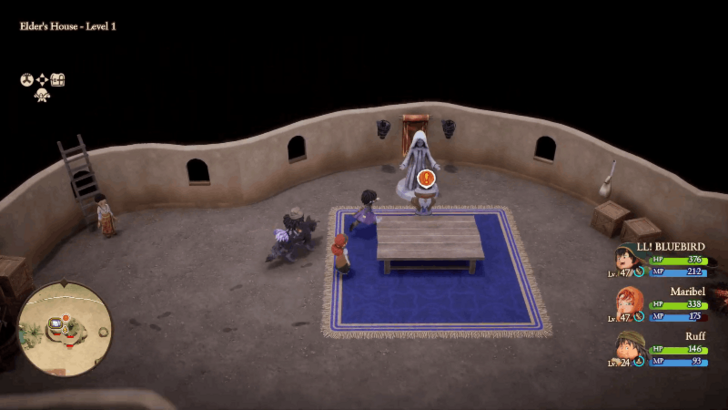
| 1 | Talk to The Elder north of the village. |
|---|---|
| 2 |
 After speaking with The Elder, rest on the second floor. To get to the location, talk to the woman on the left to use the ladder. |
| 3 | After resting on the second floor, head down to activate a cutscene with The Elder. After the cutscene is over, travel back to the Temple Palace. |
| 4 | Go back to the Temple Palace and head down to Basement Level 2. Defeat the Skeleton Squire in the boss fight. |
| 5 | Return to Al-Balad and speak with Hadid in front of The Elder's house. |
| 6 | Talk to The Elder twice to obtain the Seal of the Sands. Then choose "Yes" for the second conversation to progress the story. |
Banks of the Nihil
| 1 | Head northwest to reach the Banks of the Nihil. Approach Hadid to activate a cutscene. |
|---|---|
| 2 | Exit to the overworld and head to the portal to return to the present. |
Dig Site (Present)
| 1 | Fast travel to the Dig Site and talk to Dr Doug Digby inside the tent. Talk to him twice so he will join you. Exit the Dig Site to teleport immediately to the Temple Palace in the past. |
|---|
Al-Balad (Part 2)
| 1 | Go to The Elder's house in Al-Balad and climb to the second floor. Talk to the old woman and exit the house to activate a cutscene. Once that cutscene is over, head back to the second floor of The Elder's house to activate another cutscene. |
|---|---|
| 2 | Talk to Hadid on the first floor and you will teleport automatically to the Banks of Nihil. |
Banks of the Nihil (Part 2)
| 1 | Talk to Hadid at the center of the area. This activates a cutscene and teleports you to the Upper Reaches of the Nihil. |
|---|---|
| 2 | Exit the Upper Reaches of the Nihil and head northwest to reach the Likeness of Great Evil. |
Likeness of Great Evil
| 1 | Approach Hadid at the entrance of Likeness of Great Evil and defeat the two Chimaeras. |
|---|---|
| 2 | Examine the brown square stone monument at the center and place the Seal of the Sands. |
| 3 |
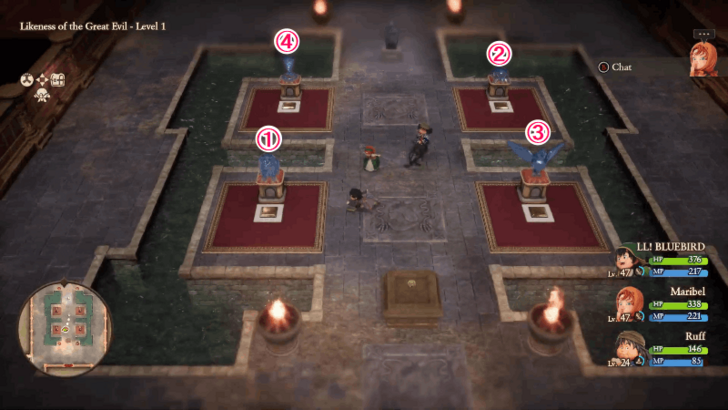 Press the switches in the following order: bottom left → top right → bottom right → top left. Take the stairs from the newly opened room. |
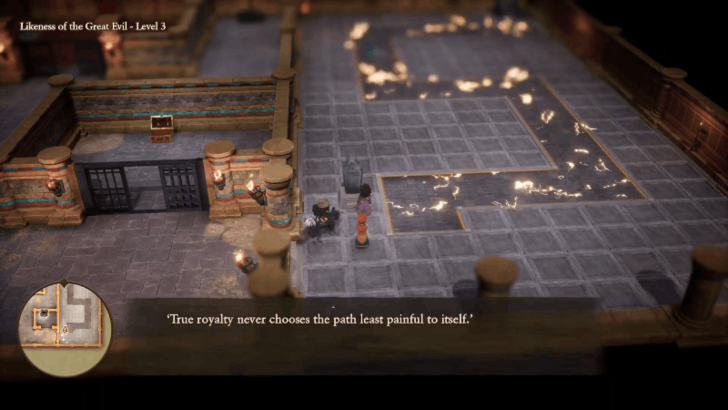
| 4 | Take the stairs on the south side of the room. |
| 5 | Talk to Fertiti in the northwest room on Level 3 to obtain the Black Key. |
| 6 |
 Once you have the Black Key, head to the east side of the area that contains the electric floor tiles. You have to go through the electric floor to reach Level 4 of the area. Stepping on the normal floor tiles causes it to break and you will fall down to the lower floor. |
| 7 | Head up to Level 5 and rescue the two women from the Chimaeras. You can get to the center by exiting to the south part of the area. Head west and open the door using the Black Key. |
| 8 |
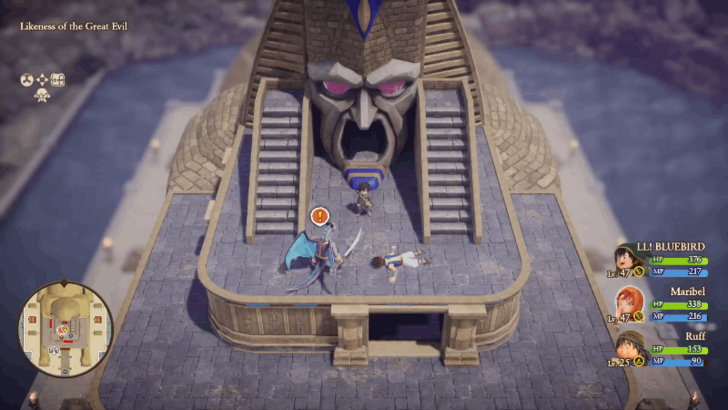 Head to the top floor to battle Setesh the Punisher. Keep your HP high during the battle as the boss has high attack power, acts twice, and can use a skill that lowers defense. |
| 9 | After beating Setesh, you will automatically teleport back to the Banks of the Nihil. Talk to Hadid to activate a cutscene. After that, talk to him at the first floor of The Elder's house. |
| 10 |
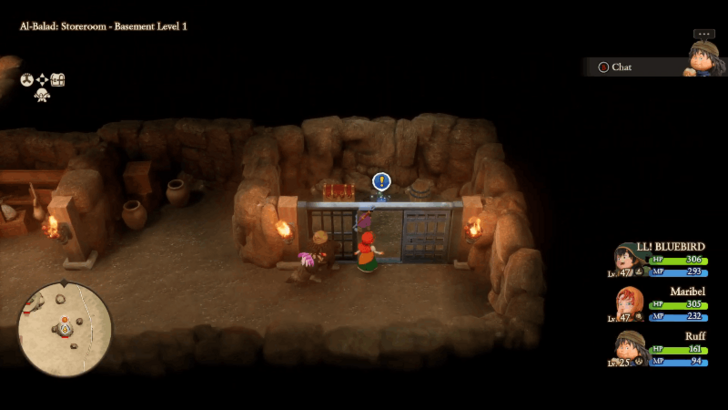 Get the Blue Fragment from the storehouse east of the village. Open the treasure chest to get a Rune Staff and break the barrel to get a Mini Medal. |
Al-Balad Region (Present)
| 1 | Head to the teleporter to retun to the present era. Travel to Al-Balad and enter the Temple Palace. A cutscene will activate and you will receive a Letter of Amity. |
|---|---|
| 2 |
 Head to Level 1 of the palace and pick up the Blue Fragment. |
| 3 |
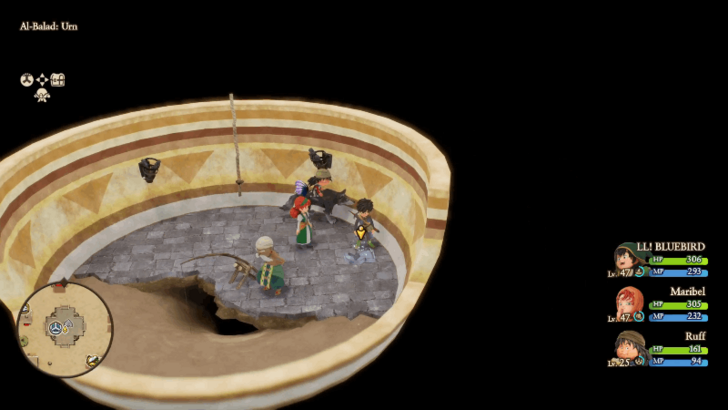 Enter Al-Balad next and pick up the Grey Fragment from the pot in the center of the village. |
| 4 |
 Disembark on the isolated cave at the southern part of the region to enter Al-Shallal. Head north and pick up the Gold Fragment. |
| 5 |
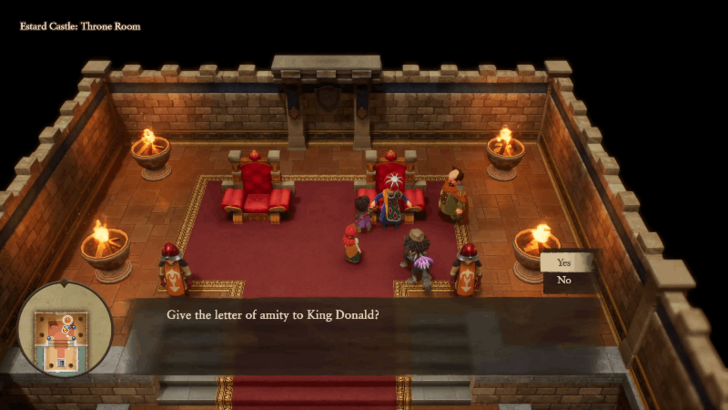 Travel to Estard Castle and give the Letter of Amity to King Donald to receive a Government Bracelet. From this point, the current objective updates and tells you to investigate the nomadic tribe on the island northwest of Estard. ▶︎ Jump to Roamer Encampment Region (Present) |
Roamer Encampment Region (Present)
| Jump to a Section | ||
|---|---|---|
| Recruit Aishe | - | - |
| Back to the Top | ||
Recruit Aishe
| 1 | Fast travel to the Roamer Encampment in the present day. Talk to the three people inside the tents. |
|---|---|
| 2 | Approach the man in the northern tent to activate a cutscene. Talk to Rom Baro in the northern tent after. |
| 3 | Exit Roamer Encampment and head to the Cape Overlooking the Ocean. Approach Aishe to activate a cutscene. |
| 4 | Return to Rom Baro's tent in Roamer Encampment for a cutscene. Leave the tent to activate another cutscene. |
| 5 | Go to the Cape Overlooking the Ocean and talk to Rom Baro to start the battle. |
| 6 |
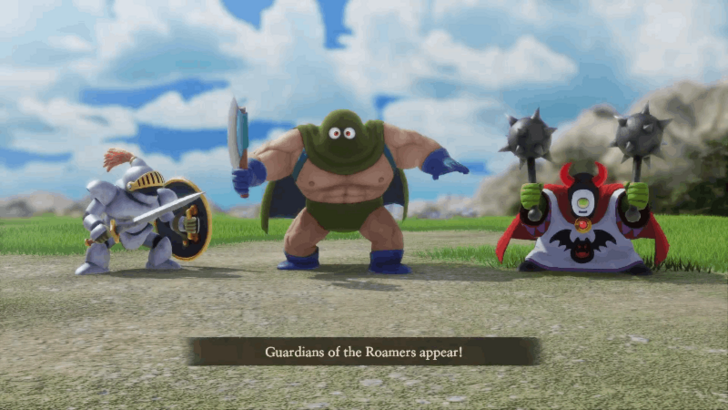 In this battle, you only have the Hero and Aishe as party members and only the former can give orders. Focus on attacking the enemies one by one to reduce their numbers. |
| 7 |
 After you defeat the Guardians of the Roamers, Aishe will give you a Blue Fragment and she will also join your party. |
| 8 |
 Fast travel to the Shrine of Mysteries and assemble the Blue Fragments to create a Blue Tablet that transports you to the next island, Hardlypool. ▶︎ Jump to Hardlypool Walkthrough |
Red Tablet Walkthroughs
| Jump to a Section | ||
|---|---|---|
| Prologue | Yellow Tablets | Red Tablets |
| Green Tablets | Grey Tablets | Blue Tablets |
| Endgame | ||
| All Red Tablet Sections | ||
| Emberdale | Frobisher | Hubble |
Emberdale Region
| Jump to a Section | ||
|---|---|---|
| Emberdale | Burnmont | Unlocking the Next Island |
| Back to the Top | ||
Emberdale
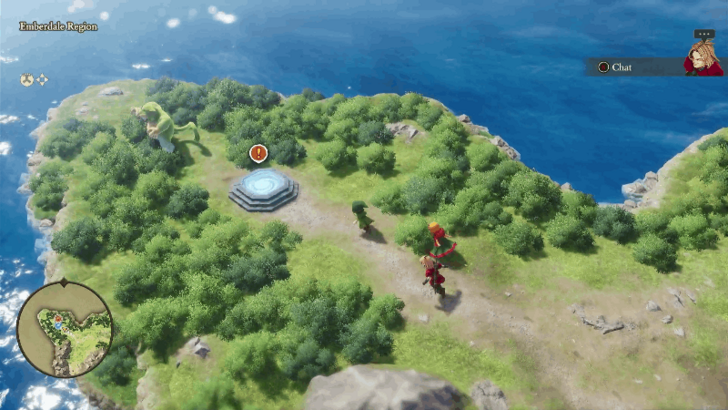
| 1 | 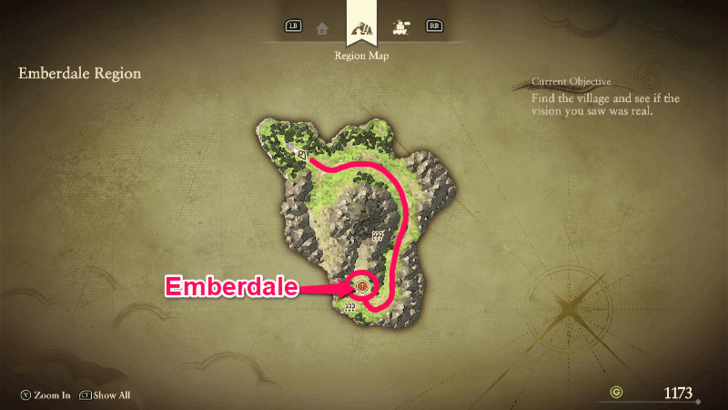 Once you arrive to the Emberdale Region, travel to the eastern side of the region to reach the signpost in the overworld. From there, head south to reach the town of Emberdale. |
|---|---|
| 2 | 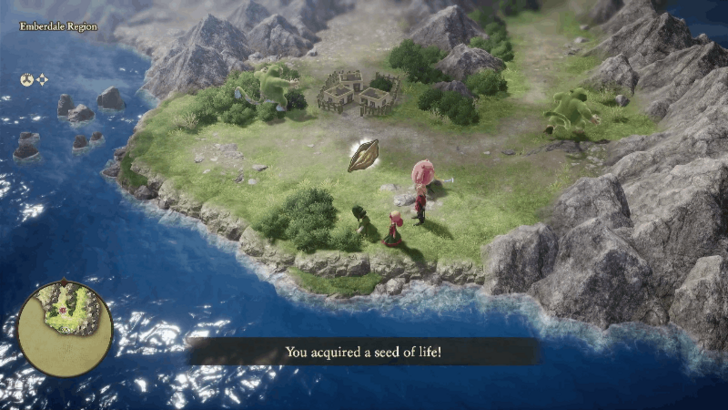 Pick up the Seed of Life south of Emberdale before entering the town. |
| 3 |
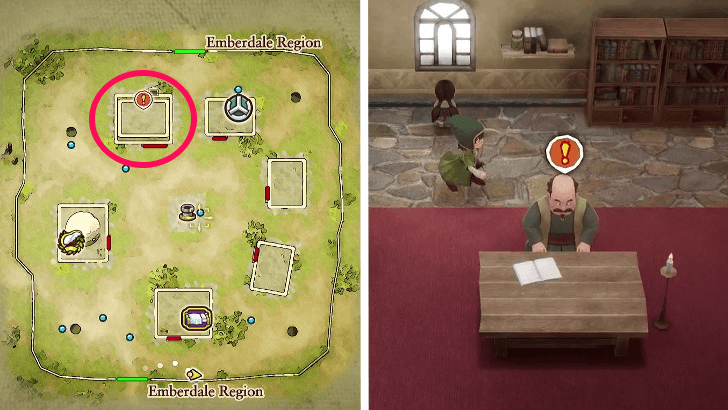 Enter the house at the northwestern side of the town and speak with the man on the top floor. |
| 4 | 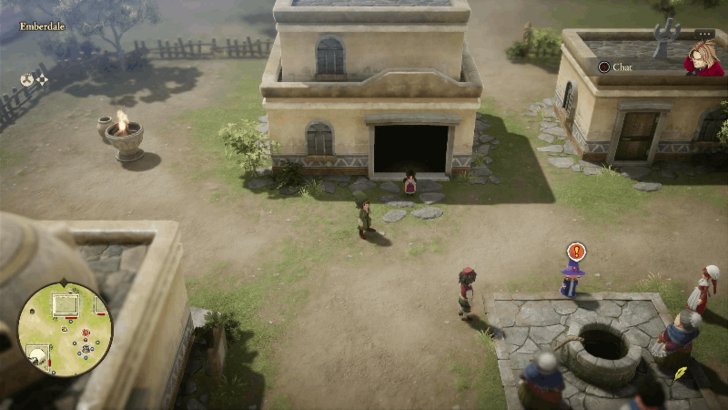 |
| 5 |
 Enter the general store west of the well and talk to Palmela inside. |
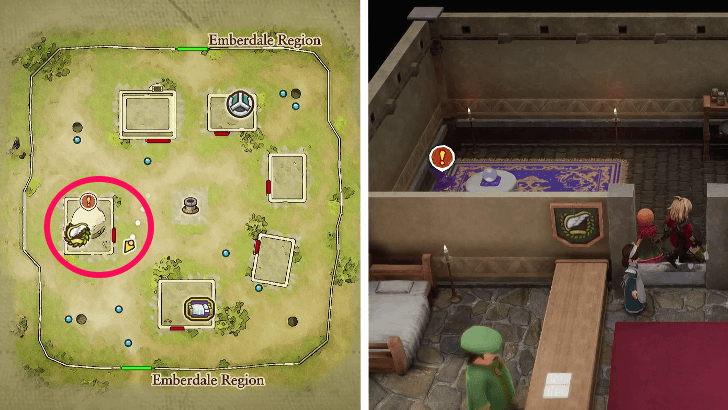
| 6 | 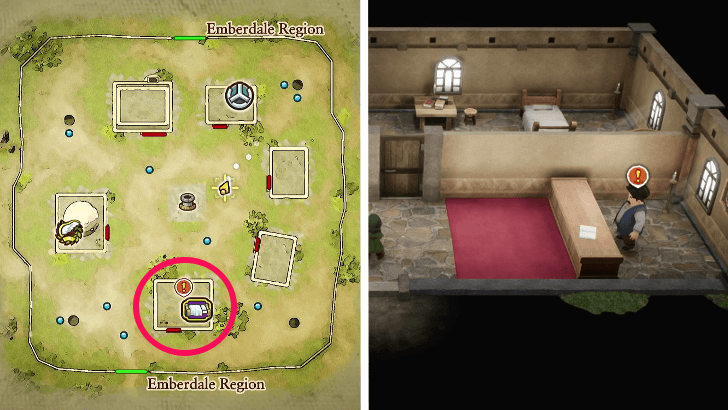 Enter the inn at the southern part of the town and rest up to prepare for the festival. |
| 7 | 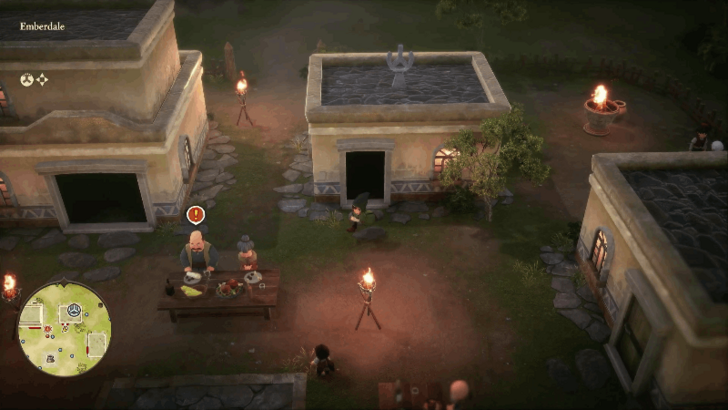 Speak with Gaffer at the center of the town. Then, speak with Palmela inside the general store. |
| 8 | 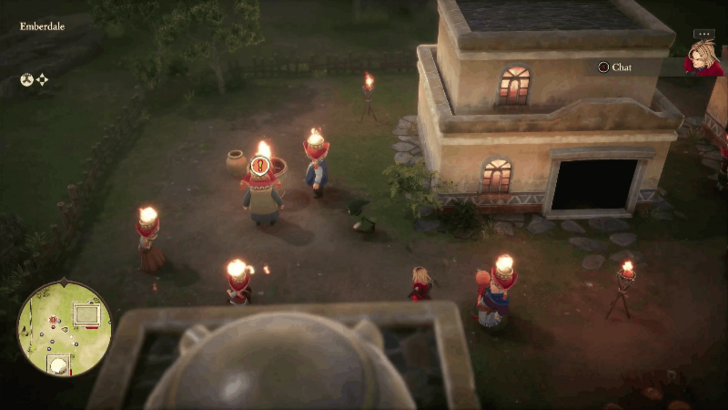 Speak with Gaffer north of the general store. Select "Yes" and you will be teleported to Burmont after the cutscene. |
Burnmont
| 1 | 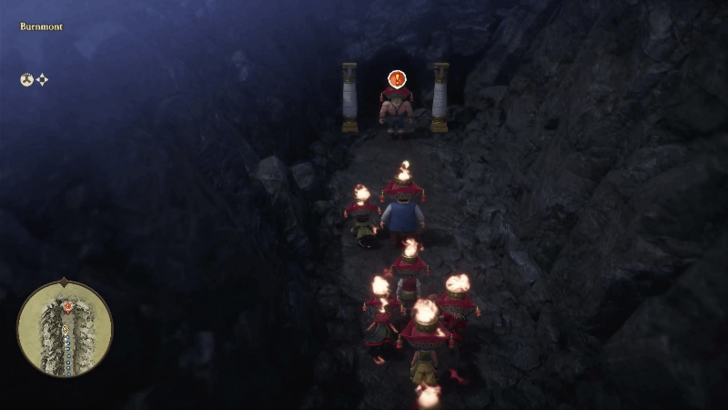 Head up the mountain and talk to the man in front of the entrance. |
|---|---|
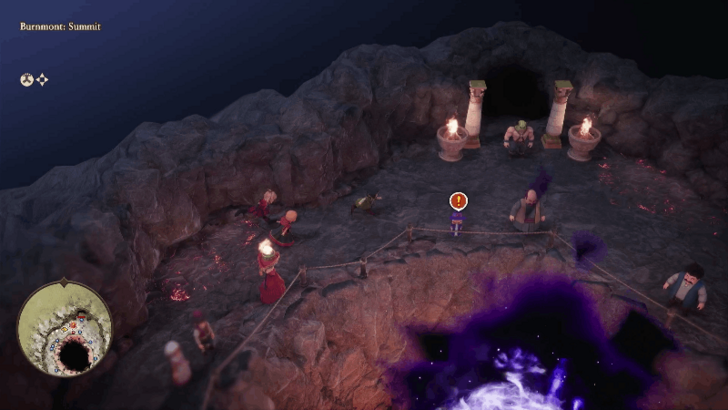
| 2 | 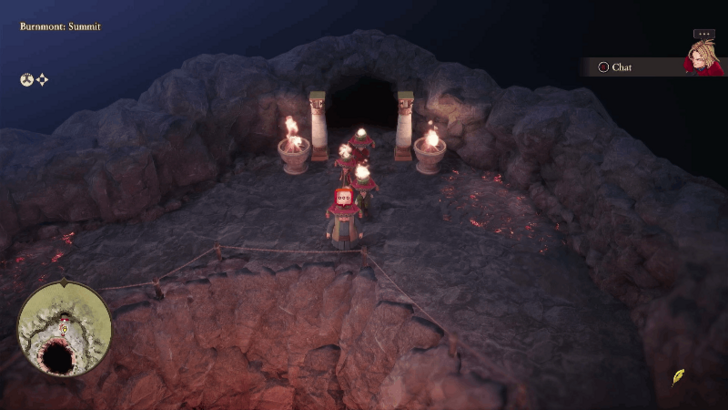 Follow the path until you enter Burnont: Summit. Talk to Gaffer near the entrance. |
| 3 | 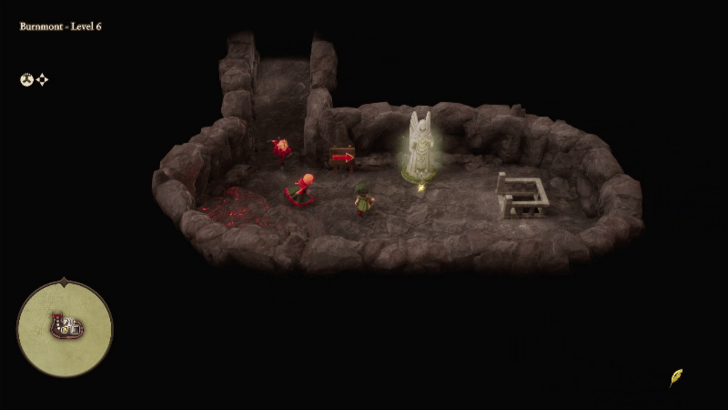 Head south to venture deep into the mountain. Use the angel statue to save before heading down further. |
| 4 | 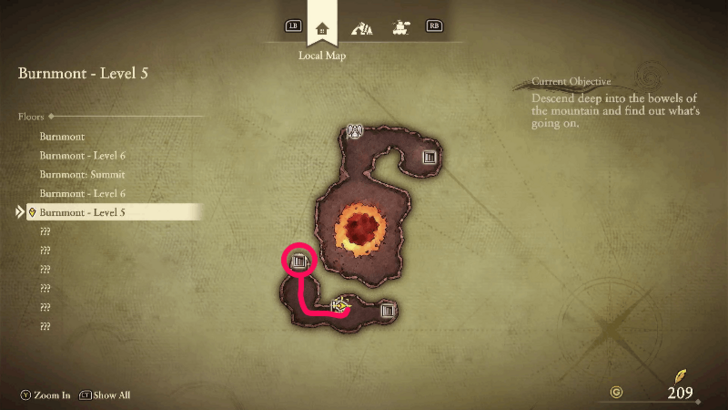 Use the stairs on the northwest side of Burnmont - Level 5 to descend to Burnmont - Level 4. |
| 5 | 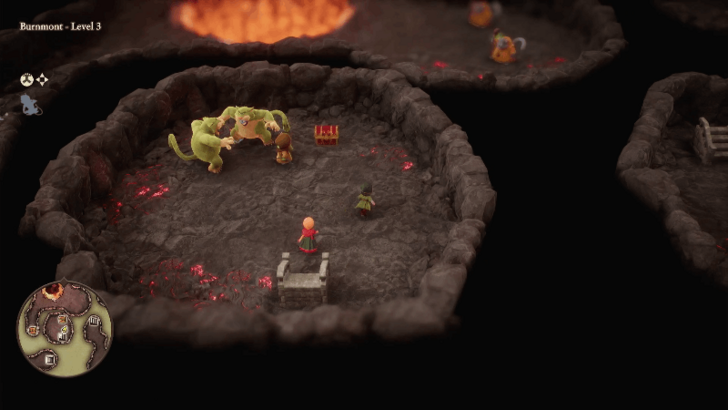 Head to the stairs south to enter a small area with 3 monsters and a treasure chest that contains a Divine Dagger. Return to Burnmont - Level 4 and head to the northern stairs. |
| 6 | 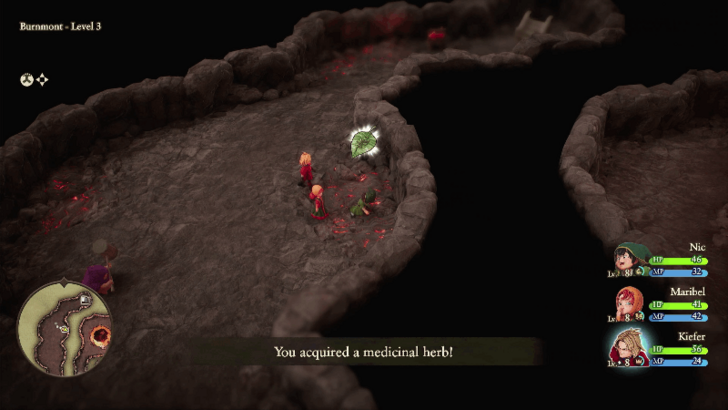 Interact with the blue shiny spot on the right side of the path at Burnmont - Level 3 to obtain a Medicinal Herb. Continue heading south to descend the stairs. |
| 7 | 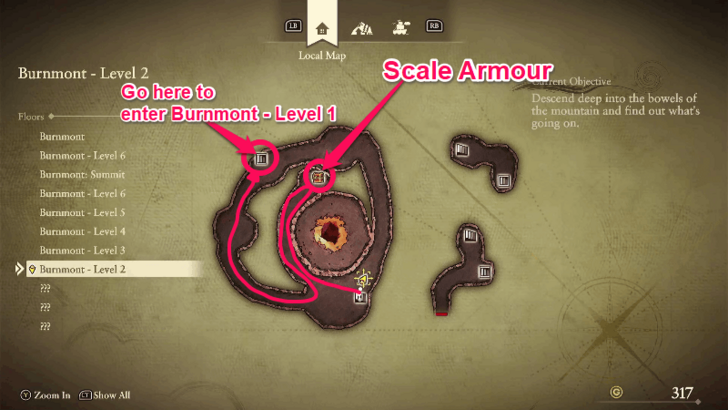 Open the treasure chest to obtain the Scale Armour before heading down the stairs at the northwestern corner of Burnmont - Level 2. |
| 8 | 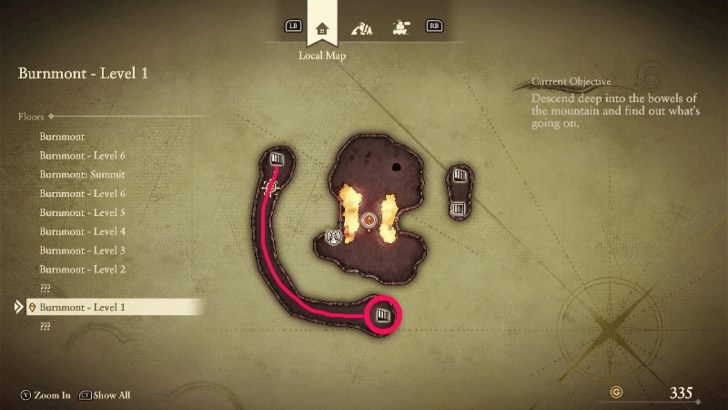 Follow the linear path heading east to reach the stairs that leads to a different area in Burnmont - Level 2. |
| 9 | 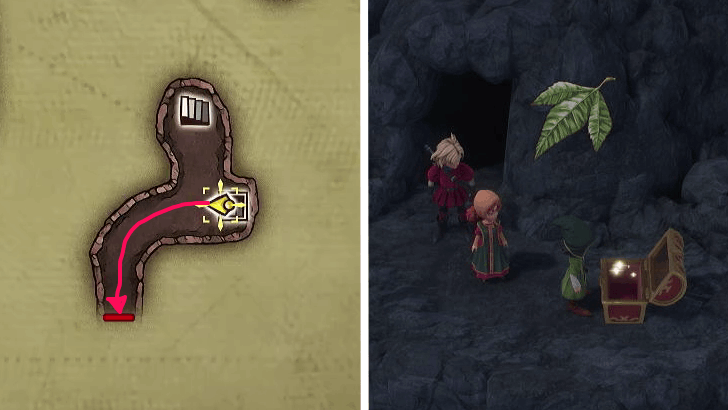 Head to the south path leading outside the mountain to reach a treasure chest that contains a Yggrasil Leaf. Head inside and use the stairs north to reach Burnmont - Level 4. |
| 10 |
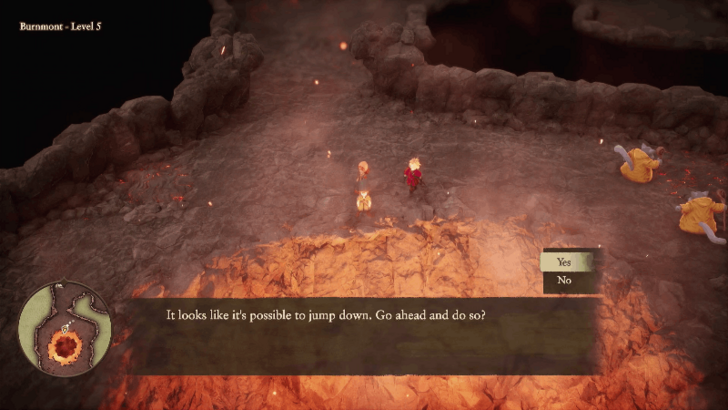 Keep going to the stairs until you reach the crater area of Burnmont - Level 5. Pick up the Phial on the right side and then interact with the crater in the middle to jump down. |
| 11 |
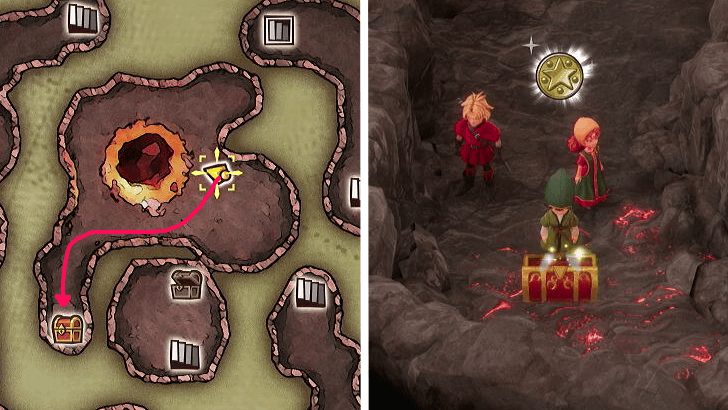 Keep interacting with the crater in the middle until you reach Burnmont - Level 3. Head southwest of the area to pick up the Mini Medal from the treasure chest. Interact with the crater in the middle to descend until you reach Burnmont - Level 1. |
| 12 |
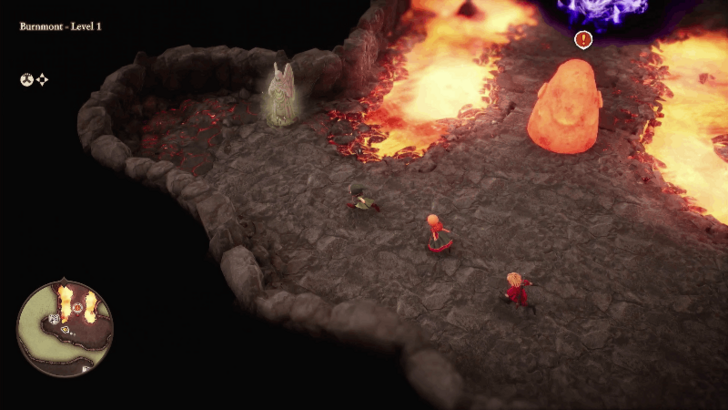 Save your progress at the angel statue before interacting with the lava statue in the middle of the area. This boss can increase its strength, so be sure to cast Buff on all three party members before attacking. Use ice skills such as Maribel's Crack at the start before the boss can change its weakness. |
| 13 |
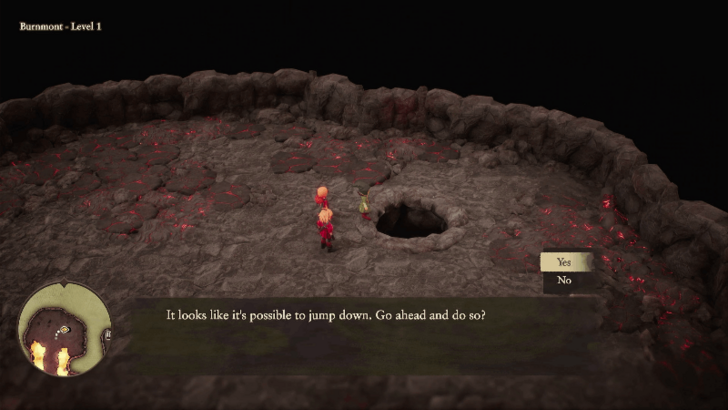 After beating the boss, heal at the angel statue and interact with the hole on the northeast corner to jump down. |
| 14 |
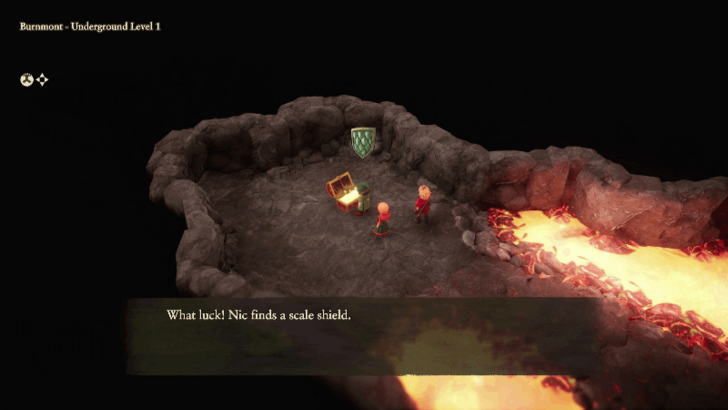 Open the treasure chest to obtain a Scale Shield. From here, use the stairs to make your way back up to the summit of the mountain. |
| 15 |
 Talk to Palmela at the summit for a cutscene. You will teleport back at Emberdale's inn after. |
| 16 |
 Exit Emberdale and head back to the portal to teleport back at the Shrine of Mysteries. |
Unlocking the Next Island
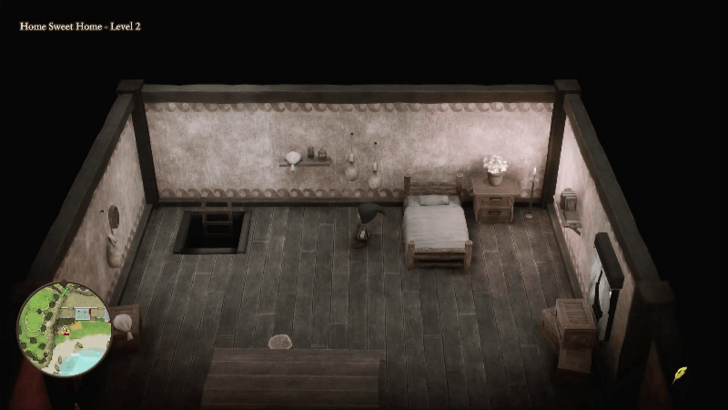
| 1 | 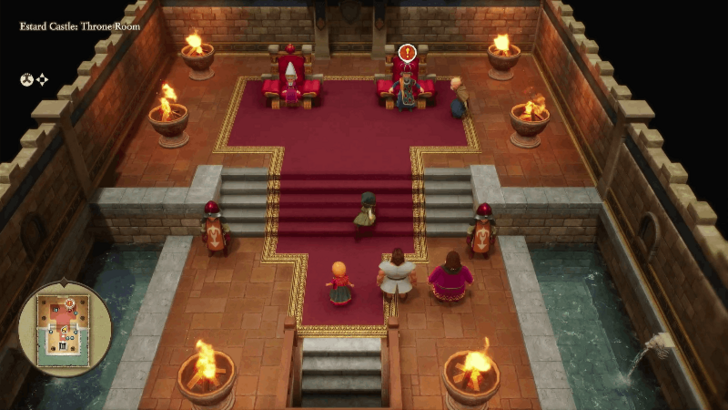 Fast travel to Estard Castle and head up the stairs to reach the throne room. Talk to King Donald for a cutscene and you will teleport back to your house in Pilchard Bay. Go up the ladder and Interact with your bed to progress the objective. |
|---|---|
| 2 | 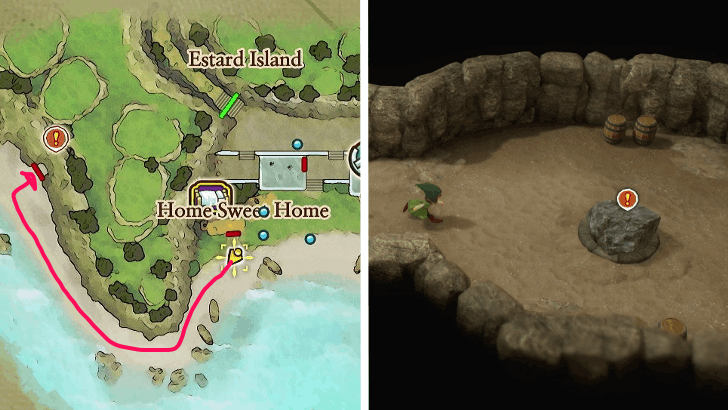 Head to the cave west of your house to reach Shoreside Shrine. Interact with the boulder that is blocking the hole leading to the ship for a cutscene. Exit the cave for another cutscene and reenter to move the boulder away successfully. |
| 3 | 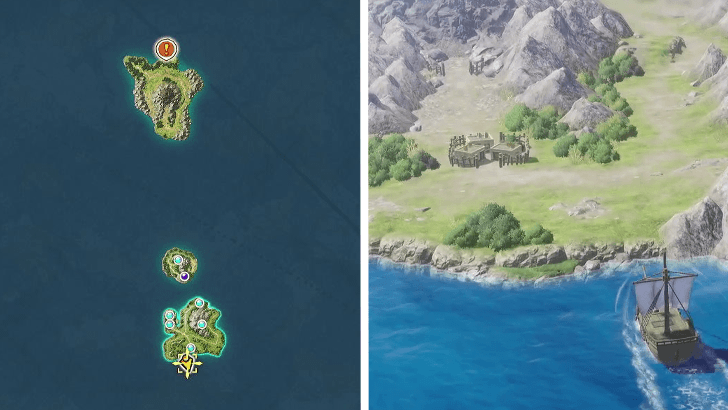 Board the ship and head north to reach present day Emberdale. |
| 4 | 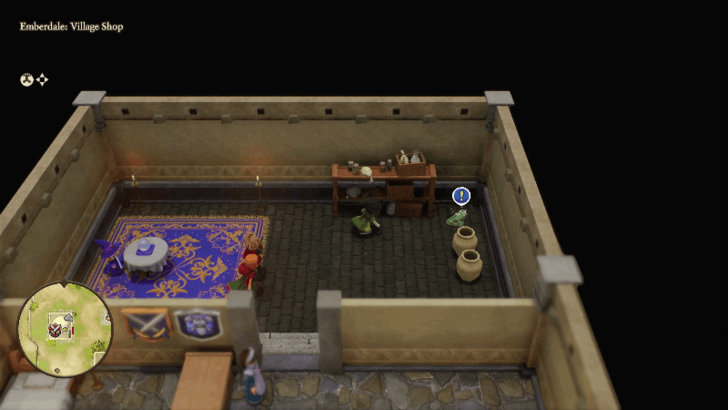 Enter the general store at the west side of the town and pick up the Green Tablet Fragment opposite of Palmela. |
| 5 | 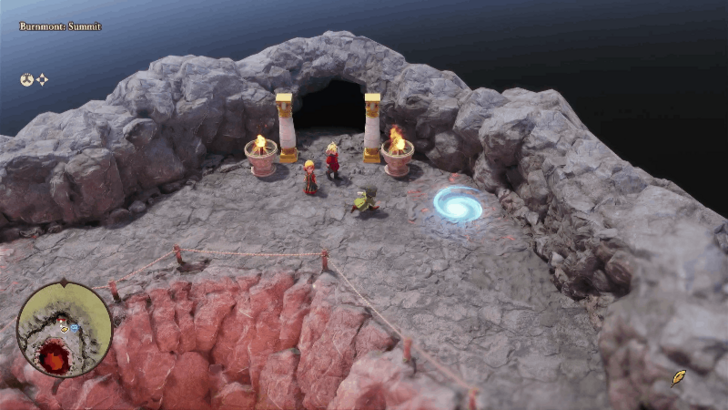 Head to present day Burnmont and descend into the mountain again. The layout of the dungeon remains the same and contains the same placement of treasure chests. Do not use the portal at the summit yet, as it will teleport you to the Shrine of Mysteries. |
| 6 |
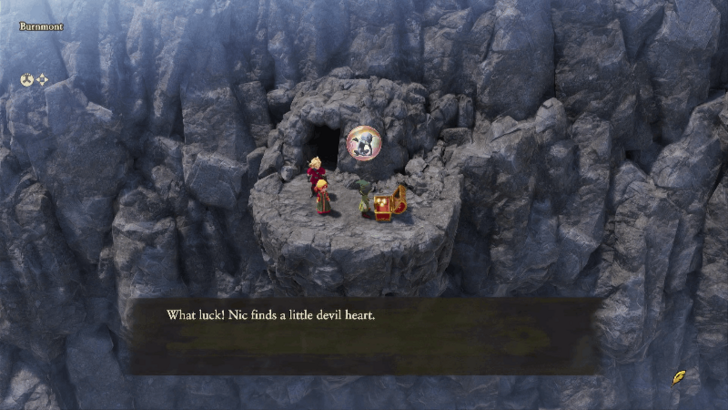 When you reach Burnmont - Level 2, head to the south exit that leads outside and open the treasure chest to get a Little Devil Heart. |
| 7 |
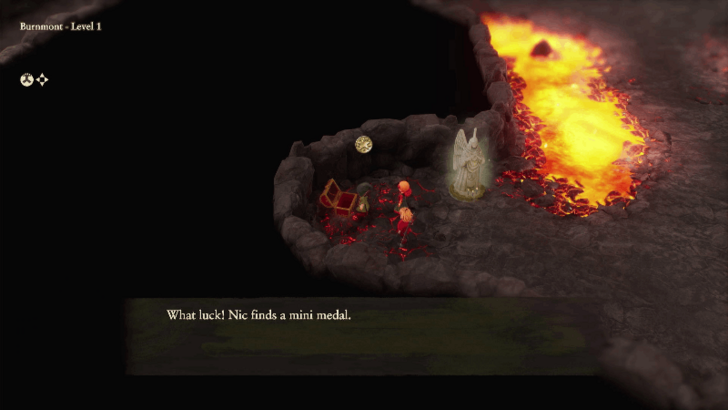 Open the treasure chest beside the angel statue at Burnmont - Level 1 to get a Mini Medal. |
| 8 |
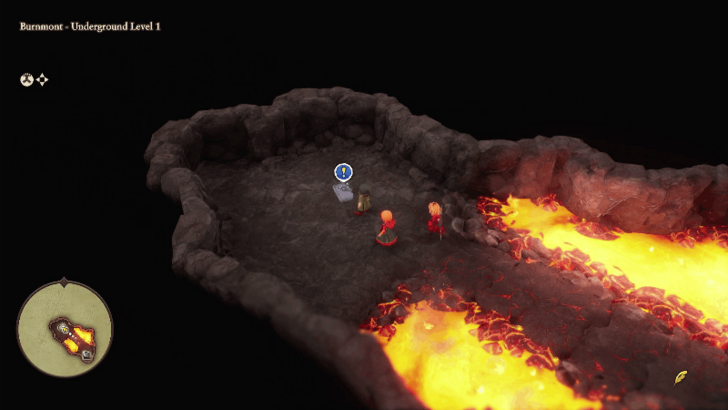 Continue to descend the mountain until you reach the underground level. From there, pick up the Gray Fragment. |
| 9 |
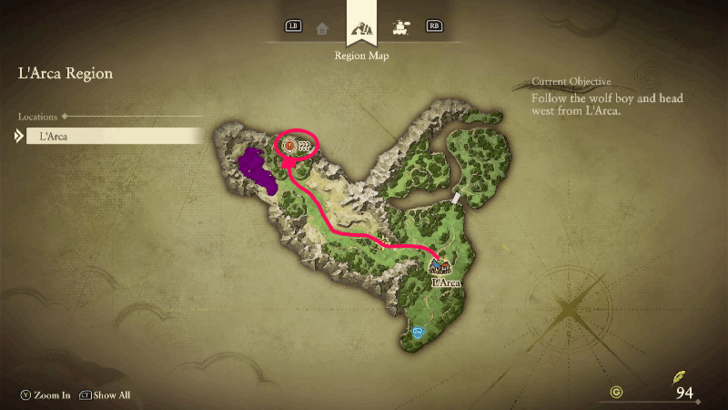
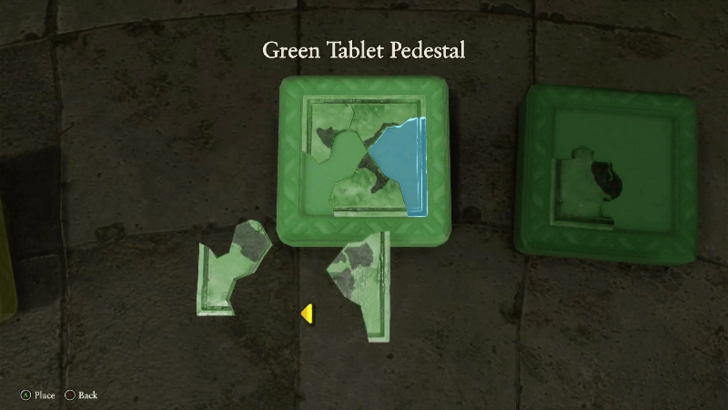 Head back to the summit and use the portal to teleport to the Shrine of Mysteries. Assemble the Green Fragment to form a Green Tablet that transports you to the third island, L'Arca. ▶︎ Jump to L'Arca |
Frobisher Region
| Jump to a Section | ||
|---|---|---|
| Frobisher | Faraday Castle | Institute of Automatry |
| Repel the Automaton Attack | Automaton Stronghold | Frobisher (Present) |
| Unlocking the Next Island | ||
| Back to the Top | ||
Frobisher
| 1 |
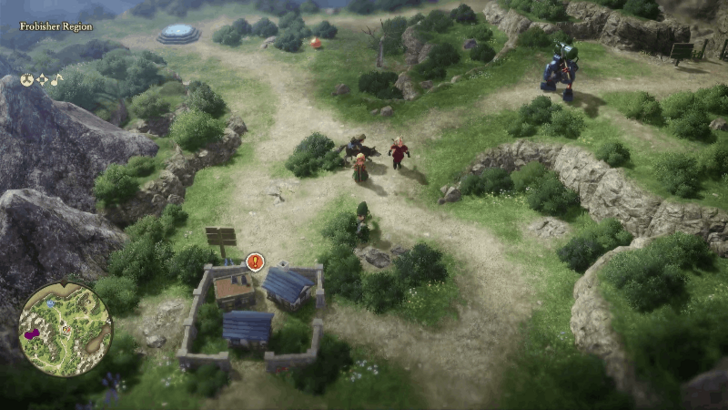 Head south from the portal to reach the town of Frobisher and watch the cutscene that plays upon entering. Use this time to buy armor and weapons from the equipment shop first before leaving. |
|---|---|
| 2 |
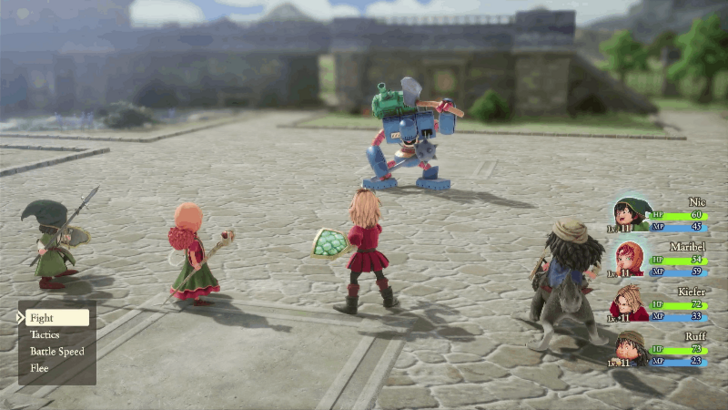 If you attempt to leave the town, you will end up in an enemy encounter with an Automaton. Defeat it using physical attacks to progress the objective and allow you to leave the town to visit Faraday Castle. |
Faraday Castle
| 1 |
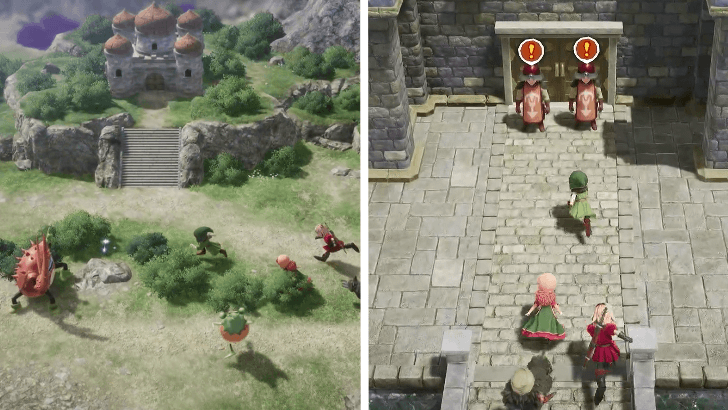 Head southwest from Frobisher to reach Faraday Castle. Speak with the two guards in front of the door to enter through the castle. |
|---|---|
| 2 |
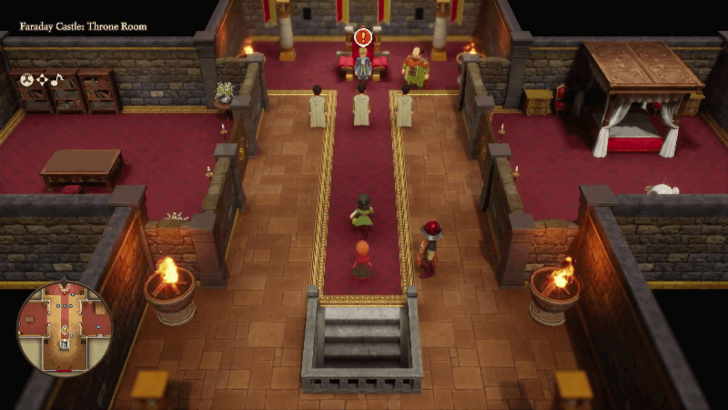
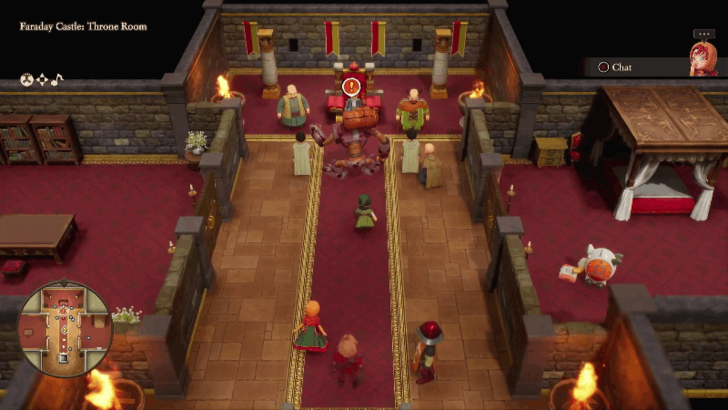
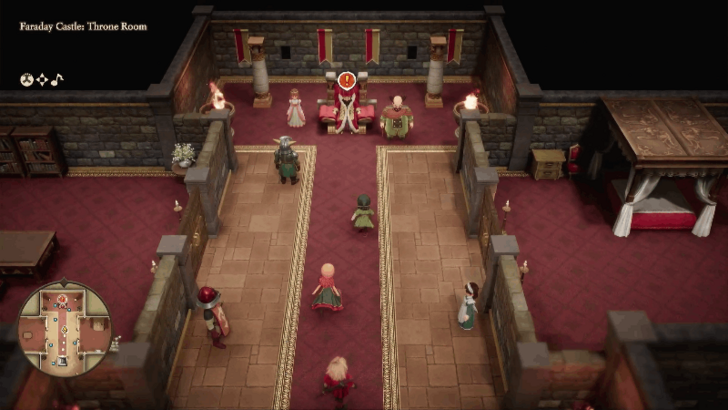 Head up the stairs and talk to the king at the throne room. |
| 3 |
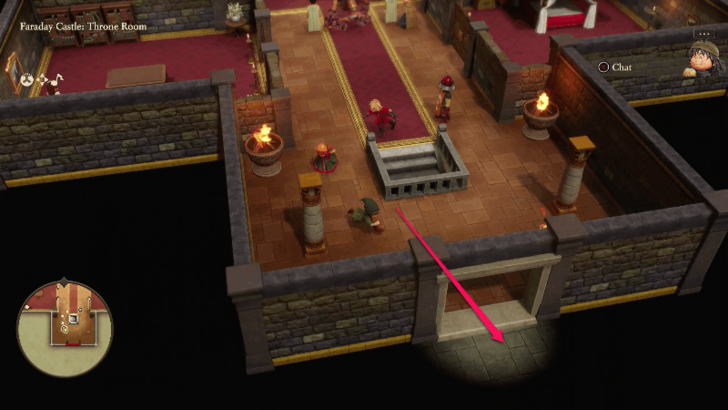
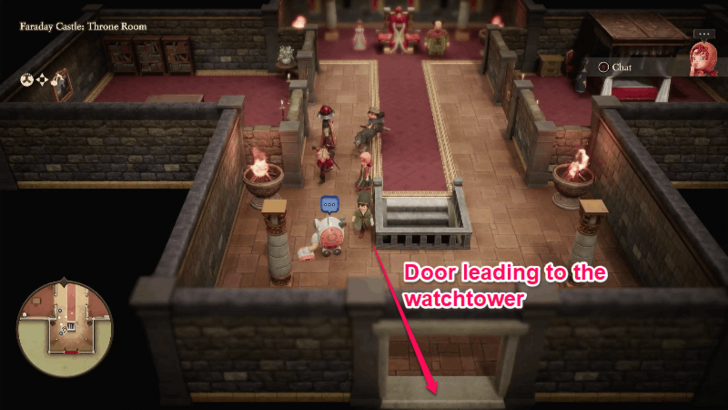 Head to the door that leads outside of the throne room. |
| 4 |
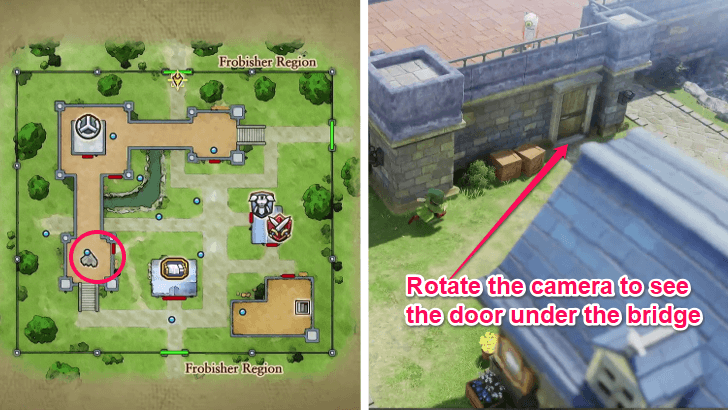
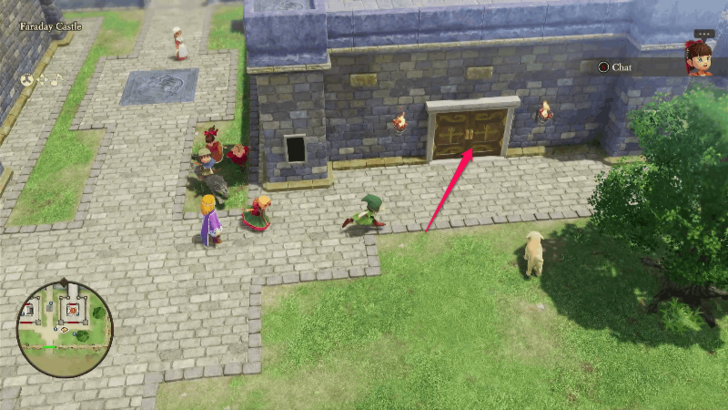
 Head to the southwestern wing of the castle to enter the watchtower. You can rotate the camera to find the door as it is obscured when using the default view. |
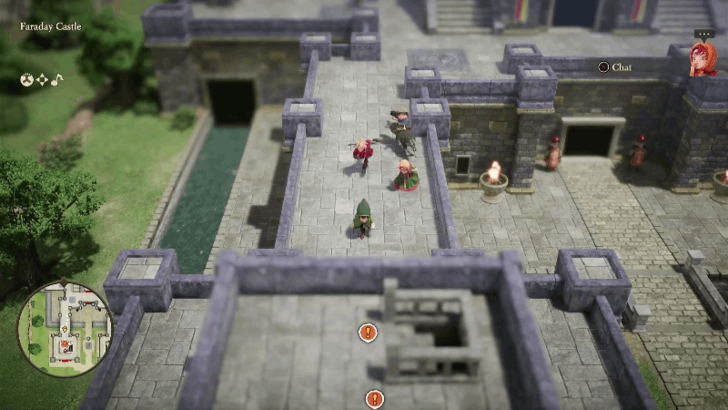
| 5 |
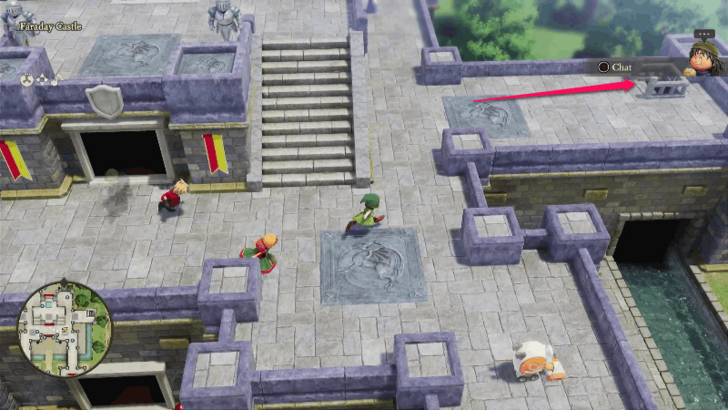
 Take the stairs on the right to climb the watchtower. Watch the cutscene and exit the castle to make your way to the Royal Institute of Automatry. |
Institute of Automatry
| 1 |
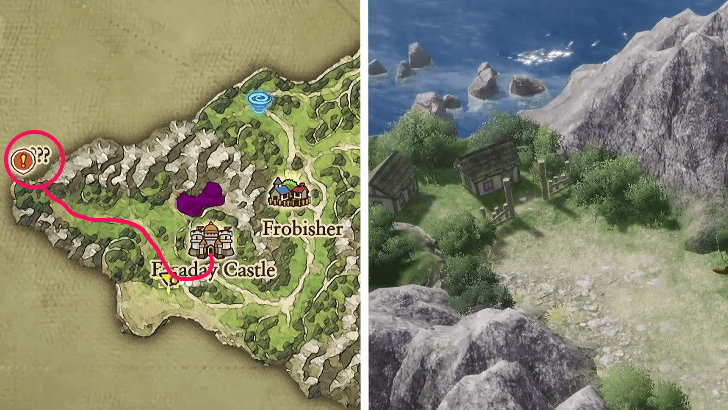 Head west from Faraday Castle to reach the Royal Institute of Automatry. |
|---|---|
| 2 |
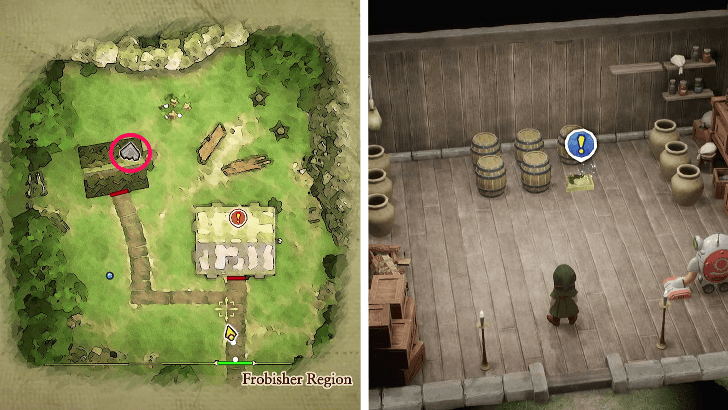 Before heading to the main house, enter the smaller house on the left to pick up the Yellow Fragment inside. |
| 3 |
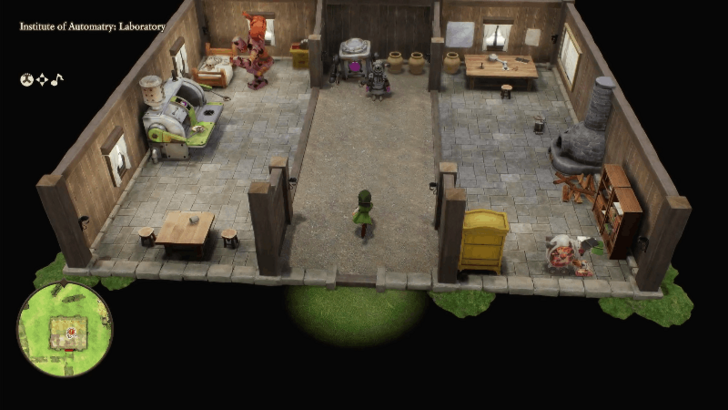
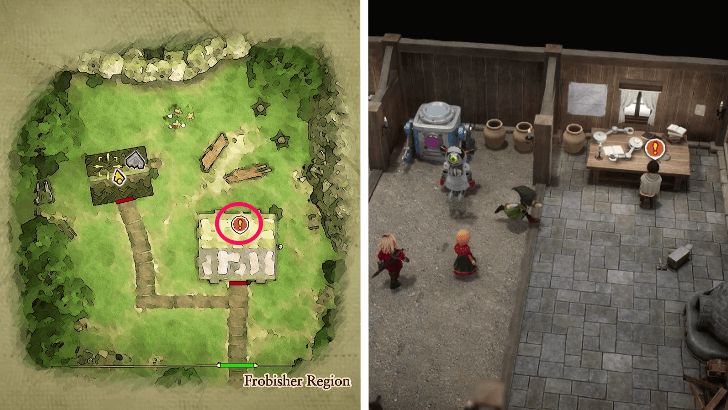 Enter the main house and talk to the man sitting at the northeastern corner of the house. |
Repel the Automaton Attack
| 1 |
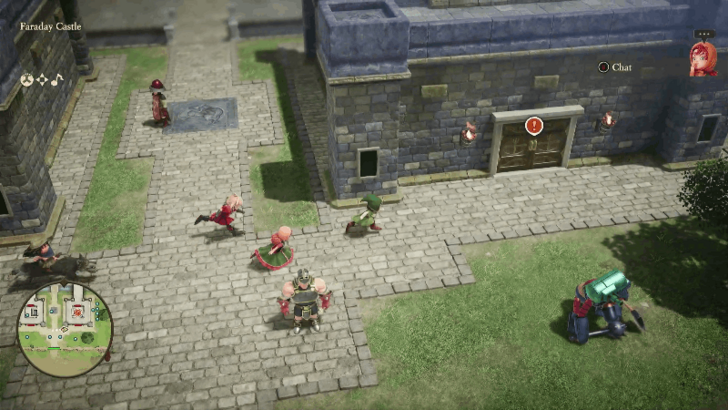
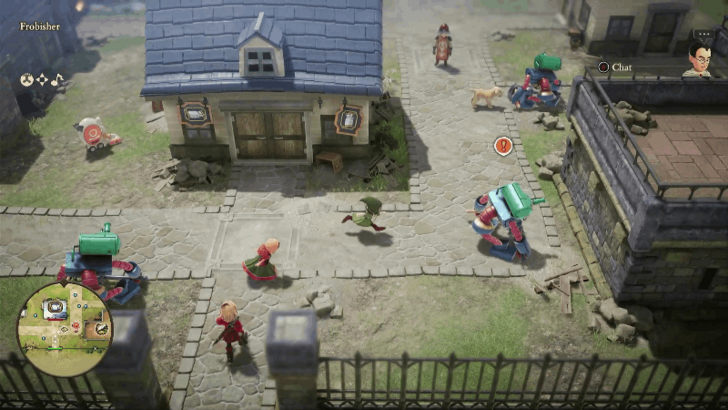 Make your way back to Frobisher and examine the three Automatons with exclamation points above them to collect the spare parts. |
|---|---|
| 2 |
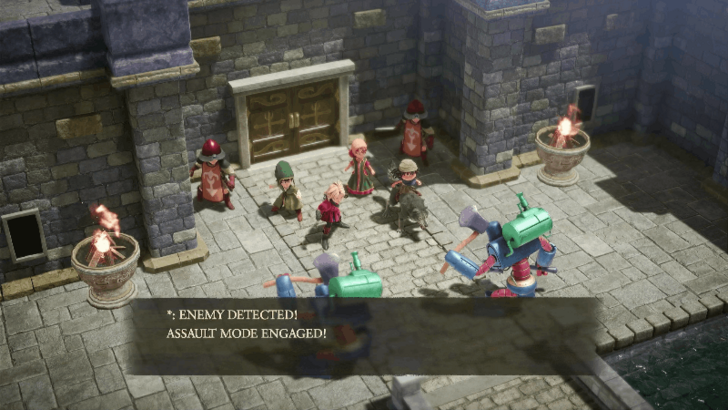 Return to Faraday Castle and defeat the two Automatons that will attack as soon as you enter the castle. Once you defeat them, Kiefer will leave the party temporarily to hold off the waves of Automatons. |
| 3 |
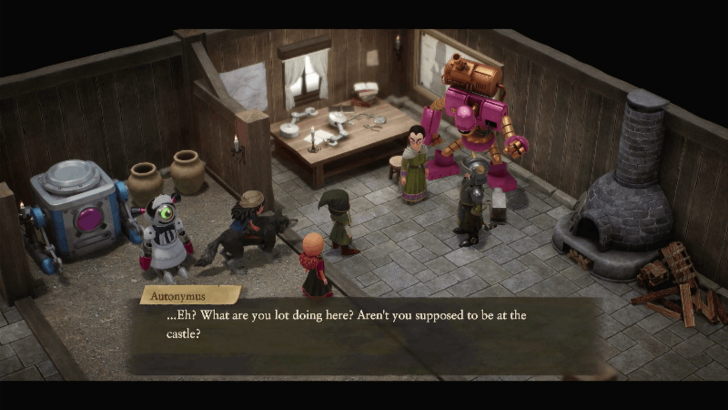 Head to the Royal Institute of Automatry to inform Autonymus and Thaddeus. Go back to Faraday Castle after to reunite with Kiefer. |
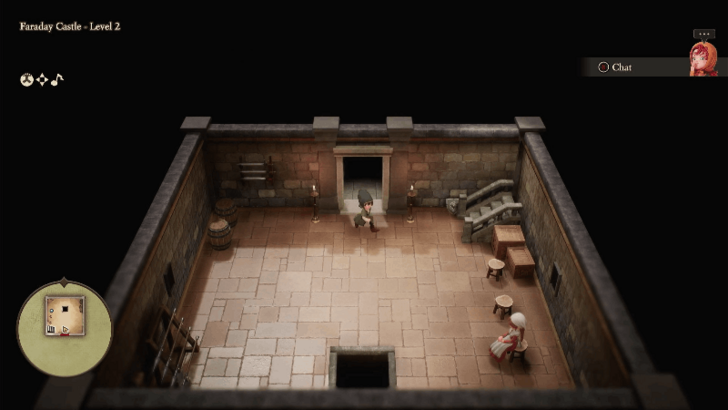
| 4 |
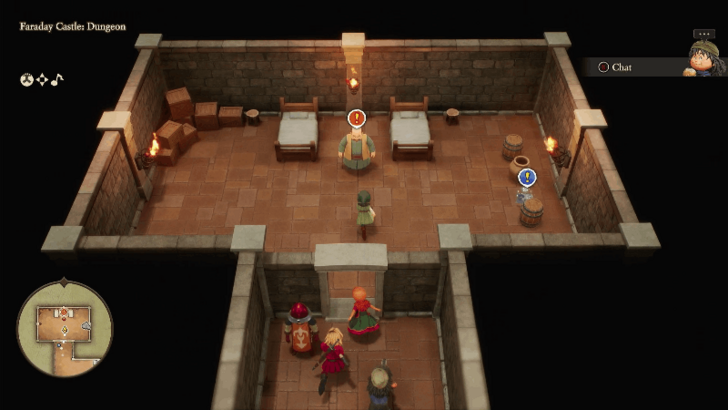
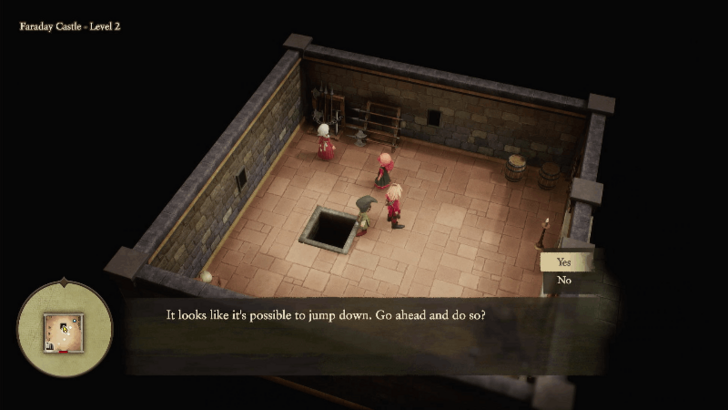 After the cutscene ends, head to the watchtower and interact with the hole on the floor to drop down to the Officer's Mess. Talk to Thaddeus at the table. |
| 5 |
 Go to the Guards' Quarters east of the Officer's Mess and talk to Autonymus inside. Talk to Thaddeus outside after. |
Automaton Stronghold
| 1 |
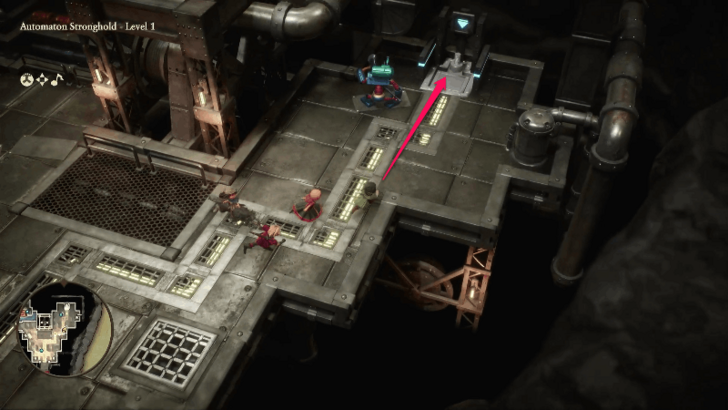
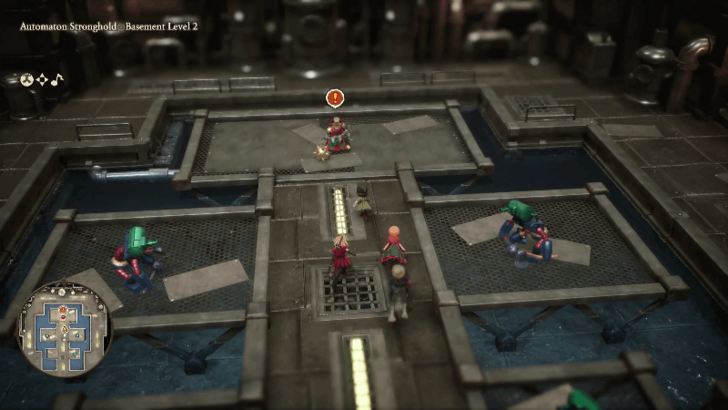
 Head northeast to reach the Automaton Stronghold. You can save your progress at the angel statue at the northern side of the area. Head down to the entrance after the cutscene plays. |
|---|---|
| 2 |
 Head down to the elevator on the northeast side of Level 1. |
| 3 |
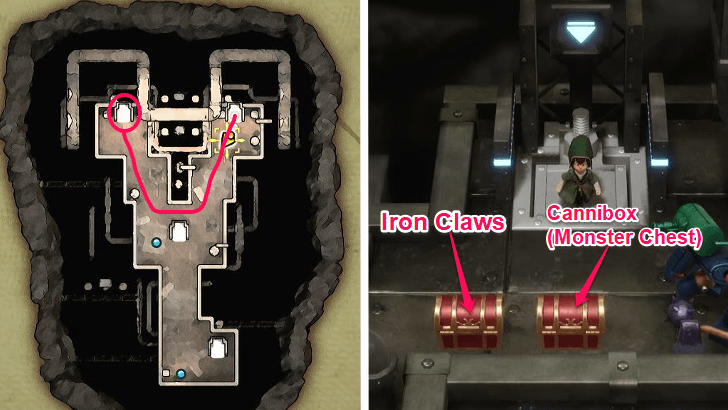 To reach the two treasure chests from the previous level, head to the northwestern elevator. The treasure chest right in front of the elevator is a Cannibox, while the one on the left contains Iron Claws. |
| 4 |
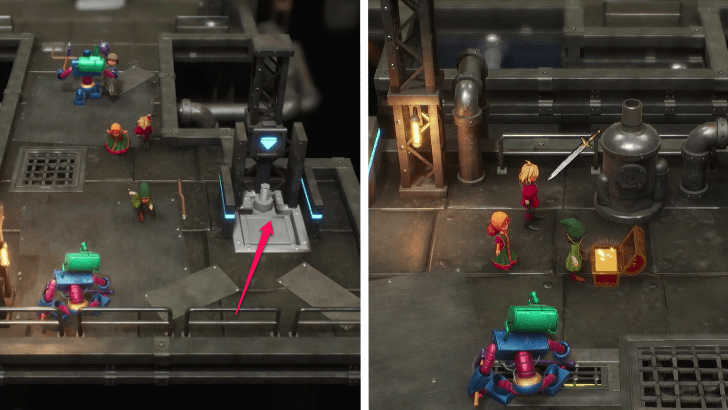
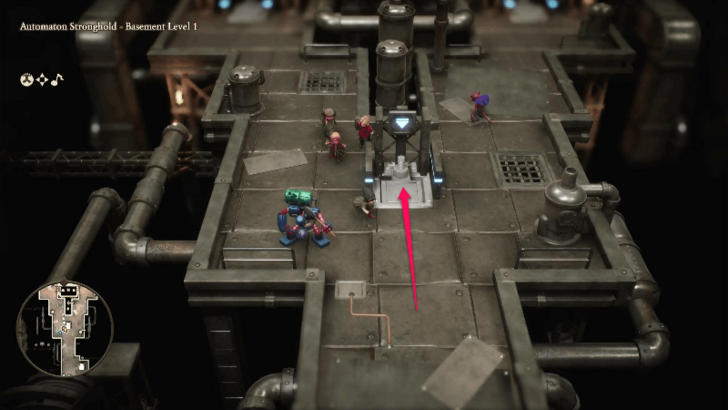 Go back to Basement Level 1 and take the elevator in the middle. Ignore the elevator at the southeastern corner as it is inaccessible at this point. |
| 5 |
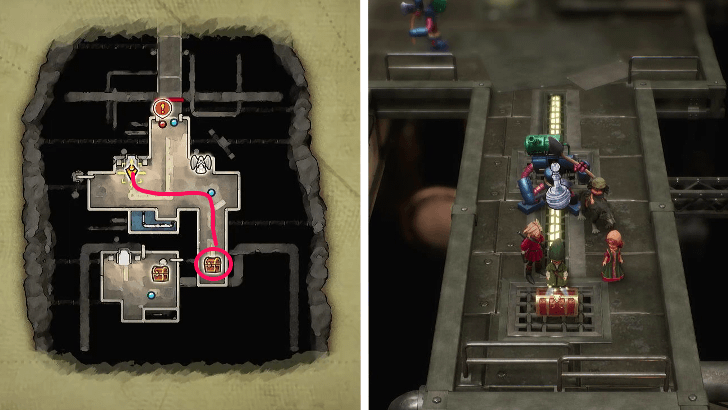 Do not interact with the NPC that has an exclamation point on his head yet. Instead, head to the southeastern path to open the treasure chest and obtain the Magic Water inside. |
| 6 |
 Heal at the angel statue and save your progress first before interacting with the NPC as this activates a battle with The Automatrist and an Automaton. Use Maribel's Bang skill at The Automatrist to deal more damage and cast Buff on everyone as both enemies deal physical damage. |
| 7 |
 After defeating The Automatrist and the Automaton, heal at the statue again as you will be facing three back to back boss fights in the next room. When you are ready, head to Basement Level 2 and interact with the NPC in the middle of the area. |
| 8 |
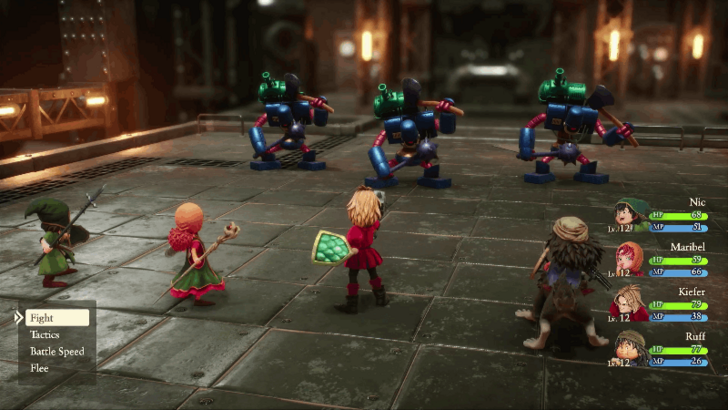 The first phase is a battle with three Automatons. Use skills that exploit their weaknesses such as Kiefer's Lightning Slash and use healing items to conserve your MP for the next two boss fights. |
| 9 |
 The second phase is a boss battle with Tinpot Dictator and two Automatons. Focus on dealing damage to the Tinpot Dictator as the Automatons will appear again whenever he calls for backup. Cast Buff on the party member that the boss targets to prevent them from getting knocked out. |
| 10 |
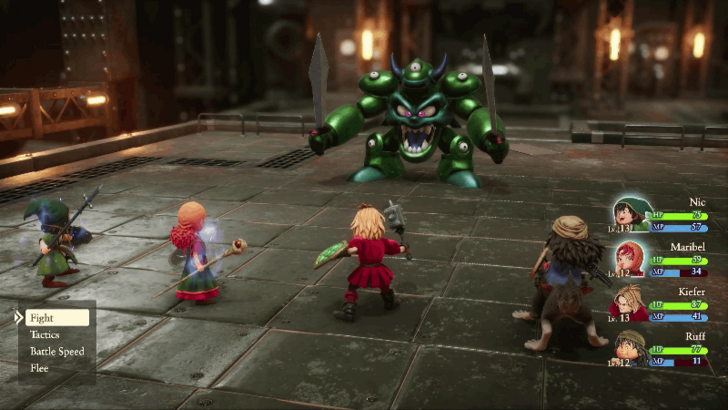 The third and last phase is a boss fight with Slaughtomaton. Use Maribel's Crack skill and Kiefer's Lightning Slash to deal more damage to the boss. Use the Hero to cast Buff and Heal when needed and have Ruff use attack or a skill if he still has MP. |
| 11 |
 After beating the bosses, backtrack to Basement Level 1 and take the elevator at the southeastern corner. Open the treasure chest to get a Steel Broadsword. |
| 12 |
 Exit the dungeon and head to the throne room of Faraday Castle. At this point, you can head back to the teleporter to return to the Shrine of Mysteries at the present era. |
Frobisher (Present)
| 1 |
 Visit the town of Frobisher at the present era. Enter the door under the bridge west of the inn to get the Yellow Fragment inside. |
|---|---|
| 2 |
 Head to Faraday Castle next and talk to King Faraday at the throne room for a cutscene. Head downstairs to activate another cutscene. |
| 3 |
 Head west to where the Institute of Automatry was in the past and enter to the main house. Approach the robot on the northeastern corner of the house to activate a cutscene. Exit the house to activate another cutscene. |
| 4 |
 Go back to the throne room in Faraday Castle and interact with E.L.L.I.E. |
| 5 |
 To reach the dungeon where Ambrose is held, head to the southern door that leads outside the throne room. |
| 6 |
 Go to the stairs at the eastern wing of the castle. Pull the lever to open the cell door and head downstairs. |
| 7 |
 Pick up the Gray Fragment at the east side of the room before speaking with Ambrose. He ask you to talk to his granddaughter at Frobisher to find the blueprints. |
| 8 |
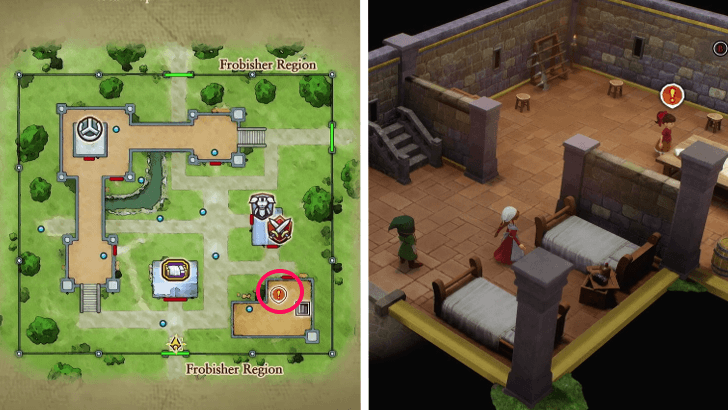 Go to Frobisher and talk to Ambrose's granddaughter at the house south of the equipment shop. |
| 9 |
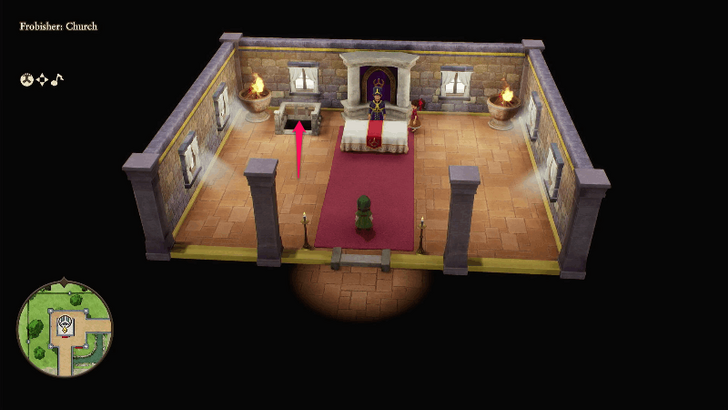 To reach the barrel near the waterway, head inside the Church and descend the stairs on the left side. |
| 10 |
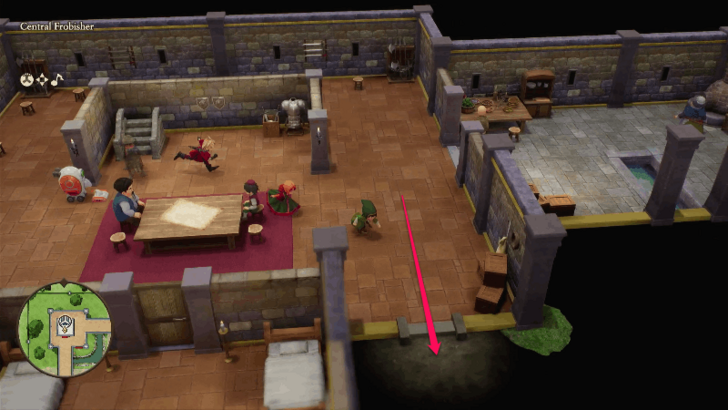 Find the exit at the southeast part of the house. |
| 11 |
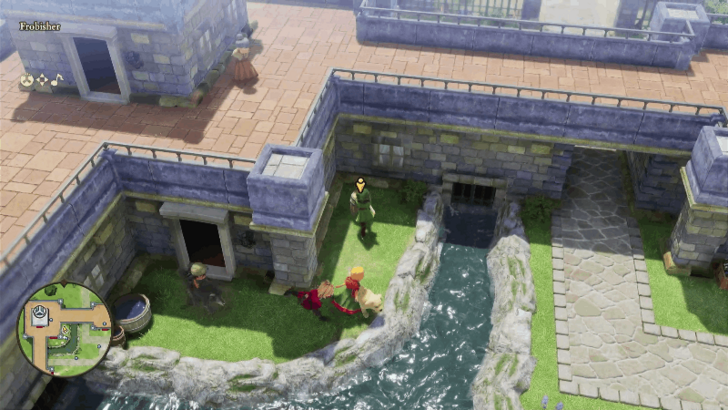 Approach the barrel and press the Confirm button to destroy it. Press the Confirm button again to obtain the blueprints and spare parts. |
| 12 |
 Head to the Laboratory room of Faraday Castle. After a long cutscene, you will receive a Yellow Fragment from Ambrose. At this point, you can head to the present day Automaton Stronghold to get 300 Gold Coins from the single treasure chest at Level 1 or head straight to Shrine of Mysteries to unlock the next island. |
Unlocking the Next Island
| 1 |
 Use Zoom to fast travel to the Shrine of Mysteries. Assemble the Yellow Fragments you have collected to form a second Yellow Tablet that transports you to the sixth island, Roamer Encampment Region. ▶︎ Jump to Roamer Encampment Walkthrough |
|---|
Hubble Region
| Jump to a Section | ||
|---|---|---|
| Rucker Castle | Hubble Castle | Grand Conjuratorium |
| Falls Hollow | Hubble Castle (Part 2) | Estard Island (Present) |
| Hubble Region (Present) | ||
| Back to the Top | ||
Rucker Castle
| 1 |
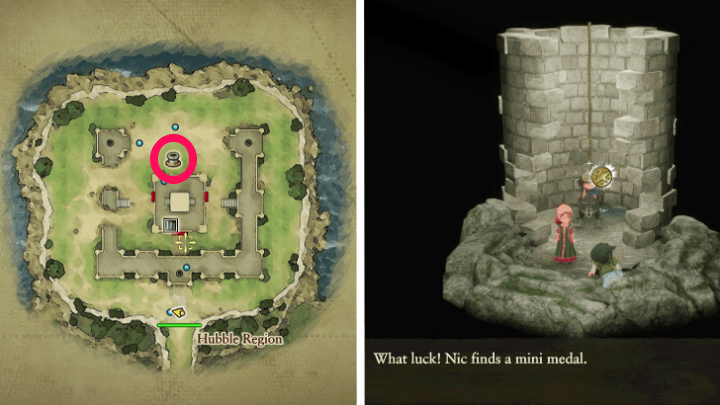 Head to the nearest castle northeast of the teleporter to reach Rucker Castle. Examine the well behind the castle and defeat the Scarewell. Enter the well and pick up the Mini Medal inside. |
|---|
Hubble Castle
| 1 |
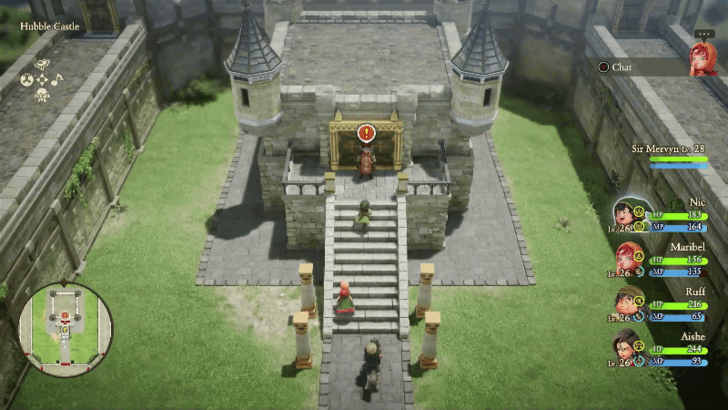
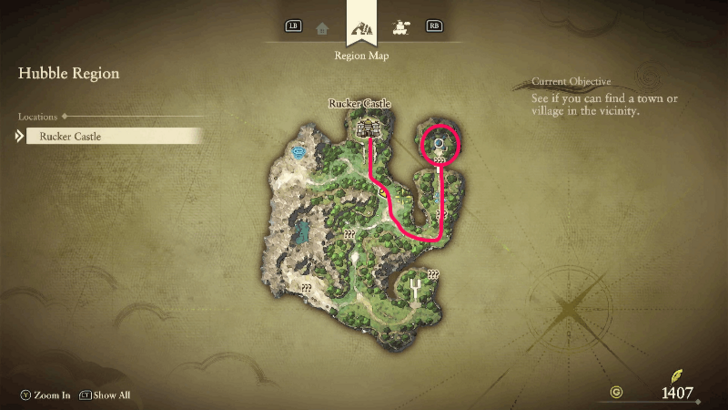 Exit Rucker Castle and east to reach Hubble Castle. |
|---|---|
| 2 |
 Talk to the soldier in front of Hubble Castle and select "Yes" for the dialogue option. |
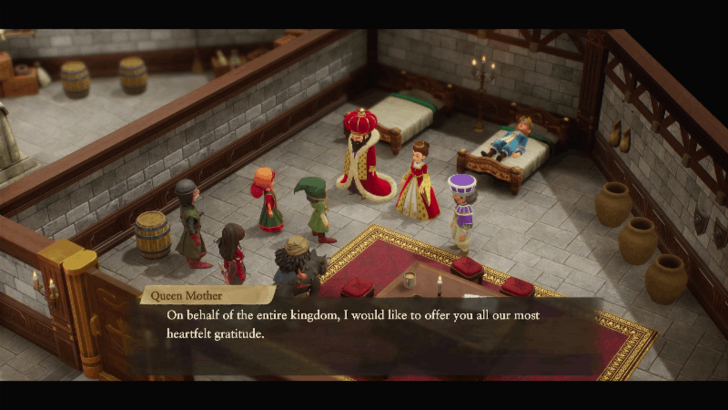
| 3 |
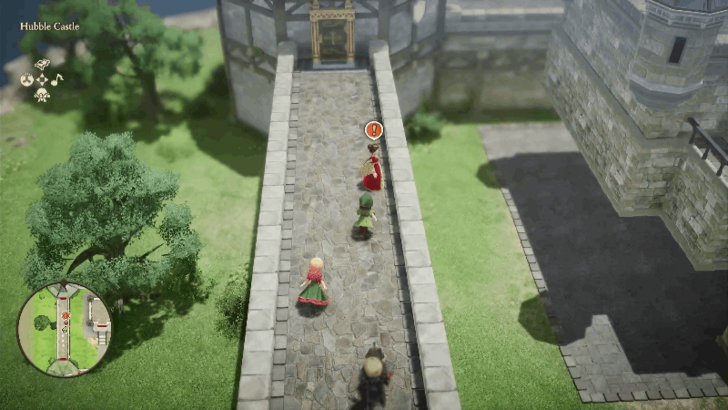 Go to the second floor of the west tower and talk to the Queen Mother at the passageway to receive the Queen Mother's missive. |
Grand Conjuratorium
| 1 |
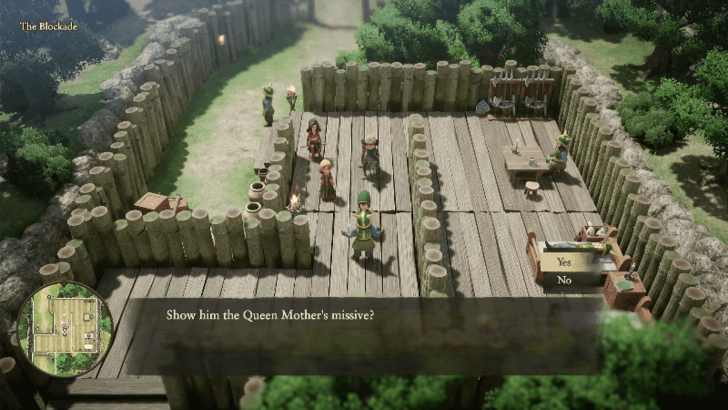 Head southwest of Hubble Castle to enter The Blockade. Show the Queen Mother's missive to the guard to allow you to pass through and exit from the south part of the area. |
|---|---|
| 2 |
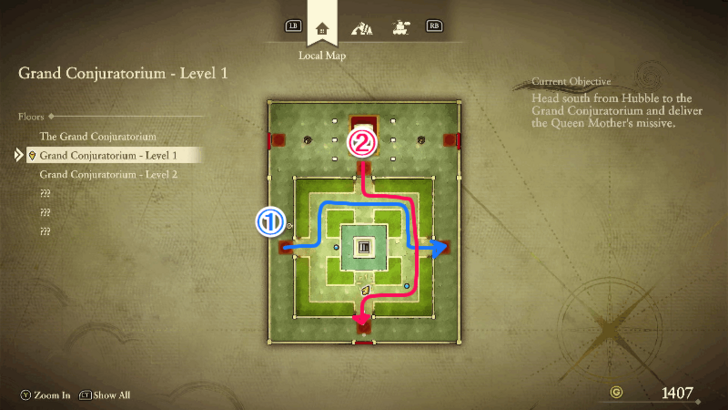 Optional: Solve the puzzle on Level 1 of the Grand Conjuratorium to obtain the Magic Wand and Echo Hat from the basement. To solve the puzzle, enter Level 1 from the west side and exit from the east side. Then, enter from the north side and exit from the south side. |
| 3 |
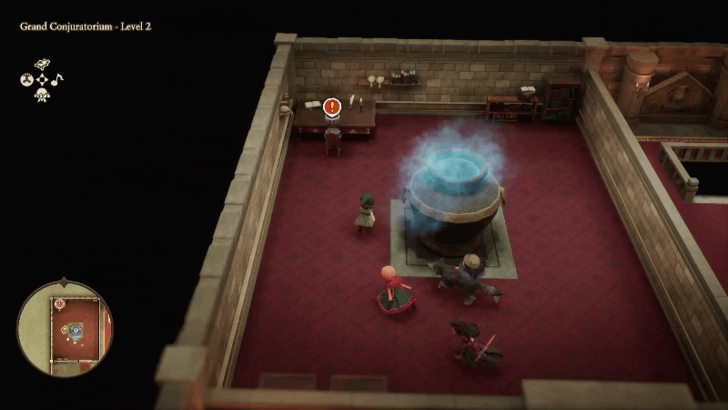 Go to Level 2 and speak with the man on the northwestern room. He will ask you to retreive the Starshard from the cave west. |
Falls Hollow
| 1 |
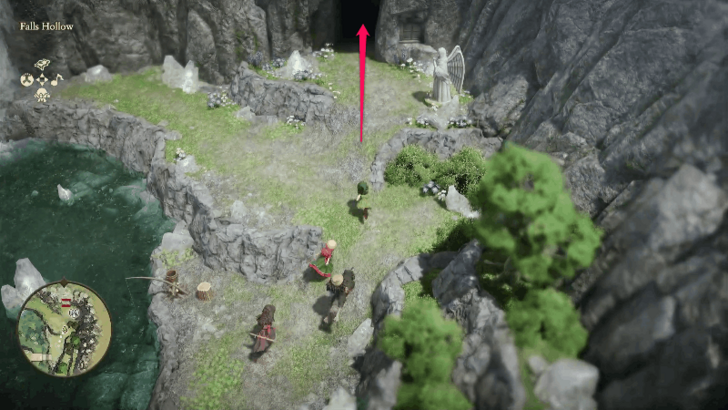 Make your way through the cave until you reach a part that you cannot pass through due to a waterfall. Enter the cave next to the angel statue once you reach that point. |
|---|---|
| 2 |
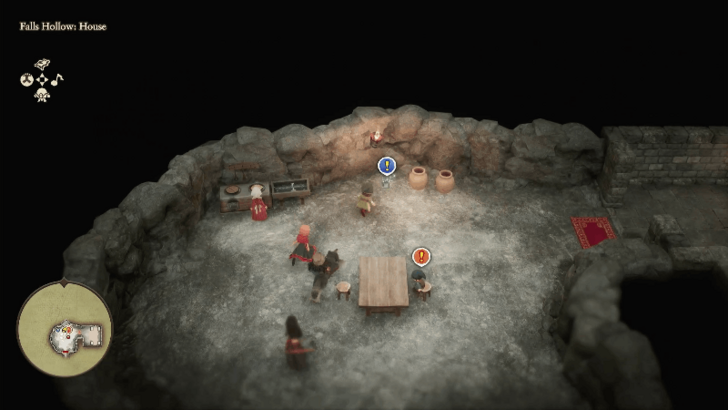 Pick up the Green Fragment inside the cave. Talk to the residents of the cave and agree to stay the night. This makes the waterfall disappear, allowing you to pass through. |
| 3 |
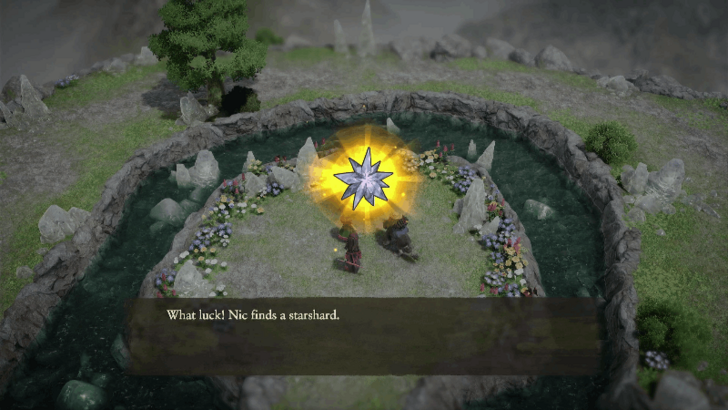 Pick up the Starshard at the top of the cave. |
| 4 |
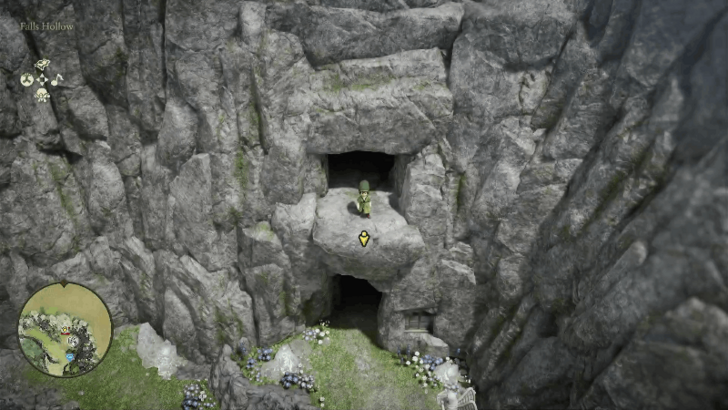 Backtrack to Level 3 and head to the path east to reach the cliffside. Jump down from the cliffside and enter the teleporter to exit the cave. |
Hubble Castle (Part 2)
| 1 |
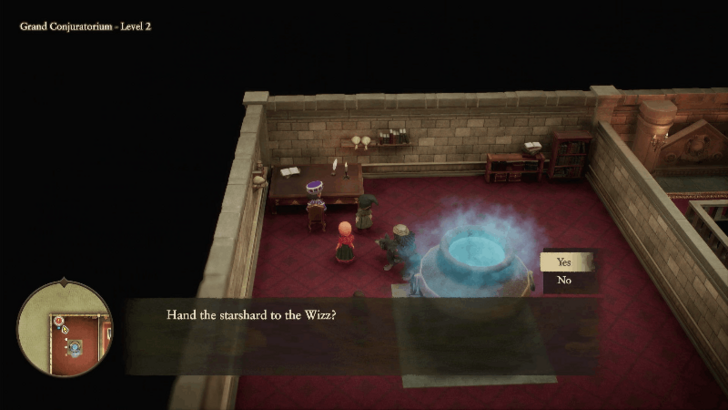 Return to the Grand Conjuratorium and hand over the Starshared to the Wizz to receive the Wizz's seal of approval. |
|---|---|
| 2 |
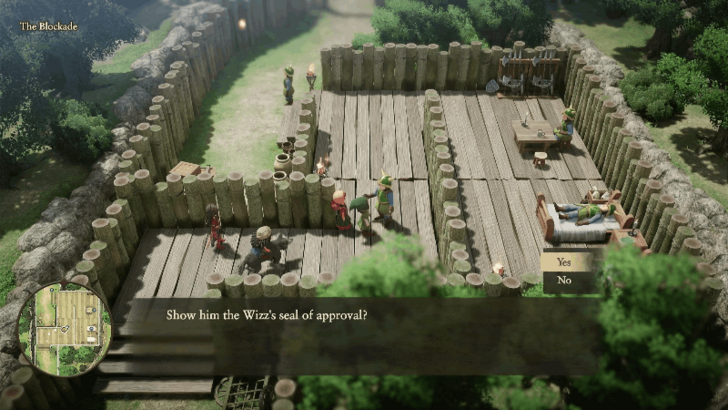 Enter The Blockade and show the Wizz's seal of approval to the guard to allow you to pass through. |
| 3 |
 Attempt to enter Hubble Castle to activate a cutscene and teleport you to the church. Head towards the castle again after the cutscene ends. |
| 4 |
 Show the guard in front of the castle the Wizz's seal of approval to enter inside. |
| 5 |
 Head to the center of the castle and talk to the soldier in fron of the throne room. Show the Wizz's seal of approval to enter. |
| 6 |
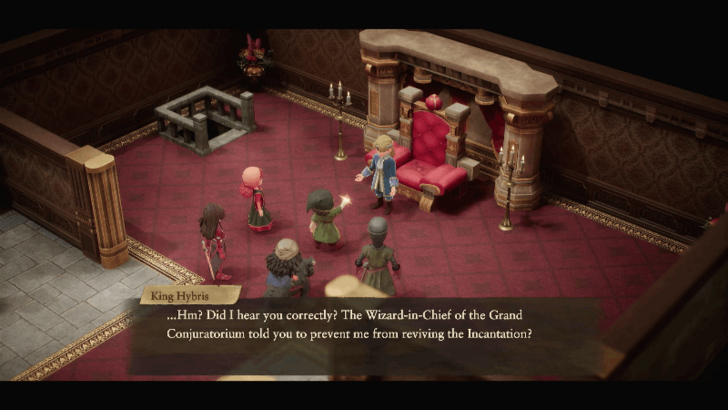 Talk to the king in the throne room to activate a boss fight with The Envoy. |
| 7 |
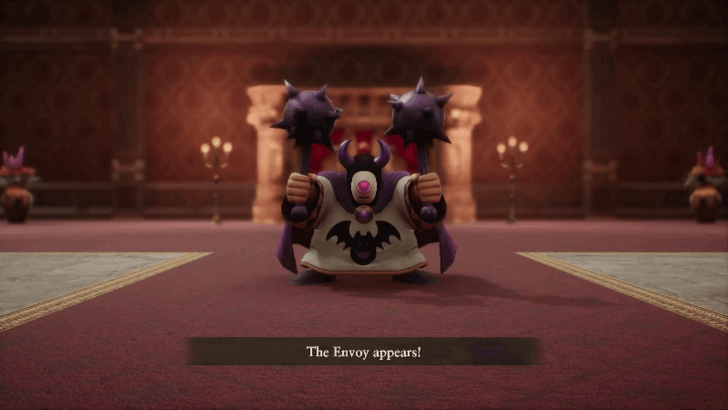 Focus on using physical attacks and applying buffs to defend against The Envoy's magic attacks. You can use buffs such as Battle Song and Muscle Dance to increase the party's physical attacks. Avoid using magic attacks as the boss can use a skill that reflects them back at your party members. |
| 8 |
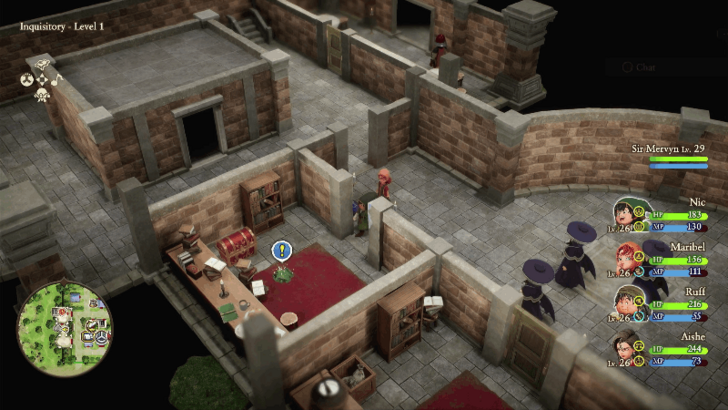
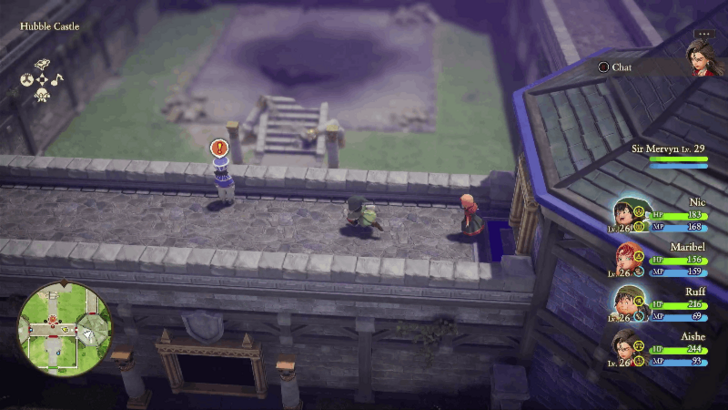
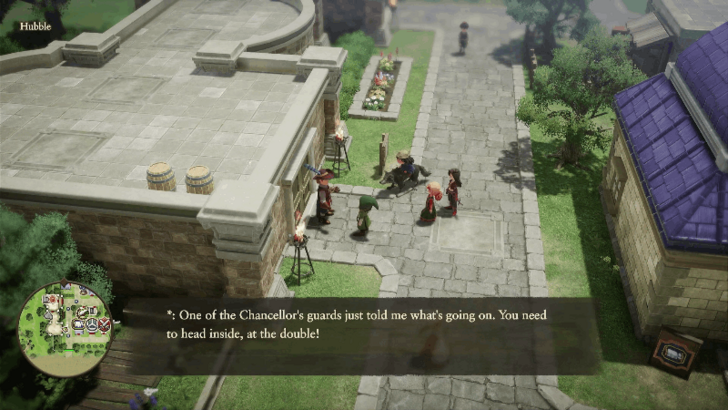 Exit the castle and head to the Inquisitory west of Hubble town. Talk to the guard in front of the entrance to allow you to pass. |
| 9 |
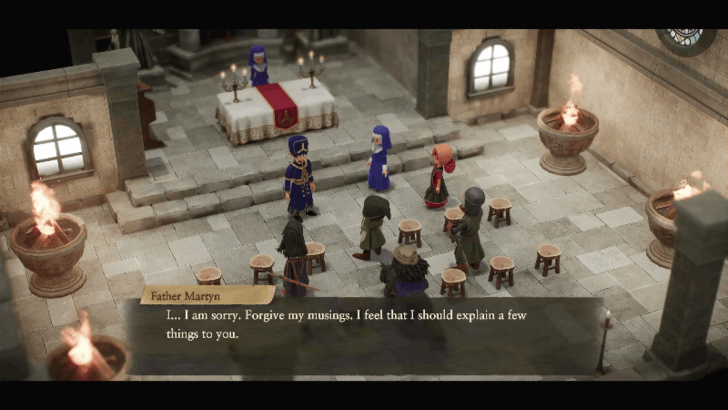
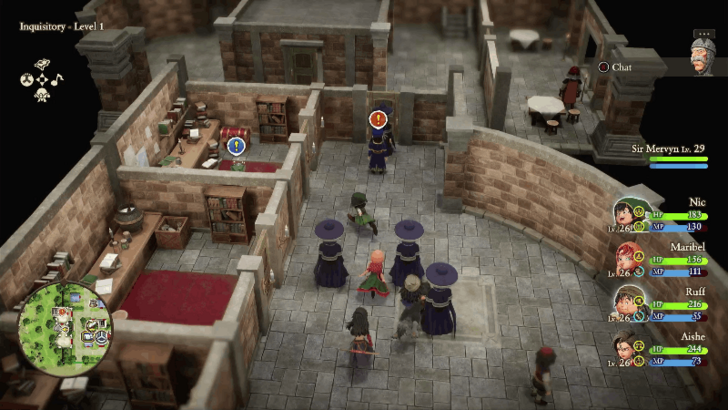 Approach Father Martyn to activate a cutscene, allowing you to proceed further inside. |
| 10 |
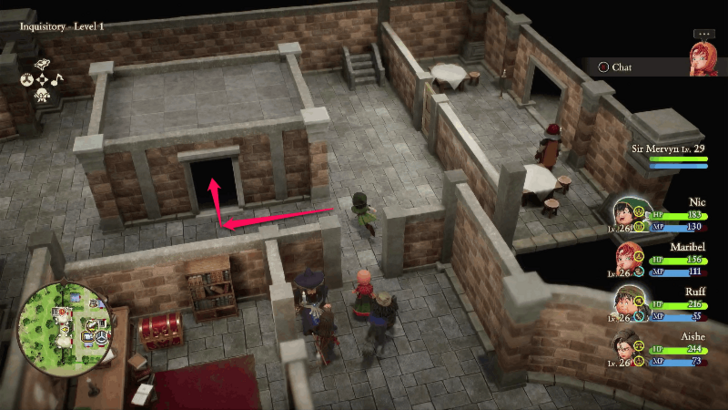
 Pick up the Green Fragment in the room west of the hallway. |
| 11 |
 Head to the basement to activate a cutscene. |
| 12 |
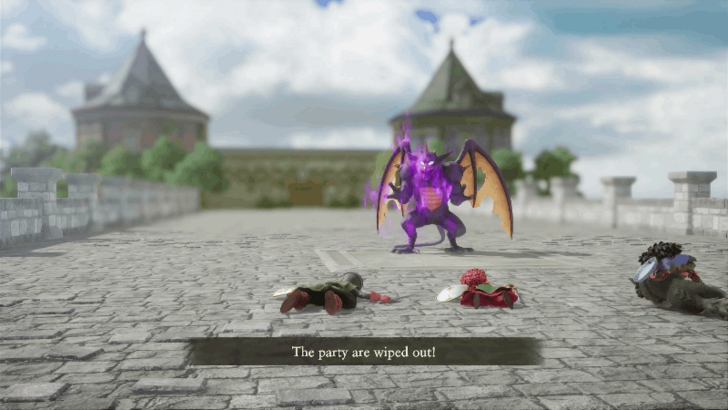 Follow the king to the bridge connecting to the castle for a scripted boss fight. Wait for the boss to knock out all your party members to progress the story. |
| 13 |
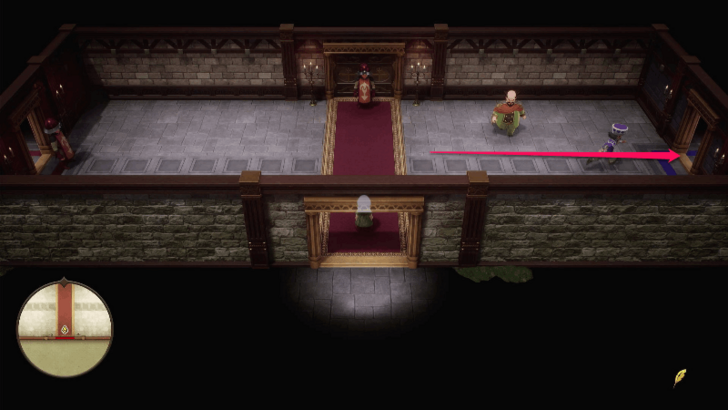 After the cutscene ends, follow the Wizz east to reach the second floor of the castle. |
| 14 |
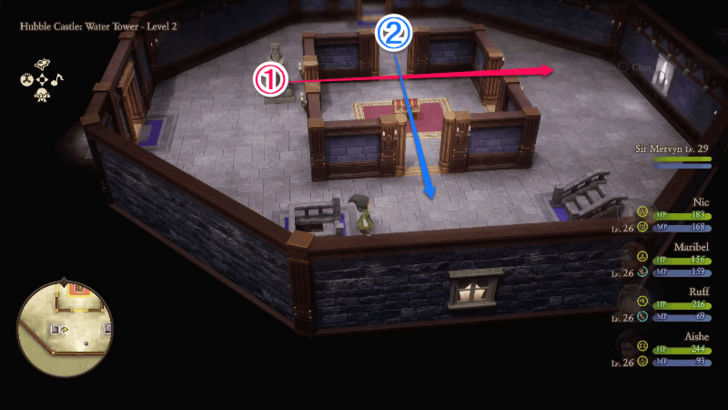 Get the Princess Robe from the treasure chest on Level 1 then head up the stairs to reach Level 2. To unlock the treasure chest on Level 2, go through the wall from west to east, and then north to south. You will get a Glowing Holy Water from it, which you can exchange later on. |
| 15 |
 Head west from Water Tower - Level 2 to talk to the Wizz to weaken Hybris. Head downstairs and towards the former throne room and interact with Hybris to start the boss fight. |
| 16 |
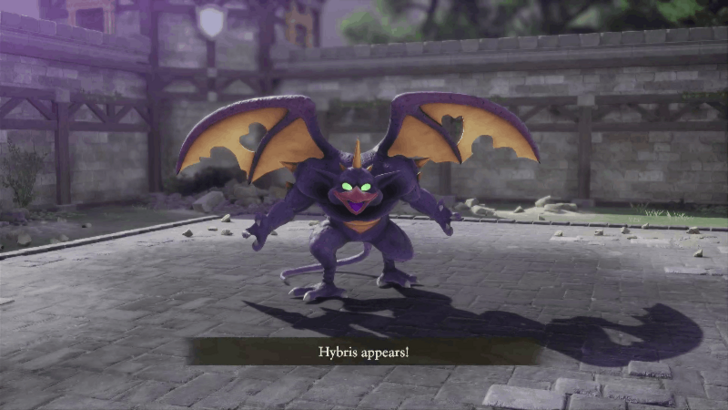 Hybris uses magic attacks and buffs that increase magic resistance. Focus on using physical attacks and use Troubadour's skills to increase fire and ice elemental resistances to all party members. |
| 17 |
 After defeating Hybris, you are free to return to Estard island. If you picked up the Glowing Holy Wayter, you can hand it over to the man on the first floor of the southwest tower to obtain a Thunder Staff. In addition, you can watch an optional cutscene of Father Martyn if you stop by the church. |
Estard Island (Present)
| 1 |
 When you teleport back to the Shrine of Mysteries, a cutscene will activate and Maribel will leave the party temporarily. Head to Pilchard Bay. |
|---|---|
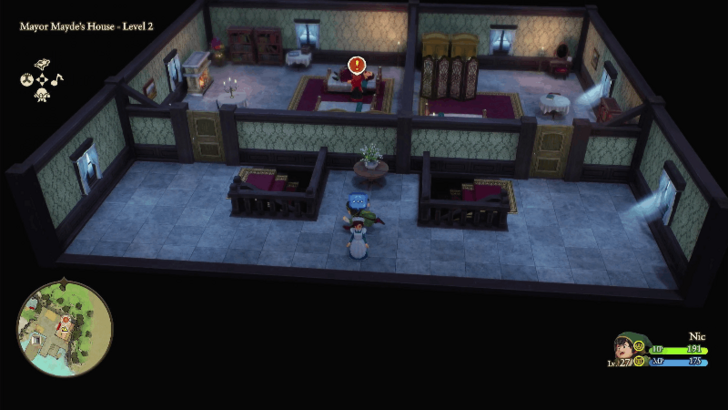
| 2 |
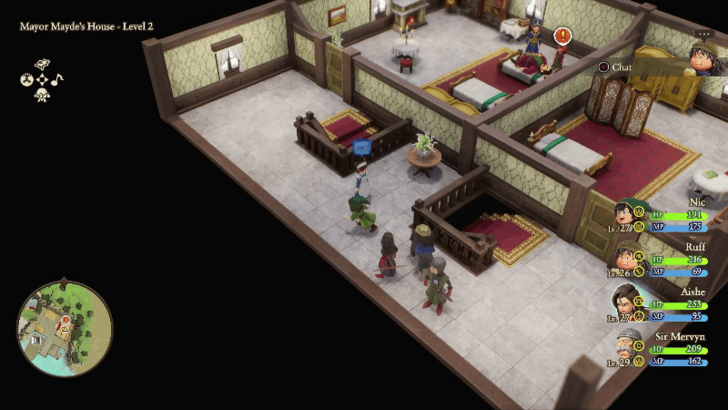 Head to Maribel's mansion east of the town. Go up to the second floor to activate a cutscene. |
| 3 |
 Head to the center of Pilchard Bay to activate the cutscene. After that, talk to your party members inside your house at the first floor. |
| 4 |
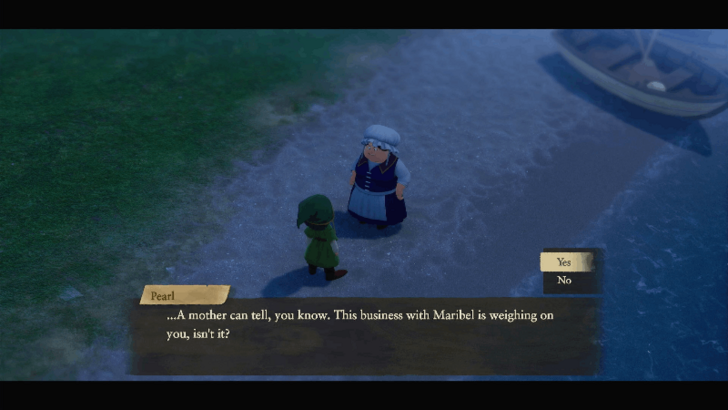 Leave the house and talk to Pearl at the center of the town. This activates a cutscene where you control the Hero in a flashback sequence. |
| 5 |
 You will teleport to the second floor of your house in a flashback scene. Head down the ladder to the first floor to activate a cutscene. |
| 6 |
 Leave the house and go to Maribel's mansion and talk to the woman in front of the stove at the first floor. |
| 7 |
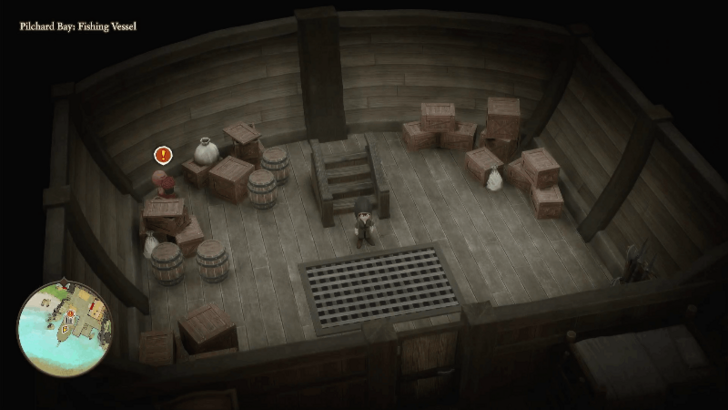 Go inside the ship and talk to Maribel near the boxes and barrels. |
| 8 |
 Once the flashback sequence ends, go to Maribel's mansion and talk to her at the second floor. |
| 9 |
 After the cutscene ends, you will be back at your home. Head to the northern exit and talk to Maribel nearby to have her join the party again. Note that Maribel's equipment will change back to its inital loadout, so make sure to change it. |
Hubble Region (Present)
| 1 |
 Travel to Hubble Castle in the present era and go to the throne room. Talk to Euphonia to obtain a Green Fragment. |
|---|---|
| 2 | Go to the second floor of the southeast tower of Hubble Castle. Unlock the treasure chest by going through the wall surrounding it from west to east, then north to south to obtain a Mink Coat. |
| 3 |
Go to the Grand Conjuratorium next and head to Level 1. Solve the puzzle the same way by entering from the west side and exit from the east side. Then, enter from the north side and exit from the south side. This unlocks a mechanicsm at the underground area and lets you obtain a Tablet Fragment and a Mini Medal on the largest tombstone. |
| 4 |
 Once you are ready to progress the story, fast travel to the Shrine of Mysteries and assemble the Green Fragments to form the Green Tablet that transports you to the next island, Aeolus Vale. ▶︎ Jump to Aeolus Vale Walkthrough |
Green Tablet Walkthroughs
| Jump to a Section | ||
|---|---|---|
| Prologue | Yellow Tablets | Red Tablets |
| Green Tablets | Grey Tablets | Blue Tablets |
| Endgame | ||
| All Green Tablet Sections | ||
| L'Arca | - | - |
L'Arca Region
| Jump to a Section | ||
|---|---|---|
| L'Arca | Grotta del Sigillo | Unlocking the Next Island |
| Back to the Top | ||
L'Arca
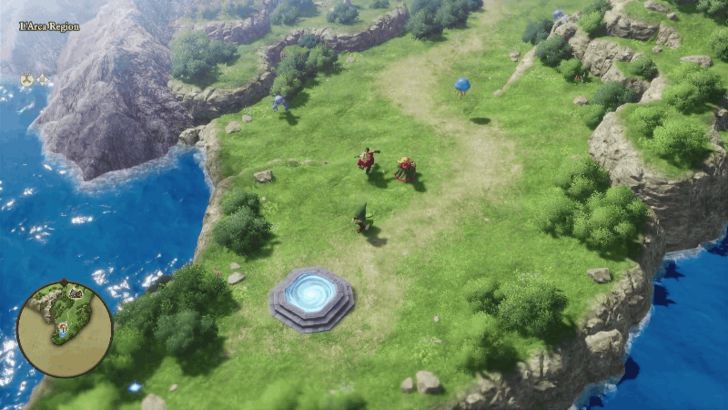
| 1 |
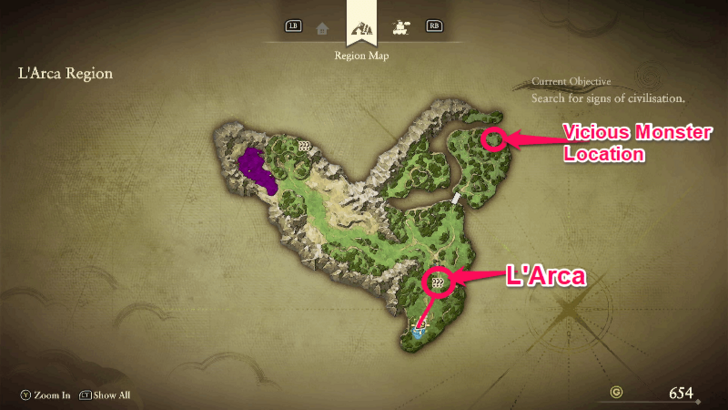 Head northeast to reach the town of L'Arca. You can head further northeast to reach the peninsula that contains a Vicious Monster. |
|---|---|
| 2 |
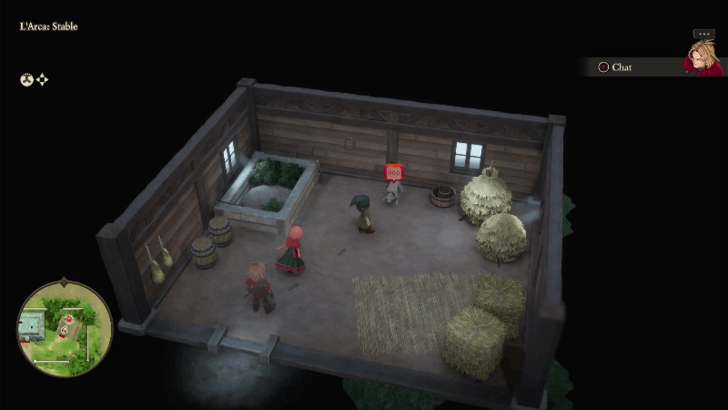
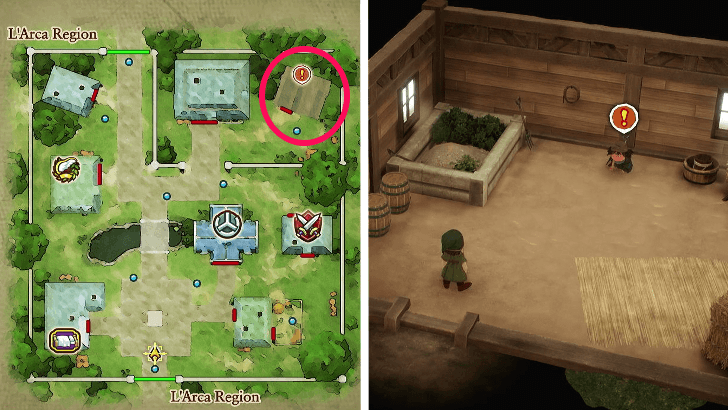 Head to the stable at the northeastern part of the map and speak with the child inside. |
| 3 |
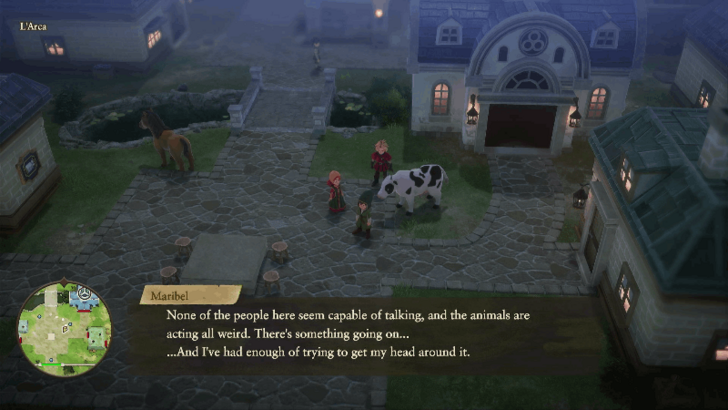 Exit the stable and talk to the animals outside until Maribel and Keifer decide to mention heading to the inn to rest until the morning. Head to the inn at the southwestern corner of the town and talk to the cow inside to rest. |
| 4 |
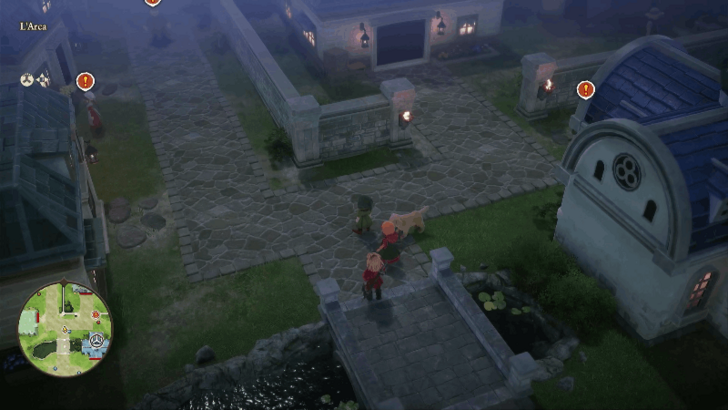 Go outside after the cutscene ends and talk to the villagers that have the exclamation marks above their heads. The man in green near the town's exit will hand you over the Collar Key when speaking with him. |
| 5 |
 Go in the barn and free the wolf using the Collar Key. The wolf will transform into the child from before and will run outside the town. |
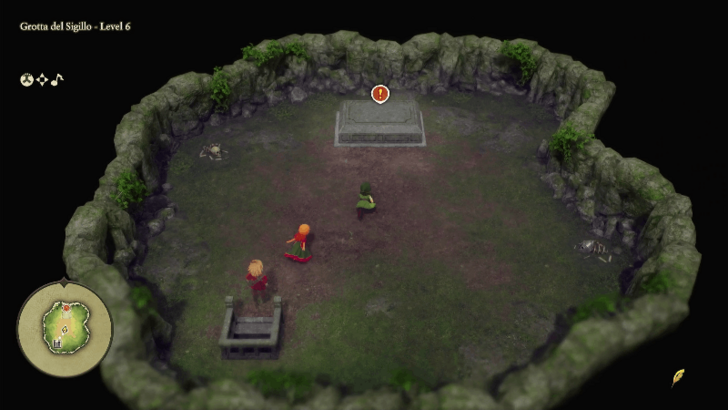
Grotta del Sigillo
| 1 |
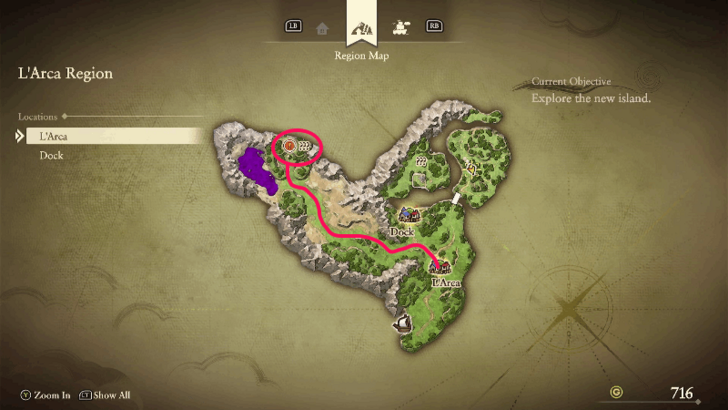
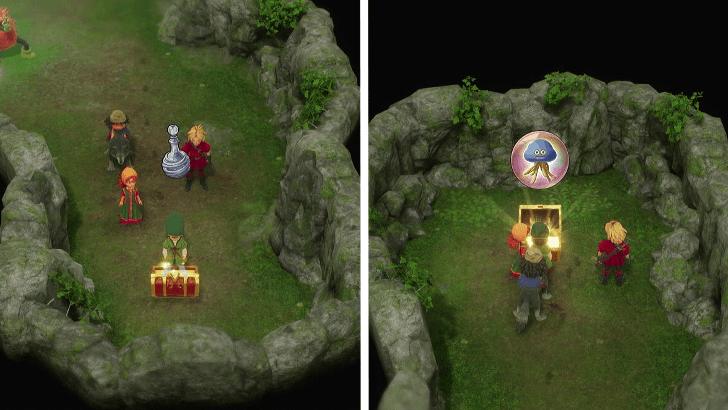
 Exit the town and follow the child in the overworld. He will lead you at the northwestern part of the region towards the cave called Grotta del Sigillo. This dungeon contains enemies that can poison your party members. Use the Hero's Squelch skill or an Antidotal Herb to cure them of the status ailment. |
|---|---|
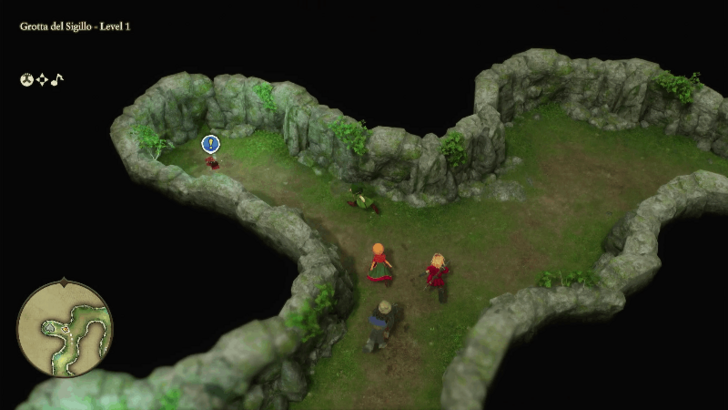
| 2 |
 The dungeon is fairly straightforward and does not have that many paths. Once you reach Level 2, head west to pick up the Red Fragment. Open the two treasure chests in the area to get 200 Gold and an Iron Lance. |
| 3 |
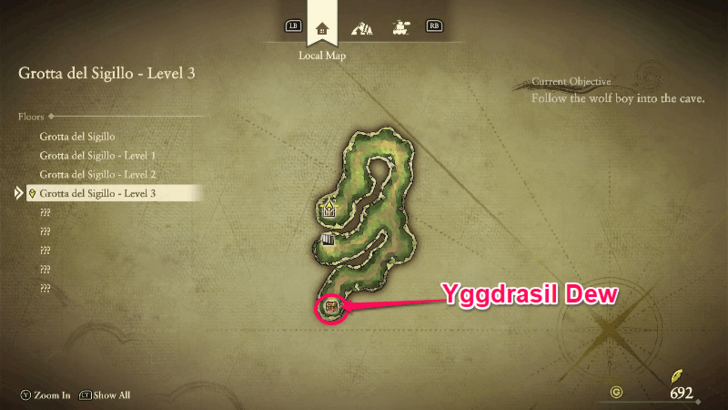 At Level 3, head south to open the treasure chest that contains an Yggdrasil Dew. Head up the stairs after. |
| 4 |
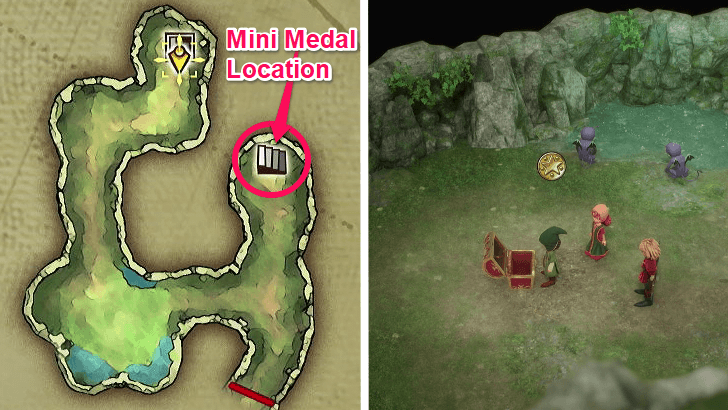 Before heading to the path south that leads outside, go up the stairs north to enter a small area within Level 5 that contains a treasure chest with a Mini Medal inside. |
| 5 |
 Once you reach the top of the grotto, head west and defeat the Drake Slime that is blocking the entrance. Head inside to open the treasure chest to get a Wizard's Staff. Equip it to Maribel. |
| 6 |
 Go back outside and enter the small opening on the mountain for a cutscene. Save your progress at the angel statue before proceeding the stairs. |
| 7 |
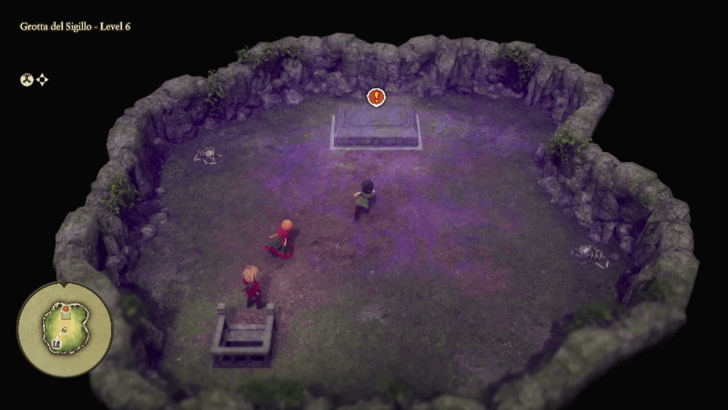 Interact with the coffin to start the boss fight with Hackrobat. Make sure to apply Buff to all your party members as the boss deals high damage when attacking. |
| 8 |
 You will teleport back to L'Arca after beating Hackrobat. Return to the portal south of the town to travel back to the Shrine of Mysteries. Ruff will join the party as you head back to the present era. |
Unlocking the Next Island
| 1 |
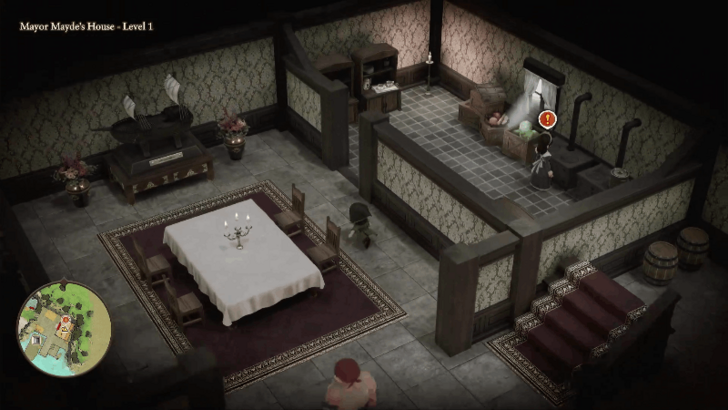
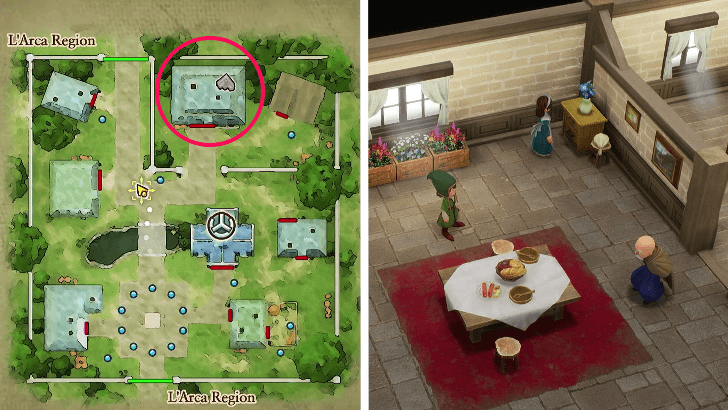 Use the ship to travel to the L'Arca region west of Estard Island in the present day. Head to L'Arca first and go to the Mayor's House. |
|---|---|
| 2 |
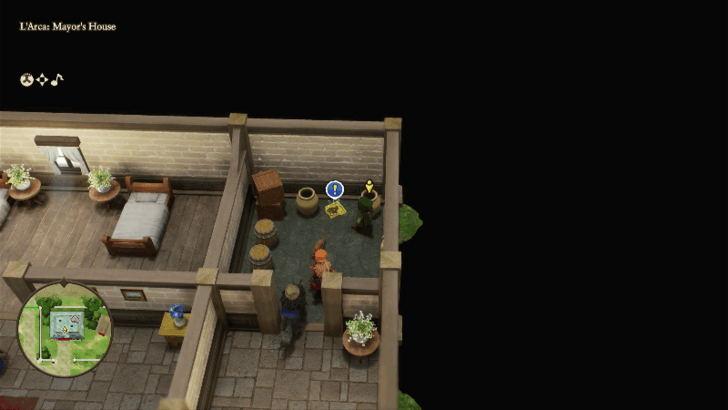 Before you open the upper drawer on the left side, go to the room on the top-right corner to pick up the Yellow Fragment. |
| 3 |
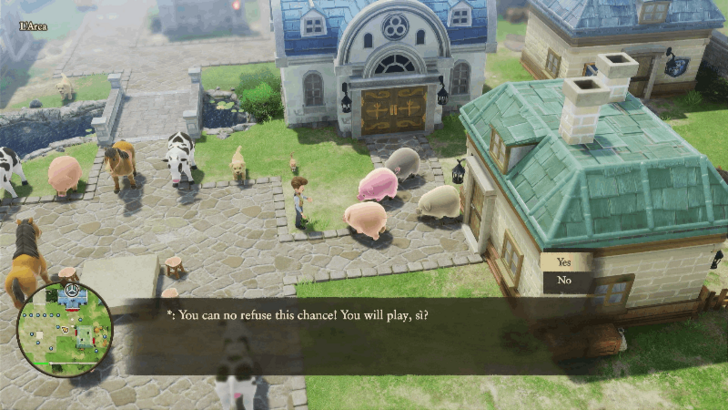 Open the upper draw to dress up as pigs. Go outside and talk to the man with the moustache near the animals to start a minigame. |
| 4 |
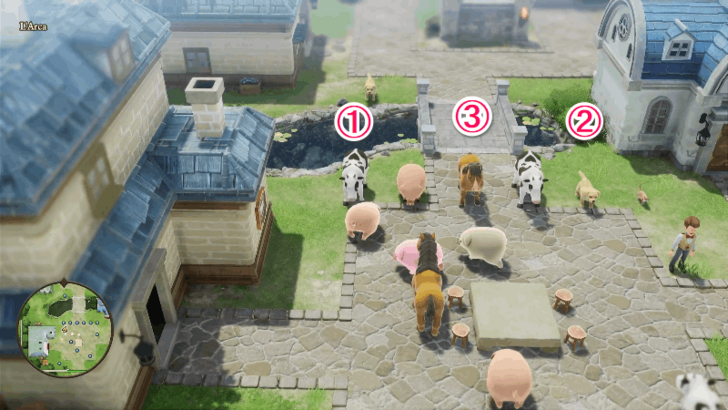 To complete the minigame, pick the cow on the far-left first, then the yellow dog second, and the horse as the third and last one. You will receive a Ruby of Protection as a reward. |
| 5 |
 Exit the town and head to Grotta del Sigillo next. The layout of the dungeon remains the same and includes new treasure chests to open located at the same areas. |
| 6 |
 At Level 1, open the treasure chest at the eastern path near the entrance to obtain a Seed of Life. Head to the western path in the middle of the area to pick up the Red Fragment. |
| 7 |
 Open the two treasure chests at Level 2 to obtain Magic Water and a Healslime Heart. |
| 8 |
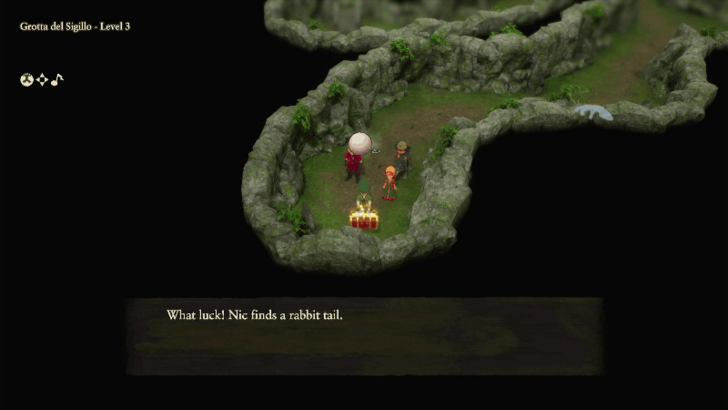 Open the treasure chest at Level 3 to get a Rabbit Tail. |
| 9 |
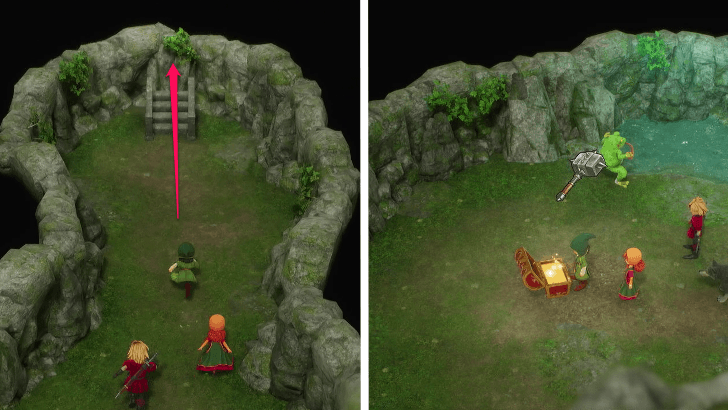 Enter Level 4 and head up the stairs first before going outside to get a Sledgehammer from the treasure chest. |
| 10 |
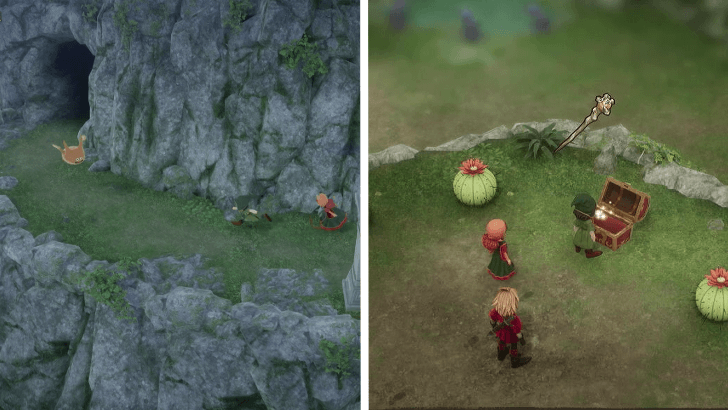
 Before you enter the cave that leads to Hackrobat's tomb, enter the cave on the left side and open the treasure chest to get a Mini Medal. |
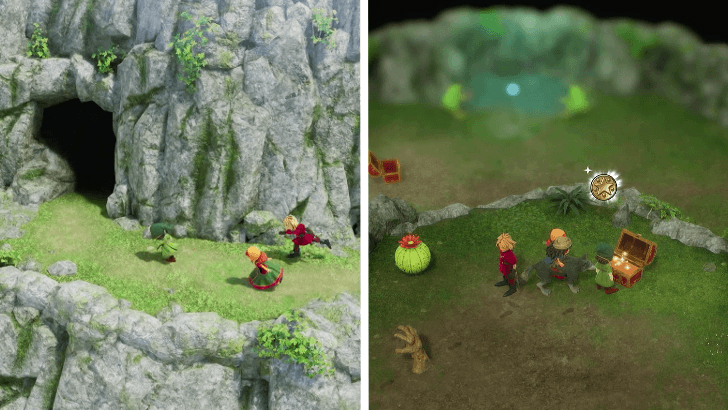
| 11 |
 Enter the cave leading to Hackrobat's tomb and select "Yes" for all the dialogue options. After the cutscene is done, fast travel to the Shrine of Mysteries. |
| 12 |
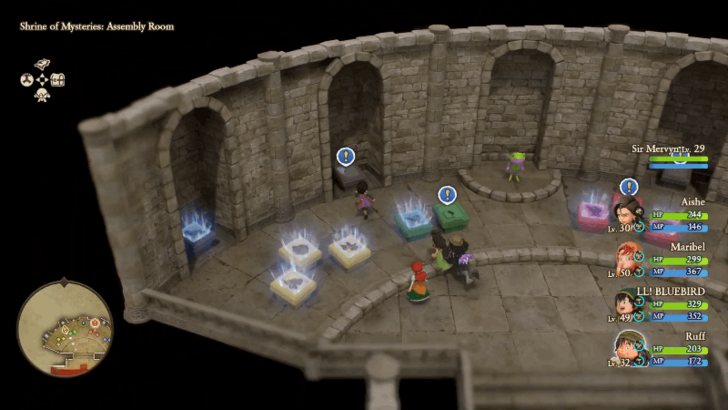
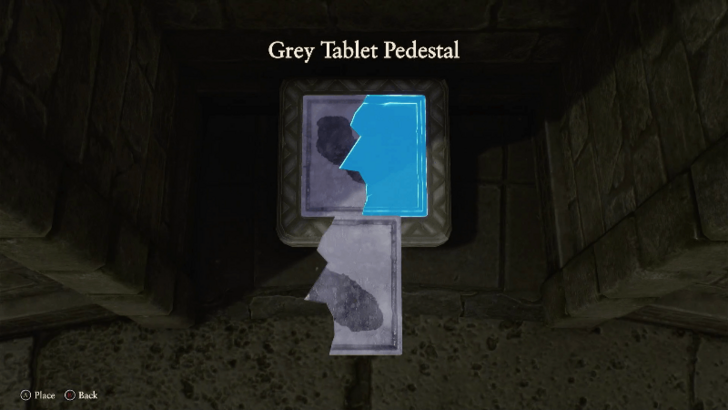 Interact with the gray pedestal behind the yellow pedestal. Assemble the Gray Fragments to form a Gray Tablet that transports you to the fourth island, Regenstein. ▶︎ Jump to Regenstein Walkthrough |
Aeolus Vale Region
| Jump to a Section | ||
|---|---|---|
| Aeolus Vale | Custodian's Camp | Sanctum |
| Aeolus Vale (Part 2) | Sanctum (Part 2) | Aeolus Vale (Part 3) |
| Aeolus Vale (Present) | ||
| Back to the Top | ||
Aeolus Vale
| 1 | Head north from the teleporter to reach the town of Aeolus Vale. |
|---|---|
| 2 | Head downstairs to the Praetor's house located above the inn. |
| 3 |
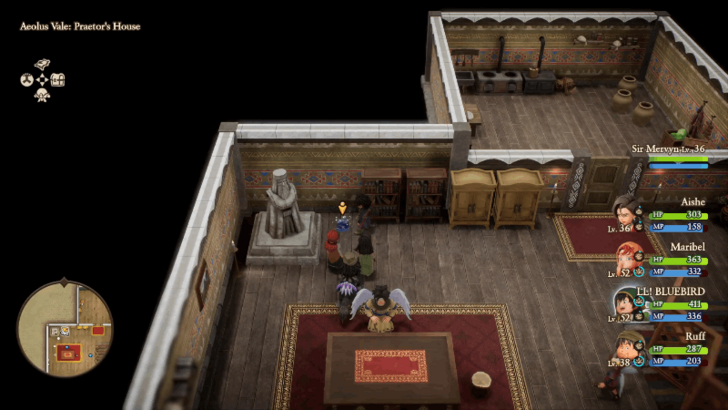 Pick up the Blue Fragment near the bookshelf and the statue. |
| 3 | Talk to The Praetor sitting in front of the table. Select "Yes" to help him and he will ask you to go to the Sanctum of the Cirrus to retrieve the Sacred Stone. |
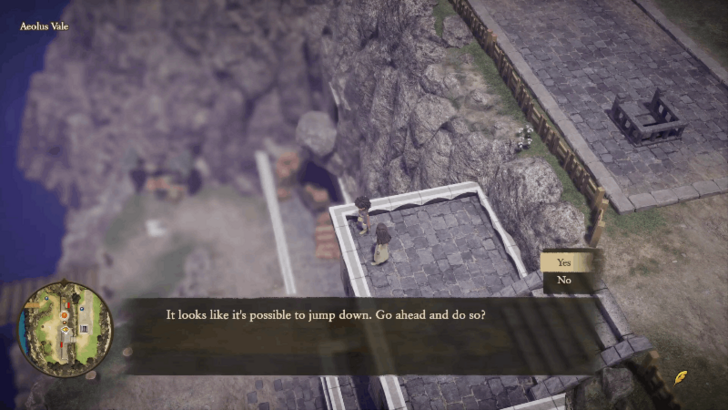
| 4 | Cross the bridge at the center of Aeolus Vale and move to the east side to activate a cutscene. After the cutscene, enter the nearby building and continue up the stairs. |
| 5 |
 Jump off the top floor of the building on the east side. Destroy the barrels to pick up the Mini Medal. |
| 6 | Exit Aeolus Vale from the north side and head north towards the small town. |
Custodian's Camp
| 1 | A cutscene will activate as you approach the building behind the well. You can head inside the building for another cutscene. |
|---|---|
| 2 |
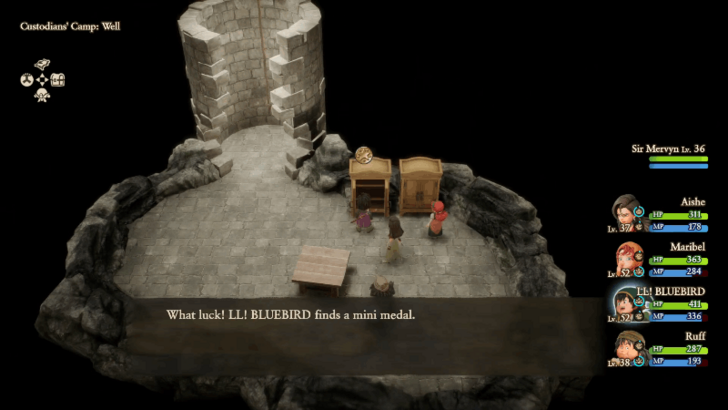 Interact with the well at the center of the camp and defeat the Well Wisher. Go inside and pick up the Mini Medal from the cabinet. |
| 3 | Once you are done exploring the camp, exit and head north to reach the Sullied Sanctum. |
Sanctum
| 1 | Explore the Sullied Sanctum and go to the very end for a boss battle. Make sure to open the treasure chests to get a Yggdrasil Leaf and Silver Mail along the way. |
|---|---|
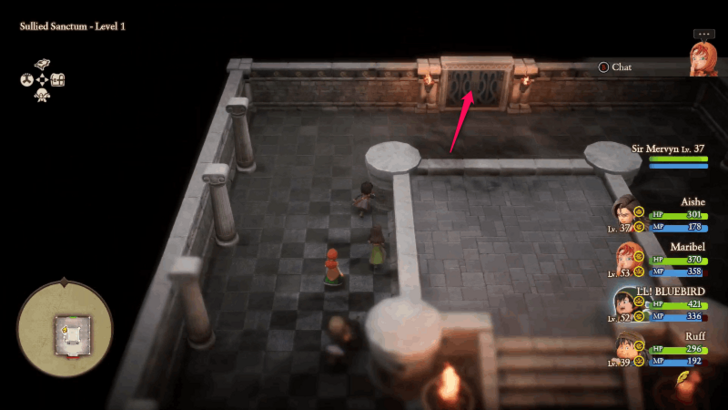
| 2 |
 When you reach an area that has the light reflection puzzle, move the pedestals so that the beam hits another mirror on a pedestal. This lights up a path that leads north towards the next area. |
| 3 |
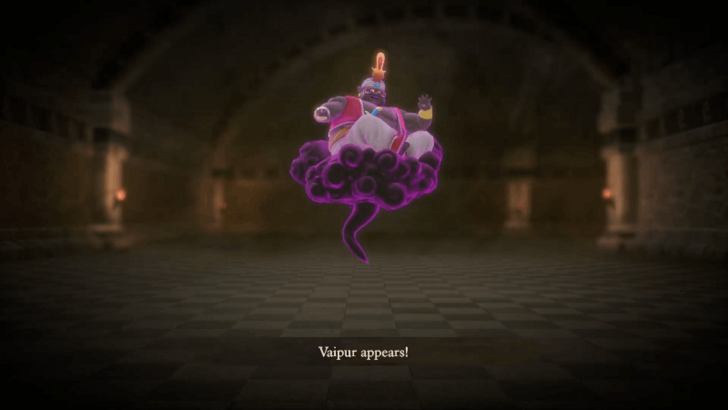 Once you reach the end of the dungeon, you will face Vaipur in a boss fight. Use the Martial Artist's Flying Knee skill as it is effective against airbone enemies. Use a Troubadour's Melody of the Wind to protect yourself from wind-based attacks. |
| 4 |
 After the boss fight is done, go through the door north of the boss arena to exit the Sullied Sanctum. Continue north to reach the Sanctum of the Cirrus. |
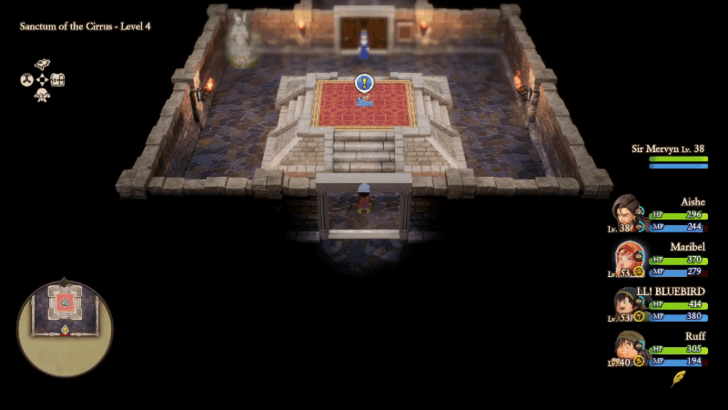
| 5 |
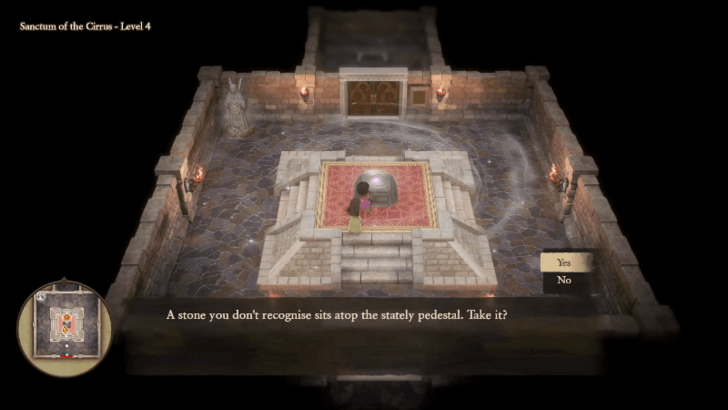 Head to Level 4 of the Sanctum of the Cirrus. Go to the back room and collect the Sacred Stone. Cast Zoom to fast travel back to The Praetor's house in Aeolus Vale. |
Aeolus Vale (Part 2)
| 1 | Go to The Praetor's house and approach the room north to activate a cutscene. Talk to the woman on the table after. You will automatically stay at the inn for one day after the cutscene ends. |
|---|---|
| 2 | Go to The Praetor's house again for a cutscene and you will receive a Stone of Life. |
| 3 | Enter the building on the east side to activate a cutscene. Afterward, return to The Praetor's house and talk to him. |
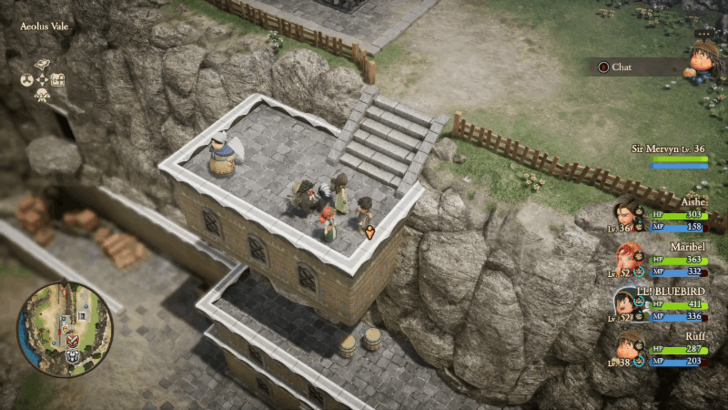
| 4 |
 Head to the roof of the building on the east side. After the cutscene, jump down from the building and approach Fidelia on the first floor. |
| 5 | Return to The Praetor's house and talk to the woman inside. You will receive the Sacret Stone from Fidelia after. Exit the town and head back to the Sanctum. |
Sanctum (Part 2)
| 1 | Head back to Level 4 of the Sanctum of the Cirrus. Place the Sacred Stone back to its pedestal. |
|---|---|
| 2 | Examine the door at the back of the pedestal to proceed. The door opens this time as you have Fidelia with you. |
| 3 |
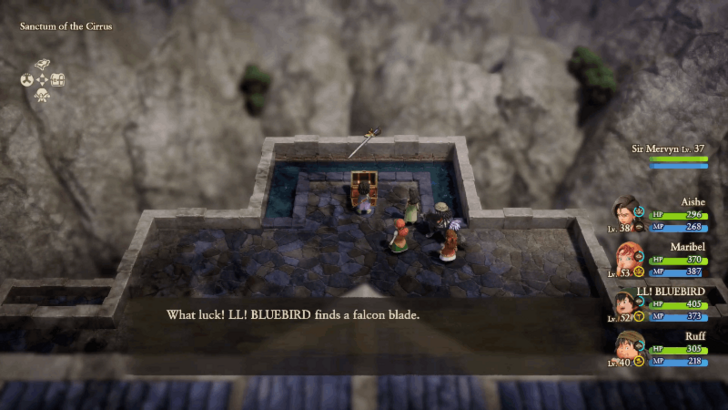 Head to the roof of the sanctum and open the treasure chest on the north side to obtain the Falcon Blade. This weapon allows you to attack twice, so it is recommended to pick it up. |
| 4 |
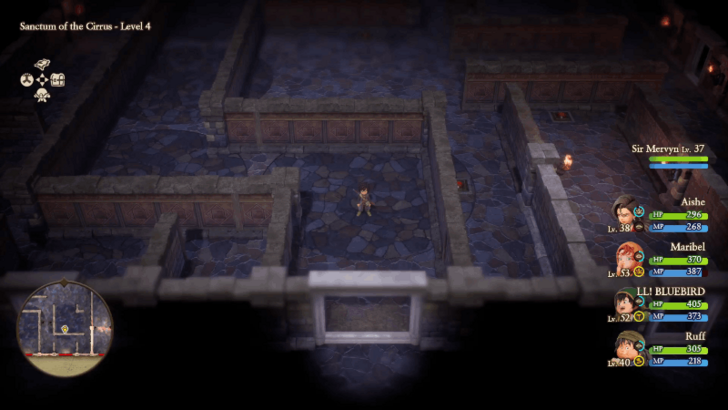
 Go back to the stairs on the east side of the roof and head to the door west. |
| 5 |
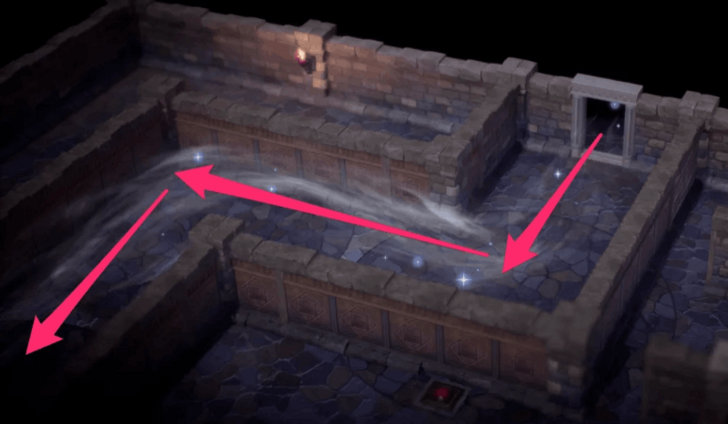 Step on the switches to create a wind path that leads from the north side to the south side. Start by pressing the switch on the north side and press the remaining counterclockwise to create the wind path. |
| 6 |
 Exit through the south door to begin the boss battle. You can save at the angel statue first before proceeding. |
| 7 |
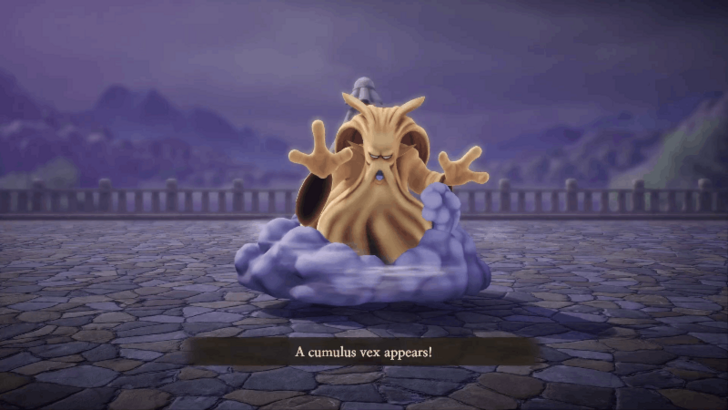 Cumulus Vex uses area-of-effect attacks so be sure to have a party member that has access to Multiheal to keep everyone's HP up. In addition, it is recommended to have items that restore HP as the boss can use a skill that seals magic. |
Aeolus Vale (Part 3)
| 1 | After defeating Cumuls Vex, exit the sanctum and return to Aeolus Vale. After the cutscene ends, head to The Praetor's house. |
|---|---|
| 2 | Exit The Prateor's house and approach Fidelia outside to receive the Sacret Stone. From here, you can head back to the teleporter to return to the present era. |
Aeolus Vale (Present)
| 1 |
 Use the Magic Carpet and head to the southwestern continent. Enter the Sanctum and retreive the Blue Fragment on Level 4. |
|---|---|
| 2 |
 Fast travel to the Shrine of Mysteries and assemble the Blue Fragments to form a Blue Tablet that transports you to the next island, Buccanham. ▶︎ Jump to Buccanham Walkthrough |
Gray Tablet Walkthroughs
| Jump to a Section | ||
|---|---|---|
| Prologue | Yellow Tablets | Red Tablets |
| Green Tablets | Grey Tablets | Blue Tablets |
| Endgame | ||
| All Gray Tablet Sections | ||
| Regenstein | Greenthumb Gardens | Vogograd |
| Nottagen | ||
Regenstein Region
| Jump to a Section | ||
|---|---|---|
| Regenstein | Unlocking the Next Island | - |
| Back to the Top | ||
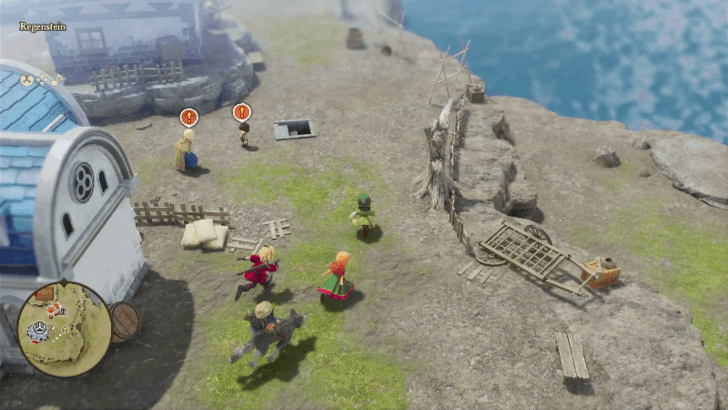
Regenstein
| 1 |
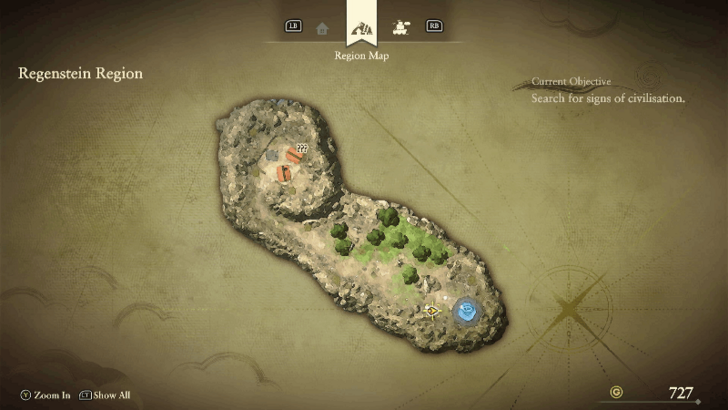 Head to the opposite side of the island to reach the town of Regenstein. |
|---|---|
| 2 |
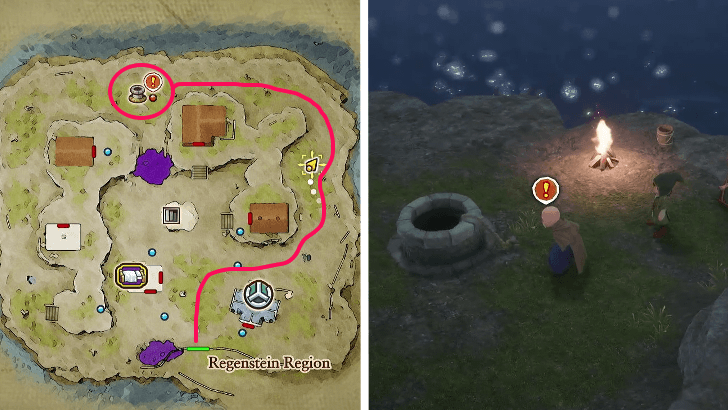 Talk to the old man standing near the well at the north side of the town. He will give you a bottle with angel's tears. Head to the inn to spend the night to progress the objective after. |
| 3 |
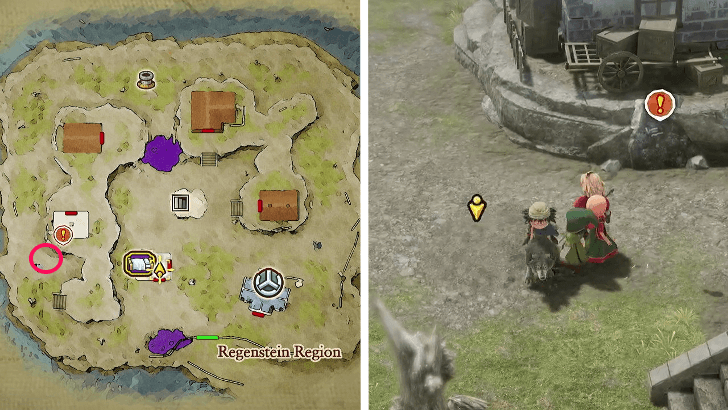 Find the hidden staircase on the left of the stone slab west of the inn. A yellow arrow will appear once you near its location. Interact with it to reveal the hidden staircase. |
| 4 |
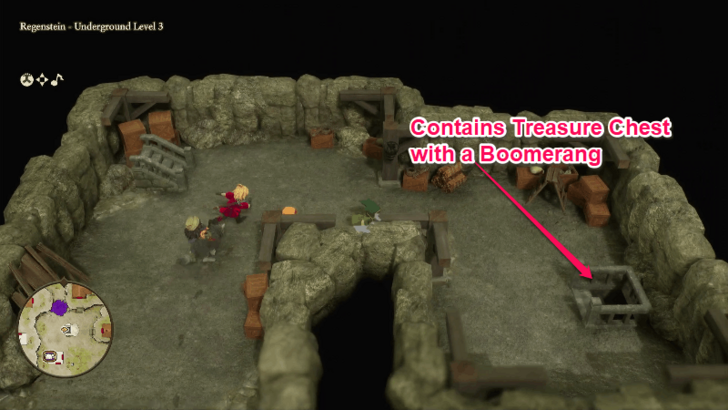 Keep going down the stairs until you reach Underground Level 3. From there, head to the east path first to get the Boomerang from the treasure chest. |
| 5 |
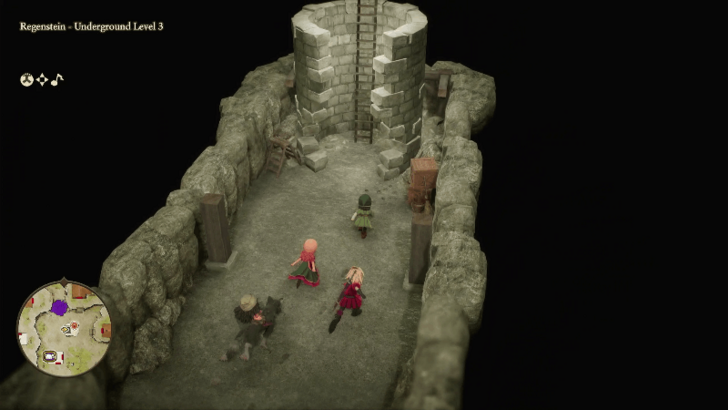 Head back and go south and east to reach the ladder leading to the old man. Talk to the old man to activate a cutscene. |
| 6 |
 Talk to the boy near north of the church for another cutscene. |
| 7 |
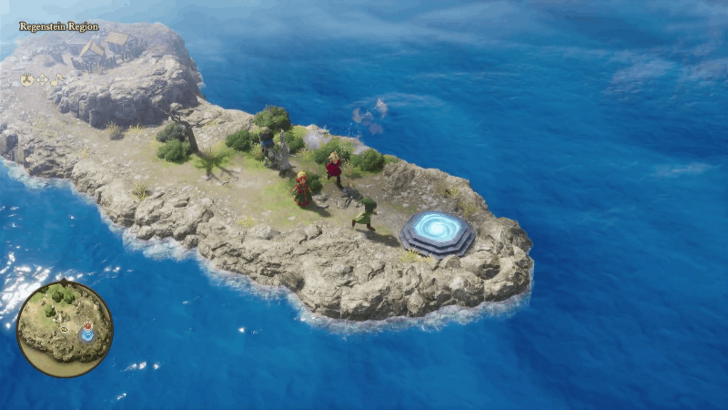 Once you are done exploring the town, return to the portal to head back to Estard in the present era. |
Unlocking the Next Island
| 1 |
 Use the boat to visit Regenstein south of Estard Island in the present day. The region is now called Unnamed Island and you can pick up a Mini Medal in the town's location from the past. |
|---|---|
| 2 |
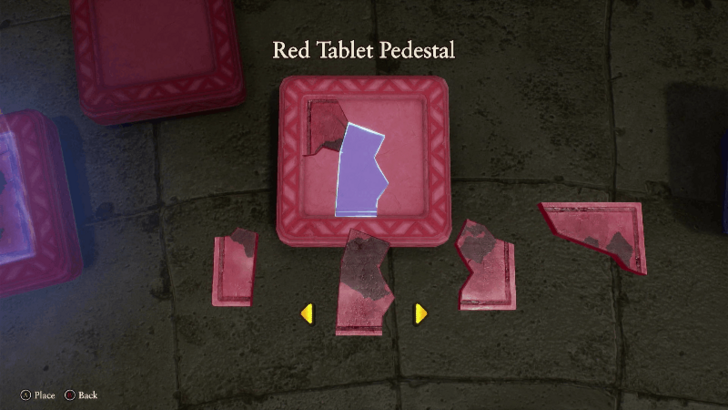 Fast travel to the Shrine of Mysteries and interact with the red pedestal to assemble the Red Fragments that you have collected to enter the fifth island, Frobisher. ▶︎ Jump to Frobisher Walkthrough |
Greenthumb Gardens Region
| Jump to a Section | ||
|---|---|---|
| Greenthumb Gardens | Emberdale (Past) | Greenthumb Gardens (Part 2) |
| Wilted Heart Region (Present) | Greenthumb Gardens (Part 3) | Wilted Heart (Past) |
| Back to the Top | ||
Greenthumb Gardens
| 1 |
 Travel to the Shrine of Mysteries and examine the pedestal behind the green pedestals. Assemble the Gray Fragments to travel to Greenthumb Gardens. |
|---|---|
| 2 | Once you arrive at Greenthumb Gardens region, head northeast to reach the town. |
| 3 | Head to the roof of the house at the center of the town. Enter through the door on the left at the front of the house and use the stairs inside to reach the roof. |
| 4 |
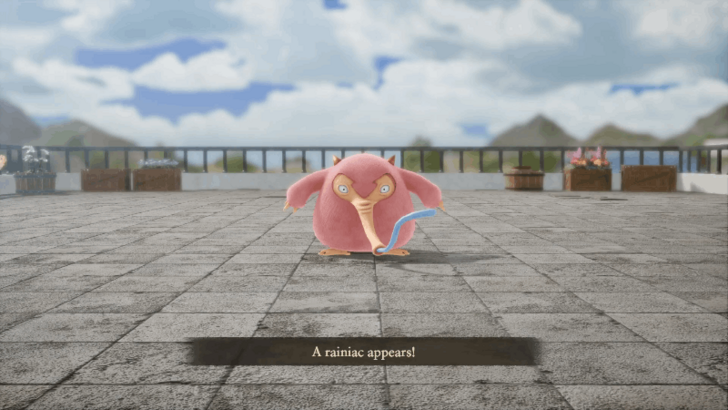 When you reach the rooftop, you will begin a battle with the boss, Rainiac. Use magic attacks and keep your HP high at all times as the boss can use an attack that inflicts ice damage to all party members. |
| 5 | Use Angel's Tears on the rooftop to activate a cutscene. |
| 6 | After using Angel's Tears, go down the stairs inside the building to activate cutscenes on the third and first floors. |
| 7 | Another cutscene will activate once you leave the house. Head north and talk to Dill next to the well to activate another cutscene. |
| 8 | Head to Burdock's mansion at the center of the town. A cutscene will activate as soon as you enter the house. |
| 9 | Go up the second floor and proceed to the room where you can find Dill and Cayenne for another cutscene. |
| 10 | Follow Dill to the general store southwest of the town. Go to the second floor for a cutscene. |
| 11 | Leave the tool shop and head to the house north to activate a cutscene. |
| 12 | Head to the back door of the tavern west of the weapon shop. Go up to the second floor and talk to the warior spinning on the red floor. He will tell you about Palmela. |
Emberdale (Past)
| 1 | Head back to the Shrine of Mysteries and teleport to Emberdale in the past. |
|---|---|
| 2 | Go to the town of Emberdale and head to the house north. Speak with Palmela inside to talk about what happened to Carraway in the herb garden. |
| 3 | Talk to Palmela at the item shop west of the town to get Palmela's Prescription. |
Greenthumb Gardens (Part 2)
| 1 | Return to the Shrine of Mysteries and head to Greenthumb Gardens region. |
|---|---|
| 2 | Go to the town of Greenthumb Gardens and head to the hut at the herb garden. Use Palmela's Prescription on Carraway. |
| 3 | Talk to Burdock at the herb garden to join the festivities. |
| 4 | Head northwest of the town and approach the Carraway and Cayenne for a cutscene. Return to Burdock after. Go to the northwestern part of the town again for another cutscene. |
| 5 | After the cutscene ends, head south of town to find Carraway. Exit the town and travel back to the Shine of Mysteries in the present era. |
Wilted Heart Region (Present)
| 1 | Head to the newly restored island west of Emberdale to reach the Wilted Heart Region. You can use the Magic Carpet to easily cross the area. |
|---|---|
| 2 | Head to the newly restored island west of Emberdale to reach the Wilted Heart Region. You can use the Magic Carpet to easily cross the area. |
| 3 | Go to the ruins west of Wilted Heart and break the pot nearby to get a Mini Medal. |
| 4 | Exit the area and head to the town east to reach Wilted Heart. |
| 5 | You can explore to pick up items in the houses. Once you are ready, leave the town from the northwest exit to enter the Mountain Path Near Wilted Heart. |
| 6 | Proceed further along the mountain path and head towards the Regrette-Rien Convent. |
| 7 | Once you arrive at the convent, talk to the nun standing in front of the grave northwest. |
| 8 | Examine the two graves to find the names. After checking them, Maribel will suggest that you return to Greenthumb Gardens in the past. No matter which option you choose here, the story will not change. |
Greenthumb Gardens (Part 3)
| 1 | Head back to the Shrine of Mysteries and pick up the removed Gray Fragment near the pedestal. Put it back together and travel to Greenthumb Gardens. |
|---|---|
| 2 | Travel to the town of Greenthumb Gardens and head to the center of the town to activate a cutscene. |
| 3 | Head to the central house and approach the two maids for a cutscene. After that, enter the house northwest for another cutscene. |
| 4 | Approach the maid next to the dog at the herb garden for a cutscene. You will automatically teleport to the herb garden shed. Talk to either of the two NPCs to progress the objective. |
| 5 | Enter the house at the center of the town and approach Camomile for a cutscene. Head to the third floor and talk to Camomile at the third floor. |
| 6 | Leave the house to search for evidence, then head back to activate another cutscene. Examine the sparkly spot to get the Dubious Concoction. |
| 7 | Enter the central house and talk to Camomile at the third floor. Select "Yes" to hand over the Dubious Concoction. |
| 8 | Go to the herb garden shed and talk to either of the two NPCs inside. |
| 9 | Return to the central house and talk to Dan D. Lion. Select "Yes" to activate a cutscene. |
| 10 | Return to the central house and talk to Dan D. Lion. Select "Yes" to activate a cutscene. After the cutscene ends, talk to Carraway in the house west of the town. |
Wilted Heart (Past)
| 1 | After talking to Carraway, head east to enter Wilted Heart. Head to the northern exit to reach Mountain Path Near Wilted Heart. |
|---|---|
| 2 | Head northwest to reach the Regrette-Rien Convent. Talk to the nun in front of the gravestone northeast. Examine the gravestone to find the name. |
| 3 | Return to Wilted Heart and talk to Carraway and tell him about Lavender's grave. Proceed to travel to the convent together. |
| 4 | A cutscene will activate once you head up to the mountain path. Once that ends, head northeast and talk to Carraway near the gravestone to complete the questline. |
Vogograd Region
| Jump to a Section | ||
|---|---|---|
| Vogograd | Mount Gora | Vogograd (Part 2) |
| Back to the Top | ||
Vogograd
| 1 |
 Travel to the Shrine of Mysteries and examine the pedestal behind the red pedestals. Assemble the Gray Fragments to travel to Vogograd. |
|---|---|
| 2 |
 Head west to enter the Forest South of Vogograd. A cutscene will activate once you enter the area. Talk to the NPC in the forest to activate an enemy encounter with three Bodkin Bowyers. |
| 3 |
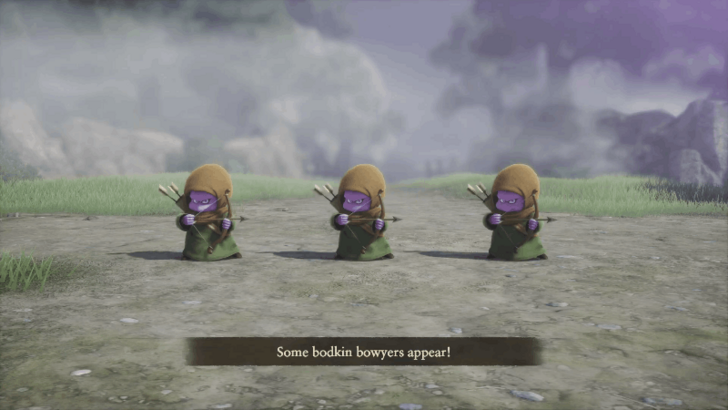 The three Bodkin Bowyers use attacks that hit all party members, so make sure to increase your defense using Immense Defense and cast debuffs such as Dazzle on the enemies. |
| 4 | Head to the town of Vogograd. Enter the northeast house to activate a cutscene involving the elder of the town. |
| 5 | Head to the cemetery northwest of the town. A cutscene will activate once you enter the area. |
| 6 | Follow the child and enter the house southeast of the cemetery. A cutscene will occur when you enter the house and as you exit it after. |
| 7 | Head to the elder's house northeast for a cutscene and talk to the elder. After that, talk to Luka twice and the elder again. |
| 8 |
 Talk to the elder for a cutscene. Once all the villagers have left, talk to the elder again. Note that if you talk to the elder and proceed with the event, you will not be able to return to the village or the present day for a while. Make sure to prepare before proceeding. |
| 9 | Talk to the elder northwest of the village and you will automatically teleport to Mount Gora. Head north to enter the mountain proper. |
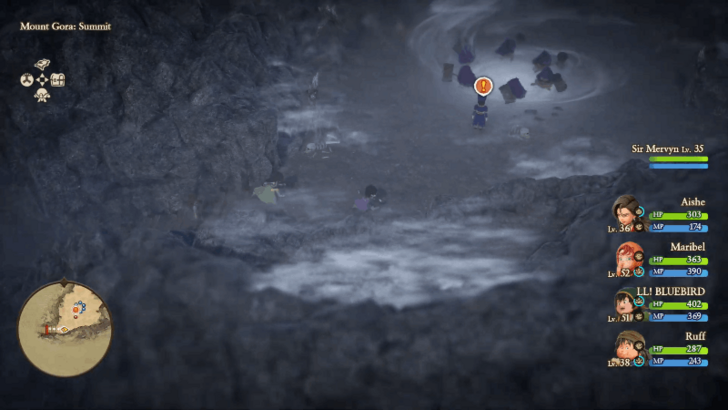
Mount Gora
| 1 |
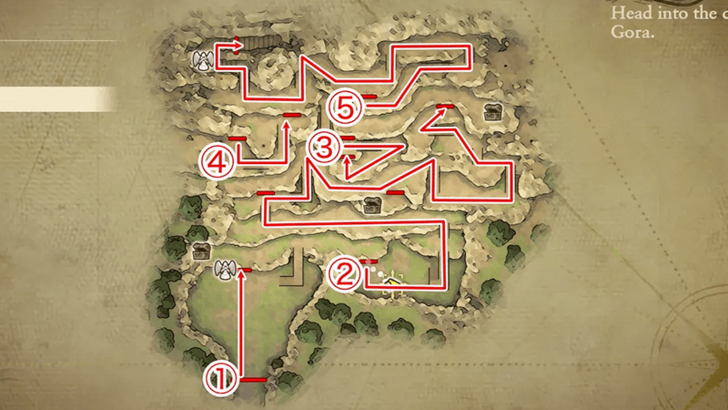 Head to the top of Mount Gora. Use the map above to navigate your way through the tunnels as you reach to the top of the mountain. |
|---|---|
| 2 |
 Once you reach the top of the mountain, approach the priest at the center to initiate a boss fight. |
| 3 |
 Lower Gasputin's defense using Sap and cast Insulate to reduce damage against breath attacks. Make sure to have lots of recovery items as the boss can use a skill move that prevents spells from being cast. |
Vogograd (Part 2)
| 1 | After defeating Gasputin, you will automatically teleport back to Vogograd. Head northeast to the elder's house. |
|---|---|
| 2 | Return to the northwest house where the priest is sleeping. A cutscene will occur when you approach the building. |
| 3 | Talk to the priest at the entrance of the town for another cutscene that ends the Vogograd questline. |
Nottagen Region
| Jump to a Section | ||
|---|---|---|
| Nottagen | - | - |
| Back to the Top | ||
Nottagen
| 1 | Travel to the Shrine of Mysteries and interact with the gray pedestal behind the three blue pedestals. Assemble the Gray Fragments to form a Gray Tablet to teleport you to Nottagen. |
|---|---|
| 2 | Head west to the town of Nottagen. You can stop at the Wooded Hill along the way, so that it is easier to fast travel there later on. |
| 3 |
 When you enter Nottagen, two Cheeky Devils will attack. These are regular enemies, so defeat them as normal to proceed. |
| 4 | After defeating the Cheeky Devils, head to the well northwest. A cutscene will occur and you will automatically teleport inside of the well. At this point, there are many monsters in the town, so you can postpone exploring it until later. |
| 5 | Once you enter the well, talk to the nun in front of you. She will tell you the current state of the town. |
| 6 | Exit the well and head north towards the mansion of the town. |
| 7 | Go up the stairs at the back to reach the second floor. Talk to the NPC in the bathtub to start a boss fight. |
| 8 | Moostapha uses only physical attacks, so cast Blunt to reduce his physical damage and use Kabuff to increase the defense of all party members. |
| 9 | After defeating Moostapha, go down to the first floor of the mansion for a cutscene. Exit the building for another cutscene. |
| 10 | Head west and enter the equipment store through the back door and retrieve the Seed of Magic. Exit the town and go back to the teleporter to return to the present era. |
Nottagen (Present)
| 1 | Once you enter to the present era, use the Magic Carpet or Skystone and head northwest to reach the Nottagen region. |
|---|---|
| 2 | Head west to enter the ruins. When you enter it, a cutscene will occur and you will have to travel back to the past. |
| 3 | Travel to the Shrine of Mysteries and examine the gray pedestal behind the red pedestals to head back to Nottagen in the past. |
Nottagen (Part 2)
| 1 |
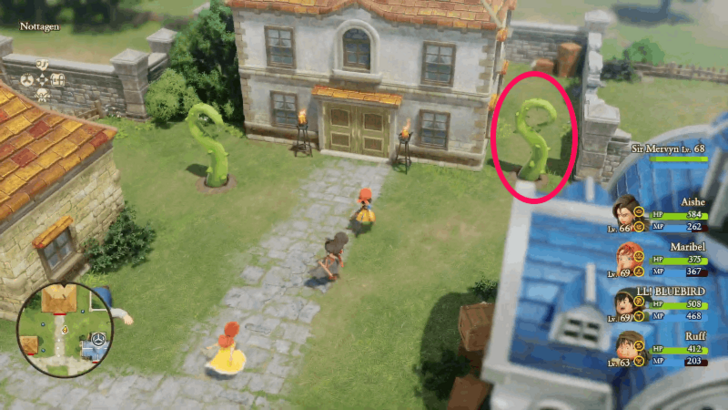 Go back to the town to find it infested with green thorns. Examine and defeat the thorn at the east side of the northern mansion. Note that you do not need to defeat all the thorns in the town to proceed to the next objective. |
|---|---|
| 2 |
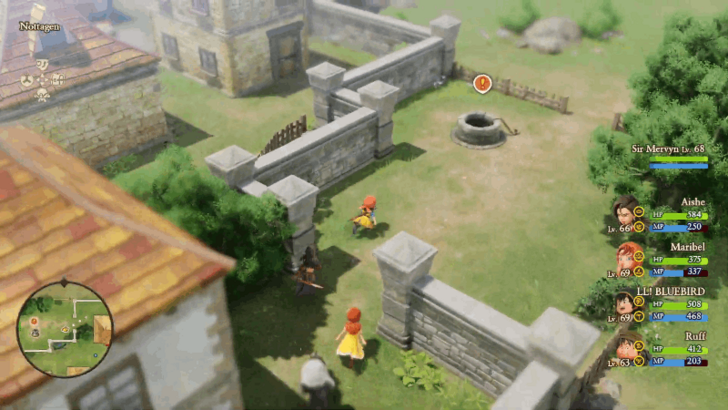 After defeating the thorn, enter the narrow path that it was previously blocking to reach the well at the back side of the mansion. |
| 3 |
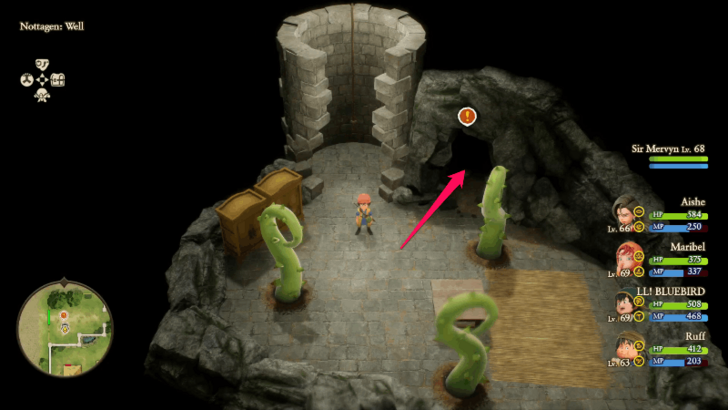 The well contains several thorns but you do not need to defeat them. Head towards the hole in the wall to enter the Nottagen Cavern. |
Nottagen Cavern
| 1 |
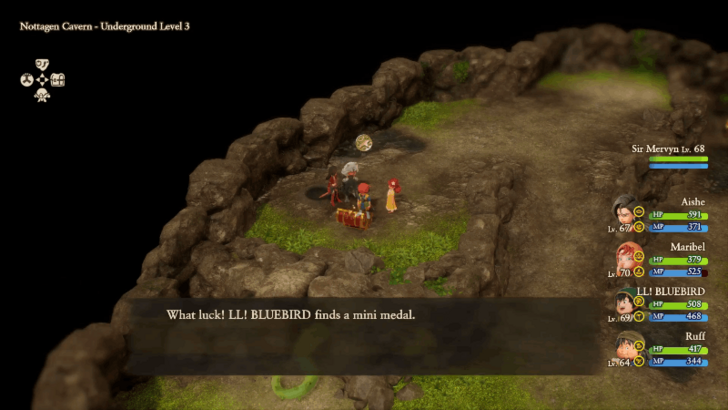 Once you enter the Nottagen Cavern, collect items as you go and head to the very back. Collect the Mini Medal from the treasure chest northwest of the Underground Level 3. |
|---|---|
| 2 |
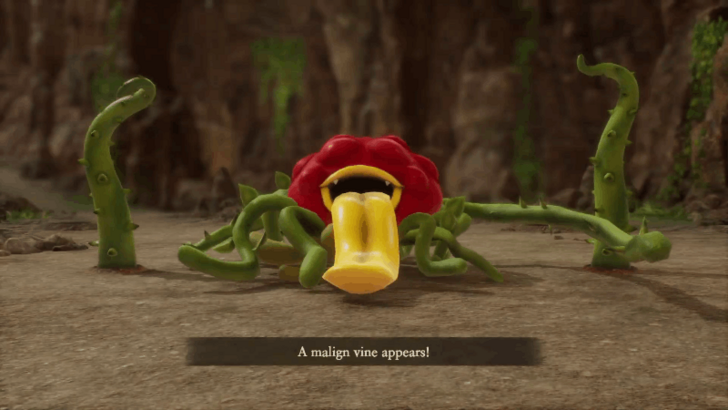 Once you reach the back of Underground Level 3, you will fight the Malign Vine. The boss summons thorns in battle, so use area-of-effect attacks to defeat them all at once. Use Blunt to reduce Malign Vine's physical attack damage and Kabuff to raise the defense of all party members. |
| 3 | After defeating Malign Vine. Use Zoom to fast travel back to Nottagen or Wooded Hill. Head to the teleport to return to the present. |
| 4 | Once you reach present day Nottagen, a cutscene will occur. After that, head back to the Shrine of Mysteries and return to Nottagen in the past. |
Nottagen (Part 3)
| 1 |
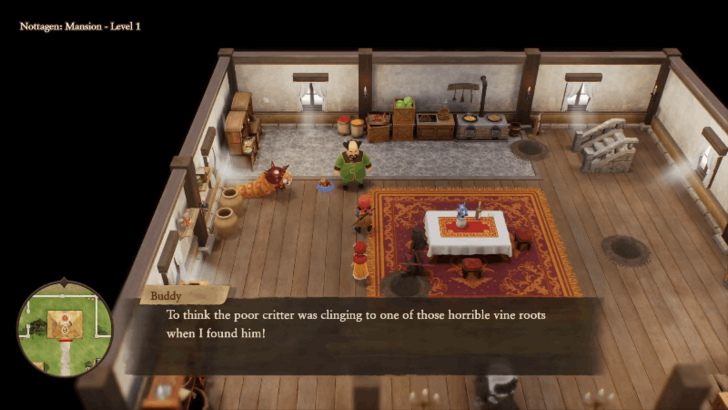 Once you arrive in Nottagen in the past, enter the northern mansion and talk to the man called Buddy inside. Leave the mansion to activate a cutscene. |
|---|---|
| 2 |
Once you arrive in Nottagen in the past, enter the northern mansion and talk to the man called Buddy inside. Leave the mansion to activate a cutscene. |
| 3 |
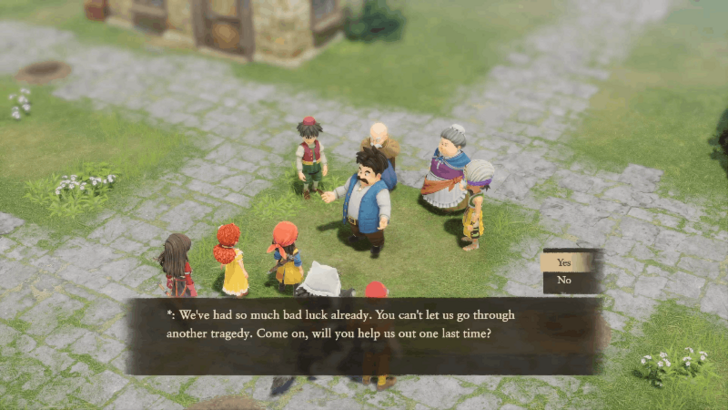 Talk to the townspeople gathering at the center of the square. Choose "No" for the dialogue option for the best ending of this questline. Choosing "No" restores Nottagen in the present era and you do not need to fight Wiggles. Choosing "Yes" causes two outcomes: If Wiggles defeats the party in battle, Nottagen remains as a town in the present. However, if the party defeats Wiggles, Nottagen will be destroyed and becomes a ruins in the present. Some items, except for the Mini Medal and the trophy "Worst. Town. Ever.", become missable when the town turns into ruins. |
| 4 |
If you chose "Yes", head to the northern mansion and interact with Wiggles to start the boss fight.
If you chose "No", talk to Buddy in the northern mansion to allow Wiggles to escape. |
| 5 |
This additional step only appears if you chose "No" in the previous dialogue option. Head to the Wooded Hill east of the town and talk to Buddy. Note that you cannot use Zoom spell at this time, so you will have to walk towards the location. After talking to Buddy, you will automatically return to the mansion. Once you leave, defeat the Worm of Woe in the battle. |
| 6 | After defeating the first Worm of Woe, three more will appear in town. Defeat the three Worms of Woe that have the exclamation mark above them. |
| 7 | Head inside the mansion and defeat the Worm of Woe. Head outside after for a cutscene. Once the cutscene is over, exit the town and head to the teleporter to return to the present. Use Zoom to travel to Nottagen in the present era. |
Nottagen (Present Part 2)
| 1 |
Once you arrive at present day Nottagen, talk to the nun in front of the church. After that, talk to the woman on the second floor of the northern mansion to complete the questline.
If you chose "Yes" in the previous dialogue option, only a Wandering Bard will appear in the Ruines of Nottagen. Talk to him and his monster friend to complete the questline. |
|---|---|
| 2 |
Examine the sparkle just before the well northwest of the town to collect a Mini Medal. If you choose "Yes" in the previous dialogue option, this Mini Medal remains on the same located near the dead tree. |
| 3 |
 Head to Wooded Hill and investigate the large hole to get a Mini Medal. |
Blue Tablet Walkthroughs
| Jump to a Section | ||
|---|---|---|
| Prologue | Yellow Tablets | Red Tablets |
| Green Tablets | Grey Tablets | Blue Tablets |
| Endgame | ||
| All Blue Tablet Islands | ||
| Alltrades Abbey | Hardlypool | La Bravoure (Present) |
| Buccanham | - | - |
Alltrades Abbey Region
Alltrades Abbey
| 1 |
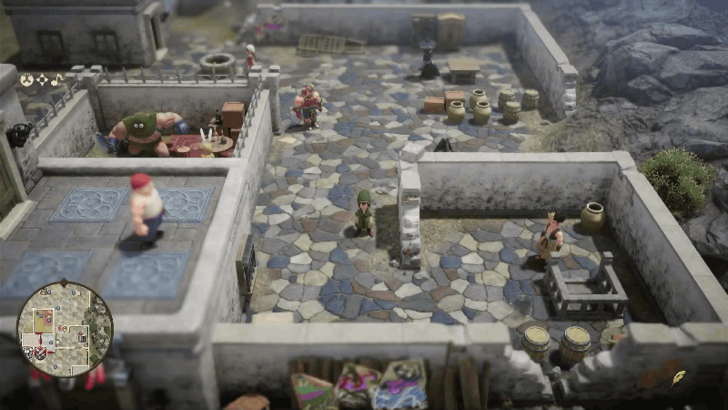
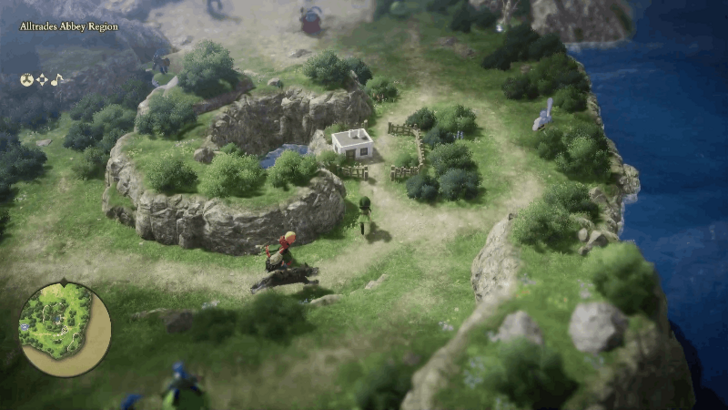 Head east of the teleporter to enter Pilgrim's Rest. |
|---|---|
| 2 |
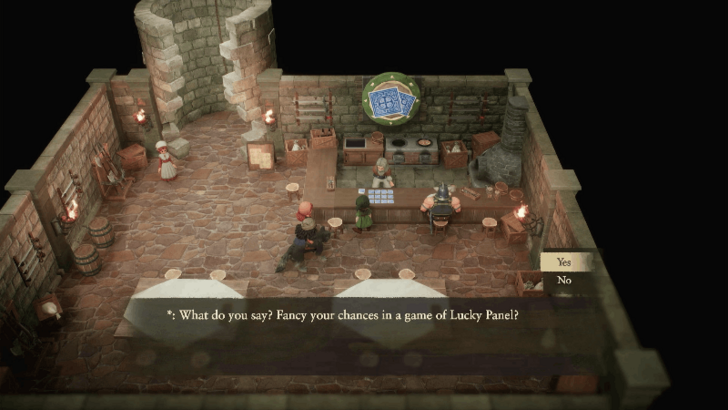 Enter the well and talk to the old man in front of the counter to play the Lucky Panel minigame. Winning the minigame allows you to obtain powerful weapons and armor that will make progression easier in the future. You can play the minigame three times a day, and you can reset this limit by resting at an inn. ▶︎ Lucky Panel Guide |
| 3 |
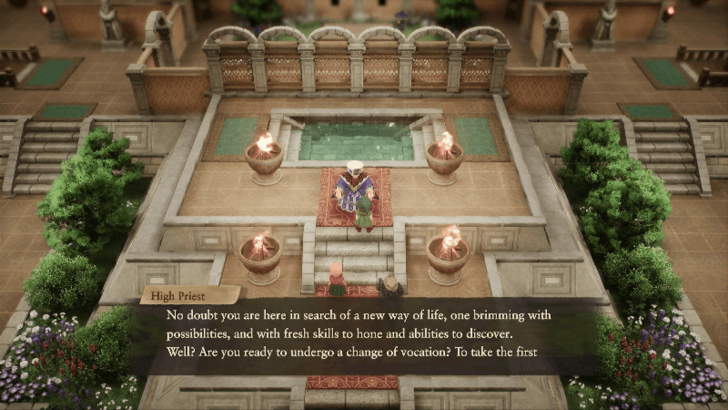 Once you are done exploring Pilgrim's Inn. Travel west to reach the Alltrades Abbey. Talk to the High Priest inside and choose a vocation to change. The vocation does not matter at this point as the High Priest will steal your skills and teleport you to Pilgrim's Perdition. |
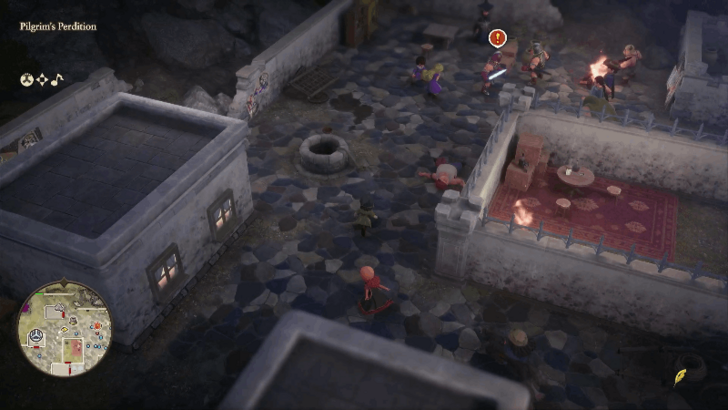
Pilgrim's Perdition
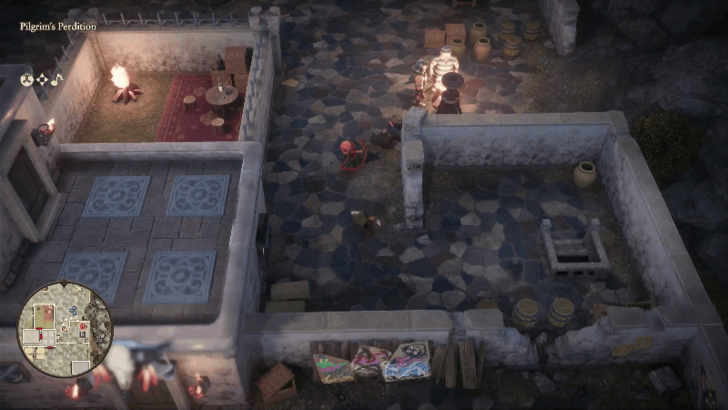
| 1 |
 Pick up the Blue Fragment at the northwestern side of the town. |
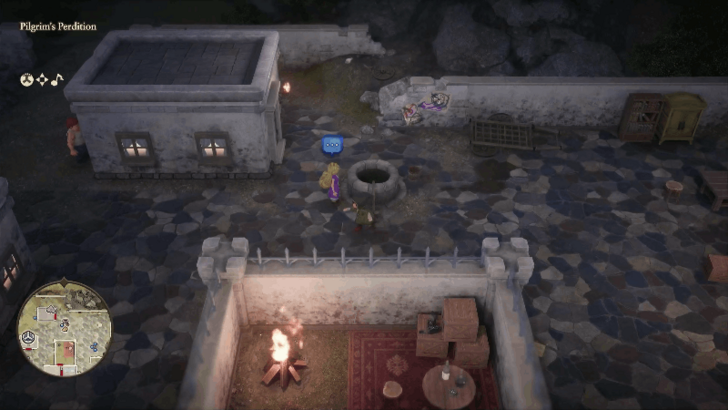
|---|---|
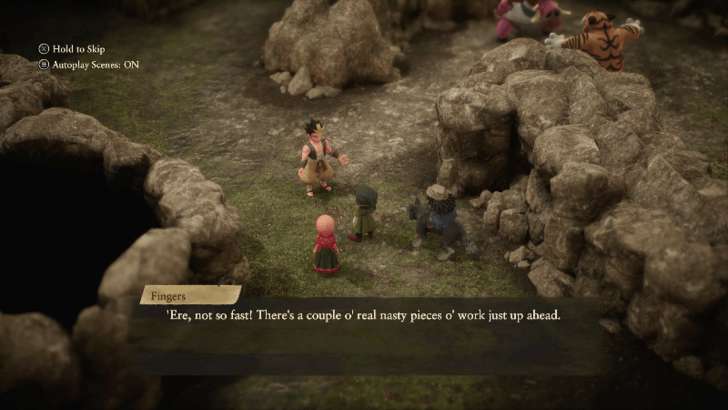
| 2 |
 Head to the stairs at the east side part of the town to activate a cutscene. You will receive a Salvation Stone from Fingers. |
| 3 |
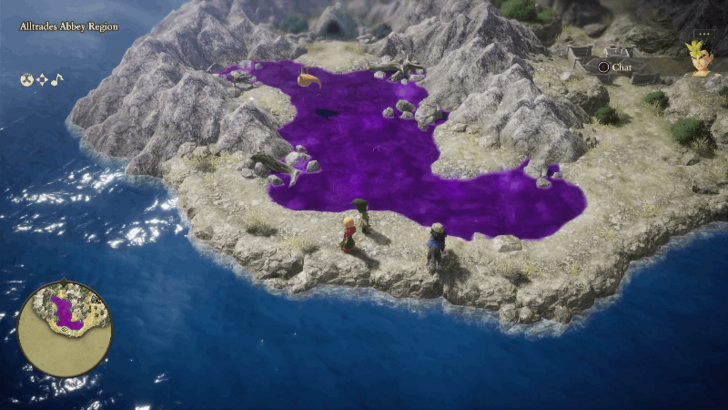 Exit Pilgrim's Perdition from the south and cross the poison swamp to reach the Western Cave. |
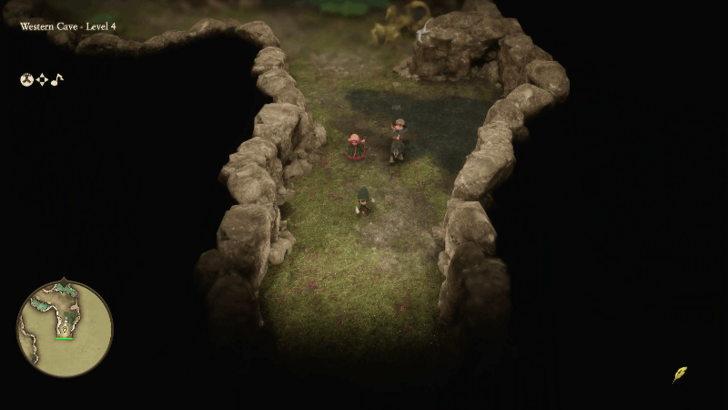
Western Cave
| 1 |
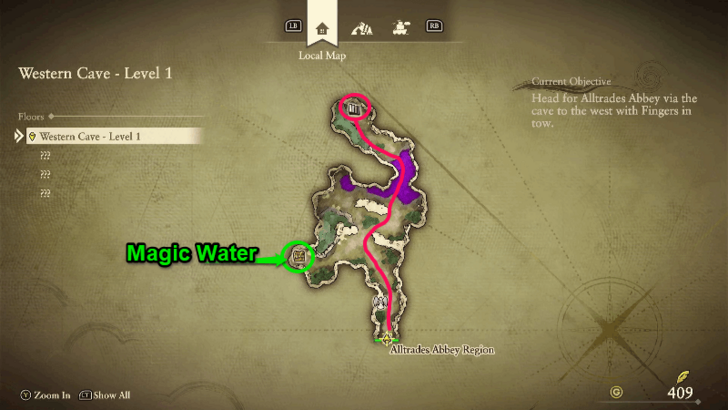 Open the treasure chest to get Magic Water. Head north and cross the poison swamp to reach Level 2 of the cave. |
|---|---|
| 2 |
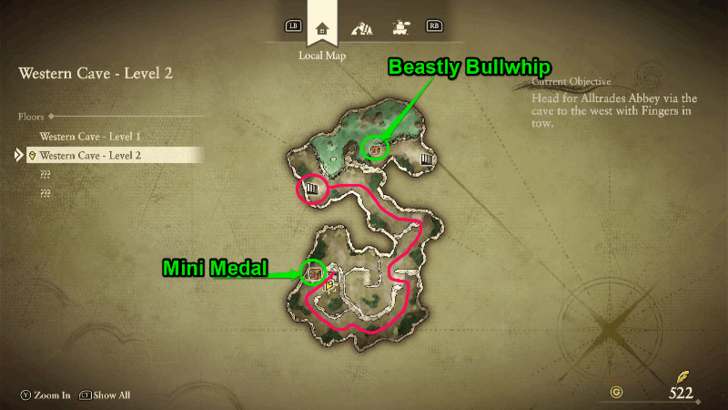 Open the treasure chest at the west side to get a Mini Medal. The second treasure chest up north is accessible at Level 3 of the cave. |
| 3 |
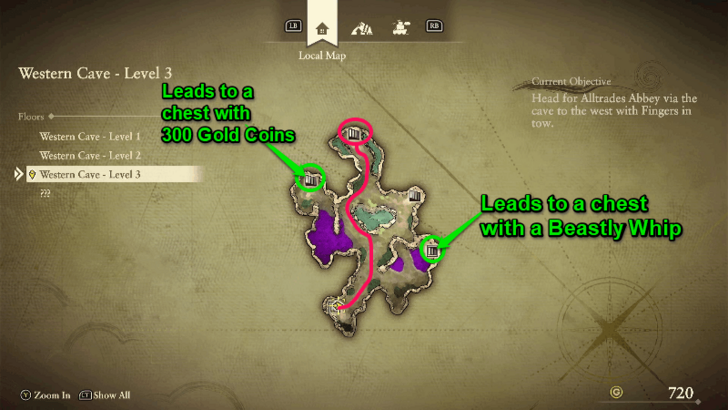 The path containing the posion swamp leads to a treasure chest with 300 Gold Coins. To progress, head to the path north to reach Level 4 of the cave. |
| 4 |
 At Level 4, continuing heading north to the path until a cutscene activates. You will lose against Rashers and Stripes in the scripted boss fight, so wait for them to knock out all your party members to proceed. |
Pilgrim's Perdition (Part 2)
| 1 |
 You will teleport back at Nava's house in Pilgrim's Perdition. Exit the house and go to the eastern stairs where you first met Fingers. |
|---|---|
| 2 |
 After talking to Eustace, exit the tavern and talk to Nava at the well. A cutscene will activate as you attempt to head to the south side. |
| 3 |
 Chase after the man northeast of the town to activate another cutscene. |
| 4 |
 Head back to Western Cave and reach Level 4 of the cave to activate a cutscene. Head to the southeastern path to exit the cave and reach Precipice Pass. |
Precipice Pass
| 1 |
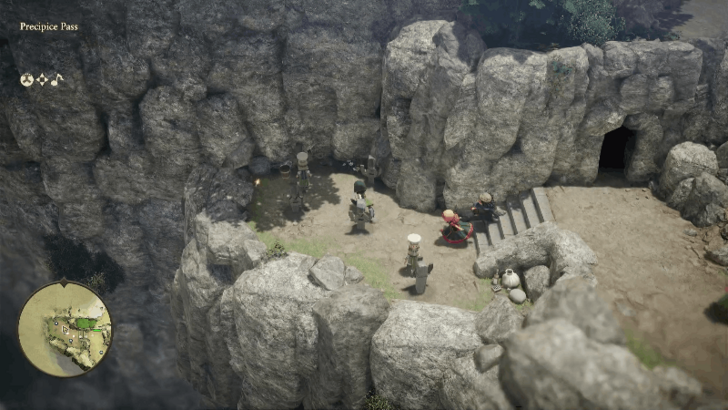 Interact with the orange shiny spot at the cliff west of the cave's entrance to get a Mini Medal. |
|---|---|
| 2 |
 Reach Eustace and Fingers at the top part of the area for a cutscene. |
| 3 |
 Find the cave's entrance northeast and enter the Dungeon of Descent. |
Dungeon of Descent
| 1 |
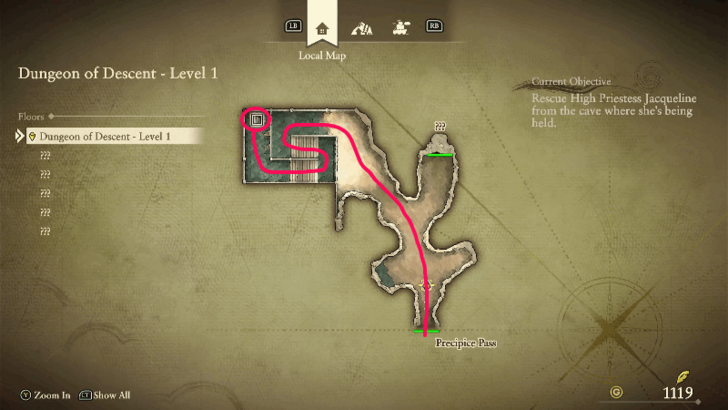 Head to the stairs at the northwest part of Level 1. Ignore the path east as it is blocked at this point. |
|---|---|
| 2 |
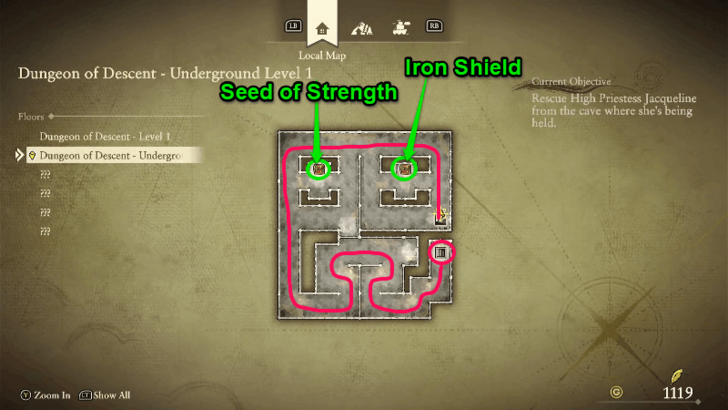 Go around the path to reach the stairs at the southeastern side of the area. Open the two treasure chests to pick up the Seed of Strength and Iron Shield. |
| 3 |
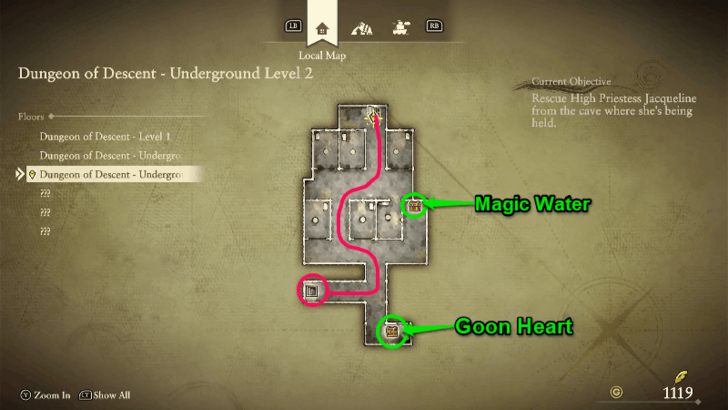 Head south and turn west to descend down to Level 3. Open the two treasure chests to get Magic Water and Goon Heart. |
| 4 |
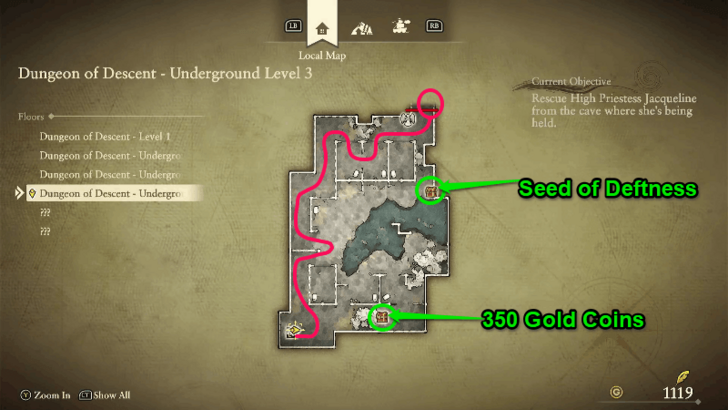 Stick to the path west and head north to reach the angel statue and the next area. The east side contains two treasure chests that have a Seed of Deftness and 350 Gold Coins in them. |
| 5 |
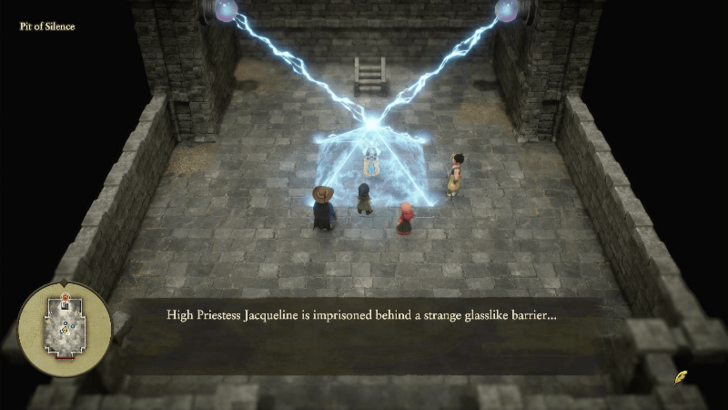 After the cutscene ends, head up the stairs north of High Priestess Jacqueline. |
| 6 |
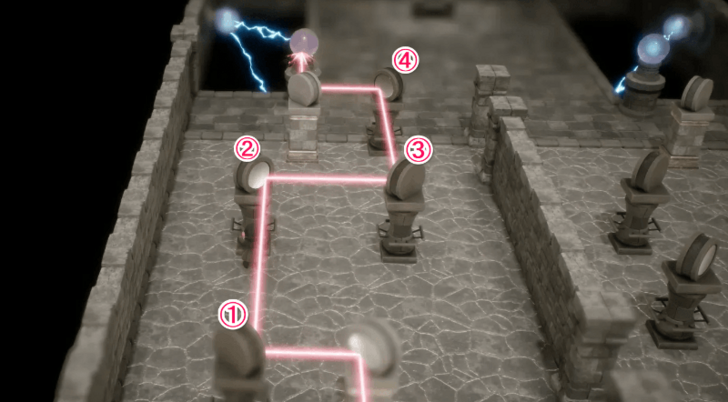 To solve the first laser puzzle, move the mirrors to reflect the red laser to destroy the orb. |
| 7 |
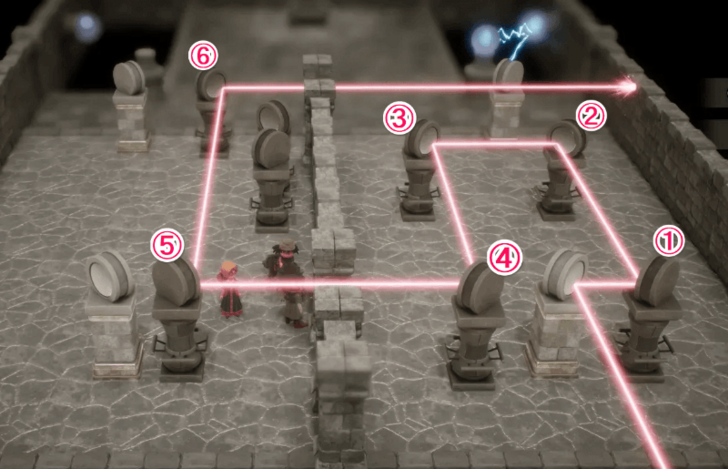 For the second laser puzzle, you need to move the mirrors so that the laser beam goes to the first laser puzzle area. From there, move two mirros from the first laser puzzle area to reach the orb. |
| 8 |
 Return to the High Priestess downstairs to activate a cutscene and a boss fight between Rashers and Stripes. |
| 9 |
 Focus on defeating Rashers as he has higher attack power than Stripes. Use Salvation Stone and healing items to heal your party members when needed. |
Tunnel to the Abbey
| 1 |
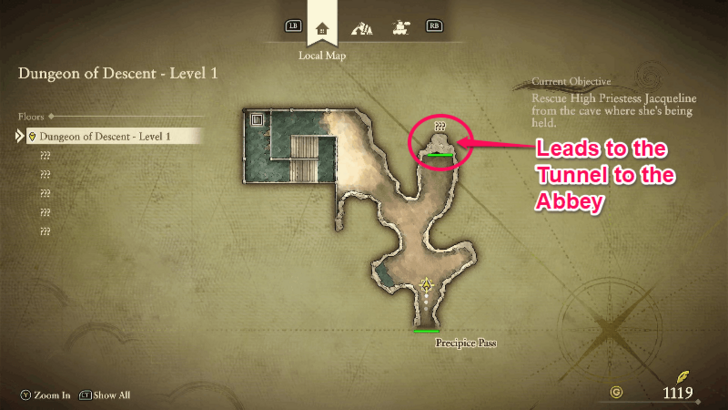 After defeating Rashers and Stripes, backtrack all the way to Level 1 of Dungeon of Descent. Head to the path east to reach the Tunnel to the Abbey. |
|---|---|
| 2 |
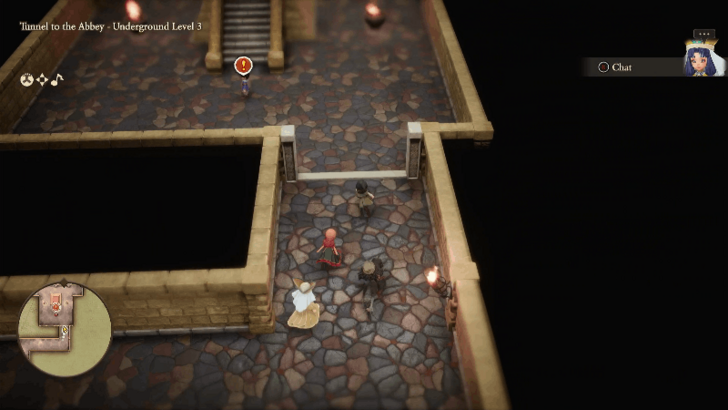 Make your way up to Underground Level 3 to reach Zev in front of the staircase. |
| 3 |
 Head west then go up north and east to reach the stairs at the northeastern corner of the area. |
| 4 |
 The last underground level requires you to go through the tunnels to reach the stairs at the north side. |
| 5 |
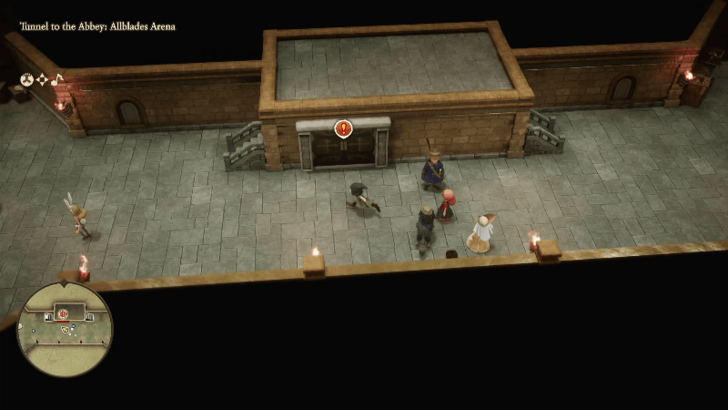 Enter the building north of the weapon and armor shop and find Nava inside the small waiting room at the northern side of the area. Exit the waiting room after. |
| 6 |
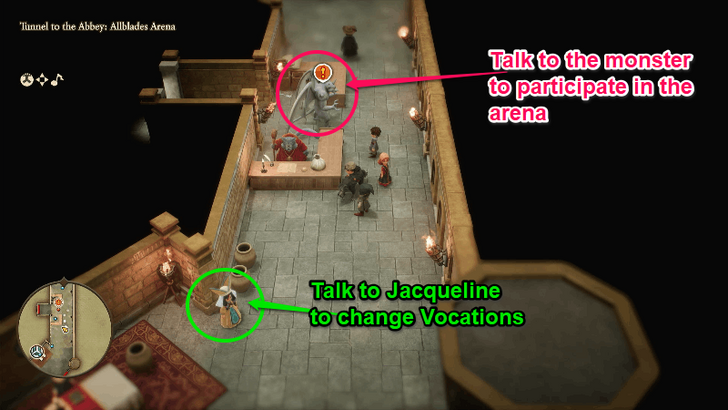 Make preparations to participate in the arena. To start, it is recommended to change the vocations of your party members, increase their proficiency level to 3, and upgrade their equipment. Choose Warrior for the Hero, Mage for Maribel, and Priest for Ruff. |
Participate in the Arena
| 1 |
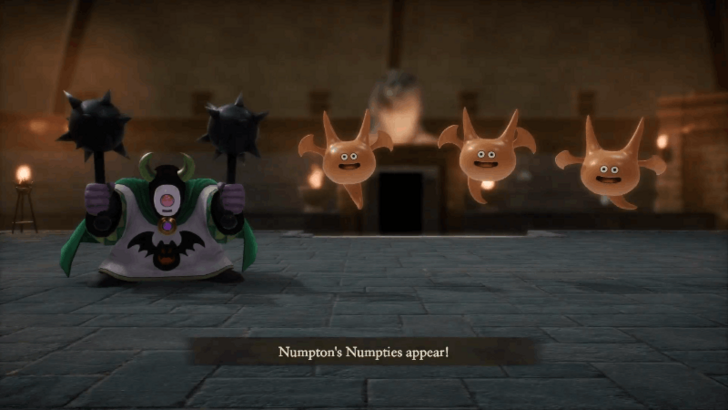 Use area of effect skills such as Maribel's Bang skill to deal damage to Numpton and the three slimes all at once. ▶︎ Numpton's Numpties Boss Guide |
|---|---|
| 2 |
 Use the same area of effect skills to defeat Bronson and the Bristles. ▶︎ Bronson and the Bristles Boss Guide |
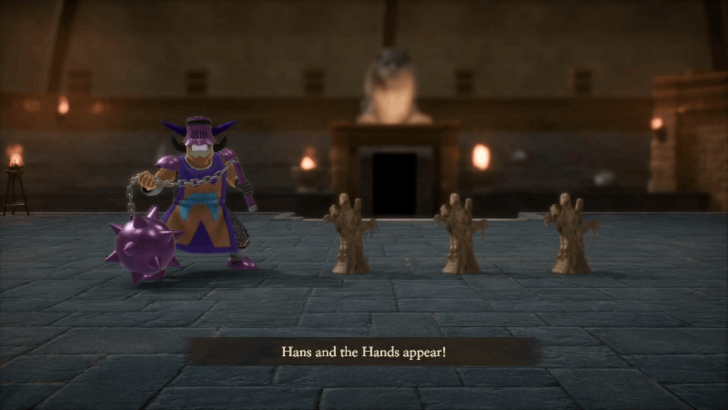
| 3 |
 Priortize defeating Hans as he can deal high damage when he performs Swoosh. If you have a party member with the Priest vocation, you can use Heal and Midheal to restore health when needed. ▶︎ Hans and the Hands Boss Guide |
| 4 |
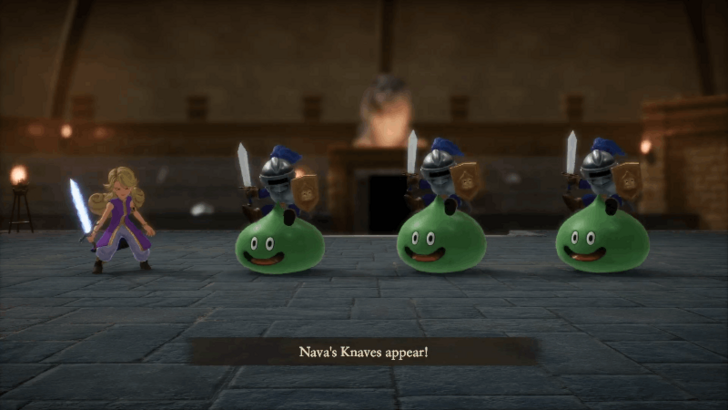 Nava will cast Bound to create reflective barrier that will bounce off magic attacks. Avoid using skills when this is active and focus on using physical attacks. Apply Buff to each party member and defeat the slime knights first as they can heal Nava periodically. ▶︎ Nava's Knaves Boss Guide |
| 5 |
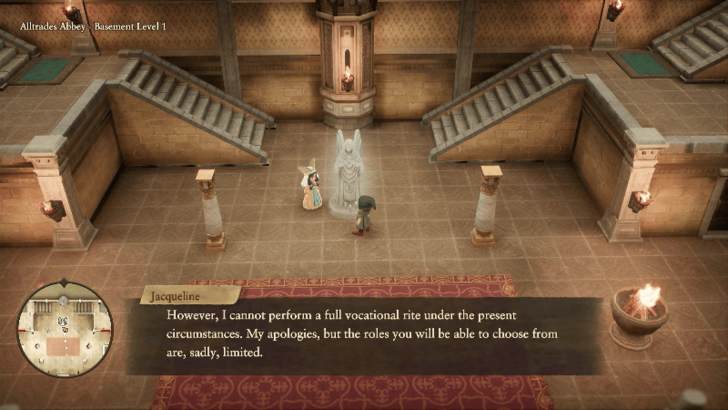 After completing the arena, head up the stairs to reach the Basement Level 1 of Alltrades Abbey. Interact with the angel statue so that Jacqueline appears, allowing you to change vocations at this point. Makes sure to prepare as there will be a boss fight after. |
| 6 |
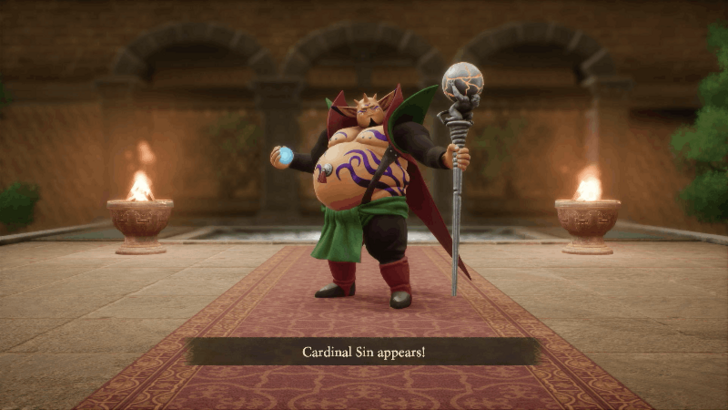 Head up the stairs to reach the High Priest and activate the boss fight with Cardinal Sin. Cast Blunt and Sap to reduce his attack and defense and keep your HP high at all times. When Cardinal Sin is about to charge for a burst attack, have everyone defend to reduce the damage of the attack. |
Collect the Three Fragments
| 1 | After defeating Cardinal Sin, you will be teleported to the inn in Alltrades Abbey. Exit the inn for a cutscene. |
|---|---|
| 2 |
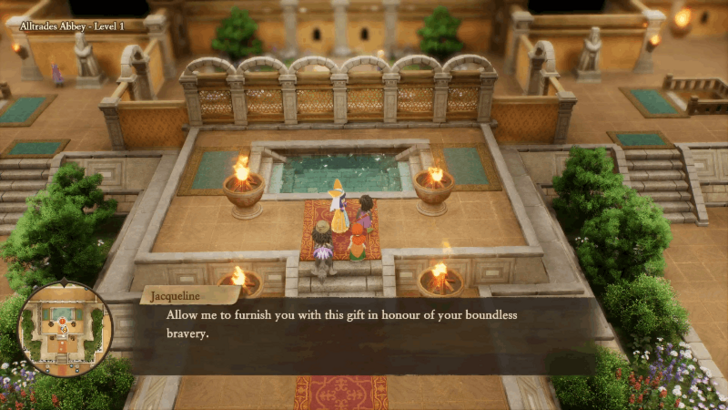 Talk to High Priestess Jacqueline at Level 1 to get a Yellow Fragment. |
| 3 |
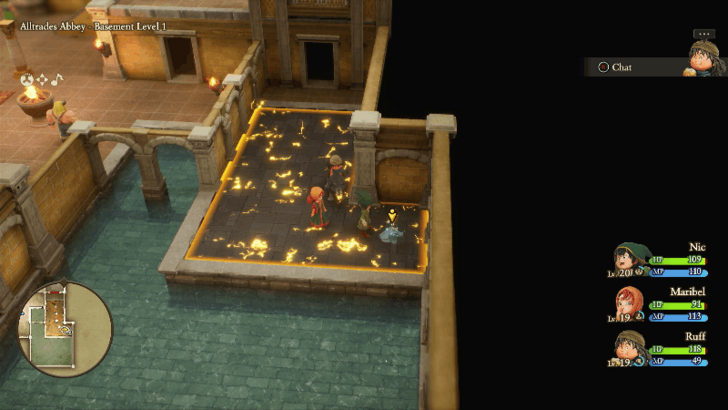 Head down to Basement Level 1 and enter the door on the right and exit. Walk past the electric floor to pick up the Gray Fragment. |
| 4 |
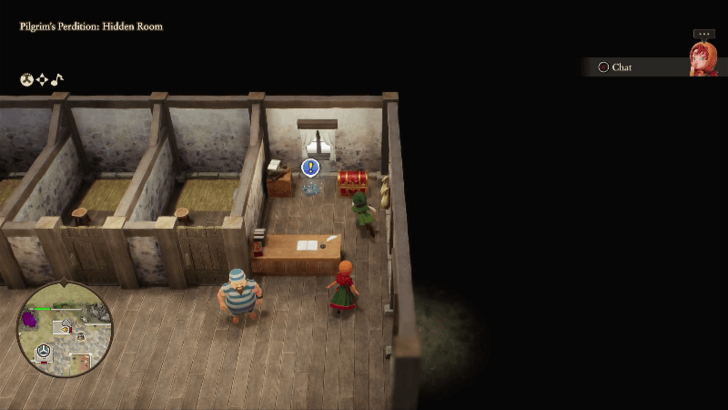 Go back to Pilgrim's Perdition and enter the house at the north end. Pick up the Silver Fragment and the Thief's Key from the treasure chest. |
| 5 |
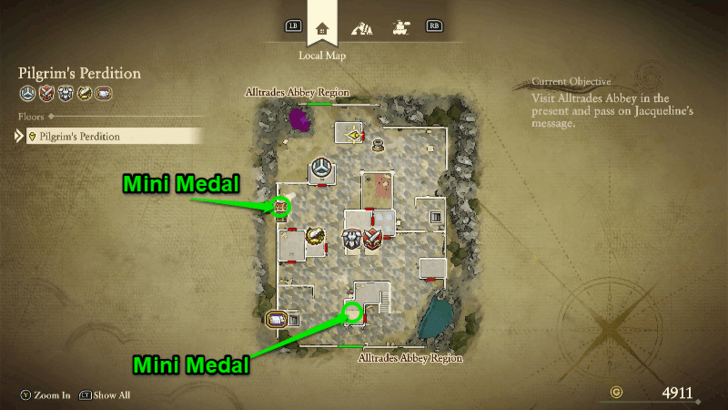 Pick up the Mini Medal from the treasure chest north of the item store and another from the pot on the roof of the southern house. |
Alltrades Abbey (Present)
| 1 |
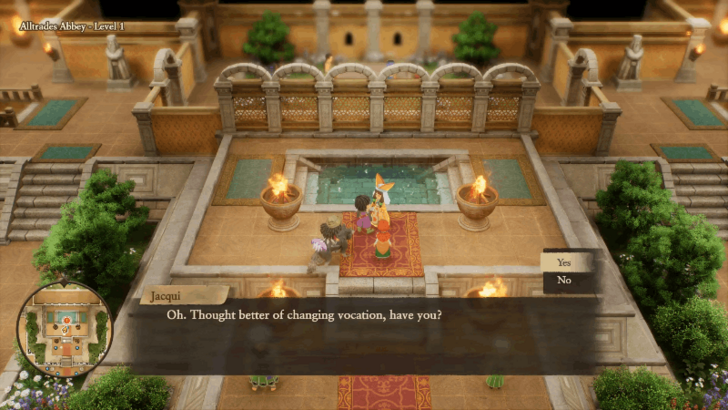 Head back to the teleporter and travel to the present day Alltrades Abbey. Talk to High Priest Jacqui to unlock the ability to change vocations while adventuring. |
|---|---|
| 2 |
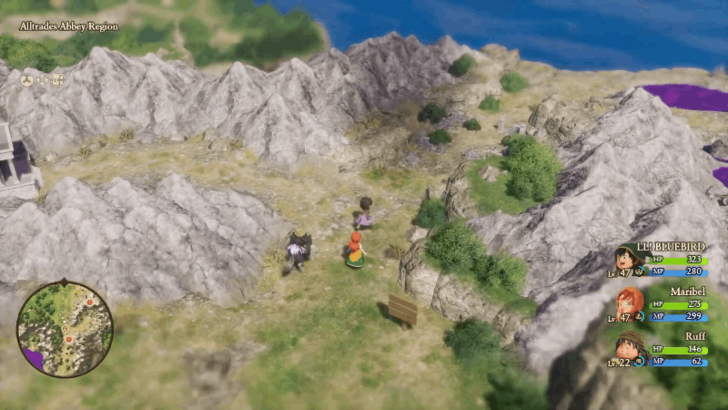 Head to the ruins south of Alltrades Abbey and talk to the man lying on the ground. As soon as you exit the area, you will get in a random battle with the Mild Bunch. |
| 3 |
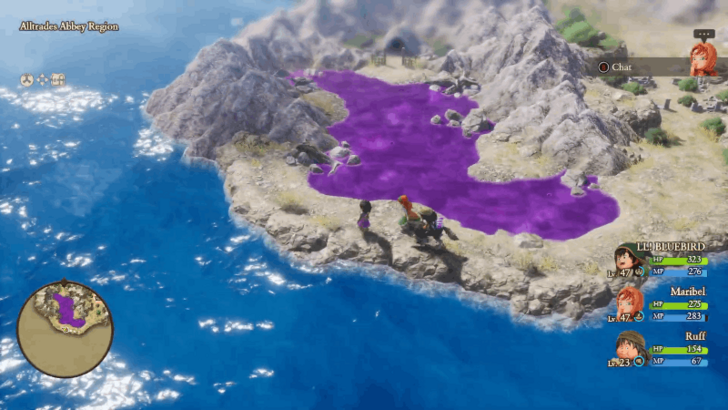 After defeating the Mild Bunch, exit the ruins via the south path and enter the bandit's hideout by walking on the poison swamp. |
| 4 |
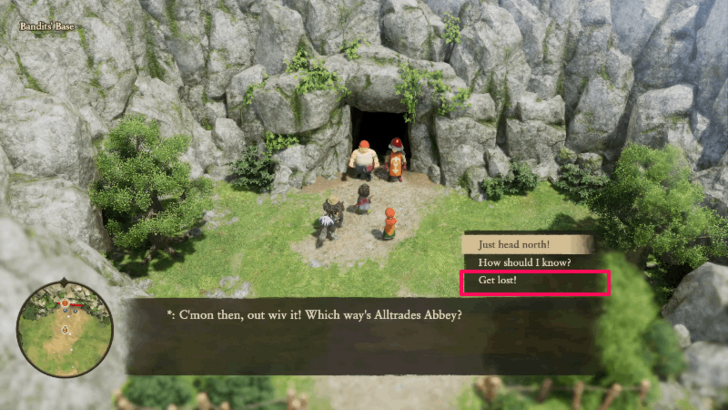 Choose "Get lost!" for the dialogue option to enter the hideout. |
| 5 |
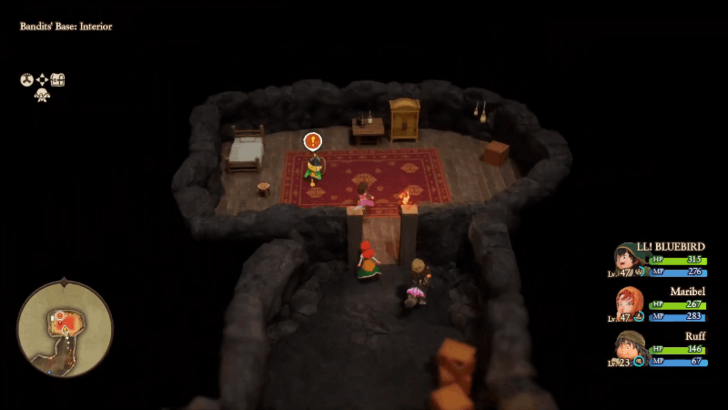 Venture into the cave until the end to find the NPC with an exclamation mark on its head. Before speaking with him, examine the drawer to obtain the Bandit's Key. |
| 6 |
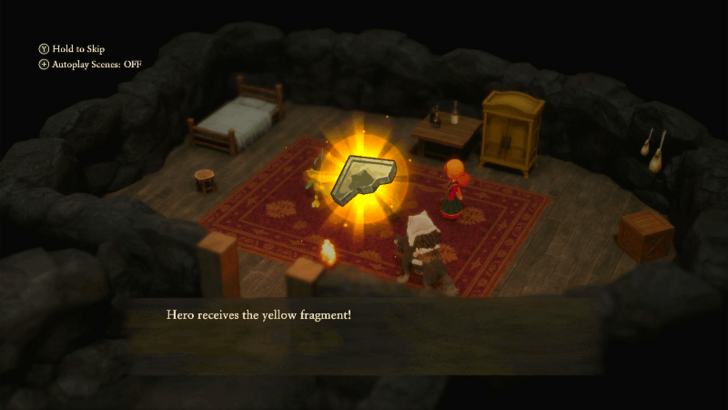 Speak with the NPC to initiate a boss fight with The Mighty Pip. Defeat him in battle to obtain a Yellow Fragment. |
| 7 |
At this point, you can travel to the island south of Frobisher region to reach La Bravoure. Talk to Honore at the village tavern to start the first part of the questline that lets you unlock the Magic Carpet. ▶︎ Where to Get the Magic Carpet |
| 8 |
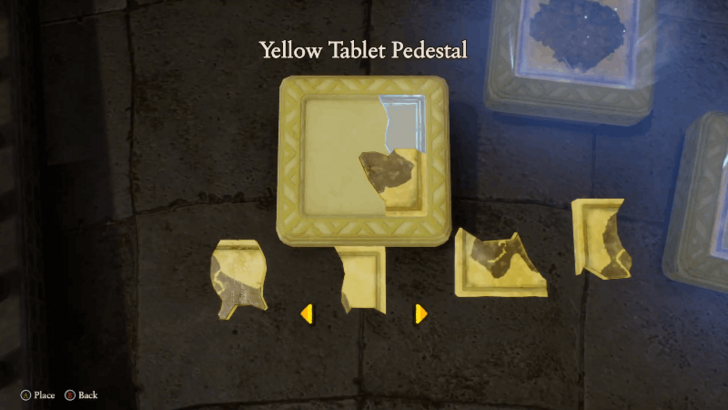 Fast travel back to the Shrine of Mysteries and assemble the Yellow Fragments to create the Yellow Tablet that lead you to the eighth island, Al-Balad. ▶︎ Jump to Al-Balad |
Hardlypool Region
| Jump to a Section | ||
|---|---|---|
| Hardlypool | Spliton-on-Sea | Wetlock |
| Highendreigh Tower | Graco's Throne Room | Wetlock (Present) |
| Highendreigh Tower (Present) | Gracos's Throne Room (Present) | - |
| Back to the Top | ||
Hardlypool
| 1 | Head south from the teleporter to reach the town of Hardlypool. |
|---|---|
| 2 | Talk to the mayor at the northeastern house in the town. Choose "Yes" to spend the night at the house. |
| 3 |
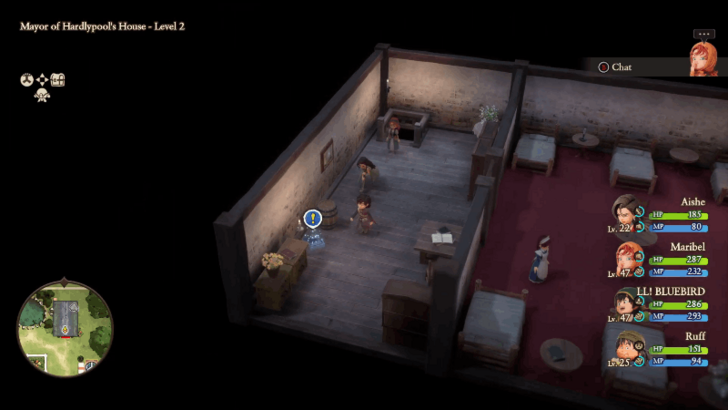 Head up to the second floor of the mayor's house to pick up the Gray Fragment. |
| 4 | Exit the house to find all the villagers gone. Enter the stairs at the southeastern part of the town to enter the Hardlypool Tunnel. |
| 5 | Go through the tunnel until you reach the exit. Head south to reach the town of Spilton-on-Sea. |
Spliton-on-Sea
| 1 | Talk to the villagers in Spilton-on-Sea. After that, choose to stay at the inn to progress the story. |
|---|---|
| 2 | Once all the villagers are gone, exit the town and head northeast to reach the town of Wetlock. |
Wetlock
| 1 | Enter the town of Wetlock and head to the center to activate a cutscene. |
|---|---|
| 2 | Head northwest to reach the inn and choose to stay in the inn. A cutscene will activate causing a teleporter to appear in front of the fountain at the center of the town. |
| 3 | Enter the teleporter to reach the Highendreigh Tower. |
Highendreigh Tower
| 1 | Explore the tower and head to Level 3. |
|---|---|
| 2 | Talk to the boy at the northeastern part of Level 3 to activate a cutscene. Proceed through the door behind the cell to go up to Level 4. |
| 3 | Proceed to Level 5 and talk to the old man at the south part of the area to activate a cutscene. |
| 4 | Proceed to Level 5 and talk to the old man at the south part of the area to activate a cutscene. If you answered "Yes" in the conversation with the old musician, you will receive a Prayer Ring and a Small Boat. |
| 5 | Go to Level 2 and head to the east side. Use the boat to go to the southwestern part of the map to reach Graco's Throne Room. |
Graco's Throne Room
| 1 | Heal and save your progress at the angel statue as the next area contains a boss fight. |
|---|---|
| 2 | Talk to Graco to start a fight with three Sunken Spirits. |
| 3 | After defeating the three Sunken Spirits, you will face Graco in a boss fight. Use fire elemental skills early on and once you have reduced his HP, switch to casting ice elemental skills. |
| 4 | Talk to the old musician after the boss fight to activate a cutscene. Once that cutscene is over, you will automatically return to Highendreigh Tower. Head to Level 1 and use the teleporter to return to Wetlock. |
| 5 | Once you return to Wetlock, talk to the mayor beside the fountain and he will tell you the location of the town's treasure room under the pub. |
| 6 |
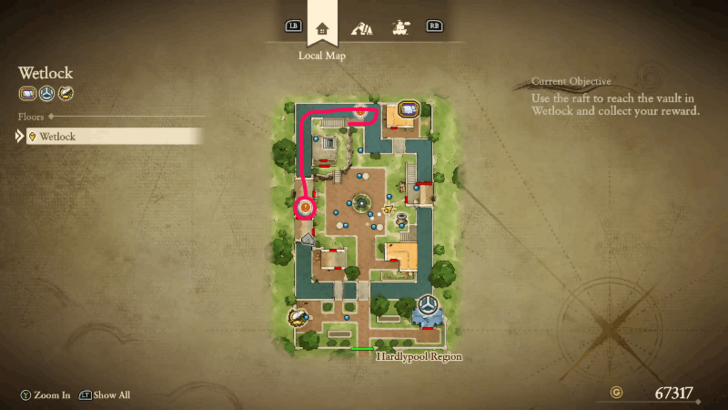 Use the raft in the northwest area to reach to the basement of the bar located southwest of the town. |
| 7 |
 Talk to the soldier behind the electric floor tiles to open the door. Enter the room to obtain the Mermaid Moon from the treasure chest and the Gray Fragment. The Mermaid Moon is the item required to unlock the real Magic Carpet. ▶︎ Where to Get the Magic Carpet |
| 8 | Leave the town and head back to the teleporter to return to the present era. |
Wetlock (Present)
| 1 | Head to the present era Wetlock located at the east side of the region. |
|---|---|
| 2 |
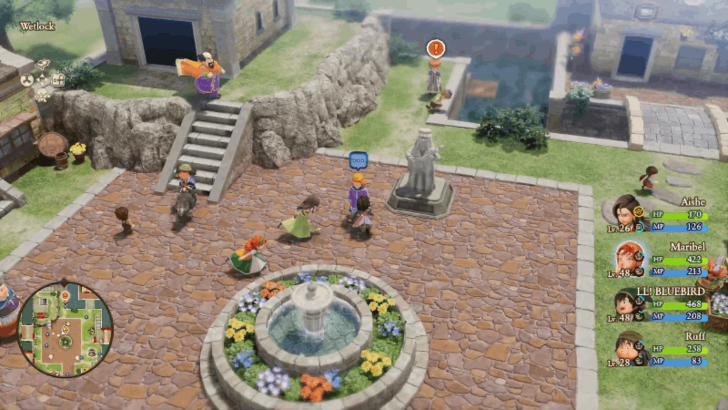 Approach to the man with the exclamation mark on his head at the north part of the town to activate a cutscene. Talk to him after and select "Yes". |
| 3 | Go to Professor Wade's house at the southeastern part of the town. Select "Yes" when you asks you to defeat the monsters in Highendreigh Tower. |
Highendreigh Tower (Present)
| 1 | Once you arrive at the tower, use the stairs located left of the entrance to head down to Basement Level 1. Inside the basement is a boss fight with King Slime. |
|---|---|
| 2 |
 Use skills that lower King Slime's physical damage as the boss only uses physical damage and use the skill that prevents the boss from using its Heal skill. |
| 3 | After defeating King Slime, Goobris will join the team. He will open up the door on Level 3. |
| 4 | Head to Level 5 of the tower and attempt to leave to start the boss fight with Ethereal Serpent. Use skills that lower the boss's physical damage as it can use area-of-effect attacks that significantly reduce your HP. |
| 5 | After defeating Ethereal Serpent, you will receive the Blue Fragment as a reward. |
| 6 | Return to Professor Wade at his house at the southeastern part of Wetlock. |
| 7 | Use the raft north of the town to reach the underground warehouse at the west part of the town. |
| 8 |
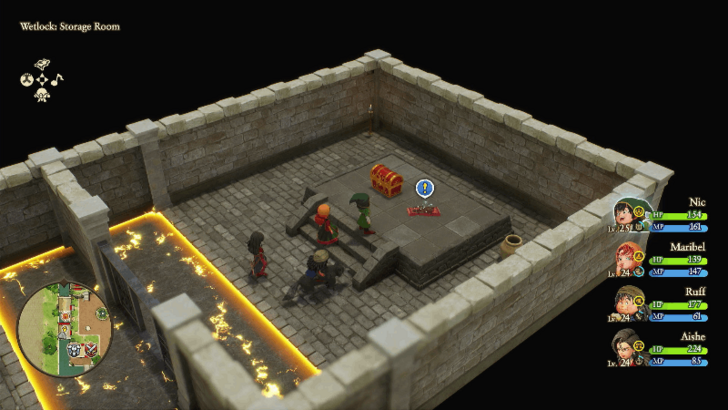 Talk to the soldier in front of the electric floor tiles to have him open the door. Go through the electric floor tiles to obtain the Red Fragment and the Rippled Rapier from the treasure chest. |
Gracos's Throne Room (Present)
| 1 | Head to the glowing teleporter southwest of Wetlock to enter Gracos's Throne Room. |
|---|---|
| 2 |
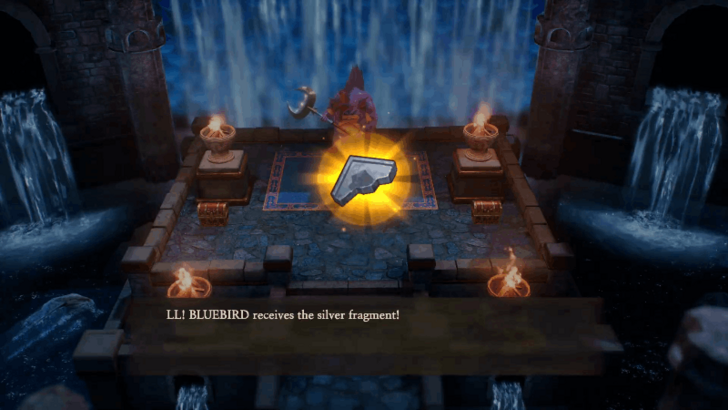 Talk to Gracos V to start the boss fight. Use fire elemental skills to deal more damage and keep your HP high at all times. Once you defeat Gracos V, choose "Yes" for the dialogue option to receive a Silver Fragment. |
| 3 |
At this point, you can travel to the La Bravoure region south of the Frosbisher region to complete the Magic Carpet questline, find The Tallest Tower, and progress the story.
▶︎ La Bravoure Walkthrough |
La Bravoure Region
| Jump to a Section | ||
|---|---|---|
| Find the Sizzling Stone | The Tallest Tower | - |
| Back to the Top | ||
Find the Sizzling Stone
| 1 |
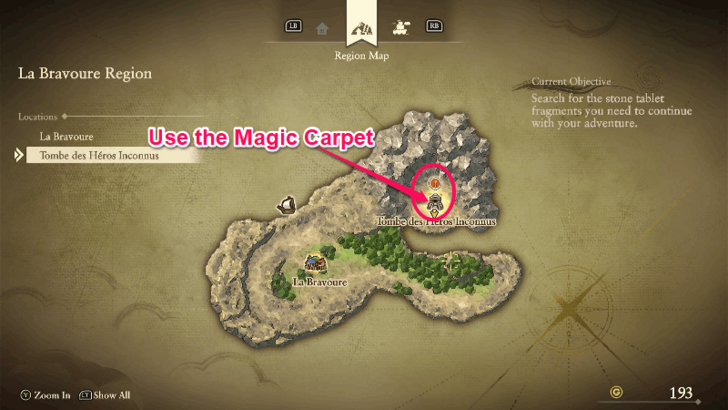 Use the Magic Carpet to reach the Tombe des Heros Inconnus northeast of La Bravoure. Press the Up Arrow on the D-Pad to use the Magic Carpet. ▶︎ Where to Get the Magic Carpet |
|---|---|
| 2 |
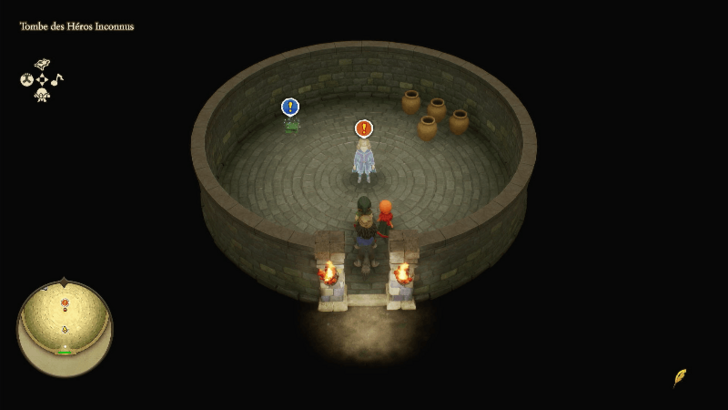 Talk to the ghost inside the tomb. Pick up the Green Fragment on the left side and break the pots on the right side to get a Mini Medal. |
| 3 |
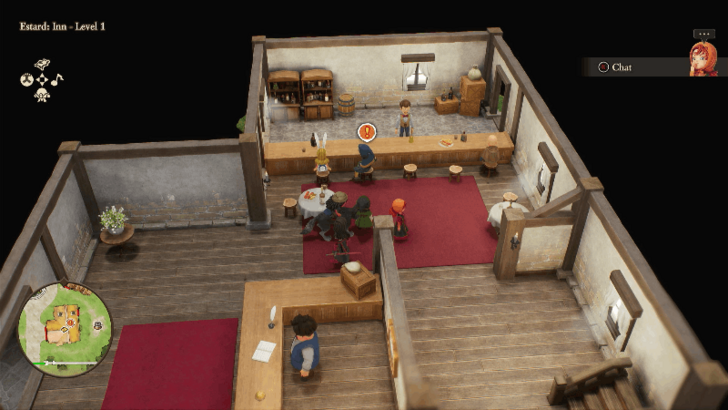 Fast travel of Estard and head inside the inn southeast of the town. Talk to Pike to learn of the location of the hot stone. |
| 4 |
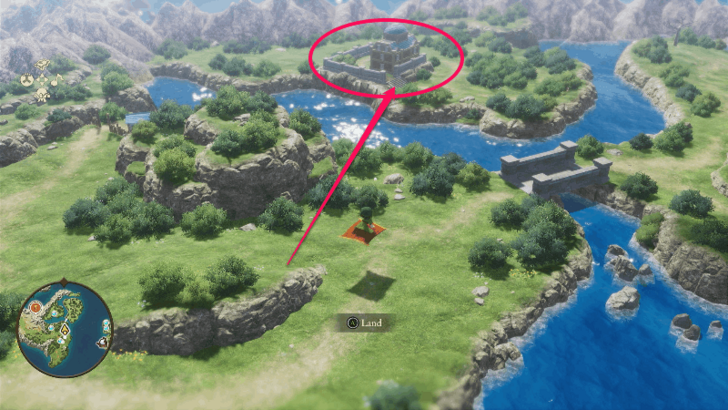 Fast travel to L'Arca and use the Magic Carpet to reach the isolated palace north of the region. |
| 5 |
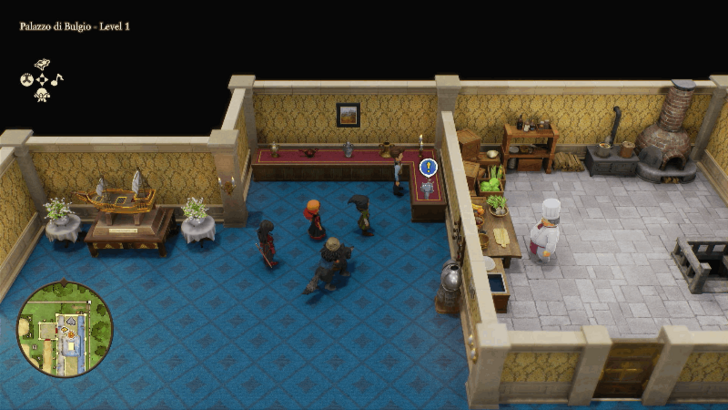 Enter the mansion and pick up the Grey Fragment on the display table of Level 1. |
| 6 |
 Talk to the man at Level 2 of the mansion. Leave the mansion after to activate a cutscene to have Bulgio join the party temporarily. |
The Tallest Tower
| 1 |
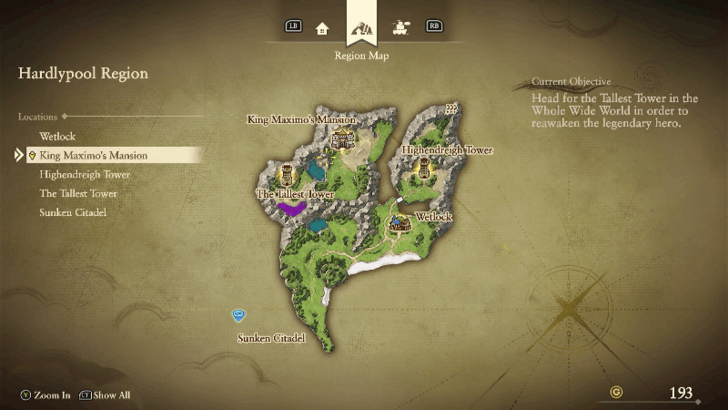 Before heading to The Tallest Tower, use the Magic Carpet to King Maximo's Mansion west of Highendreigh Tower in the Hardlypool Region. Talk to King Maximo to exchange the Mini Medals that you have to obtain equipment and items as rewards. ▶︎ All Mini Medal Locations and Rewards |
|---|---|
| 2 | Head west of the Highendreigh Tower to reach The Tallest Tower. A cutscene plays when you enter the tower. Go inside the door afterward. |
| 3 | Explore the tower and aim to reach the top floor. There are no bosses, but there are various gimmicks and complex paths so be sure to check the map as you go. |
| 4 | Once you reach the top floor, use the Sizzling Stone on the altar and watch the cutscene that follows. |
| 5 |
Once the cutscene ends, Sir Mervyn will join your party. Note that since only four party members can participate in battle, it is recommended to decide how to organize your party.
▶︎ Sir Mervyn Profile |
| 6 |
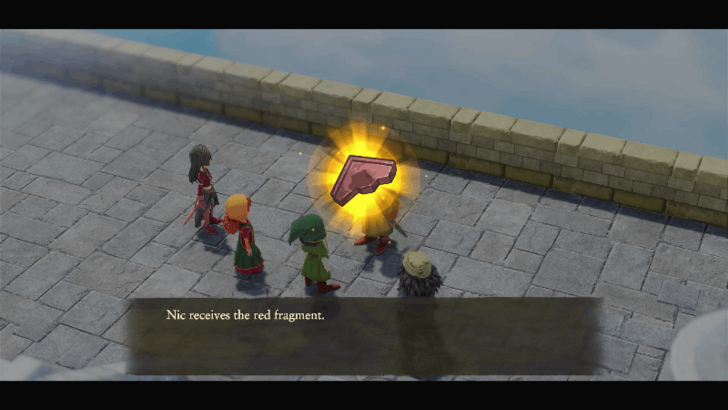 After Sir Mervyn joins your party, you will receive a Red Fragment. Bulgio will leave the party once you exit The Tallest Tower. |
| 7 |
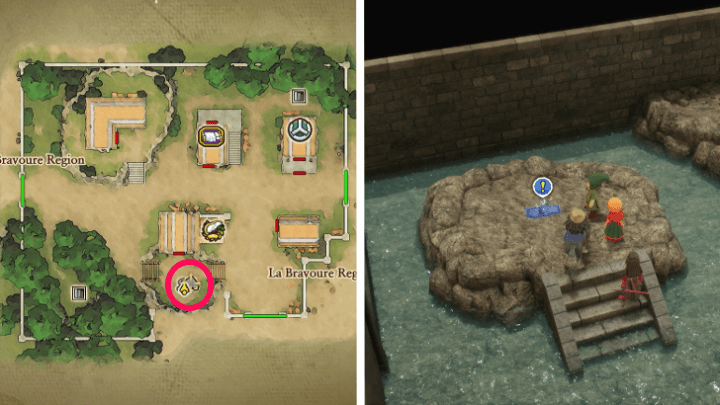 Head back to La Bravoure and go inside the well south of the town. Pick up the Blue Fragment inside. |
| 8 |
Travel to the Shrine of Mysteries and assemble the Red Fragments to form a Red Tablet that transports you to the next island, Hubble.
▶︎ Jump to Hubble Walkthrough |
Buccanham Region
| Jump to a Section | ||
|---|---|---|
| Buccanham Palace | Heavy Metal Hole | Retrieve the Prism Dew |
| The Beacon | Buccanham Palace (Part 2) | Buccanham Region (Present) |
| Back to the Top | ||
Buccanham Palace
| 1 | Head northwest from the teleporter to reach the Buccanham Palace. Head to the building north to activate a cutscene. |
|---|---|
| 2 | Enter the castle and talk to the king in the throne room. |
| 3 | Go up to the third floor from the east side of the castle. Talk to the servant in the bedroom. |
| 4 | Go down to the second floor, go out the door onto the balcony and talk to the musician on the balcony. |
| 5 | After the cutscene with the musician ends, head to the beadroom on the third floor and rest on the bed. A cutscene will occur before you go to the third floor. |
| 6 |
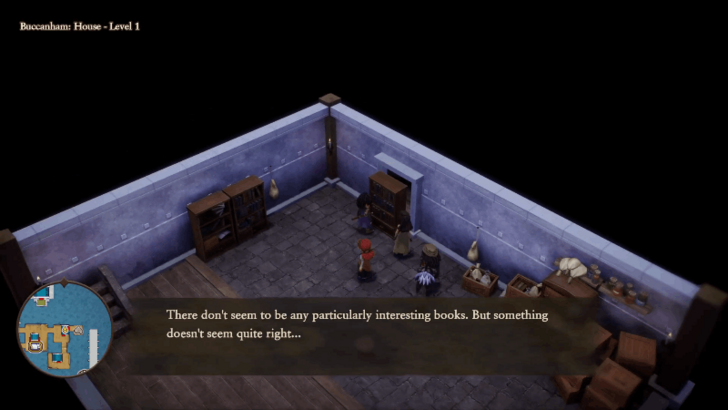 Go to the house east of the town and examine the bookshelf multiple times to find a switch. Press the switch to proceed further and retrieve the Blue Fragment. Exit the palace and head north to reach the cave leading to the Heavy Metal Hole. |
Heavy Metal Hole
| 1 | Enter the Foreman's house north of the campfire. |
|---|---|
| 2 | Talk to the dwarves and the Foreman inside. Talking to the Foreman allows you to go further into the cave. |
| 3 | After speaking with the required NPCs, head to the stairs east to reach the Den of the Dwarves. Descend to Basement Level 3 to reach a boss, The Slamphibians. |
| 4 |
 Prioritize with beating the main boss and it can use a skill that revives the other enemies. Make sure to have countermeasures against poison as the boss uses attacks that inflict poison. |
| 5 | Examine the wall where the boss was and collect the Box of Glowmoss. Exit the dungeon and return to Buccanham Palace. |
Retrieve the Prism Dew
| 1 | Return to Buccanham Palace and a cutscene will activate once you are on the way to the castle. After the cutscene ends, exit the palace and travel to the present using the teleporter. |
|---|---|
| 2 | Once you arrive at the Shrine of Mysteries, head to the eastern passage and enter through the door with the blue candlestick to teleport to Rainbow Cove. |
| 3 |
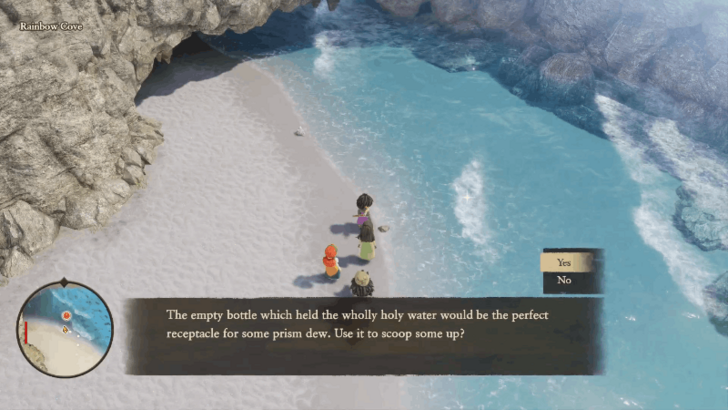 Examine the water at the shore to get a phial of prism dew. |
| 4 | Return to Buccanham (Past) and head north to The Beacon. |
The Beacon
| 1 | Follow the footprints inside the Beacon until you reach the Top Level. |
|---|---|
| 2 | Examine the giant jar with black flame and use the phial of Prism Dew on it. This will take you to The Beacon (Other World). Note that doing so leads you to a boss fight, so be sure to save at the angel statue before proceeding. |
| 3 |
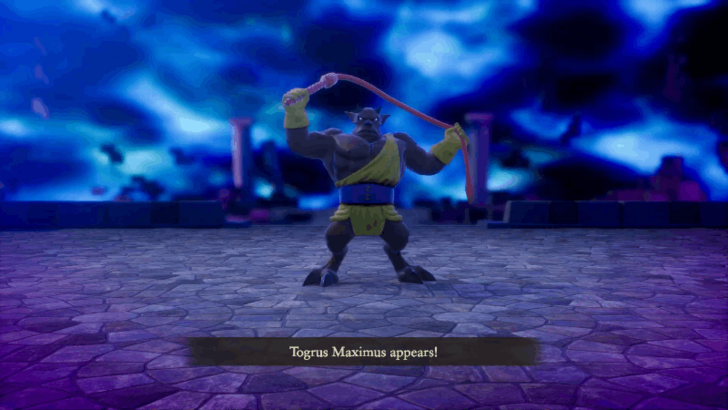 Togrus Maximus uses attacks that cause Paralysis, so be sure to have some items and skills that cure your party members of this status ailment. Make sure to keep your HP high as the boss can use critical hit attacks. |
Buccanham Palace (Part 2)
| 1 | After defeating Togrus Maximus, you will automatically teleport to the Buccanham Palace Lighthouse. Go to Level 4 and light up the brazier with the Guiding Light. |
|---|---|
| 2 | Leave the palace and use Zoom to teleport to the Den of Dwarves. Speak with The Foreman to allow access to the storeroom below. Pick up the Blue Fragment and the Siren Sword from the treasure chest. |
Buccanham Region (Present)
| 1 | Return to the present day using the teleporter south of Buccanham Palace. |
|---|---|
| 2 |
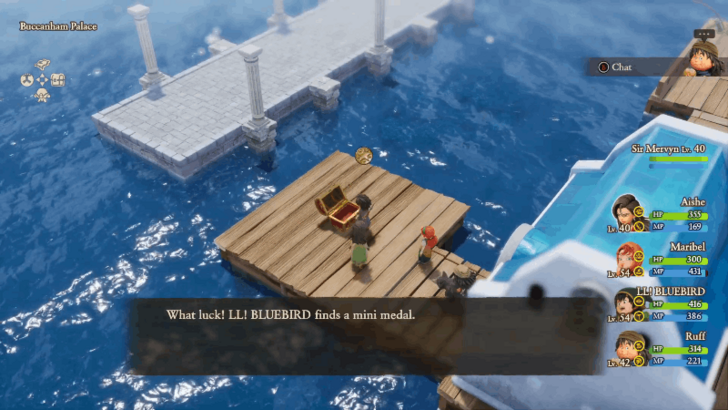 Use the Magic Carpet to travel to the western continent and head to Buccanham Palace. Head to the house east and examine the bookshelf multiple times to move it and reach the treasure chest that contains Mini Medal. |
| 3 | Travel to the Den of the Dwarves and to go the location where you picked up the Box of Glowmoss in the past to obtain a Mini Medal. |
| 4 |
At this point, you can progress the story by heading to the Frobisher region and going northeast to reach the Pool of Piety.
▶︎ Jump to Pool of Piety Walkthrough |
Endgame Walkthroughs
| Jump to a Section | ||
|---|---|---|
| Prologue | Yellow Tablets | Red Tablets |
| Green Tablets | Grey Tablets | Blue Tablets |
| Endgame | ||
| All Endgame Sections | ||
| Turquoise | Black | Cathedral of Light |
| Awakening the Fire Spirit | Awakening the Earth Spirit | Awakening the Wind Spirit |
| Curious Tablet | Cathedral of Blight | - |
Turquoise Tablet
| Jump to a Section | ||
|---|---|---|
| Coral Cave | Divine Shrine | Pool of Piety (Past) |
| Divine Shrine (Part 2) | - | - |
| Back to the Top | ||
Coral Cave
| 1 | Travel to the Frobisher region in the present and head northeast to reach the Pool of Piety. |
|---|---|
| 2 | Head to the second floor of the shrine and talk to the soldier. After talking to the soldier, you can proceed through the door on the first floor. Head north towards the lily pads to enter the Coral Cave. |
| 3 |
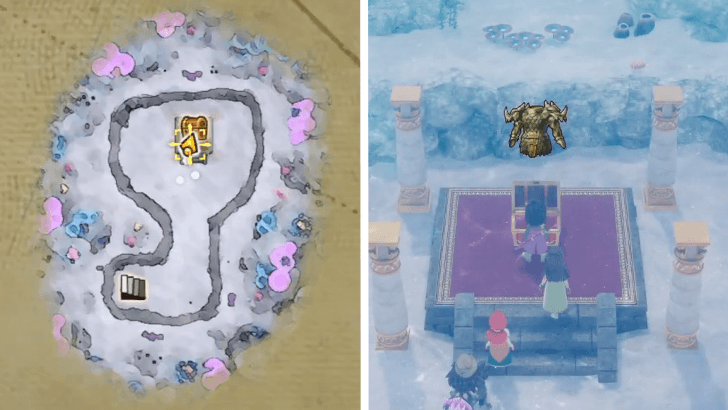 Go to Basement Level 2 and open the treasure chest to obtain the Dragon Mail. This armor has high defense and reduces damage from fire and ice. |
| 4 |
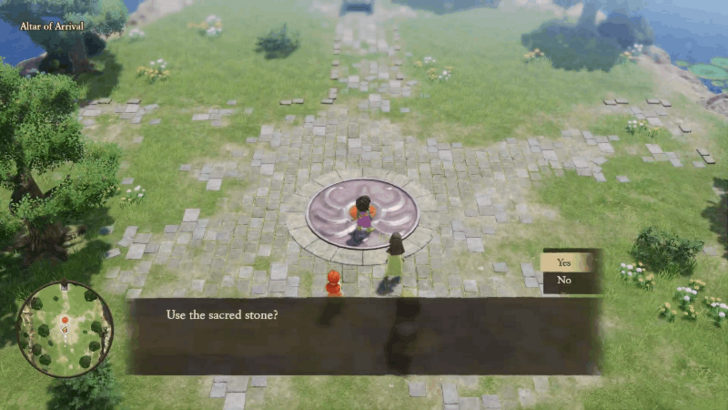 Reach the Altar of Arrival and examine the cenrtal crest to use the Sacred Stone. This causes a platform on the east side of the area. Step on the platform to reach the Divine Shrine. |
Divine Shrine
| 1 | Talk to the soldier in front of you and then talk to the woman on the second floor of the shrine to get a Pure Robe. |
|---|---|
| 2 | Head to the shrine north and place the Turquoise Fragment to create a Turquoise Tablet to travel to the Pool of Piety Region. |
Pool of Piety (Past)
| 1 | Head north into the shrine and towards the lily pad to enter Coral Cave. |
|---|---|
| 2 |
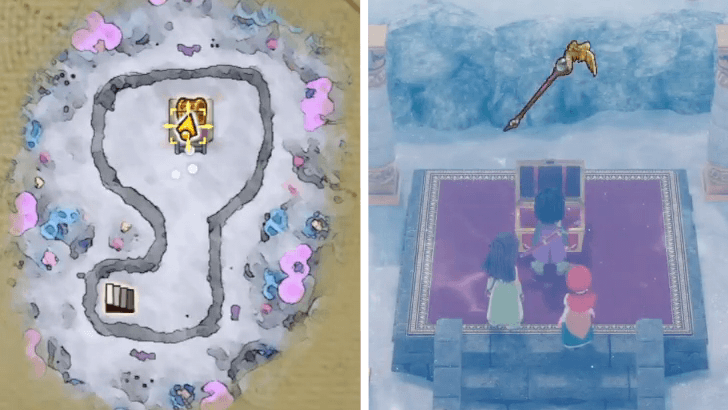 Go to Basement Level 2 and open the treasure chest to obtain the Siren's Staff. This is a staff that can restore HP when used during battle, so it is recommended to give it to a party member that does not have any healing skills. |
| 3 |
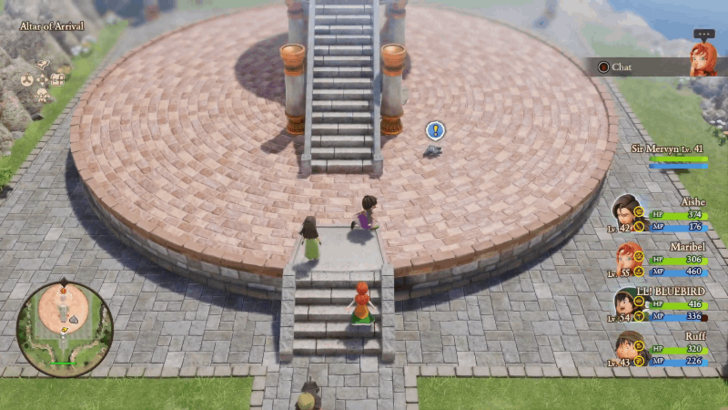 Once you reach the Altar of Arrival, pick up the Black Fragment near the stairs. |
| 4 | Climb the stairs to reach the platform with the circle insignia on the floor. Interact with the platform and use the Sacred Stone. |
Divine Shrine (Part 2)
| 1 | Use Zoom to fast travel to the Divine Shrine. Head to the building on the south side. |
|---|---|
| 2 |
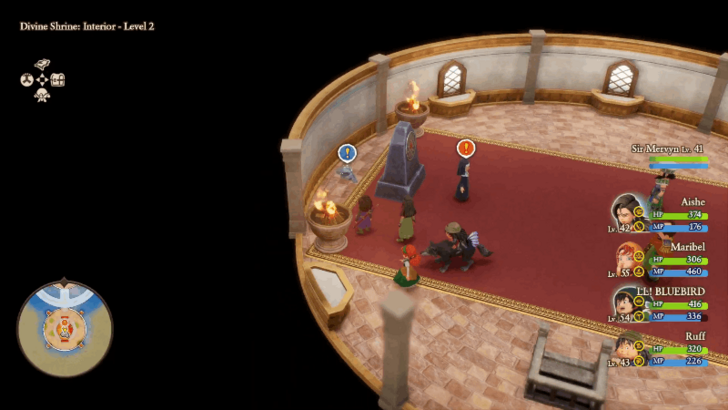 Climb to the second floor and pick up the Grey Fragment. |
| 3 |
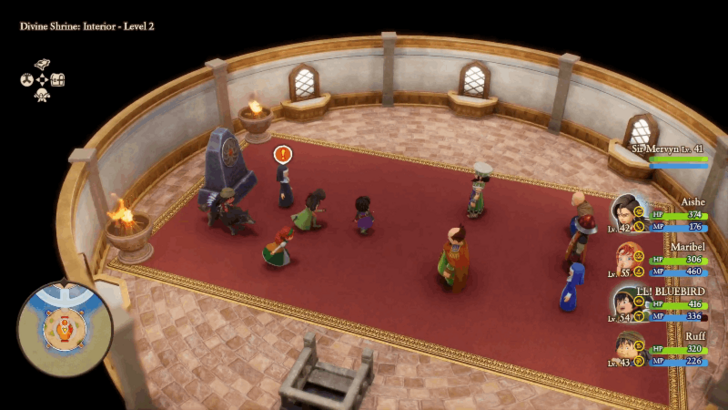 Talk to the nun in front of the stone monument. After talking to her, examine the floating rock, the Skystone, north of the shrine to unlock it as a vehicle. Riding the Skystone allows you to reach inaccessible locations surrounded by high mountains. Use it to reach the northern shrine in Hardlypool region. ▶︎ Jump to Black Tablet Walkthrough |
Black Tablet
| Jump to a Section | ||
|---|---|---|
| Dig Site | Malign Shrine | - |
| Back to the Top | ||
Dig Site
| 1 |
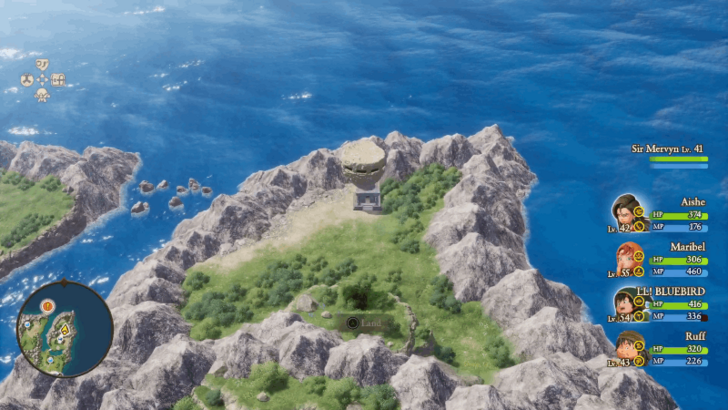 Zoom to the Hardlypool region and use the Skystone to reach the shrine on the north side. Talk to the person inside to get a Black Fragment. |
|---|---|
| 2 | Go to the Dig Site at the Roamer Encampment Region and descend the stairs on the west side to enter the cave. |
| 3 | You can get two Mini Medals from the treasure chest inside the tent and in the pot near the stairs leading to the cave. |
| 3 | Enter the door on Basement Level 3 of the cave to reach a treasure chest that contains a Mini Medal. |
| 6 | Head to Underground Level 4 of the cave. |
| 7 | Place the Black Fragments to form a Black Tablet that transports you to the Malign Shrine. |
Malign Shrine
| 1 | Head to the deepest part of the Malign Shrine. Make sure to open the treasure chests to obtain powerful equipment such as the Sunbolt Blade at Level 3 and the Dark Robe at Level 5, as these will help with the upcoming boss battle. |
|---|---|
| 2 |
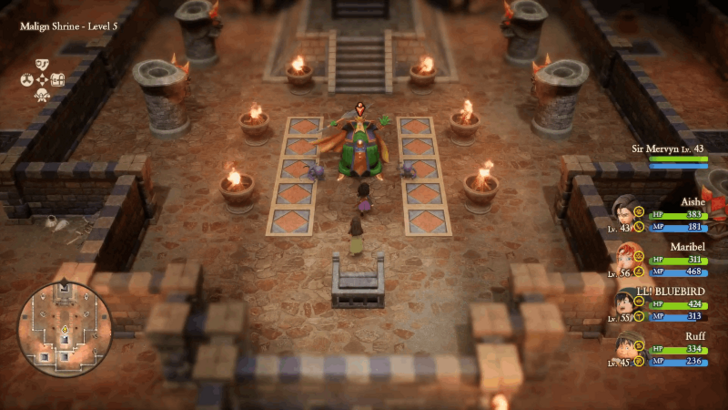 You can proceed with Level 5 without defeating The Time Being. The Time Being is a powerful monster on par with a boss, so be sure to prepare before battling it. |
| 3 | Heal and save at the angel statue. Go to the throne room and talk to the NPC sitting on the throne to start the boss fight. |
| 4 |
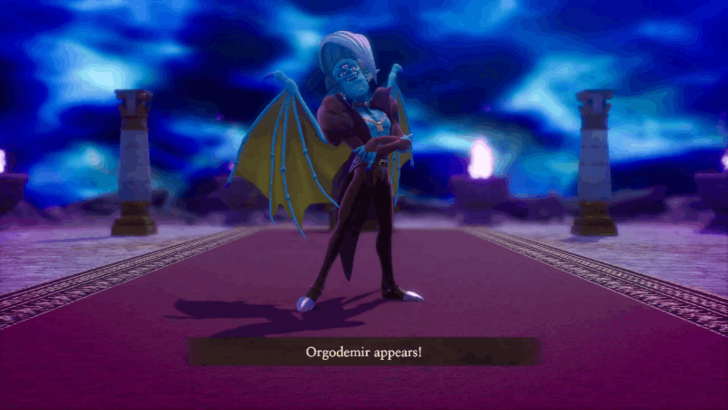 Orgodemir uses powerful magic attacks, so make sure to increase your magic resistance using the Magic Barrier to reduce damage. If you are hit with the Ice Wave attack, your Magic Barrier will disappear, so be sure to cast the spell again to increase magic resistance. |
| 5 |
 Orgodemir's second phase uses powerful breath attacks such as Ice Breath and Fire Breath. Cast Magic Barrier to increase magic resistance at all times and recast it again if you are hit with the Ice Breath. |
| 6 | After defeating the boss, leave the Malign Shrine via the staircase to activate a cutscene. You will automatically teleport to the Divine Shrine. |
| 7 |
Leave the Divine Shrine via the teleporter to activate another cutscene. Once you are ready to progress the story, head to Estard Castle.
▶︎ Jump to Cathedral of Light Walkthrough |
Cathedral of Light
| Jump to a Section | ||
|---|---|---|
| Divine Shrine | Pool of the Cave | Estard Island |
| Cathedral of Light | Estard Island (Part 2) | Buccanham Region |
| Back to the Top | ||
Divine Shrine
| 1 | Fast travel to Estard Castle and talk to the servant in front of the dining room. Talk to King Donald afterward. |
|---|---|
| 2 | Go to the Hubble region and enter The Grand Conjuratorium. Speak with Queen Euphonia at the center of the area. |
| 3 | Go to the Roamer Encampment and talk to the nun inside the northern tent. |
| 4 | Head west to enter the Pool of the Cave. When you arrive at the area, a cutscene will play. Talk to the woman in the rest after the cutscene to rest. |
Pool of the Cave
| 1 | Enter the location for a cutscene. After that, talk to the woman inside the tent to rest to receive the Chimes of the Chosen. |
|---|---|
| 2 | Proceed to Basement Level 4 of the cave and offer the Chimes of the Chosen at the altar. |
| 3 | Talk to the villager in the area where the water has receded on Level 1 to proceed to the Altar of the Almighty. |
| 4 | Speak with Rom Baro at the base of the stairs to receive the Vestment of Virtue. You will automatically teleport to the Shrine of Mysteries afterward. |
Estard Island
| 1 | Head to Pilchard Bay and talk to Pearl and Pollock. |
|---|---|
| 2 | Talk to the chef inside the ship east of the village. |
| 3 | Talk to the old man near the village exit to activate a cutscene and allow you to leave the village. |
| 4 | Head to Estard Castle to activate a cutscene. You will teleport automatically at your house in Pilchard Bay. |
| 5 | Recieve the sandwich from Pearl on the first floor and give it to Pollock on the ship east of the village. Go inside the ship and talk to the cook. After the cutscene, talk to Mayor Mayde near the shore. |
| 6 | Talk to the chancellor in the throne room of Estard Castle. |
| 7 | Talk to King Donald in the dining room on the first floor. Talking to the king automatically transports you to the Cathedral of Light, so be sure to prepare some items and upgrade your equipment before doing so. |
Cathedral of Light
| 1 |
Once you are able to move freely in the Cathedral of Light, make sure to collect the Ultimate Key in Basement Level 1. You won't be able to return to this location for a while, so be sure to collect all the items the first time you visit. |
|---|---|
| 2 |
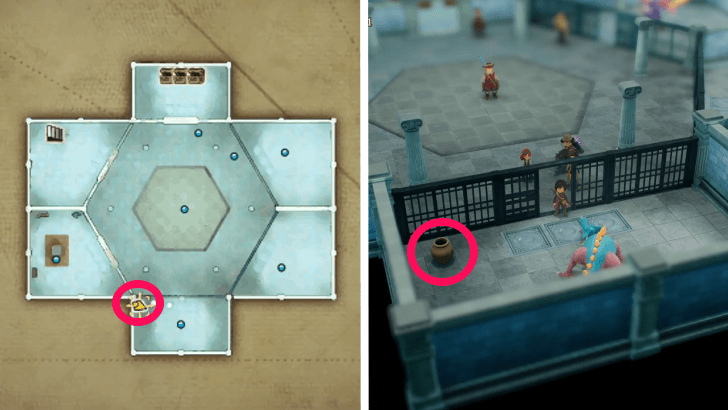 Break the pot inside the prison on the south side of Basement Level 1 to get a Mini Medal. |
| 3 | Rest on the bed in the room on the second floor of the cathedral. Enter that room by going to Basement Level 1 to reach that side of the second floor. |
| 4 | Talk to the soldier in front of the stairs on the second floor to activate a cutscene and allows you to proceed further. |
| 5 | Talk to the soldier in front of the stairs on the third floor to proceed to the fourth floor. |
| 6 | Once you reach the fourth floor, talk to everyone that has the exclamation mark above their heads. Talk to Nephil after to activate a cutscene. |
| 7 | After the cutscene ends, you can use the free time at this point to pick up the Ultimate Key and the Mini Medal on Basement Level 1 if you haven't already. Once you are ready, leave the cathedral to activate a cutscene that teleports you to Estard Castle. |
Estard Island (Part 2)
| 1 | Before leaving the castle, go to the basement treasure room to get the King's Sword and King's Cloak from the treasure chests. Access the basement treasure room by going behind the central stairs on the first floor of the castle. |
|---|---|
| 2 |
If you have the Ultimate Key, you can retreive the Mini Medal in the dungeon. Descend from the east room on the third floor of the castle to reach the dock. Then, use the raft to reach the west side fo the castle. |
| 3 | A cutscene will activate when you attempt to leave the Estard Castle. Monsters will spawn on the field after. |
| 4 | Head to Pilchard Bay and talk to the fisherman in the house next to the church. |
| 5 | Use the Ultimate Key to open the treasure chest in the basement of the house to get a Mini Medal. |
| 6 | Talk to Pearl near the docks east and Mayor Mayde in the mansion. Talking to both activates a cutscene. |
| 7 | Head to the Shrine of Mysteries and examine the statue. This activates a cutscene and you will be able to enter the Assembly Room. |
| 8 |
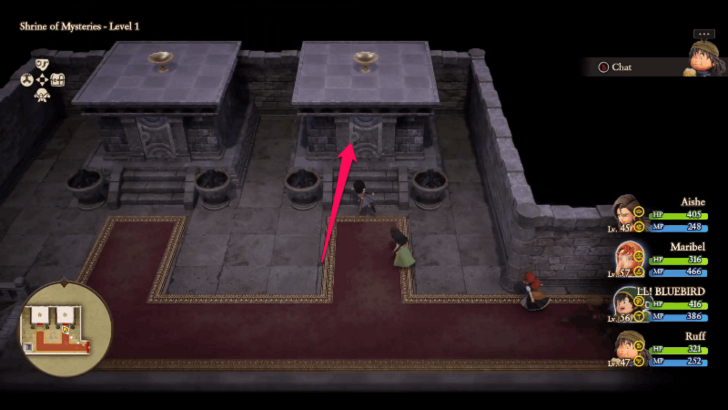 Approach the doors on the left and right sides of the Assembly Room and head downstairs. Approach one of the altars inside to activate a cutscene. |
Buccanham Region
| 1 | Leave Buccanham Palace and travel to The Beacon north. Talk to the soldier at the entrance. He will tell you that you need King Buccanham's permission to enter the beacon. |
|---|---|
| 2 | Head to the cave southeast and talk to King Buccanham. Collect the Mini Medal from the treasure chest on the right side of the king before leaving. |
| 3 | Return to The Beacon and head to the top of the lighthouse. Note that the puzzle sections for this dungeon is complete, so you can just head up to the top without difficulty. Note that a boss awaits at the top, so it is recommended to gear up and prepare. |
| 4 | Once you reach the top, go to the shiny spot on the north side to pick up the Mini Medal. |
| 5 |
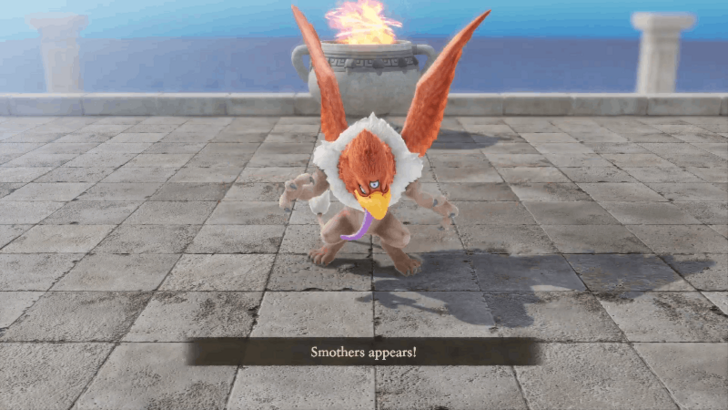 You will fight Smothers with just Sir Mervyn alone. Make sure to keep his HP high and have items that restore HP and the boss can use Magic Tome to seal spells. |
| 6 |
Interact with the Guiding Light at the top of The Beacon. This unlocks a door in the Shrine of Mysteries. Once you gain control of the Hero, head towards the unlocked door to teleport to Burnmount.
▶︎ Awakening the Fire Spirit Walkthrough |
Awakening the Fire Spirit
| Jump to a Section | ||
|---|---|---|
| Burnmount Region | Estard Island | - |
| Back to the Top | ||
Burnmount Region
| 1 | Exit the Burnmount mountain and go to Emberdale. |
|---|---|
| 2 | Once you arrive at Emberdale, defeat the monsters attacking the village to progress the story. |
| 3 | Head to Gaffer's house west of the church and go to the second floor for a cutscene to get the Conflagration Key. Open the treasure chest nearby to get the Mini Medal. |
| 4 |
Go back to Burmount, jump off the central crater, and head to the first floor. Floors 5, 3, and 1 have treasure chests that can be opened with the Ultimate Key, so be sure to collect them. Floor 5 has a Fire Blade but do not equip it yet. Floor 3 has 1500 Gold while Floor 1 has a Mini Medal and a Magma Staff. |
| 5 | Use the Conflagration Key to open the door at the first floor to head to the deepest part. After the cutscene, you will fight the Fire Spirit in a boss fight. Make sure to heal at the angel statue beforehand. |
| 5 |
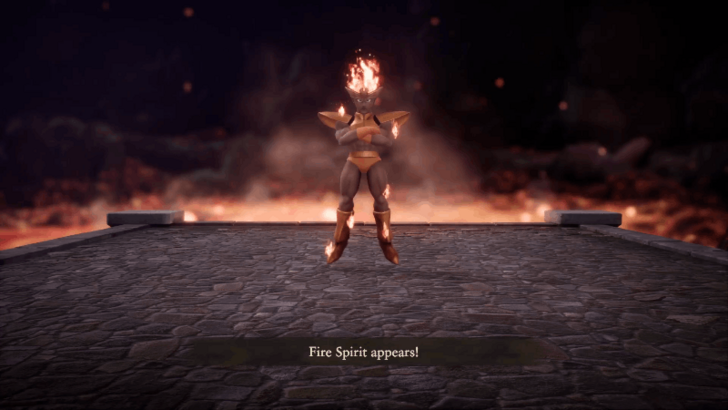 Equip armor that reduce fire damage such as the Dragon Shield and Dragon Mail. Set up a Magic Barrier to increase your magic resistance. |
| 6 | After defeating the Fire Spirit, return to Emberdale for a cutscene. Return to Burnmount and use the teleporter at the summit to warp back at the Shrine of Mysteries. |
Estard Island
| 1 | Go to Pilchard Bay and talk to Pearl and Mayor Mayde to teleport to The Sea Dragon. |
|---|---|
| 2 |
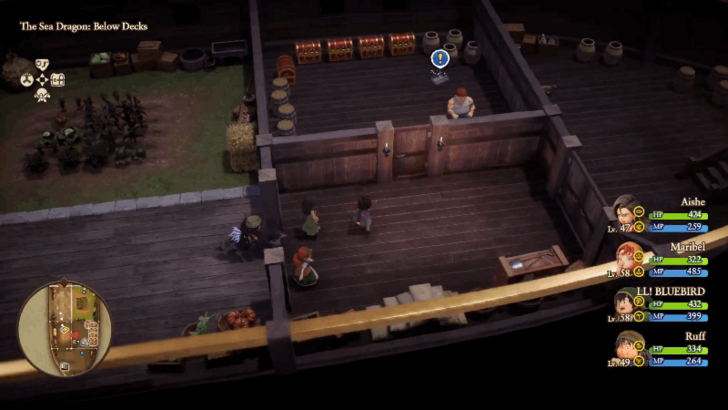 Explore the ship and retrieve the Gray Fragment at the treasure room on the east side fo the ship. Go down the stairs on the east side to the basement to reach the location. |
| 3 | After exploring The Sea Dragon, talk to the sailor in front of the eastern deck to disembark the ship. You can board and disembark the ship again by talking to the sailor. |
| 4 |
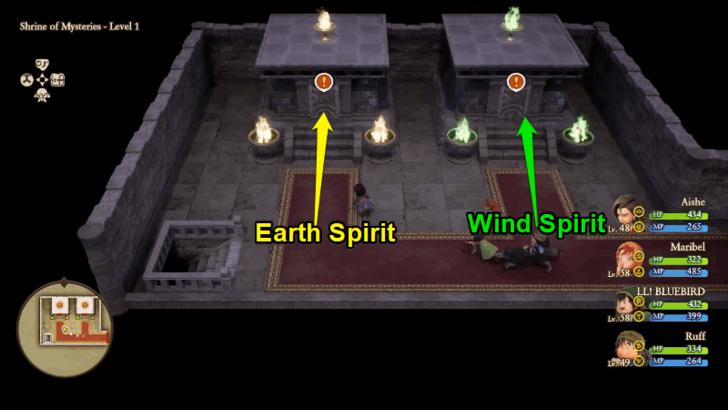 Enter the Shrine of Mysteries and talk the western door to your next destination. The yellow flame room leads to the Earth Spirit at the Al-Balad region while the green flame room leads to the Wind Spirit at the Aeolus Vale region. ▶Awakening the Earth Spirit Walkthrough ▶Awakening the Wind Spirit Walkthrough |
Awakening the Earth Spirit
| Jump to a Section | ||
|---|---|---|
| Al-Balad Region | Hidden Pyramid | - |
| Back to the Top | ||
Al-Balad Region
| 1 | After entering the yellow flame room to teleport to Al-Balad, you'll end up at The Oasis. Leave the area and travel north to the Temple Palace for a cutscene. |
|---|---|
| 2 |  Enter the palace and head to the queen's chamber. Check out the treasure room behind her to retrieve a Mini Medal and some equipment from the chests. ▶All Mini Medal Locations and Rewards |
| 3 | 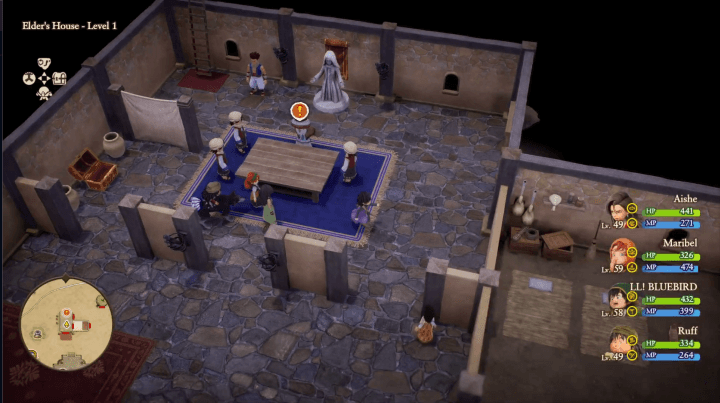 Leave the Temple Palace and visit Al-Balad village, then speak to the elder inside his house. There's another Mini Medal there in a locked chest. |
| 4 | Proceed to the hut in the northeast corner of the village to talk to Sa'id, then speak to the man inside the large pot in the center. You'll end up back at the Oasis and will need to return to Al-Balad to speak to the elder again. |
| 5 | After the cutscenes, return to the Temple Palace and speak to the Queen. She'll direct you to Basement Level 2, where you can speak to the guards to unlock access to the shrine. |
| 6 | 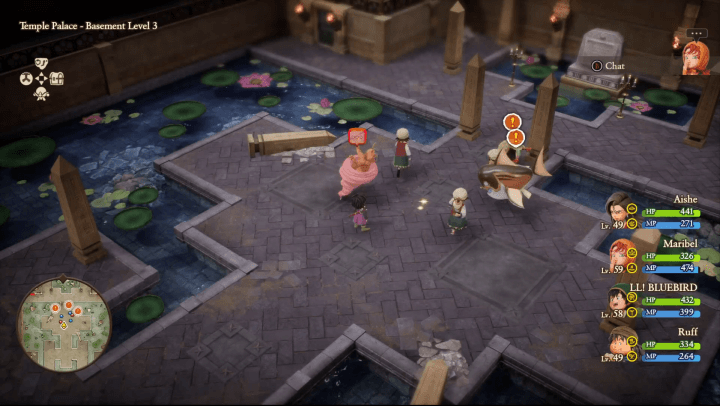 When you descend into the shrine, you'll need to fight three monsters chasing the children around. They're not particularly strong, so you can defeat them with normal tactics. |
| 7 | For your trouble you'll receive the Royal Key. Speak to the queen about it, and you'll be allowed access to the Likeness of the Great Spirit. |
| 8 |  Return to Al-Balad and use the teleporter inside the central pot to teleport directly to the Likeness of the Great Spirit. Enter the Likeness and speak to the spirit maiden there to be given access to the basement levels. |
| 9 | 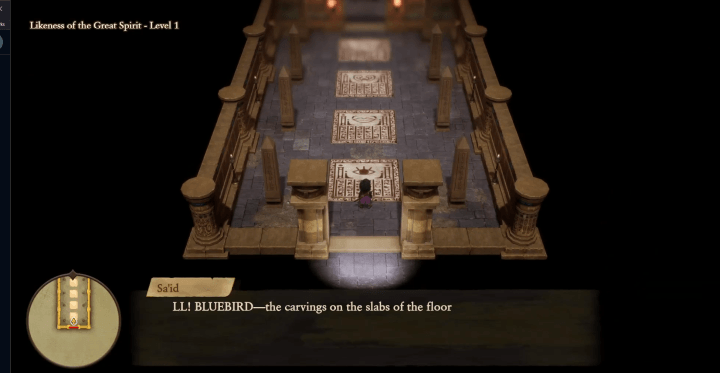 Examine the floor tiles for clues about the likenesses. Sa'id will take down notes so you can refer to them later to solve puzzles. Enter Basement level 1 and follow the short path to enter the Hidden Pyramid. Don't forget to open the chest for a Seed of Resilience. |
Hidden Pyramid
| 1 | 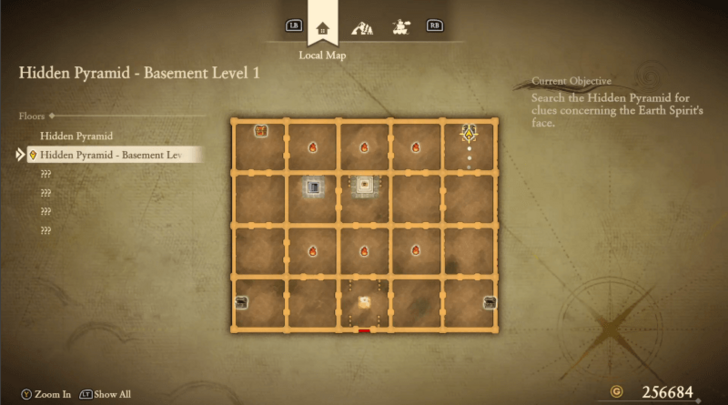 The first main room of the Hidden Pyramid is a large puzzle. The map is divided into 20 rooms with six burning torches in the center. |
|---|---|
| 2 |
You must extinguish the torches in all of the rooms. You can do so in any order. The room will get darker but you can navigate using the map. Once all torches are extinguished, you can obtain the Eye Stones from the center room. Make sure to open the chest in the northeast corner to get a Mini Medal. ▶All Mini Medal Locations and Rewards |
| 3 | 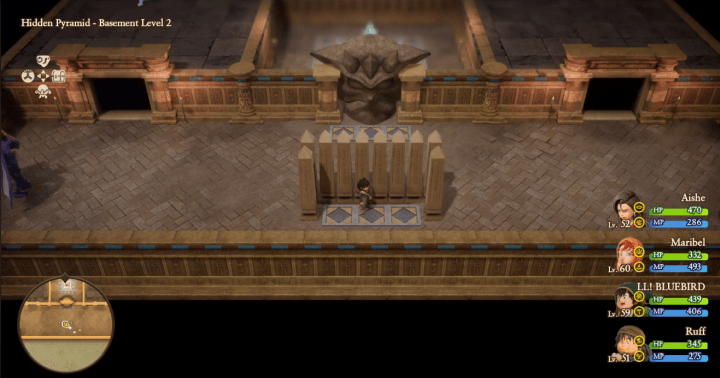 Enter Basement Level 2 via the ladder. The way to the Mouth Stone is blocked by a large stone face. Simply hide behind the barrier and don't move for a short while, and the face will lift up to allow you to claim the stone. |
| 3 | 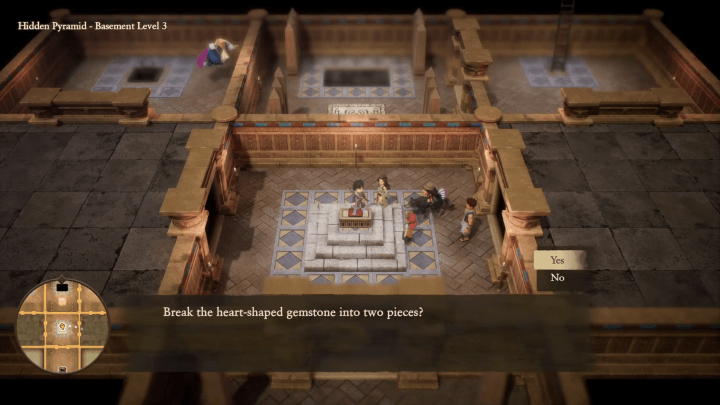 Jump down the hole to get to Basement Level 3. The Heart Stone is on the pedestal in easy reach. After getting it, enter your inventory and examine the Heart Stone again. Choose to split the stone to obtain Ear Stones. Check the southern door for a chest containing a Skeleton Swordsman Monster Heart. |
| 5 | 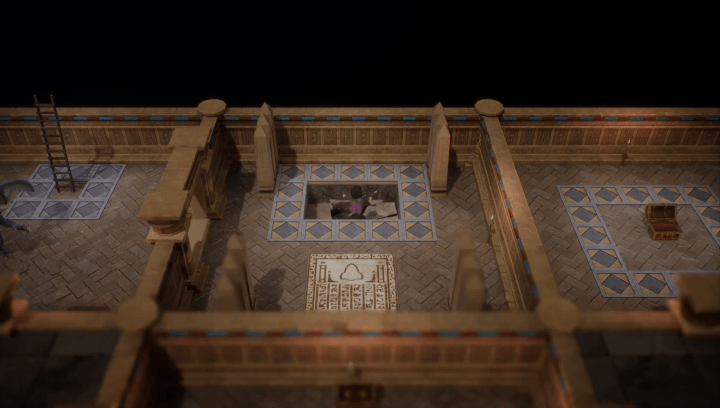 Jump through the hole down to Basement Level 4. Before leaving the room, grab the treasure chests for a Shield of Shame and Divine Bustier. When ready, step on the tiles north of the clue tile to fall down to where the Nose Stone is kept. Grab the stone and step on the circular panel to teleport back to Level 1. |
| 6 | Return to the Oasis and speak with the old man to trigger a cutscene and obtain the Amulet of Earth. |
| 7 | Use the Oasis Teleporter to return to the Shrine of Mysteries. From here you can enter the green flame room to awaken the Wind Spirit, if you haven't done so already. Otherwise, you can awaken the Water Spirit. ▶Awaken the Wind Spirit Walkthrough |
Awakening the Wind Spirit
| Jump to a Section | ||
|---|---|---|
| Aeolus Vale Region | Ventus Tower / Villa Priores | Multipleximus Maximus |
| Back to the Top | ||
Aeolus Vale Region
| 1 | After passing through the green teleporter, you'll emerge in the Sanctum of the Cirrus. Exit the building and use the teleporter outside to move down to ground, and leave the area. |
|---|---|
| 2 | 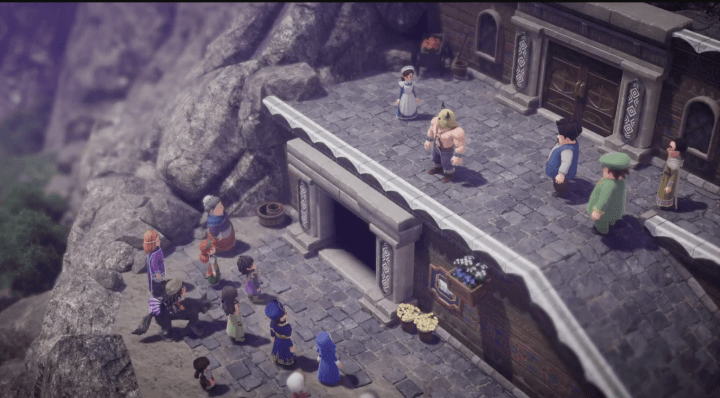 Head to Aeolus Vale town and approach the Praetor's House to trigger a cutscene. Afterward, enter the house and speak to Serafina to offer your help. Before leaving, check the wardrobes for a Mini Medal. ▶All 100 Mini Medals Locations and Rewards |
| 3 | 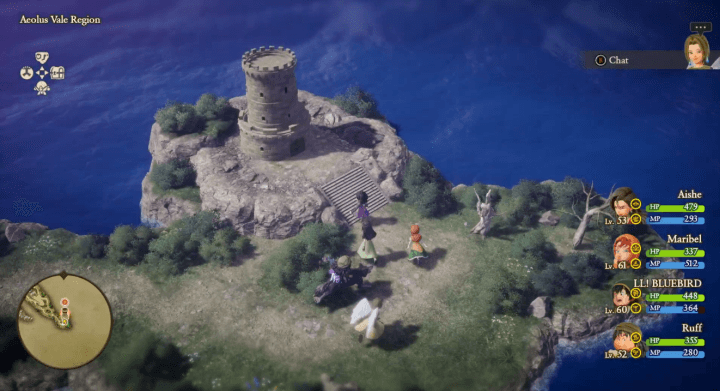 Leave Aeolus Vale via the southern exit and bring Serafina to Ventus Tower at the southeastern tip of the island. You can also choose veer north to fight the Vicious Dragster for the Dragster Heart. ▶All Menacing and Vicious Monster Locations |
Ventus Tower and Villa Priores
| 1 | Speak to the guard to enter the tower, and once inside, follow the stairways around to enter the stairs to the northeast. |
|---|---|
| 2 | Continue up the tower. There are no notable puzzles or bosses in the area, but the treasure chests include a Tempest Shield on Level 2, the Infanticore Monster Heart on Level 3, and a Mini Medal on Level 6. ▶Best Weapons and Equipment |
| 3 |  In the center of Level 6 you'll get the Staff of Resurrection at a sparkly spot. From there, emerge onto the tower summit and pproach the hole in the roof for a cutscene that teleports you to Villa Priores. |
| 4 |  Villa Priores is an unusual village spread over the faces of a floating cube. Explore the area at your leisure, then make your way to the Praetor's House at the marker. |
| 5 | Speak to the Praetor lying on the floor and break the pots in the room at his request. He will present you with the Multipleximus Key to access the great maze. He'll also give you the Aeolus Globe that allows you to travel back and forth to Villa Priores. |
| 6 |  Leave the Praetor's House and unlock the door into the domed structure to enter the Multipleximus Maximus. |
Multipleximus Maximus
| 1 | The Multipleximus Maximus is a labyrinth that involves traveling along the faces of different surfaces, just like in Villa Priores. You won't fall off. Just try not to be confused by the shifting perspective and you'll be able to navigate fairly easily. |
|---|---|
| 2 | Area 1 is fairly linear. Just follow the paths and check the different faces so you don't miss the treasure chests containing a Shimmering Dress and Seed of Strength. At the other end of the area, step on the panel to move to Area 2. |
| 3 |  Area 2 introduces the ability to advance by jumping through holes. Check the area for treasure chests to find a Notso Macho Monster Heart and Mercury's Bandana before moving on to Area 3. |
| 4 |  Area 3 just has an empty treasure chest that triggers a boss battle against Macho Picchu. He relies entirely on physical attacks, so buff up your defenses (and debuff his attack power) to gain the advantage. Defeating him earns you the Cirrus Surplice and a way back to Villa Priores. |
| 5 | Return to the Praetor's House and speak once more to the Praetor (after breaking the pots again) to receive Hermes' Hat. |
| 6 | Trek back from Villa Priores to Ventus Tower, through Aeolus Vale, and back to the Sanctum of the Cirrus, using the teleporters to get up to the roof where you can access the Wind Spirit statue. |
| 6 | 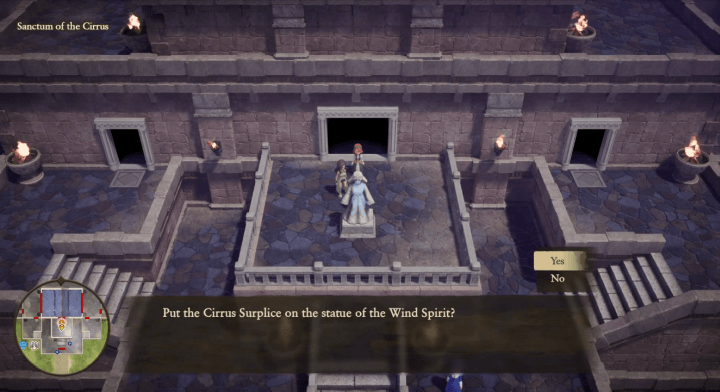 Put the Cirrus Surplice on the statue to awaken the Wind Spirit. You can then use the Teleporter inside the Sanctum to return to the Shrine of Mysteries. |
| 7 | Once back at the shrine, if you haven't done so yet, you can go through the yellow flame room to Awaken the Earth Spirit. If you've done so already, head to Pilchard Bay to awaken the Water Spirit. ▶ Curious Tablet Walkthrough |
Curious Tablet
| Jump to a Section | ||
|---|---|---|
| Awakening the Water Spirit | Altar of the Almighty | Rucker Region |
| Back to the Top | ||
Awakening the Water Spirit
| 1 | After awakening both the Earth Spirit and Wind Spirit, head to Pilchard Bay. |
|---|---|
| 2 |
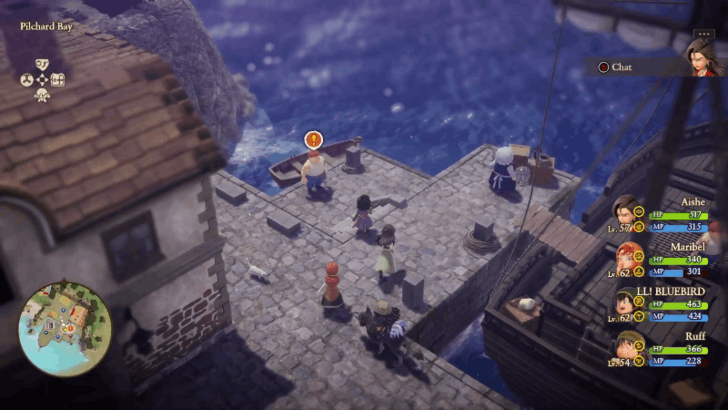 Talk to the man at the southeastern part of the area to head inside the ship, the Sea Dragon. After the cutscene, the Water Spirit will be revived and you will obtain the Water Amulet. |
| 3 | After the cutscene ends, you will teleport at the throne room in Estard Castle. Leave the throne room to activate a cutscene. |
| 4 |
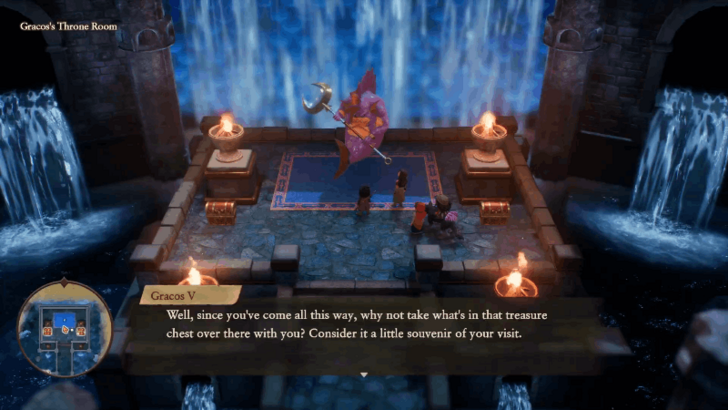 Once all four spirits have been awakened, head to Gracos's Throne Room and open the two treasure chests in front of Gracos V to get a Mini Medal and a Yggdrasil Dew. |
| 5 |
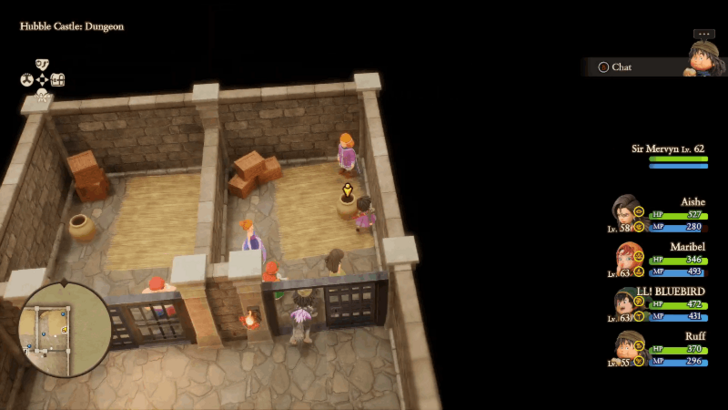 If you obtained the Ultimate Key at the Cathedral of Light, you can head to the first basement floor of the northeast tower to reach the dungeon of Hubble Castle. Break the pot there to get a Mini Medal. |
Altar of the Almighty
| 1 | Head to the Altar of the Almighty and talk to the Rom Baro near the steps to activate a cutscene. |
|---|---|
| 2 | Examine the wall next to the stairs to allow you to enter inside the altar. |
| 3 | Go to the paths on the left side and right side to open the treasure chests. The left side contains a Dryspell Fan while the other contains an Elfin Elixir. |
| 4 |
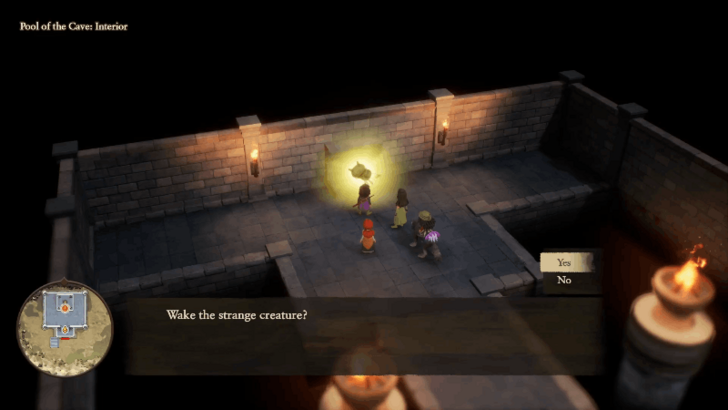 Go to the end of the hall and wake the strange creature three times in a row to activate a cutscene where you will receive a Mysterious Stone Tablet. |
| 5 |
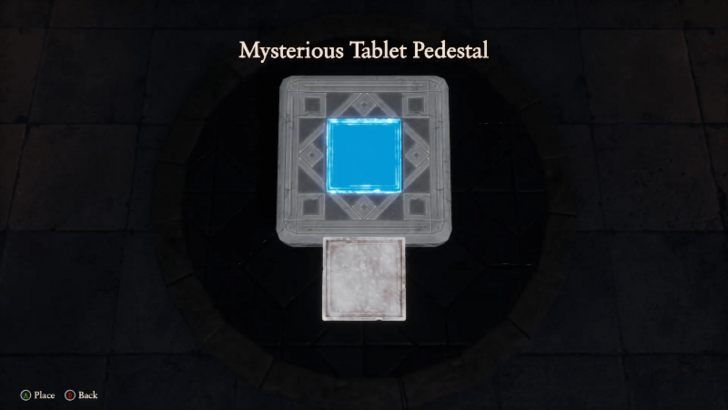 Place the Mysterious Stone Tablet on the pedestal that appears to teleport to the Sunny Forest. Aishe and Sir Meryvn will not accompany the party at this time. |
Rucker Region
| 1 |
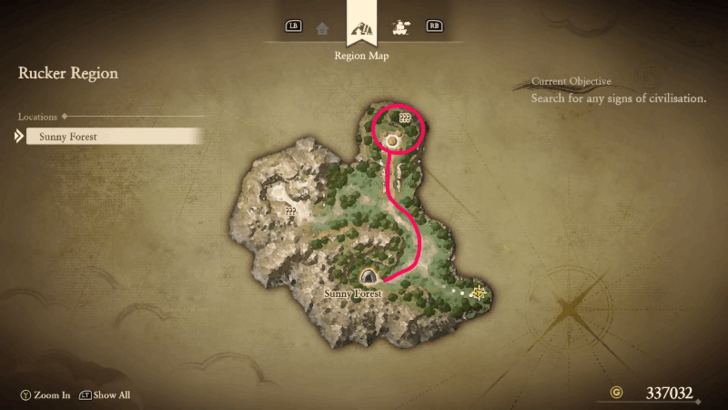 Exit the Sunny Forest and head north to Rucker Castle. |
|---|---|
| 2 |
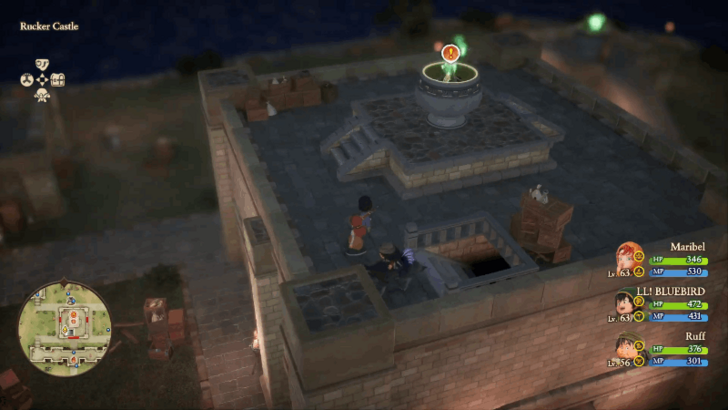 |
| 3 | Head west towards the Exposure Enclosure and talk to the hooded man at the back. Examine the water nearby and talk to him again. |
| 4 |
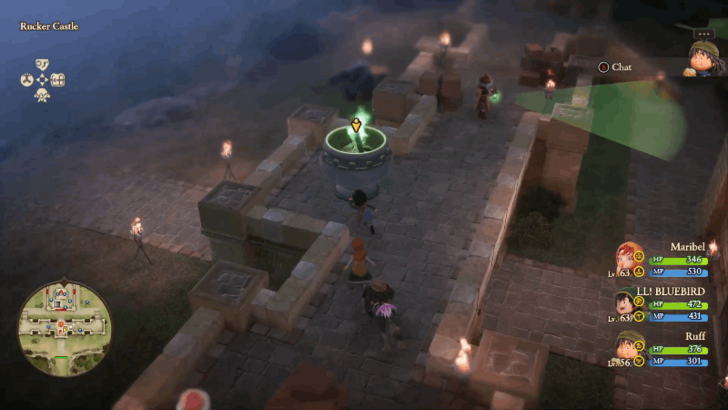 Go back to Rucker Castle and extinguish the three green flames without being seen by the soldiers. The green flames are located in three places: northeast, northwest, and south. |
| 5 | Once all the green flames have been extinguished, you will be taken out of the castle. Head to the Exposure Enclosure and interact with the two enemies. These two enemies are normal monsters, so defeat them as usual in battle. |
| 6 |
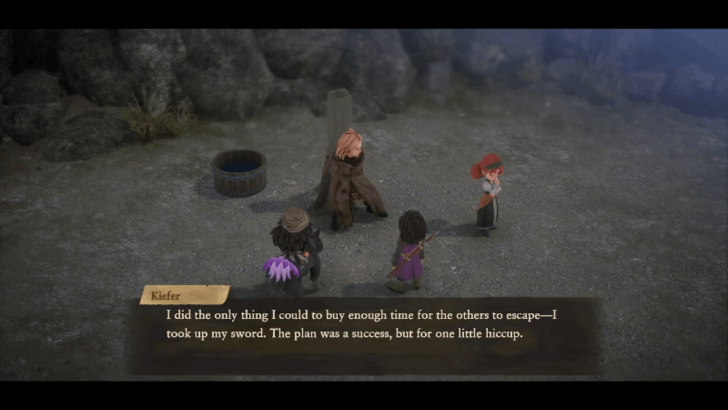 Talk to Kiefer to activate a cutscene. After that, if you move a little, another cutscene will activate that starts a boss fight,. |
| 7 |
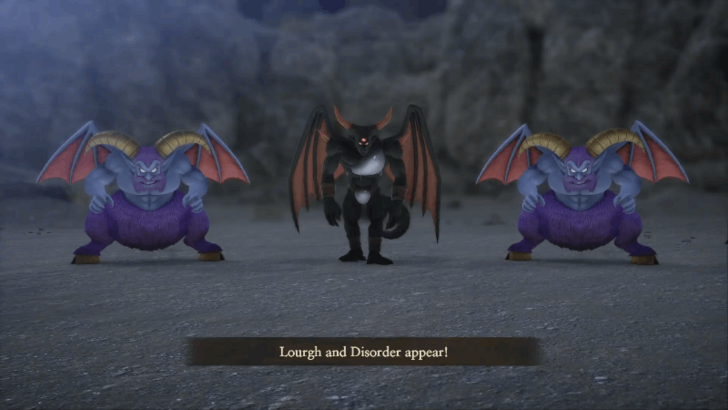 You'll be fighting Marshal Lourgh and two enemies in the boss fight. Set up Magic Barrier to reduce damage from spell attacks that the boss uses. |
| 8 | After defeating the boss, you will teleport to Rucker Castle. Head outside to the overworld. |
| 9 | Before returning to the present, head back to Exposure Enclosure west and destroy the barrel to obtain a Mini Medal. |
| 10 |
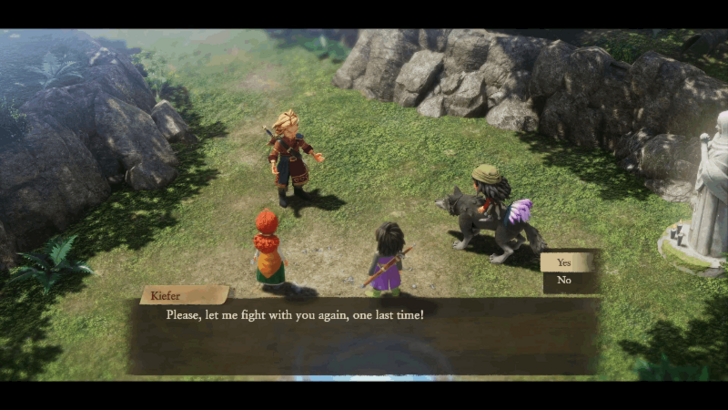 Go back to Sunny Forest to activate a cutscene. Kiefer will ask if he can fight with the party again. Choose "Yes" to add him as a support member of the party. He will fight alongside the party at the last dungeon and a new cutscene will be added when defeating the final boss. |
| 11 |
Once you return to the present, use the Skystone to reach the final dungeon, Cathedral of Blight. The final dungeon is located on the small island on the center of the map, where the Cathedral of Light was located.
▶ Jump to Cathedral of Blight Walkthrough |
Cathedral of Blight
| Jump to a Section | ||
|---|---|---|
| Cathedral of Blight | Post-Game | - |
| Back to the Top | ||
Cathedral of Blight
| 1 | Use the Skystone to travel to the Cathedral of Blight at the center of the map. |
|---|---|
| 2 | Go down the area that used to be the Cathedral of Light and go down through the hole in the center to the lowest floor. If you have not obtained the Ultimate Key yet, you can get it from the treasure chest in the north of the 5th floor. |
| 3 | Once you reach the sixth floor, head outside through the south door and examine the sparkly spot to collect a Mini Medal. |
| 4 | Continue down the stairs to the first floor. Press the switch on the north side of the first floor to open the door ahead, allowing you to take a shortcut when you return. |
| 5 | Go down the sairs to the second basement floor and go all the way to the back. Once you reach the back, examine the glowing spirits. If you examine the spirits, you will be able to go to the Almighty's treasure vault. |
| 6 | Once you enter the Whitewater Cave section, go down the stairs in the southeast part of the cave to reach the Statue Room. |
| 7 | Present the Water Amulet at the statue to receive the Ocean Sword. Enter the teleporter behind the statue to return to the main cathedral area. |
| 8 | Present the Water Amulet at the statue to receive the Ocean Sword. Enter the teleporter behind the statue to return to the main cathedral area. |
| 8 | At Hellfire Hollow northwest, go down the stairs near the center to reach the Statue Room. |
| 9 | Collect the Mini Medal from the treasure chest on the south side of Hellfire Hollow. |
| 10 | Hold the Fire Amulet at the statue to activate the fire at the main cathedral area. |
| 11 | Enter Chasm of Chaos northeast. Go down the stairs in the northeast section of the area to reach the statue room. |
| 12 | Collect the Mini Medal from the treasure chest on the southeast side of the area. |
| 13 | Present the Earth Amulet at the statue to light the fire at the main cathedral area. |
| 14 | Enter Whirlwind Way southwest. Go down the stairs southwest to reach the statue room. |
| 15 | Present the Wind Amulet at the statue to light the fire at the main cathedral area. |
| 16 | Once all the amulets are presented at their respective statues, the door at the northern side will open. |
| 17 | Enter the northern door and head north towards the end of the path to find Orgodemir. This boss has four forms, so be sure to prepare well before initiating the boss fight. |
| 18 |
 Orgodemir uses breath attacks, so cast Insulate to protect all your party members from it. Cast debuff spells to reduce his attack and defense. |
| 19 |
 Orgodemir's 2nd phase uses spells, so you can counter this by casting Magic Barrier to protect against it and Bounce to reflect spells back at the boss. Make sure to keep your HP high at all times as his attacks target all party members. |
| 20 |
 Orgodemir's 3rd phase inflicts a curse on a targeted party member, halving their maximum HP in the process. Use the Priest's Benediction spell to immediately cure the curse. |
| 21 |
 Orgodemir's final form will summon Miry Hands early on. Use area-of-effect attacks to take those down, as they attack with magic spells. Cast Bounce to reflect Orgodemir's powerful spell back at him. |
| 22 | Once you defeat Orgodemir's final form, you will teleport automatically to the Cathdral of Light and the ending sequence begins. |
Post-Game
| 1 | When the ending sequence begins, enter the temple in front of you and talk to the nun near the statue. |
|---|---|
| 2 | Talk to the soldier west of the temple and you have the choice to travel to Alltrades Abbey, Aeolus Vale, La Bravoure, Temple Palace, Emberdale, Hubble, and Buccanham Palace. If you want to skip this and head straight for the ending, select Call It a Day. |
| 3 | Go to Alltrades Abbey and talk to Jacqui on the first floor. Go to Basement Level 1 and talk to The Mighty Pip after. |
| 4 | Select Aeolus Vale and talk to Serafina. |
| 5 | Select La Bravoure and talk to Colette in the house northwest. |
| 6 | Select Temple Palace and talk to Neferta on the throne outside. Talk to the servant after and talk to Neferta. |
| 7 | Go to Emberdale next to activate a cutscene. Once the Flame Festival begins, talk to the village chief at the center of the town to activate another cutscene. |
| 8 | Select Hubble as your next destination and talk to Queen Euphonia at the throne room. After the cutscene ends, you can talk to your party members outside before heading back to the Skystone. |
| 9 | Select Buccanham Palace next and talk to the king. Talk to the dwarf near the entrance and head to the next destination. |
| 10 | Once you have visited all the destinations, a cutscene occurs and you will be teleported to the Altar of the Almighty. Examine the stone slab at the back. |
| 11 | When you examine the stone slab, you will automatically teleport to Estard Castle. Enter the cutscene for another cutscene. |
| 12 | After the cutscene ends, you will teleport to the second floor of your house in Pilchard Bay. Go down the first floor and you will receive a sandwich from Pearl. |
| 13 | Talk to Pollock on the ship east of the village. |
| 14 |
After talking to Pollock, talk to Maribel inside the ship. This activates the end credits and the game will be cleared.
► Post-Game Guide |
Main Story Trophies
All Main Story Trophies
Below are the trophies and achievements you obtain as you progress through various points of the main story.

|
Into the Unknown |
|---|---|
| Awarded for completing "The Adventure Begins". | |
|
|
Anchors Aweigh! |
|
Awarded for completing "The Heroes of Ballymolloy". ► Ballymolloy Walkthrough Guide |
|
|
|
A Well Earned-Brew |
|
Awarded for completing "An Enormous Eruption". ► Emberdale Walkthrough Guide |
|
|
|
Sonnenschein nach denn Regem |
|
Awarded for completing "Tears Fall on Regenstein". ► Regenstein Walkthrough Guide |
|
|
|
Amici degli Animali |
|
Awarded for completing "Ruff and Ready". ► L'Arca Walkthrough Guide |
|
|
|
A Clockwork Soul |
|
Awarded for completing "Automata Through the Ages". ► Frobisher Walkthrough Guide |
|
|
|
Goodbye, Sweet Prince |
|
Awarded for completing "Farewell to Kiefer". ► Roamer Encampment Walkthrough |
|
|
|
A Profitable Trade |
|
Awarded for completing "Restoring the Abbey!". ► Alltrades Abbey Walkthrough |
|
|
|
Saviours of the Sands |
| Awarded for completing "Darkness in the Desert". | |
|
|
Spirit and Image |
|
Awarded for completing "An Encounter with Aishe". ► Roamer Encampent (Present) Guide |
|
|
|
Local Legends |
|
Awarded for completing "An Island Underwater". ► Al-Balad Walkthrough Guide |
|
|
|
Everlastin' Love |
| Awarded for completing "The Look of Love". | |
|
|
Dizzy New Heights |
|
Awarded for completing "Meeting Ser Mervyn". ► The Tallest Tower Walkthrough |
|
|
|
The Great Levellers |
|
Awarded for completing "Magic and Mayhem". ► Hubble Walkthrough Guide |
|
|
|
An Unbreakable Bond |
|
Awarded for completing "Making a Promise to Maribel". ► Hubble Walkthrough Guide |
|
|
|
Whispers on the Wind |
|
Awarded for completing "The Fate of the Circus". ► Aeolus Vale Walkthrough Guide |
|
|
|
Beacons of Hope |
|
Awarded for completing "The Ultimate Curse". ► Buccanham Walkhtrough Guide |
|
|
|
Darkest Before the Dawn |
|
Awarded for completing "Defeating the Demon King". ► Malign Shrine Walkhthrough Guide |
|
|
|
Righting the Righteous |
|
Awarded for completing "Awakening the Almighty". ► Cathedral of Light Walkthrough |
|
|
|
Awakening the Flames |
|
Awarded for completing "Reawakening the Fire Spirit". ► Awakening the Fire Spirit Walkthrough |
|
|
|
Awakening the Earth |
|
Awarded for completing "Restoring the Earth Spirit". ► Awakening the Earth Spirit Walkthrough |
|
|
|
Awakening the Wind |
|
Awarded for completing "Awakening the Wind Spirit". ► Awakening the Wind Spirit Walkthrough |
|
|
|
Divine Revelation |
| Awarded for completing "Unmasking the Almighty". | |
|
|
Grand Finale |
|
Awarded for completing "A Showdown with the Demonking". ► Cathedral of Blight Walkthrough |
|
|
|
The Future is in Your Hands |
| Awarded for completing "Another World". | |
|
|
Crowing Glory |
| Awarded for completing "Yet Another World". |
Trophy Guide and Achievements List
Dragon Quest 7 Reimagined (DQ7) Related Guides

Dragon Quest 7 Reimagined Wiki Front
Guides by Category
 Walkthrough Walkthrough |
 Vocations Vocations |
 Tips and Tricks Tips and Tricks |
 Bosses Bosses |
 Menacing Monsters Menacing Monsters |
 Monster Hearts Monster Hearts |
 Tablet Fragments Tablet Fragments |
 Map and Locations Map and Locations |
 Weapons Weapons |
 Equipment Equipment |
 Characters Characters |
 Skills Skills |
 Items Items |
 Enemies Enemies |
 Puzzles Puzzles |
 Arena Arena |
 News News |
- |
Recommended Guides
 All Mini Medal Locations
 All Sparkly Spot Locations
 Best Vocations Tier List
 Best Characters Tier List
 Best Vocations For Each Character
 Best Party Builds
 Best Starting Vocations
 Best Monster Hearts
 Best Weapons and Equipment
 Best Skills Tier List
 EXP Farming Guide
 Money Farming Guide
 Vocational Proficiency Farming Guide
 Seed Farming Guide
 Trophy Guide and Achievements List
 List of Missables
 All Cut Content
 Lucky Panel Guide
 List of All DLCs
 List of All Keys
 Post Game Guide
 Allblades Arena Guide
 Is There New Game Plus?
Comment
Author

100% Walkthrough Guide
Rankings
- We could not find the message board you were looking for.
Gaming News


Popular Games

Genshin Impact Walkthrough & Guides Wiki
Umamusume: Pretty Derby Walkthrough & Guides Wiki
Crimson Desert Walkthrough & Guides Wiki
Monster Hunter Stories 3: Twisted Reflection Walkthrough & Guides Wiki
Honkai: Star Rail Walkthrough & Guides Wiki
Pokemon Pokopia Walkthrough & Guides Wiki
The Seven Deadly Sins: Origin Walkthrough & Guides Wiki
Wuthering Waves Walkthrough & Guides Wiki
Zenless Zone Zero Walkthrough & Guides Wiki
Arknights: Endfield Walkthrough & Guides Wiki


Recommended Games
Fire Emblem Heroes (FEH) Walkthrough & Guides Wiki
Diablo 4: Vessel of Hatred Walkthrough & Guides Wiki
Cyberpunk 2077: Ultimate Edition Walkthrough & Guides Wiki
Yu-Gi-Oh! Master Duel Walkthrough & Guides Wiki
Super Smash Bros. Ultimate Walkthrough & Guides Wiki
Pokemon Brilliant Diamond and Shining Pearl (BDSP) Walkthrough & Guides Wiki
Elden Ring Shadow of the Erdtree Walkthrough & Guides Wiki
Monster Hunter World Walkthrough & Guides Wiki
The Legend of Zelda: Tears of the Kingdom Walkthrough & Guides Wiki
Persona 3 Reload Walkthrough & Guides Wiki


All rights reserved
© ARMOR PROJECT/BIRD STUDIO/SQUARE ENIX
© SUGIYAMA KOBO ℗ SUGIYAMA KOBO
The copyrights of videos of games used in our content and other intellectual property rights belong to the provider of the game.
The contents we provide on this site were created personally by members of the Game8 editorial department.
We refuse the right to reuse or repost content taken without our permission such as data or images to other sites.