Alltrades Abbey Walkthrough Guide
☆ 100% Walkthrough Guide
★ Best Vocations | Best Party | Best Characters
☆ Find all Mini Medals and Tablet Fragments!
★ Farm Guides: EXP | Gold | Vocation Prof.
☆ List of Missables and Cut Content
★ Post-Game Guide
This is a walkthrough guide for the Alltrades Abbey of Dragon Quest 7 Reimagined (DQ7). See a step-by-step guide to complete the Alltrades Abbey and the quest, Restoring the Abbey, as well as how to unlock the next area here.
| ◀ Previous Guide | Next Guide ▶ |
|---|---|
| Roamer Encampment | Al-Balad |
List of Contents
 Warning! Warning! |
This page contains spoilers for Dragon Quest 7 Reimagined! If you wish to continue reading on, you have been warned. |
|---|
Alltrades Abbey Walkthrough Guide
Alltrades Abbey
| 1 |
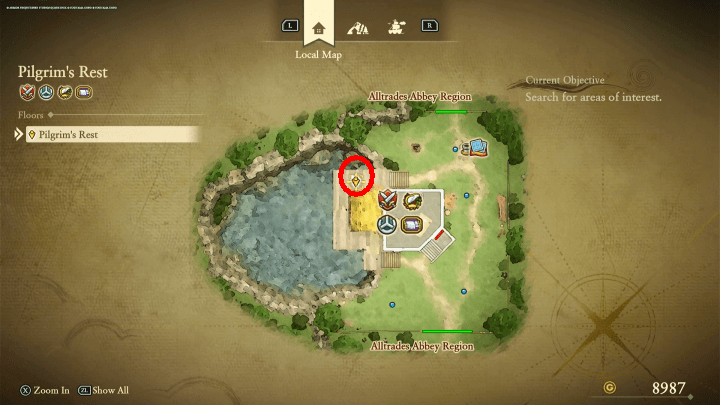
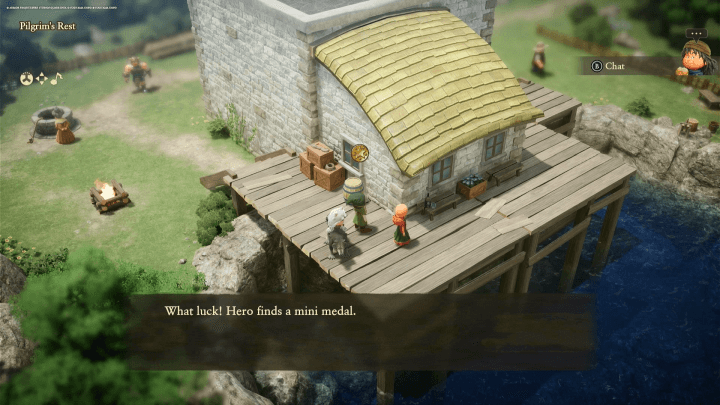
 Head east of the teleporter to enter Pilgrim's Rest. |
|---|---|
| 2 |
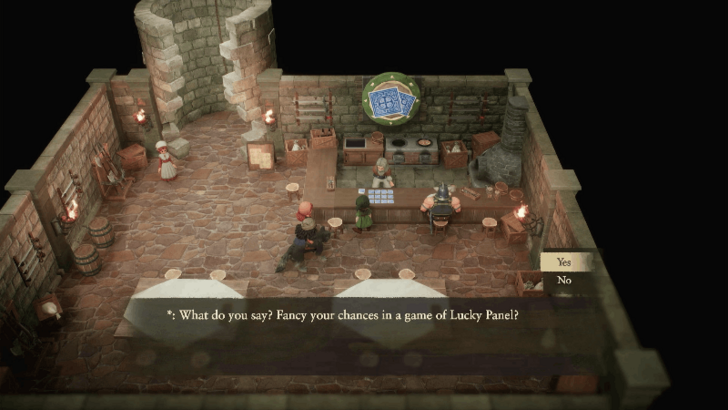 Enter the well and talk to the old man in front of the counter to play the Lucky Panel minigame. Winning the minigame allows you to obtain powerful weapons and armor that will make progression easier in the future. You can play the minigame three times a day, and you can reset this limit by resting at an inn. ▶︎ Lucky Panel Guide |
| 3 |
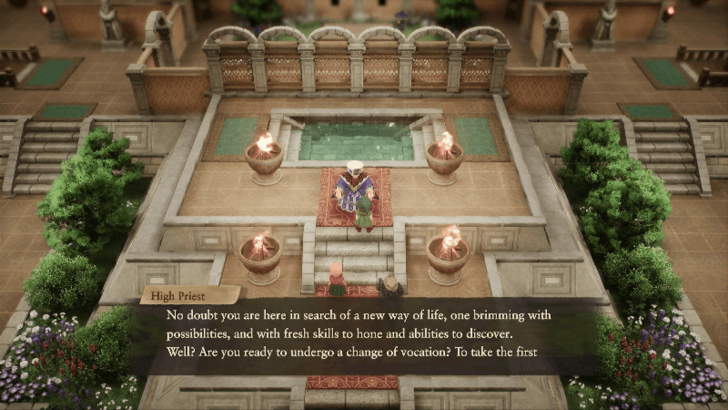 Once you are done exploring Pilgrim's Inn. Travel west to reach the Alltrades Abbey. Talk to the High Priest inside and choose a vocation to change. The vocation does not matter at this point as the High Priest will steal your skills and teleport you to Pilgrim's Perdition. |
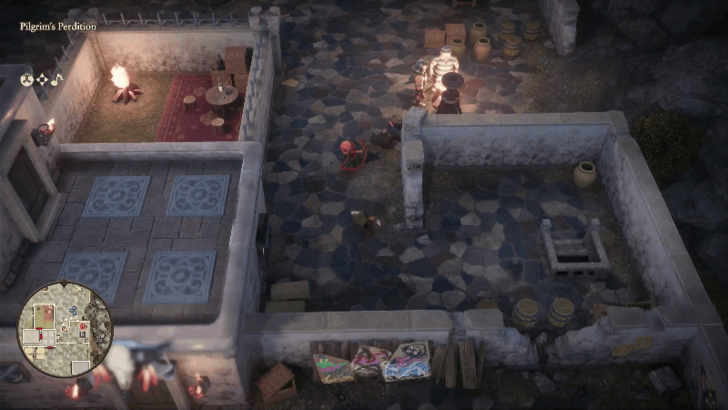
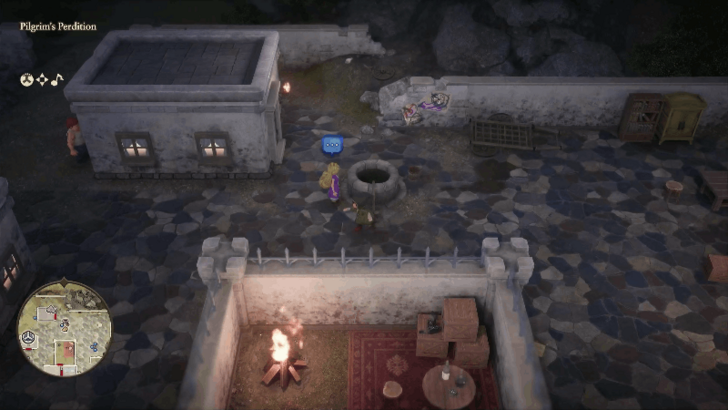
Pilgrim's Perdition
| 1 |
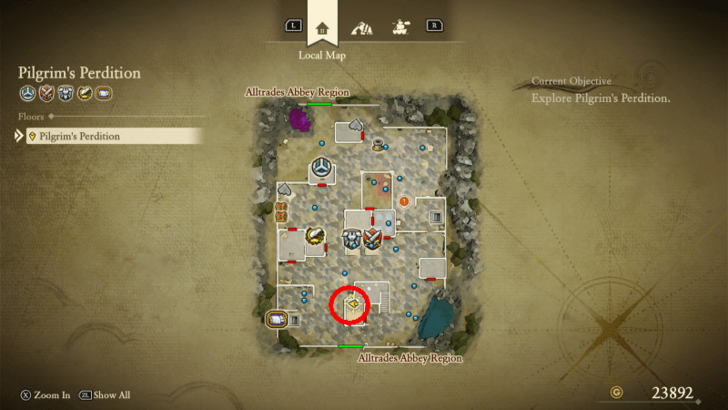
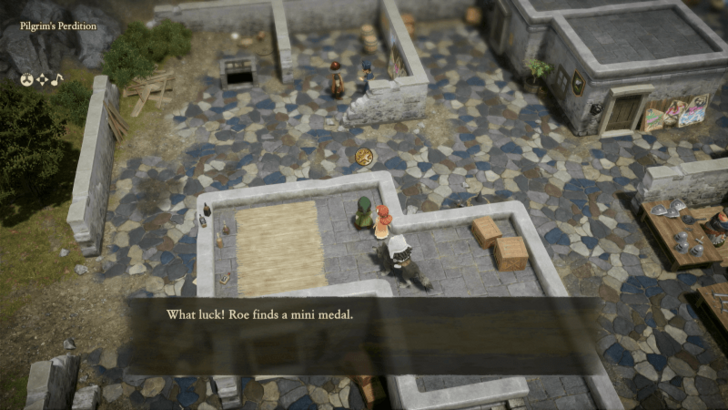
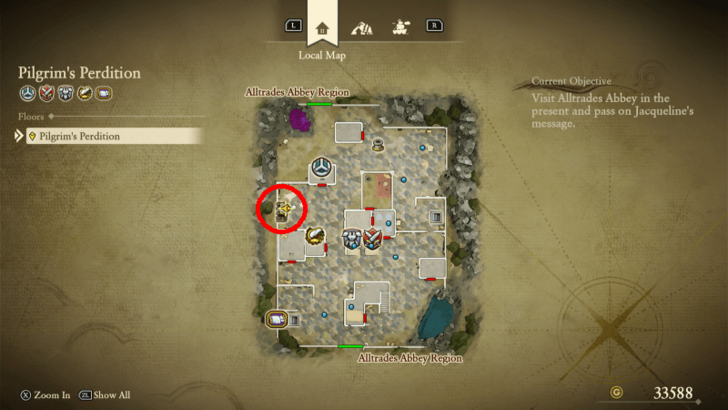
 Pick up the Blue Fragment at the northwestern side of the town. |
|---|---|
| 2 |
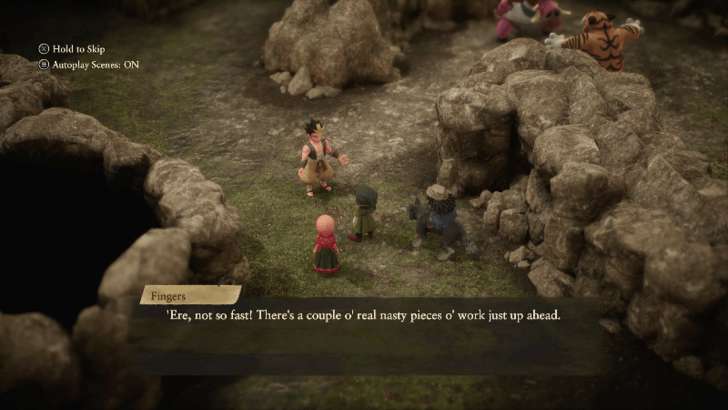
 Head to the stairs at the east side part of the town to activate a cutscene. You will receive a Salvation Stone from Fingers. |
| 3 |
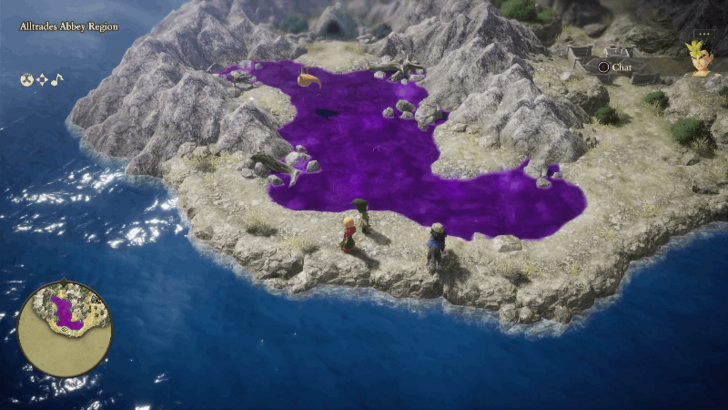 Exit Pilgrim's Perdition from the south and cross the poison swamp to reach the Western Cave. |
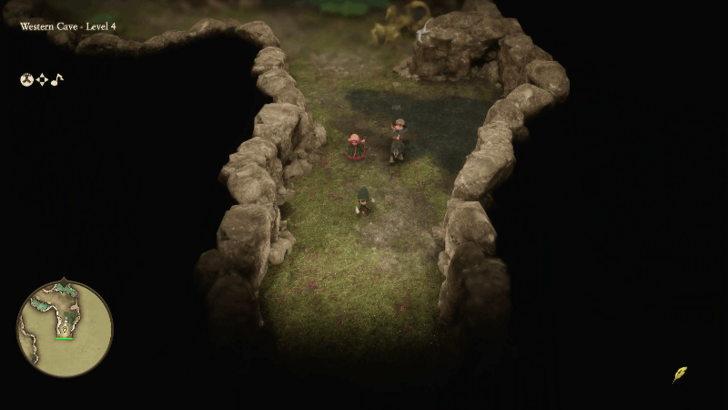
Western Cave
| 1 |
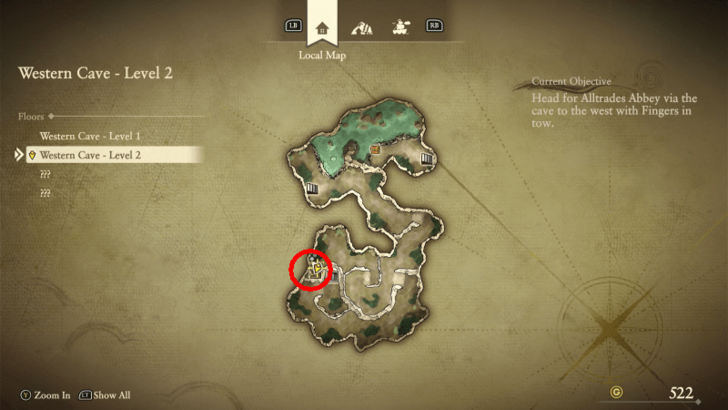
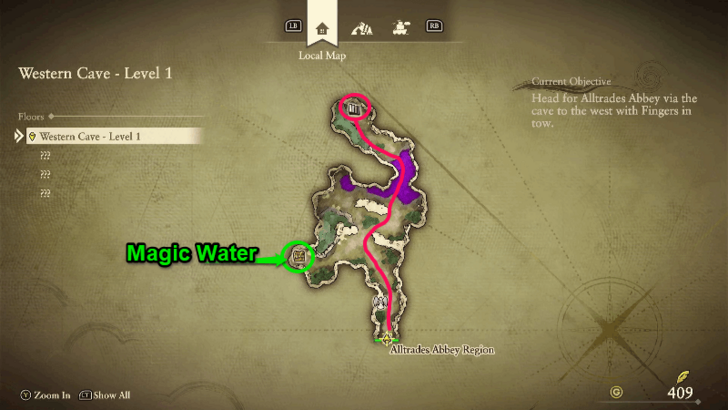 Open the treasure chest to get Magic Water. Head north and cross the poison swamp to reach Level 2 of the cave. |
|---|---|
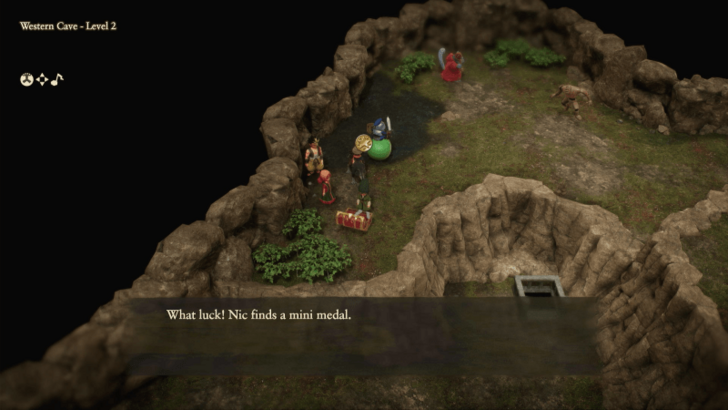
| 2 |
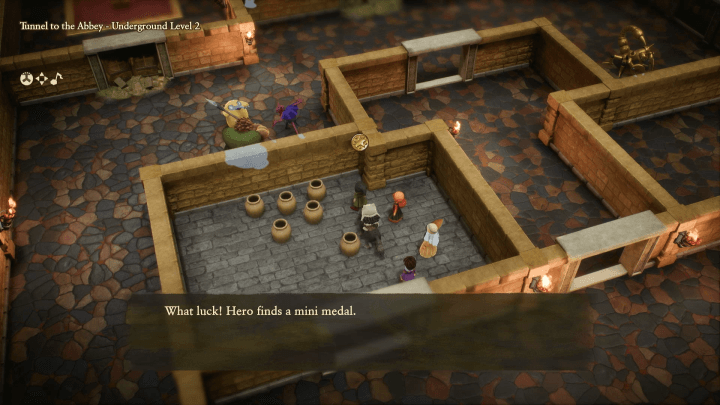
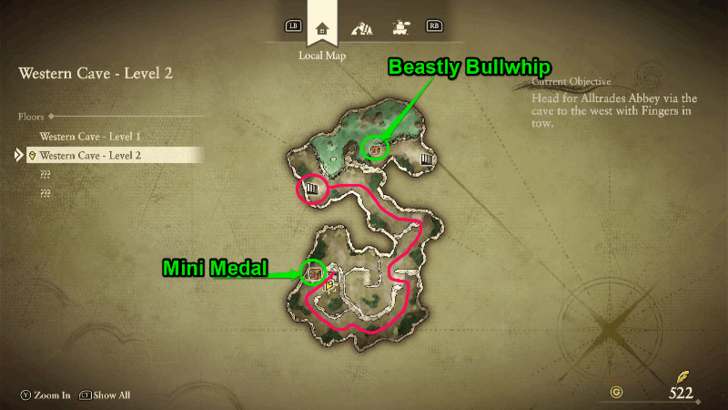 Open the treasure chest at the west side to get a Mini Medal. The second treasure chest up north is accessible at Level 3 of the cave. |
| 3 |
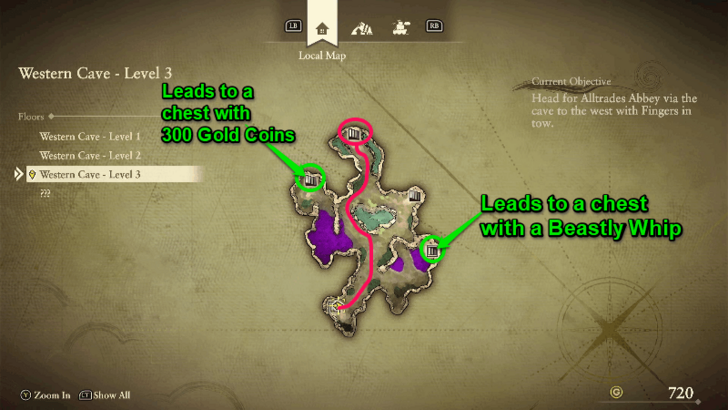 The path containing the posion swamp leads to a treasure chest with 300 Gold Coins. To progress, head to the path north to reach Level 4 of the cave. |
| 4 |
 At Level 4, continuing heading north to the path until a cutscene activates. You will lose against Rashers and Stripes in the scripted boss fight, so wait for them to knock out all your party members to proceed. |
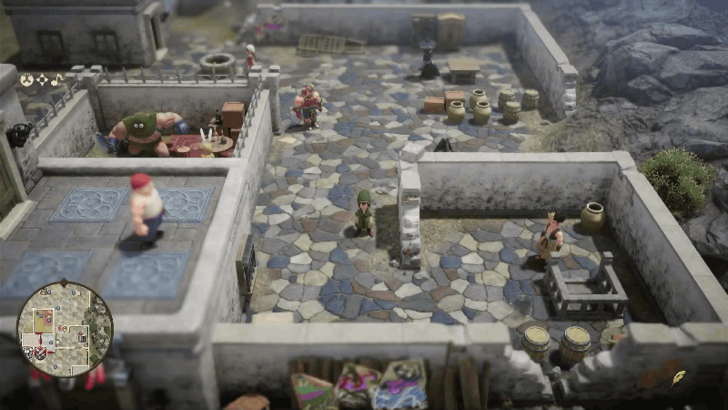
Pilgrim's Perdition (Part 2)
| 1 |
 You will teleport back at Nava's house in Pilgrim's Perdition. Exit the house and go to the eastern stairs where you first met Fingers. |
|---|---|
| 2 |
 After talking to Eustace, exit the tavern and talk to Nava at the well. A cutscene will activate as you attempt to head to the south side. |
| 3 |
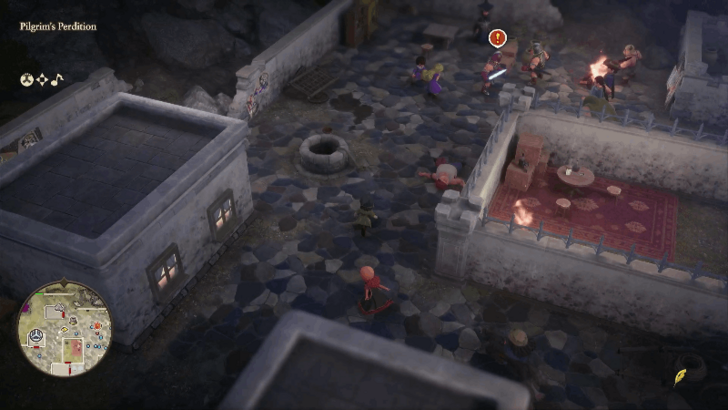 Chase after the man northeast of the town to activate another cutscene. |
| 4 |
 Head back to Western Cave and reach Level 4 of the cave to activate a cutscene. Head to the southeastern path to exit the cave and reach Precipice Pass. |
Precipice Pass
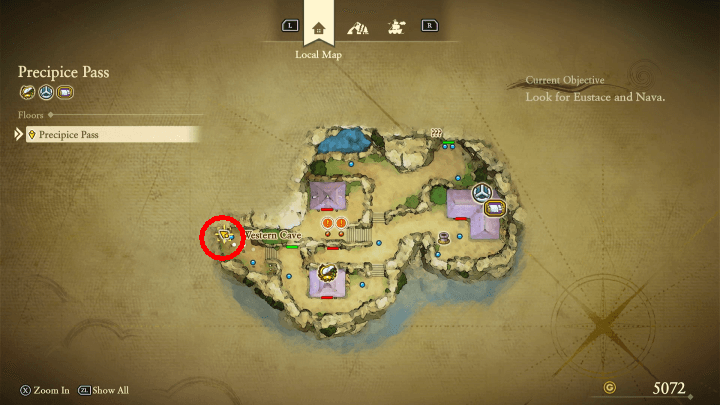
| 1 |
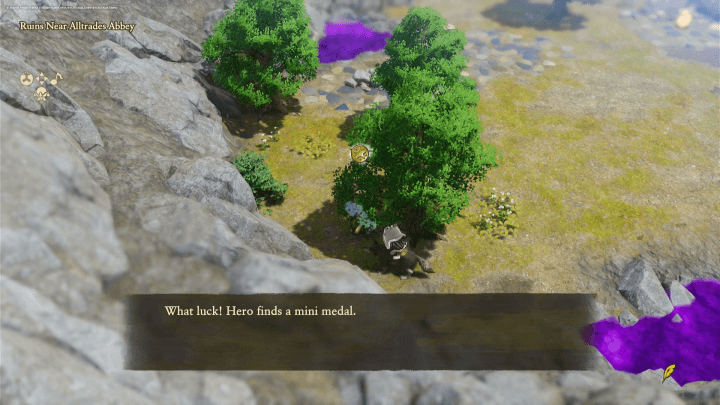
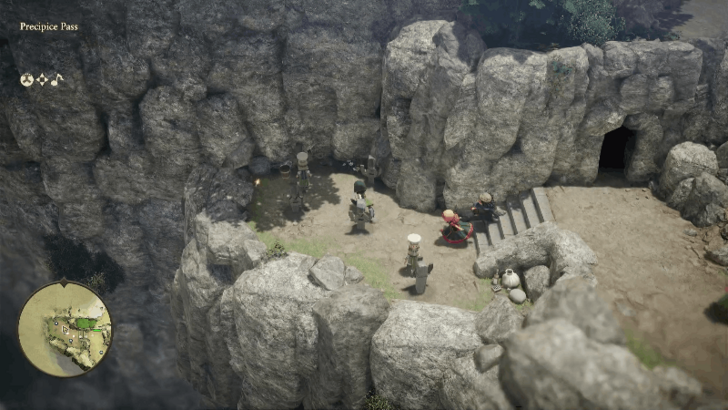 Interact with the orange shiny spot at the cliff west of the cave's entrance to get a Mini Medal. |
|---|---|
| 2 |
 Reach Eustace and Fingers at the top part of the area for a cutscene. |
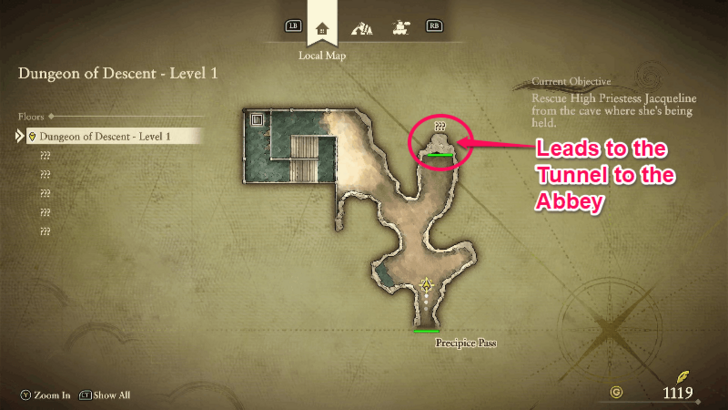
| 3 |
 Find the cave's entrance northeast and enter the Dungeon of Descent. |
Dungeon of Descent
| 1 |
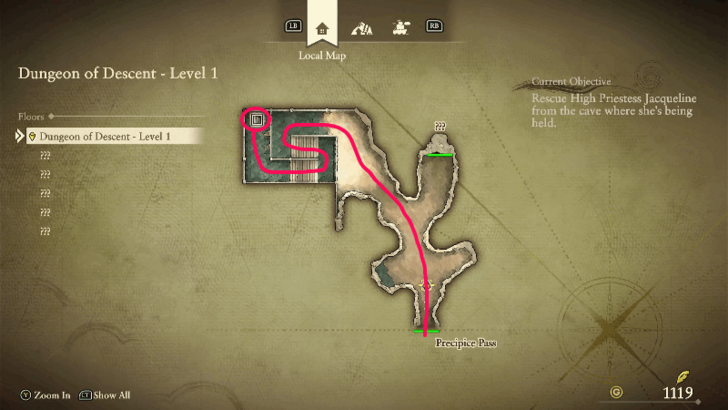 Head to the stairs at the northwest part of Level 1. Ignore the path east as it is blocked at this point. |
|---|---|
| 2 |
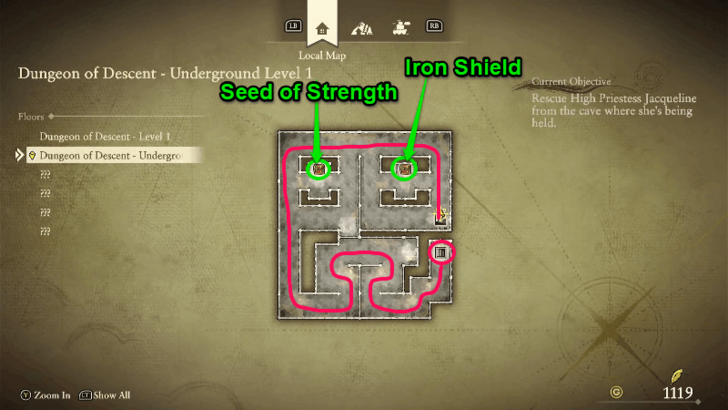 Go around the path to reach the stairs at the southeastern side of the area. Open the two treasure chests to pick up the Seed of Strength and Iron Shield. |
| 3 |
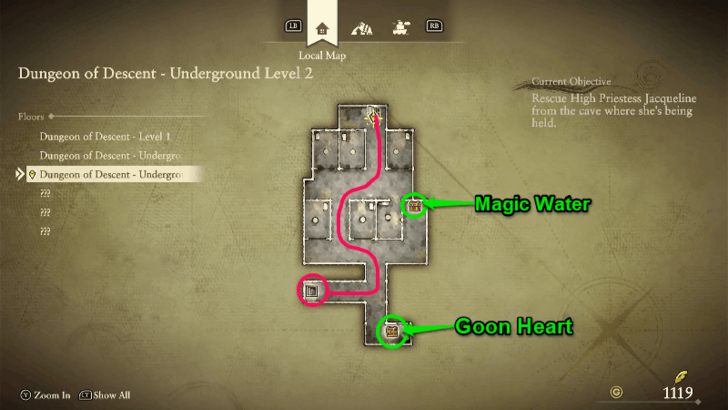 Head south and turn west to descend down to Level 3. Open the two treasure chests to get Magic Water and Goon Heart. |
| 4 |
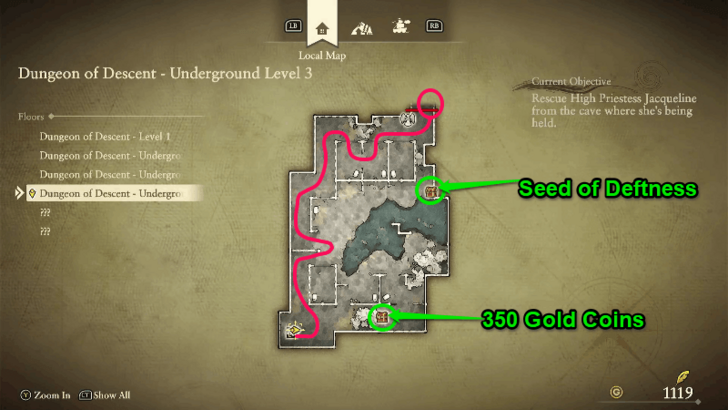 Stick to the path west and head north to reach the angel statue and the next area. The east side contains two treasure chests that have a Seed of Deftness and 350 Gold Coins in them. |
| 5 |
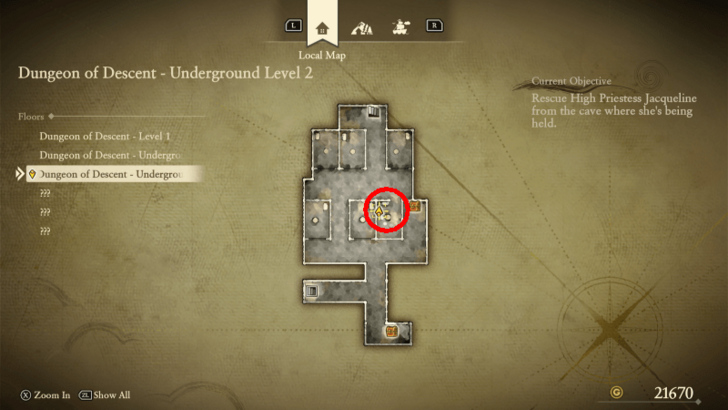
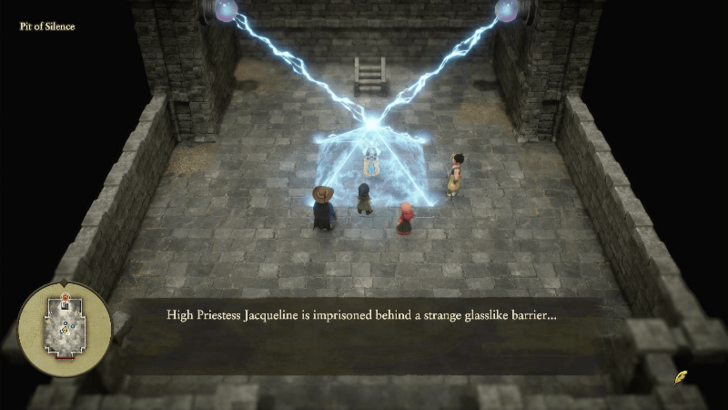 After the cutscene ends, head up the stairs north of High Priestess Jacqueline. |
| 6 |
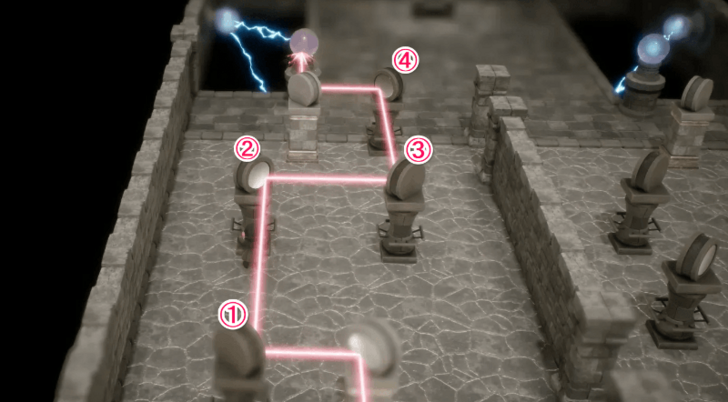 To solve the first laser puzzle, move the mirrors to reflect the red laser to destroy the orb. |
| 7 |
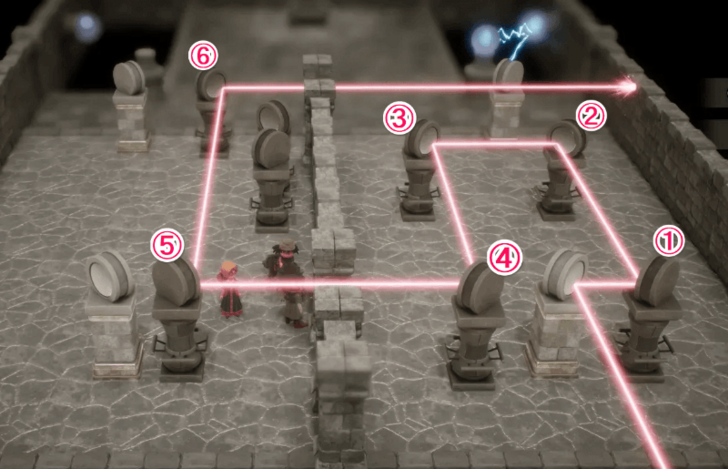 For the second laser puzzle, you need to move the mirrors so that the laser beam goes to the first laser puzzle area. From there, move two mirros from the first laser puzzle area to reach the orb. |
| 8 |
 Return to the High Priestess downstairs to activate a cutscene and a boss fight between Rashers and Stripes. |
| 9 |
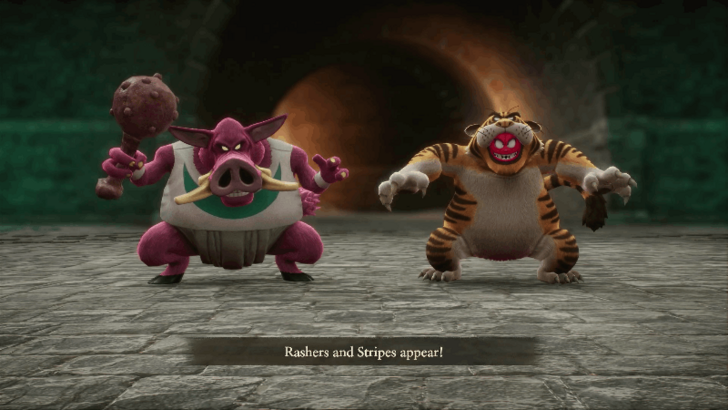 Focus on defeating Rashers as he has higher attack power than Stripes. Use Salvation Stone and healing items to heal your party members when needed. ▶︎ Rashers and Stripes Boss Guide |
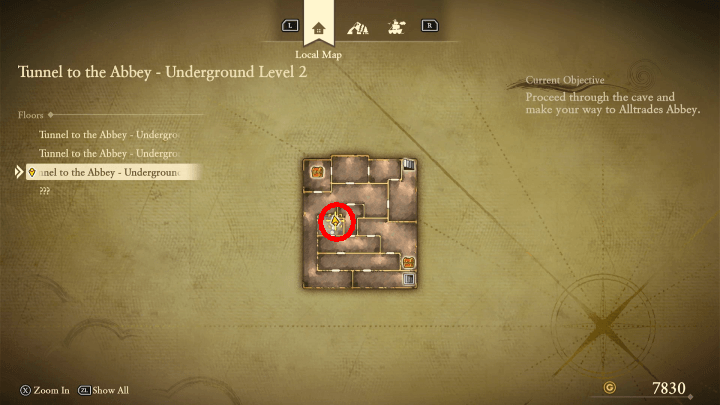
Tunnel to the Abbey
| 1 |
 After defeating Rashers and Stripes, backtrack all the way to Level 1 of Dungeon of Descent. Head to the path east to reach the Tunnel to the Abbey. |
|---|---|
| 2 |
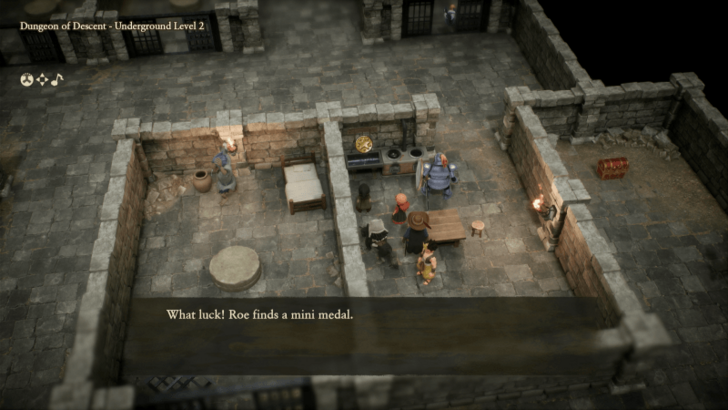
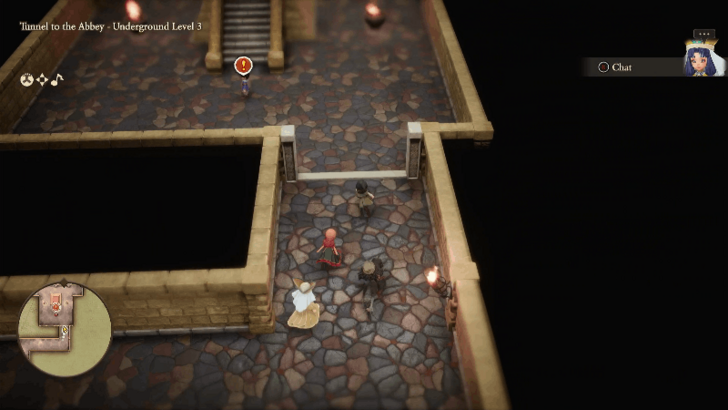 Make your way up to Underground Level 3 to reach Zev in front of the staircase. |
| 3 |
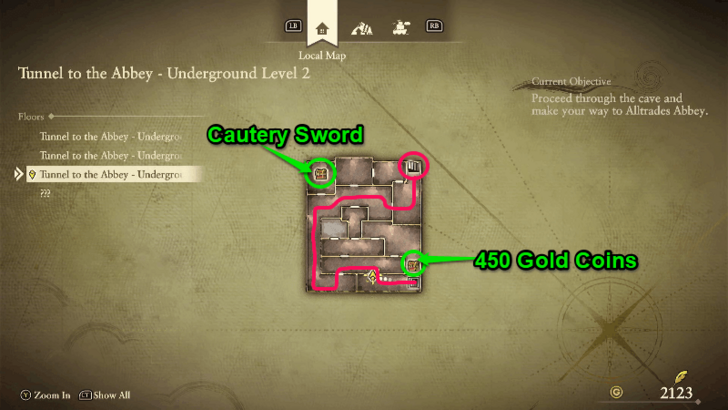 Head west then go up north and east to reach the stairs at the northeastern corner of the area. |
| 4 |
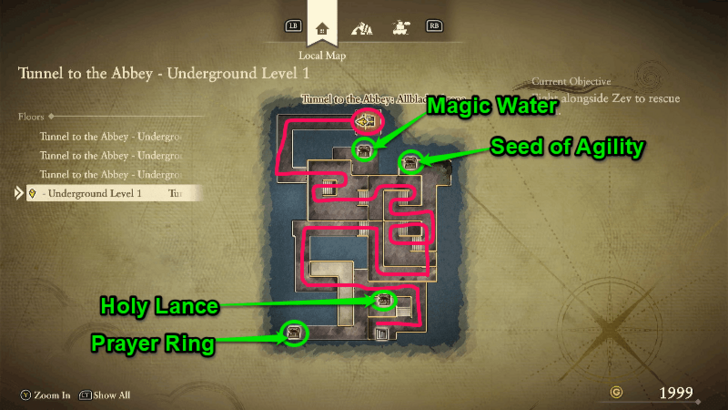 The last underground level requires you to go through the tunnels to reach the stairs at the north side. |
| 5 |
 Enter the building north of the weapon and armor shop and find Nava inside the small waiting room at the northern side of the area. Exit the waiting room after. |
| 6 |
 Make preparations to participate in the arena. To start, it is recommended to change the vocations of your party members, increase their proficiency level to 3, and upgrade their equipment. Choose Warrior for the Hero, Mage for Maribel, and Priest for Ruff. |
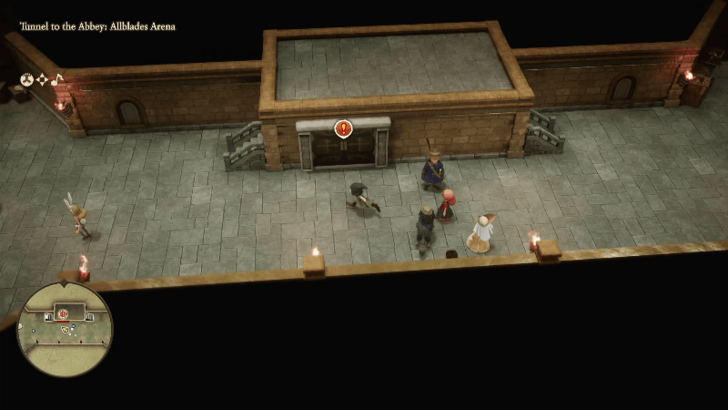
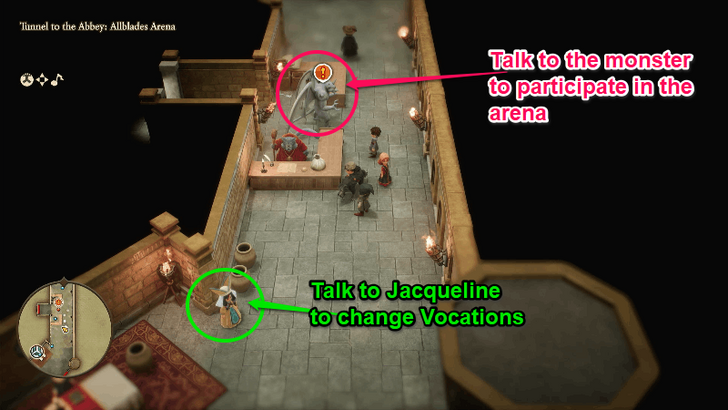
Participate in the Arena
| 1 |
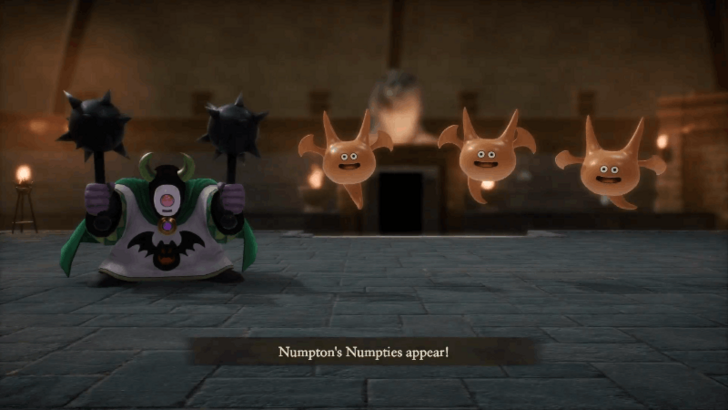 Use area of effect skills such as Maribel's Bang skill to deal damage to Numpton and the three slimes all at once. ▶︎ Numpton's Numpties Boss Guide |
|---|---|
| 2 |
 Use the same area of effect skills to defeat Bronson and the Bristles. ▶︎ Bronson and the Bristles Boss Guide |
| 3 |
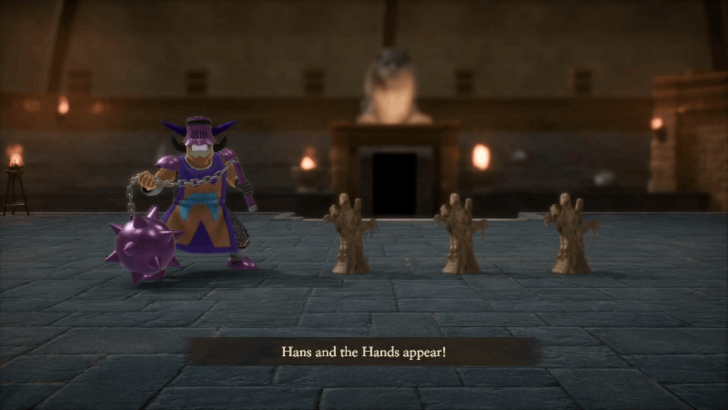 Priortize defeating Hans as he can deal high damage when he performs Swoosh. If you have a party member with the Priest vocation, you can use Heal and Midheal to restore health when needed. ▶︎ Hans and the Hands Boss Guide |
| 4 |
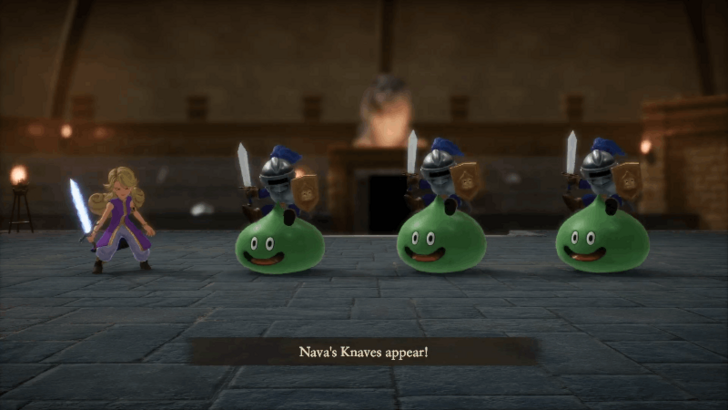 Nava will cast Bound to create reflective barrier that will bounce off magic attacks. Avoid using skills when this is active and focus on using physical attacks. Apply Buff to each party member and defeat the slime knights first as they can heal Nava periodically. ▶︎ Nava's Knaves Boss Guide |
| 5 |
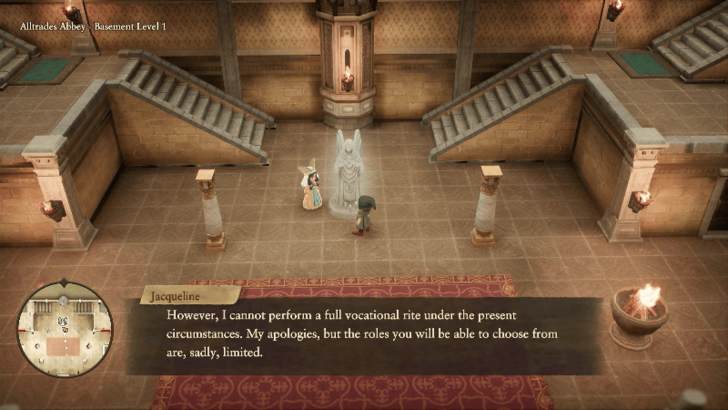 After completing the arena, head up the stairs to reach the Basement Level 1 of Alltrades Abbey. Interact with the angel statue so that Jacqueline appears, allowing you to change vocations at this point. Makes sure to prepare as there will be a boss fight after. |
| 6 |
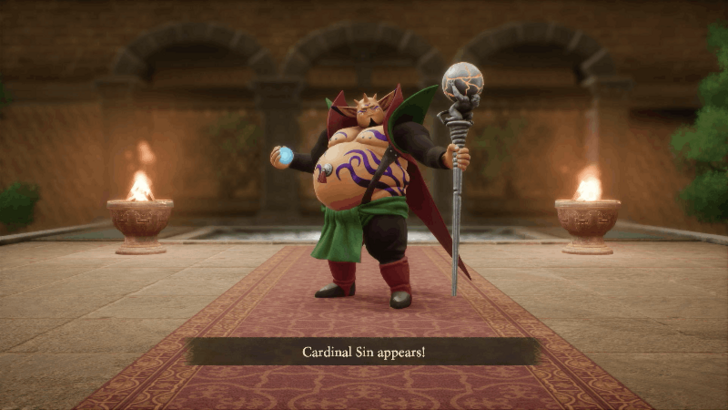 Head up the stairs to reach the High Priest and activate the boss fight with Cardinal Sin. Cast Blunt and Sap to reduce his attack and defense and keep your HP high at all times. When Cardinal Sin is about to charge for a burst attack, have everyone defend to reduce the damage of the attack. ▶︎ Cardinal Sin Boss Guide |
Collect the Three Fragments
| 1 | After defeating Cardinal Sin, you will be teleported to the inn in Alltrades Abbey. Exit the inn for a cutscene. |
|---|---|
| 2 |
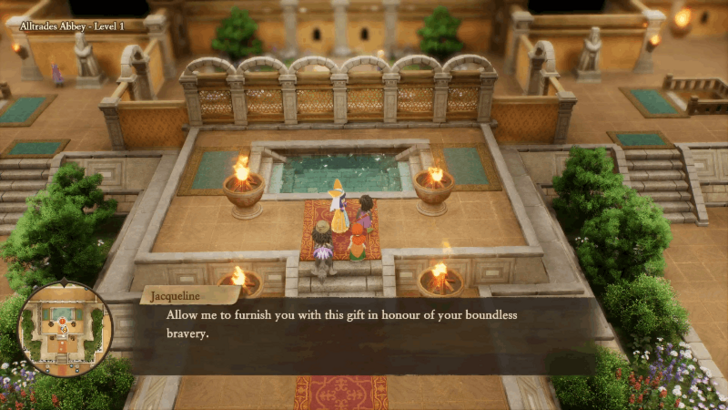 Talk to High Priestess Jacqueline at Level 1 to get a Yellow Fragment. |
| 3 |
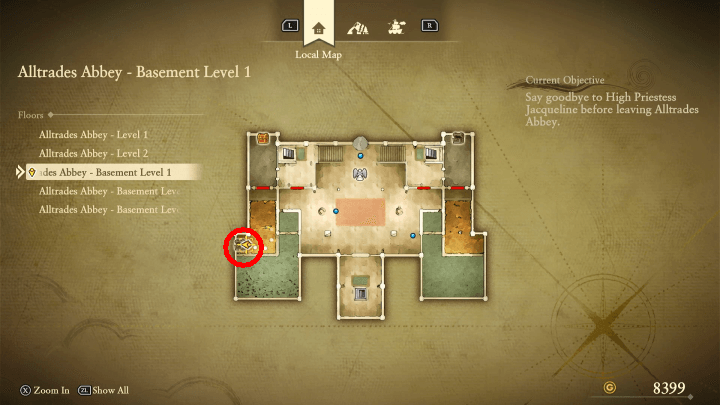
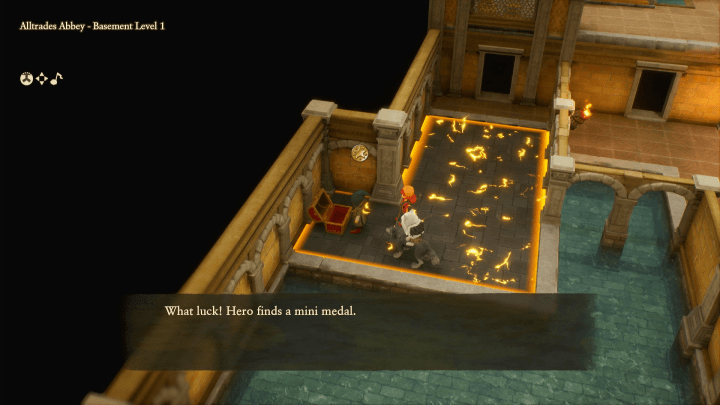
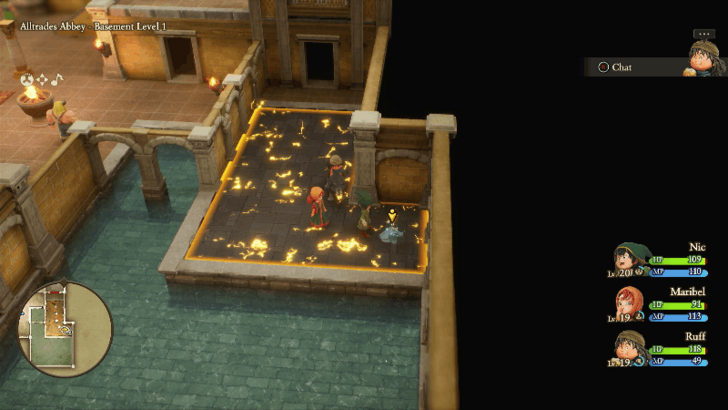 Head down to Basement Level 1 and enter the door on the right and exit. Walk past the electric floor to pick up the Gray Fragment. |
| 4 |
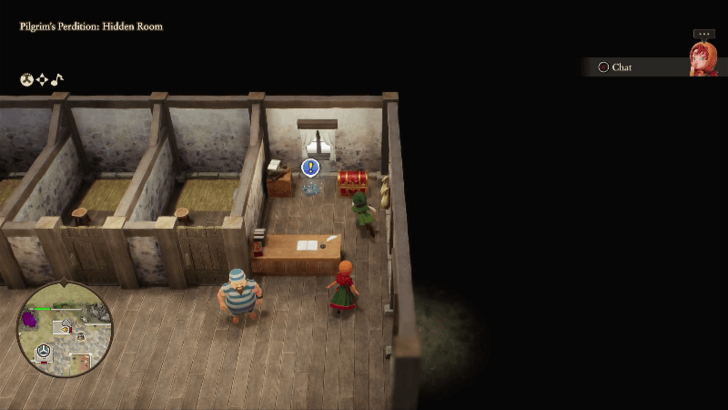 Go back to Pilgrim's Perdition and enter the house at the north end. Pick up the Silver Fragment and the Thief's Key from the treasure chest. |
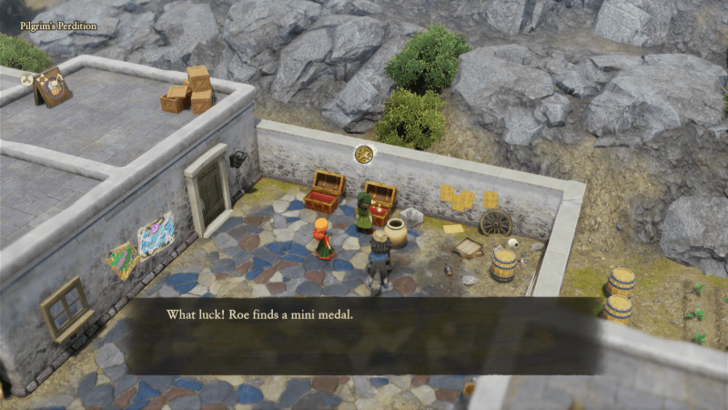
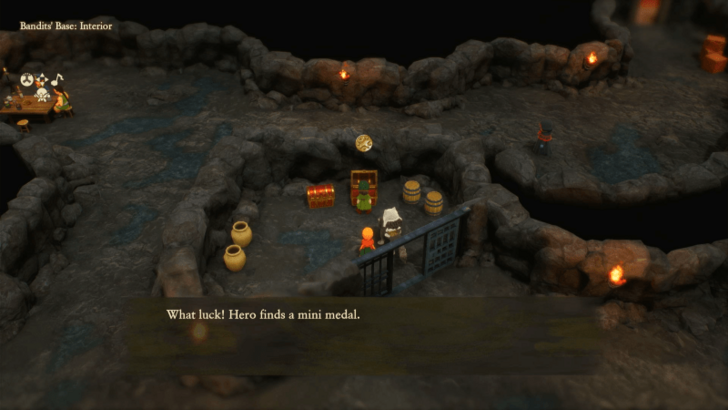
| 5 |
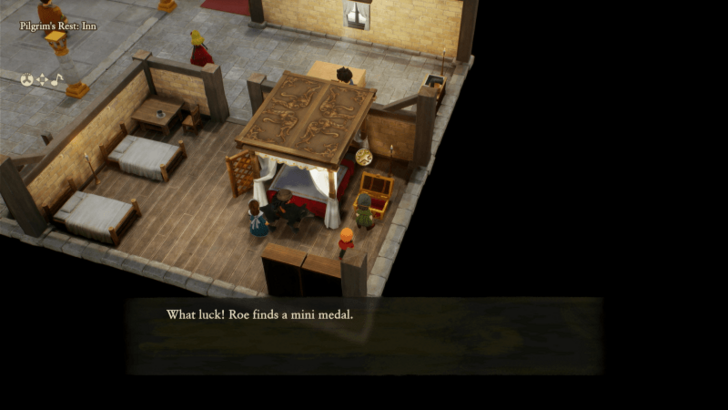
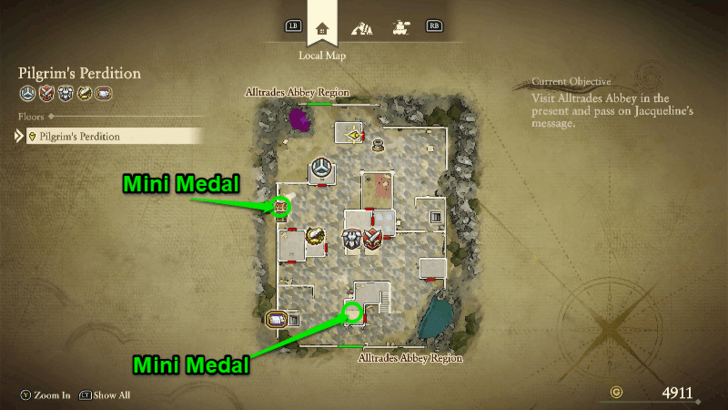 Pick up the Mini Medal from the treasure chest north of the item store and another from the pot on the roof of the southern house. |
Alltrades Abbey (Present)
| 1 |
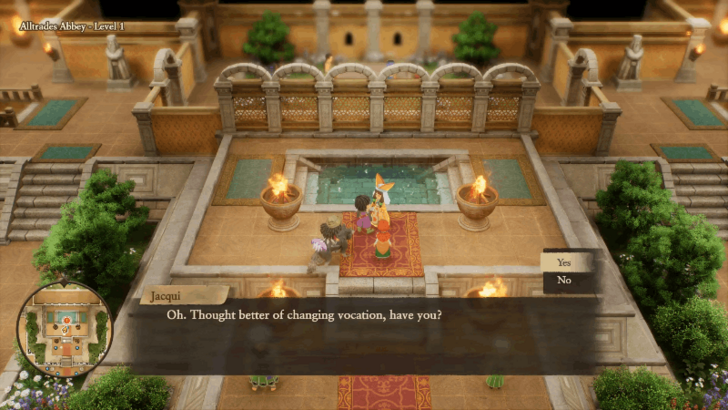 Head back to the teleporter and travel to the present day Alltrades Abbey. Talk to High Priest Jacqui to unlock the ability to change vocations while adventuring. |
|---|---|
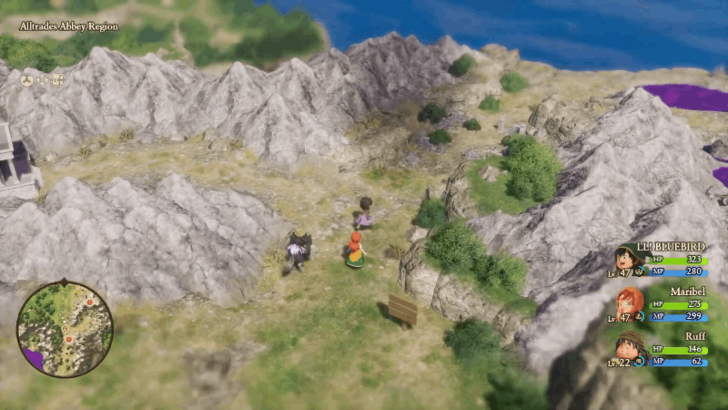
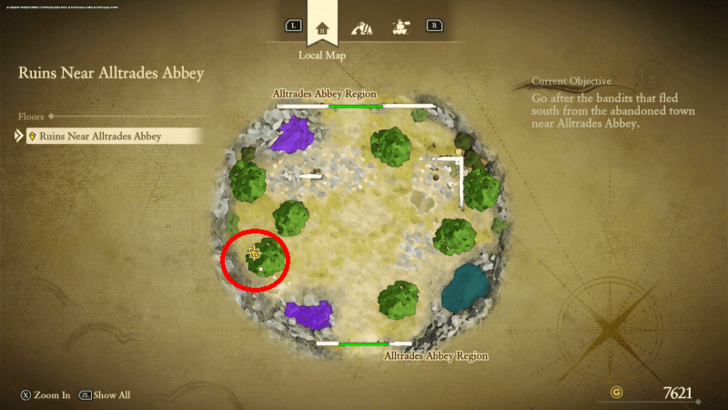
| 2 |
 Head to the ruins south of Alltrades Abbey and talk to the man lying on the ground. As soon as you exit the area, you will get in a random battle with the Mild Bunch. |
| 3 |
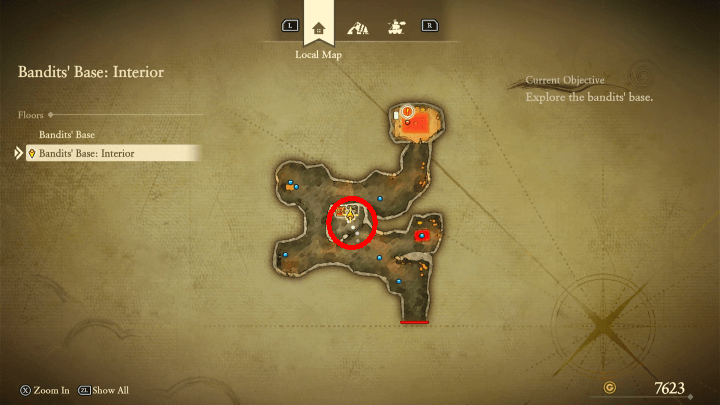
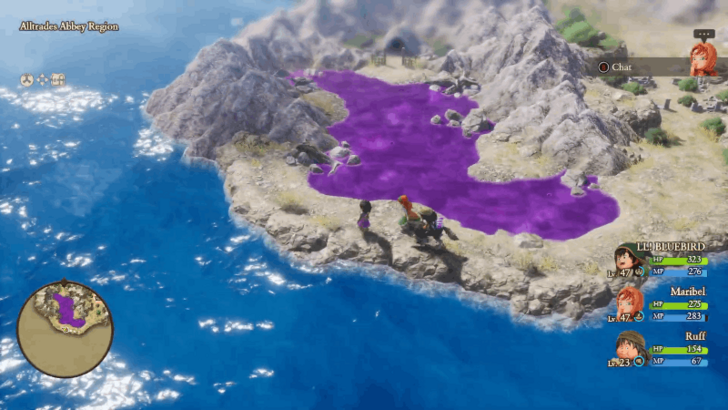 After defeating the Mild Bunch, exit the ruins via the south path and enter the bandit's hideout by walking on the poison swamp. |
| 4 |
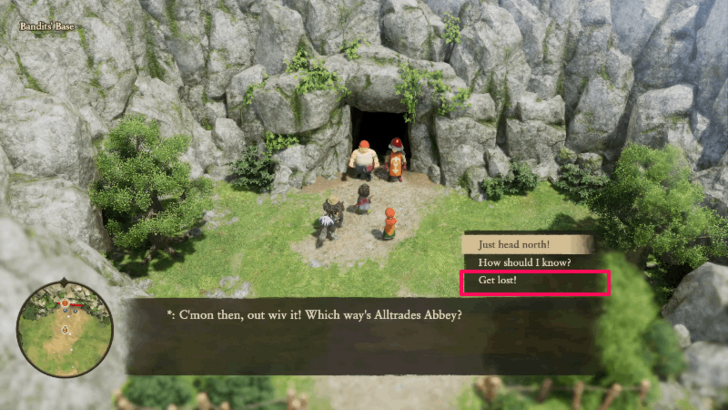 Choose "Get lost!" for the dialogue option to enter the hideout. |
| 5 |
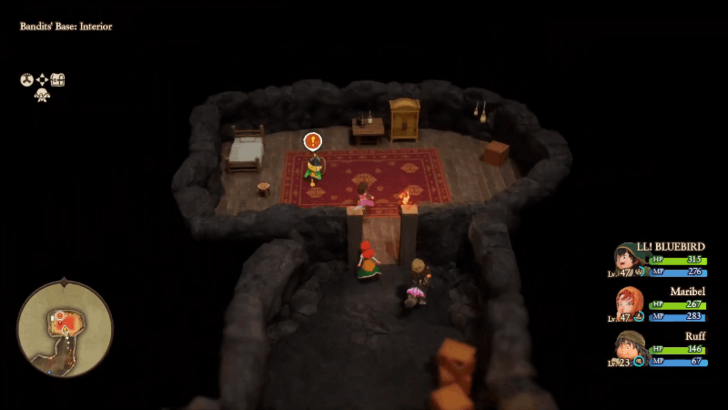 Venture into the cave until the end to find the NPC with an exclamation mark on its head. Before speaking with him, examine the drawer to obtain the Bandit's Key. |
| 6 |
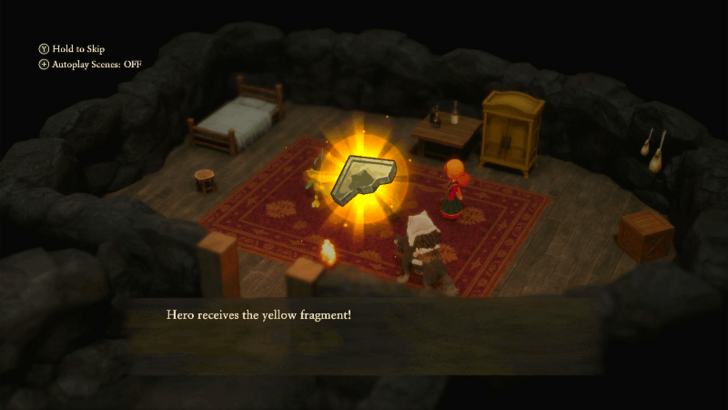 Speak with the NPC to initiate a boss fight with The Mighty Pip. Defeat him in battle to obtain a Yellow Fragment. |
| 7 |
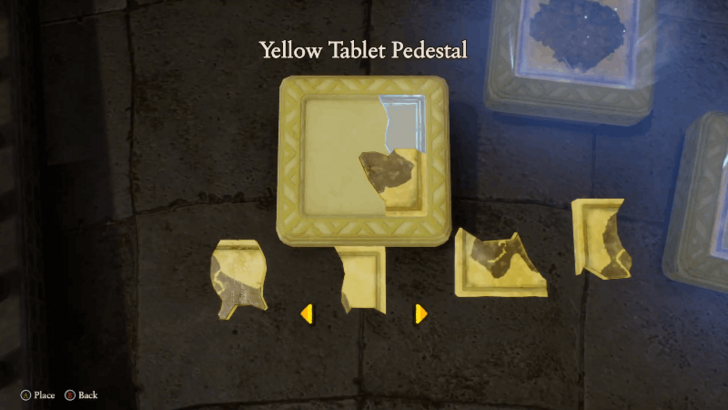 Fast travel back to the Shrine of Mysteries and assemble the Yellow Fragments to create the Yellow Tablet that lead you to the eighth island, Al-Balad. |
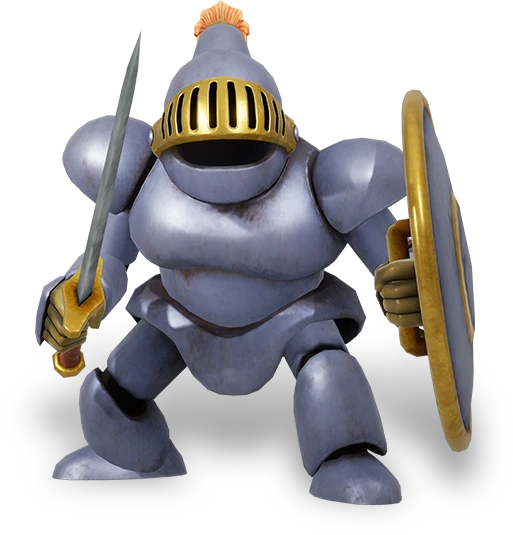
Alltrades Abbey Bosses
All Alltrades Abbey Bosses
| Boss | Information |
|---|---|
|
|
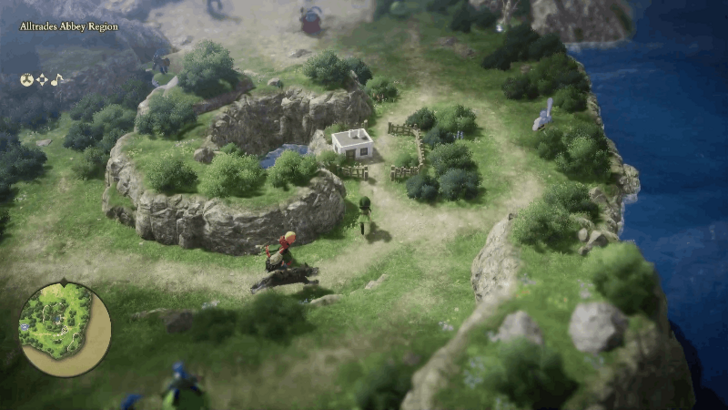
Location:
Alltrades Abbey Region
(Past) Walkthrough:
Alltrades Abbey
How to Beat: ・Use Multi-Target Skills ・Use Aooo! to Disable Numpton ・Conserve HP and MP |
|
|
Location:
Alltrades Abbey Region
(Past) Walkthrough:
Alltrades Abbey
How to Beat: ・Use Multi-Target Skills ・Recover HP and MP Against Bronson ・Conserve HP and MP |
|
|
Location:
Alltrades Abbey Region
(Past) Walkthrough:
Alltrades Abbey
How to Beat: ・Prioritize Mud Hands ・Use Hero's Let Loose ・Conserve HP and MP |
|
|
Location:
Alltrades Abbey Region
(Past) Walkthrough:
Alltrades Abbey
How to Beat: ・Use Multi-Target Skills ・Do Not Use Skills When Bound is Active ・Stay at Green HP as Much as Possible |
|
|
Location:
Alltrades Abbey Region
(Past) Walkthrough:
Alltrades Abbey
How to Beat: ・Lower Cardinal Sin's Defense ・Use Dazzle on Cardinal Sin ・Do Not Attack When Cardinal Sin Lets Loose |
|
|
Location:
Alltrades Abbey Region
(Present) Walkthrough:
Alltrades Abbey
How to Beat: ・Level Up Vocations ・Use Multi-Target Skills ・Use Fizzle on Rogue |
|
|
Location:
Alltrades Abbey Region
(Present) Walkthrough:
Alltrades Abbey
|
Alltrades Abbey Mini Medals
List of Mini Medal Locations
| Map Image | World Image | |
|---|---|---|
33 |
 (Past) |
 |
34 |
 (Past) |
 |
35 |
 (Past) |
 |
36 |
 (Past) |
 |
37 |
 (Past) |
 |
38 |
 (Past) |
 |
39 |
 (Past) |
 |
40 |
 (Past) |
 |
41 |
 (Present) |
 |
42 |
 (Present) |
 |
43 |
 (Present) |
 |
Alltrades Abbey Trophies
All Trophies Unlocked in Alltrades Abbey

|
A Profitable Trade |
|---|---|
|
Awarded for completing "Restoring the Abbey!". ► Alltrades Abbey Walkthrough |
Trophy Guide and Achievements List: How to Get Platinum
Dragon Quest 7 Reimagined (DQ7) Related Guides

List of All Story Walkthroughs
| All Main Story Walkthroughs | ||||
|---|---|---|---|---|
| 1 | Prologue | 2 | Ballymolloy | |
| 3 | Emberdale | 4 | L'Arca | |
| 5 | Regenstein | 6 | Frobisher | |
| 7 | Roamer Encampment | 8 | Alltrades Abbey | |
| 9 | Al-Balad | 10 | Roamer Encampment (Present) | |
| 11 | Hardlypool | 12 | The Tallest Tower | |
| 13 | Hubble | 14 | Aeolus Vale | |
| 15 | Buccanham | 16 | Pool of Piety | |
| 17 | Malign Shrine | 18 | Cathedral of Light | |
| 19 | Awakening the Fire Spirit | 20 | Awakening the Earth Spirit | |
| 21 | Awakening the Wind Spirit | 22 | Curious Tablet | |
| 23 | Cathedral of Blight | |||
| All Optional Side Stories | ||||
| 1 | Greenthumb Gardens | 2 | Vogograd | |
| 3 | Nottagen | |||
| All Post-Game Content | ||||
| 1 | Another World | 2 | Yet Another World | |
Comment
Author

Alltrades Abbey Walkthrough Guide
Rankings
- We could not find the message board you were looking for.
Gaming News

![Death Stranding 2: On The Beach [PC] Review | A Port That Delivers](https://img.game8.co/4447392/15310a0c9aa1b6843bb713b2ea216930.jpeg/show)


Popular Games

Genshin Impact Walkthrough & Guides Wiki
Umamusume: Pretty Derby Walkthrough & Guides Wiki
Crimson Desert Walkthrough & Guides Wiki
Monster Hunter Stories 3: Twisted Reflection Walkthrough & Guides Wiki
Honkai: Star Rail Walkthrough & Guides Wiki
Pokemon Pokopia Walkthrough & Guides Wiki
The Seven Deadly Sins: Origin Walkthrough & Guides Wiki
Wuthering Waves Walkthrough & Guides Wiki
Zenless Zone Zero Walkthrough & Guides Wiki
Arknights: Endfield Walkthrough & Guides Wiki


Recommended Games
Fire Emblem Heroes (FEH) Walkthrough & Guides Wiki
Diablo 4: Vessel of Hatred Walkthrough & Guides Wiki
Cyberpunk 2077: Ultimate Edition Walkthrough & Guides Wiki
Yu-Gi-Oh! Master Duel Walkthrough & Guides Wiki
Super Smash Bros. Ultimate Walkthrough & Guides Wiki
Pokemon Brilliant Diamond and Shining Pearl (BDSP) Walkthrough & Guides Wiki
Elden Ring Shadow of the Erdtree Walkthrough & Guides Wiki
Monster Hunter World Walkthrough & Guides Wiki
The Legend of Zelda: Tears of the Kingdom Walkthrough & Guides Wiki
Persona 3 Reload Walkthrough & Guides Wiki


All rights reserved
© ARMOR PROJECT/BIRD STUDIO/SQUARE ENIX
© SUGIYAMA KOBO ℗ SUGIYAMA KOBO
The copyrights of videos of games used in our content and other intellectual property rights belong to the provider of the game.
The contents we provide on this site were created personally by members of the Game8 editorial department.
We refuse the right to reuse or repost content taken without our permission such as data or images to other sites.