Best Starting Vocations
☆ 100% Walkthrough Guide
★ Best Vocations | Best Party | Best Characters
☆ Find all Mini Medals and Tablet Fragments!
★ Farm Guides: EXP | Gold | Vocation Prof.
☆ List of Missables and Cut Content
★ Post-Game Guide
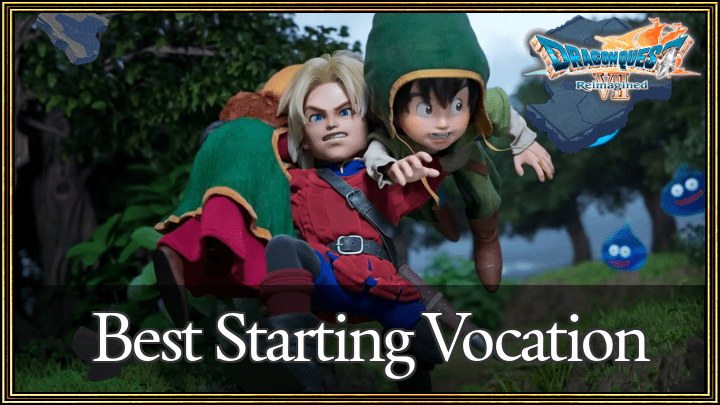
The Warrior and Martial Artist classes are the best vocations to start with upon changing jobs for the first time in Dragon Quest 7 (DQ7). Learn what the best vocations are and which ones you should avoid early here!
| All Vocation Guides | |||||
|---|---|---|---|---|---|
| All 26 Vocations | Best Starting Vocations | Best Vocations Tier List | |||
| Best Vocations Per Character | Moonlighting Guide | ||||
List of Contents
Best Starting Vocations
- Best Vocations Overall
- Best Magic Based Vocations
- Best Balanced / Hybrid Vocations
- Best Vocations for Unlocking Intermediate
Best Vocations Overall
| Vocation | Explanation |
|---|---|
 Warrior Warrior
|
・High HP, strong attack, and solid defense make Warrior the most reliable overall vocation. ・Let Loose ability provides counter-protection for allies, boosting early-game survivability. ・Excels in consistent physical damage and doesn’t really require MP to attack, making it ideal for all situations. |
 Martial Artist Martial Artist
|
・High physical damage output, with critical-focused skills allowing strong early-game hits. ・Fragile compared to Warrior, but can remain relevant without MP reliance. ・Best paired with a support vocation or tank to maximize effectiveness. |
These vocations are the most reliable early on, combining high survivability with strong damage output. Warrior excels as a tanky backbone, while Martial Artist hits hard and can finish fights quickly.
Best Magic Based Vocations
| Vocation | Explanation |
|---|---|
 Mage Mage
|
・Strong elemental offense and AoE spells make Mage ideal for tackling multiple enemies or exploiting weaknesses. ・Let Loose ability Mage's Rage guarantees critical spell hits for a few turns. ・Low HP and MP-dependent, so requires careful resource management. |
Mage is the go-to magic attacker for early-game encounters. It deals consistent elemental damage and can exploit enemy weaknesses, but it’s fragile and heavily MP-reliant, so support is recommended.
Best Balanced / Hybrid Vocations
| Vocation | Explanation |
|---|---|
 Sailor Sailor
|
・Balanced physical attacker that also boosts the party’s attack and agility. ・Useful for softening enemies while enabling other vocations to strike effectively. ・Less raw damage than Warrior or Martial Artist, but adds support utility. |
 Thief Thief
|
・Versatile physical damage dealer with utility skills that can inflict status effects. ・Let Loose ability allows extra actions when status effects land, adding burst potential. ・Moderate survivability; pairing with a tank or healer recommended. |
Attack-based vocations provide good early-game damagewhile adding support at the same time. The Sailor enhances party offense, and Thief rewards clever targeting and status exploitation.
Best Support Vocations
| Vocation | Explanation |
|---|---|
 Priest Priest
|
・Top-tier healing, revival, and status removal, keeping the party alive and stable. ・MP-dependent, so careful management is needed in longer fights. ・Critical for survival and synergy with offensive vocations. |
 Dancer
 Dancer
Dancer |
・Buffs allies by passing positive status effects to party members. ・Moderate offense but shines in amplifying team performance. ・Requires strategic placement to maximize effects. |
 Troubadour Troubadour
 Jester Jester
|
・Provides MP reduction, debuffs, and status manipulation. ・Less effective in direct damage, but strengthens overall party synergy. ・Best used to enhance other vocations’ effectiveness. |
 Shepherd Shepherd
|
・Summoning-focused support, bringing allies to the field via sheep. ・Adds crowd control and utility, while also healing through summoning skills. ・Can be fragile; pair with a tank or healer for safety. |
Support vocations ensure survival, boost performance, and provide great assists while your main damagers do the heavylifting. Priest is essential for keeping the party alive, while Dancer, Troubadour, and Shepherd enhance overall team effectiveness.
Best Vocations for Unlocking Intermediate
| Starter Vocation | Explanation |
|---|---|
|
Warrior
|
・Unlocks Gladiator for heavy physical DPS or Armamentalist for elemental hybrids. ・Early mastery ensures strong mid-game offense! |
|
Martial Artist
|
・Unlocks Gladiator for critical burst damage or Paladin for hybrid tanking. ・Prioritize to maintain consistent physical offense throughout the game. |
|
Mage
|
・Unlocks Sage for advanced magic utility or Armamentalist for elemental offense. ・Leveling early gives spellcasting dominance in the mid-game. |
|
Priest
|
・Unlocks Sage for magical versatility or Paladin for durable hybrid options. ・Maximizing early ensures party stability for longer encounters. |
|
Sailor
|
・Unlocks Pirate, a hybrid that boosts attack and defence and provides minor healing. ・Useful if you want balanced offense plus team utility. |
Focusing on these vocations first gives you the most impactful intermediate options for mid-game. Leveling weaker or niche starters isn’t as urgent since their intermediate vocations aren’t as universally useful.
Vocations to Avoid Early
Dancer, Troubadour, Jester, Thief, and Shepherd
| Vocation | Reason to Delay Early Leveling |
|---|---|
|
Dancer
|
・Weak offense on its own; mainly a support/buff vocation. ・Intermediate unlock Luminary is strong, but relies on strategic buffing or moonlighting with another vocation. |
|
Troubadour
|
・Primarily reduces MP costs and provides minor utility, also fragile in combat. ・Becomes powerful only when mastered or combined with other vocations for hybrid builds. |
|
Jester
|
・Focuses on status effects and debuffs, not raw damage. ・Shines once moonlighted or paired with another vocation for synergy, but weak alone early on. |
|
Thief
|
・Balanced damage but situational; Let Loose triggers only on status effects. ・Intermediate unlock Monster Wrangler is summon-focused, which is effective only once combined with other vocations. |
|
Shepherd
|
・Summoning-heavy support, is fragile in early fights. ・Strong once mastered or moonlighted with another vocation for better offensive options. |
These vocations can be excellent later in the game once you’ve mastered a starter vocation or moonlighted them with another. Early on, however, they are less self-sufficient and rely heavily on support or synergy to be effective.
Dragon Quest 7 Reimagined (DQ7) Related Guides

Dragon Quest 7 Reimagined Wiki Front
Recommended Guides
| Location Guides | |
|---|---|
 All Mini Medal Locations All Mini Medal Locations |
 All Sparkly Spot Locations All Sparkly Spot Locations |
| Tier Lists | |
 Best Vocations Tier List Best Vocations Tier List |
 Best Characters Tier List Best Characters Tier List |
| Best Guides | |
 Best Vocations For Each Character Best Vocations For Each Character |
 Best Party Builds Best Party Builds |
| Best Starting Vocations |
 Best Monster Hearts Best Monster Hearts |
 Best Weapons and Equipment Best Weapons and Equipment |
 Best Skills Tier List Best Skills Tier List |
| Farming Guides | |
 EXP Farming Guide EXP Farming Guide |
 Money Farming Guide Money Farming Guide |
 Vocational Proficiency Farming Guide Vocational Proficiency Farming Guide |
 Seed Farming Guide Seed Farming Guide |
| Recommended Guides | |
 Trophy Guide and Achievements List Trophy Guide and Achievements List |
 List of Missables List of Missables |
 All Cut Content All Cut Content |
 Lucky Panel Guide Lucky Panel Guide |
 List of All DLCs List of All DLCs |
 List of All Keys List of All Keys |
 Post Game Guide Post Game Guide
|
 Allblades Arena Guide Allblades Arena Guide
|
 Is There New Game Plus? Is There New Game Plus?
|
- |
Comment
Author
Best Starting Vocations
Rankings
- We could not find the message board you were looking for.
Gaming News

![Death Stranding 2: On The Beach [PC] Review | A Port That Delivers](https://img.game8.co/4447392/15310a0c9aa1b6843bb713b2ea216930.jpeg/show)


Popular Games

Genshin Impact Walkthrough & Guides Wiki
Umamusume: Pretty Derby Walkthrough & Guides Wiki
Crimson Desert Walkthrough & Guides Wiki
Monster Hunter Stories 3: Twisted Reflection Walkthrough & Guides Wiki
Honkai: Star Rail Walkthrough & Guides Wiki
Pokemon Pokopia Walkthrough & Guides Wiki
The Seven Deadly Sins: Origin Walkthrough & Guides Wiki
Wuthering Waves Walkthrough & Guides Wiki
Zenless Zone Zero Walkthrough & Guides Wiki
Arknights: Endfield Walkthrough & Guides Wiki


Recommended Games
Fire Emblem Heroes (FEH) Walkthrough & Guides Wiki
Diablo 4: Vessel of Hatred Walkthrough & Guides Wiki
Cyberpunk 2077: Ultimate Edition Walkthrough & Guides Wiki
Yu-Gi-Oh! Master Duel Walkthrough & Guides Wiki
Super Smash Bros. Ultimate Walkthrough & Guides Wiki
Pokemon Brilliant Diamond and Shining Pearl (BDSP) Walkthrough & Guides Wiki
Elden Ring Shadow of the Erdtree Walkthrough & Guides Wiki
Monster Hunter World Walkthrough & Guides Wiki
The Legend of Zelda: Tears of the Kingdom Walkthrough & Guides Wiki
Persona 3 Reload Walkthrough & Guides Wiki


All rights reserved
© ARMOR PROJECT/BIRD STUDIO/SQUARE ENIX
© SUGIYAMA KOBO ℗ SUGIYAMA KOBO
The copyrights of videos of games used in our content and other intellectual property rights belong to the provider of the game.
The contents we provide on this site were created personally by members of the Game8 editorial department.
We refuse the right to reuse or repost content taken without our permission such as data or images to other sites.