Aeolus Vale Walkthrough Guide
☆ 100% Walkthrough Guide
★ Best Vocations | Best Party | Best Characters
☆ Find all Mini Medals and Tablet Fragments!
★ Farm Guides: EXP | Gold | Vocation Prof.
☆ List of Missables and Cut Content
★ Post-Game Guide
This is a walkthrough guide for the Aeolus Vale of Dragon Quest 7 Reimagined (DQ7). See a step-by-step guide to complete the Aeolus Vale and the quest, The Fate of the Cirrus, as well as how to unlock the next area here.
| ◀ Previous Guide | Next Guide ▶ |
|---|---|
| Hubble | Buccanham |
List of Contents
 Warning! Warning! |
This page contains spoilers for Dragon Quest 7 Reimagined! If you wish to continue reading on, you have been warned. |
|---|
Aeolus Vale Walkthrough Guide
| Jump to a Section | ||
|---|---|---|
| Aeolus Vale | Custodian's Camp | Sanctum |
| Aeolus Vale (Part 2) | Sanctum (Part 2) | Aeolus Vale (Part 3) |
| Aeolus Vale (Present) | ||
Aeolus Vale
| 1 | Head north from the teleporter to reach the town of Aeolus Vale. |
|---|---|
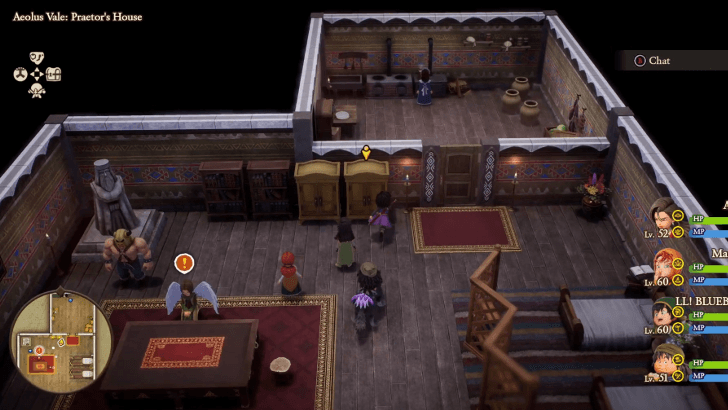
| 2 | Head downstairs to the Praetor's house located above the inn. |
| 3 |
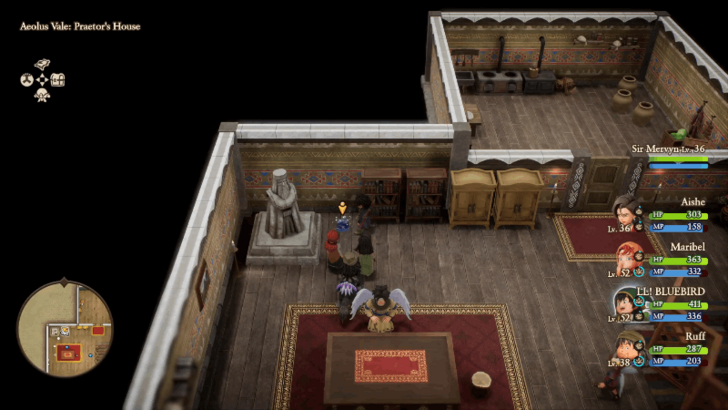 Pick up the Blue Fragment near the bookshelf and the statue. |
| 3 | Talk to The Praetor sitting in front of the table. Select "Yes" to help him and he will ask you to go to the Sanctum of the Cirrus to retrieve the Sacred Stone. |
| 4 | Cross the bridge at the center of Aeolus Vale and move to the east side to activate a cutscene. After the cutscene, enter the nearby building and continue up the stairs. |
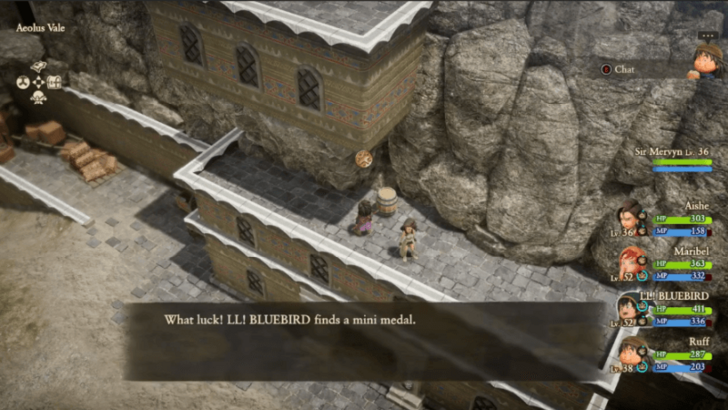
| 5 |
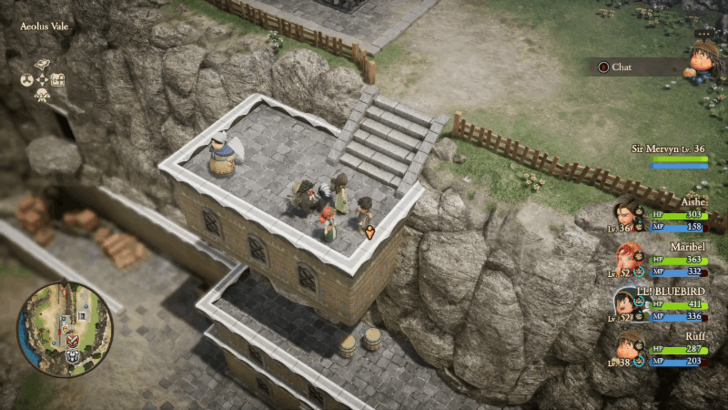 Jump off the top floor of the building on the east side. Destroy the barrels to pick up the Mini Medal. |
| 6 | Exit Aeolus Vale from the north side and head north towards the small town. |
Custodian's Camp
| 1 | A cutscene will activate as you approach the building behind the well. You can head inside the building for another cutscene. |
|---|---|
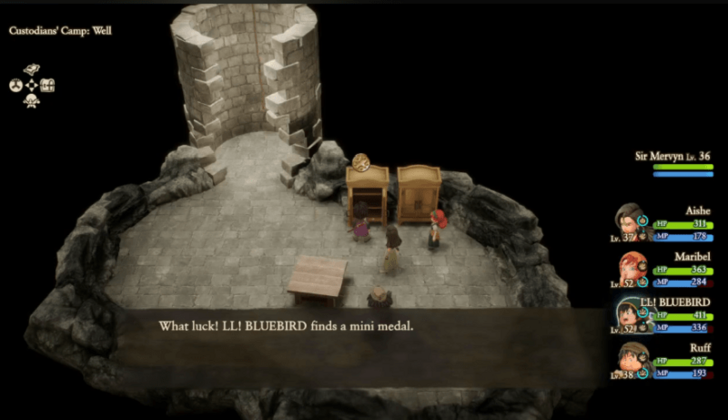
| 2 |
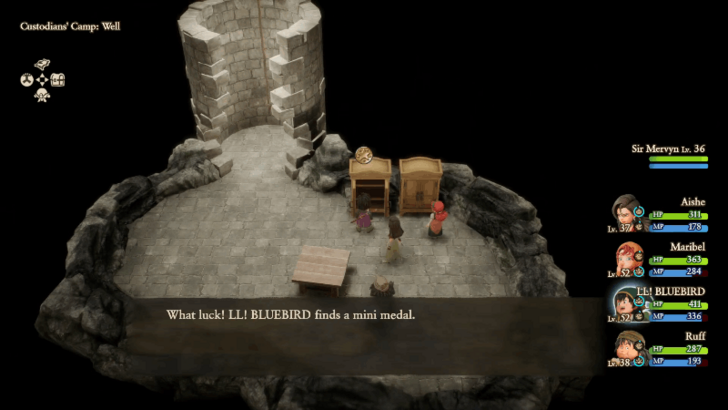 Interact with the well at the center of the camp and defeat the Well Wisher. Go inside and pick up the Mini Medal from the cabinet. |
| 3 | Once you are done exploring the camp, exit and head north to reach the Sullied Sanctum. |
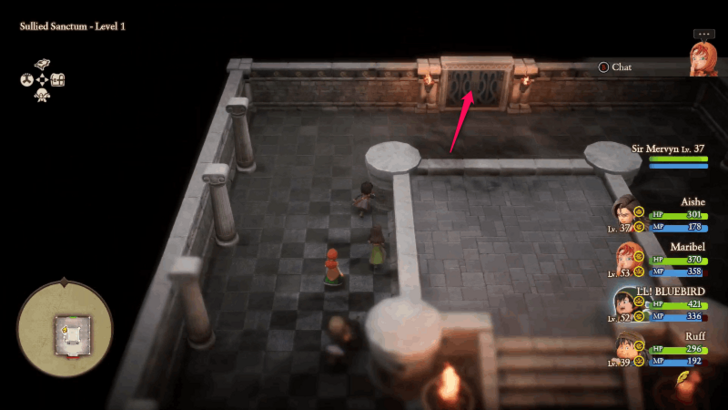
Sanctum
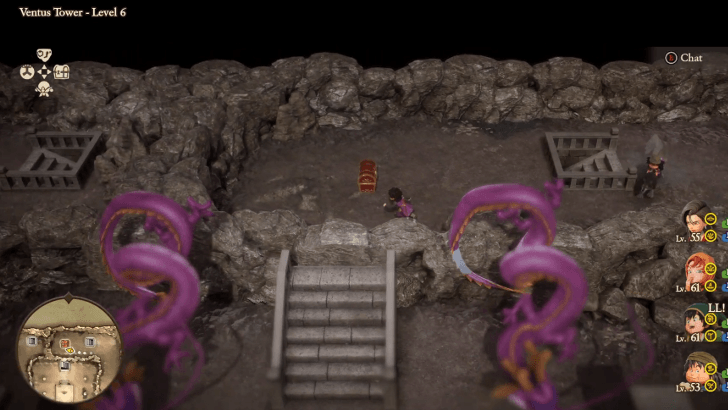
| 1 | Explore the Sullied Sanctum and go to the very end for a boss battle. Make sure to open the treasure chests to get a Yggdrasil Leaf and Silver Mail along the way. |
|---|---|
| 2 |
 When you reach an area that has the light reflection puzzle, move the pedestals so that the beam hits another mirror on a pedestal. This lights up a path that leads north towards the next area. |
| 3 |
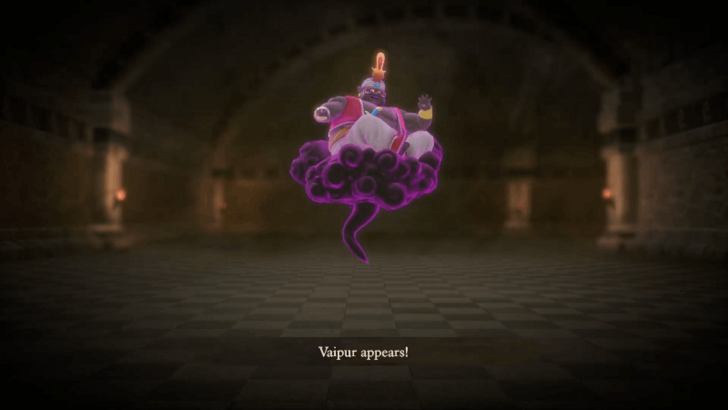 Once you reach the end of the dungeon, you will face Vaipur in a boss fight. Use the Martial Artist's Flying Knee skill as it is effective against airbone enemies. Use a Troubadour's Melody of the Wind to protect yourself from wind-based attacks. |
| 4 |
 After the boss fight is done, go through the door north of the boss arena to exit the Sullied Sanctum. Continue north to reach the Sanctum of the Cirrus. |
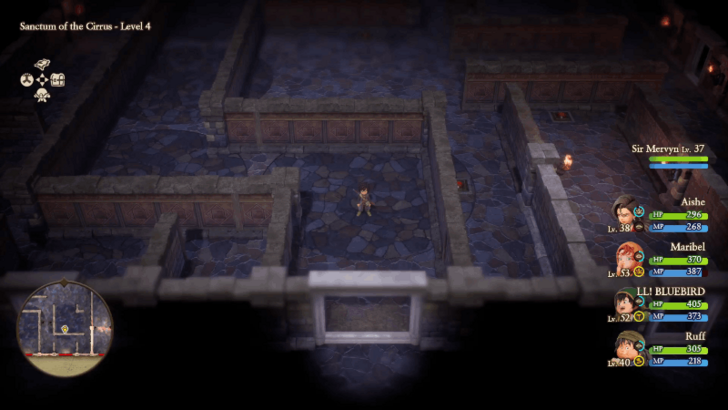
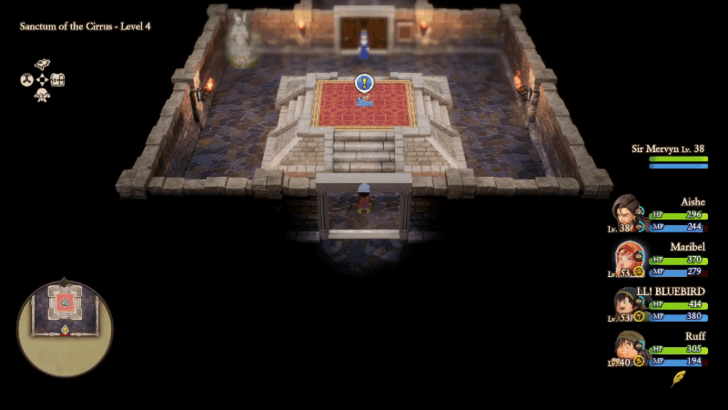
| 5 |
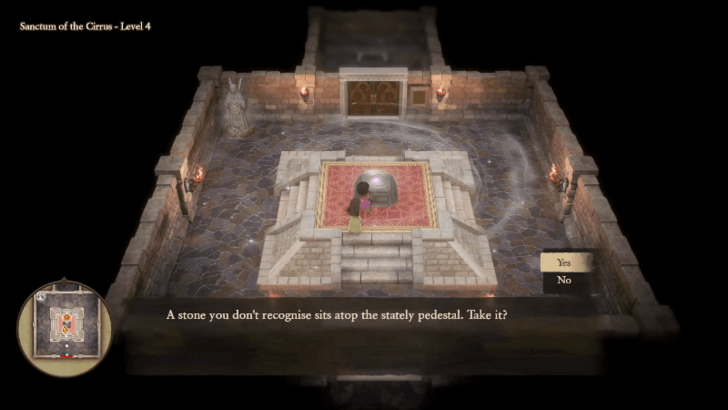 Head to Level 4 of the Sanctum of the Cirrus. Go to the back room and collect the Sacred Stone. Cast Zoom to fast travel back to The Praetor's house in Aeolus Vale. |
Aeolus Vale (Part 2)
| 1 | Go to The Praetor's house and approach the room north to activate a cutscene. Talk to the woman on the table after. You will automatically stay at the inn for one day after the cutscene ends. |
|---|---|
| 2 | Go to The Praetor's house again for a cutscene and you will receive a Stone of Life. |
| 3 | Enter the building on the east side to activate a cutscene. Afterward, return to The Praetor's house and talk to him. |
| 4 |
 Head to the roof of the building on the east side. After the cutscene, jump down from the building and approach Fidelia on the first floor. |
| 5 | Return to The Praetor's house and talk to the woman inside. You will receive the Sacret Stone from Fidelia after. Exit the town and head back to the Sanctum. |
Sanctum (Part 2)
| 1 | Head back to Level 4 of the Sanctum of the Cirrus. Place the Sacred Stone back to its pedestal. |
|---|---|
| 2 | Examine the door at the back of the pedestal to proceed. The door opens this time as you have Fidelia with you. |
| 3 |
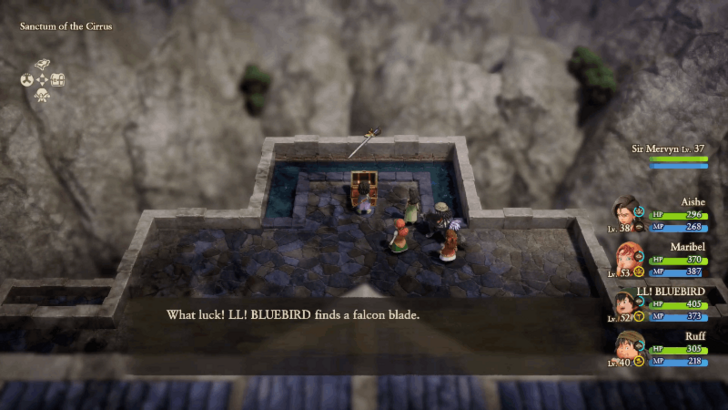 Head to the roof of the sanctum and open the treasure chest on the north side to obtain the Falcon Blade. This weapon allows you to attack twice, so it is recommended to pick it up. |
| 4 |
 Go back to the stairs on the east side of the roof and head to the door west. |
| 5 |
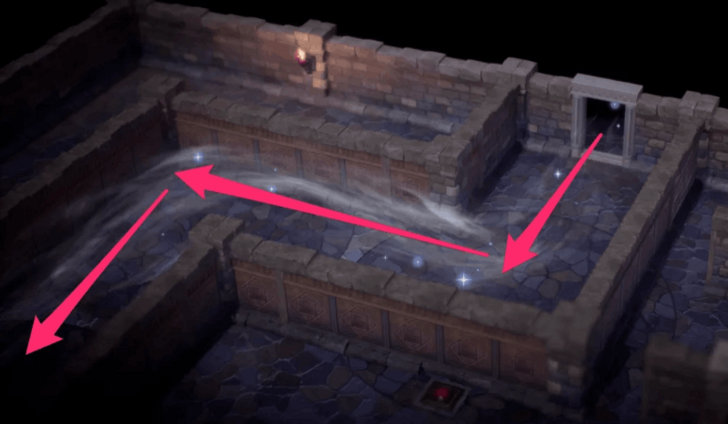 Step on the switches to create a wind path that leads from the north side to the south side. Start by pressing the switch on the north side and press the remaining counterclockwise to create the wind path. |
| 6 |
 Exit through the south door to begin the boss battle. You can save at the angel statue first before proceeding. |
| 7 |
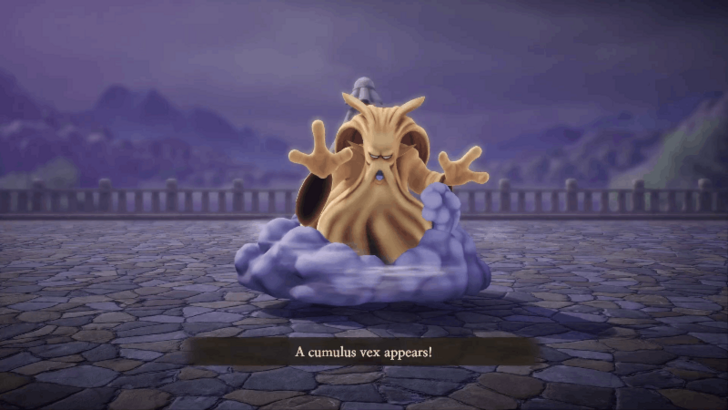 Cumulus Vex uses area-of-effect attacks so be sure to have a party member that has access to Multiheal to keep everyone's HP up. In addition, it is recommended to have items that restore HP as the boss can use a skill that seals magic. |
Aeolus Vale (Part 3)
| 1 | After defeating Cumuls Vex, exit the sanctum and return to Aeolus Vale. After the cutscene ends, head to The Praetor's house. |
|---|---|
| 2 | Exit The Prateor's house and approach Fidelia outside to receive the Sacret Stone. From here, you can head back to the teleporter to return to the present era. |
Aeolus Vale (Present)
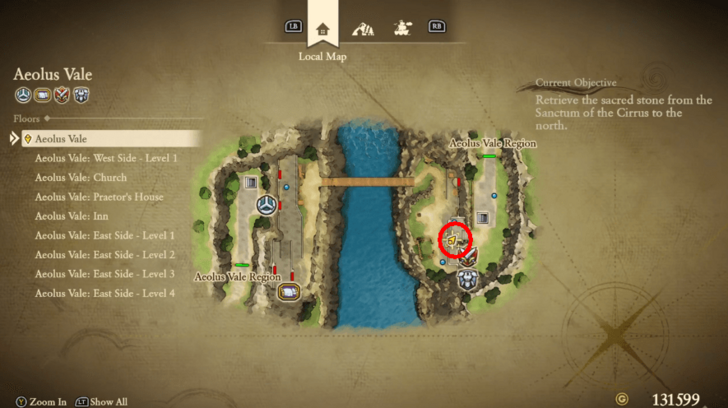
| 1 |
 Use the Magic Carpet and head to the southwestern continent. Enter the Sanctum and retreive the Blue Fragment on Level 4. |
|---|---|
| 2 |
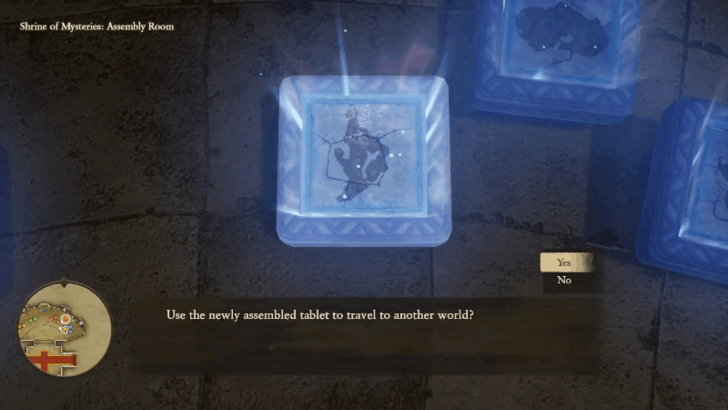 Fast travel to the Shrine of Mysteries and assemble the Blue Fragments to form a Blue Tablet that transports you to the next island, Buccanham. ▶ Buccanham Walkthrough |
Aeolus Vale Bosses
All Bosses in Aeolus Vale
| Boss | Information |
|---|---|
|
|
Location: TBD (Past) Walkthrough:
How to Beat: ・Use Defensive AoE Skills ・Bring a Buffer Support |
|
|
Location:
Sanctum of the Cirrus
(Past) Walkthrough:
Hubble
|
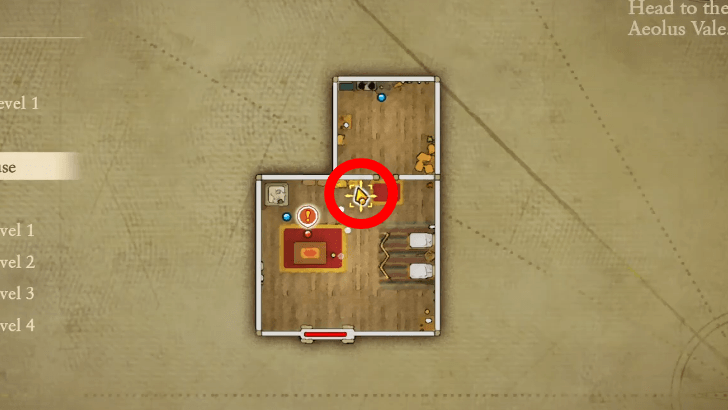
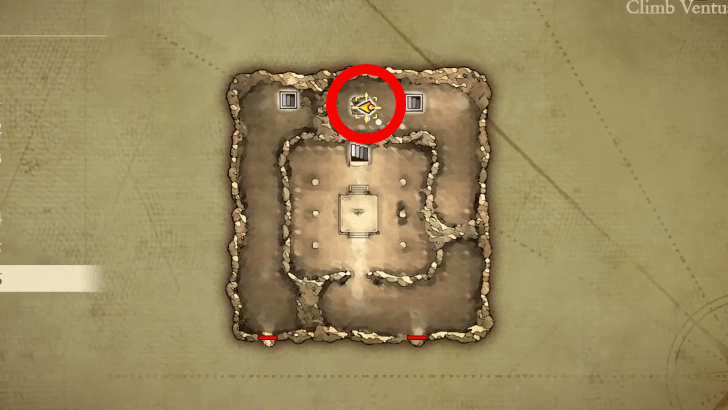
Aeolus Vale Mini Medals
List of Mini Medal Locations
| Map Image | World Image | |
|---|---|---|
73 |
 (Past) |
 |
74 |
 (Past) |
 |
75 |
 (Present) |
 |
76 |
 (Present) |
 |
Aeolus Vale Trophy Rewards
All Trophies Unlocked in Aeolus Vale

|
Whispers on the Wind |
|---|---|
|
Awarded for completing "The Fate of the Circus". ► Aeolus Vale Walkthrough Guide |
Trophy Guide and Achievements List: How to Get Platinum
Dragon Quest 7 Reimagined (DQ7) Related Guides

List of All Story Walkthroughs
| All Main Story Walkthroughs | ||||
|---|---|---|---|---|
| 1 | Prologue | 2 | Ballymolloy | |
| 3 | Emberdale | 4 | L'Arca | |
| 5 | Regenstein | 6 | Frobisher | |
| 7 | Roamer Encampment | 8 | Alltrades Abbey | |
| 9 | Al-Balad | 10 | Roamer Encampment (Present) | |
| 11 | Hardlypool | 12 | The Tallest Tower | |
| 13 | Hubble | 14 | Aeolus Vale | |
| 15 | Buccanham | 16 | Pool of Piety | |
| 17 | Malign Shrine | 18 | Cathedral of Light | |
| 19 | Awakening the Fire Spirit | 20 | Awakening the Earth Spirit | |
| 21 | Awakening the Wind Spirit | 22 | Curious Tablet | |
| 23 | Cathedral of Blight | |||
| All Optional Side Stories | ||||
| 1 | Greenthumb Gardens | 2 | Vogograd | |
| 3 | Nottagen | |||
| All Post-Game Content | ||||
| 1 | Another World | 2 | Yet Another World | |
Comment
Author

Aeolus Vale Walkthrough Guide
Rankings
- We could not find the message board you were looking for.
Gaming News


![Death Stranding 2: On The Beach Review [PC] | A Port That Delivers](https://img.game8.co/4447392/15310a0c9aa1b6843bb713b2ea216930.jpeg/thumb)


Popular Games

Genshin Impact Walkthrough & Guides Wiki
Umamusume: Pretty Derby Walkthrough & Guides Wiki
Crimson Desert Walkthrough & Guides Wiki
Monster Hunter Stories 3: Twisted Reflection Walkthrough & Guides Wiki
Honkai: Star Rail Walkthrough & Guides Wiki
Pokemon Pokopia Walkthrough & Guides Wiki
The Seven Deadly Sins: Origin Walkthrough & Guides Wiki
Wuthering Waves Walkthrough & Guides Wiki
Zenless Zone Zero Walkthrough & Guides Wiki
Arknights: Endfield Walkthrough & Guides Wiki


Recommended Games
Fire Emblem Heroes (FEH) Walkthrough & Guides Wiki
Diablo 4: Vessel of Hatred Walkthrough & Guides Wiki
Cyberpunk 2077: Ultimate Edition Walkthrough & Guides Wiki
Yu-Gi-Oh! Master Duel Walkthrough & Guides Wiki
Super Smash Bros. Ultimate Walkthrough & Guides Wiki
Pokemon Brilliant Diamond and Shining Pearl (BDSP) Walkthrough & Guides Wiki
Elden Ring Shadow of the Erdtree Walkthrough & Guides Wiki
Monster Hunter World Walkthrough & Guides Wiki
The Legend of Zelda: Tears of the Kingdom Walkthrough & Guides Wiki
Persona 3 Reload Walkthrough & Guides Wiki


All rights reserved
© ARMOR PROJECT/BIRD STUDIO/SQUARE ENIX
© SUGIYAMA KOBO ℗ SUGIYAMA KOBO
The copyrights of videos of games used in our content and other intellectual property rights belong to the provider of the game.
The contents we provide on this site were created personally by members of the Game8 editorial department.
We refuse the right to reuse or repost content taken without our permission such as data or images to other sites.