Cathedral of Blight Walkthrough Guide
☆ 100% Walkthrough Guide
★ Best Vocations | Best Party | Best Characters
☆ Find all Mini Medals and Tablet Fragments!
★ Farm Guides: EXP | Gold | Vocation Prof.
☆ List of Missables and Cut Content
★ Post-Game Guide
This is a walkthrough guide for the Cathedral of Blight of Dragon Quest 7 Reimagined (DQ7). See a step-by-step guide to complete the Cathedral of Blight and the quest, A Showdown with the Demon King, as well as how to unlock the next area here.
| ◀ Previous Guide | Next Guide ▶ |
|---|---|
| Curious Tablet | Post-Game |
List of Contents
 Warning! Warning! |
This page contains spoilers for Dragon Quest 7 Reimagined! If you wish to continue reading on, you have been warned. |
|---|
Cathedral of Blight Walkthrough Guide
| Jump to a Section | ||
|---|---|---|
| Cathedral of Blight | Post-Game | - |
Cathedral of Blight
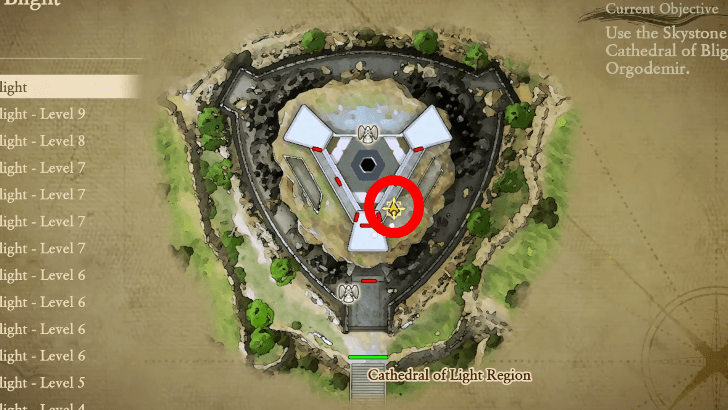
| 1 | Use the Skystone to travel to the Cathedral of Blight at the center of the map. |
|---|---|
| 2 | Go down the area that used to be the Cathedral of Light and go down through the hole in the center to the lowest floor. If you have not obtained the Ultimate Key yet, you can get it from the treasure chest in the north of the 5th floor. |
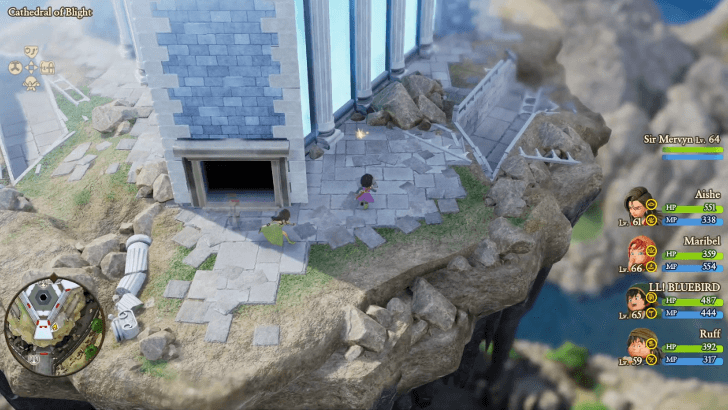
| 3 | Once you reach the sixth floor, head outside through the south door and examine the sparkly spot to collect a Mini Medal. |
| 4 | Continue down the stairs to the first floor. Press the switch on the north side of the first floor to open the door ahead, allowing you to take a shortcut when you return. |
| 5 | Go down the sairs to the second basement floor and go all the way to the back. Once you reach the back, examine the glowing spirits. If you examine the spirits, you will be able to go to the Almighty's treasure vault. |
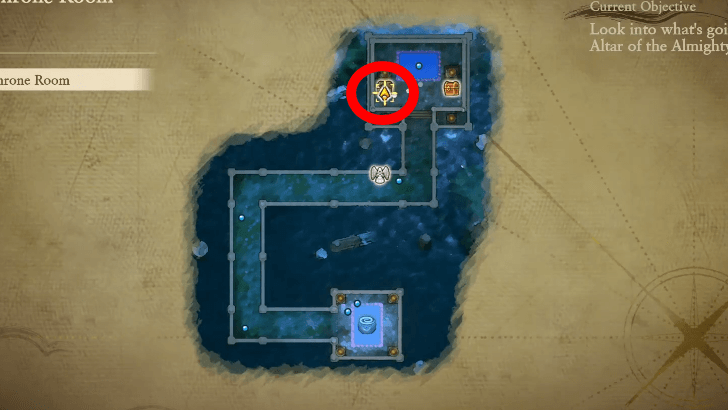
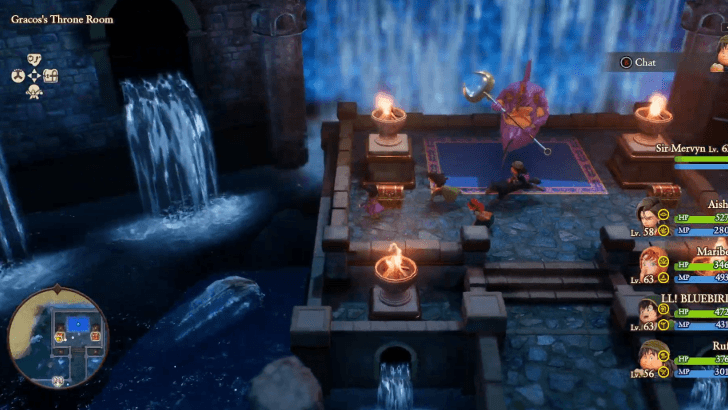
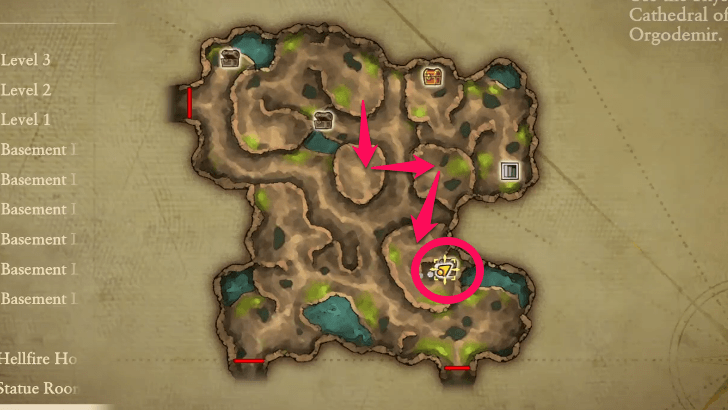
| 6 | Once you enter the Whitewater Cave section, go down the stairs in the southeast part of the cave to reach the Statue Room. |
| 7 | Present the Water Amulet at the statue to receive the Ocean Sword. Enter the teleporter behind the statue to return to the main cathedral area. |
| 8 | Present the Water Amulet at the statue to receive the Ocean Sword. Enter the teleporter behind the statue to return to the main cathedral area. |
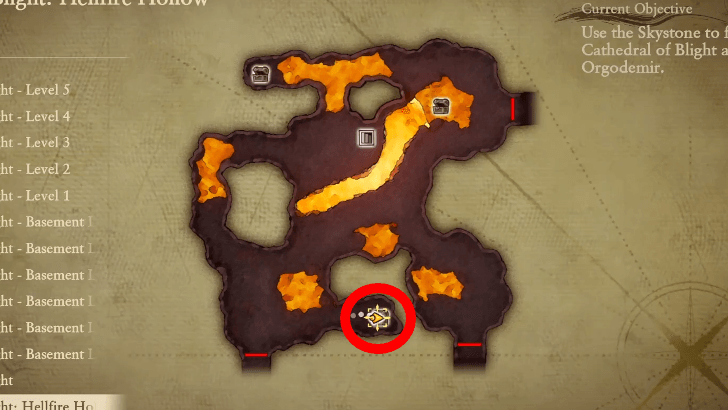
| 8 | At Hellfire Hollow northwest, go down the stairs near the center to reach the Statue Room. |
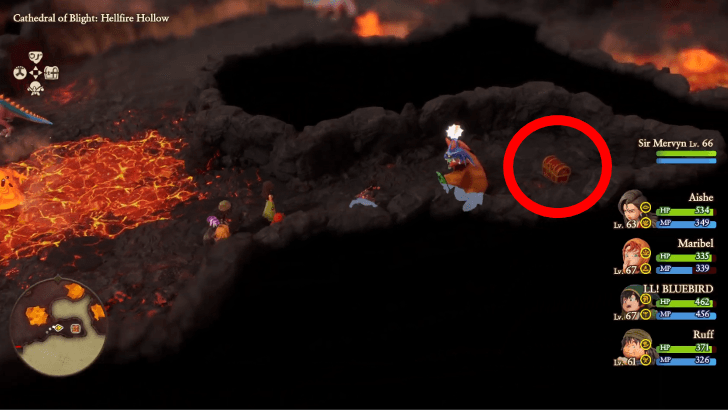
| 9 | Collect the Mini Medal from the treasure chest on the south side of Hellfire Hollow. |
| 10 | Hold the Fire Amulet at the statue to activate the fire at the main cathedral area. |
| 11 | Enter Chasm of Chaos northeast. Go down the stairs in the northeast section of the area to reach the statue room. |
| 12 | Collect the Mini Medal from the treasure chest on the southeast side of the area. |
| 13 | Present the Earth Amulet at the statue to light the fire at the main cathedral area. |
| 14 | Enter Whirlwind Way southwest. Go down the stairs southwest to reach the statue room. |
| 15 | Present the Wind Amulet at the statue to light the fire at the main cathedral area. |
| 16 | Once all the amulets are presented at their respective statues, the door at the northern side will open. |
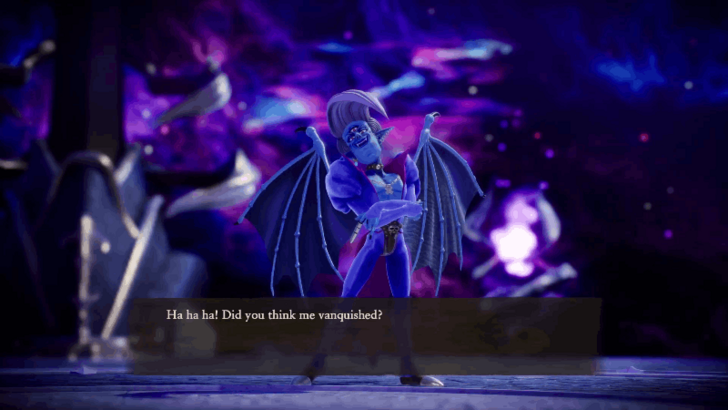
| 17 | Enter the northern door and head north towards the end of the path to find Orgodemir. This boss has four forms, so be sure to prepare well before initiating the boss fight. |
| 18 |
 Orgodemir uses breath attacks, so cast Insulate to protect all your party members from it. Cast debuff spells to reduce his attack and defense. |
| 19 |
 Orgodemir's 2nd phase uses spells, so you can counter this by casting Magic Barrier to protect against it and Bounce to reflect spells back at the boss. Make sure to keep your HP high at all times as his attacks target all party members. |
| 20 |
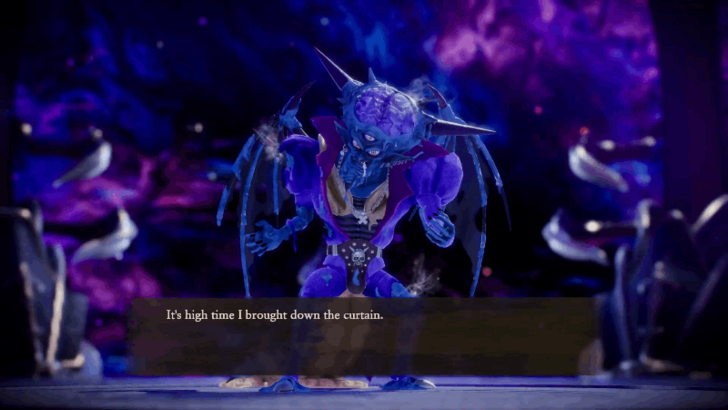 Orgodemir's 3rd phase inflicts a curse on a targeted party member, halving their maximum HP in the process. Use the Priest's Benediction spell to immediately cure the curse. |
| 21 |
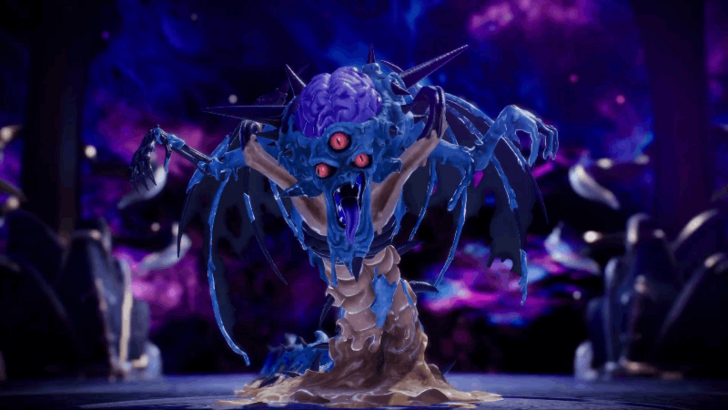 Orgodemir's final form will summon Miry Hands early on. Use area-of-effect attacks to take those down, as they attack with magic spells. Cast Bounce to reflect Orgodemir's powerful spell back at him. |
| 22 | Once you defeat Orgodemir's final form, you will teleport automatically to the Cathdral of Light and the ending sequence begins. |
Post-Game
| 1 | When the ending sequence begins, enter the temple in front of you and talk to the nun near the statue. |
|---|---|
| 2 | Talk to the soldier west of the temple and you have the choice to travel to Alltrades Abbey, Aeolus Vale, La Bravoure, Temple Palace, Emberdale, Hubble, and Buccanham Palace. If you want to skip this and head straight for the ending, select Call It a Day. |
| 3 | Go to Alltrades Abbey and talk to Jacqui on the first floor. Go to Basement Level 1 and talk to The Mighty Pip after. |
| 4 | Select Aeolus Vale and talk to Serafina. |
| 5 | Select La Bravoure and talk to Colette in the house northwest. |
| 6 | Select Temple Palace and talk to Neferta on the throne outside. Talk to the servant after and talk to Neferta. |
| 7 | Go to Emberdale next to activate a cutscene. Once the Flame Festival begins, talk to the village chief at the center of the town to activate another cutscene. |
| 8 | Select Hubble as your next destination and talk to Queen Euphonia at the throne room. After the cutscene ends, you can talk to your party members outside before heading back to the Skystone. |
| 9 | Select Buccanham Palace next and talk to the king. Talk to the dwarf near the entrance and head to the next destination. |
| 10 | Once you have visited all the destinations, a cutscene occurs and you will be teleported to the Altar of the Almighty. Examine the stone slab at the back. |
| 11 | When you examine the stone slab, you will automatically teleport to Estard Castle. Enter the cutscene for another cutscene. |
| 12 | After the cutscene ends, you will teleport to the second floor of your house in Pilchard Bay. Go down the first floor and you will receive a sandwich from Pearl. |
| 13 | Talk to Pollock on the ship east of the village. |
| 14 |
After talking to Pollock, talk to Maribel inside the ship. This activates the end credits and the game will be cleared.
► Post-Game Guide |
Cathedral of Blight Bosses
All Cathedral of Blight Bosses
| Boss | Information |
|---|---|
|
|
Location:
Cathedral of Blight
(Present) Walkthrough:
Nottagen
How to Beat: ・Stack Multi-Target Buffs ・Bring a Priest Character ・Bring an Armamentalist Character |
|
|
Location:
Cathedral of Blight
(Present) Walkthrough:
Nottagen
How to Beat: ・Stack Multi-Target Buffs ・Bring a Priest Character ・Bring an Armamentalist Character |
|
|
Location:
Cathedral of Blight
(Present) Walkthrough:
Nottagen
How to Beat: ・Stack Multi-Target Buffs ・Bring a Priest Character ・Bring an Armamentalist Character |
|
|
Location:
Cathedral of Blight
(Present) Walkthrough:
Nottagen
How to Beat: ・Stack Multi-Target Buffs ・Bring a Priest Character ・Bring an Armamentalist Character |
Cathedral of Blight Mini Medals
List of Mini Medal Locations
| Map Image | World Image | |
|---|---|---|
60 |
 (Present) |
 |
86 |
 (Present) |
 |
87 |
 (Present) |
 |
88 |
 (Present) |
 |
Cathedral of Blight Trophy Reward
Grand Finale

|
Grand Finale |
|---|---|
|
Awarded for completing "A Showdown with the Demonking". ► Cathedral of Blight Walkthrough |
Completing the Cathedral of Blight will unlock the Grand Finale achievement.
Trophy Guide and Achievements List
Dragon Quest 7 Reimagined (DQ7) Related Guides

List of All Story Walkthroughs
| All Main Story Walkthroughs | ||||
|---|---|---|---|---|
| 1 | Prologue | 2 | Ballymolloy | |
| 3 | Emberdale | 4 | L'Arca | |
| 5 | Regenstein | 6 | Frobisher | |
| 7 | Roamer Encampment | 8 | Alltrades Abbey | |
| 9 | Al-Balad | 10 | Roamer Encampment (Present) | |
| 11 | Hardlypool | 12 | The Tallest Tower | |
| 13 | Hubble | 14 | Aeolus Vale | |
| 15 | Buccanham | 16 | Pool of Piety | |
| 17 | Malign Shrine | 18 | Cathedral of Light | |
| 19 | Awakening the Fire Spirit | 20 | Awakening the Earth Spirit | |
| 21 | Awakening the Wind Spirit | 22 | Curious Tablet | |
| 23 | Cathedral of Blight | |||
| All Optional Side Stories | ||||
| 1 | Greenthumb Gardens | 2 | Vogograd | |
| 3 | Nottagen | |||
| All Post-Game Content | ||||
| 1 | Another World | 2 | Yet Another World | |
Comment
Author

Cathedral of Blight Walkthrough Guide
Rankings
- We could not find the message board you were looking for.
Gaming News

![Star Savior Review [First Impressions] | Engaging, Entertaining, and Expensive](https://img.game8.co/4447603/8f500e9bf666bdb8adb1af478e9dfdbd.png/show)
![Death Stranding 2: On The Beach Review [PC] | A Port That Delivers](https://img.game8.co/4447392/15310a0c9aa1b6843bb713b2ea216930.jpeg/thumb)


Popular Games

Genshin Impact Walkthrough & Guides Wiki
Umamusume: Pretty Derby Walkthrough & Guides Wiki
Crimson Desert Walkthrough & Guides Wiki
Monster Hunter Stories 3: Twisted Reflection Walkthrough & Guides Wiki
Honkai: Star Rail Walkthrough & Guides Wiki
Pokemon Pokopia Walkthrough & Guides Wiki
The Seven Deadly Sins: Origin Walkthrough & Guides Wiki
Wuthering Waves Walkthrough & Guides Wiki
Zenless Zone Zero Walkthrough & Guides Wiki
Arknights: Endfield Walkthrough & Guides Wiki


Recommended Games
Fire Emblem Heroes (FEH) Walkthrough & Guides Wiki
Diablo 4: Vessel of Hatred Walkthrough & Guides Wiki
Cyberpunk 2077: Ultimate Edition Walkthrough & Guides Wiki
Yu-Gi-Oh! Master Duel Walkthrough & Guides Wiki
Super Smash Bros. Ultimate Walkthrough & Guides Wiki
Pokemon Brilliant Diamond and Shining Pearl (BDSP) Walkthrough & Guides Wiki
Elden Ring Shadow of the Erdtree Walkthrough & Guides Wiki
Monster Hunter World Walkthrough & Guides Wiki
The Legend of Zelda: Tears of the Kingdom Walkthrough & Guides Wiki
Persona 3 Reload Walkthrough & Guides Wiki


All rights reserved
© ARMOR PROJECT/BIRD STUDIO/SQUARE ENIX
© SUGIYAMA KOBO ℗ SUGIYAMA KOBO
The copyrights of videos of games used in our content and other intellectual property rights belong to the provider of the game.
The contents we provide on this site were created personally by members of the Game8 editorial department.
We refuse the right to reuse or repost content taken without our permission such as data or images to other sites.