Arena Guide: All Battles and Rewards
☆ 100% Walkthrough Guide
★ Best Vocations | Best Party | Best Characters
☆ Find all Mini Medals and Tablet Fragments!
★ Farm Guides: EXP | Gold | Vocation Prof.
☆ List of Missables and Cut Content
★ Post-Game Guide
This is a guide for the arena in Dragon Quest 7 Reimagined (DQ7). Find out what the arena is, see all the arena battles, their rewards, and learn how to unlock the arena here!
List of Contents
All Arena Battles
All Battle Arena Details and Strategy
| Category | How to Beat |
|---|---|
| Bronze | Recommended Level: 33+ ・Fight using the Hero and equip Hero exclusive equipment. ・Avoid healing as HP resets after every battle. ・Don't buff yourself and just attack to win faster. |
| Silver | Recommended Level: 40+ ・Use powerful skills against enemies. ・If you always get defeated, consider leveling up more, then retry the battle. ・Equip a fully maxed vocation during battle. |
| Gold | Recommended Level: 47+ ・Equip the hero with the best weapons and armour. ・Reset the battle if afflicted by status effects. ・Use multihit or AoE skills. |
The Battle Arena are sets of solo battles can be done efficiently by choosing the Hero to fight. This mode has progressively tougher fights in Bronze, Silver, and Gold categories. Since HP resets after each battle, the focus is on ending fights quickly rather than surviving.
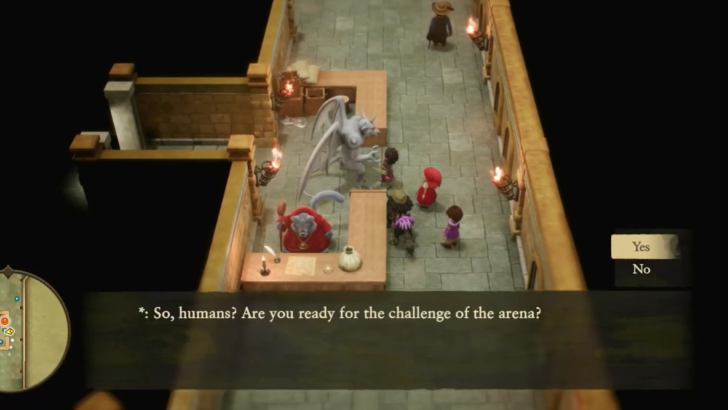
You can start the Battle Arena by speaking to the human NPC at the Arena desk.
All Rampage Roads Details and Strategy
| Category | How to Beat |
|---|---|
| Testy | Recommended Level: 90+ ・Use AoE Thunder-based skills on enemies. ・Enemies have guaranteed critical attacks so know when to guard yourself. |
| Simmering | Recommended Level: 95+ ・Use Shield of the Hero whenever the party gets status inflicted. ・Enemies can use Let Loose too so time your attacks and defenses. ・Thunder-based skills on enemies work effectively. |
| Fuming | Recommended Level: 99 ・Spam the Hero's Gigagash on enemies . ・Use Sword Dance for enemies resistant to lightning attacks. |
| Furious | Recommended Level: 99 ・Equip Sleep resistant equipment. ・Use the highest tier AoE and multihit attacks that you have. |
Rampage Roads is designed for late-game parties and always uses fixed difficulty, meaning your current difficulty settings doesn't matter and is ignored. Enemies often have guaranteed critical attacks or dangerous status effects, so preparation is key.
You can start Rampage Roads by talking to the Slime NPC at the Arena desk.
Rampage Roads Guide and Rewards
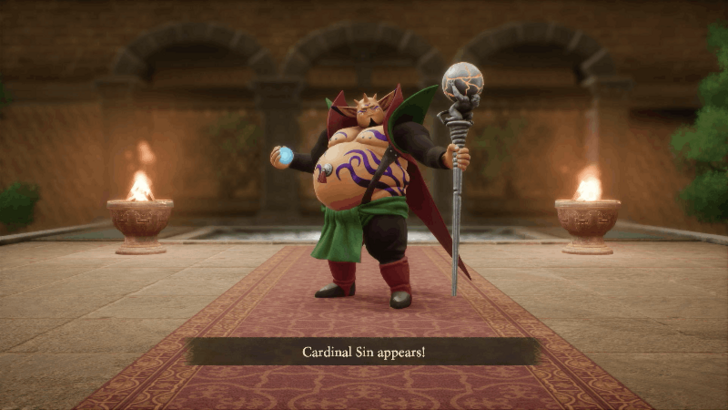
Road of Regal Wretches (DLC) Details and Strategy
| Category | How to Beat |
|---|---|
| The Original Demon | Recommended Level: 60+ ・Aim for a total of 6000 damage per turn. ・Have Magic Barrier ready to nullify spell damage. ・Use Pass the Torch so Hero can go on the offensive twice. |
| Master of Destruction | Recommended Level: 70+ ・Use AoE Thunder-based skills on enemies. ・Use Divine Intervention to lower enemy spell resistance. ・Equip Swagman Heart for automatic HP Recovery. |
| The Lord of Darkness | Recommended Level: 75+ ・Use AoE Thunder-based skills on enemies. ・Equip armor that is resistant to Ice spells. ・Cloth of Darkness can be destroyed with a powerful or critical strike. |
Road of Regal Wretches is a DLC-exclusive mode featuring high-damage bosses inspired by classic Dragon Quest villains, this mode can be played if you purchased the DLCs separately or own the Digital Deluxe Edition of the game. If you fail to meet the turn requirement, you can always restart.
Speak to the She-Slime NPC at the Arena desk to begin.
Arena Rewards
All Battle Arena Rewards
| Category | Reward | Requirement |
|---|---|---|
| Bronze | Victory | |
| 20 Turns | ||
| ~15 Turns | ||
| ~10 Turns | ||
| Silver | Victory | |
| ~25 Turns | ||
| ~20 Turns | ||
| ~15 Turns | ||
| Gold | Victory | |
| ~35 Turns | ||
| ~28 Turns | ||
| ~20 Turns |
Some rewards in the Battle Arena are locked behind turn limits. You'll always receive rewards for your victory for the first time in each category, but the other rewards are only obtainable if you clear entire battles in the required turns or fewer.
The faster you win, the better the rewards, so optimizing the best strategy and party build for each fight is important.
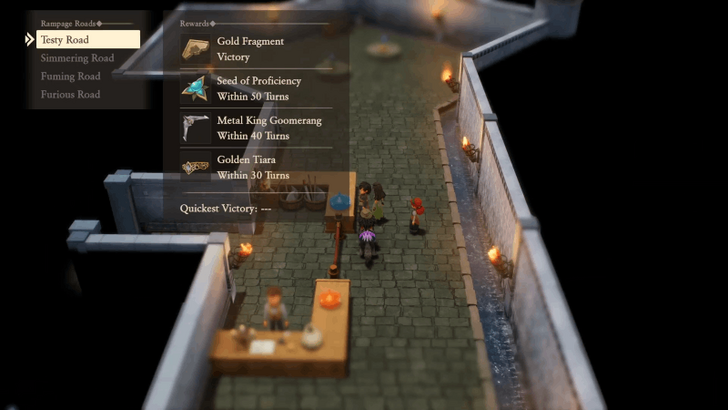
All Rampage Roads Reward
| Category | Reward | Requirement |
|---|---|---|
| Testy | Victory | |
| ~ 50 Turns | ||
| ~ 40 Turns | ||
| ~ 30 Turns | ||
| Simmering | Victory | |
| ~ 60 Turns | ||
| ~ 50 Turns | ||
| Metal King Armour | ~ 40 Turns | |
| Fuming | Victory | |
| Glitzy Glomborero | ~ 90 Turns | |
| ~ 80 Turns | ||
| ~ 70 Turns | ||
| Furious | Victory | |
| ~ 60 Turns | ||
| ~ 50 Turns | ||
| ~ 40 Turns |
Rampage Roads rewards are tied to how quickly you finish the battle. The turn limits here are higher than that of the Battle Arena categories, but this also means that the battles can stretch that long because of its difficulty.
The rewards for the Rampage Road battles, including the Metal King equipment set, make the challenge worthwhile since it is one of the best equipment in the game.
All Road of Regal Wretches Rewards
| Category | Reward | Requirement |
|---|---|---|
| The Original Demon | Victory | |
| ~ 40 Turns | ||
| ~ 30 Turns | ||
| ~ 25 Turns | ||
| Master of Destruction | Victory | |
| ~ 70 Turns | ||
| ~ 60 Turns | ||
| ~ 50 Turns | ||
| The Lord of Darkness | Victory | |
| ~ 60 Turns | ||
| ~ 50 Turns | ||
| ~ 40 Turns |
The Road of Regal Wretches rewards turn-based victories like the other arenas, but it also grants DLC-exclusive monster hearts that are incredibly powerful such as the Malroth Heart, which when equipped, casts Fullheal on the bearer when HP is low every turn.
The Dragonlord Heart can occasionally bring the Dragonlord itself into battle and the Zoma Heart wraps the bearer in a Cloth of Darkness at the start of each fight, reducing damage taken by 300%.
How to Unlock the Arena
After Completing the Buccanham Questline
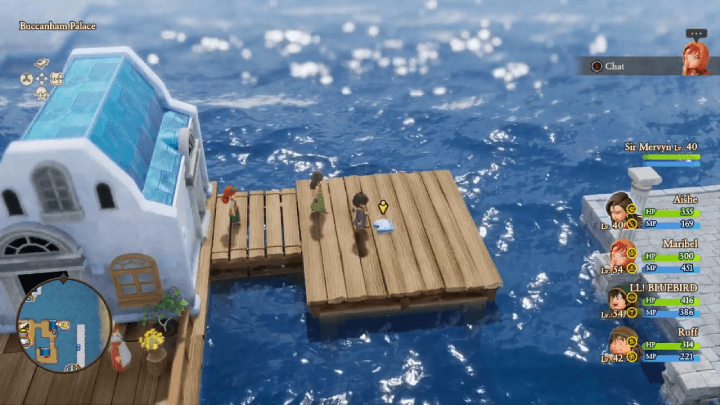
Once you complete all the events in Buccanham (Past), the monster arena becomes available in Buccanham (Present). From here, you can challenge the Battle Arena, Rampage Roads, and the DLC-exclusive Road of Regal Wretches.
Rampage Roads is Unlocked Post-Game
The Rampage Roads mode of the arena is only unlocked once you beat the game once.
What is the Battle Arena?
Coliseum Where You Battle Enemies
The Battle Arena is a dedicated challenge coliseum where you fight enemies under specific rules to earn rare rewards, powerful equipment, and stat-boosting items.
Different From the Allblades Arena
Unlike the Allblades Arena, which is tied to the main story, the Arena is optional and can be attempted anytime after unlocking.
Dragon Quest 7 Reimagined (DQ7) Related Guides

Dragon Quest 7 Reimagined Wiki Front
Guides by Category
 Walkthrough Walkthrough |
 Vocations Vocations |
 Tips and Tricks Tips and Tricks |
 Bosses Bosses |
 Menacing Monsters Menacing Monsters |
 Monster Hearts Monster Hearts |
 Tablet Fragments Tablet Fragments |
 Map and Locations Map and Locations |
 Weapons Weapons |
 Equipment Equipment |
 Characters Characters |
 Skills Skills |
 Items Items |
 Enemies Enemies |
 Puzzles Puzzles |
 Arena Arena |
 News News |
- |
Comment
Author
Arena Guide: All Battles and Rewards
Rankings
- We could not find the message board you were looking for.
Gaming News


![Death Stranding 2: On The Beach Review [PC] | A Port That Delivers](https://img.game8.co/4447392/15310a0c9aa1b6843bb713b2ea216930.jpeg/thumb)

Popular Games

Genshin Impact Walkthrough & Guides Wiki
Umamusume: Pretty Derby Walkthrough & Guides Wiki
Crimson Desert Walkthrough & Guides Wiki
Monster Hunter Stories 3: Twisted Reflection Walkthrough & Guides Wiki
Honkai: Star Rail Walkthrough & Guides Wiki
Pokemon Pokopia Walkthrough & Guides Wiki
The Seven Deadly Sins: Origin Walkthrough & Guides Wiki
Wuthering Waves Walkthrough & Guides Wiki
Zenless Zone Zero Walkthrough & Guides Wiki
Arknights: Endfield Walkthrough & Guides Wiki


Recommended Games
Fire Emblem Heroes (FEH) Walkthrough & Guides Wiki
Diablo 4: Vessel of Hatred Walkthrough & Guides Wiki
Cyberpunk 2077: Ultimate Edition Walkthrough & Guides Wiki
Yu-Gi-Oh! Master Duel Walkthrough & Guides Wiki
Super Smash Bros. Ultimate Walkthrough & Guides Wiki
Pokemon Brilliant Diamond and Shining Pearl (BDSP) Walkthrough & Guides Wiki
Elden Ring Shadow of the Erdtree Walkthrough & Guides Wiki
Monster Hunter World Walkthrough & Guides Wiki
The Legend of Zelda: Tears of the Kingdom Walkthrough & Guides Wiki
Persona 3 Reload Walkthrough & Guides Wiki


All rights reserved
© ARMOR PROJECT/BIRD STUDIO/SQUARE ENIX
© SUGIYAMA KOBO ℗ SUGIYAMA KOBO
The copyrights of videos of games used in our content and other intellectual property rights belong to the provider of the game.
The contents we provide on this site were created personally by members of the Game8 editorial department.
We refuse the right to reuse or repost content taken without our permission such as data or images to other sites.