Chapter 11: Conflict in the Holy Tomb Walkthrough
This is the battle walkthrough for the mission Conflict in the Holy Tomb from Fire Emblem: Three Houses (FETH, FE3H). Read on to find out about map features, what enemies you will encounter, and tips for winning!
List of Contents
| Previous Battle | Story Walkthrough | Next Battle |
|---|---|---|
| Chapter 10: Sealed Forest Snare | Chapter 11: Throne of Knowledge | Chapter 12: Battle at Garreg Mach |
Chapter 11 - Overview

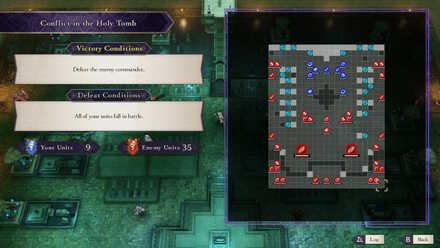
| Victory Conditions | |
|---|---|
| Defeat the enemy commander. | |
| Defeat Conditions | |
| Casual: All of your units fall in battle. Classic: Your character or your house leader falls in battle. |
|
| # of Player Units | 9 |
| # of Enemies | Normal: 29 Hard: 35 |
Chapter 11 - Enemies

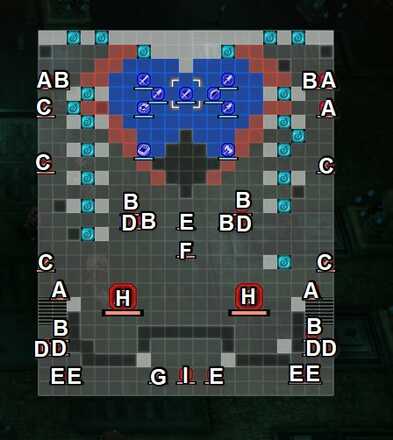
| Pos | Enemy | Pos | Enemy |
|---|---|---|---|
| A | Imperial Soldier (Brigand) | B | Imperial Soldier (Armored Knight) |
| C | Imperial Soldier (Thief) | D | Imperial Soldier (Archer) |
| E | Mysterious Mage (Dark Bishop) | F | Imperial Soldier (Priest) |
| G | Metodey | H | Demonic Beast |
| I | Flame Emperor | - | - |
Enemy Stats
Metodey
| Level | HP | Mov. | Class |
|---|---|---|---|
| 22 | 39 | 6 | Assassin |
| Mt. | Spd | Hit | Crit |
| 32 | 23 | 108 | 15 |
| Range | Prt | Res | Avd |
| 1 | 15 | 10 | 30 |
| Weapon | Dropped Items | ||
| Venin Edge | N/A | ||
| Battalion | |||
| Empire Raiders | |||
| Level | Endurance | Gambit | Uses |
| 1 | 75 | Absorption | 1 |
Flame Emperor
| Level | HP | Mov. | Class |
|---|---|---|---|
| 23 | 51 | - | Flame Emperor |
| Mt. | Spd | Hit | Crit |
| 38 | 0 | 85 | 13 |
| Range | Prt | Res | Avd |
| 1 | 25 | 10 | -3 |
| Weapon | Dropped Items | ||
| Steel Axe | N/A | ||
| Battalion | |||
| Flame Emperor Co. | |||
| Level | Endurance | Gambit | Uses |
| 1 | 75 | Raging Flames | 2 |
Metodey
| Level | HP | Mov. | Class |
|---|---|---|---|
| 23 | 42 | 6 | Assassin |
| Mt. | Spd | Hit | Crit |
| 34 | 27 | 112 | 19 |
| Range | Prt | Res | Avd |
| 1 | 19 | 10 | 34 |
| Weapon | Dropped Items | ||
| Venin Edge | N/A | ||
| Battalion | |||
| Empire Raiders | |||
| Level | Endurance | Gambit | Uses |
| 1 | 75 | Absorption | 1 |
Flame Emperor
| Level | HP | Mov. | Class |
|---|---|---|---|
| 24 | 55 | 5 | Flame Emperor |
| Mt. | Spd | Hit | Crit |
| 42 | 2 | 87 | 15 |
| Range | Prt | Res | Avd |
| 1 | 25 | 13 | -1 |
| Weapon | Dropped Items | ||
| Steel Axe | N/A | ||
| Battalion | |||
| Flame Emperor Co. | |||
| Level | Endurance | Gambit | Uses |
| 1 | 75 | Raging Flames | 2 |
Extra Rewards
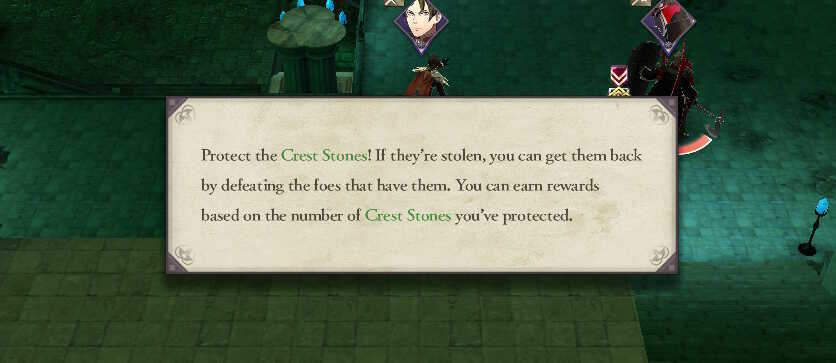
When you successfully protect all the Crest Stones by not letting the enemies flee with the items, you will receive a Rusted Bow which you can forge into a Silver Bow. You will also receive a Knowledge Gem, and an Advanced Seal.
Chapter 11 - Chests
No Chests
There are no chests on this map.
Chapter 11 - Map Features
There are blue tiles that are basically chests that contain crest stones, which your enemies will loot and then return to the exit. The Flame Emperor sits in the middle of a platform at the bottom of the map, with only two staircases to the left and right that will allow melee units to get there.
Chapter 11 - Tips and Tricks
Catch That Crest Stone Thief!

Enemies who loot crest stones will then rush back to the escape point right behind position O. There is a bonus for making sure none of them get stolen. Have cavalry units chase down the opponents with crest stones with their high movement. Alternatively you can have your ranged units take them out from afar and still get the crest stones back.
Block the Staircases To Prevent Theft
Since enemies with crest stones need to return to the tile behind Position O for it to be counted as stolen, another way to easily retrieve them would be to take the two staircases and block it.
Focus the Flame Emperor to Quickly End the Battle
Defeating the Flame Emperor before any of the soldiers return to the escape point counts as protecting all of the crest stones, regardless of whether or not any of them still have crest stones in their inventory.
Sniping The Flame Emperor / Metodey

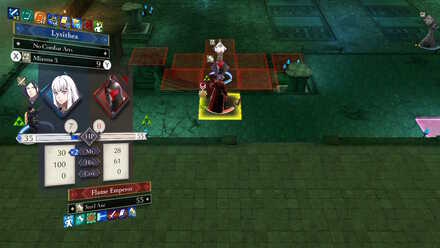
A Sniper class unit with Curved Shot, Deadeye, or a Longbow can attack the Flame Emperor from the position right in front of the trench, allowing you to attack without even going up the hill. The Flame Emperor however, has counter-attack and will damage your Sniper regardless of range, so have a healer nearby.
Likewise, it is also possible to lure both Metodey and the Flame emperor to the left and right side of their starting point. This allows units with an attack range of 2 such as mages to snipe them with ease.
Fire Emblem: Three Houses - Related Links
Part 1 - White Clouds Battle Walkthroughs
Comment
Author
Chapter 11: Conflict in the Holy Tomb Walkthrough
improvement survey
03/2026
improving Game8's site?

Your answers will help us to improve our website.
Note: Please be sure not to enter any kind of personal information into your response.

We hope you continue to make use of Game8.
Rankings
- We could not find the message board you were looking for.
Gaming News
Popular Games

Genshin Impact Walkthrough & Guides Wiki

Honkai: Star Rail Walkthrough & Guides Wiki

Umamusume: Pretty Derby Walkthrough & Guides Wiki

Pokemon Pokopia Walkthrough & Guides Wiki

Resident Evil Requiem (RE9) Walkthrough & Guides Wiki

Monster Hunter Wilds Walkthrough & Guides Wiki

Wuthering Waves Walkthrough & Guides Wiki

Arknights: Endfield Walkthrough & Guides Wiki

Pokemon FireRed and LeafGreen (FRLG) Walkthrough & Guides Wiki

Pokemon TCG Pocket (PTCGP) Strategies & Guides Wiki
Recommended Games

Diablo 4: Vessel of Hatred Walkthrough & Guides Wiki

Cyberpunk 2077: Ultimate Edition Walkthrough & Guides Wiki

Fire Emblem Heroes (FEH) Walkthrough & Guides Wiki

Yu-Gi-Oh! Master Duel Walkthrough & Guides Wiki

Super Smash Bros. Ultimate Walkthrough & Guides Wiki

Pokemon Brilliant Diamond and Shining Pearl (BDSP) Walkthrough & Guides Wiki

Elden Ring Shadow of the Erdtree Walkthrough & Guides Wiki

Monster Hunter World Walkthrough & Guides Wiki

The Legend of Zelda: Tears of the Kingdom Walkthrough & Guides Wiki

Persona 3 Reload Walkthrough & Guides Wiki
All rights reserved
©2019 Nintendo / INTELLIGENT SYSTEMS. Co-developed by KOEI TECMO GAMES CO., LTD. Fire Emblem and Nintendo Switch are trademarks of Nintendo. © 2019 Nintendo.
The copyrights of videos of games used in our content and other intellectual property rights belong to the provider of the game.
The contents we provide on this site were created personally by members of the Game8 editorial department.
We refuse the right to reuse or repost content taken without our permission such as data or images to other sites.


![Monster Hunter Stories 3 Review [First Impressions] | Simply Rejuvenating](https://img.game8.co/4438641/2a31b7702bd70e78ec8efd24661dacda.jpeg/thumb)


