Chapter 8: The Remire Calamity Walkthrough
This is the battle walkthrough for the mission The Remire Calamity from Fire Emblem: Three Houses (FETH, FE3H). Read on to find out about map features, what enemies you will encounter, and tips for winning!
List of Contents
| Previous Battle | Story Walkthrough | Next Battle |
|---|---|---|
| Chapter 7: Battle of The Eagle and Lion Battle | Chapter 8: The Flame in the Darkness | Chapter 9: Salvation at the Chapel |
Chapter 8 - Map and Overview
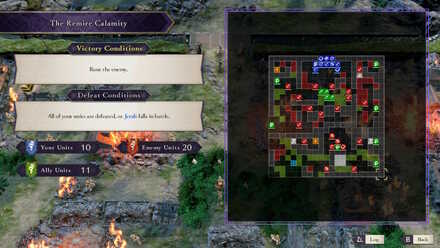
| Victory Conditions | |
|---|---|
| Rout the enemy. ↓ Defeat the enemy commander. |
|
| Defeat Conditions | |
| Byleth, your house leader, or Jeralt falls in battle. | |
| # of Player Units | 10 |
| # of Enemies | 20 + 8 |
| # of Allies | 11 |
Chapter 8 - Enemies

| Pos | Enemy | Pos | Enemy |
|---|---|---|---|
| A | Rampaging Villager (Commoner) |
B | Mysterious Soldier (Mercenary) |
| C | Mysterious Soldier (Armored Knight) |
D | Mysterious Soldier (Archer) |
| E | Mysterious Soldier (Mage) |
F | Solon |
| G | Death Knight | H | Flame Emperor Soldier (Cavalry) |
| I | Flame Emperor Soldier (Priest) |
J | Flame Emperor Soldier (Archer) |
Enemy Stats
Death Knight
| Level | HP | Mov. | Class |
|---|---|---|---|
| 24 | 45 | - | Death Knight |
| Mt. | Spd | Hit | Crit |
| 39 | 16 | 124 | 43 |
| Range | Prt | Res | Avd |
| 1 | 18 | 18 | 37 |
| Weapon | Dropped Items | ||
| Scythe of Sariel | Dark Seal | ||
| Battalion | |||
| Reaper Knights | |||
| Level | Endurance | Gambit | Uses |
| 1 | 75 | Assault Troop | 2 |
Solon
| Level | HP | Mov. | Class |
|---|---|---|---|
| 17 | 31 | - | Dark Bishop |
| Mt. | Spd | Hit | Crit |
| 33 | 5 | 87 | 17 |
| Range | Prt | Res | Avd |
| 1-2 | 12 | 25 | 0 |
| Weapon | Dropped Items | ||
| Banshee | N/A | ||
| Battalion | |||
| Solon Subordinates | |||
| Level | Endurance | Gambit | Uses |
| 1-2 | 75 | Resonant Flames | 1 |
Death Knight
| Level | HP | Mov. | Class |
|---|---|---|---|
| 24 | 49 | 7 | Death Knight |
| Mt. | Spd | Hit | Crit |
| 43 | 21 | 124 | 43 |
| Range | Prt | Res | Avd |
| 1 | 23 | 18 | 43 |
| Weapon | Dropped Items | ||
| Scythe of Sariel | Dark Seal | ||
| Battalion | |||
| Reaper Knights | |||
| Level | Endurance | Gambit | Uses |
| 1 | 75 | Assault Troop | 2 |
Solon
| Level | HP | Mov. | Class |
|---|---|---|---|
| 18 | 34 | - | Dark Bishop |
| Mt. | Spd | Hit | Crit |
| 36 | 5 | 88 | 18 |
| Range | Prt | Res | Avd |
| 1-2 | 13 | 26 | 0 |
| Weapon | Dropped Items | ||
| Banshee | N/A | ||
| Battalion | |||
| Solon Subordinates | |||
| Level | Endurance | Gambit | Uses |
| 1-2 | 75 | Resonant Flames | 1 |
Loot
Succesfully taking down the Death Knight will, like in your previous encounter, net you a Dark Seal. His lackeys, the Flame Emperor Soldiers, both carry Crescent Sickles.
Chapter 8 - Chests
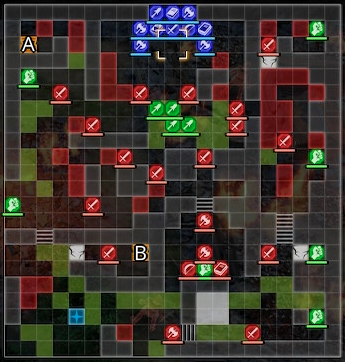
| A | Giant Shell |
|---|---|
| B | Horseslayer |
Chapter 8 - Map Features
Tiles
| Tiles | Description |
|---|---|
| Forest | +30% Avo, 1 Prt to all non-fliers |
| Edifice, Rubble, Rock | Navigable only by fliers |
| Stairs | Difficult for cavalry to travers |
| Fiery Floor | -15% HP. Causes damage each turn. Has no effect on fliers. |
| Heal Tile+ | 1 Prt, 1 Res, +30% HP each turn for non-fliers |
Breakable Barricades
There are breakable barricades scattered around the battlefield. One serves to protect an NPC while the other serves as a barrier to a valuable weapon.
Flaming Tiles
There are several flaming tiles on the area. These tiles damage units that stays on them and reduces the movement of cavalry units. Be careful of using cavalries on this stage.
Hidden Rewards
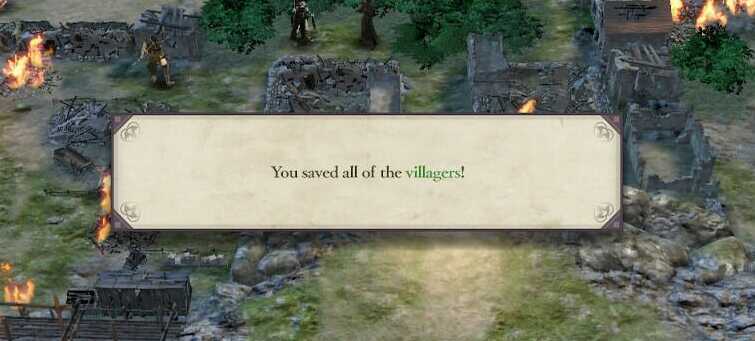
 You saved all of the villagers!
The more villagers you rescue, the greater your reward. Rescuing least half will get you a Large Bullion, and an Advanced Seal. Rescuing all 6 villagers will earn you an Extra Large Bullion, worth a whopping 10,000 gold, and an Advanced Seal.
Chapter 8 - Tips and Tricks
Using the Stride Gambit
Seiros Holy Monks is a support battalion that can use the Gambit “Stride”. Stride will greatly increase the tiles covered by your unit's movement which is extremely useful in getting units to hard to access areas.
Rescuing Villagers
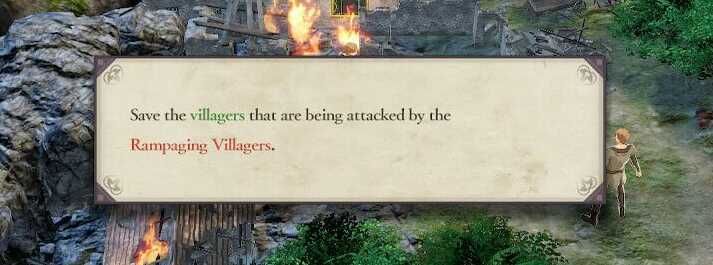
Save the villagers that are being attacked by the rampaging villagers.
There are two areas with villagers you need to rescue. The villagers on the right side of the map, however, are harder to reach, so sending a unit with the Rescue spell to the right side while supported by sprint will allow you to place the last villager in a safer spot.
Fire Emblem: Three Houses - Related Links
Part 1 - White Clouds Battle Walkthroughs
Author
Chapter 8: The Remire Calamity Walkthrough
improvement survey
03/2026
improving Game8's site?

Your answers will help us to improve our website.
Note: Please be sure not to enter any kind of personal information into your response.

We hope you continue to make use of Game8.
Rankings
- We could not find the message board you were looking for.
Gaming News
Popular Games

Genshin Impact Walkthrough & Guides Wiki

Honkai: Star Rail Walkthrough & Guides Wiki

Umamusume: Pretty Derby Walkthrough & Guides Wiki

Pokemon Pokopia Walkthrough & Guides Wiki

Resident Evil Requiem (RE9) Walkthrough & Guides Wiki

Monster Hunter Wilds Walkthrough & Guides Wiki

Wuthering Waves Walkthrough & Guides Wiki

Arknights: Endfield Walkthrough & Guides Wiki

Pokemon FireRed and LeafGreen (FRLG) Walkthrough & Guides Wiki

Pokemon TCG Pocket (PTCGP) Strategies & Guides Wiki
Recommended Games

Diablo 4: Vessel of Hatred Walkthrough & Guides Wiki

Cyberpunk 2077: Ultimate Edition Walkthrough & Guides Wiki

Fire Emblem Heroes (FEH) Walkthrough & Guides Wiki

Yu-Gi-Oh! Master Duel Walkthrough & Guides Wiki

Super Smash Bros. Ultimate Walkthrough & Guides Wiki

Pokemon Brilliant Diamond and Shining Pearl (BDSP) Walkthrough & Guides Wiki

Elden Ring Shadow of the Erdtree Walkthrough & Guides Wiki

Monster Hunter World Walkthrough & Guides Wiki

The Legend of Zelda: Tears of the Kingdom Walkthrough & Guides Wiki

Persona 3 Reload Walkthrough & Guides Wiki
All rights reserved
©2019 Nintendo / INTELLIGENT SYSTEMS. Co-developed by KOEI TECMO GAMES CO., LTD. Fire Emblem and Nintendo Switch are trademarks of Nintendo. © 2019 Nintendo.
The copyrights of videos of games used in our content and other intellectual property rights belong to the provider of the game.
The contents we provide on this site were created personally by members of the Game8 editorial department.
We refuse the right to reuse or repost content taken without our permission such as data or images to other sites.


![Monster Hunter Stories 3 Review [First Impressions] | Simply Rejuvenating](https://img.game8.co/4438641/2a31b7702bd70e78ec8efd24661dacda.jpeg/thumb)


