Chapter 3: The Magdred Ambush Walkthrough
This is the battle walkthrough for the mission The Magdred Ambush from Fire Emblem: Three Houses (FETH, FE3H). Read on to find out map features, what enemies you will encounter, and tips for winning!
List of Contents
| Previous Battle | Story Walkthrough | Next Battle |
|---|---|---|
| Chapter 2: Red Canyon Dominance Walkthrough | Chapter 3: Mutiny in the Mist | Chapter 4: Assault at the Rite of Rebirth Walkthrough |
Chapter 3 - Map and Overview
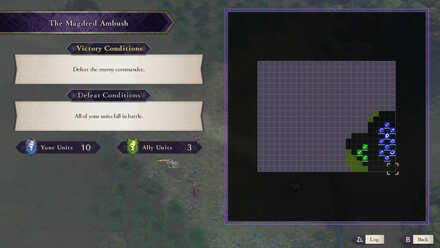
| Victory Condition | |
|---|---|
| Defeat the enemy commander. | |
| Defeat Condition | |
| Byleth or House Leader dies. (Classic) All of your units fall in battle. (Casual) |
|
| # of Player Units | 10 |
| # of Allies | 3 |
| # of Enemies | 20 |
Chapter 3 - Enemies
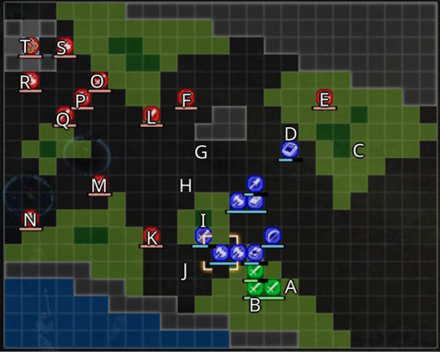
| Pos | Enemy | Pos | Enemy |
|---|---|---|---|
| A | Gaspard Soldier (Myrmidon) | K | Militia (Myrmidon) |
| B | Gaspard Soldier (Myrmidon) | L | Militia (Soldier) |
| C | Militia (Fighter) | M | Militia (Soldier) |
| D | Militia (Archer) | N | Gaspard Soldier (Fighter) |
| E | Gaspard Soldier (Fighter) | O | Gaspard Soldier (Myrmidon) |
| F | Militia (Archer) | P | Gaspard Soldier (Armored Knight) |
| G | Militia (Soldier) | Q | Gaspard Soldier (Soldier) |
| H | Militia (Fighter) | R | Gaspard Soldier (Fighter) |
| I | Gaspard Commander (Dark Mage) | S | Gaspard Soldier (Fighter) |
| J | Gaspard Soldier (Archer) | T | Lonato (Paladin) |
Enemy Stats
Enemy data will be gathered soon.
Lonato
| Level | HP | Mov. | Class |
|---|---|---|---|
| 8 | 35 | - | Paladin |
| Mt. | Spd | Hit | Crit |
| 21 | 4 | 103 | 11 |
| Range | Prt | Res | Avd |
| 1 | 15 | 10 | 14 |
| Weapon | Dropped Items | ||
| Iron Lance | N/A | ||
| Battalion | |||
| Gaspard Knights | |||
| Level | Endurance | Gambit | Uses |
| 1 | 75 | Assault Troop | 2 |
Chapter 3 - Map Features
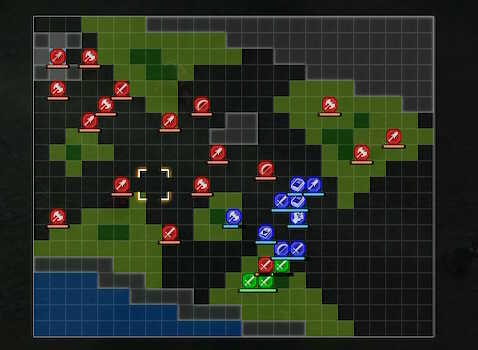
Standard fare here with forest and thickets abundant. A single Heal Tile exists on the far edge of the map occupied by Lonato. The fog of war makes it so most enemy positions are unclear so if you have any torches make use of them.
| Tiles | Description |
|---|---|
| Forest | +30% Avo, +1 Def, No effect on fliers |
| Thicket | +40% Avo, +2 Def, No effect on fliers |
| Heal Tile + | 30% HP healed per turn, +1 Def, +1 Res |
Chapter 3 - Chests
There are no chests on this map.
Chapter 3 - Tips and Tricks
Protect Your Allies
You battle along with Catherine and two other Church Soldiers. If they survive til the end, you get a Secret Book and a Goddess Icon. You can keep them alive by engaging all enemies before they do, or healing them with your white mages after they fight.
Beware of Ambush
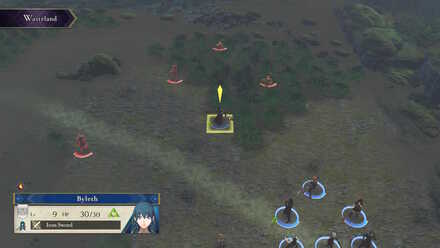
The battlefield is covered in mist so be careful where you place your units; many of the enemies are hiding in the trees waiting to ambush you.
Take Out the Gaspard Commander
 Map being revealed after the commander's death.
Press forward together with Catherine until you reach the Gaspard Commander, defeat him to remove the fog.
Finish Off All Enemies Before Lonato
After Lonato reveals himself, leave him be for a while and take out the rest of the stragglers in hiding to prevent a pincer attack later on.
Armored Units Are Weak to Magic
One of the Gaspard Soldiers is wearing heavy armor and takes little to no damage from anything but axes and magic.
Use Knightkneeler On Lonato
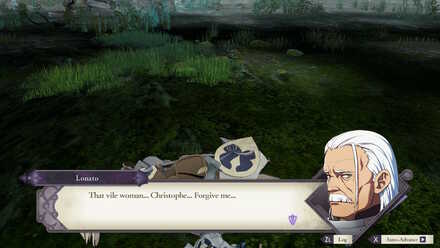
Once all the Militia units are down, head for Lonato and defeat him. Having a spear user with the ability Knighkneeler can easily break Lonato due to his Cavalry class.
Fire Emblem: Three Houses - Related Links
Part 1 - White Clouds Battle Walkthroughs
Comment
Author
Chapter 3: The Magdred Ambush Walkthrough
improvement survey
03/2026
improving Game8's site?

Your answers will help us to improve our website.
Note: Please be sure not to enter any kind of personal information into your response.

We hope you continue to make use of Game8.
Rankings
- We could not find the message board you were looking for.
Gaming News
Popular Games

Genshin Impact Walkthrough & Guides Wiki

Honkai: Star Rail Walkthrough & Guides Wiki

Umamusume: Pretty Derby Walkthrough & Guides Wiki

Pokemon Pokopia Walkthrough & Guides Wiki

Resident Evil Requiem (RE9) Walkthrough & Guides Wiki

Monster Hunter Wilds Walkthrough & Guides Wiki

Wuthering Waves Walkthrough & Guides Wiki

Arknights: Endfield Walkthrough & Guides Wiki

Pokemon FireRed and LeafGreen (FRLG) Walkthrough & Guides Wiki

Pokemon TCG Pocket (PTCGP) Strategies & Guides Wiki
Recommended Games

Diablo 4: Vessel of Hatred Walkthrough & Guides Wiki

Fire Emblem Heroes (FEH) Walkthrough & Guides Wiki

Yu-Gi-Oh! Master Duel Walkthrough & Guides Wiki

Super Smash Bros. Ultimate Walkthrough & Guides Wiki

Pokemon Brilliant Diamond and Shining Pearl (BDSP) Walkthrough & Guides Wiki

Elden Ring Shadow of the Erdtree Walkthrough & Guides Wiki

Monster Hunter World Walkthrough & Guides Wiki

The Legend of Zelda: Tears of the Kingdom Walkthrough & Guides Wiki

Persona 3 Reload Walkthrough & Guides Wiki

Cyberpunk 2077: Ultimate Edition Walkthrough & Guides Wiki
All rights reserved
©2019 Nintendo / INTELLIGENT SYSTEMS. Co-developed by KOEI TECMO GAMES CO., LTD. Fire Emblem and Nintendo Switch are trademarks of Nintendo. © 2019 Nintendo.
The copyrights of videos of games used in our content and other intellectual property rights belong to the provider of the game.
The contents we provide on this site were created personally by members of the Game8 editorial department.
We refuse the right to reuse or repost content taken without our permission such as data or images to other sites.


![Everwind Review [Early Access] | The Shaky First Step to A Very Long Journey](https://img.game8.co/4440226/ab079b1153298a042633dd1ef51e878e.png/thumb)

![Monster Hunter Stories 3 Review [First Impressions] | Simply Rejuvenating](https://img.game8.co/4438641/2a31b7702bd70e78ec8efd24661dacda.jpeg/thumb)


