This survey will take about 1 minute.
Your answers will help us to improve our website.
Honkai: Star Rail
Morose Monsters - All Patron Drinks and Emoscapes
★ Exclusive: Check out the State of Meta in 4.0!
♦ Latest: 4.1 Livestream Redeem Codes
♦ Phase 2: Sparkxie, Sparkle, Cerydra, Rappa
♦ Upcoming: Ashveil, Silver Wolf Lv.999, Evanescia
♦ Events: Cosmicon, Roll On!, Ding! Arcadia Fun-Time Clock-In Essentials
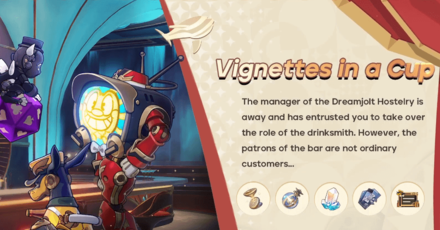
Morose Monsters is the questline of Honkai: Star Rail's Vignettes in a Cup event. See how to mix the drinks of each Patron and a guide for their Emoscape here!
| Vignettes In A Cup Event Guides | |||
|---|---|---|---|
 All Drink Recipes All Drink Recipes |
 List of Patrons List of Patrons |
 How to Mix Drinks How to Mix Drinks |
 Siobhan Guide Siobhan Guide |
List of Contents
All Morose Monsters Guides
| All Morose Monsters Guides | ||
|---|---|---|
| (I) Drinks | (II) Drinks | (III) Drinks |
| (IV) Drinks | (V) Drinks | Emoscapes |
Use the table above to jump to a guide!
All Morose Monsters (I) Drinks
For Morose Monsters (I), you will be mixing drinks for Spade and Mr. Bigwig. Click the links above to jump to their respective guides.
Return to All Morose Monsters Guides
All Morose Monsters (II) Drinks
- Tin Man's First Drink
- Tin Man's Second Drink
- Spade's Third Drink
- Spade's Fourth Drink
- Mr. Bigwig's Third Drink
- Mr. Bigwig's Fourth Drink
For Morose Monsters (II), you will be mixing drinks for Tin Man for the first time. Spade and Mr. Bigwig will also return to order more drinks for this mission. Click the links above to jump to their respective guides.
Return to All Morose Monsters Guides
All Morose Monsters (III) Drinks
- Melancholy's First Drink
- Melancholy's Second Drink
- Lady's First Drink
- Lady's Second Drink
- Tin Man's Third Drink
- Tin Man's Fourth Drink
For Morose Monsters (III), you will be mixing drinks for Melancholy and the Lady for the first time. Tin Man will also return to order more drinks from you. Click the links above to jump to their respective guides.
Return to All Morose Monsters Guides
All Morose Monsters (IV) Drinks
- Melancholy's Third Drink
- Melancholy's Fourth Drink
- Lady's Third Drink
- Lady's Fourth Drink
- Starlet's First Drink
- Starlet's Second Drink
For Morose Monsters (IV), you will be mixing drinks for Melancholy and the Lady again. Starlet will appear here for the first time and you have to mix two drinks for them. Click the links above to jump to their respective guides.
Return to All Morose Monsters Guides
All Morose Monsters (V) Drinks
- Tin Man's Fifth Drink
- Tin Man's Sixth Drink
- Starlet's Third Drink
- Starlet's Fourth Drink
- Starlet's Fifth Drink
For Morose Monsters (V), you will be mixing drinks for the Tin Man and Starlet again. Click the links above to jump to their guides.
Return to All Morose Monsters Guides
All Emoscape Guides
- Spade's Emoscape
- Mr. Bigwig's Emoscape
- Tin Man's Emoscape
- Melancholy's Emoscape
- Lady's Emoscape
- Starlet's Emoscape
Listed above are all the Emoscape stages for all the Patrons in the whole Morose Monsters questline. Click the links to jump to their guides.
Return to All Morose Monsters Guides
Spade - Drinks and Emoscape Guide
| All Spade Guides | |
|---|---|
| First Drink | Second Drink |
| Third Drink | Fourth Drink |
| Emoscape | |
Use the table above to jump to a section.
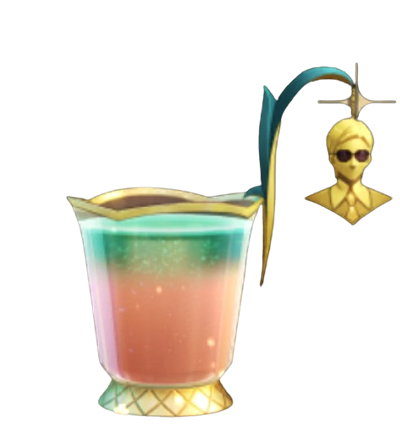
Spade's First Drink Guide
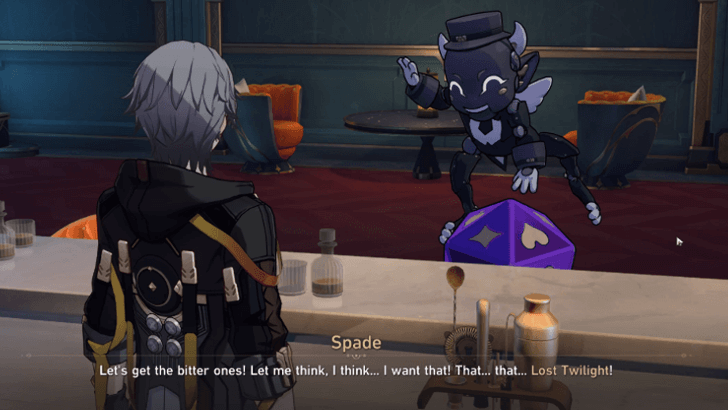
The Lost Twilight is the first drink that you will make for Spade during the mission called Morose Monsters (I).
How to Make Lost Twilight
 |
How to Make Drink | |
|---|---|---|
| 1 | Select Large Wine Glass | |
| 2 | Select More Ice | |
| 3 | ||
| 4 | ||
| 5 | Stir the Drink | |
| 6 | ||
| 7 | Select Robin Card for the Decoration |
Return to All Morose Monsters Guides
Spade's Second Drink Guide
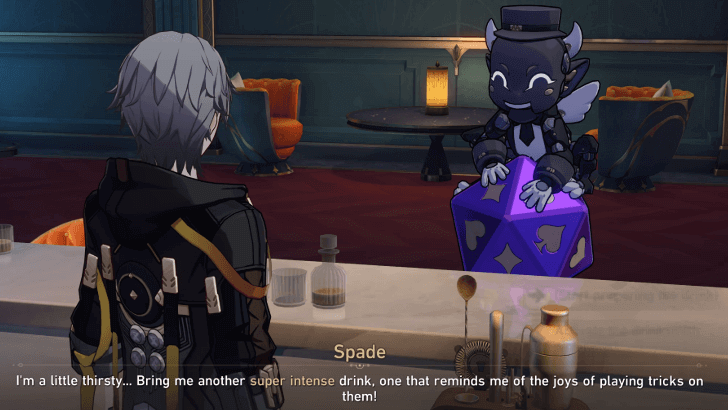
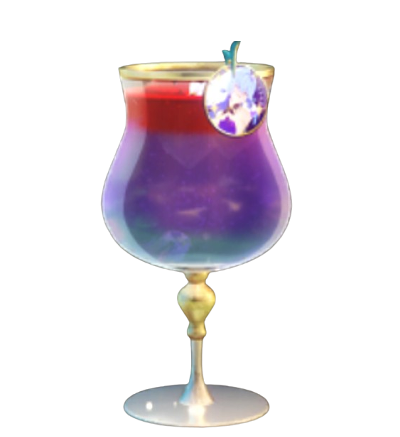
The second drink that you need to make for Spade during the mission, Morose Monsters (I), should be super intense. So, you can make a Metropolitan Roam.
How to Make Metropolitan Roam
 |
How to Make Drink | |
|---|---|---|
| 1 | Select Mini Vintage Glass | |
| 2 | Select No Ice | |
| 3 | ||
| 4 | ||
| 5 | Select Intellitron Ornament for the Decoration |
Return to All Morose Monsters Guides
Spade's Third Drink Guide
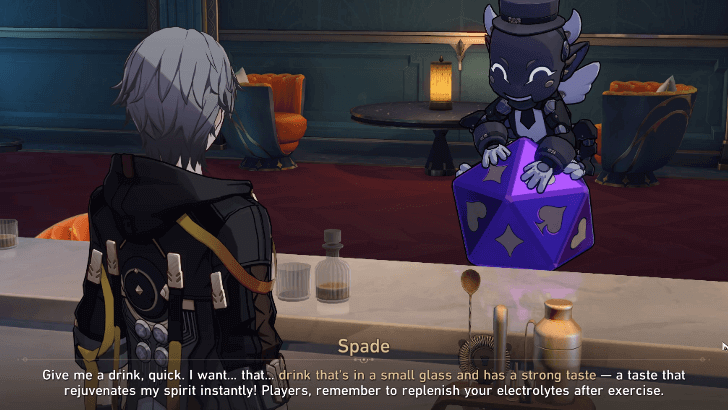
The third drink that you need to make for Spade during the mission, Morose Monsters (II), should be in a small glass that tastes intense. You are required to do a free mix for this drink.
How to Make a Free Mix Drink
| Free Mix Drink | How to Make Drink | |
|---|---|---|
| 1 | Select Any Small Glass | |
| 2 | Select Any Ice | |
| 3 | ||
| 4 | ||
| 5 | Select Any Decoration |
Return to All Morose Monsters Guides
Spade's Fourth Drink Guide
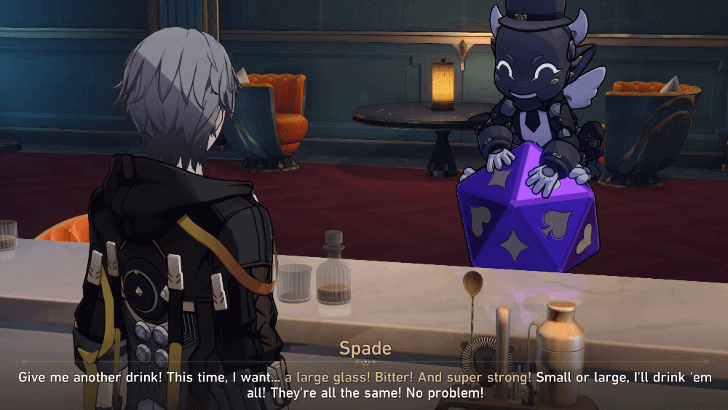
The last one that you need to make for Spade during the mission, Morose Monsters (II), should be in a large glass, bitter, and super strong. This drink will require you to free mix.
How to Make Free Mix Drink
| Free Mix Drink | How to Make Drink | |
|---|---|---|
| 1 | Select Any Large Glass | |
| 2 | Select Any Ice | |
| 3 | ||
| 4 | ||
| 5 | ||
| 6 | Select Any Decoration |
Return to All Morose Monsters Guides
Spade's Emoscape Guide
| Spade's Emoscape Walkthrough | |
|---|---|
| 1 | 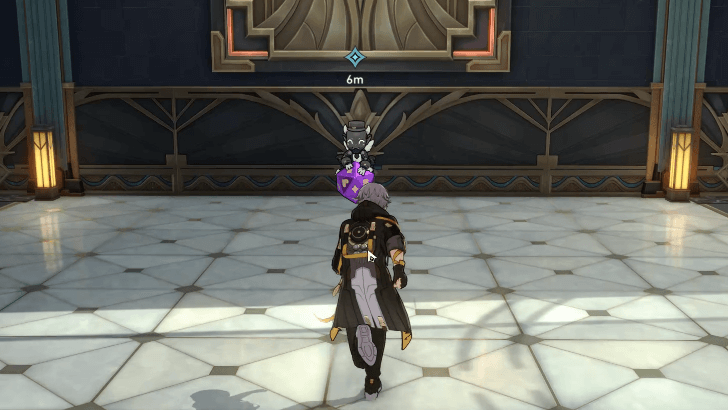 After entering Spade's Emoscape in Morose Monsters (II), follow the waypoint to enter the dreamscape room. Then, talk to Spade. |
| 2 | 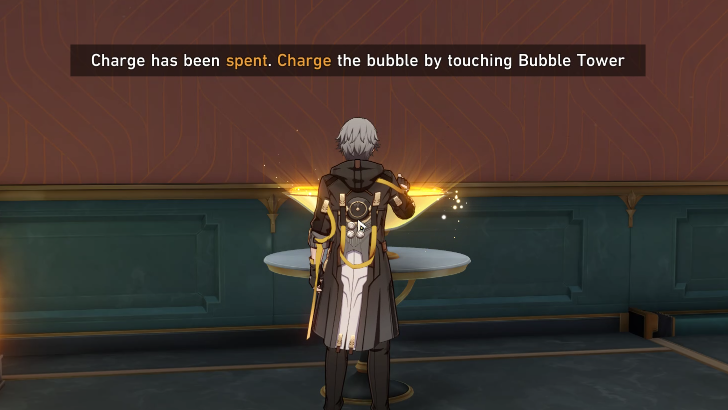 After talking to Spade, head to the nearest Bubble Tower and then use it. |
| 3 | 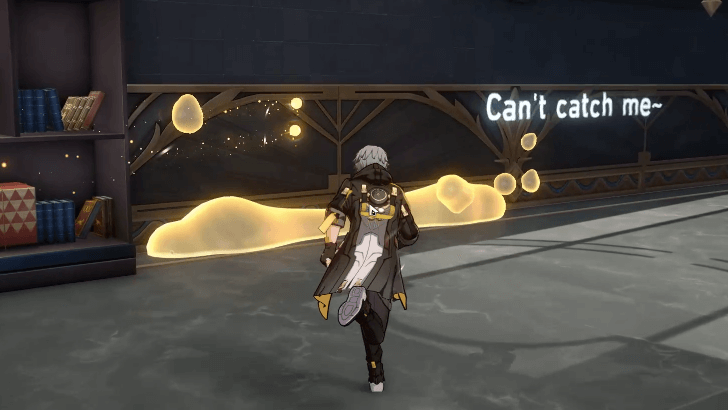 After getting Bubble Charges, head to the nearest wall and then use one Bubble Charge to walk on it. |
| 4 | 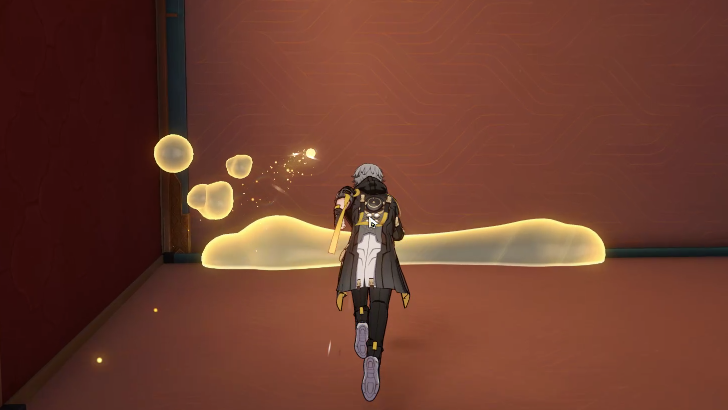 After walking on the first wall, immediately turn right and then use another Bubble Charge to walk on the second wall. |
| 5 | 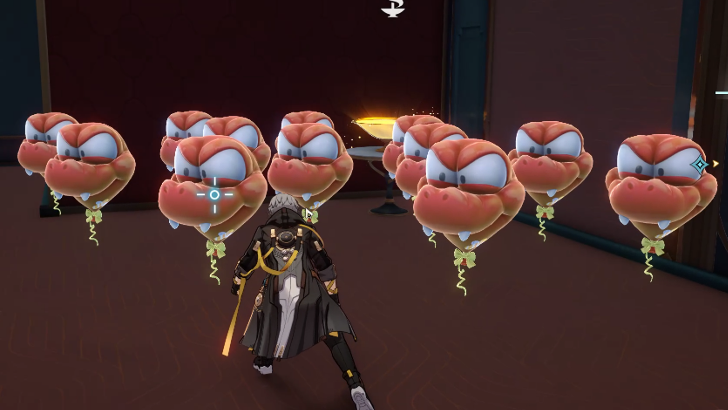 Since you have run out of Bubble Charges, go to the nearest Bubble Tower to gain a new set of Bubbles. Clear the red balloons first by attacking them. |
| 6 | 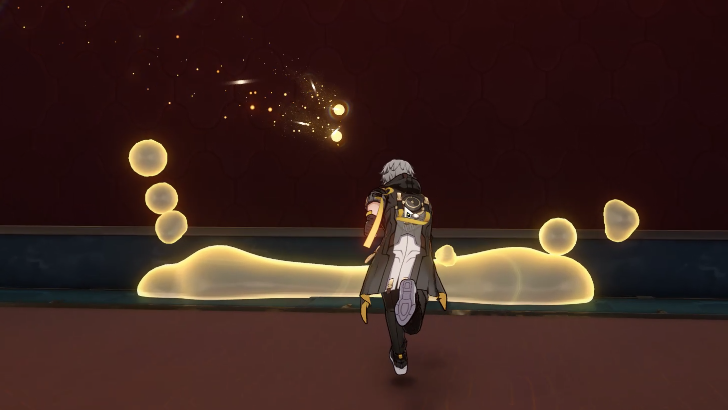 After getting new charges, head to the nearest wall where you can use the Bubbles and then walk on it. After that, talk to Spade. |
| 7 | After talking to Spade, they will teleport again to another location. Return to the initial area of the room and then pick up another set of charges. |
| 8 |  Then, walk on the wall farthest to the Bubble Tower and then follow the waypoint to activate another wall. Finally, talk to Spade again to end the Emoscape mission. |
Return to All Morose Monsters Guides
Mr. Bigwig - Drinks and Emoscape Guide
| All Mr. Bigwig Guides | |
|---|---|
| First Drink | Second Drink |
| Third Drink | Fourth Drink |
| Emoscape | |
Use the table above to jump to a section.
Mr. Bigwig's First Drink Guide
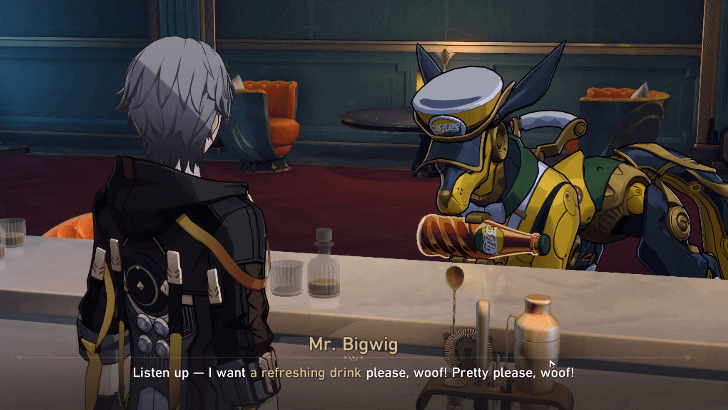
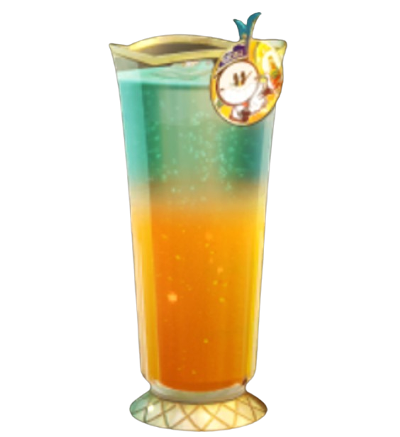
The first drink that you will make for Mr. Bigwig during the mission, Morose Monsters (I), should be refreshing. With this, you can make a Clockwise Sleeptalk.
How to Make Clockwise Sleeptalk
 |
How to Make Drink | |
|---|---|---|
| 1 | Select Supersized Vintage Glass | |
| 2 | Select Less Ice | |
| 3 | ||
| 4 | ||
| 5 | Select Clockie Card for the Decoration |
Return to All Morose Monsters Guides
Mr. Bigwig's Second Drink Guide
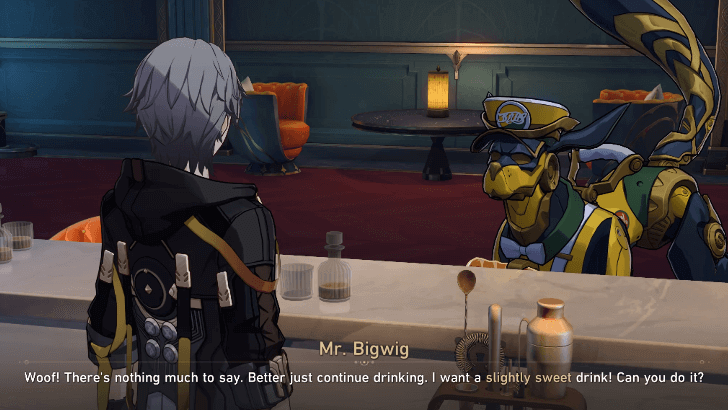
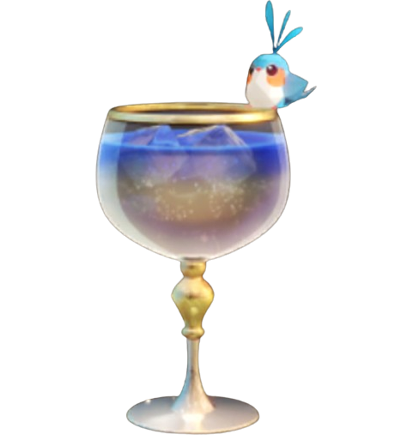
The second drink that you will make for Mr. Bigwig during the mission, Morose Monsters (I), should be slightly sweet. With this, you can make a Glimmering Dreamscape.
How to Make Glimmering Dreamscape
 |
How to Make Drink | |
|---|---|---|
| 1 | Select Mini Wine Glass | |
| 2 | Select More Ice | |
| 3 | ||
| 4 | ||
| 5 | Stir the Drink | |
| 6 | ||
| 7 | Select Origami Bird for the Decoration |
Return to All Morose Monsters Guides
Mr. Bigwig's Third Drink Guide
The third drink that you will make for Mr. Bigwig during the mission, Morose Monsters (II), should be large and strong. You are required to do a free mix for this drink.
How to Make a Free Mix Drink
| Free Mix Drink | How to Make Drink | |
|---|---|---|
| 1 | Select Any Large Glass | |
| 2 | Select Any Ice | |
| 3 | ||
| 4 | ||
| 5 | ||
| 6 | Select Any Decoration |
Return to All Morose Monsters Guides
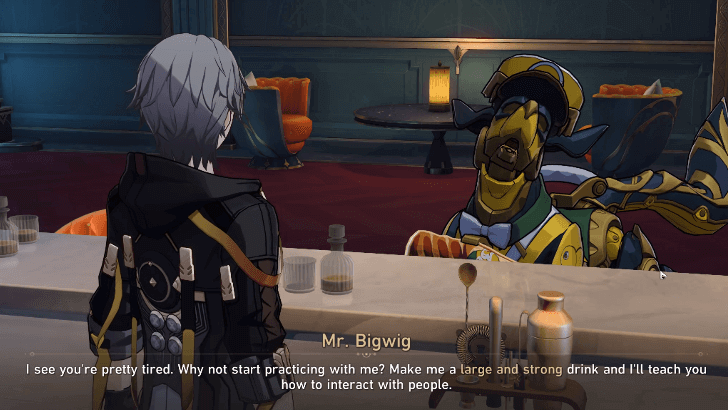
Mr. Bigwig's Fourth Drink Guide
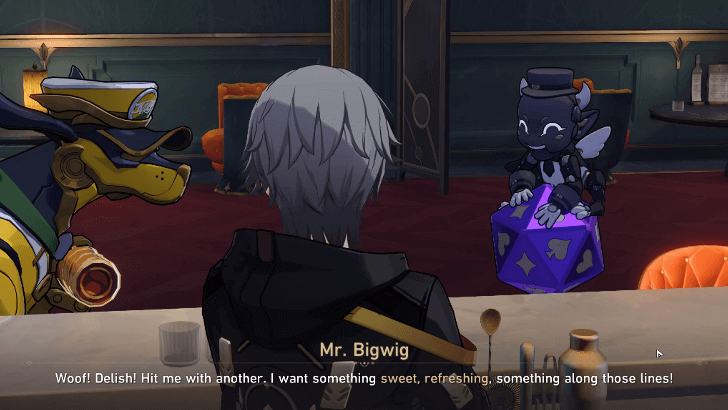
The last drink that you will make for Mr. Bigwig during the mission, Morose Monsters (II), should be sweet and refreshing. You are free to serve a premier drink or do a free mix.
How to Make Clockwise Sleeptalk
|
How to Make Drink | |
|---|---|---|
| 1 | Select Supersized Vintage Glass | |
| 2 | Select Less Ice | |
| 3 | ||
| 4 | ||
| 5 | Select Clockie Card for the Decoration |
Serve this drink if you chose Premier Drinks.
How to Make a Free Mix Drink
| Free Mix Drink | How to Make Drink | |
|---|---|---|
| 1 | Select Any Small Glass | |
| 2 | Select Any Ice | |
| 3 | ||
| 4 | ||
| 5 | ||
| 6 | Select Any Decoration |
Serve this drink if you chose Free Mixing.
Return to All Morose Monsters Guides
Mr. Bigwig's Emoscape Guide
| Mr. Bigwig's Emoscape Walkthrough | |
|---|---|
| 1 | 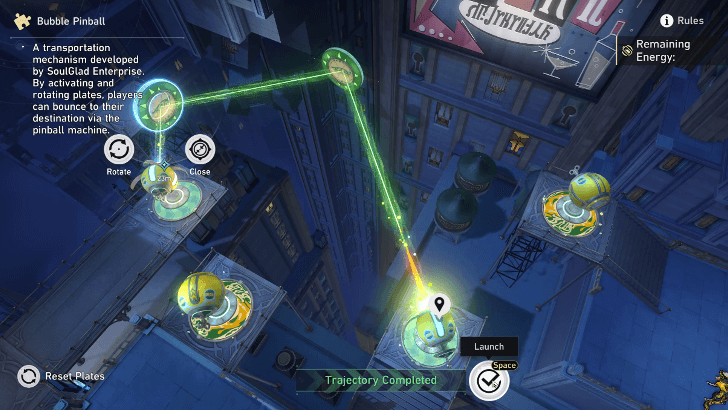 Mr. Bigwig's Emoscape, which you will enter in Morose Monsters (II), is pretty simple to clear. You only need to solve the Bubble Pinball Puzzle by following the solution shown above. |
| 2 | 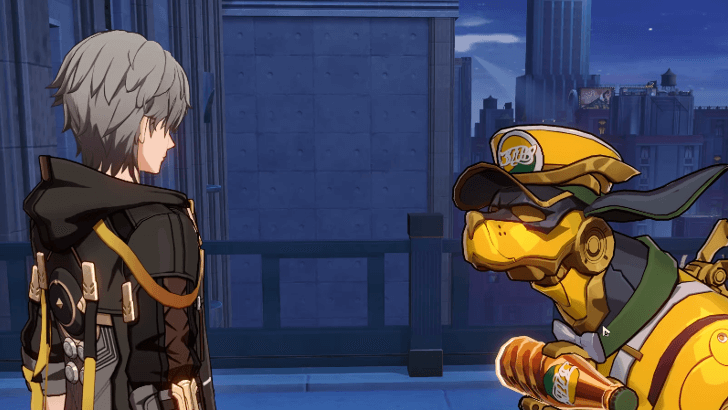 After solving the puzzle, talk to Mr. Bigwig to exit their Emoscape. |
Return to All Morose Monsters Guides
Tin Man - Drinks and Emoscape Guide
| All Tin Man Guides | ||
|---|---|---|
| First Drink | Second Drink | Third Drink |
| Fourth Drink | Fifth Drink | Sixth Drink |
| Emoscape | ||
Use the table above to jump to a section.
Tin Man's First Drink Guide
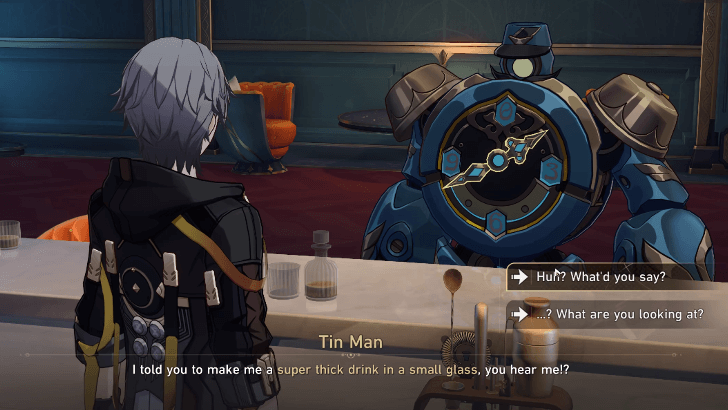
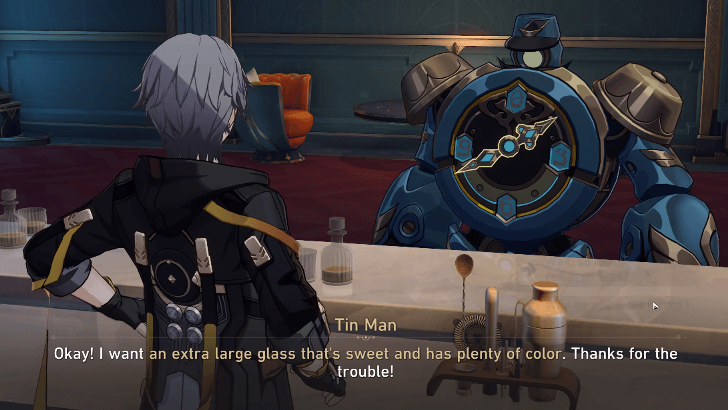
The first drink that you will make for the Tin Man during the mission, Morose Monsters (II), should be in a small glass and super thick. You are required to do a free mix for this drink.
How to Make a Free Mix Drink
| Free Mix Drink | How to Make Drink | |
|---|---|---|
| 1 | Select Any Small Glass | |
| 2 | Select Any Ice | |
| 3 | ||
| 4 | ||
| 5 | Select Any Decoration |
Return to All Morose Monsters Guides
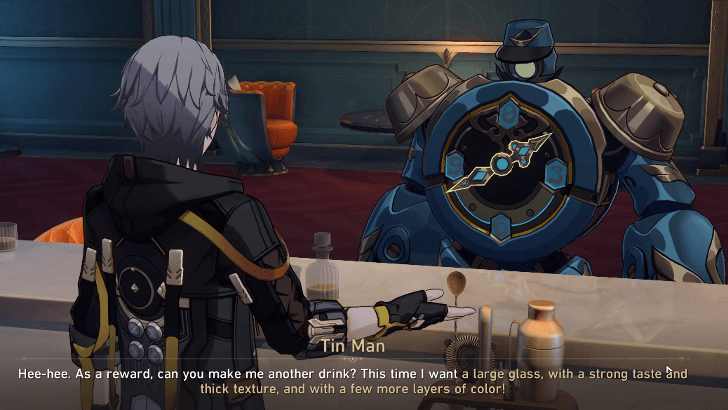
Tin Man's Second Drink Guide
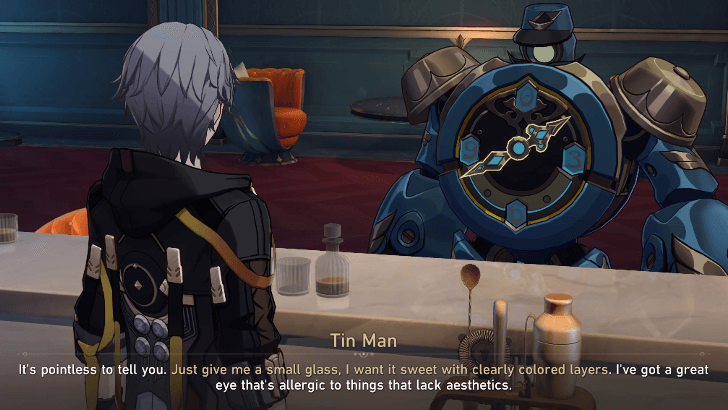
The second one that you will make for the Tin Man during the mission, Morose Monsters (II), should be a small glass of sweet, multi-color layered, and distinctive drink. You are free to serve a premier drink or do a free mix.
How to Make Glimmering Dreamscape
|
How to Make Drink | |
|---|---|---|
| 1 | Select Mini Wine Glass | |
| 2 | Select More Ice | |
| 3 | ||
| 4 | ||
| 5 | Stir the Drink | |
| 6 | ||
| 7 | Select Origami Bird for the Decoration |
Serve this drink if you chose Premier Drinks.
How to Make a Free Mix Drink
| Free Mix Drink | How to Make Drink | |
|---|---|---|
| 1 | Select Any Small Glass | |
| 2 | Select Any Ice | |
| 3 | ||
| 4 | ||
| 5 | Select Any Decoration |
Serve this drink if you chose Free Mixing.
Return to All Morose Monsters Guides
Tin Man's Third Drink Guide
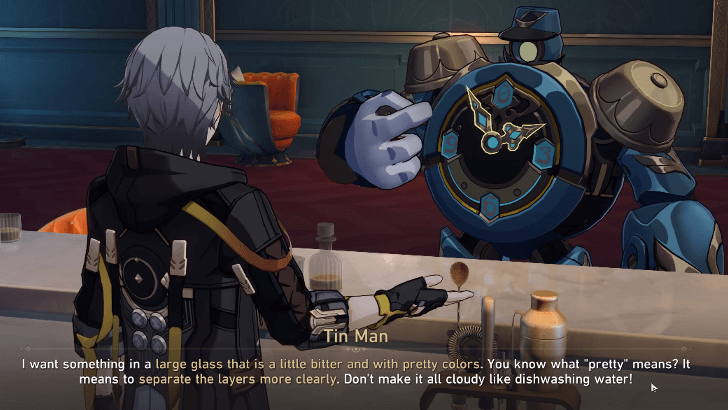
The third one that you will need to make for the Tin Man during the mission, Morose Monsters (III), should be a large glass of slightly bitter and two color layered drink. You are required to do a free mix for this drink.
How to Make a Free Mix Drink
| Free Mix Drink | How to Make Drink | |
|---|---|---|
| 1 | Select Any Large Glass | |
| 2 | Select Any Ice | |
| 3 | ||
| 4 | ||
| 5 | Select Any Decoration |
Return to All Morose Monsters Guides
Tin Man's Fourth Drink Guide
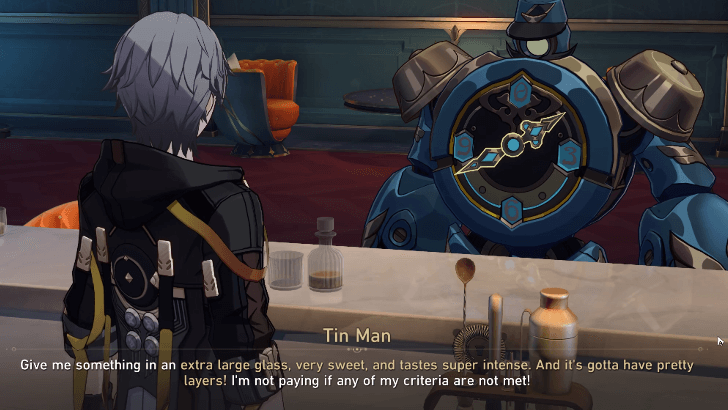
The fourth one that you need to make for the Tin Man during the mission, Morose Monsters (III), should be an extra large glass of super sweet, super intense, and three color layered drink. You are required to do a free mix for this drink.
How to Make a Free Mix Drink
| Free Mix Drink | How to Make Drink | |
|---|---|---|
| 1 | Select Any Extra Large Glass | |
| 2 | Select Any Ice | |
| 3 | ||
| 4 | ||
| 5 | ||
| 6 | Select Any Decoration |
Return to All Morose Monsters Guides
Tin Man's Fifth Drink Guide
The fifth drink that you need to make for the Tin Man during the mission called Morose Monsters (V), should be in an extra large glass, slightly sweet, and has no less than three color layers. You are required to do a free mix for this drink.
How to Make a Free Mix Drink
| Free Mix Drink | How to Make Drink | |
|---|---|---|
| 1 | Select Any Extra Large Glass | |
| 2 | Select Any Ice | |
| 3 | ||
| 4 | ||
| 5 | ||
| 6 | ||
| 7 | ||
| 8 | Select Any Decoration |
Return to All Morose Monsters Guides
Tin Man's Sixth Drink Guide
The last drink that you will need to make for the Tin Man during the mission, Morose Monsters (V), should be in a large glass, strong, thick, and has exactly three-color layers. You are required to do a free mix for this drink.
How to Make a Free Mix Drink
| Free Mix Drink | How to Make Drink | |
|---|---|---|
| 1 | Select Any Large Glass | |
| 2 | Select Any Ice | |
| 3 | ||
| 4 | ||
| 5 | ||
| 6 | Select Any Decoration |
Return to All Morose Monsters Guides
Tin Man's Emoscape Guide
| Tin Man's Emoscape Walkthrough | |
|---|---|
| 1 | 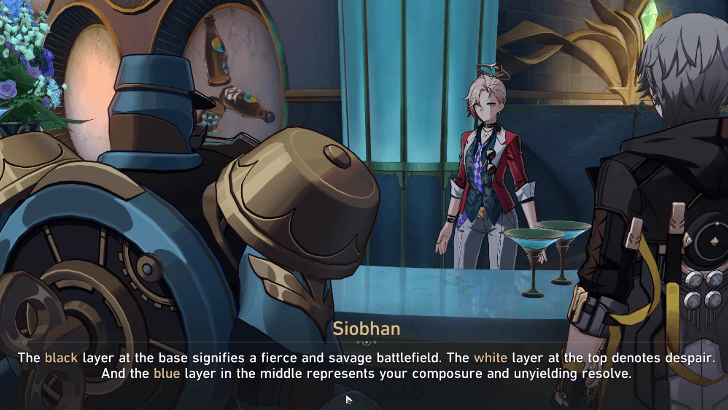 After entering Tin Man's Emoscape in Morose Monsters (III), progress the mission until you are asked to pick up Siobhan's special drink and serve it to Tin Man. |
| 2 | 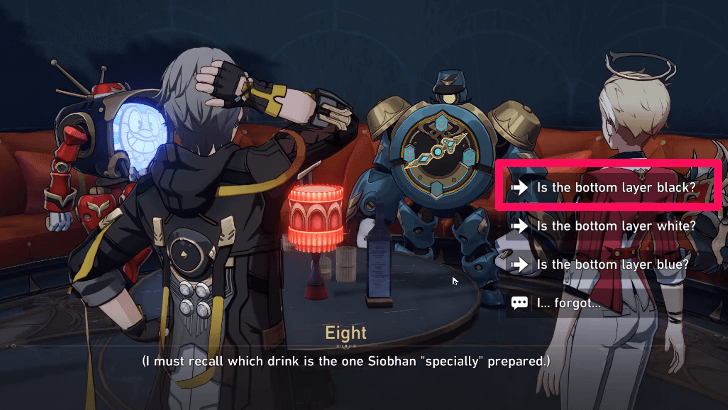 At this point of the mission, select the dialogue option, “Is the bottom layer black?” to progress it. |
| 3 | 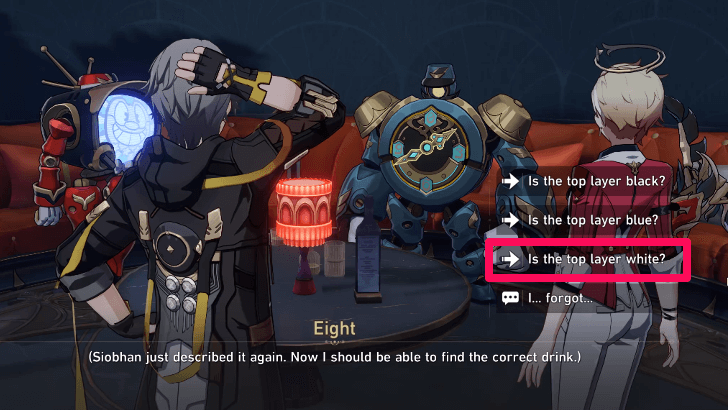 For this part of the dialogue, choose “Is the top layer white?” to progress it. Tin Man's Emoscape will shortly end afterwards. |
Return to All Morose Monsters Guides
Melancholy - Drinks and Emoscape Guide
| All Melancholy Guides | |
|---|---|
| First Drink | Second Drink |
| Third Drink | Fourth Drink |
| Emoscape | |
Use the table above to jump to a section.
Melancholy's First Drink Guide
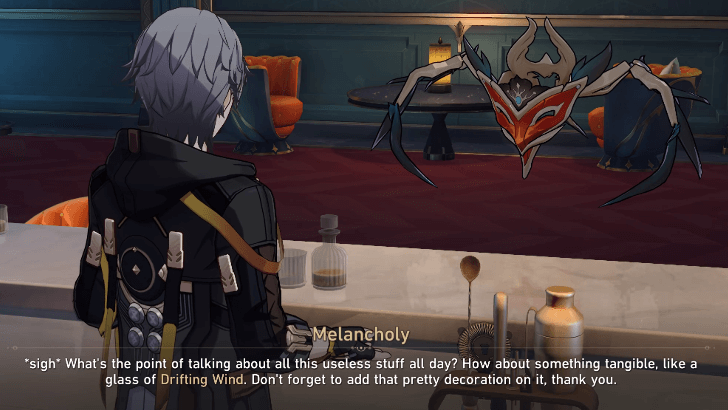
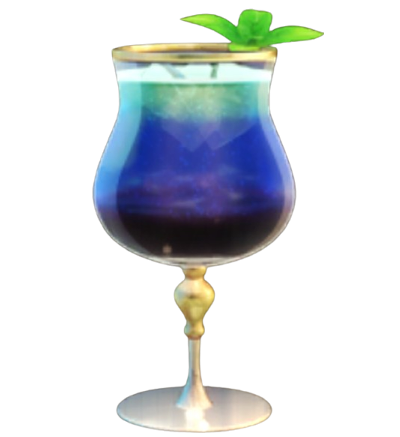
Drifting Wind is the first drink that you will need to make for Melancholy during the mission called Morose Monsters (III).
How to Make Drifting Wind
 |
How to Make Drink | |
|---|---|---|
| 1 | Select Large Wine Glass | |
| 2 | Select More Ice | |
| 3 | ||
| 4 | ||
| 5 | ||
| 6 | Select Mint Leaf for the Decoration |
Return to All Morose Monsters Guides
Melancholy's Second Drink Guide
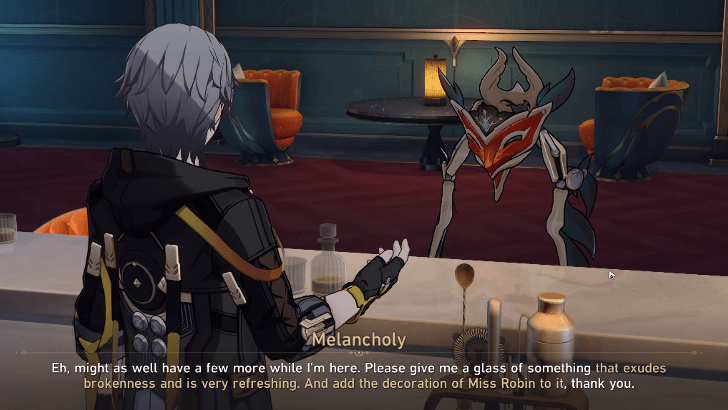
The second drink that you will need to make for Melancholy during the mission, Morose Monsters (III), should feel vulnerable, very refreshing, and has Miss Robin's ornament. You are required to do a free mix for this drink.
How to Make a Free Mix Drink
| Free Mix Drink | How to Make Drink | |
|---|---|---|
| 1 | Select Any Large Glass | |
| 2 | Select Any Ice | |
| 3 | ||
| 4 | ||
| 5 | Stir the Drink | |
| 6 | ||
| 7 | ||
| 8 | Select Robin Card for the Decoration |
Return to All Morose Monsters Guides
Melancholy's Third Drink Guide
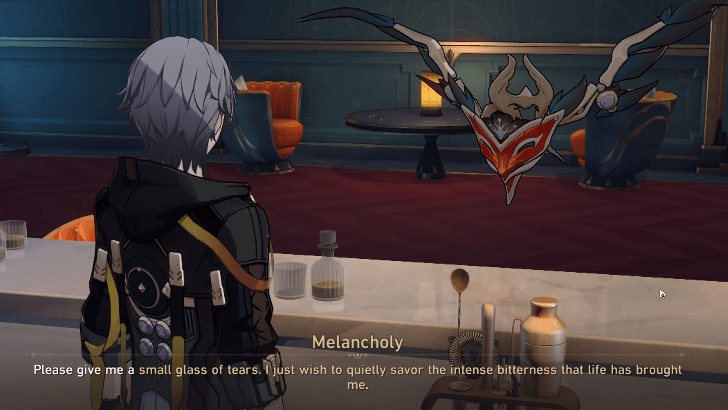
The third drink that you will need to make for Melancholy during the mission, Morose Monsters (IV), should be in a small glass, bitter, strong, and has a Penconian decoration. You are required to do a free mix for this drink.
How to Make a Free Mix Drink
| Free Mix Drink | How to Make Drink | |
|---|---|---|
| 1 | Select Any Small Glass | |
| 2 | Select Any Ice | |
| 3 | ||
| 4 | ||
| 5 | ||
| 6 | Select Pepeshi Fluff Ball for the Decoration |
Return to All Morose Monsters Guides
Melancholy's Fourth Drink Guide
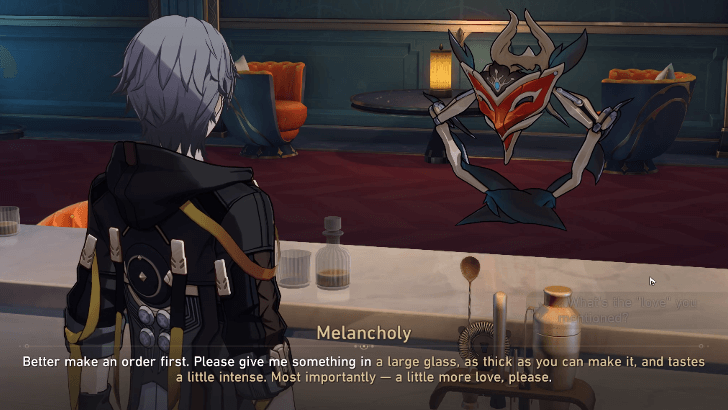
The last drink that you will need to make for Melancholy during the mission, Morose Monsters (IV), should be in a large glass, very thick, strong, and has an animated character decoration. You need to do a free mix for this.
How to Make a Free Mix Drink
| Free Mix Drink | How to Make Drink | |
|---|---|---|
| 1 | Select Any Large Glass | |
| 2 | Select Any Ice | |
| 3 | ||
| 4 | ||
| 5 | Select Hamster Ball Knight Card for the Decoration |
Return to All Morose Monsters Guides
Melancholy's Emoscape Guide
| Melancholy's Emoscape Walkthrough | |
|---|---|
| 1 | 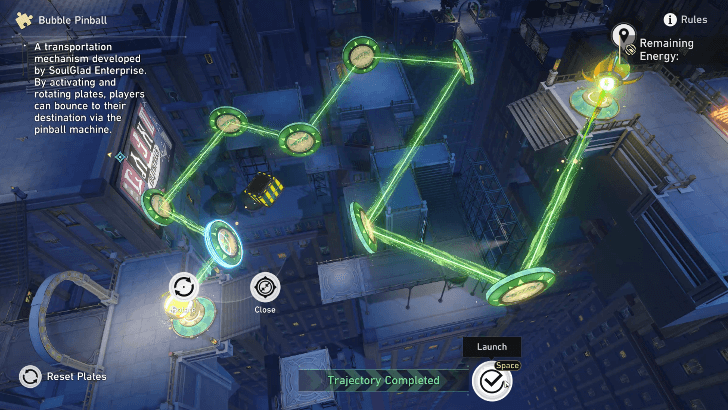 Melancholy's Emoscape, which you will enter in Morose Monsters (IV), will only require you to solve a Bubble Pinball Puzzle. Simply follow the solution shown above to solve the puzzle. |
| 2 | 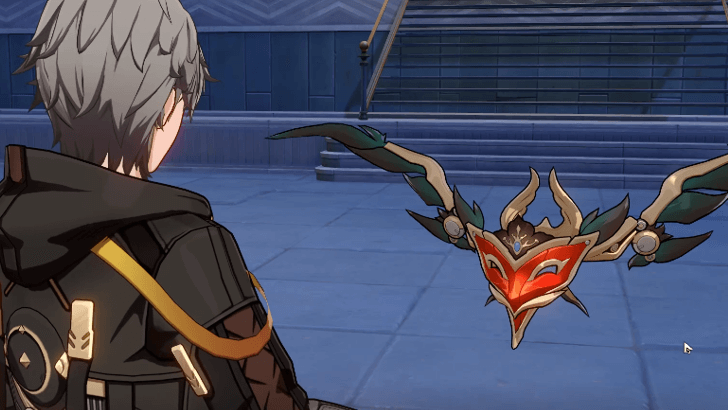 After solving the puzzle, talk to Melancholy to exit their Emoscape. |
Return to All Morose Monsters Guides
Lady - Drinks and Emoscape Guide
| All Lady Guides | |
|---|---|
| First Drink | Second Drink |
| Third Drink | Fourth Drink |
| Emoscape | |
Use the table above to jump to a section.
Lady's First Drink Guide
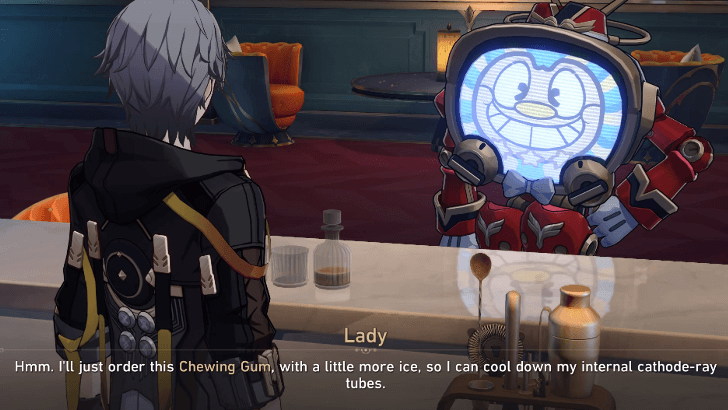
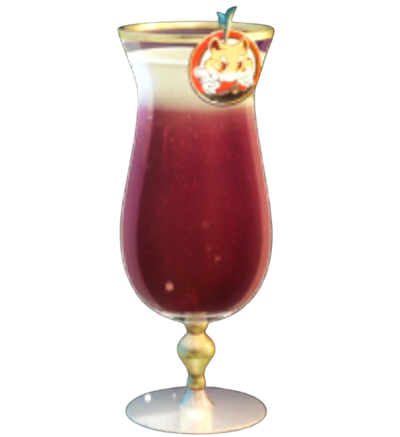
Chewing Gum is the first drink that you will need to make for the Lady during the mission called Morose Monsters (III).
How to Make Chewing Gum
 |
How to Make Drink | |
|---|---|---|
| 1 | Select Supersized Wine Glass | |
| 2 | Select More Ice | |
| 3 | ||
| 4 | ||
| 5 | ||
| 6 | Stir the Drink | |
| 7 | ||
| 8 | Select Hamster Ball Knight Card for the Decoration |
Return to All Morose Monsters Guides
Lady's Second Drink Guide
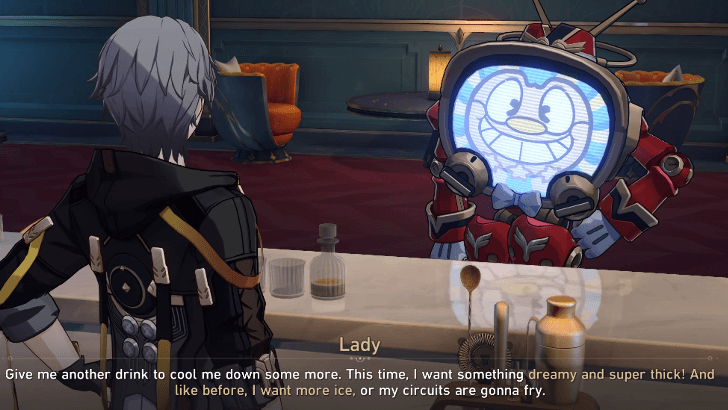
The second drink that you will need to make for the Lady during the mission, Morose Monsters (III), should be dreamy, super strong, and have a lot of ice. You need to do a free mix for this.
How to Make a Free Mix Drink
| Free Mix Drink | How to Make Drink | |
|---|---|---|
| 1 | Select Any Large Glass | |
| 2 | Select More Ice | |
| 3 | ||
| 4 | ||
| 5 | ||
| 6 | Select Pepeshi Fluff Ball for the Decoration |
Return to All Morose Monsters Guides
Lady's Third Drink Guide
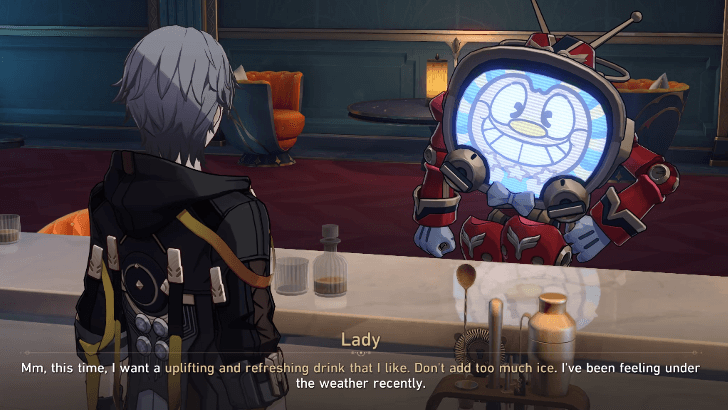
The third drink that you will need to make for the Lady during the mission, Morose Monsters (IV), should be uplifting, refreshing, and have less ice. You need to do a free mix for this.
How to Make a Free Mix Drink
| Free Mix Drink | How to Make Drink | |
|---|---|---|
| 1 | Select Any Small Glass | |
| 2 | Select Less Ice | |
| 3 | ||
| 4 | ||
| 5 | Stir the Drink | |
| 6 | ||
| 7 | Select Any Decoration |
Return to All Morose Monsters Guides
Lady's Fourth Drink Guide
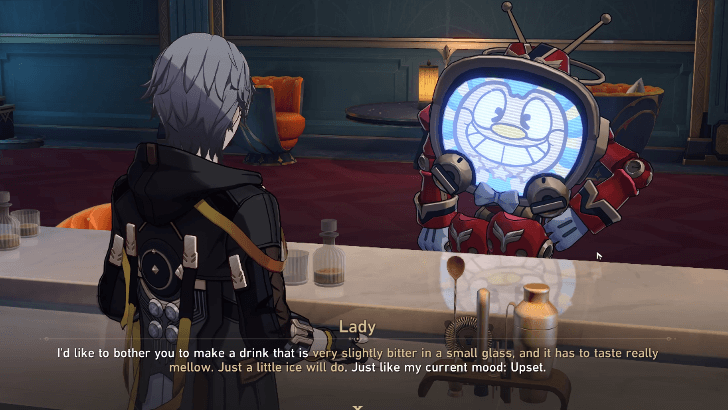
The last drink that you will need to make for the Lady during the mission, Morose Monsters (IV), should be small, slightly bitter, very mellow, and have less ice. This drink requires a free mix.
How to Make a Free Mix Drink
| Free Mix Drink | How to Make Drink | |
|---|---|---|
| 1 | Select Any Small Glass | |
| 2 | Select Less Ice | |
| 3 | ||
| 4 | ||
| 5 | ||
| 6 | Select Any Decoration |
Return to All Morose Monsters Guides
Lady's Emoscape Guide
| Lady's Emoscape Walkthrough | |
|---|---|
| 1 |  When you spawn in the Lady's Emoscape during Morose Monsters (IV), follow the waypoint to enter the dreamscape room. Activate the bridge nearby to reach Lady's location and then talk to them. |
| 2 |  After talking to the Lady, she will teleport to a different location. So, turn around and use the Bubble Tower. |
| 3 |  After getting Bubble Charges, walk on the wall farthest from the Bubble Tower. |
| 4 | 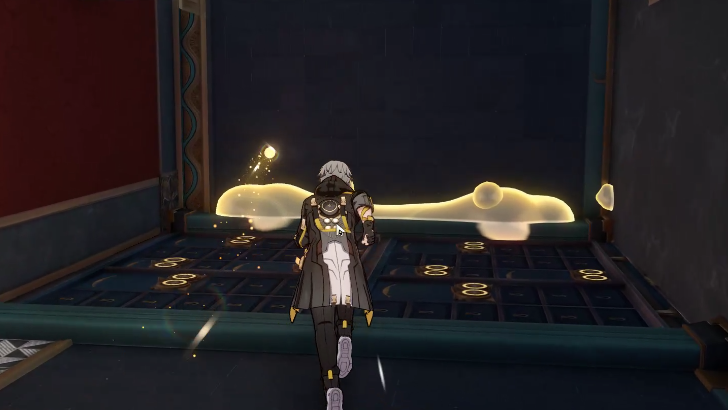 Then, turn left to walk on another wall. |
| 5 | 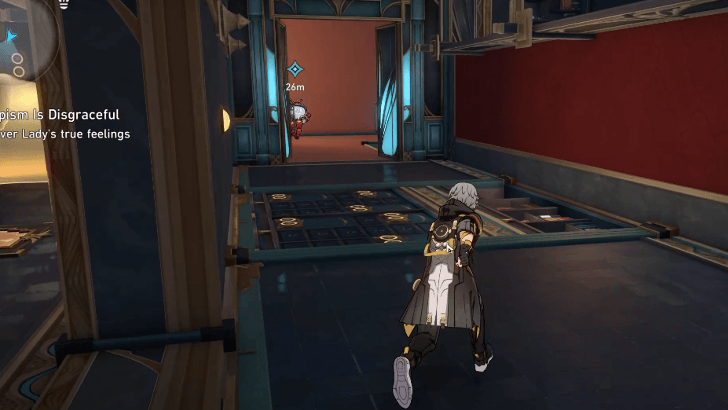 After walking on the second wall, walk straight and then do a U-turn to reach the Lady's location. |
| 6 | 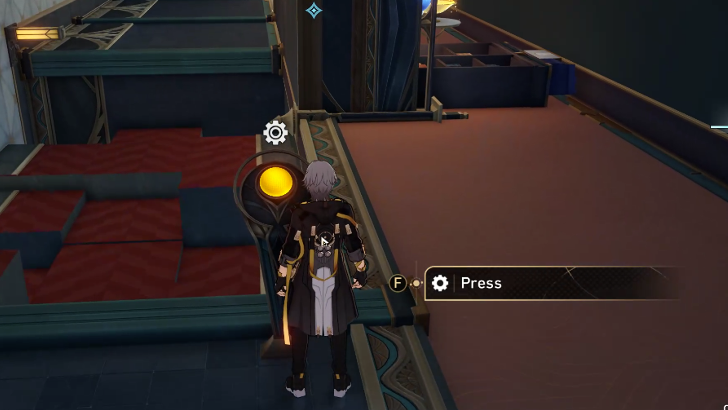 After talking to the Lady for the second time, she will teleport to another location again. Proceed to the room with an unactivated bridge. Cross the bridge and then use the Bubble Tower nearby. |
| 7 | 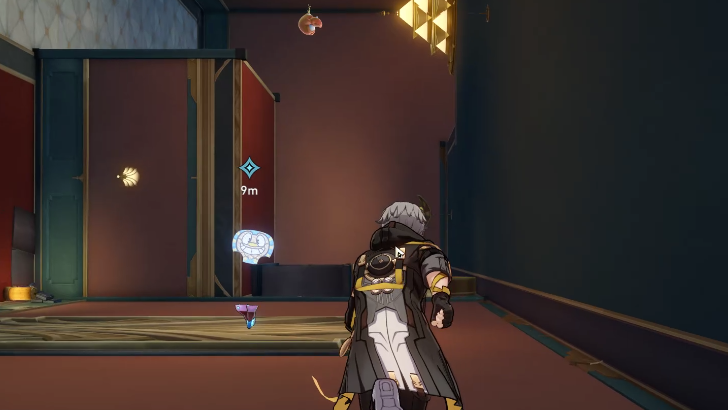 After using the Bubble Tower, walk on the wall behind it. Then, use another Bubble Charge to walk on another one in front of you. Finally, go to the Lady's location. |
| 8 | 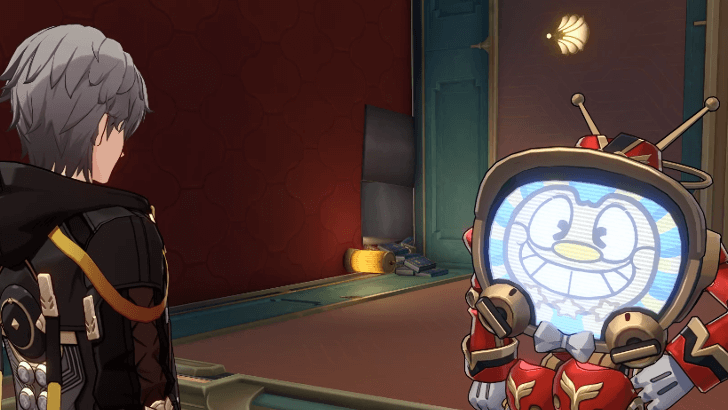 Talk to the Lady to end the Emoscape mission. |
Return to All Morose Monsters Guides
Starlet - Drinks and Emoscape Guide
| All Starlet Guides | ||
|---|---|---|
| First Drink | Second Drink | Third Drink |
| Fourth Drink | Fifth Drink | - |
| Emoscape | ||
Use the table above to jump to a section.
Starlet's First Drink Guide
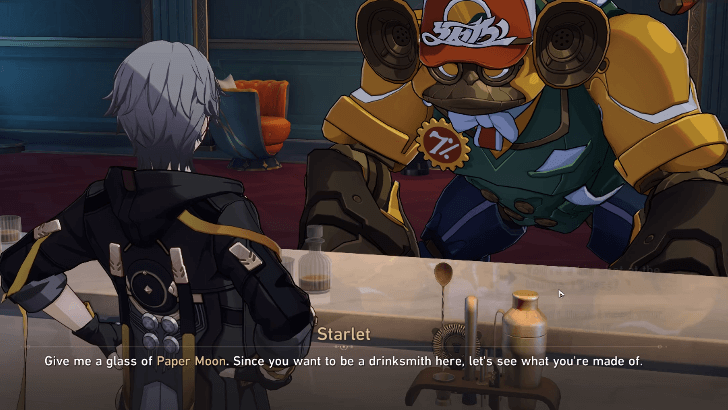
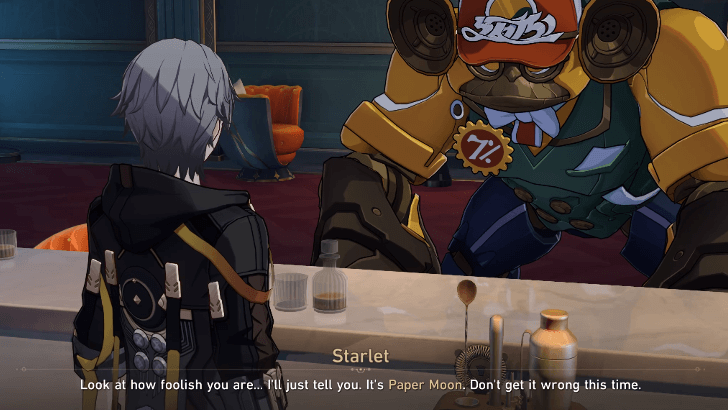
Paper Moon is the first drink that you will need to make for Starlet during the mission called Morose Monsters (IV).
How to Make Paper Moon
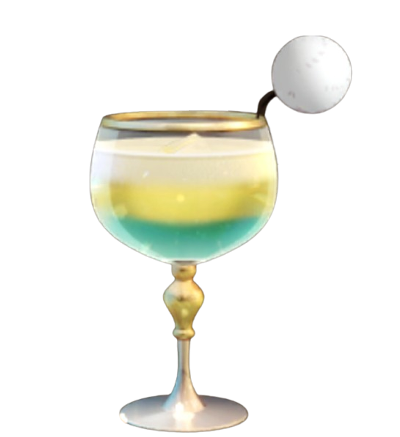 |
How to Make Drink | |
|---|---|---|
| 1 | Select Mini Wine Glass | |
| 2 | Select Less Ice | |
| 3 | ||
| 4 | ||
| 5 | ||
| 6 | Select Pepeshi Fluff Ball for the Decoration |
Return to All Morose Monsters Guides
Starlet's Second Drink Guide
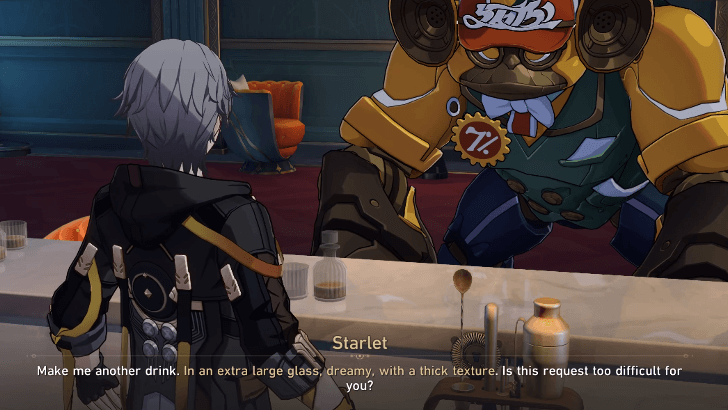
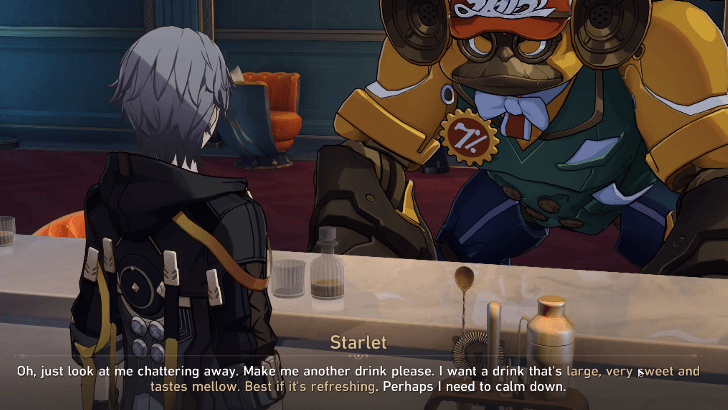
The second drink that you will need to make for Starlet during the mission, Morose Monsters (IV), should be extra large, dreamy, and thick. You need to do a free mix for this.
How to Make a Free Mix Drink
| Free Mix Drink | How to Make Drink | |
|---|---|---|
| 1 | Select Any Extra Large Glass | |
| 2 | Select Any Ice | |
| 3 | ||
| 4 | ||
| 5 | ||
| 6 | Stir the Drink | |
| 7 | ||
| 8 | Select Any Decoration |
Return to All Morose Monsters Guides
Starlet's Third Drink Guide
Starlet will request a Paper Moon again as their third drink during the mission called Morose Monsters (V).
How to Make Paper Moon
|
How to Make Drink | |
|---|---|---|
| 1 | Select Mini Wine Glass | |
| 2 | Select Less Ice | |
| 3 | ||
| 4 | ||
| 5 | ||
| 6 | Select Pepeshi Fluff Ball for the Decoration |
Return to All Morose Monsters Guides
Starlet's Fourth Drink Guide
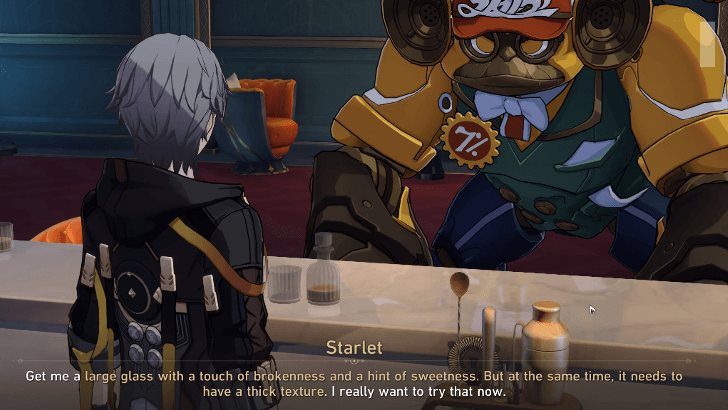
The fourth drink that you will need to make for Starlet during the mission, Morose Monsters (V), should be large, very sweet, mellow, and refreshing. A free mix is needed.
How to Make a Free Mix Drink
| Free Mix Drink | How to Make Drink | |
|---|---|---|
| 1 | Select Any Large Glass | |
| 2 | Select Any Ice | |
| 3 | ||
| 4 | ||
| 5 | ||
| 6 | ||
| 7 | Select Any Decoration |
Return to All Morose Monsters Guides
Starlet's Fifth Drink Guide
The last drink that you will need to make for Starlet during the mission, Morose Monsters (V), should be large, with a vulnerable feeling, slightly sweet, and thick. A free mix is needed.
How to Make a Free Mix Drink
| Free Mix Drink | How to Make Drink | |
|---|---|---|
| 1 | Select Any Large Glass | |
| 2 | Select Any Ice | |
| 3 | ||
| 4 | ||
| 5 | Stir the Drink | |
| 6 | ||
| 7 | ||
| 8 | Select Any Decoration |
Return to All Morose Monsters Guides
Starlet's Emoscape Guide
| Starlet's Emoscape Walkthrough | |
|---|---|
| 1 | 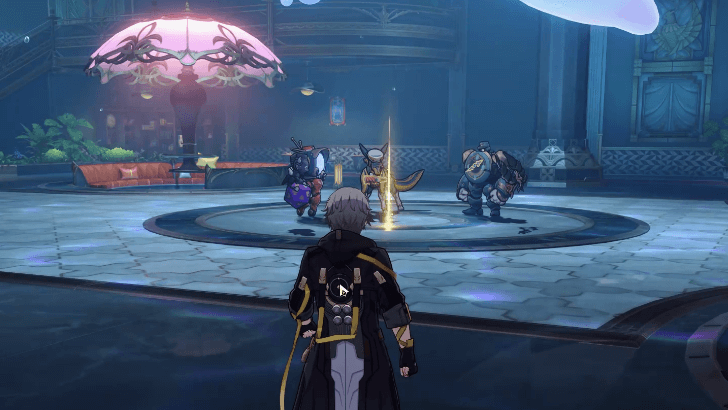 When you spawn in the Starlet's Emoscape during Morose Monsters (V), follow the waypoint to reach the Patrons' location. Walk up to them to progress the mission. |
| 2 | 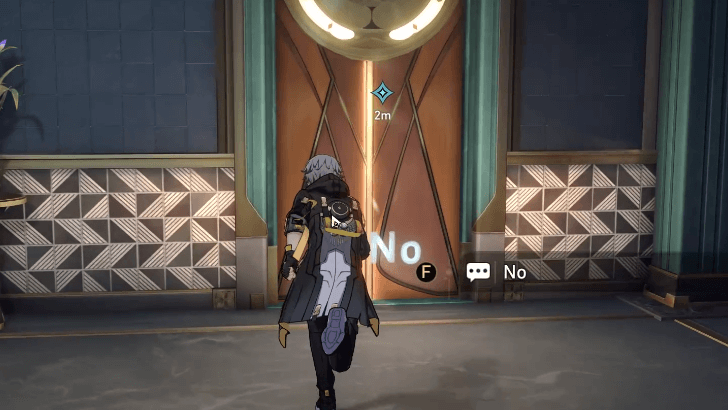 Once you are asked to select your first choice, enter the door that is labeled as “No.” After that, progress the mission by following the waypoints and selecting whichever dialogue choices you want in the cutscenes. |
| 3 | 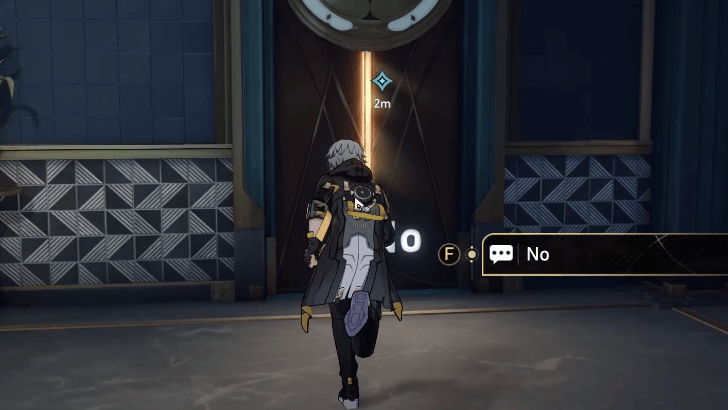 Once you are asked to select your second choice, enter the door that is labeled as “No” again. Then, simply progress the mission by following the waypoints. |
| 4 | 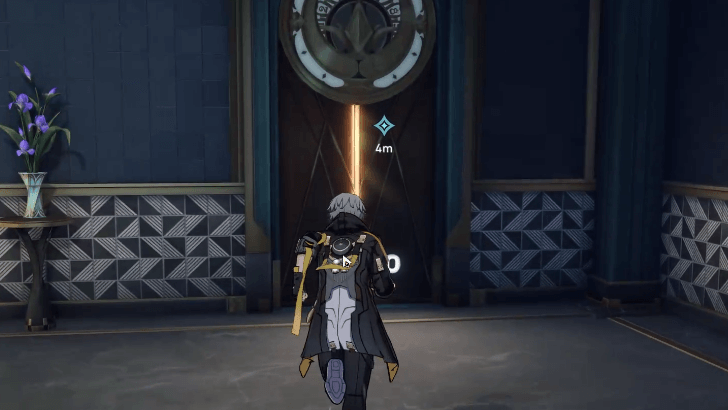 For your final choice, select “No” again. Starlet's Emoscape mission will shortly end after this. |
Return to All Morose Monsters Guides
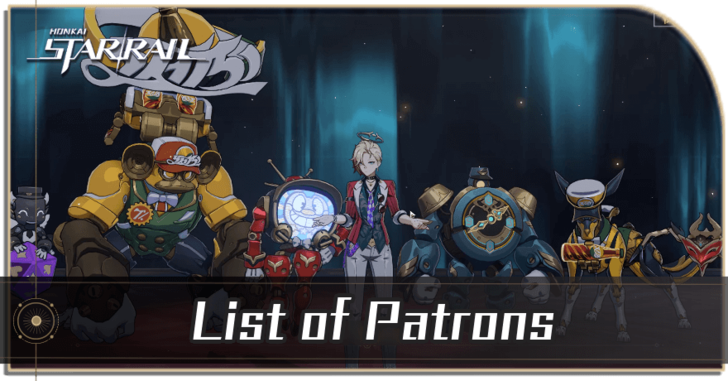
Patrons Information
Part of Vignettes in a Cup Event Guide
Patrons are the Dreamjolt Troupe monsters who will frequently visit the bar in the Vignettes in a Cup Event. You need to gain their Trust by serving the Drinks they want. You will then enter their Emoscape to resolve their troubles.
Vignettes in a Cup Event Guide
Honkai: Star Rail Related Guides

Vignettes in a Cup Event Guide
All Vignettes In A Cup Guides
| Vignettes In A Cup Guides | |
|---|---|
 All Drink Recipes All Drink Recipes |
List of Patrons |
 How to Mix Drinks How to Mix Drinks |
 Siobhan Guide Siobhan Guide |
Other Upcoming and Current Events

Author

Morose Monsters - All Patron Drinks and Emoscapes
Please participate in our site
improvement survey
03/2026
improvement survey
03/2026
Would you assist in
improving Game8's site?
improving Game8's site?

×
We are listening to our users' valuable opinions and discussing how to act on them.
The information collected through this survey will be used for the purpose of improving our services. In addition, the information will only be disclosed a part of a statistic in a format that will not allow identification of personal information.
Begin Survey
Not Now
×
Please rate each item regarding Game8.co's Advertisements.
Amount of Ads
Very Dissatisfied
Somewhat Dissatisfied
Fine
Somewhat Satisfied
Highly Satisfied
Placement of Ads
Timing of Ad Display
Ad Loading Speed
Safeness of Ads
Content of Ads
×
Please rate each item regarding Game8.co's Quality of Articles.
Amount of information
Very Dissatisfied
Somewhat Dissatisfied
Fine
Somewhat Satisfied
Highly Satisfied
Frequency of updates
Speed of new information
Accuracy of articles
Understandibility of articles
Readability of sentences
×
Please rate each item regarding Game8.co's Usability of the Site.
Ease of finding information
Very Dissatisfied
Somewhat Dissatisfied
Fine
Somewhat Satisfied
Highly Satisfied
Loading Speed
Use of Color
Font Size
Visibility of Images
Easy to Understand Layout
×
Please rate each item regarding Game8.co's Message Boards, Comments.
Ease of Writing
Very Dissatisfied
Somewhat Dissatisfied
Fine
Somewhat Satisfied
Highly Satisfied
Readability
Ease in Finding Information
Comment Quality
Comment Quantity
Admin Response
×
Please rate each item regarding Game8.co's Site's new design.
Please rate our site's new design
Very Dissatisfied
Somewhat Dissatisfied
Fine
Somewhat Satisfied
Highly Satisfied
Do you think that the website's design change makes the site easier to use?
Has the new design made it easier for you to find information on the site?
Has the new design improved the overall visual appeal of the site?
How would you rate your overall satisfaction with the new design of the site?
×
How likely are you to recommend Game8 to someone you know?
Very Unlikely
0
1
2
3
4
5
6
7
8
9
10
Very Likely
If you have other opinions regarding potential improvement to the website, please share them with us. We would appreciate your honest opinion.
Note: This is a free response section, so you can proceed without entering anything.
Note: Please be sure not to enter any kind of personal information into your response.
Note: Please be sure not to enter any kind of personal information into your response.
×
Thank You
×
Thank you for participating in our survey! Your answers will help us to improve the quality of our website and services.
We hope you continue to make use of Game8.
We hope you continue to make use of Game8.
Close
Premium Articles

Rankings
- We could not find the message board you were looking for.
Gaming News


![Monster Hunter Stories 3 Review [First Impressions] | Simply Rejuvenating](https://img.game8.co/4438641/2a31b7702bd70e78ec8efd24661dacda.jpeg/thumb)
Popular Games

Genshin Impact Walkthrough & Guides Wiki
Honkai: Star Rail Walkthrough & Guides Wiki
Umamusume: Pretty Derby Walkthrough & Guides Wiki
Pokemon Pokopia Walkthrough & Guides Wiki
Resident Evil Requiem (RE9) Walkthrough & Guides Wiki
Monster Hunter Wilds Walkthrough & Guides Wiki
Wuthering Waves Walkthrough & Guides Wiki
Arknights: Endfield Walkthrough & Guides Wiki
Pokemon FireRed and LeafGreen (FRLG) Walkthrough & Guides Wiki
Pokemon TCG Pocket (PTCGP) Strategies & Guides Wiki


Recommended Games
Diablo 4: Vessel of Hatred Walkthrough & Guides Wiki
Cyberpunk 2077: Ultimate Edition Walkthrough & Guides Wiki
Fire Emblem Heroes (FEH) Walkthrough & Guides Wiki
Yu-Gi-Oh! Master Duel Walkthrough & Guides Wiki
Super Smash Bros. Ultimate Walkthrough & Guides Wiki
Pokemon Brilliant Diamond and Shining Pearl (BDSP) Walkthrough & Guides Wiki
Elden Ring Shadow of the Erdtree Walkthrough & Guides Wiki
Monster Hunter World Walkthrough & Guides Wiki
The Legend of Zelda: Tears of the Kingdom Walkthrough & Guides Wiki
Persona 3 Reload Walkthrough & Guides Wiki


All rights reserved
Copyright © 2024 HoYoverse, COGNOSPHERE. All Rights Reserved.
The copyrights of videos of games used in our content and other intellectual property rights belong to the provider of the game.
The contents we provide on this site were created personally by members of the Game8 editorial department.
We refuse the right to reuse or repost content taken without our permission such as data or images to other sites.
the free mix recipes worked for me. I did try to change a bit on of the ones here during the Siobhan and Tin man free mix recipes but all did worked out fine on my end