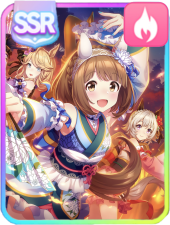
Seiun Sky (Reeling in the Big One) Build Guide and Character Info
This is a build guide for Seiun Sky (Reeling in the Big One) in Umamusume: Pretty Derby. Find out how to build Seiun Sky, her preferred tracks, distances, and style, as well as her basic character information, here!
| Seiun Sky Related Guides | |
|---|---|
|
|
|
List of Contents
Seiun Sky (Reeling in the Big One) Character Info
Seiun Sky Stats
| Seiun Sky (Reeling in the Big One) | |||||||||||||||||||
|---|---|---|---|---|---|---|---|---|---|---|---|---|---|---|---|---|---|---|---|

|
|||||||||||||||||||
| Overall | Ease (TB) | T.Trials | CM11 | ||||||||||||||||
|
|
|
|
| ||||||||||||||||
| Track Aptitude | |||||||||||||||||||
| Turf: A | Dirt: G | ||||||||||||||||||
| Distance Aptitude | |||||||||||||||||||
| Sprint: G | Mile: C | Med: A | Long: A | ||||||||||||||||
| Pace Aptitude | |||||||||||||||||||
| Front: A | Pace: B | Late: D | End: E | ||||||||||||||||
| Stat Growth | |||||||||||||||||||
| SPD: 0% | STA: 10% | POW: 0% | GUT: 0% | WIT: 20% | |||||||||||||||
Seiun Sky (Reeling in the Big One) Unique Skill
|
|
Increase acceleration at an opportune moment when in the lead on a corner late-race. |
|---|
Seiun Sky's Angling and Scheming is a strong acceleration skill that activates when she is positioned at 1st place on a corner during the late race.
This means it is most effective with Front Runners; those who can be positioned at the front immediately and are able to maintain a strong lead. The skill also becomes easier to trigger if there are no other Front Runners in the race.
It is important to note, however, that this requires you to be on a corner in the late race. If the race track does not have a corner during the late race, the skill will not activate.
Seiun Sky (Reeling in the Big One) Innate Skills
| All Innate Skills |
|---|
Seiun Sky (Reeling in the Big One) Potential Skills
| Skill Per Potential Level |
|---|
| Potential 2: Potential 3: Potential 4: Potential 5: |
Seiun Sky (Reeling in the Big One) Career Skills
| All Career Event Skills |
|---|
Is Seiun (Reeling in the Big One) Sky Worth It?
Pull for a Strong Front Runner
Seiun Sky is considered one of the best Front Runners racers in the game and will remain strong for a long time. She is also an important Legacy for Front Runners, as her Unique Skill helps them keep their lead in the late race.
Pull for her if you own other Front Runners like Maruzensky and Silence Suzuka and want to strengthen them even further.
Seiun Sky (Reeling in the Big One) Career Training Tips
| Training Tips |
|---|
|
|
Train in the Trackblazer (MANT) Scenario
When training Seiun Sky, use the brand new Trackblazer (MANT) scenario, as this will allow you to get higher stats than before. Try to participate in 30 to 35 races during your career runs while making sure to prioritize winning G1 races.
Seiun Sky's C aptitude for Mile races will allow rivals to appear in them. We recommend getting at least 1 Mile spark to upgrade it to B and improve your chances of winning. You can also get 4 Mile sparks to cancel out the Speed penalty entirely.
Trackblazer (Make a New Track) Scenario Guide
Run Her As A Front Runner
Seiun Sky is a Front Runner through and through. This is because her more powerful skills, like Fast-Paced (and its upgrade Escape Artist) are both Front Runner skills. Additionally, her Unique Skill activates when she is in the lead in a late-race corner, so running her as a Front Runner makes it easier to activate it.
Make sure to improve her Front Runner aptitude from A to S using Legacies.
Prioritize Speed And Stamina
Because Seiun Sky primarily runs Medium and Long races, Speed and Stamina are both important, especially since she is running as a stamina-hungry Front Runner. Increasing both Speed and Stamina is a must if you want her to keep her lead at all times.
Of course, this doesn't mean that you should neglect Power, as you will still need some Power to help Seiun Sky reach her top speed and head to the front.
Increase Her Potential Level
It is important to get Seiun Sky's Potential level to the max level as this unlocks the skill Escape Artist, which is a helpful mid-race velocity skill for Seiun Sky.
Recommended for Medium Aptitude
Seiun Sky is recommended for Medium aptitude at least for Team Trials, so we suggest improving her Medium aptitude. However, you can still have her as a Long racer at your preference.
Medium is the preferred distance for Seiun Sky beyond her career since she's a Front Runner lacking her own stamina recovery skills, being more manageable than Longs. The effect of Angling and Scheming, her unique skill, also has a more delayed activation on Long tracks since the late-race corners are further into the late-race stage, rendering them less effective than compared to its use in Medium and even Mile races.
Outside of career, Front Runners tend to be disadvantaged at Long tracks against their rear counterparts, such as End Closers and Late Surgers like Gold Ship and Symboli Rudolf. Even Pace Chasers have better chances in performing efficiently in this distance with Umas like Mejiro McQueen and Narita Brian who have unique skills that perform more effectively in Long races.
Get Enough Stamina For Her Long Races
Seiun Sky needs to race in both the Kikuka Sho and the Tenno Sho (Spring) as part of her career races. To ensure that you perform well in both races, try to get at least 400 Stamina before the Kikuka Sho, and at least 500 Stamina before the Tenno Sho (Spring).
Seiun Sky (Reeling in the Big One) Build
Recommended Stats
| 1200 | 800 | 800 | 500 | 1000 |
As a Front Runner on your Medium team for Team Trials, Seiun Sky will need a lot of Speed and Stamina so that she can maintain her running speed throughout the entire race. Focus on increasing those stats first before increasing her Power to help with her acceleration. A gold Recovery Skill like Swinging Maestro is recommended to help keep her Stamina topped up throughout the race.
If you are only planning to clear a career run with Seiun Sky, then you can aim for lower stat numbers, as the stats above are for Team Trials.
Training Guide: Which Stats to Train?
Recommended Support Cards
Trackblazer (MANT) Build


For Support cards, we recommend a Speed-Wit deck consisting of 2 Speed and 3 Wit cards, as well as 1 Race Bonus filler. This will allow Seiun Sky to get the Speed and Power she needs for her Medium races, as well as enough Wit to improve her skill activation, prevent getting Rushed, and help her keep her position. The filler cards can be for any stat as long as you have at least 50 Race Bonus.
Due to the nature of the Trackblazer (MANT) Scenario, it is important to prioritize cards with high Race Bonus.
Budget Build


This deck consists mostly of SR cards and free SSR cards, and is meant for players who do not have many SSR Support Cards. Despite the lower rarity, this deck can still hold up and perform well in the latest scenario. Silence Suzuka is a good budget Speed card as she can provide hints for Trackblazer, as well as other Front Runner skills.
Take advantage of the game's borrowing feature to borrow a powerful MLB SSR, like Kitasan Black (Fire at My Heels). However, Matikane Fukukitaru (Touching Sleeves Is Good Luck! ♪) can also work.
Alternate Cards


These cards will help Seiun Sky level her needed Stats (especially with Rainbow/Friendship Training), as well as provide some needed skills.
Previous Scenario Builds
Unity Cup Build

If you plan to run the Unity Cup, we recommend using either a Speed-Power deck or a Speed-Wit deck to help Seiun Sky get the stats she needs.
Unity Cup (Aoharu Hai) Scenario Guide
URA Build


If you plan to run the URA Finale, we recommend using either a Speed-Stamina or a Speed-Power deck to help Seiun Sky get the stats she needs.
Recommended Legacy Sparks
| Recommended | |
|---|---|
| 12★ Stamina 6★ Power |
|
| 3★ Front Runner 3★ Medium 1-4★ MIle (Trackblazer) |
For Legacy Sparks, we recommend trying to find Stamina and Power sparks to help with Seiun Sky's races. As she already has an A aptitude for the races in her career, getting Medium to push her aptitude to S is the ideal move, as this will help her in Team Trials. For running style, Front Runner sparks are the best choice, as you will not be running Seiun Sky in any other running style.
Additionally, you can also get at least 1 Mile spark so that Seiun Sky's performance in Mile races during the Trackblazer scenario will be more stable. If you want to increase her aptitude to A instead, get a total of 4 Mile sparks.
You can use either your own Veterans, or borrow the ones from your friends. If you do not have Veterans with full sparks, you can go with whatever you have access to.
Recommended Skills
| Recommended Skills | ||
|---|---|---|
 Focus Focus
|
 Up-Tempo Up-Tempo
|
Front Runner Corners ◯
|
|
Medium Corners ◯
|
 Front Runner Savvy ◯ Front Runner Savvy ◯
|
 Groundwork Groundwork
|
|
Playtime's Over!
|
 Professor of Curvature Professor of Curvature
|
 Taking the Lead Taking the Lead
|
 Swinging Maestro Swinging Maestro
|
Escape Artist
|
As a Front Runner, Seiun Sky benefits from skills that let her get to the front of the pack and keep her position. Speed skills like Taking the Lead will help her go to the front early, and can activate Groundwork alongside Focus and Front Runner Savvy.
During the mid-race, skills like Escape Artist and Up-Tempo will provide velocity boosts alongside corner skills like Professor of Curvature and Front Runner and Medium Corners. Playtime's Over! can also be useful, especially since Seiun Sky will be in the front.
As for recovery skills, Swinging Maestro will be your best pick, although other recovery skills like Trackblazer or Restless are good if you can get them.
If you cannot get the recommended skills, you can replace them with similar skills that you have access to. You will just need to make sure that Seiun Sky can activate said skills in a race. Additionally, if you are not able to get hints for a Skill's upgraded version, getting the base version will still be helpful for your runs.
Seiun Sky (Reeling in the Big One) Events
Sleepy Time Incense
| Choice | Outcome |
|---|---|
| Choice 1 | ・ 20 Wit |
| Choice 2 | ・ 20 Stamina |
Tactician vs. King
| Choice | Outcome |
|---|---|
| Choice 1 | ・ 20 Guts |
| Choice 2 | ・ 20 Speed |
Who Do You Run For?
| Choice | Outcome |
|---|---|
|
Choice 1
(Thank you.) |
・ 20 Stamina ・ Charming ◯ (Random) |
|
Choice 2
(I've gotta work harder.) |
・ 20 Power ・ Charming ◯ (Random) |
Cat Expert
| Choice | Outcome |
|---|---|
| Choice 1 | ・ 10 Wit |
| Choice 2 | ・ 10 Speed |
Cat Patrol
| Choice | Outcome |
|---|---|
| Choice 1 | ・ 10 Stamina |
| Choice 2 | ・ 10 Guts |
Cloudy, Followed By...
| Choice | Outcome |
|---|---|
|
Choice 1
(That solves that.) |
・ 10 Guts |
|
Choice 2
(So the source of the temptation was none other than...) |
・ 10 Speed |
Goodbye, Cat
| Choice | Outcome |
|---|---|
| Choice 1 | ・ 10 Wit |
| Choice 2 | ・ 10 Stamina |
| Choice 3 | ・ 10 Power |
Nap Master
| Choice | Outcome |
|---|---|
| Choice 1 | ・ 10 Stamina |
| Choice 2 | ・ 10 Wit |
Dance Lesson (Seiun Sky)
| Choice | Outcome |
|---|---|
|
Choice 1
(Wait, are you taking this seriously?) |
・ 10 Guts |
|
Choice 2
(A little more effort and you can get the win!) |
・ 10 Stamina |
I Can Unwind Outdoors Too
| Choice | Outcome |
|---|---|
|
Choice 1
(Don't eat too many!) |
・ 10 Energy ・ 5 Skill Pts |
|
Choice 2
(Success)
(It's hard to stop once you start, right?) |
・ 30 Energy ・ 10 Skill Pts |
|
Choice 2
(Fail)
(It's hard to stop once you start, right?) |
・ 30 Energy ・ -5 Speed ・ 5 Power ・ 10 Skill Pts ・ Slow Metabolism |
Is Cat Language Real?
| Choice | Outcome |
|---|---|
| Choice 1 | ・ 10 Stamina |
| Choice 2 | ・ 10 Wit |
Sei's Escape Plan
| Choice | Outcome |
|---|---|
|
Choice 1
(Let's try deception...) |
・ 10 Speed ・ 15 Skill Pts |
|
Choice 2
(Use your front runner skills.) |
・ Subdued Late Surgers +1 Skill Hint |
Shady Dealings
| Choice | Outcome |
|---|---|
| Choice 1 | ・ 10 Speed |
| Choice 2 | ・ 10 Power |
Sunny Day Standoff
| Choice | Outcome |
|---|---|
|
Choice 1
(Random 1)
(Insist that she practice) |
・ 25 Speed |
|
Choice 1
(Random 2)
(Insist that she practice) |
・ -1 Mood ・ 5 Speed |
|
Choice 2
(Random 1)
(Let her rest until she's happy.) |
・ 20 Energy ・ Deep Breaths +1 Skill Hint |
|
Choice 2
(Random 2)
(Let her rest until she's happy.) |
・ 10 Energy ・ Slacker |
|
Choice 3
(Train after a little relaxing.) |
・ 5 Energy ・ 5 Speed |
At Summer Camp (Year 2) (Seiun Sky)
| Choice | Outcome |
|---|---|
|
Choice 1
(Strategy training to prepare for the third-corner hill.) |
・ 10 Power |
|
Choice 2
(Perseverance training to pull ahead in the last stretch.) |
・ 10 Guts |
New Year's Resolutions (Seiun Sky)
| Choice | Outcome |
|---|---|
|
Choice 1
(Yep! Training!) |
・ 10 Speed |
|
Choice 2
(How about a cup of tea for our meeting?) |
・ 20 Energy |
|
Choice 3
(Tell me more about Nishino Flower.) |
・ 20 Skill Pts |
New Year's Shrine Visit (Seiun Sky)
| Choice | Outcome |
|---|---|
|
Choice 1
(Pray that she refrains from overworking herself.) |
・ 30 Energy |
|
Choice 2
(Pray that she achieves great success.) |
・ 5 All Stats |
|
Choice 3
(Pray that she can enjoy her races.) |
・ 35 Skill Pts |
Don't Over Do it! (Seiun Sky)
| Choice | Outcome |
|---|---|
| Choice 1 |
・ 10 Energy ・ -2 Mood ・ Last trained stat and two other random stat -10 ・ Practice Poor (random) |
| Choice 2 (Success) | ・ Practice Perfect ◯ |
| Choice 2 (Fail) |
・ -3 Mood ・ 3 Random stat -10 ・ Practice Poor |
Extra Training (Seiun Sky)
| Choice | Outcome |
|---|---|
|
Choice 1
(Why don't you do some running together?) |
・ -5 Energy ・ Last trained stat +5 ・ 5 Friendship with Director |
|
Choice 2
(True. It's important to take good care of your body.) |
・ 5 Energy |
Get Well Soon! (Seiun Sky)
| Choice | Outcome |
|---|---|
| Choice 1 |
・ -1 Mood ・ Last trained stat -5 ・ Practice Poor (random) |
| Choice 2 (Success) | ・ Practice Perfect ◯ |
| Choice 2 (Fail) |
・ -1 Mood ・ Last trained stat -10 ・ Practice Poor (random) |
Defeat (G1) (Seiun Sky)
| Choice | Outcome |
|---|---|
|
Choice 1
(It wasn't a bad strategy.) |
・ -25 Energy ・ 25 Skill Pts ・ Random Stat +4 |
|
Choice 2
(Success)
(We'll get them next time!) |
・ -15 Energy ・ 25 Skill Pts ・ Random Stat +4 |
|
Choice 2
(Fail)
(We'll get them next time!) |
・ -35 Energy ・ 25 Skill Pts ・ Random Stat +4 |
Defeat (G2) (Seiun Sky)
| Choice | Outcome |
|---|---|
| Choice 1 |
・ -25 Energy ・ 20 Skill Pts ・ Random Stat +3 |
| Choice 2 (Success) |
・ -15 Energy ・ 20 Skill Pts ・ Random Stat +3 |
| Choice 2 (Fail) |
・ -35 Energy ・ 20 Skill Pts ・ Random Stat +3 |
Defeat (G3) (Seiun Sky)
| Choice | Outcome |
|---|---|
| Choice 1 |
・ -25 Energy ・ 20 Skill Pts ・ Random Stat +3 |
| Choice 2 (Success) |
・ -15 Energy ・ 20 Skill Pts ・ Random Stat +3 |
| Choice 2 (Fail) |
・ -35 Energy ・ 20 Skill Pts ・ Random Stat +3 |
Defeat (OP and Pre-OP) (Seiun Sky)
| Choice | Outcome |
|---|---|
| Choice 1 |
・ -25 Energy ・ 10 Skill Pts |
| Choice 2 (Success) |
・ -15 Energy ・ 10 Skill Pts |
| Choice 2 (Fail) |
・ -35 Energy ・ 10 Skill Pts |
Solid Showing (G1) (Seiun Sky)
| Choice | Outcome |
|---|---|
|
Choice 1
(It wasn't a bad strategy!) |
・ -20 Energy ・ 45 Skill Pts ・ Random Stat +8 |
|
Choice 2
(Success)
(Let's really blow their socks off in the next one.) |
・ -10 Energy ・ 45 Skill Pts ・ Random Stat +8 |
|
Choice 2
(Fail)
(Let's really blow their socks off in the next one.) |
・ -30 Energy ・ 45 Skill Pts ・ Random Stat +8 |
Solid Showing (G2) (Seiun Sky)
| Choice | Outcome |
|---|---|
|
Choice 1
(It wasn't a bad strategy!) |
・ -20 Energy ・ 35 Skill Pts ・ Random Stat +5 |
|
Choice 2
(Success)
(Let's really blow their socks off in the next one.) |
・ -10 Energy ・ 35 Skill Pts ・ Random Stat +5 |
|
Choice 2
(Fail)
(Let's really blow their socks off in the next one.) |
・ -30 Energy ・ 35 Skill Pts ・ Random Stat +5 |
Solid Showing (G3) (Seiun Sky)
| Choice | Outcome |
|---|---|
|
Choice 1
(It wasn't a bad strategy!) |
・ -20 Energy ・ 35 Skill Pts ・ Random Stat +5 |
|
Choice 2
(Success)
(Let's really blow their socks off in the next one.) |
・ -10 Energy ・ 35 Skill Pts ・ Random Stat +5 |
|
Choice 2
(Fail)
(Let's really blow their socks off in the next one.) |
・ -30 Energy ・ 35 Skill Pts ・ Random Stat +5 |
Solid Showing (OP and Pre-OP) (Seiun Sky)
| Choice | Outcome |
|---|---|
| Choice 1 |
・ -20 Energy ・ 30 Skill Pts ・ Random Stat +3 |
| Choice 2 (Success) |
・ -10 Energy ・ 30 Skill Pts ・ Random Stat +3 |
| Choice 2 (Fail) |
・ -30 Energy ・ 30 Skill Pts ・ Random Stat +3 |
Victory! (G1) (Seiun Sky)
| Choice | Outcome |
|---|---|
| Choice 1 |
・ -15 Energy ・ 45 Skill Pts ・ Random Stat +10 |
| Choice 2 (Success) |
・ -5 Energy ・ 45 Skill Pts ・ Random Stat +10 |
| Choice 2 (Fail) |
・ -20 Energy ・ 45 Skill Pts ・ Random Stat +10 |
Victory! (G2) (Seiun Sky)
| Choice | Outcome |
|---|---|
| Choice 1 |
・ -15 Energy ・ 35 Skill Pts ・ Random Stat +8 |
| Choice 2 (Success) |
・ -5 Energy ・ 35 Skill Pts ・ Random Stat +8 |
| Choice 2 (Fail) |
・ -20 Energy ・ 35 Skill Pts ・ Random Stat +8 |
Victory! (G3) (Seiun Sky)
| Choice | Outcome |
|---|---|
| Choice 1 |
・ -15 Energy ・ 35 Skill Pts ・ Random Stat +8 |
| Choice 2 (Success) |
・ -5 Energy ・ 35 Skill Pts ・ Random Stat +8 |
| Choice 2 (Fail) |
・ -20 Energy ・ 35 Skill Pts ・ Random Stat +8 |
Victory! (OP and Pre-OP) (Seiun Sky)
| Choice | Outcome |
|---|---|
|
Choice 1
(You were amazing!) |
・ -15 Energy ・ 30 Skill Pts ・ Random Stat +5 |
|
Choice 2
(Success)
(We've got to come up with a strategy for the next race.) |
・ -5 Energy ・ 30 Skill Pts ・ Random Stat +5 |
|
Choice 2
(Fail)
(We've got to come up with a strategy for the next race.) |
・ -20 Energy ・ 30 Skill Pts ・ Random Stat +5 |
Seiun Sky (Reeling in the Big One) Secret Events
| Notes on Hidden Events |
|---|
|
The Hidden Event rewards listed below are the base values, and can increase based on your Race Bonus. Hidden Events do not occur in the following scenarios: ・Trackblazer (Make a New Track) |
Landed That Triple Crown!
| Condition | Win the Satsuki Sho, Japanese Derby, and Kikuka Sho |
|---|---|
| Event Time | Classic Year Late October |
| Event Rewards |
・ Mood +1 ・ Speed +5 ・ Power +5 ・ Fast-Paced hint +2 |
| Race(s) to Win | |
|
Satsuki Sho
| 2000m (Medium)
Early April, Classic Year Japanese Derby (Tokyo Yushun) | 2400m (Medium) Late May, Classic Year Kikuka Sho | 3000m (Long) Late Oct, Classic Year |
|
The Landed That Triple Crown! Secret Event requires Seiun Sky to win the Satsuki Sho, Japanese Derby, and Kikuka Sho, all of which are part of her career. To maximize your chances of winning, especially in the Kikuka Sho, make sure that she has enough Stamina for the entire race. Getting at least 400 Stamina before the Kikuka Sho should help improve your chances of winning.
East vs. West
| Race | Date |
|---|---|
 Medium, 2400m |
Classic/Senior Year |
Racing in the Kyoto Daishoten with Seiun Sky will trigger the Secret Event East vs. West. This event has no special benefits, and is mostly for story purposes (special dialogue). Note that the Mainichi Okan is also held in the same period.
The real-life Seiun Sky participated and won in the race Kyoto Daishoten. Interestingly, the race is not a part of her in-game goal races. This may be done to give way to a what-if scenario of Seiun Sky participating in Mainichi Okan against Silence Suzuka.
Facing the Otherworldly Front-Runner
| Race | Date |
|---|---|
 Mile, 1800m |
Classic/Senior Year |
Racing in the Mainichi Okan with Seiun Sky will trigger the Secret Event Facing the Otherworldly Front-Runner. This event has no special benefits, and is mostly for story purposes (special dialogue). Note that the Kyoto Daishoten is also held in the same period.
Notably, Mainichi Okan is a goal race of Silence Suzuka in her career. It is also the goal race of the other Umamusume El Condor Pasa and Grass Wonder.
Got a Bite
| Facility | Outcome |
|---|---|
| ・ Speed +10 | |
| ・ Stamina +10 | |
| ・ Power +10 | |
| ・ Guts +10 | |
| ・ Wit +10 |
Got a Bite is a random event with 5 possible outcomes that happens depending on which training facility has the highest level. If 2 or more facilities are tied in level, then the outcome between those tied facilities is chosen at random.
Seiun Sky (Reeling in the Big One) Career Goals
| Goal | Race/Goal |
|---|---|
| Run in Junior Make Debut | Junior Make Debut |
| Earn 3000 Fans | 3000 or above Junior Year Early Dec |
| Place top 5 in Satsuki Sho |
 Satsuki Sho Satsuki Sho
(Medium - 2000m) Classic Year Early Apr |
| Place top 5 in Japenese Derby |
 Japanese Derby (Tokyo Yushun) Japanese Derby (Tokyo Yushun)
(Medium - 2400m) Classic Year Late May |
| Place top 3 in Kikuka Sho |
 Kikuka Sho Kikuka Sho
(Long - 3000m) Classic Year Late Oct |
| Place top 3 in Arima Kinen |
 Arima Kinen Arima Kinen
(Long - 2500m) Classic Year Late Dec |
| Place top 3 in Tenno Sho (Spring) |
 Tenno Sho (Spring) Tenno Sho (Spring)
(Long - 3200m) Senior Year Late Apr |
| Place top 3 in Takarazuka Kinen |
 Takarazuka Kinen Takarazuka Kinen
(Medium - 2200m) Senior Year Late Jun |
| Place 1st in Tenno Sho (Autumn) |
 Tenno Sho (Autumn) Tenno Sho (Autumn)
(Medium - 2000m) Senior Yar Late Oct |
| Place 1st in Arima Kinen |
Arima Kinen
(Long - 2500m) Senior Year Late Dec |
Seiun Sky Profile
Basic Information
 Seiun Sky Seiun Sky"Hey now, why don't we take it easy? Tortoise and the hare and all that." | Voice Actress | Akari Kito |
|---|---|---|
| Height | 155cm / 5'1" | |
| Weight | Undeclared | |
| Birthday | Apr 26 | |
| Three Sizes | B 77 | W 55 | H 80 | |
| As one of the most easygoing girls you'll meet, she lives life at her own pace. But on the inside, she's quite the schemer, and her laziness is just an act to get others to let down their guard... sometimes. Her hobbies include taking afternoon naps and fishing. She also loves cats and is often seen curling up with them outside on the grass. She's classmates with Special Week. | ||
Umamusume: Pretty Derby Related Guides

Character Guides
| Height and Weight | Voice Actors | Three Sizes | List of Birthdays |
Characters (Trainees) by Rarity
| 3-Star Characters | 2-Star Characters | 1-Star Characters |
Current Uma Musume Characters (Trainees)
 Matikane Tannhauser (Clippety Tippety Clop)
 Kitasan Black (Gilded Shrine to Glory)
 Admire Vega (Starry Nocturne)
 Mejiro Ardan (Crystalline)
 Eishin Flash (Precise Chocolatier)
 Mihono Bourbon (CODE: ICING)
 Sakura Chiyono O (Strength in Full Bloom)
 T.M. Opera O (New Year, Same Radiance!)
 Haru Urara (New Year ♪ New Urara!)
 Tamamo Cross (Fast as Lightning)
 Fine Motion (Noble Seamair)
 Biwa Hayahide (Rouge Caroler)
 Oguri Cap (Ashen Miracle)
 Mejiro Dober (Off the Line)
 Tosen Jordan (Jokester ☆ Vibes)
 Gold City (Autumn Cosmos)
 Symboli Rudolf (Archer by Moonlight)
 Manhattan Cafe (Creeping Shadow)
 Kawakami Princess (Princess of Pink)
 Super Creek (Chiffon-Wrapped Mummy)
 Rice Shower (Vampire Makeover!)
 Agnes Digital (Full-Color Fangirling)
 Hishi Akebono (Buono☆Alla Moda)
 Matikane Fukukitaru (Lucky Tidings)
 Eishin Flash (Meisterschaft)
 Meisho Doto (Turbulent Blue)
 Maruzensky (Hot☆Summer Night)
 Special Week (Hopp'n♪Happy Heart)
 Gold City (Authentic / 1928)
 Fuji Kiseki (Shooting Star Revue)
 Grass Wonder (Saintly Jade Cleric)
 El Condor Pasa (Kukulkan Warrior)
 Hishi Amazon (Azure Amazon)
 Air Groove (Quercus Civilis)
 Mayano Top Gun (Sunlight Bouquet)
 Narita Brian (Maverick)
 Smart Falcon (LOVE☆4EVER)
 Narita Taishin (Nevertheless)
 Curren Chan (Fille Éclair)
 Tokai Teio (Beyond the Horizon)
 Mejiro McQueen (End of the Skies)
 Biwa Hayahide (pf. Winning Equation...)
 Mihono Bourbon (MB-19890425)
 T.M. Opera O (O Sole Suo!)
 Rice Shower (Rosy Dreams)
 Symboli Rudolf (Emperor's Path)
 Mejiro McQueen (Frontline Elegance)
 Taiki Shuttle (Wild Frontier)
 Oguri Cap (Starlight Beat)
 Maruzensky (Formula R)
 Tokai Teio (Peak Joy)
 Silence Suzuka (Innocent Silence)
 Special Week (Special Dreamer)
 Super Creek (Murmuring Stream)
 Mayano Top Gun (Scramble Zone)
 Air Groove (Empress Road)
 El Condor Pasa (El Numero 1)
 Grass Wonder (Stone-Piercing Blue)
 Daiwa Scarlet (Peak Blue)
 Vodka (Wild Top Gear)
 Gold Ship (Red Strife)
 King Halo (King of Emeralds)
 Nice Nature (Poinsettia Ribbon)
 Matikane Fukukitaru (Rising Fortune)
 Haru Urara (Bestest Prize)
 Sakura Bakushin O (Blossom in Learning)
 Winning Ticket (Get to Winning!)
 Agnes Tachyon (Tach-nology)
 Mejiro Ryan (Down the Line)
Author

Seiun Sky (Reeling in the Big One) Build Guide and Character Info
Premium Articles
Rankings
- We could not find the message board you were looking for.

Gaming News


Popular Games

Genshin Impact Walkthrough & Guides Wiki
Umamusume: Pretty Derby Walkthrough & Guides Wiki
Crimson Desert Walkthrough & Guides Wiki
Monster Hunter Stories 3: Twisted Reflection Walkthrough & Guides Wiki
Honkai: Star Rail Walkthrough & Guides Wiki
Pokemon Pokopia Walkthrough & Guides Wiki
The Seven Deadly Sins: Origin Walkthrough & Guides Wiki
Wuthering Waves Walkthrough & Guides Wiki
Zenless Zone Zero Walkthrough & Guides Wiki
Arknights: Endfield Walkthrough & Guides Wiki


Recommended Games
Fire Emblem Heroes (FEH) Walkthrough & Guides Wiki
Diablo 4: Vessel of Hatred Walkthrough & Guides Wiki
Cyberpunk 2077: Ultimate Edition Walkthrough & Guides Wiki
Yu-Gi-Oh! Master Duel Walkthrough & Guides Wiki
Super Smash Bros. Ultimate Walkthrough & Guides Wiki
Pokemon Brilliant Diamond and Shining Pearl (BDSP) Walkthrough & Guides Wiki
Elden Ring Shadow of the Erdtree Walkthrough & Guides Wiki
Monster Hunter World Walkthrough & Guides Wiki
The Legend of Zelda: Tears of the Kingdom Walkthrough & Guides Wiki
Persona 3 Reload Walkthrough & Guides Wiki


All rights reserved
© Cygames, Inc.
The copyrights of videos of games used in our content and other intellectual property rights belong to the provider of the game.
The contents we provide on this site were created personally by members of the Game8 editorial department.
We refuse the right to reuse or repost content taken without our permission such as data or images to other sites.
Wait, Medium Team Trials? And not for my Long Team Trials team? Why? Explain. 🫠