This survey will take about 1 minute.
Your answers will help us to improve our website.
Super Mario RPG
6th Star Piece Walkthrough (Chapter 6)
This is a walkthrough on how to get the sixth Star Piece in Super Mario RPG Remake. Read on to see a detailed guide on how to get to the 6th star piece, how to get to Monstro Town and climb the Land's End Cliff, as well as strategies to defeat this chapter's bosses.
How to Get the Sixth Star Piece
| Objectives |
|---|
|
|
Best Party and Recommended Level
| Party | Recommended Level | |||
|---|---|---|---|---|
 Mario Mario
|
 Mallow Mallow
|
|
17 | |
After Obtaining the Starpiece
| ① |  |
|---|
Seaside Town
| ① |  ▶Should you Give the Star Piece to Speardovich? |
|---|---|
| ② |  Proceed to the next area through the passageway at the far left. You'll face off against Speardovich. Defeating him will return it to you - he’s weak to lightning, so have Mallow cast Thunderbolt to hit his weakness and speed up the battle. ▶How to Beat Speardovich |
| ③ |  |
| ④ |  |
| ⑤ | Speak with the elder of Seaside Town. His house is located in the upper-left area. Afterwards, you will be able to access Land's End. Before you leave, head to the shop to pick up new weapons: the Parasol for Peach, Paratroopa Shell for Mario, Double Punch for Geno, and Ribbit Stick for Mallow |
| ⑥ | 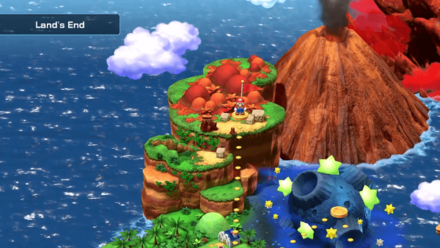 |
Seaside Town Walkthrough, Map, and Hidden Treasure Chests
Land's End (Belome Temple) - How to Get to Monstro Town
| ① | Save at the save point. |
|---|---|
| ② | 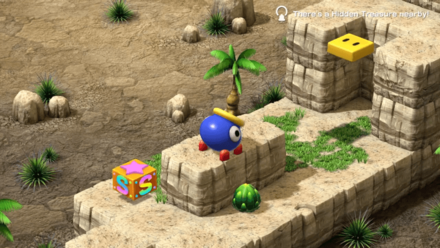 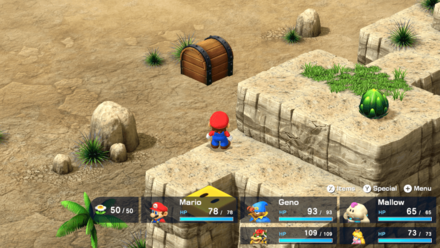 |
| ③ | 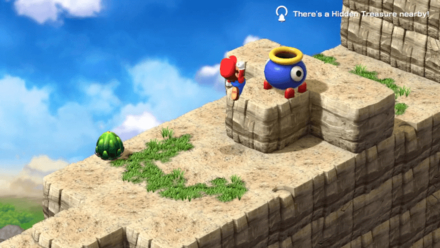  |
| ④ | Go straight without falling off the cliff and proceed to the next area from the passage in the back. ┗If you fall, there is a cannon at the bottom right of the bottom row that will lead you back at the top of the cliff |
| ⑤ |  TIP: Jump when the flower points you at the direction you wish to go to. |
| ⑥ |
Cross the Sky Bridge and proceed to the next area located through the passageway beyond the bridge. If you accidentally fall to the bottom area, don’t worry - there’s a hidden bonus! You’ll find a Flower Tab down there. To get back up, just jump onto the nearby Sky Bridge operator and he’ll give you a lift. ▶Sky Bridge Guide and Rewards  Don’t continue east, or you’ll just loop into the Kero Sewers - instead, exit the cave and return to the Sky Bridge to resume your journey. |
| ⑦ | After crossing the bridge, you may save at the next save point. Then proceed to the next area located in the passage towards the upper-right. |
| ⑧ |  If you enter the whirlpool without the Shogun, you will be returned to the previous area but if you run away, you won't be able to lure it out again unless you leave the area and come back. TIP: Lure the Shogun by getting just close enough that it comes all the way out and make it battle you. After defeating it, you can enter the whirlpool to get to Belome Temple. |
| ⑨ |  If you take the Star from the Treasure Chest located on the bottom, you can defeat the enemies in the next two areas. |
| ⑩ | 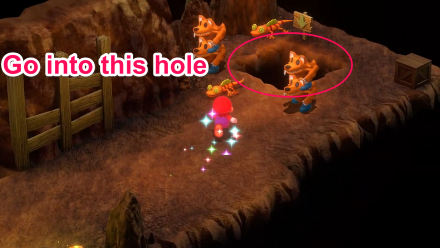 |
| ⑪ |  To make this encounter easier, you can talk to the Shaman behind the wooden blocks (as seen in the image) and they will give you 400 coins. Stars can be purchased from them for 800 coins, and can help you defeat all the enemies in this area. |
| ⑫ | 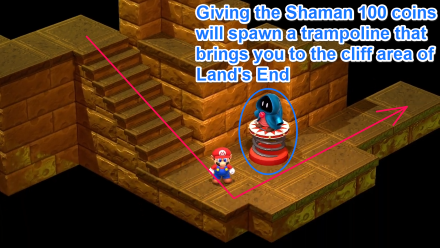 A Shaman is at the bottom of the staircase. If you pay them 100 coins, you can use the trampoline that will bring you to the cliff area of Land's End. |
| ⑬ | 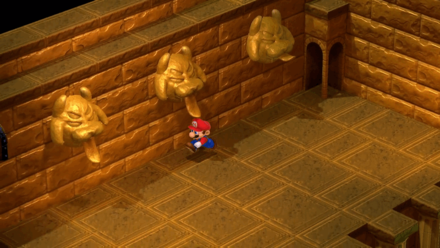 The contents of the treasure chest (seen in ⑮) will change depending on the result of the fortune. ▶ Belome Temple Fortune Guide |
| ⑭ | 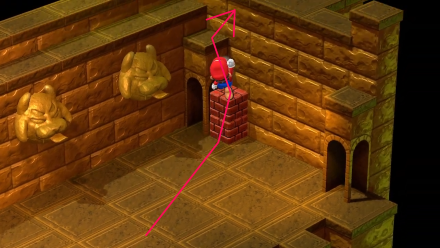 |
| ⑮ | Enter the clay pipe located at the back and proceed to the next area. |
| ⑯ | 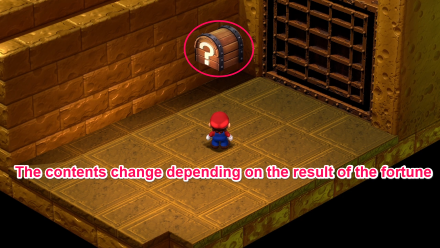 |
| ⑰ | 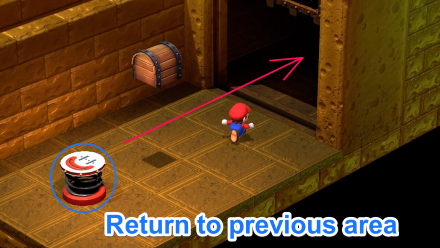 |
| ⑱ | Descend down the stairs and go through the passage to the right to proceed to the next area. |
| ⑲ | 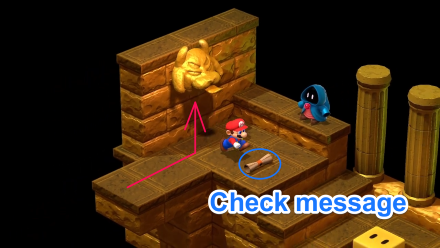 If "Mmm, I'm hungry..." is the text inside the scroll, you may proceed to the next step. If "Hmm, I'm already bored. That's it..." is the text, then go back to the previous area and try again. 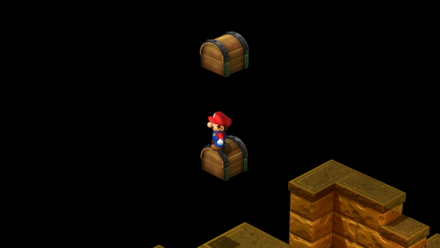 |
| ⑳ | Step on the yellow platform to descend, then proceed to the next area located in front of you. |
| ㉑ | 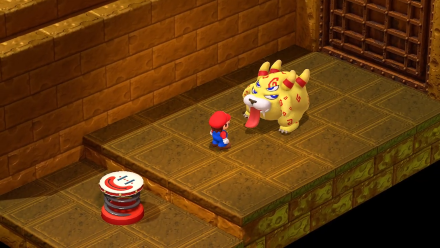 Speak to Belome to begin the battle. During the Belome boss fight, focus your attacks on Belome himself and ignore the clones. Be prepared to cure sleep status quickly or equip accessories like the Wake Up Pin to prevent it altogether. Upon their defeat, a switch will appear. Note: If the room is different from the image above, then the result of the fortune draw in ⑱ was different. Return to the previous area and start over from ⑰. ▶How to Beat Belome (Second Fight) |
| ㉒ | Step on the switch and the door will open. Go forward and proceed to the next area, the Monstro Town. |
Land's End Walkthrough, Map, and Hidden Treasure Chests
Monstro Town
| ① | 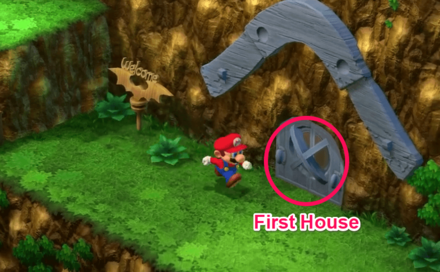 When you arrive at Monstro Town, head towards the first house on the left. |
|---|---|
| ② | 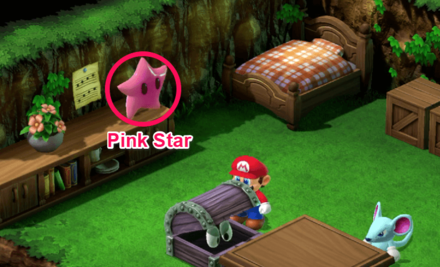 First House Talk to the Pink Star on the second floor, then go back to the first floor and talk to Monster Mama. You should be able to go to Bean Valley with the help of the flying koopas afterwards. |
| ③ | 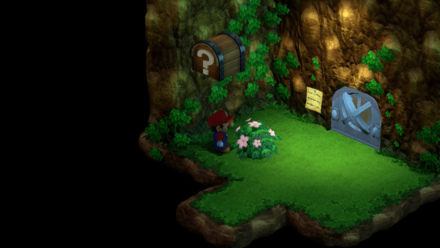 Treasure: In the room by the area's exit, go beside the bush at the northwest spot then jump to reveal the chest containing a Frog Coin. In Monstro Town, take your time to explore thoroughly - this quiet little hub hides some of the best items in the game. Talk to every NPC, check the houses, and don’t overlook any doors or corners! |
Monstro Town Walkthrough, Map, and Hidden Treasure Chests
Exploring Monstro Town
| ① | 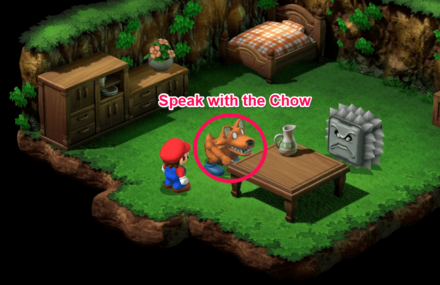 Second House • Obtain the Temple Key from the roof by speaking to the Thwomp inside 7 times. • Obtain the Attack Scarf by talking to the Chow and executing 30 Super Jumps. • You can also obtain the Super Suit when you reach 100 Super Jumps. |
|---|---|
| ② | Third House This is a sealed door with a secret boss. Purchase fireworks in Moleville and exchange it with a Shiny Stone, then bring the stone here to undo the seal. ▶How to Open the Sealed Door |
| ③ | 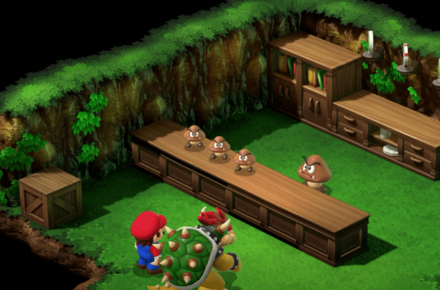 Fourth House This is an item store. Bowser's equipment and various other items are for sale. |
| ④ | 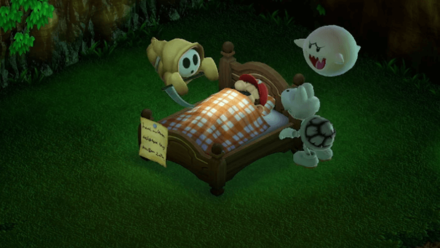 Fifth House You can start the 3 Musty Fears Quest here by talking to the Mushroom. Finding all three flags will award you with the Ghost Medal. ▶3 Musty Fears Flag Locations |
| ⑤ | 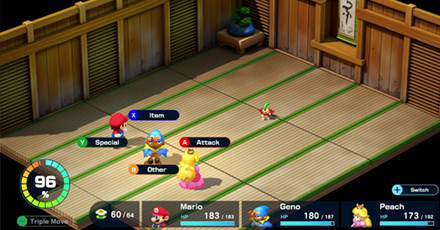 House Upstairs Obtain the Jinx Belt by defeating Jagger then Jinx (for the third time). When fighting Jinx, make sure you have protection against instant death like Safety Ring, as his later forms can knock out party members in a single hit. Each match gets progressively harder, so be ready with plenty of Pick Me Ups or use Peach’s Come Back to revive fallen allies. Stick to strong physical and non-elemental attacks, and use buffs like Geno Boost to stay ahead in this fast-paced, punishing battle. |
Land's End Pt. 2 - Land's End Cliff
| ① | Go back to the area where the Shogun in the whirpool is located. |
|---|---|
| ② | Reach the other side using the pot cannon. |
| ③ | Use the flower to reach the next room. |
| ④ | Cross the Sky Bridge to get to the whirlpool area. |
| ⑤ | 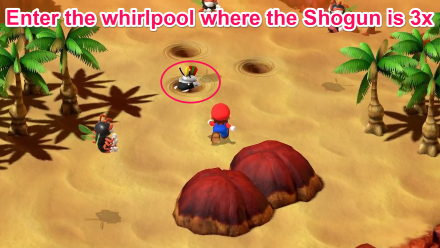 If you enter the whirlpool without the Shogun, you will be returned to the previous area. |
| ⑥ | 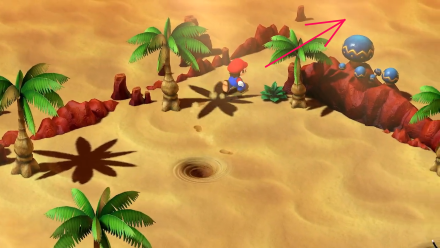 |
| ⑦ | Climb the cliff by using the Flying Koopas as platforms and enter the passage on the top of the cliff to go to Bean Valley. |
Land's End Walkthrough, Map, and Hidden Treasure Chests
Bean Valley
| ① | Enter the pipes in this order: Right → Left → Left. Then proceed to the next area through the passage located on the left.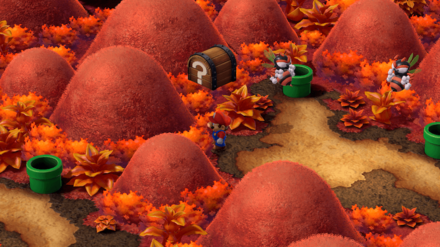 Treasure: Once you enter the pipe on the right in the first area, get to the corner beside the westernmost hill and jump to reveal the chest containing a Frog Coin.
 |
|---|---|
| ② | 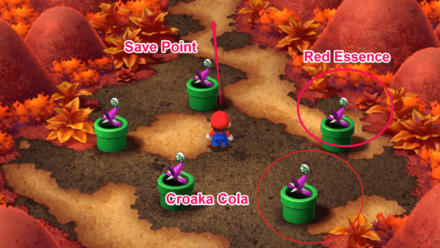 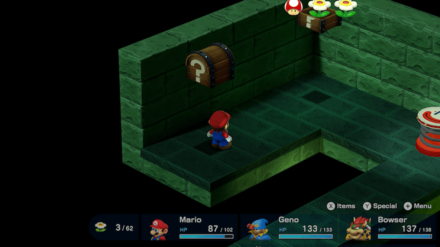 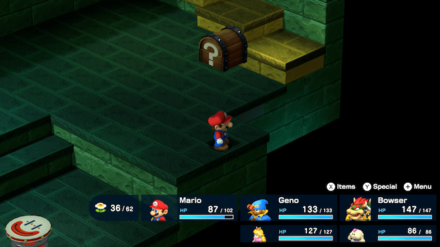 One of the treasure chests in this area is actually a trap - opening it triggers a battle with a Pleaseno, who can summon a Jinnie. Don’t get distracted by the Jinnie; focus all your attacks on Pleaseno first to end the fight faster and prevent things from getting out of hand. |
| ③ | 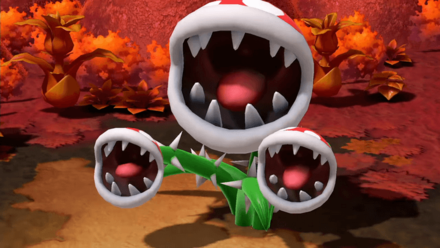 Touch the flower inside the pipe to begin the Megasmilax fight. During the Smilax fight, save Mallow’s Snowy attack for its final form - it deals strong damage to the plant boss and helps end the battle faster. Keep your party healed and focus your big moves once it transforms. Upon Megasmiliax's defeat, Shy Away will drop an item. Pick it up to receive a Seed. ▶How to Beat Megasmilax |
| ④ | Enter the pipe where Megasmilax was. |
| ⑤ | Hit the brown block from below; doing so will cause vines to appear. Hit the block once more to climb the beanstalk and proceed to Nimbus Land. |
Bean Valley Walkthrough, Map, and Hidden Treasure Chests
Nimbus Land
| ① | Climb the vines by walking towards them in this order: Green → Yellow → Blue. Then proceed to the next area. |
|---|---|
| ② |  • [Yellow Route]: This is a detour, but you can find valuable items. • [Green Route]: This is an easy and short route, but there are no valuable items here. |
| ③ | 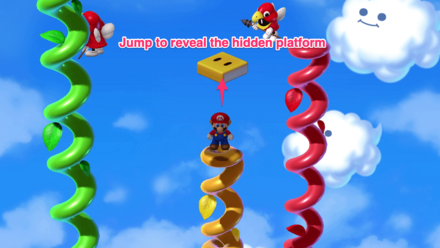 • Climb the vines in this order: Blue → Red → Yellow. From the Yellow vine, climb to the top and jump to reveal an invisible platform. Jump back onto the Red vine, then climb to the top and jump to the invisible platform, then finally jump to the Green vine. At the top, you can then find a Frog Coin and a Defense Scarf from the treasure chest. • Then, fall through the hole near the treasure chest to go to an area where you can obtain 2 Flowers from chests. • Fall down the next hole to find a trampoline that takes you to the next area. Green Route: • Climb the vines in this order: Blue → Red → Yellow → Green |
| ④ | Jump on the trampoline to move to the next area. 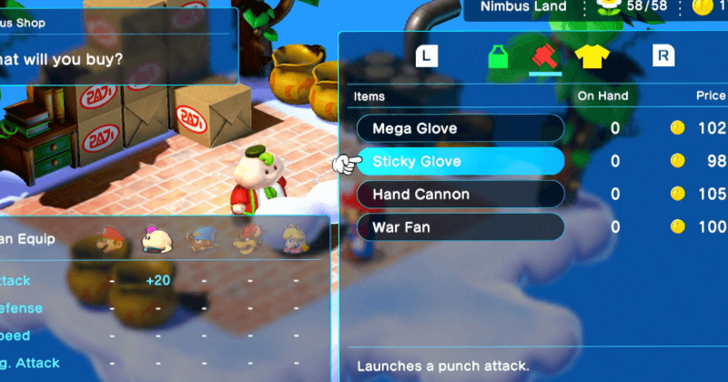 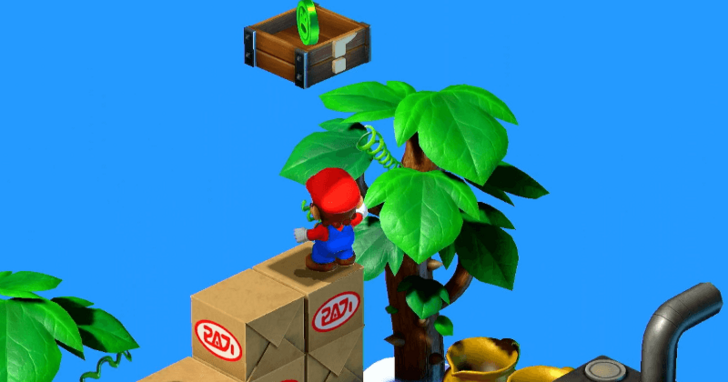 |
| ⑤ |  |
| ⑥ | An event will trigger wherein you examine the golden statue of Mario in the upper-left area of Garro's House. |
| ⑦ | 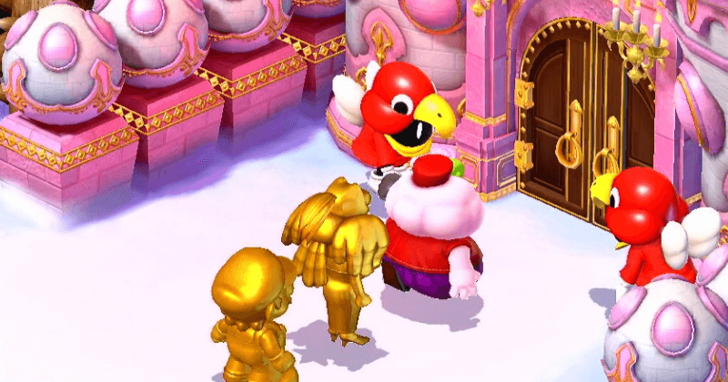 |
Nimbus Land Map and Walkthrough
Nimbus Castle
| ① | 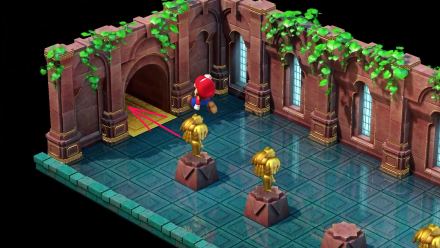 |
|---|---|
| ② | This room has a save point. If you try to open the door on the left of it, the mini-game Pretend to be a Statue will begin. Succeeding within 2 attempts will award you a Feather that can be found in the next room. If you fail twice, you will have to fight Dodo and you will not be able to obtain the Feather. ▶Dodo Statue Mini-Game ▶How to Beat Dodo (Second Fight) |
| ③ | Start from the save point, head through the main door. |
| ④ | 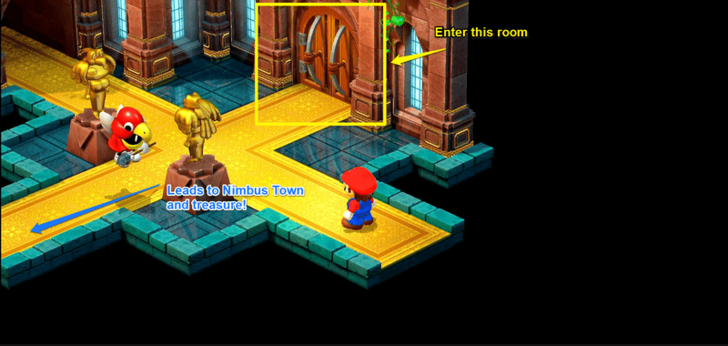 |
| ⑤ | 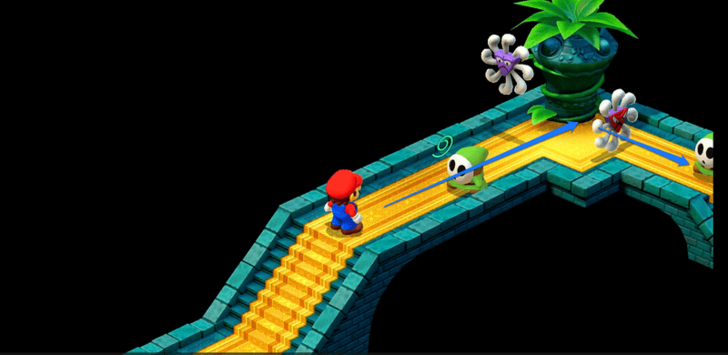 |
| ⑥ | 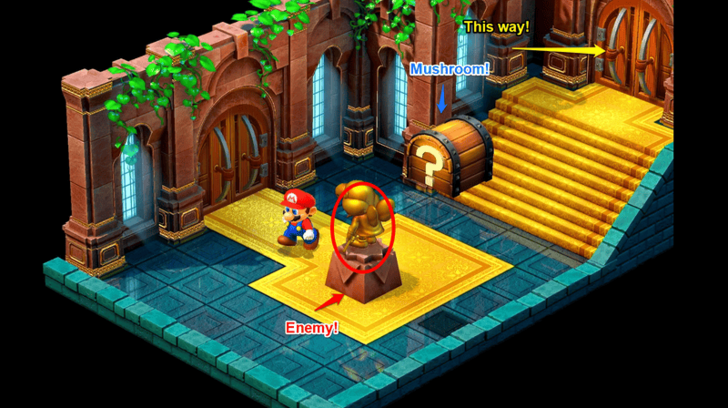 |
| ⑦ | 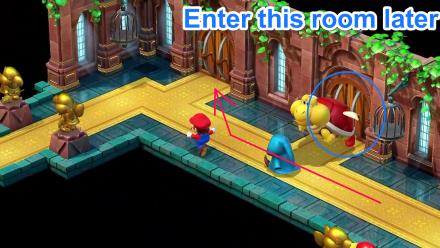 |
| ⑧ | 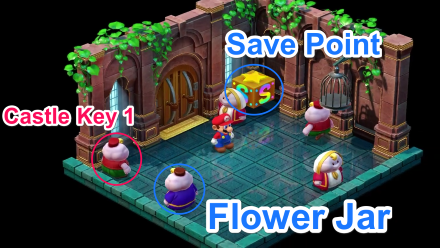 Talk to the Nimbus on the bottom left wearing red clothes to receive Castle Key 1. You may also speak to the Nimbus in blue clothes to receive a Flower Jar. Then save at the save point |
| ⑨ | Return to the room shown in ⑬ and defeat the Big Troopa in front of the door and proceed through it. |
| ⑩ | 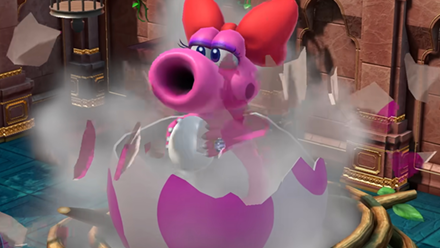 You will find a giant egg in this room; examining it will trigger the battle against Birdo. When you defeat it, you will obtain Castle Key 2. ▶How to Beat Shelly/Birdo |
| ⑪ | Go through the door in the back. |
| ⑫ | 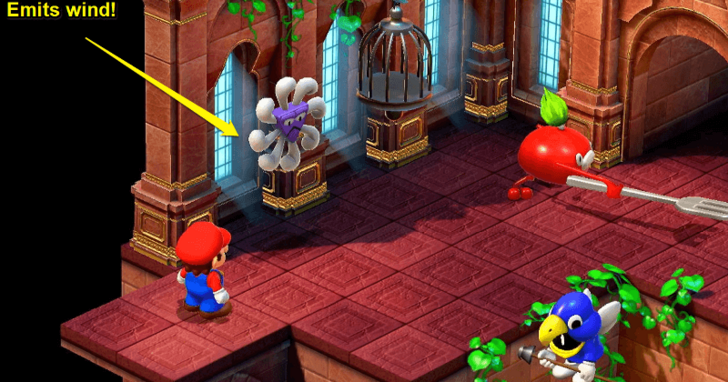 |
| ⑲ |  |
| ⑬ | 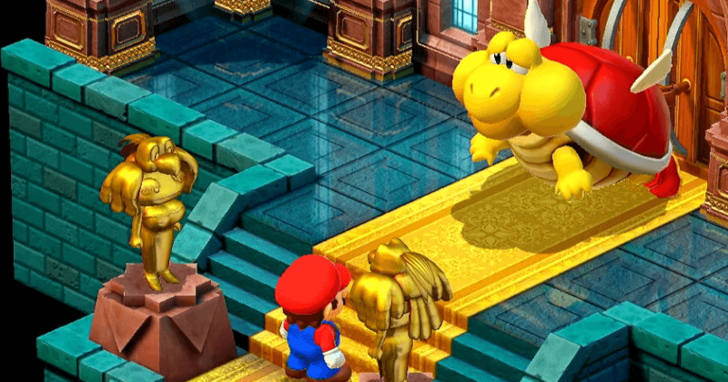 |
| ⑭ | 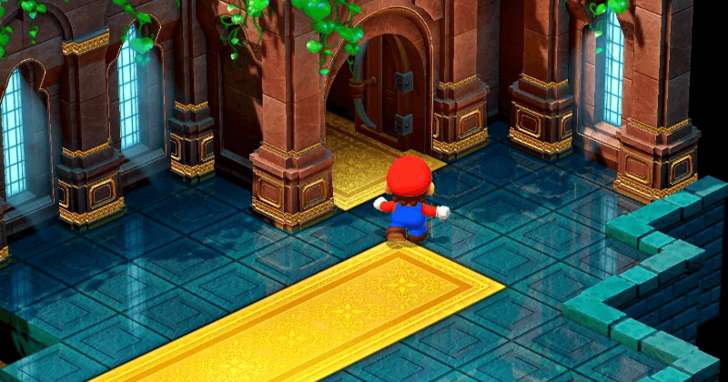 |
| ⑮ |  |
| ⑯ | 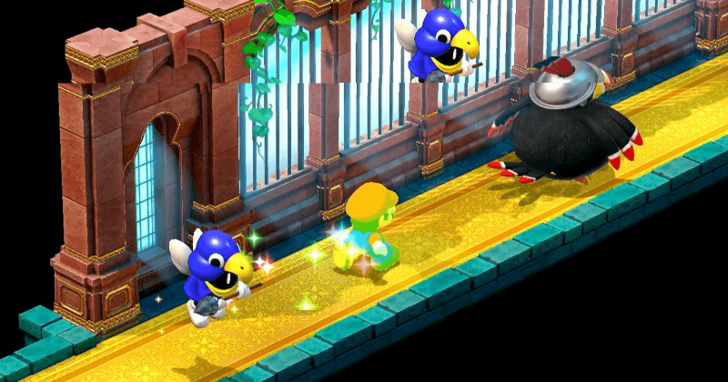 Grab the Star from the treasure chest and use it to clear the path until you reach the hallway where Dodo is pacing. Grab the Star from the treasure chest and use it to clear the path until you reach the hallway where Dodo is pacing.Jump under the treasure chest to reveal a hidden board, them jump on top of it to open the treasure chest. |
| ⑰ | Go to the door at the back of the room where Dodo is and you will enter a cloud area. |
| ⑱ | Jump off the clouds through the holes and get on the trampoline. |
| ⑲ | 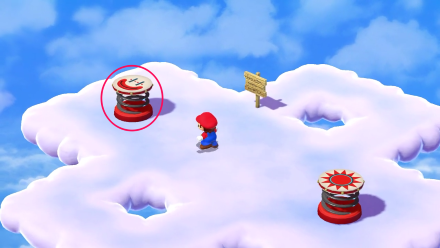 |
| ⑳ | 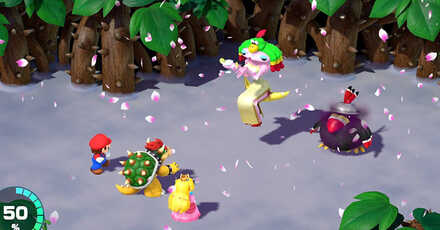 After the cutscene, Valentina's battle will commence. When you defeat her, another cutscene will trigger and you will enter the Nimbus Castle. ▶How to Beat Valentina |
| ㉑ | After the event with Mallow's parents, proceed through the door behind them, follow the path to its end and jump off the clouds as you did with ⑱. |
| ㉒ | Speak to the Nimbus guard to open the way, then head through the passage he was blocking to reach the hot springs. |
| ㉓ | Go to the next area, Barrel Volcano, from the passage at the back right of the hot springs area. Tip: Soak in the hot springs to fully heal your party, just like an inn — but free! |
Nimbus Land Walkthrough, Map, and Hidden Treasure Chests
Barrel Volcano
| ① | Proceed to the next area through the lower left passage. |
|---|---|
| ② | 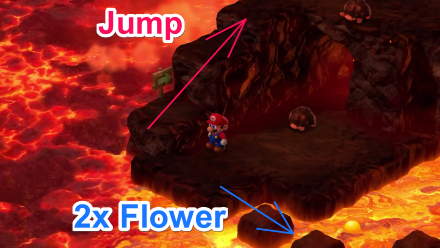 Proceed on the block situated above the magma and follow the path to the right to find 2 Flowers from treasure chests. |
| ③ | Continue following the path and go through the passage in the back. |
| ④ | Continue following the path to the next area. You can find Flowers in the treasure chest at the front and coins in the chest at the back. |
| ⑤ | 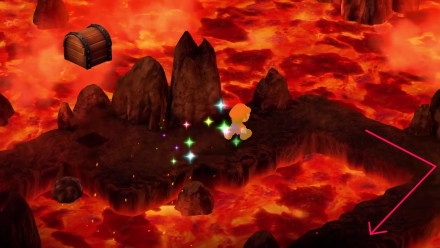 There is a Star in the treasure chest of this area. Use it to defeat the next set of enemies quickly. |
| ⑥ |  |
| ⑦ | Follow the path and go to the next area. |
| ⑧ |  You can obtain Frog Coins by jumping towards them as shown in the image above. |
| ⑨ | 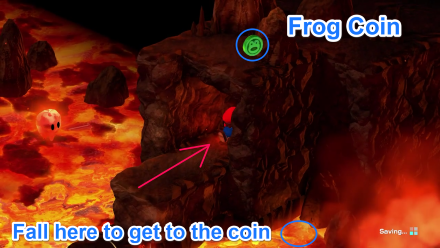 The Frog Coins in the inner passage can be obtained by falling into the position show in this image. |
| ⑩ |  You can obtain 2 Frog Coins by jumping from the block above the magma. |
| ⑪ | 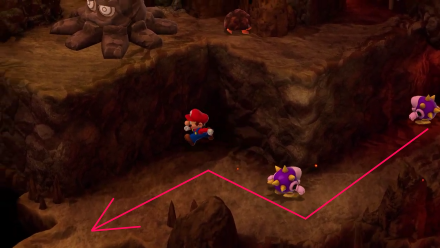 |
| ⑫ | 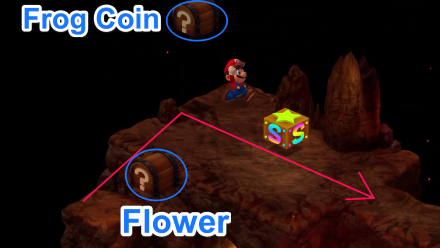 |
| ⑬ |  Continue along the path and try not to fall to the bottom. Then proceed to the next area via the upper-right passage. If you do not want to fight Stumpet, then take the path along the wall. |
| ⑭ | Follow the path and go through the passage in the upper-left. |
| ⑮ | As you continue along the path, there will be Corkepedites and Urspikes blocking the way forward. Defeat them, and proceed to the next area. |
| ⑯ | 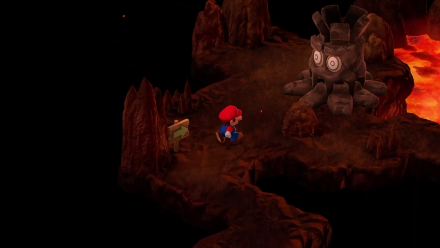 |
| ⑰ | 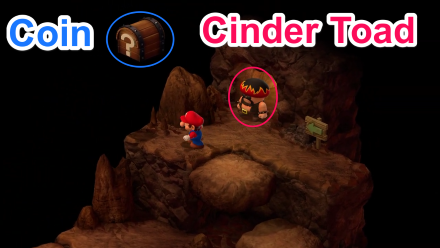 You can get coins from the treasure chest. |
| ⑱ |  |
| ⑲ | Save at the save point, then head to the next area through the upper-right passage.. |
| ⑳ | Jump over the Sky blocks and go to the next area through the passage at the back. |
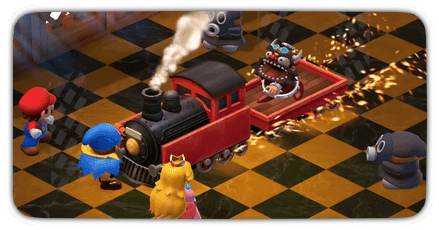
| ㉑ | 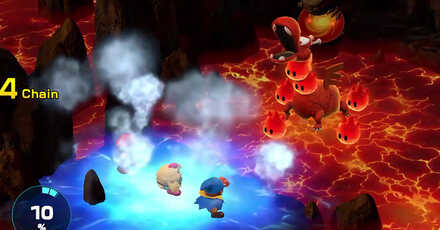 A cutscene will trigger, then the Czar Dragon fight will begin. During the fight Mallow’s Snowy works wonders - use it! ▶How to beat Czar Dragon |
| ㉒ |  After defeating Czar Dragon, it will reanimate into Zombone and the boss fight will continue. ▶How to Beat Zombone |
| ㉓ | Another cutscene will trigger when you go to the next area. |
| ㉔ | Climb up the steps, then proceed to the next area on the upper-right side. |
| ㉕ | Continue along the path while chasing Red and the others. When you arrive at the room with the trampoline, jump on it to advance to the next area. |
| ㉖ | 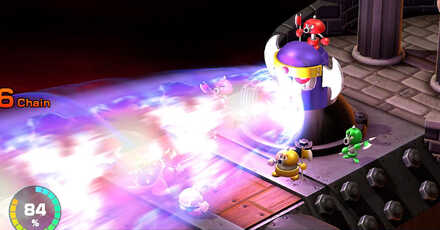 Defeat the Axem Rangers. Upon defeating the rangers, you will obtain the 6th Star Piece. ▶How to Beat the Axem Rangers |
Barrel Volcano Walkthrough, Map, and Hidden Treasure Chests
Sixth Star Piece Bosses
| Super Jump to a Section! | ||
|---|---|---|
| Speardovich | Belome | Megasmilax |
| Dodo | Birdo | Valentina |
| Czar Dragon | Axem Rangers | Secret Boss |
Speardovich
Overview
Speardovich
Speardovich Clone
Speardovich Strategy and Tips
- Use Accessories that Emphasize Status
- Strengthen your Allies with Geno Boost
- Focus your Normal Attacks on the Real Speardovich!
- Use Mario and Geno for Normal Attacks while Peach on healing support
- Initial Target Indicates the Real Speardovich
- Be careful for his powerful AoE attacks like Water Blast, Meteor Blast, and Static Electricity
How to Beat Speardovich and Rewards
Belome (Second Fight)
Overview
|
|
|||
| Recommended Level | HP | ||
|---|---|---|---|
| 12 | 1200 | ||
| Attacks | |||
| Aurora Flash, Light Bubble, Lulla-Bye | |||
|
Weaknesses and Resistances
|
|||
|
|
|
|
|
|
|
|
|
|
Belome Strategy and Tips
- Bring Protection against Sleep Effects
- Ignore the Clones and Focus on Belome
- Inflict Fear with Bowser's Terrorize
- Use Normal Attacks as Belome has no Weaknesses
How to Beat Belome and Rewards
Megasmilax
Overview
Megasmilax
Smilax
Megasmilax Strategy and Tips
- Bring Protection from Status Ailments
- Defeat Megasmilax's Buds with Specials
- Use Mallow's Snowy or Ice Attacks to Exploit its Weakness
How to Beat Megasmilax and Rewards
Dodo
Overview
Dodo Strategy and Tips
- Bring Protection Against Silence
- Inflict Fear with Bowser's Terrorize
- Use Bowser for a 1-on-1 duels
- Defeat Dodo First in Valentina Fight
- Utilize Fire Attacks to Exploit his Weakness
Shelly/Birdo
Overview
Birdo
Shelly
Eggbert
Shelly/Birdo Strategy and Tips
- Birdo is a Multi-Phase Boss and will start in Shelly Form
- Use Accessories Focused on Defense
- Block and Attack Eggberts
- Strengthen your Allies with Geno Boost
- Be careful of her High Burst Damage potential
How to Beat Shelly/Birdo and Rewards
Valentina
Overview
Valentina
Dodo (3rd Encounter)
Valentina Strategy and Tips
- Prioritize Defeating Dodo First
- Bring Protection against Sleep and Mushroom Status Effects
- Position Bowser Second to Fight Dodo
- Use Normal Attacks and FP for Recovery
- Be careful of her Special Move, Petal Blast
How to Beat Valentina and Rewards
Czar Dragon / Zombone
Overview
Czar Dragon
Zombone
Czar Dragon Strategy and Tips
- Prevent Fear with Accessories
- Stock Up on Items
- Defeat the Helios with Snowy
- Defend when HP is Low
- Use Ice Attacks to Exploit its Weakness
Zombone Strategy and Tips
- Use Lightning Attacks to Exploit its Weakness
- Defend when HP is Low
- Use Pure Water to Damage Zombone
How to Beat Czar Dragon / Zombone and Rewards
Axem Rangers
Overview
Axem Red
Blade
Axem Black
Axem Yellow
Axem Green
Axem Pink
| | |||
| Recommended Level | HP | ||
|---|---|---|---|
| 17 | 550 | ||
| Attacks | |||
| Spritz Bomb | |||
| Weaknesses and Resistances | |||
| | | | |
| | | | |
| | |||
| Recommended Level | HP | ||
|---|---|---|---|
| 17 | 600 | ||
| Attacks | |||
| Body Slam | |||
| Weaknesses and Resistances | |||
| | | | |
| | | | |
Axem Rangers Strategy and Tips
- Boost your Attack and Defense with Geno Boost
- Avoid hitting Axem Black with a Special Move
- Prioritize Axem Pink and Green
- Heal before Defeating All Rangers
- Heal After Breaker Beam
How to Beat Axem Rangers and Rewards
Secret Boss
The following content contains spoilers about Monstro Town's secret boss. Please only click the spoiler tag below if you really want to know the identity of the secret boss!
Culex Overview
| | |||
| Recommended Level | HP | ||
|---|---|---|---|
| 22 | 4096 | ||
| Attacks | |||
| Shredder, Meteor Blast, Flame Stone, Dark Star | |||
| Weaknesses and Resistances | |||
| | | | |
| | | | |
Culex Strategy and Tips
- Equip Accessories for Elemental Attacks
- Prepare at Least 4 Rock Candy
- Target Culex's Crystals
- Geno Boost Mario's Normal Attacks
- Wait for the Enemy's FP to Run Out
Super Mario RPG Remake Related Guides

| All Star Piece Chapters Walkthrough | |
|---|---|
 1st Star Piece Walkthrough 1st Star Piece Walkthrough |
 2nd Star Piece Walkthrough 2nd Star Piece Walkthrough |
 3rd Star Piece Walkthrough 3rd Star Piece Walkthrough |
 4th Star Piece Walkthrough 4th Star Piece Walkthrough |
 5th Star Piece Walkthrough 5th Star Piece Walkthrough |
 6th Star Piece Walkthrough 6th Star Piece Walkthrough |
 7th Star Piece Walkthrough 7th Star Piece Walkthrough |
 Post-Game Contents Post-Game Contents |
Comment
Author
6th Star Piece Walkthrough (Chapter 6)
Please participate in our site
improvement survey
03/2026
improvement survey
03/2026
Would you assist in
improving Game8's site?
improving Game8's site?

×
We are listening to our users' valuable opinions and discussing how to act on them.
The information collected through this survey will be used for the purpose of improving our services. In addition, the information will only be disclosed a part of a statistic in a format that will not allow identification of personal information.
Begin Survey
Not Now
×
Please rate each item regarding Game8.co's Advertisements.
Amount of Ads
Very Dissatisfied
Somewhat Dissatisfied
Fine
Somewhat Satisfied
Highly Satisfied
Placement of Ads
Timing of Ad Display
Ad Loading Speed
Safeness of Ads
Content of Ads
×
Please rate each item regarding Game8.co's Quality of Articles.
Amount of information
Very Dissatisfied
Somewhat Dissatisfied
Fine
Somewhat Satisfied
Highly Satisfied
Frequency of updates
Speed of new information
Accuracy of articles
Understandibility of articles
Readability of sentences
×
Please rate each item regarding Game8.co's Usability of the Site.
Ease of finding information
Very Dissatisfied
Somewhat Dissatisfied
Fine
Somewhat Satisfied
Highly Satisfied
Loading Speed
Use of Color
Font Size
Visibility of Images
Easy to Understand Layout
×
Please rate each item regarding Game8.co's Message Boards, Comments.
Ease of Writing
Very Dissatisfied
Somewhat Dissatisfied
Fine
Somewhat Satisfied
Highly Satisfied
Readability
Ease in Finding Information
Comment Quality
Comment Quantity
Admin Response
×
Please rate each item regarding Game8.co's Site's new design.
Please rate our site's new design
Very Dissatisfied
Somewhat Dissatisfied
Fine
Somewhat Satisfied
Highly Satisfied
Do you think that the website's design change makes the site easier to use?
Has the new design made it easier for you to find information on the site?
Has the new design improved the overall visual appeal of the site?
How would you rate your overall satisfaction with the new design of the site?
×
How likely are you to recommend Game8 to someone you know?
Very Unlikely
0
1
2
3
4
5
6
7
8
9
10
Very Likely
If you have other opinions regarding potential improvement to the website, please share them with us. We would appreciate your honest opinion.
Note: This is a free response section, so you can proceed without entering anything.
Note: Please be sure not to enter any kind of personal information into your response.
Note: Please be sure not to enter any kind of personal information into your response.
×
Thank You
×
Thank you for participating in our survey! Your answers will help us to improve the quality of our website and services.
We hope you continue to make use of Game8.
We hope you continue to make use of Game8.
Close
Rankings
Gaming News


![Everwind Review [Early Access] | The Shaky First Step to A Very Long Journey](https://img.game8.co/4440226/ab079b1153298a042633dd1ef51e878e.png/thumb)

![Monster Hunter Stories 3 Review [First Impressions] | Simply Rejuvenating](https://img.game8.co/4438641/2a31b7702bd70e78ec8efd24661dacda.jpeg/thumb)
Popular Games

Genshin Impact Walkthrough & Guides Wiki
Honkai: Star Rail Walkthrough & Guides Wiki
Umamusume: Pretty Derby Walkthrough & Guides Wiki
Pokemon Pokopia Walkthrough & Guides Wiki
Resident Evil Requiem (RE9) Walkthrough & Guides Wiki
Monster Hunter Wilds Walkthrough & Guides Wiki
Wuthering Waves Walkthrough & Guides Wiki
Arknights: Endfield Walkthrough & Guides Wiki
Pokemon FireRed and LeafGreen (FRLG) Walkthrough & Guides Wiki
Pokemon TCG Pocket (PTCGP) Strategies & Guides Wiki


Recommended Games
Diablo 4: Vessel of Hatred Walkthrough & Guides Wiki
Fire Emblem Heroes (FEH) Walkthrough & Guides Wiki
Yu-Gi-Oh! Master Duel Walkthrough & Guides Wiki
Super Smash Bros. Ultimate Walkthrough & Guides Wiki
Pokemon Brilliant Diamond and Shining Pearl (BDSP) Walkthrough & Guides Wiki
Elden Ring Shadow of the Erdtree Walkthrough & Guides Wiki
Monster Hunter World Walkthrough & Guides Wiki
The Legend of Zelda: Tears of the Kingdom Walkthrough & Guides Wiki
Persona 3 Reload Walkthrough & Guides Wiki
Cyberpunk 2077: Ultimate Edition Walkthrough & Guides Wiki


All rights reserved
© Nintendo/SQUARE ENIX Characters: © Nintendo, © SQUARE ENIX
The copyrights of videos of games used in our content and other intellectual property rights belong to the provider of the game.
The contents we provide on this site were created personally by members of the Game8 editorial department.
We refuse the right to reuse or repost content taken without our permission such as data or images to other sites.