Johnny Rematch: How to Beat and Unlock
This is a guide for Rematch Johnny, known in-game as Duel-Ready Johnny, a post-game rematch boss of Johnny in Super Mario RPG Remake. Read on to learn how you can beat Rematch Johnny, its stats, rewards, location, weaknesses, and best party setup!
List of Contents
How to Unlock Johnny Rematch
Unlocked in Post-Game
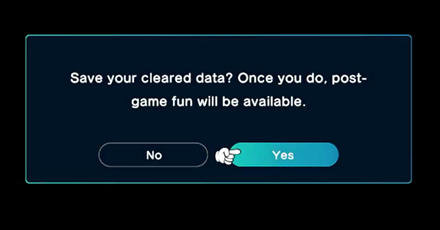
The post-game of Super Mario RPG Remake is unlocked by completing the main story, which requires defeating Smithy, the final boss found in his Weapon World.
Revisit Sunken Ship

After reaching the post-game, revisit the Sunken Ship and talk to Johnny. You can choose to accept or decline this challenge.
Johnny Weaknesses and Recommended Level
Overview
Duel-Ready Johnny (Rematch Johnny)
|
|
|||
| Recommended Level | HP | ||
|---|---|---|---|
| 25 | 2000 | ||
| Attacks | |||
| Get Tough, Skewer, Diamond Saw, Fire Saber | |||
|
Weaknesses and Resistances
|
|||
|
|
|
|
|
|
|
|
|
|
This is a post-game rematch version of the original Johnny. Post-game bosses are stronger variants of the main story, and may have significant changes to stats.
How to Beat Johnny and Rewards
Rewards
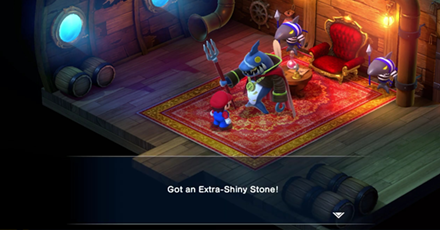
Defeating Rematch Johnny will give you the Extra-Shiny Stone, which you need to fight Culex 3D.
Once you have the Extra-Shiny Stone, enter the door where you fight Culex in Monstro Town to get a chance to fight his 3D version!
How to Unlock the Extra-Shiny Stone
Best Party for Johnny Rematch
Best Party Setup
| Active Party (Duelist) | |
|---|---|
| Character | Role |
|
|
・Main duelist ・Deal damage with normal attacks and specials whenever possible ・Reduce damage with blocks |
| Active Party (Cheering) | |
|
|
・Provides Attack Up and Speed Up Ally Buff |
|
|
・Provides Magic Defense Up Ally Buff |
Recommended Equipment and Level
| Active Party | |
|---|---|
| Character/Level | Equipment |
|
Level: 23 |
Weapon:
Armor: Alternative Armor: Accessory: |
Exchange equipment with other party members when needed.
Take note that Mario will be fighting alone in this battle. Make sure to give him the best equipment before the fight!
It is recommended to defeat Rematch Johnny as quick as you can since each of his attacks can still be devastating without perfect blocks. You can try out the Lazy Shell Armor for reducing damage at the cost reduced damage that you deal.
Remember that you cannot recover your HP and use items in this fight, so choosing higher attack or higher defense is a matter of whether you can endure Johnny and if you need more time to make or correct battle decisions.
Best Equipment for Each Character
How to Beat Johnny Rematch and Strategy
|
|
Equip the Quartz Charm from Culex
| Accessories | Effect |
|---|---|
| ・Prevents instant death, halves enemy attack damage received, and adds 50% damage to attacks performed. |
It is best that you have the best equipment available for Mario. Obtaining and equipping the Quartz Charm is highly recommended since it gives you access to buffs that you normally cannot have without other support buffs (like Geno's Geno Boost).
This will make the fight less demanding in terms of using Action Commands, since you will have to rely on well-timed blocks to survive.
Can Mitigate Lazy Shell Armor Debuffs
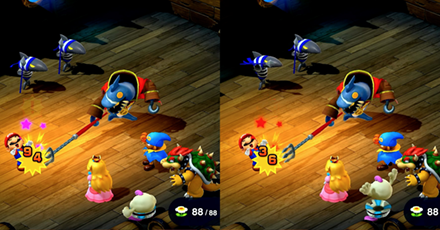
Left: Hero Shirt, Right: Lazy Shell Armor. Tested at Lv. 29 with Balanced Build.
Equipping the Quartz Charm will also mitigate the debuffs given by the Lazy Shell Armor (which increases your defense tremendously) when it is equipped. At Lv. 29, with a Mario Balanced Build, you should be able to take around 5 direct hits from Skewers, compared to the Hero Shirt which will put you at risk of 2-3 direct hits depending on Mario's health (around 190+ at that level).
The Lazy Shell Armor will also help reduce damage from special attacks like Fire Saber and Diamond Saw to 1 damage on block.
This can make it more comfortable in dealing with Rematch Johnny at higher levels, enabling you to receive more punishment from his damaging Skewers and giving you more chances for a come back if you make mistakes. If you can hold on to the fight with good but not consistent perfect blocks, the Lazy Shell Armor is an ideal alternative to use.
Purely a One-on-One Duel
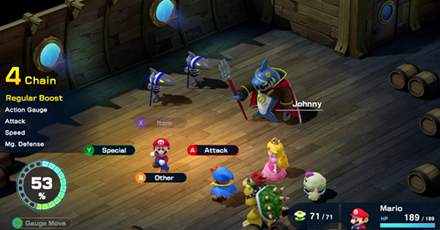
Unlike his fight alongside his Bandana Blues in the main story, this post-game boss battle with him is purely a one-on-one duel. This is the ultimate test in knowing Mario's and Johnny's moves.
Make sure to have the best equipment ready before taking this fight. If needed, switch out equipment with other party members! It would be good also to grind levels if you want to make the fight more convenient.
Set Your Active Party for Ally Buffs
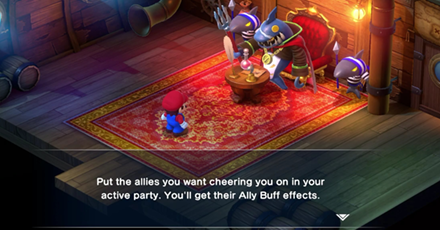
Your active party in this boss battle will not be fighting alongside you. Instead, they will be on the sidelines cheering for you and providing you their passive Ally Buffs.
It is recommended to have Geno for a boost in Attack and Speed, and Peach for Magic Defense in the active party slot.
Use Normal Attacks on Rematch Johnny
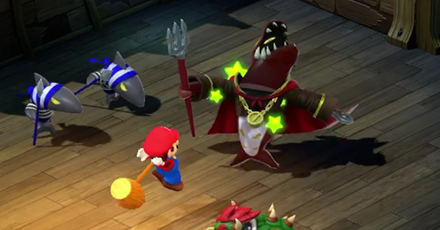
Rematch Johnny is resistant to specials, so it best you focus on dealing damage to him with normal attacks! Time Mario's attacks as much as you to consistently deal extra damage.
Practice Block Timing
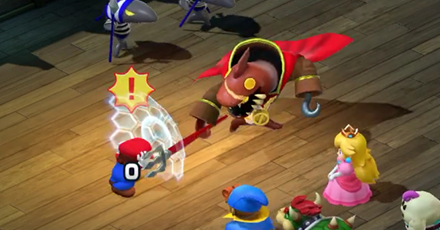
Since this battle is a one-on-one with Johnny, making sure you can survive his attacks is extremely important!
Johnny's Skewer this time around can be particularly devastating since it can cause enough damage for a 1-hit KO. Make to block this one, especially when he is buffed with Get Tough.
Make sure to time your blocks to reduce damage receive. If needed, heal yourself with Max Mushrooms!
You Cannot Use Items
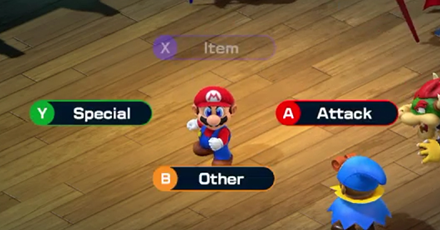
During the fight against Rematch Johnny, the Item button will be faded out, meaning that you will be unable to use any items.
This locks you out in any recovery items for the fight. Make sure that you have replenished your HP prior to duelling with Johnny.
Johnny Rematch Attacks
Rematch Johnny Attacks
Normal Attack
Rematch Johnny will pull back the trident in his hand to perform a stab. To time a block on this, it is best press right as he extends the weapon with his hand.
Skewer
Rematch Johnny's signature Skewer is the more damaging for of his regular attack, signalled by the rotating tip. To block this, time your button press right as the trident extends.
Take note that he will not do a pull animation on this one (instead he will lower and position his weapon.)
Diamond Saw
Two crystal snowflakes will be launched right behind Mario in a movement similar to a boomerang.
You will want to wait momentarily and listen in as the snowflakes get closer from behind, then time your button press.
Fire Saber
Time your button press just right after he shakes the sword for the third time (it will look the slowest compared to his first two sword shakes).
Vigor Up
Vigor Up is used to increased its user's attack power, so Duel-Ready Johnny's attacks will hit harder.
Make sure to practice your Action Command blocks well since doing perfect blocks to reduce your damage to the minimum will help!
Get Tough
Get Tough increases its user's defense power, and will be used by Duel-Ready Johnny when his HP is low enough. This signals the second-half of the battle.
Super Mario RPG Remake Related Guides

All Bosses
| 1st Star Piece Bosses | ||
|---|---|---|
| Bowser | Hammer Bros. | Croco (1st Fight) |
| Claymorton | - | - |
| 2nd Star Piece Bosses | ||
| Belome (1st Fight) |
Bowyer | - |
| 3rd Star Piece Bosses | ||
| Croco (2nd Fight) |
Punchinello | - |
| 4th Star Piece Bosses | ||
| Booster | Knife Guy and Grate Guy | Bundt and Raspberry |
| 5th Star Piece Bosses | ||
| King Calamari | Johnny | - |
| 6th Star Piece Bosses | ||
| Speardovich | Belome (2nd Fight) |
Megasmilax |
| Birdo | Dodo | Valentina |
| Czar Dragon | Zombone | Axem Rangers | 7th Star Piece Bosses |
| Wizakoopa | Boomer | Exor |
| Count Down and Ding-a-Ling | Cloaker and Domino | Clerk |
| Manager | Director | Gunyolk and Factory Chief |
| Smithy (Final Boss) |
- | - |
Non-Story Bosses
| Non-Story Bosses | ||
|---|---|---|
| Jinx | Jagger | Culex |
Post-Game Rematch Bosses
| Post-Game Rematch Bosses | ||
|---|---|---|
| Mario-Style Jinx | Scratchy-Throat Belome | Leveled-Up Punchinello |
| Engine 023 Booster | Extra Fancy Bundt & Raspberry |
Duel-Ready Johnny |
| Culex 3D | - | - |
Comment
"Use Max Mushroom to heal", right below that statement... cannot use items. lmao
Author
Johnny Rematch: How to Beat and Unlock
improvement survey
03/2026
improving Game8's site?

Your answers will help us to improve our website.
Note: Please be sure not to enter any kind of personal information into your response.

We hope you continue to make use of Game8.
Rankings
- We could not find the message board you were looking for.
Gaming News
Popular Games

Genshin Impact Walkthrough & Guides Wiki

Honkai: Star Rail Walkthrough & Guides Wiki

Umamusume: Pretty Derby Walkthrough & Guides Wiki

Pokemon Pokopia Walkthrough & Guides Wiki

Resident Evil Requiem (RE9) Walkthrough & Guides Wiki

Monster Hunter Wilds Walkthrough & Guides Wiki

Wuthering Waves Walkthrough & Guides Wiki

Arknights: Endfield Walkthrough & Guides Wiki

Pokemon FireRed and LeafGreen (FRLG) Walkthrough & Guides Wiki

Pokemon TCG Pocket (PTCGP) Strategies & Guides Wiki
Recommended Games

Diablo 4: Vessel of Hatred Walkthrough & Guides Wiki

Cyberpunk 2077: Ultimate Edition Walkthrough & Guides Wiki

Fire Emblem Heroes (FEH) Walkthrough & Guides Wiki

Yu-Gi-Oh! Master Duel Walkthrough & Guides Wiki

Super Smash Bros. Ultimate Walkthrough & Guides Wiki

Pokemon Brilliant Diamond and Shining Pearl (BDSP) Walkthrough & Guides Wiki

Elden Ring Shadow of the Erdtree Walkthrough & Guides Wiki

Monster Hunter World Walkthrough & Guides Wiki

The Legend of Zelda: Tears of the Kingdom Walkthrough & Guides Wiki

Persona 3 Reload Walkthrough & Guides Wiki
All rights reserved
© Nintendo/SQUARE ENIX Characters: © Nintendo, © SQUARE ENIX
The copyrights of videos of games used in our content and other intellectual property rights belong to the provider of the game.
The contents we provide on this site were created personally by members of the Game8 editorial department.
We refuse the right to reuse or repost content taken without our permission such as data or images to other sites.





![Monster Hunter Stories 3 Review [First Impressions] | Simply Rejuvenating](https://img.game8.co/4438641/2a31b7702bd70e78ec8efd24661dacda.jpeg/thumb)


Yeah, I’m noticing errors like this throughout the Game8 for this game. I usually expect better from this website