Walkthrough and All Chapters
★ Super Mario RPG Remake out now: Full review here!
┗ Changes from the Original Game
★ Complete 100% Walkthrough updated for the Remake!
☆ 12 Beginner's Tips and Tricks
★ Best Character Tier List
☆ Secrets and Easter Eggs
Beat the game with Game8's complete story walkthrough and chapter list for Super Mario RPG Remake. Read on for the complete list of walkthroughs and chapters per location, how to get all Star Pieces, and hidden chests, and more!
List of Contents
Walkthrough and Chapter List
| Jump to a Star Piece Chapter! | |||
|---|---|---|---|
This walkthrough guide has individual sections for each of the Worlds in the Super Mario RPG Remake! If you wish to jump to a certain part of the story, please refer to this directory.
All Star Piece Chapter Walkthroughs
 1st Star Piece Walkthrough
 2nd Star Piece Walkthrough
 3rd Star Piece Walkthrough
 4th Star Piece Walkthrough
 5th Star Piece Walkthrough
 6th Star Piece Walkthrough
 7th Star Piece Walkthrough
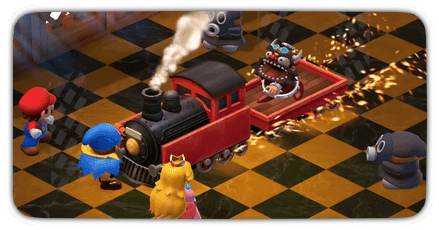 Post-Game Contents
Beginner Guides
Before diving in the wacky world of Super Mario RPG Remake, you might want to check out these guides to help you on your journey!
Beginner's Guide: 10 Tips and Tricks to Get Started
How to Get the First Star Piece
| Jump to a Star Piece Chapter! | |||
|---|---|---|---|
| Objectives |
|---|
|
|
1st Star Piece Walkthrough (Chapter 1)
Best Party and Recommended Level to Get FIrst Star Piece
| Party | Recommended Level | ||
|---|---|---|---|
 Mario Mario
|
 Mallow Mallow
|
4 | |
Bowser's Castle
| ① | Proceed along the path while defeating the Terrapins. |
|---|---|
| ② | 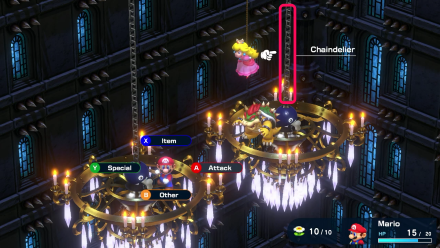 How to Beat Bowser |
| ③ | Defeating Bowser will bring you to the next map “Mario's House”. |
Mario's House (Tutorial)
| ① | 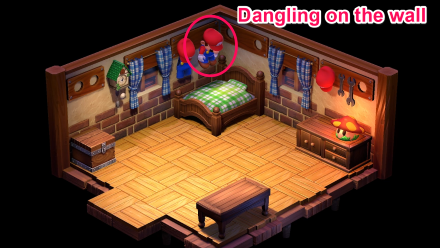 |
|---|---|
| ② | 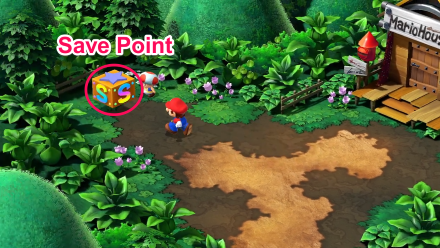 |
| ③ | 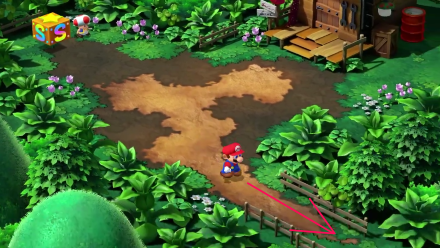 |
| ④ | Finish the cutscene at Bowser's Keep then head back to Mario's House. |
| ⑤ | An event will trigger when you talk to Toad then you can exit the house again. |
| ⑥ | 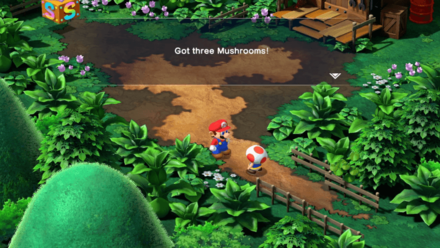 |
| ⑦ | Exit then proceed to Mushroom Way. |
Mushroom Way
| ① | 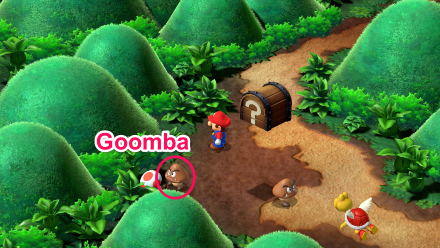 |
|---|---|
| ② |  |
| ③ | 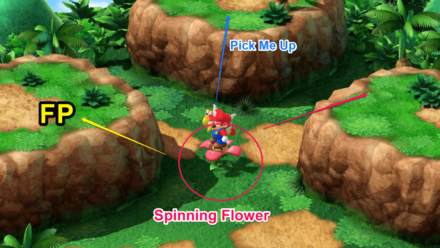 ┗ Go on the middle platform to get a Pick Me Up. ┗ Go to the left platform and get the bag to gain a Flower Point. |
| ④ |  |
| ⑤ | 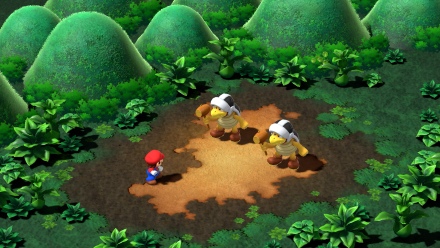 Follow the road until you encounter the Hammer Bros. Defeat them and obtain the Hammer. You can equip it from the menu. ▶ How to Beat Hammer Bros |
| ⑥ |  |
Mushroom Kingdom
| ① |  |
|---|---|
| ② | An event will trigger when you enter the back room where the chancellor is found. |
| ③ |  After talking to the chancellor, go to the cellar vault and get 10 Coins, a Flower, and a Mushroom from the chests then head to Peach's room and interact with the blue chair to get a Mushroom. After talking to the chancellor, go to the cellar vault and get 10 Coins, a Flower, and a Mushroom from the chests then head to Peach's room and interact with the blue chair to get a Mushroom. |
| ④ | Leave the castle to trigger an event. |
| ⑤ |  Talk to Mallow who is crying outside. Mallow will join the party after. Talk to Mallow who is crying outside. Mallow will join the party after. |
| ⑥ | 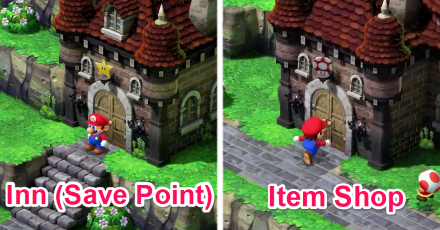 Examine the shop to buy some armor and if you have extra money to spare, you can purchase some accessories too. Examine the shop to buy some armor and if you have extra money to spare, you can purchase some accessories too. |
| ⑦ | Go to the basement of the shop and follow the Toad's instructions. This will reveal a Hidden Treasure Chest which contains the Signal Ring! |
| ⑧ | 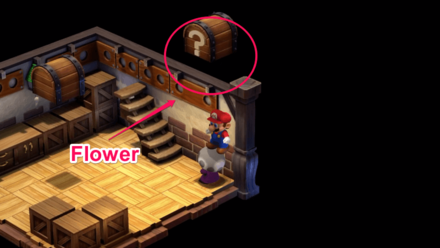 |
| ⑨ | 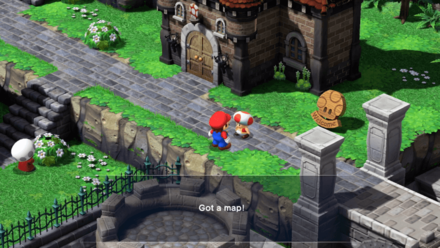 |
Bandit's Way
| ① |  |
|---|---|
| ② |  |
| ③ | Use the moving platforms to traverse and reach the next elevated area. |
| ④ | 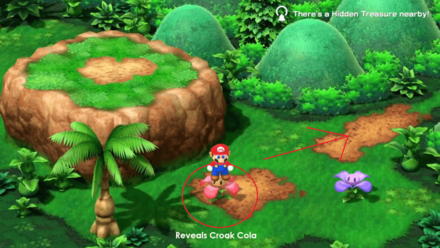 |
| ⑤ | Follow through the path to proceed to the next zone once again. |
| ⑥ | If you use the moving platform to open the treasure chest, you can become invincible and defeat all the enemies for easy experience. |
| ⑦ | 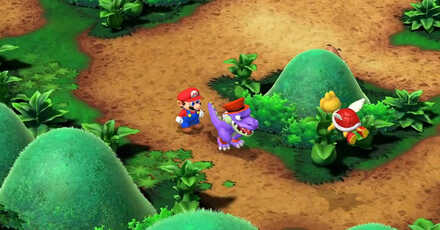 He will be moving around at a predictable pattern, so you should take the time to study it when you are hiding from him. ▶ How to Catch Croco |
| ⑧ |  A battle with Croco will start after you have caught him three times. ▶ How to Beat Croco |
| ⑨ |  |
Mushroom Kingdom Part 2
| ① | Head back to the Chancellor's Room.
┗ You can take the left path and help the toad reach Peach's room to obtain a Flower Tab. You can also talk to the old man to recover HP . ┗ You can take the right path and talk to the vault keeper inside the room to get the Wake up Pin. |
|---|---|
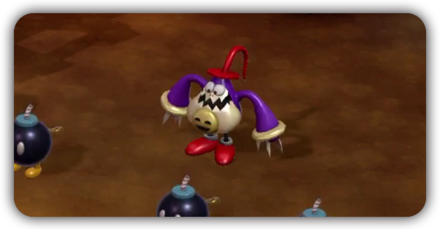
| ② |  When you reach the Chancellor's Room, you'll head straight to a boss battle with Claymorton. Defeating Claymorton will net you the 1st Star Piece. ▶ How to Beat Claymorton |
How to Get the Second Star Piece
| Jump to a Star Piece Chapter! | |||
|---|---|---|---|
| Objectives |
|---|
|
|
2nd Star Piece Walkthrough (Chapter 2)
Best Party and Recommended Level to Get Second Star Piece
| Party | Recommended Level | ||
|---|---|---|---|
|
Mario
|
Mallow
|
6 | |
Mushroom Kingdom Part 2 Continuation
| ① | 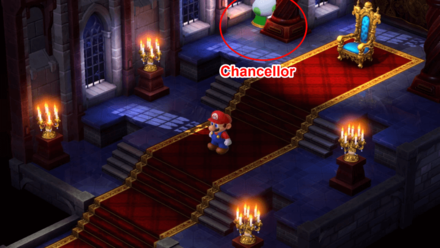 |
|---|---|
| ② |  |
| ③ | 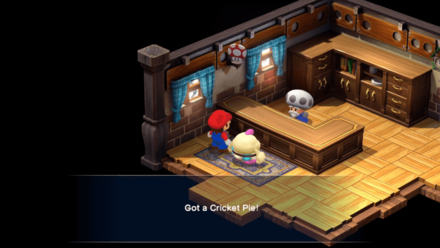 ▶How to Use Cricket Pie |
| ④ | 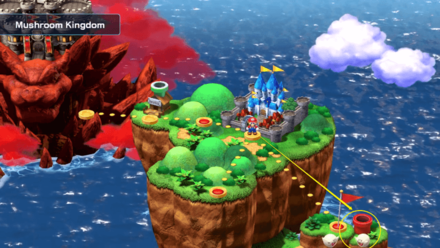 |
Kero Sewers
| ① | When you enter the Kero Sewers area, you'll immediately enter the pipe that will take you to the actual sewers. |
|---|---|
| ② |  |
| ③ | Enter the pipe after crossing the water. |
| ④ | 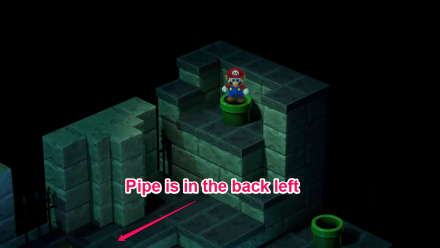 |
| ⑤ | 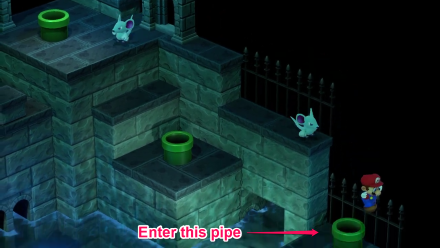 |
| ⑥ | 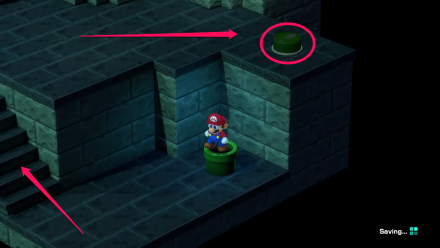 The button with the exclamation mark will drain the water which will open up new areas. |
| ⑦ | 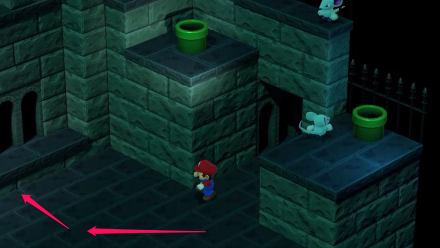 |
| ⑧ | 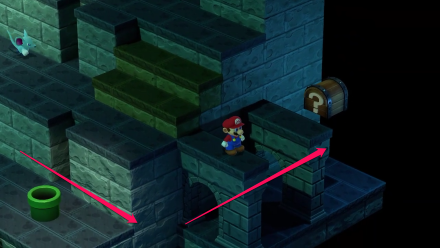 Winning against the Huhwhat will allow you to obtain a Trueform Pin. |
| ⑨ | 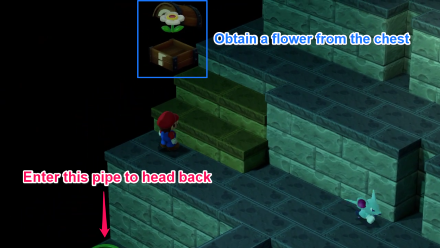 You can also jump to the left from the second stairs to find a treasure chest. |
| ⑩ |  |
| ⑪ | 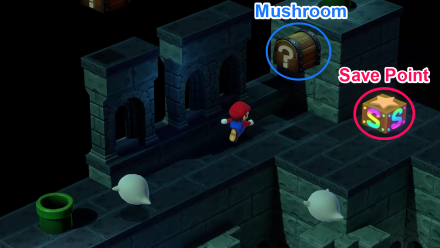 |
| ⑫ | Enter the clay pipe in the back right corner to start your next boss fight against Belome. ▶ How to Beat Belome |
| ⑬ |  ▶ Midas River 100 Coins Guide |
| ⑭ | 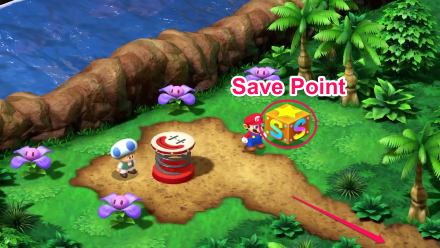 |
Tadpole Pond
| ① |  |
|---|---|
| ② | 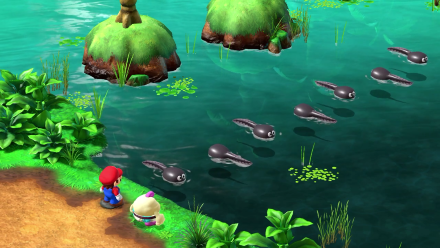 Use the tadpole as a platform to navigate the pond. Use the tadpole as a platform to navigate the pond. |
| ③ | 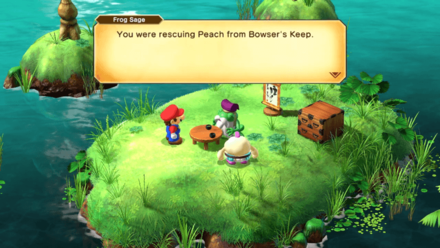 ▶ Where to Get Frog Sage's Snack |
| ④ | 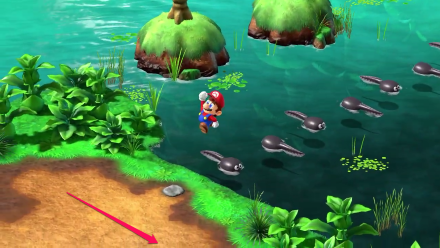 |
| ⑤ | 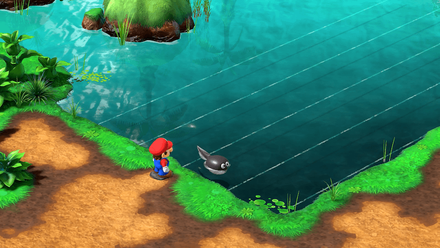 ▶ All Toadofsky Songs |
| ⑥ | 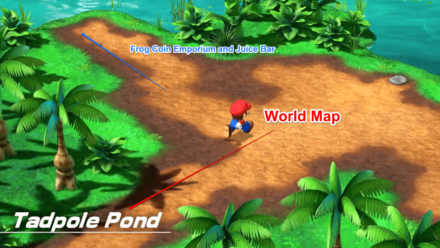 ┗You can purchase items at the Frog Coin Emporium and Juice Bar located on the left of the pond. (obtain the Alto Card in step 5). |
Rose Way
| ① |  |
|---|---|
| ② | 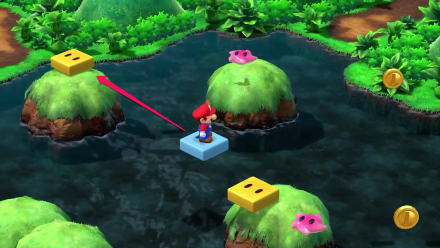 |
| ③ | 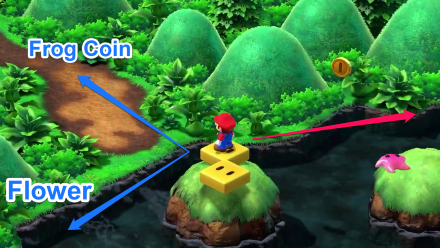 |
| ④ |  |
| ⑤ | Follow the u-shaped path and proceed to the next area to reach the end of the current zone. |
| ⑥ | 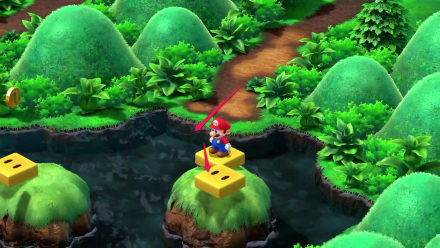 |
| ⑦ | 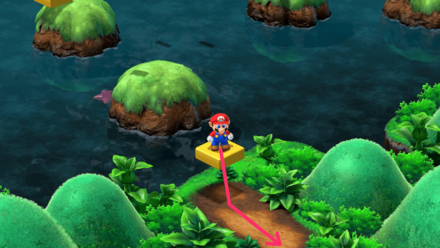 |
| ⑧ | Follow the path to reach the end of Rose Way and see a cutscene. |
| ⑨ | Exit the area and head to Rose Town. |
Rose Town
| ① | 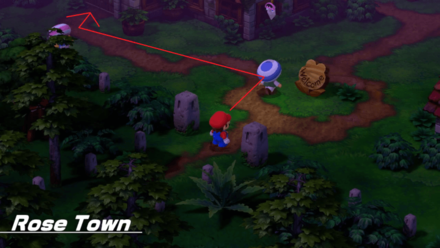 |
|---|---|
| ② | You will wake up in a room on the second floor of the inn. You can also save at the save point in this area. |
| ③ | An event will occur when you head to the inn's first floor. |
| ④ | 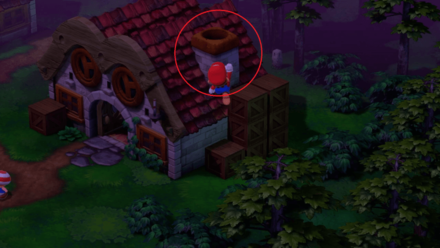 |
| ⑤ |  |
| ⑥ | Buy Equipment from the Item Shop. ┗ It is recommended to buy Thick Shirt and Thick Pants for Mario and Mallow respectively. After buying the Equipment, exit Rose Town and go to the Forest Maze. |
Forest Maze
| ① | Follow the path and move forward to the next zone. |
|---|---|
| ② | Proceed along the path and enter the stump at the back (you can enter them similar to a pipe). |
| ③ |  |
| ④ | Follow the path and go through the passage in the back to the next area. |
| ⑤ | 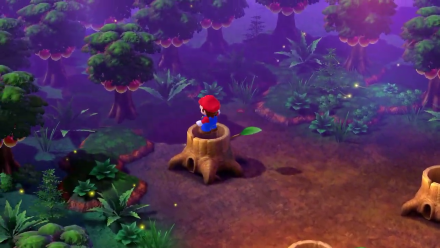 |
| ⑥ | Jump on the sleeping caterpillar. |
| ⑦ | 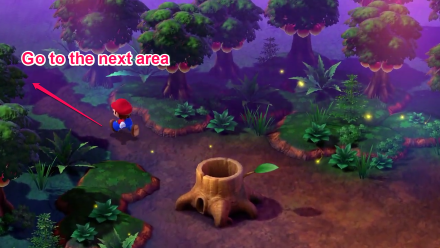 |
| ⑧ | Enter the tree stump ahead. |
| ⑨ | Keep following the path to head to the next area. |
| ⑩ | Follow the path and use the trampoline to jump to the next area. |
| ⑪ | 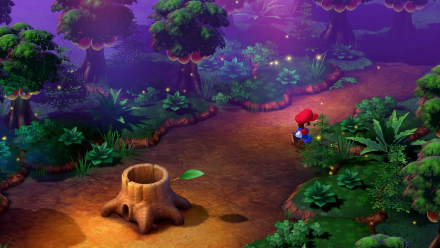 |
| ⑫ | 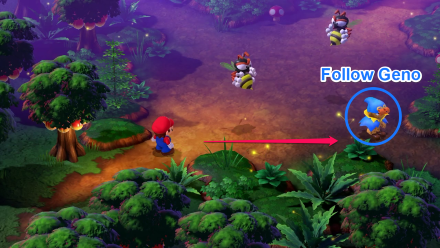 |
| ⑬ | 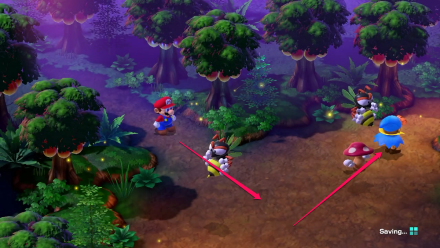 |
| ⑭ | 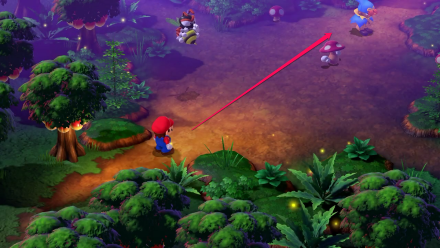 |
| ⑮ | 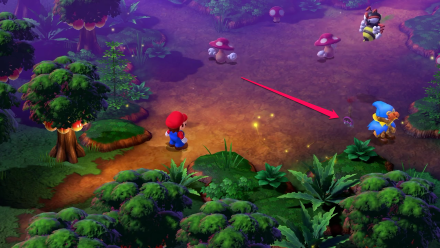 |
| ⑯ |  |
| ⑰ | 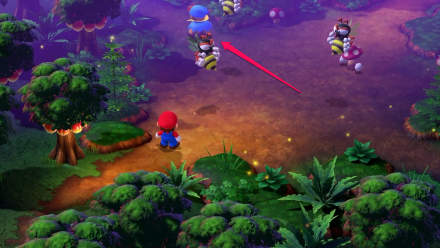 |
| ⑱ | 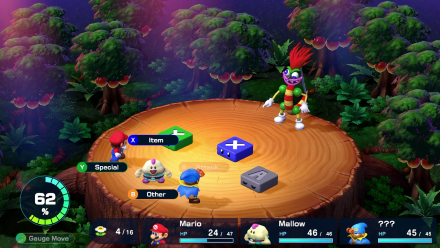 Save on the Save Point first then proceed further and a cutscene will play. Fight Bowyer. After dealing a certain amount of damage, you will be able to unlock the Triple Move feature. Defeat Bowyer and get the 2nd Star. ▶ How to Beat Bowyer |
How to Get the Third Star Piece
| Jump to a Star Piece Chapter! | |||
|---|---|---|---|
| Objectives |
|---|
|
|
3rd Star Piece Walkthrough (Chapter 3)
Best Party and Recommended Level to Get the Third Star
| Party | Recommended Level | ||
|---|---|---|---|
|
Mario
|
Mallow
|
 Geno Geno
|
7 |
Before Moleville
| ① | 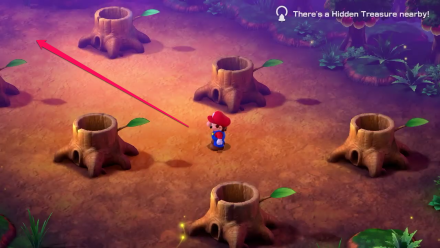 |
|---|
Moleville
| ① | 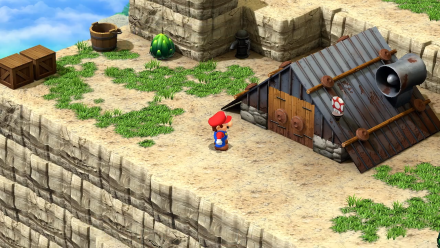 |
|---|---|
| ② | 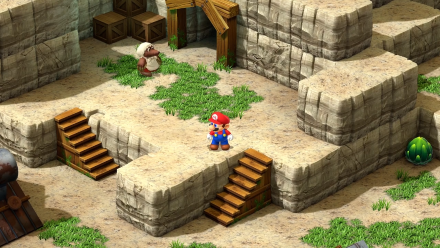 |
| ③ | 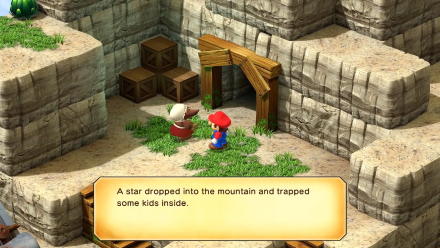 |
Moleville Mines
| ① | 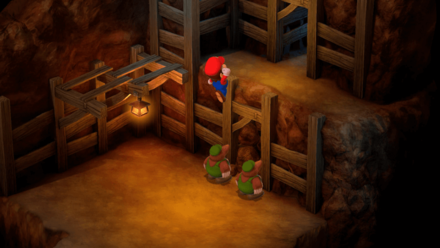 |
|---|---|
| ② | Follow the path and go through the path to the right to head to the next zone. |
| ③ | 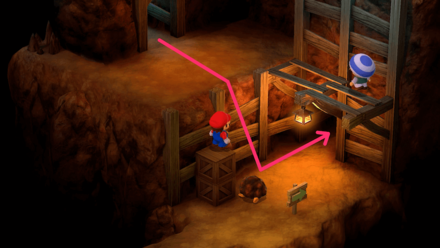 |
| ④ | 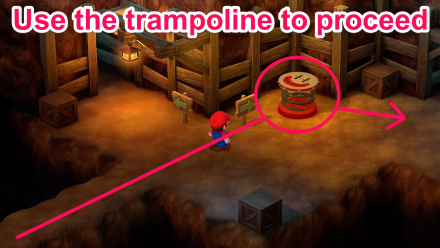 |
| ⑤ | 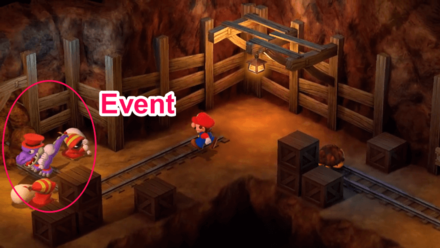 |
| ⑥ |  |
| ⑦ | Follow Croco to the next area. Croco will begin to roam the area in a counter clockwise pattern so move in the opposite way (clock wise) to catch Croco. |
| ⑧ | Battle Croco Again (Reco. Level: 7) When you fight Croco, you'll be able to obtain the Microbomb after winning. ▶ How to Beat Croco |
| ⑨ | 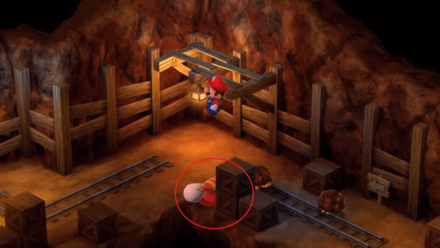 |
| ⑩ | Proceed to the area in step 6 to proceed to the next part of the dungeon. |
| ⑪ |  |
| ⑫ | After blowing up the wall, enter the next zone. |
| ⑬ | 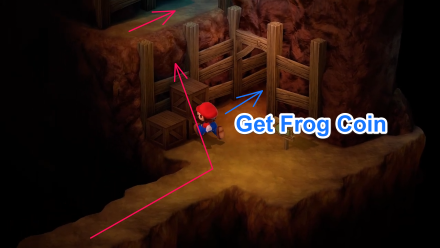 Proceed through the upper passage to the next area. Proceed through the upper passage to the next area. You can also enter the lower area and follow the railroad tracks to get a Frog Coin. |
| ⑭ |  ┗ You can also get a Star from the Treasure Chest and wipe out the enemies. |
| ⑮ |  |
| ⑯ | 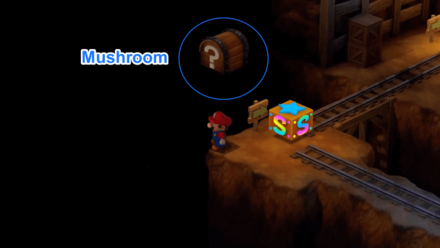 |
| ⑰ | 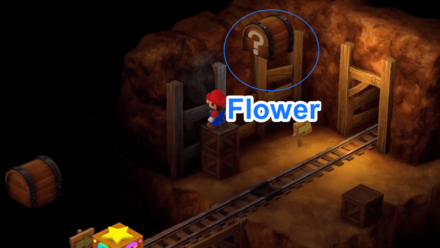 You can also get a Flower from a chest by jumping on the stack of boxes and hitting the chest. This might take a few tries as it can be hard to hit this chest so don't lose hope! |
| ⑱ | 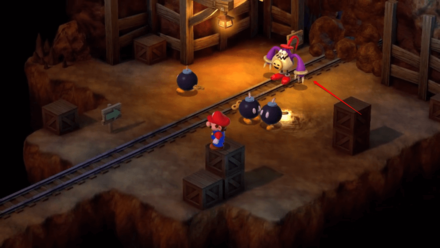 Approach Punchinello from the side to initiate the fight (approaching from the front will push you back) ▶ How to Beat Punchinello |
How to Get the Fourth Star Piece
| Jump to a Star Piece Chapter! | |||
|---|---|---|---|
| Objectives |
|---|
|
|
4th Star Piece Walkthrough (Chapter 4)
Best Party and Recommended Level to Get Fourth Star Piece
| Party | Recommended Level | |||
|---|---|---|---|---|
|
Mario
|
Geno
|
 Bowser Bowser
|
9 | |
Mines After Obtaining Third Star Piece
| ① | 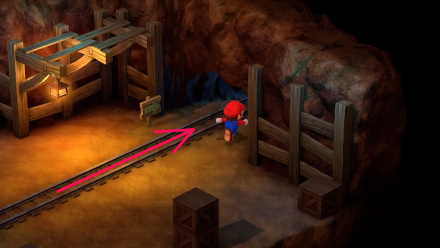 After defeating Punchinello and obtaining the star piece, the wall will break and a new path will appear. use it and proceed to the next zone. After defeating Punchinello and obtaining the star piece, the wall will break and a new path will appear. use it and proceed to the next zone. |
|---|---|
| ② | 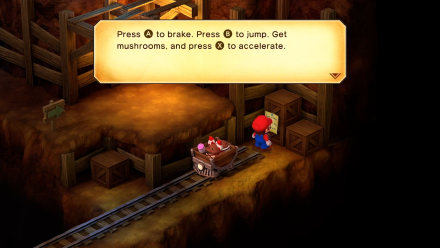 As you go deeper, the minecart minigame will trigger As you go deeper, the minecart minigame will trigger ▶ Minecart (Moleville Mountain). |
| ③ | After the minigame, leave the area to trigger an event. Once done, exit and proceed to Booster Pass. |
Booster Pass
| ① | 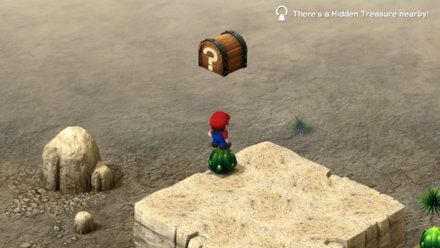 |
|---|---|
| ② | 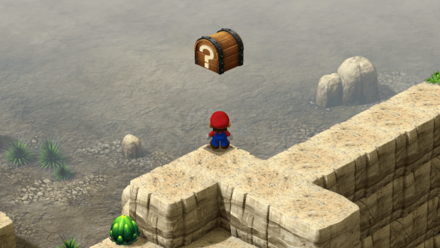 Proceed to the next area after you get the chest. |
| ③ |  |
| ④ |  A note can be found pinned on a wall in Booster Pass denoting that the Monster List Agent is near. When you enter the hollow area, you will find that you can 'Talk' to someone inside it. |
| ⑤ | Climb the steps near the entrance of this zone to move to the next map, Booster Tower. |
Booster Tower
| ① | An event will trigger after you enter the Booster Tower |
|---|---|
| ② |  Optional: Go back to Moleville to buy armor for Bowser. |
| ③ | Open the door and enter it. |
| ④ | 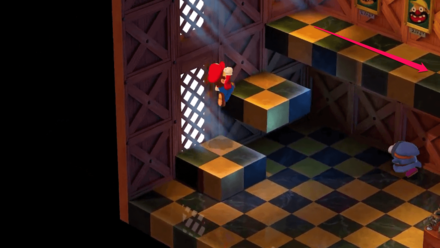 After entering the door, proceed through the passage above the steps to the next room. After entering the door, proceed through the passage above the steps to the next room. |
| ⑤ |  There is also a Hidden Treasure in the northernmost corner containing a Frog Coin. |
| ⑥ |  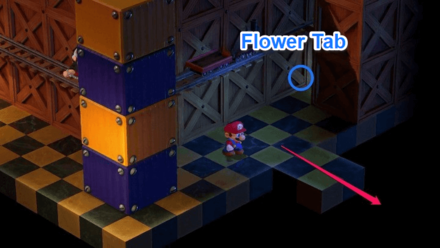 You can get a Flower Tab from the wall between the box on the right. ┗Go to the corner on the left and a battle with a Snifit will begin. |
| ⑦ | 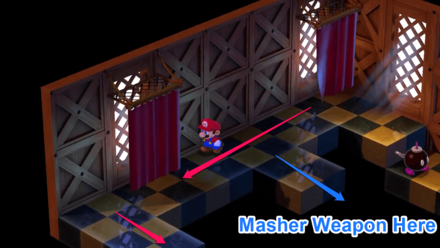 If you successfully fall into the seesaw and launch yourself, you'll be able to obtain the Masher. |
| ⑧ |  |
| ⑨ |  You can go through the curtain to see an interesting scene. |
| ⑩ | 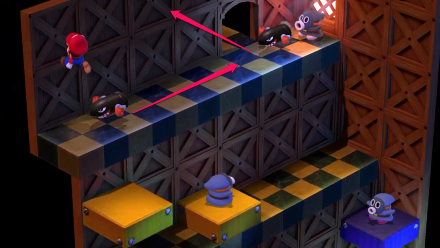 |
| ⑪ | Proceed to the next room through the passage at the top of the stairs. |
| ⑫ | Use the save point in the center then proceed to the next room. |
| ⑬ | 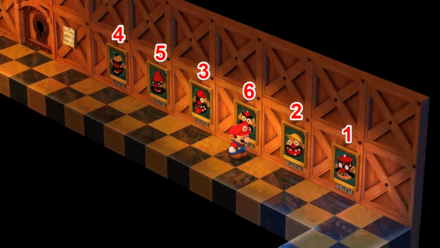 |
| ⑭ | 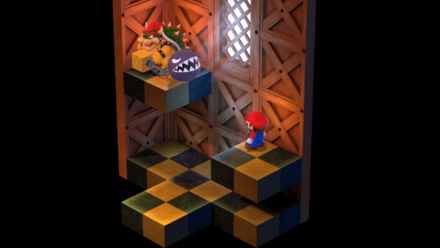 |
| ⑮ | Exit the room and go through the the lower right passage. |
| ⑯ | 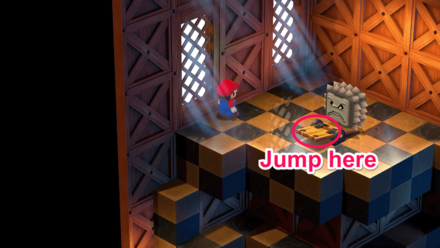 |
| ⑰ |  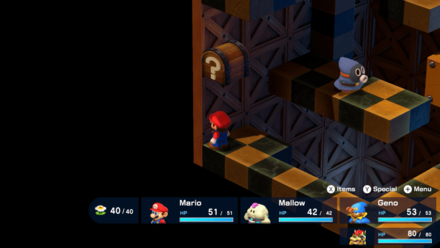 Enter the gap to get a Frog Coin. There is also a Hidden Treasure which contains a Frog Coin. |
| ⑱ | 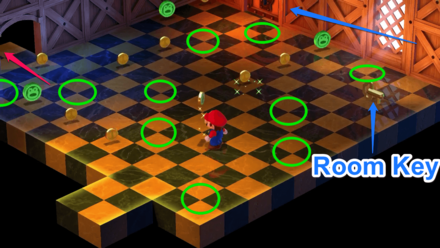 After getting the room key, you can open the locked door and obtain a Zoom Shoes. |
| ⑲ | 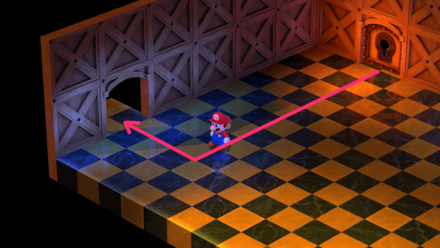 |
| ⑳ | 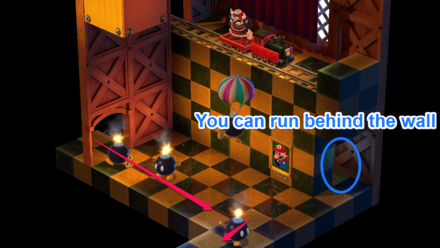 |
| ㉑ | Proceed to the next room through the path at the top of the stairs. |
| ㉒ |  You can obtain a Frog Coin from the treasure chest in the upper left. 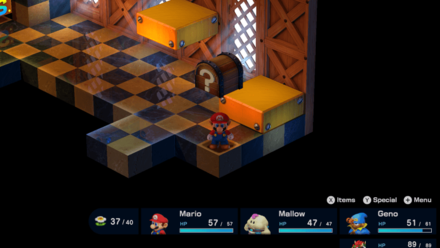 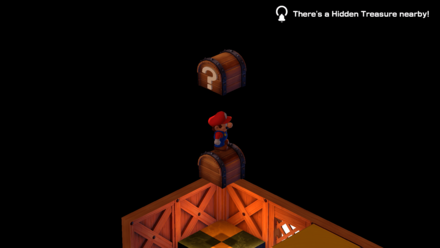 |
| ㉓ | 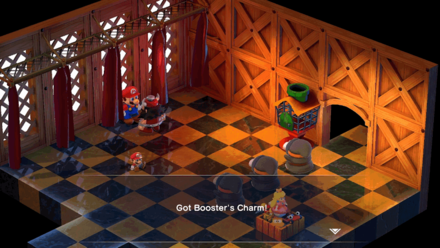 When you try to proceed to the next room from the path in front of you, the curtain minigame will start. Getting caught twice or less rewards you with an Booster's Charm and getting caught three times will start a battle with Booster. ▶ Curtain Minigame Guide and Rewards |
| ㉔ | 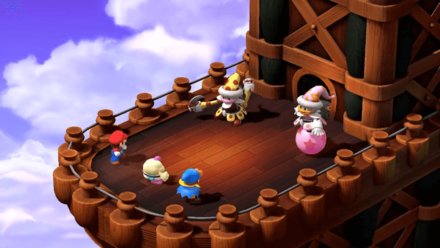 ▶ How to Beat Grate Guy and Knife Guy |
| ㉕ | 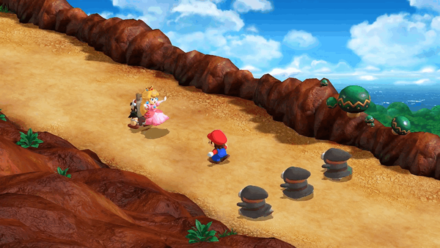 ▶ Booster Hill Guide and Rewards |
Marrymore
| ① |   |
|---|---|
| ② |  |
| ③ | 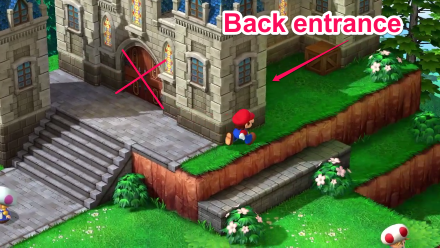 |
| ④ | Go down the stairs in front of you and proceed to the next room. |
| ⑤ | Go up the stairs in the back left and proceed to the next room. |
| ⑥ | 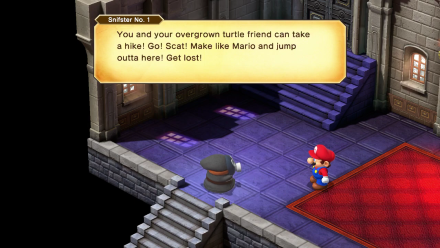 When you go to the center of the room, an event will occur and you will be asked to say something. Respond by jumping. When you go to the center of the room, an event will occur and you will be asked to say something. Respond by jumping. |
| ⑦ | Rush in at the same time to open the door. This can take many tries as it can be difficult to time but patience is the key here so don't give up! |
| ⑧ | Use the save point then rush in at the same time as Bowser to open the door. |
| ⑨ | 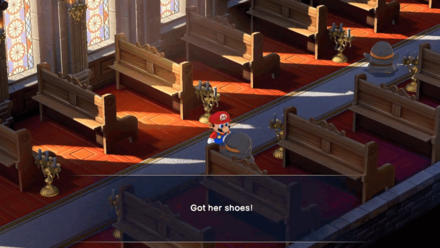 ▶ Marrymore Wedding Minigame |
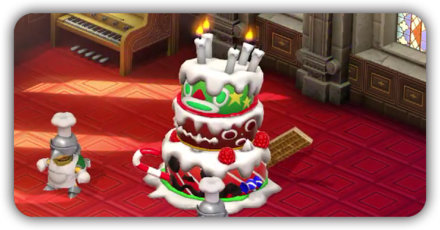
| ⑩ | 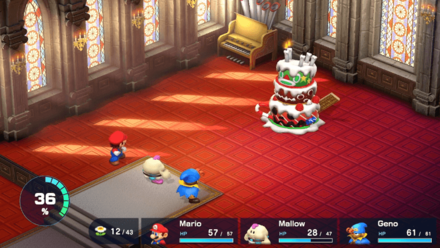 (Reco. Level: 9) After collecting the jewelries, the mini-game will end. Talk to Booster and an event will occur and the battle between you and Bundt and Raspberry will start ▶ How to Beat Bundt and Raspberry |
| ⑪ | 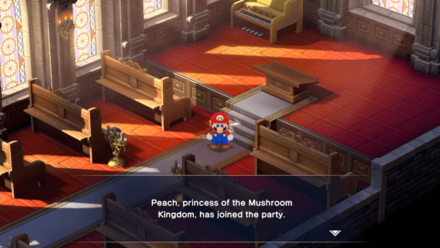 |
| ⑫ |  |
Mushroom Kingdom (3rd)
| ① | An event will occur once you head inside the castle. |
|---|---|
| ② |  |
| ③ |  |
| ④ | Head to Tadpole Pond through the path on the bottom or the right area. You can also open the Map and go there directly. |
Tadpole Pond
| ① | 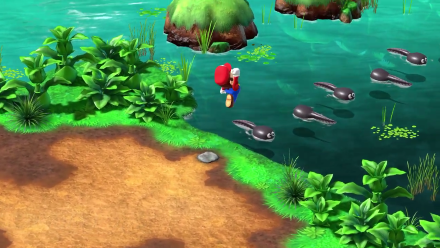 |
|---|---|
| ② | Talk to Frog Sage. He won't talk to you if you haven't given him a Cricket Pie yet, which you can get from the Mushroom Kingdom item shop. |
| ③ | 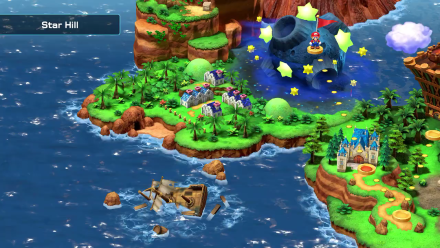 |
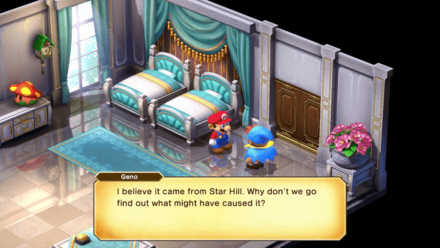
Star Hill
| ① | 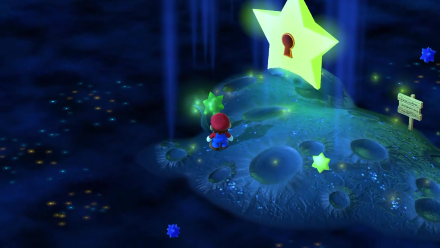 |
|---|---|
| ② | Interact with the 5 star flowers in the area to open the next area. Go to the next area. |
| ③ | Interact with the 6 star flowers and the star keyhole will open. Go to the next area. |
| ④ | 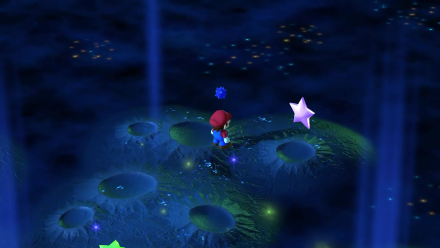 |
How to Get the Fifth Star Piece
| Jump to a Star Piece Chapter! | |||
|---|---|---|---|
| Objectives |
|---|
|
|
5th Star Piece Walkthrough (Chapter 5)
Best Party and Recommended Level to Get Fifth Star
| Party | Recommended Level | |||
|---|---|---|---|---|
|
Mario
|
|
Bowser
|
10 | |
After Obtaining the Star Piece
| ① |  |
|---|---|
| ② | 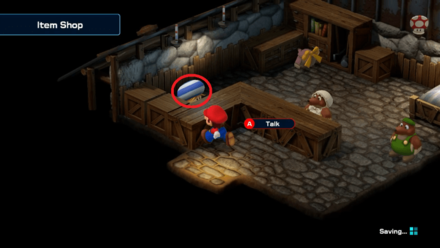 Treasure Hunting Toad: All Items |
Seaside Town
| ① | 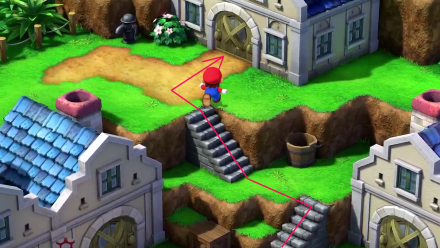 Go to the top left area of the town and enter the house at the top of the stairs where you can talk to the Elder. Go to the top left area of the town and enter the house at the top of the stairs where you can talk to the Elder.There is also a shop on the second floor where you can exchange items for Frog Coins. |
|---|---|
| ② | 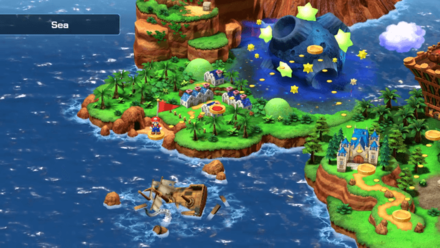 |
Sea and Sunken Ship
| ① | Proceed to the next area through the path ahead. |
|---|---|
| ② | 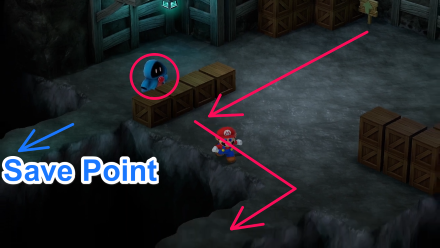 Further to the left, there is a save point past the vendor. |
| ③ | Proceed to the next area by entering the passage below. You can open the Treasure Chest to get a Star and wipe out the enemies in both this and the next area at once if you're fast enough. |
| ④ | 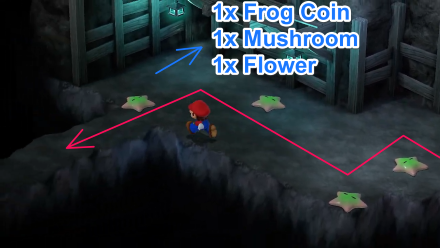 The room to the right contains a Frog Coin, a Mushroom, and a Flower. |
| ⑤ | 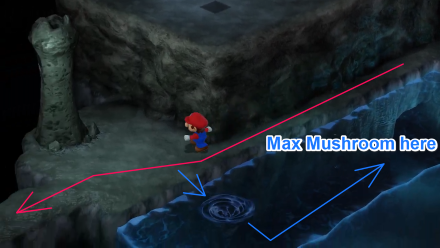 Jump into the vortex for an underwater passage that will lead you to the area above where you can get an Max Mushroom from a chest. |
| ⑥ | 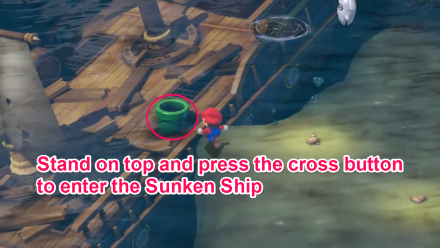 |
| ① |  |
|---|---|
| ② | 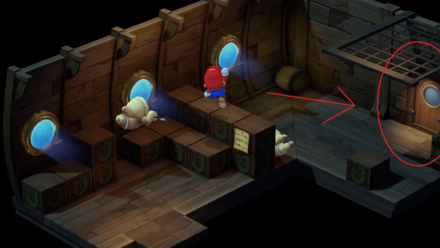 |
| ③ |  |
| ④ | 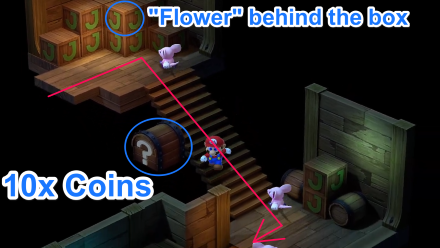 Behind the boxes at the top of the stairs are Flowers, while the chest floating next to the stairs contains 10 coins. |
| ⑤ |  Note: You can also go straight through the door if you already know the password for the Treasure Room. Sunken Ship Puzzle Solutions |
| ⑥ |  There's a shop before the second door that you can check out if you need to buy items. |
| ⑦ |  Sunken Ship Puzzle Solutions |
| ⑧ |  Sunken Ship Puzzle Solutions |
| ⑨ | 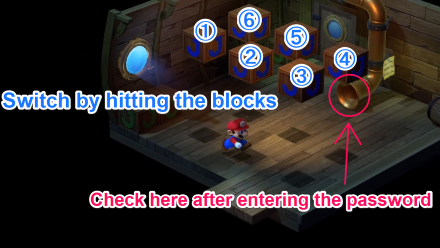 ▶︎ Sunken Ship Password |
| ⑩ | 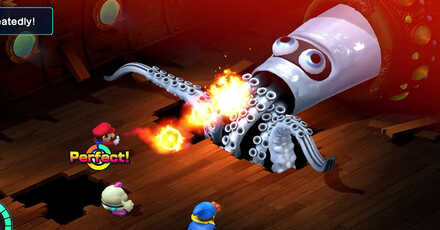 Enter the next room and defeat King Calamari. Make sure to have the Fearless Pin equipped to prevent thie Fear status ailment from affecting a party member. ▶︎ How to Beat King Calamari |
| ⑪ | Go through the door ahead. |
| ⑫ | 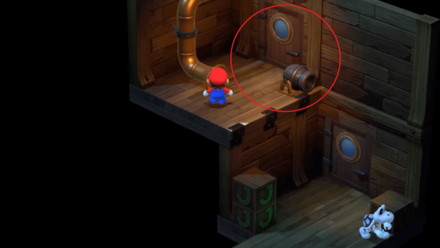 |
| ⑬ | 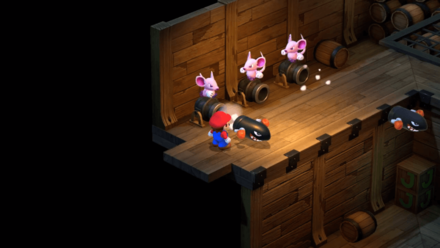 |
| ⑭ | Go downstairs and through the next door. |
| ⑮ | 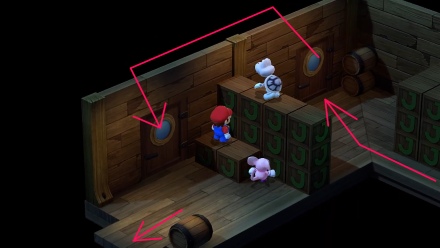 Enter the door on the right. Do not interact with the Mario Doppelganger yet if you want to get the Hidden Treasure. Enter the door on the right. Do not interact with the Mario Doppelganger yet if you want to get the Hidden Treasure. Talk to the doppelganger once you have gotten the chest and exit through the other door on the left. Move to the next room by continuing left.  |
| ⑯ | 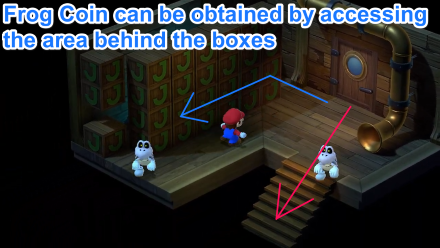 Go down the stairs to the next room. Go down the stairs to the next room.There's a secret passage behind the blocks on the left where you can open a Treasure Chest containing a Frog Coin. |
| ⑰ |  Hop onto the wall of blocks immediately to your right and use them to cross to the right side of the room to reach the door. Hop onto the wall of blocks immediately to your right and use them to cross to the right side of the room to reach the door.The chest on the left contains a Mushroom while the one on the right contains a Safety Badge, but you'll have to fight Whuhoh first. |
| ⑱ | Ignore the pool and head straight to the next room. |
| ⑲ | 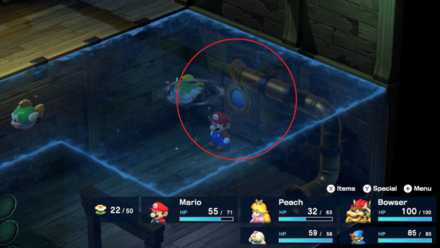 The path on the lower right corner leads to a room with 4 Frog Coins. |
| ⑳ | Dive downstairs and go through the door at the base. |
| ㉑ |  There is a door hidden behind the barrels on the left which has a chest that contains a Safety Ring. |
| ㉒ |  |
| ㉓ | 5 Bandana Reds will fight you when you reach the top of the stairs. Defeat them and go through the door in front of you. |
| ㉔ | 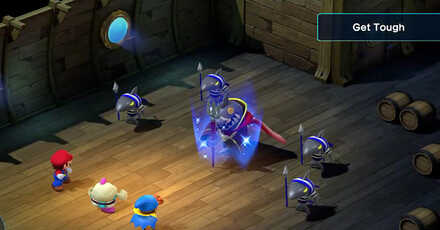 Defeat Johnny, the Sunken Ship's boss, in battle. ▶︎ How to Beat Johnny |
Sunken Ship Puzzle Solutions
Puzzle Hints
Click here if you want to learn the hints but try to figure out the Password on your own!
| 1 | There is an "s" in the word. |
|---|---|
| 2 | It is found on the bed of the ocean. |
| 3 | It has two vowels. |
| 4 | It is very valuable. |
| 5 | "It" is actually a "they." |
| 6 | The "R" comes before the "L." |
Sunken Ship Password
Please only click this if you are really sure you want to see the Password!
| Password | PEARLS |
|---|
How to Solve Each Puzzle
| ① | Go behind the iron ball and let the flying enemy follow you. Quickly go in front of the ball once the enemy is behind the iron ball, then it'll push the ball towards the button. |
|---|---|
| ② | Hit the blocks to stop the trampolines. Stop them in between the windows. This will bounce the ball towards the button. |
| ③ |
・ Follow the entry path until you hit a wall ・ Turn right and jump over a step ・ Turn right and jump multiple times until you hit a wall ・ Follow the next directions taking a turn once you hit a wall: right, right, left, left ・ From here you should be able to see Mario ・ Enter the doorway, turn right, and you should be able to see Mario again ・ Walk around the corner ・After going around the corner, you'll drop down a step ・Turn left dropping down another step ・Turn right, left, then right ・Jump and climb the step, turn right and climb the rest of the steps ・At the top of the steps, turn right and immediately take the first left ・Jump up a steep step and you should be able to see Mario again. |
| ④ | Follow the moving coin and collect the coins it drops that disappears after a certain amount of time. The puzzle will be cleared once you collect the final coin. |
| ⑤ | Hit the left-most block to fire the first cannon. Then jump under the cannonball once it's placed under the box to hit it. Repeat until you've hit the right-most block with the cannonballs. |
| ⑥ | There is a barrel with a slightly darker color than the rest. Go behind it and push it to drop the barrel onto the floor. Stand on top of the barrel and face in the direction of the button, and jump repeatedly until the barrel is under the right button. Step on the left button after that to finish the puzzle. |
All Sunken Ship Puzzle Solutions
How to Get the Sixth Star Piece
| Jump to a Star Piece Chapter! | |||
|---|---|---|---|
| Objectives |
|---|
|
|
6th Star Piece Walkthrough (Chapter 6)
Best Party and Recommended Level to Get Sixth Star
| Party | Recommended Level | |||
|---|---|---|---|---|
|
Mario
|
Mallow
|
|
17 | |
After Obtaining the Starpiece
| ① |  |
|---|
Seaside Town
| ① | 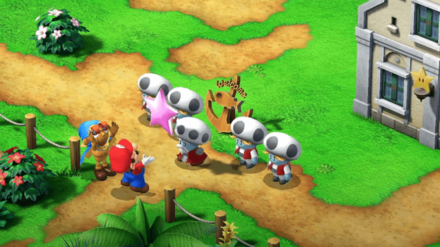 ▶Should you Give the Star Piece to Speardovich? |
|---|---|
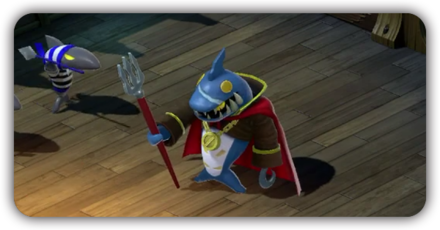
| ② |  Proceed to the next area from the passageway at the far left. You will have to fight Speardovich, and defeating him will give you back the stolen star piece. ▶How to Beat Speardovich |
| ③ |  |
| ④ |  |
| ⑤ | Speak with the elder of Seaside Town. His house is located in the upper-left area. Afterwards, you will be able to access Land's End. |
| ⑥ | 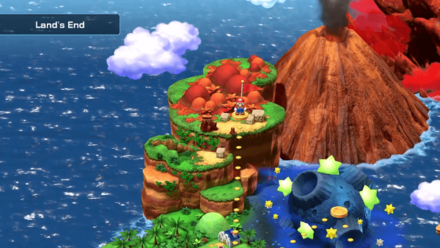 |
Land's End (Belome Temple)
| ① | Save at the save point. |
|---|---|
| ② | 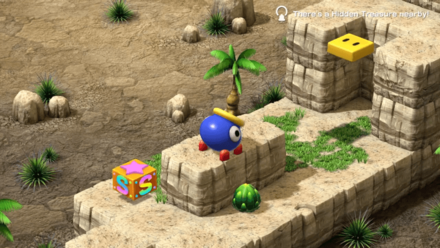 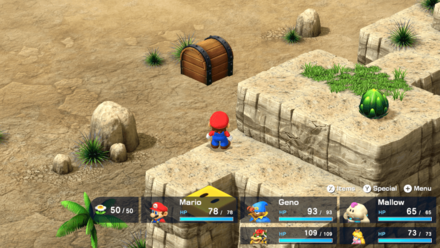 |
| ③ | 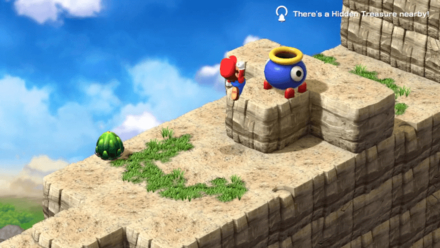 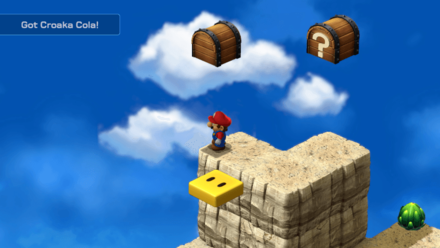 |
| ④ | Go straight without falling off the cliff and proceed to the next area from the passage in the back. ┗If you fall, there is a cannon at the bottom right of the bottom row that will lead you back at the top of the cliff |
| ⑤ | 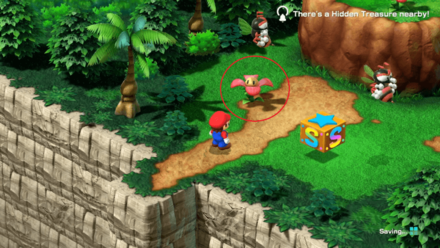 TIP: Jump when the flower points you at the direction you wish to go to. |
| ⑥ |
Cross the Sky Bridge and proceed to the next area located through the passageway beyond the bridge. ▶Sky Bridge Guide and Rewards  |
| ⑦ | After crossing the bridge, you may save at the next save point. Then proceed to the next area located in the passage towards the upper-right. |
| ⑧ |  If you enter the whirlpool without the Shogun, you will be returned to the previous area. |
| ⑨ |  If you take the Star from the Treasure Chest located on the bottom, you can defeat the enemies in the next two areas. |
| ⑩ |  |
| ⑪ |  To make this encounter easier, you can talk to the Shaman behind the wooden blocks (as seen in the image) and they will give you 400 coins. Stars can be purchased from them for 800 coins, and can help you defeat all the enemies in this area. |
| ⑫ | 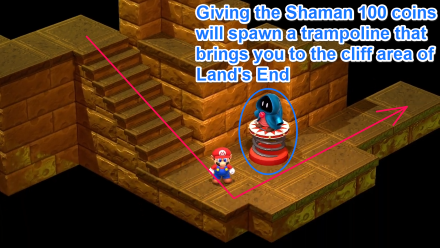 A Shaman is at the bottom of the staircase. If you pay them 100 coins, you can use the trampoline that will bring you to the cliff area of Land's End. |
| ⑬ |  The contents of the treasure chest (seen in ⑮) will change depending on the result of the fortune. ▶ Belome Temple Fortune Guide |
| ⑭ | 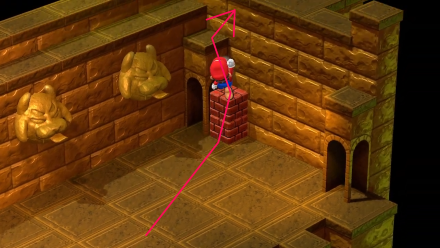 |
| ⑮ | Enter the clay pipe located at the back and proceed to the next area. |
| ⑯ | 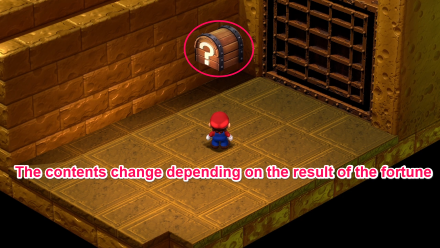 |
| ⑰ | 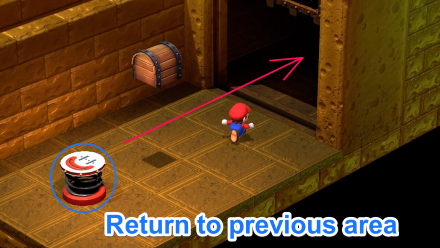 |
| ⑱ | Descend down the stairs and go through the passage to the right to proceed to the next area. |
| ⑲ | 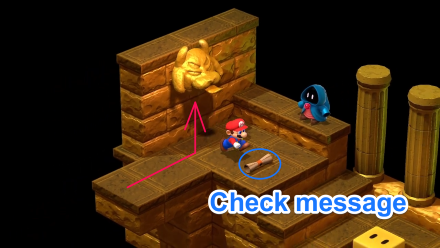 If "Mmm, I'm hungry..." is the text inside the scroll, you may proceed to the next step. If "Hmm, I'm already bored. That's it..." is the text, then go back to the previous area and try again. |
| ⑳ | Step on the yellow platform to descend, then proceed to the next area located in front of you. |
| ㉑ | 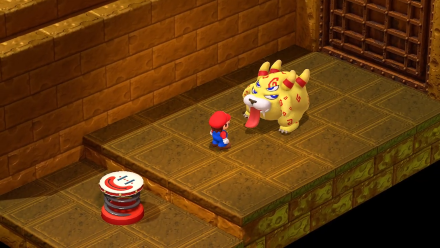 Speak to Belome to begin the battle. Upon their defeat, a switch will appear. Note: If the room is different from the image above, then the result of the fortune draw in ⑱ was different. Return to the previous area and start over from ⑰. ▶How to Beat Belome (Second Fight) |
| ㉒ | Step on the switch and the door will open. Go forward and proceed to the next area, the Monstro Town. |
Monstro Town
| ① | 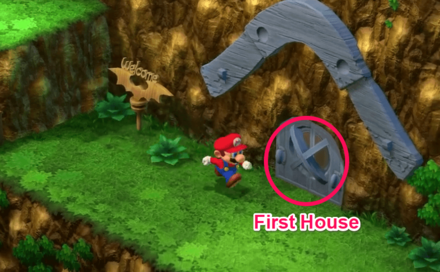 When you arrive at Monstro Town, head towards the first house on the left. |
|---|---|
| ② | 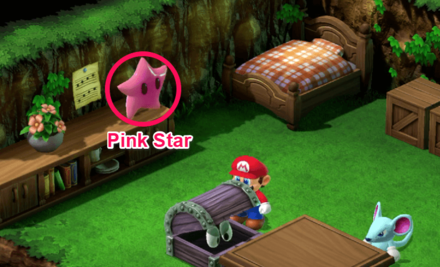 First House Talk to the Pink Star on the second floor, then go back to the first floor and talk to Monster Mama. You should be able to go to Bean Valley with the help of the flying koopas afterwards. |
| ③ | 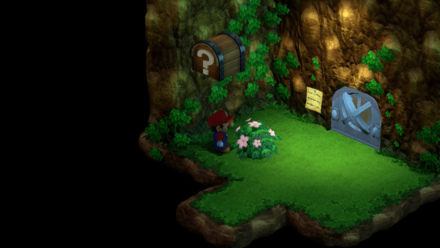 Treasure: In the room by the area's exit, go beside the bush at the northwest spot then jump to reveal the chest containing a Frog Coin. |
Exploring Monstro Town
| ① | 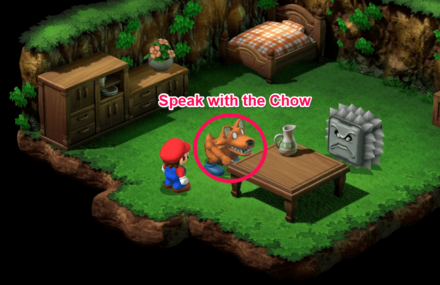 Second House • Obtain the Temple Key from the roof by speaking to the Thwomp inside 7 times. • Obtain the Attack Scarf by talking to the Chow and executing 30 Super Jumps. • You can also obtain the Super Suit when you reach 100 Super Jumps. |
|---|---|
| ② | Third House This is a sealed door with a secret boss. Purchase fireworks in Moleville and exchange it with a Shiny Stone, then bring the stone here to undo the seal. ▶How to Open the Sealed Door |
| ③ | 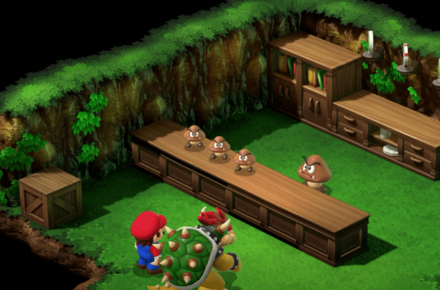 Fourth House This is an item store. Bowser's equipment and various other items are for sale. |
| ④ |  Fifth House You can start the 3 Musty Fears Quest here by talking to the Mushroom. Finding all three flags will award you with the Ghost Medal. ▶3 Musty Fears Flag Locations |
| ⑤ | 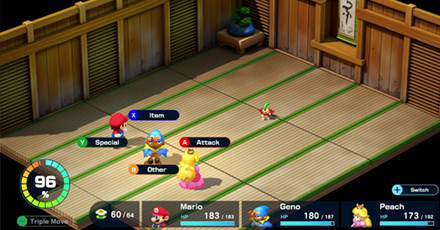 House Upstairs Obtain the Jinx Belt by defeating Jagger then Jinx (for the third time). |
Land's End Pt. 2 - Land's End Cliff
| ① | Go back to the area where the Shogun in the whirpool is located. |
|---|---|
| ② | Reach the other side using the pot cannon. |
| ③ | Use the flower to reach the next room. |
| ④ | Cross the Sky Bridge to get to the whirlpool area. |
| ⑤ | 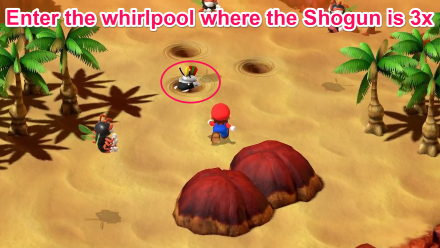 If you enter the whirlpool without the Shogun, you will be returned to the previous area. |
| ⑥ | 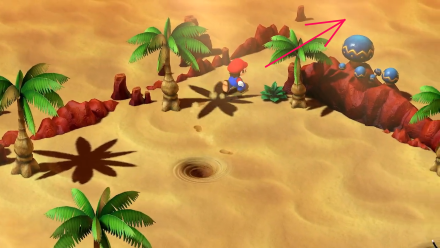 |
| ⑦ | Climb the cliff by using the Flying Koopas as platforms and enter the passage on the top of the cliff to go to Bean Valley. |
Bean Valley
| ① | Enter the pipes in this order: Right → Left → Left. Then proceed to the next area through the passage located on the left.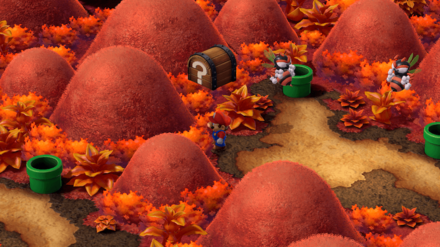 Treasure: Once you enter the pipe on the right in the first area, get to the corner beside the westernmost hill and jump to reveal the chest containing a Frog Coin.
 |
|---|---|
| ② | 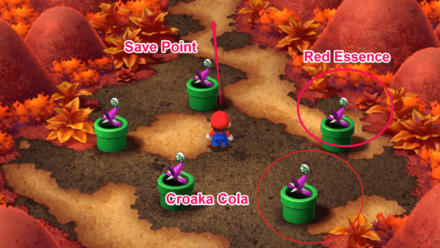 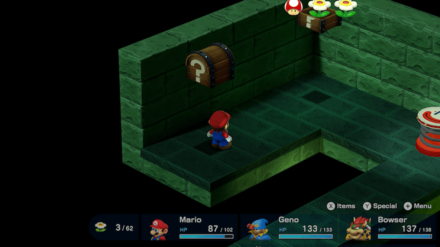 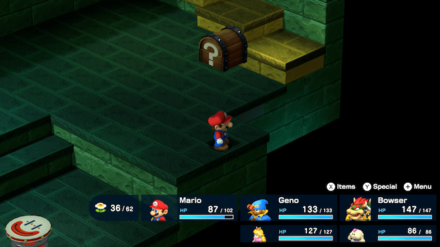 |
| ③ | 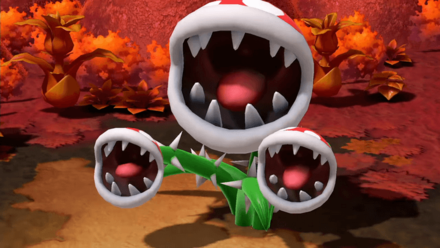 Touch the flower inside the pipe to begin the Megasmilax fight. Upon Megasmiliax's defeat, Shy Away will drop an item. Pick it up to receive a Seed. ▶How to Beat Megasmilax |
| ④ | Enter the pipe where Megasmilax was. |
| ⑤ | Hit the brown block from below; doing so will cause vines to appear. Hit the block once more to climb the beanstalk and proceed to Nimbus Land. |
Nimbus Land
| ① | Climb the vines by walking towards them in this order: Green → Yellow → Blue. Then proceed to the next area. |
|---|---|
| ② |  • [Yellow Route]: This is a detour, but you can find valuable items. • [Green Route]: This is an easy and short route, but there are no valuable items here. |
| ③ | 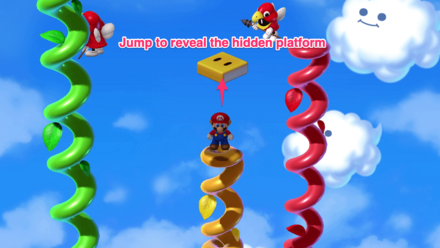 • Climb the vines in this order: Blue → Red → Yellow. From the Yellow vine, climb to the top and jump to reveal an invisible platform. Jump back onto the Red vine, then climb to the top and jump to the invisible platform, then finally jump to the Green vine. At the top, you can then find a Frog Coin and a Defense Scarf from the treasure chest. • Then, fall through the hole near the treasure chest to go to an area where you can obtain 2 Flowers from chests. • Fall down the next hole to find a trampoline that takes you to the next area. Green Route: • Climb the vines in this order: Blue → Red → Yellow → Green |
| ④ | Jump on the trampoline to move to the next area. |
| ⑤ | An event will trigger wherein you examine the golden statue of Mario in the upper-left area of Garro's House. |
| ⑥ | Talk to Garro at the back of the room and select "Yes" to proceed to the palace. |
| ⑦ | 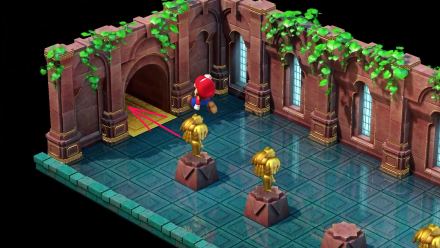 |
| ⑧ | This room has a save point. If you try to open the door on the left of it, the mini-game Pretend to be a Statue will begin. Succeeding within 2 attempts will award you a Feather that can be found in the next room. If you fail twice, you will have to fight Dodo and you will not be able to obtain the Feather. ▶How to Pretend to be a Statue ▶How to Beat Dodo (Second Fight) |
| ⑨ | Open the door again in the room with the save point to proceed to the next area. |
| ⑩ | Proceeding forward, an event will trigger. After it finishes, go through the door in the upper-right area. |
| ⑪ | Follow the path and go through the passage in the back to proceed to the next room. |
| ⑫ | Proceed to the next room through the door on the top right. (Mushrooms can be ontained from the treasure chest.) |
| ⑬ | 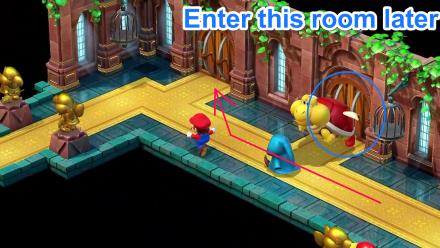 |
| ⑭ | 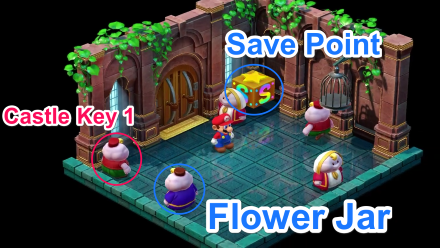 Talk to the Nimbus on the bottom left wearing red clothes to receive Castle Key 1. You may also speak to the Nimbus in blue clothes to receive a Flower Jar. Then save at the save point |
| ⑮ | Return to the room shown in ⑬ and defeat the Big Troopa in front of the door and proceed through it. |
| ⑯ | 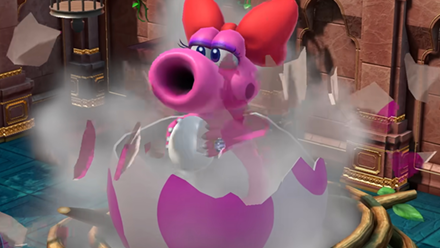 You will find a giant egg in this room; examining it will trigger the battle against Birdo. When you defeat it, you will obtain Castle Key 2. ▶How to Beat Shelly/Birdo |
| ⑰ | Go through the door in the back. |
| ⑱ | There will be an enemy that will emit wind. So, move only when the wind disappears and proceed through the next passage in the back to get to the next area. |
| ⑲ | An event will trigger when you attempt to open the door on the left, then proceed to the next room through the door in the back. |
| ⑳ | An event will trigger when you defeat the Big Troopa blocking the door. Then proceed to the next room. |
| ㉑ | At the end, go through the door on the left. |
| ㉒ | After saving at the save point, follow the path and go through the door in the back. |
| ㉓ | Grab the Star from the treasure chest and clear the path all the way to Dodo's room. Jump under the treasure chest to reveal a hidden board, them jump on top of it to open the treasure chest. |
| ㉔ | Go to the door at the back of the room where Dodo is and you will enter a cloud area. |
| ㉕ | Jump off the clouds through the holes and get on the trampoline. |
| ㉖ | 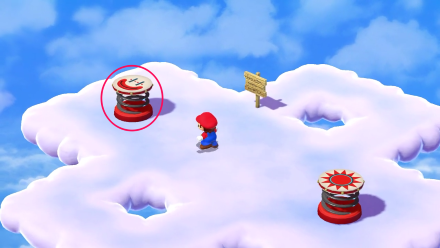 |
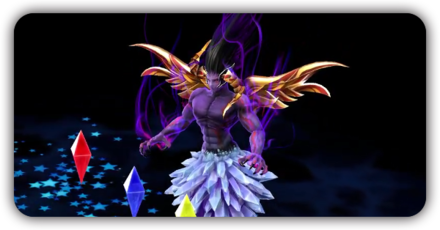
| ㉗ | 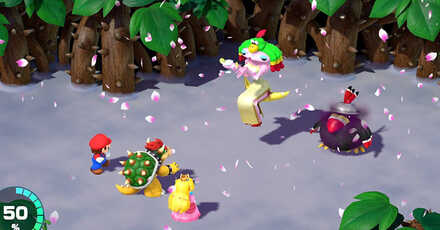 After the event trigger, Valentina's battle will commence. When you defeat her, an event will trigger and you will enter the Nimbus Castle. ▶How to Beat Valentina |
| ㉘ | Proceed in the same way as ㉑~㉔ and jump off the cloud. |
| ㉙ | Talking to the guard will open the way for you, then go through the passage where the guard was and you will arrive at the hot springs area. |
| ㉚ | Go to the next area, Barrel Volcano, from the passage at the back right of the hot springs area. |
Barrel Volcano
| ① | Proceed to the next area through the lower left passage. |
|---|---|
| ② | 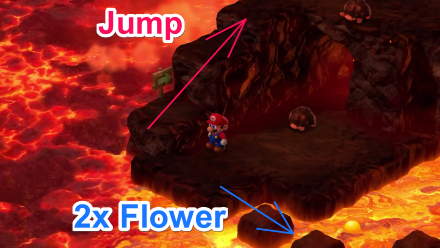 Proceed on the block situated above the magma and follow the path to the right to find 2 Flowers from treasure chests. |
| ③ | Continue following the path and go through the passage in the back. |
| ④ | Continue following the path to the next area. You can find Flowers in the treasure chest at the front and coins in the chest at the back. |
| ⑤ | 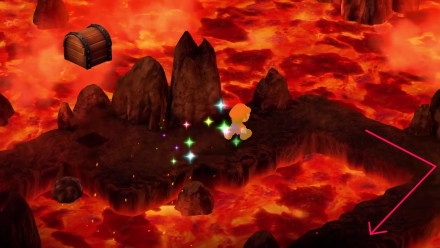 There is a Star in the treasure chest of this area. Use it to defeat the next set of enemies quickly. |
| ⑥ |  |
| ⑦ | Follow the path and go to the next area. |
| ⑧ |  You can obtain Frog Coins by jumping towards them as shown in the image above. |
| ⑨ | 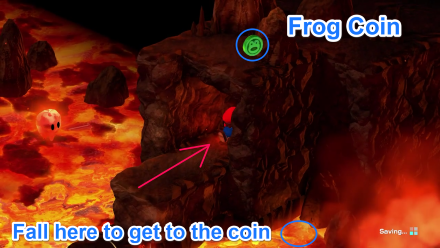 The Frog Coins in the inner passage can be obtained by falling into the position show in this image. |
| ⑩ |  You can obtain 2 Frog Coins by jumping from the block above the magma. |
| ⑪ | 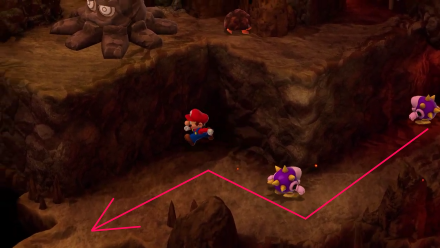 |
| ⑫ | 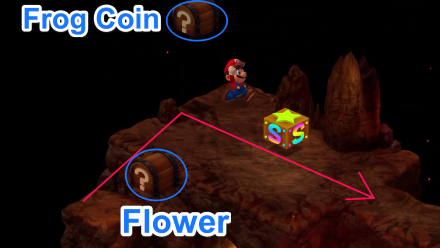 |
| ⑬ |  Continue along the path and try not to fall to the bottom. Then proceed to the next area via the upper-right passage. If you do not want to fight Stumpet, then take the path along the wall. |
| ⑭ | Follow the path and go through the passage in the upper-left. |
| ⑮ | As you continue along the path, there will be Corkepedites and Urspikes blocking the way forward. Defeat them, and proceed to the next area. |
| ⑯ | 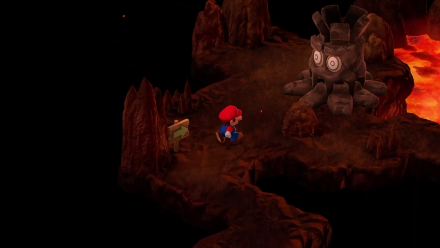 |
| ⑰ | 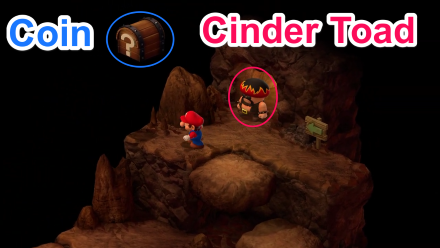 You can get coins from the treasure chest. |
| ⑱ | 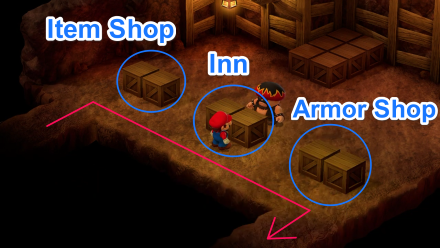 |
| ⑲ | After saving at the save point, go to the next area through the upper-right passage. |
| ⑳ | Jump over the Sky blocks and go to the next area through the passage at the back. |
| ㉑ | 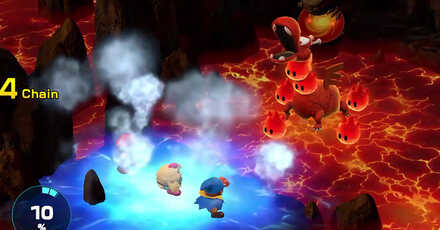 An event will trigger, then the Czar Dragon fight will begin. ▶How to beat Czar Dragon |
| ㉒ |  After defeating Czar Dragon, it will reanimate into Zombone and the boss fight will continue. ▶How to Beat Zombone |
| ㉓ | An event will trigger when you go to the next area. |
| ㉔ | Climb up the steps, then proceed to the next area on the upper-right side. |
| ㉕ | Continue along the path while chasing Red and the others. When you arrive at the room with the trampoline, jump on it to advance to the next area. |
| ㉖ | 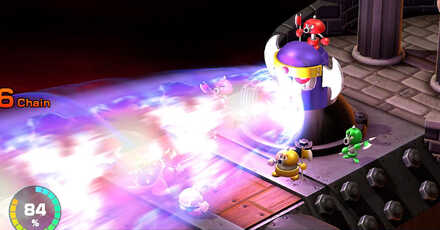 Defeat the Axem Rangers. Upon defeating the rangers, you will obtain the 6th Star Piece. ▶How to Beat the Axem Rangers |
How to Get the Seventh Star Piece
| Jump to a Star Piece Chapter! | |||
|---|---|---|---|
| Objectives |
|---|
|
|
7th Star Piece Walkthrough (Chapter 7)
Best Party and Recommended Level to Get Seventh Star
| Party | Recommended Level | |||
|---|---|---|---|---|
|
Mario
|
|
Geno
|
20 | |
Talk to the King and Take the Royal Bus
| ① |  |
|---|---|
| ② | 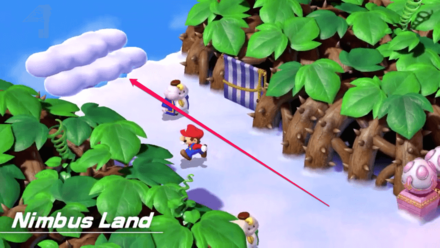 Take the passage on the far left upon exiting the Palace, and take the Royal Bus to Bowser's Keep. Take the passage on the far left upon exiting the Palace, and take the Royal Bus to Bowser's Keep. |
Bowser's Keep
| ① | Once you're in the keep, follow the road and pass through the four rooms. |
|---|---|
| ② |  Once you're in the next room, go through the passage on the left side that has chests that contains coins and a mushroom. |
| ③ | 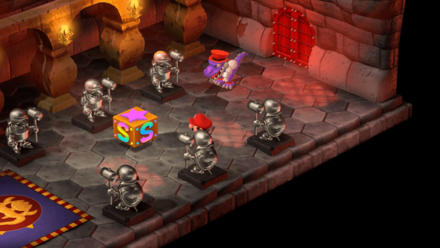 |
| ④ | 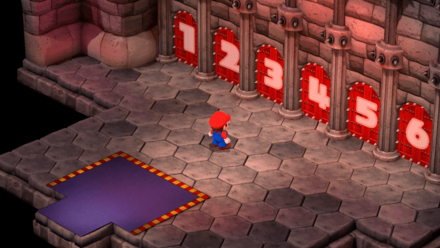 2 rooms are action courses, 2 are puzzle courses, and 2 are battle courses. It doesn't matter which door you choose since it's randomized. If you fail a course, you'll be returned in front of the doors. ▶ 6 Doors in Bowser's Keep |
| ⑤ | Save your progress and proceed to the next room. |
| ⑥ | 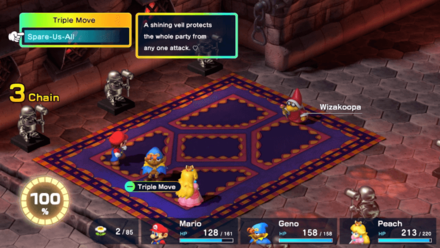 Enter the next room and defeat Wizakoopa. A Treasure Chest with an infinite amount of coins will appear after you've won the battle. ▶ How to Beat Wizakoopa |
| ⑦ |
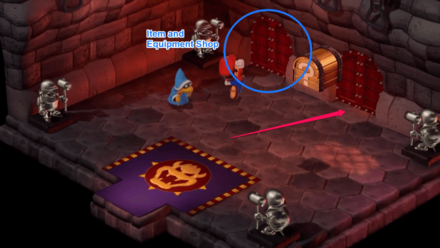 Proceed to the next room using the door on the right.
 Croco is in the left room where you can buy items and equipment. |
| ⑧ | Go towards the end of the room while passing multiple Thwomps. You'll temporarily stop moving if you get hit by a Thwomp, and you'll be engaged in a fight with enemies. |
| ⑨ |
Defeat Boomer (Reco. Level: 18) Enter the room and defeat Boomer. ▶ How to Beat Boomer |
| ⑩ |  Once you reach the top of the keep, you'll be battling Exor. Defeat him to proceed. ▶ How to Beat Exor |
Weapon World
| ① | Follow the path towards the next area. |
|---|---|
| ② | To move forward to the next area, jump repeatedly on the nut bolt. Be sure to save before continuing. |
| ③ | You will be presented with platforms connected by the same nut bolt bridges from the last area. The next passage is located on the upper-right platform. |
| ④ | You will find a switch in this location. Stepping on it will cause a bridge to appear on the upper-right area. Cross it, then proceed to the next location. |
| ⑤ | After saving at the save point, go onto the next area. |
| ⑥ | 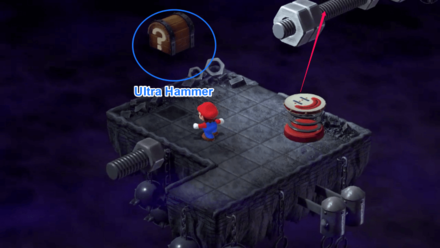 The treasure chest in this area contains an item called the Ultra Hammer. It is a weapon for Mario. |
| ⑦ | 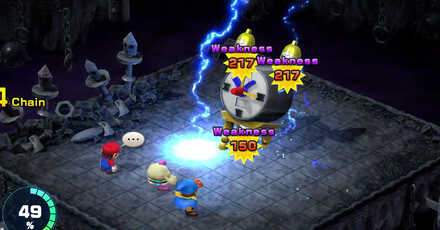 This next room is where you will encounter and battle Count Down. Defeat it to continue. ▶How to Beat Count Down |
| ⑧ | Once you have saved at the save point, use the trampoline to continue on to the next area. |
| ⑨ | When you land on the platform below the previous one, continue to the next area. |
| ⑩ |  If you fall from the slab, there is a Mushroom and a Flower from the treasure chest below. |
| ⑪ | 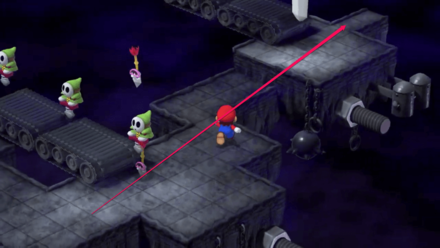 |
| ⑫ | You will find a stone slab along this path. Jump on it and it will take you to the next area. There is a treasure chest containing Royal Syrup along the way. |
| ⑬ | Go to the upper-right area and into the passage at the back to proceed onwards. If you choose to go along the conveyor on the left, you can get Max Mushrooms from the treasure chest. |
| ⑭ | Continue on this path towards the next area. (Enemies moving sideways can be avoided by jumping.) |
| ⑮ | Make sure to save at the save point, then go to the next area. |
| ⑯ | 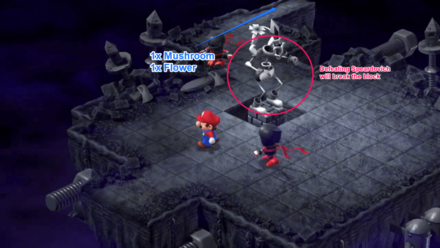 |
| ⑰ |  In this next area, you will encounter and battle Cloaker and Domino. • If you defeat Cloaker first, Mad Adder will join the fight. • If you defeat Domino first, Bad Adder will join the fight instead. ▶︎How to Beat Cloaker and Domino |
| ⑱ | Go to the next area through the upper-left passage. |
| ⑲ |  Continuing forward, you will face 3 Mad Mallets. After defeating them, you will battle Clerk along with 2 more Mad Mallets. ▶︎How to Beat Clerk |
| ⑳ | Moving on, you will trigger two events. And after that, Toad will appear. |
| ㉑ | You can purchase items from Toad. This will be the last time you can purchase items before the final fight. When you are ready, proceed to the next area. |
| ㉒ | 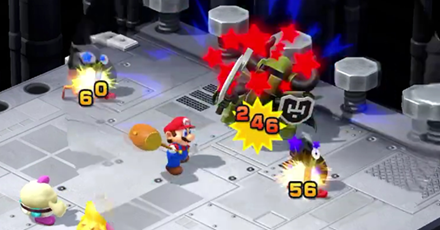 This next area is where you will face the Manager. Defeat them to continue. ▶︎How to Beat Manager |
| ㉓ | Move onto the next room. |
| ㉔ |  Defeat the Director. ▶︎How to Beat Director |
| ㉕ | Be sure to save after the fight, then proceed to the next area. |
| ㉖ |  Defeat the Factory Chief ▶︎How to Beat Factory Chief |
| ㉗ |  Step on the switch to go to the area where Smithy is. Defeat Smithy. Upon his defeat, you will receive the 7th and final Star Piece. ▶︎How to Beat Smithy |
| * | After finishing the game, you will have access to exclusive post-game content! ▶︎Post-Game Guide |
Main Story and Chapter Length
Around 10 to 15 Hours to Finish the Main Story
The main story chapters of Super Mario RPG will take around 10 to 15 hours to complete. This estimate assumes that players focus solely on story progression and ignore collection of collectibles like Hidden Chests and skipping optional content like the secret boss, Culex.
Game Length: How Long to Beat?
Post-Game Boss Rematches
All Post-Game Boss Rematches
| Post-Game Boss Rematches | ||
|---|---|---|
 Scratchy-Throat Belome Scratchy-Throat Belome |
 Leveled-Up Punchinello Leveled-Up Punchinello |
|
 Engine 023 Booster Engine 023 Booster |
 Extra-Fancy Bundt & Extra-Fancy Raspberry Extra-Fancy Bundt & Extra-Fancy Raspberry |
|
 Duel-Ready Johnny Duel-Ready Johnny |
 Culex 3D Culex 3D |
|
There are a total of six bosses you can take on for a rematch in the post-game. These bosses are much stronger in the rematch, with them having higher health and dealing higher damage to your party, with some able to take out your team in a single move without proper preparation. Consider taking these boss rematches on if you want to unlock the strongest gear that are only obtainable from the post-game!
How to Unlock Post-Game Boss Rematches
Upon completing the main story of the game, you can begin taking on post-game content in Mario's Pad. Toad will come and give you a Stay Voucher which allows you to stay at the Marrymore Hotel for free.
All Post-Game Boss Rematches and How to Unlock
Super Mario RPG Remake Related Guides

Super Mario RPG Remake Top Page
Super Mario RPG Remake Categories
| All Categories | |
|---|---|
 Walkthrough Walkthrough |
 Characters Characters |
 Bosses Bosses |
 Maps and Locations Maps and Locations |
 Weapons Weapons |
 Armor Armor |
 Accessories Accessories |
 Items Items |
 Special Moves Special Moves |
 Enemies and Monster List Enemies and Monster List |
 Enemy Attacks Enemy Attacks |
 Hidden Treasure Chests Hidden Treasure Chests |
Super Mario RPG Remake Tips and Tricks
Super Mario RPG Minigames
List of All Minigames and Rewards
Super Mario RPG Game Mechanics
| Game Mechanics and Stat Guides | |
|---|---|
| All Characters by Stats | Stats Explained |
| Level Up Bonus Explained | Bonus Flower Effects and How to Get |
| How to Flee From Battle | List of Controls |
| Element Guides | |
| Element Explained and List of Moves by Element | Jump Moves |
| Fire Moves | Thunder Moves |
| Ice Moves | Neutral Moves |
| Status Effect Guides | |
| List of Status Conditions | Sleep |
| Poison | Fear |
| Mute | Mushroom |
| Scarecrow | - |
All News Articles
-
![]()
Is there Multiplayer or Online Co-op?
Updated 11/8/2023
Find out if the game has multiplayer or online co-op.
-
![]()
Latest News and Updates
Updated 12/11/2023
All the latest news on Super Mario RPG Remake!
-
![]()
Available Platforms
Updated 11/8/2023
Find about the game's availability on consoles!
-
![]()
Will There be a Demo?
Updated 11/8/2023
Learn about any information regarding about a demo of the game.
-
![]()
When Will Preload Be Available?
Updated 11/13/2023
Learn about about the game's preload information.


Comment
Author
Walkthrough and All Chapters
Rankings
- We could not find the message board you were looking for.
Gaming News


![Monster Hunter Stories 3 Review [First Impressions] | Simply Rejuvenating](https://img.game8.co/4438641/2a31b7702bd70e78ec8efd24661dacda.jpeg/thumb)
Popular Games

Genshin Impact Walkthrough & Guides Wiki
Honkai: Star Rail Walkthrough & Guides Wiki
Umamusume: Pretty Derby Walkthrough & Guides Wiki
Pokemon Pokopia Walkthrough & Guides Wiki
Resident Evil Requiem (RE9) Walkthrough & Guides Wiki
Monster Hunter Wilds Walkthrough & Guides Wiki
Wuthering Waves Walkthrough & Guides Wiki
Arknights: Endfield Walkthrough & Guides Wiki
Pokemon FireRed and LeafGreen (FRLG) Walkthrough & Guides Wiki
Pokemon TCG Pocket (PTCGP) Strategies & Guides Wiki


Recommended Games
Diablo 4: Vessel of Hatred Walkthrough & Guides Wiki
Cyberpunk 2077: Ultimate Edition Walkthrough & Guides Wiki
Fire Emblem Heroes (FEH) Walkthrough & Guides Wiki
Yu-Gi-Oh! Master Duel Walkthrough & Guides Wiki
Super Smash Bros. Ultimate Walkthrough & Guides Wiki
Pokemon Brilliant Diamond and Shining Pearl (BDSP) Walkthrough & Guides Wiki
Elden Ring Shadow of the Erdtree Walkthrough & Guides Wiki
Monster Hunter World Walkthrough & Guides Wiki
The Legend of Zelda: Tears of the Kingdom Walkthrough & Guides Wiki
Persona 3 Reload Walkthrough & Guides Wiki


All rights reserved
© Nintendo/SQUARE ENIX Characters: © Nintendo, © SQUARE ENIX
The copyrights of videos of games used in our content and other intellectual property rights belong to the provider of the game.
The contents we provide on this site were created personally by members of the Game8 editorial department.
We refuse the right to reuse or repost content taken without our permission such as data or images to other sites.