Land's End Map and Walkthrough
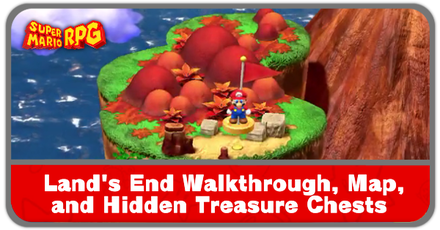
Land's End is the location where you can access Belome's Temple in Super Mario RPG Remake. See a map and walkthrough of Land's End, hidden treasure chest locations, enemies and bosses, what to do in Land's End and minigames.
Land's End Map and Hidden Chests
Land's End Map
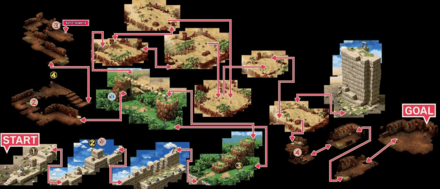
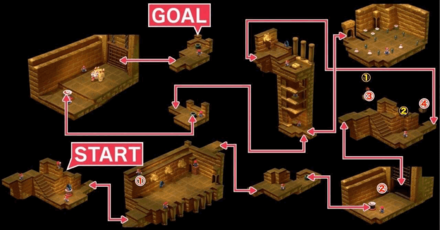
Red Numbers: Normal Chests, Yellow Numbers: Hidden Chests, Blue Numbers: Other Items
Land's End Hidden Chests and Items
Land's End Hidden Chests
| No. | Hidden Chest | Location |
|---|---|---|
| 1 |
Hidden Chest #24 Red Essence |
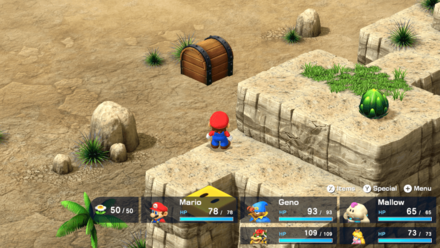 |
| 2 |
Hidden Chest #25 Croaka Cola |
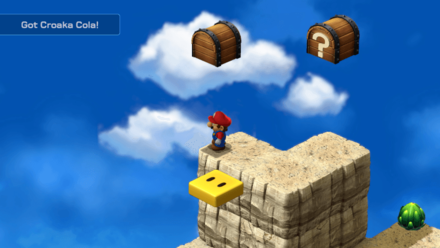 |
| 3 |
Hidden Chest #26 Frog Coin |
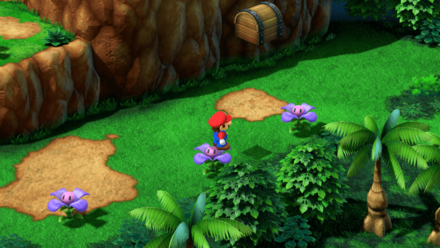 |
| 4 |
Hidden Chest #27 Frog Coin |
 |
Land's End Normal Treasure Chests
| 1 | Frog Coin | 1 | Coin x5 |
|---|---|---|---|
| 2 | Frog Coin | 2 | Random (Yoshi Cookie, Mushroom, Enemy, Frog Coin, 100 Coins) |
| 3 | Mushroom | 3 | Coin x15 |
| 4 | Star | 4 | Frog Coin |
Land's End Other Items
| 1 |
Flower Tab |
|---|
Belome Temple Hidden Chests and Items
Belome Temple Hidden Chests
| No. | Hidden Chest | Location |
|---|---|---|
| 1 |
Hidden Chest #28 Frog Coin |
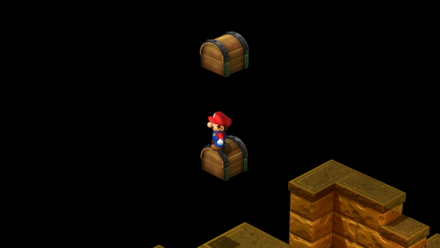 |
| 2 |
Hidden Chest #29 Frog Coin |
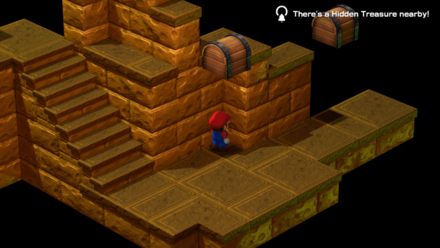 |
Belome Temple Normal Treasure Chests
| 1 | Coin x5 | 2 | Random (Yoshi Cookie, Mushroom, Enemy, Frog Coin, 100 Coins) |
|---|---|---|---|
| 3 | Coin x15 | 4 | Frog Coin |
Belome Temple Other Items
| There are no other items in this area. |
Land's End Walkthrough
Land's End (Belome Temple)
| Following Seaside Town Part 2 | |
| ① | Save at the save point. |
|---|---|
| ② | 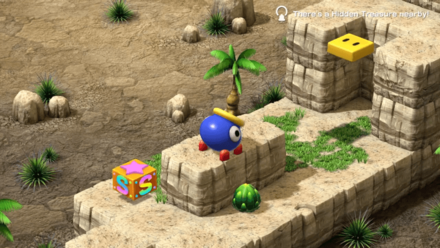  |
| ③ | 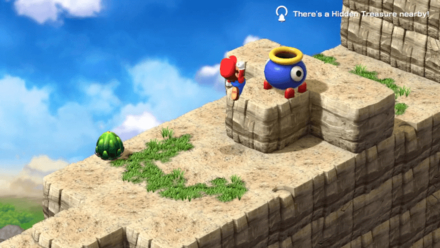  |
| ④ | Go straight without falling off the cliff and proceed to the next area from the passage in the back. ┗If you fall, there is a cannon at the bottom right of the bottom row that will lead you back at the top of the cliff |
| ⑤ | 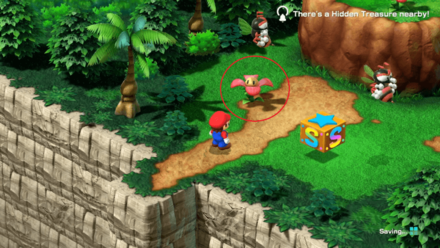 TIP: Jump when the flower points you at the direction you wish to go to. |
| ⑥ |
Cross the Sky Bridge and proceed to the next area located through the passageway beyond the bridge. If you accidentally fall to the bottom area, don’t worry - there’s a hidden bonus! You’ll find a Flower Tab down there. To get back up, just jump onto the nearby Sky Bridge operator and he’ll give you a lift. ▶Sky Bridge Guide and Rewards  Don’t continue east, or you’ll just loop into the Kero Sewers - instead, exit the cave and return to the Sky Bridge to resume your journey. |
| ⑦ | After crossing the bridge, you may save at the next save point. Then proceed to the next area located in the passage towards the upper-right. |
| ⑧ |  If you enter the whirlpool without the Shogun, you will be returned to the previous area but if you run away, you won't be able to lure it out again unless you leave the area and come back. TIP: Lure the Shogun by getting just close enough that it comes all the way out and make it battle you. After defeating it, you can enter the whirlpool to get to Belome Temple. |
| ⑨ | 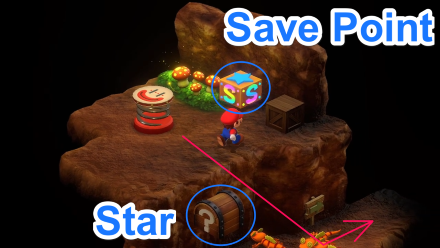 If you take the Star from the Treasure Chest located on the bottom, you can defeat the enemies in the next two areas. |
| ⑩ | 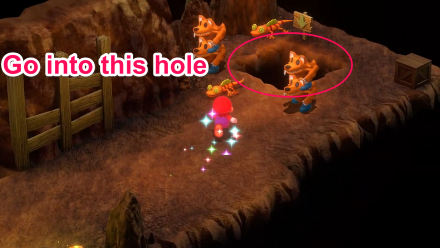 |
| ⑪ |  To make this encounter easier, you can talk to the Shaman behind the wooden blocks (as seen in the image) and they will give you 400 coins. Stars can be purchased from them for 800 coins, and can help you defeat all the enemies in this area. |
| ⑫ | 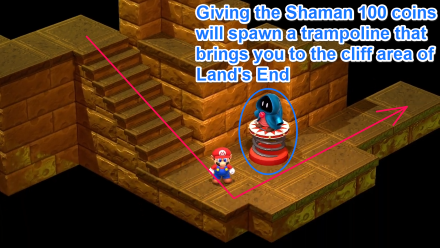 A Shaman is at the bottom of the staircase. If you pay them 100 coins, you can use the trampoline that will bring you to the cliff area of Land's End. |
| ⑬ | 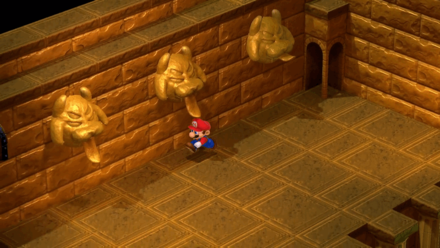 The contents of the treasure chest (seen in ⑮) will change depending on the result of the fortune. ▶ Belome Temple Fortune Guide |
| ⑭ | 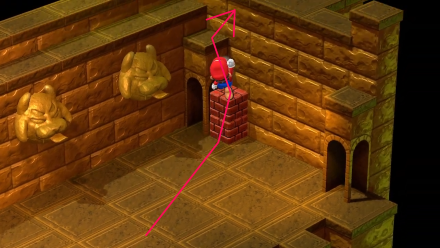 |
| ⑮ | Enter the clay pipe located at the back and proceed to the next area. |
| ⑯ | 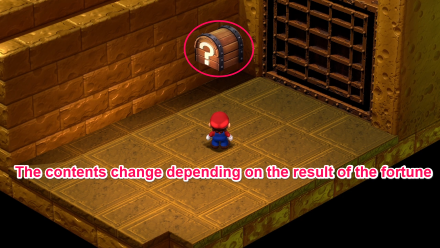 |
| ⑰ | 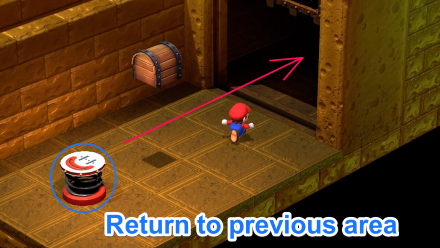 |
| ⑱ | Descend down the stairs and go through the passage to the right to proceed to the next area. |
| ⑲ | 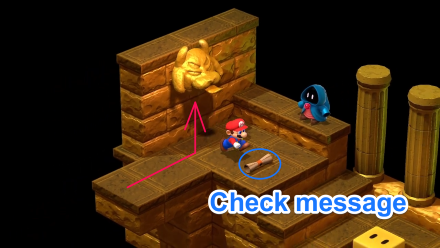 If "Mmm, I'm hungry..." is the text inside the scroll, you may proceed to the next step. If "Hmm, I'm already bored. That's it..." is the text, then go back to the previous area and try again.  |
| ⑳ | Step on the yellow platform to descend, then proceed to the next area located in front of you. |
| ㉑ | 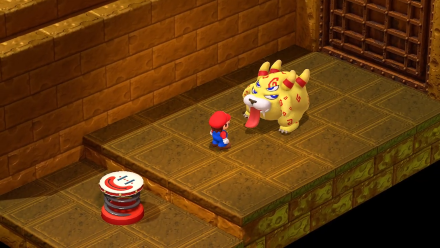 Speak to Belome to begin the battle. During the Belome boss fight, focus your attacks on Belome himself and ignore the clones. Be prepared to cure sleep status quickly or equip accessories like the Wake Up Pin to prevent it altogether. Upon their defeat, a switch will appear. Note: If the room is different from the image above, then the result of the fortune draw in ⑱ was different. Return to the previous area and start over from ⑰. ▶How to Beat Belome (Second Fight) |
| ㉒ | Step on the switch and the door will open. Go forward and proceed to the next area, the Monstro Town. |
| Continues into Monstro Town | |
Land's End Part 2
| Following Monstro Town | |
| ① | Go back to the area where the Shogun in the whirpool is located. |
|---|---|
| ② | Reach the other side using the pot cannon. |
| ③ | Use the flower to reach the next room. |
| ④ | Cross the Sky Bridge to get to the whirlpool area. |
| ⑤ | 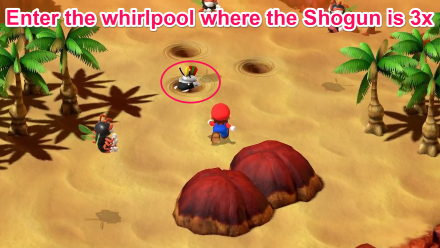 If you enter the whirlpool without the Shogun, you will be returned to the previous area. |
| ⑥ | 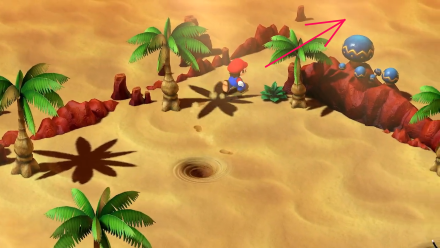 |
| ⑦ | Climb the cliff by using the Flying Koopas as platforms and enter the passage on the top of the cliff to go to Bean Valley. | Continues into Bean Valley |
6th Star Piece Walkthrough (Chapter 6)
Things to Do in Land's End
Draw Fortunes to Farm Items

You can return to the Shaman and pay 100 Coins to draw a fortune after the first time. Depending on the order you hit the statues, you can earn rewards such as Max Mushrooms or Yoshi Cookies!
Belome Temple Fortune and Best Order
Defeat Belome

Defeating Belome is required to complete Belome's Temple in Land's End. Belome will be stronger this time around, with more HP and new set of Attacks!
How to Beat Belome and Rewards
Land's End Bosses and Enemies
All Bosses
| Boss | HP | Weakness |
|---|---|---|
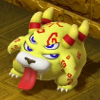 Belome (Temple) Belome (Temple)
|
1200 | Lightning |
All Enemies
| Enemy | HP | Weakness |
|---|---|---|
 Chewy Chewy
|
90 | - |
 Chow Chow
|
80 | - |
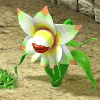 Fink Flower Fink Flower
|
200 | Fire |
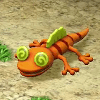 Geckit Geckit
|
100 | Ice |
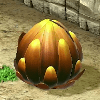 Kriffid Kriffid
|
320 | Ice |
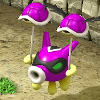 Octovader Octovader
|
250 | Fire |
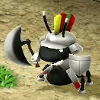 Shogun Shogun
|
150 | Ice |
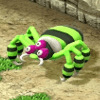 Spinthra Spinthra
|
230 | Ice |
 Stinger Stinger
|
65 | - |
Land's End Shops
| There are no shops in this location. |
Super Mario RPG Remake Related Guides

All Locations
| First Star Piece | |||
|---|---|---|---|
| Bowser's Keep | Mario's House | Mushroom Way | |
| Mushroom Kingdom | Bandit's Road | - | |
| Second Star Piece | |||
| Kero Sewers | Midas River | Tadpole Pond | |
| Rose Way | Rose Town | Forest Maze | |
| Third Star Piece | |||
| Pipe Vault* | Yo'ster Isle* | Moleville | |
| Fourth Star Piece | |||
| Booster Pass | Booster Tower | Booster Hill | |
| Marrymore | Star Hill | - | |
| Fifth Star Piece | |||
| Seaside Town | Sea | Sunken Ship | |
| Sixth Star Piece | |||
| Land's End | Monstro Town | Bean Valley | |
| Grate Guy's Casino* | Nimbus Land | Barrel Volcano | |
| Seventh Star Piece | |||
| Bowser's Keep | Weapon World | - | |
| *Optional Areas | |||
Comment
Author
Land's End Map and Walkthrough
Rankings
Gaming News
Popular Games

Genshin Impact Walkthrough & Guides Wiki

Honkai: Star Rail Walkthrough & Guides Wiki

Umamusume: Pretty Derby Walkthrough & Guides Wiki

Pokemon Pokopia Walkthrough & Guides Wiki

Resident Evil Requiem (RE9) Walkthrough & Guides Wiki

Monster Hunter Wilds Walkthrough & Guides Wiki

Wuthering Waves Walkthrough & Guides Wiki

Arknights: Endfield Walkthrough & Guides Wiki

Pokemon FireRed and LeafGreen (FRLG) Walkthrough & Guides Wiki

Pokemon TCG Pocket (PTCGP) Strategies & Guides Wiki
Recommended Games

Diablo 4: Vessel of Hatred Walkthrough & Guides Wiki

Cyberpunk 2077: Ultimate Edition Walkthrough & Guides Wiki

Fire Emblem Heroes (FEH) Walkthrough & Guides Wiki

Yu-Gi-Oh! Master Duel Walkthrough & Guides Wiki

Super Smash Bros. Ultimate Walkthrough & Guides Wiki

Pokemon Brilliant Diamond and Shining Pearl (BDSP) Walkthrough & Guides Wiki

Elden Ring Shadow of the Erdtree Walkthrough & Guides Wiki

Monster Hunter World Walkthrough & Guides Wiki

The Legend of Zelda: Tears of the Kingdom Walkthrough & Guides Wiki

Persona 3 Reload Walkthrough & Guides Wiki
All rights reserved
© Nintendo/SQUARE ENIX Characters: © Nintendo, © SQUARE ENIX
The copyrights of videos of games used in our content and other intellectual property rights belong to the provider of the game.
The contents we provide on this site were created personally by members of the Game8 editorial department.
We refuse the right to reuse or repost content taken without our permission such as data or images to other sites.





![Monster Hunter Stories 3 Review [First Impressions] | Simply Rejuvenating](https://img.game8.co/4438641/2a31b7702bd70e78ec8efd24661dacda.jpeg/thumb)


