Chapter 6: Light the Way Story Guide & Walkthrough
This is a guide and walkthrough to Chapter 6: Light the Way, a story chapter in the game Final Fantasy 7 Remake. Read on to learn locations of items, rewards for completing this chapter, as well as useful tips and strategies for getting through this part of the story.
| Previous Chapter | Dogged Pursuit |
|---|---|
| Current Chapter | Light the Way |
| Next Chapter | A Trap is Sprung |
List of Contents
- List of Main Scenario Objectives
- Chapter 6: Light the Way Walkthrough
- Sector 4 Plate
- Section G - Lower Level
- Section G - Upper Level
- Section H - Sun Lamp 1
- Section H - Sun Lamp 2
- Section H - Sun Lamp 3
- Section H - Sun Lamp 1 (2nd Time)
- Interplate Utility Access
- Optional: Get the Chocobo & Moogle Summon Materia
- Maps and Obtainable Items
- Maps
- Obtainable Items
- Shops & Vending Machines
- Tips and Strategies
- Story Walkthrough Related Links
List of Main Scenario Objectives
| No. | Title | Description |
|---|---|---|
| 1 | Head for Section G | The facilities inside the plate are not operating properly due to a lack of power. The team kills the lights to secure the emergency power supply. This allows them to open the Section G gate and keep moving forward. |
| 1-1 | Head to the Control Room | The team confirms that there is not enough electricity, and so they set out to secure an emergency power supply. |
| 1-2 | Secure a Power Source | The team turns off the sun lamp, thus triggering the emergency power supply. The gate now has enough power to operate. |
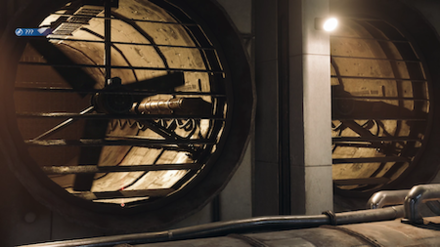
| 2 | Head for Section H | The team uses the pipe in front of the ventilation fans to reach Section H. There they find the cargo platform leading to Mako Reactor 5. |
| 2-1 | The Way to Section H | The team finds a pipe on the wall that leads to Section H. They have found a way through. |
| 3 | Power for the Platform | The team kills the lights and returns to the cargo platform. Now it is time to rendezvous with Biggs. |
| 3-1 | One Sun Lamp Down | The team has diverted power from one of the lights to the surrounding area. With this, the security system comes online. |
| 3-2 | Console Online | The terminal to operate the platforms is working. Activate it and keep forging ahead. |
| 3-3 | Two Sun Lamps Down | The team has diverted power from another sun lamp. The small platform now has power. |
| 3-4 | Three Sun Lamps Down | The team has diverted power from three sun lamps. The cargo platform now has enough power to operate. |
| 4 | To the Cargo Platform | Using the cargo platform, the team makes it to the rendezvous with Biggs. They take the grappling guns they will need to escape the facility, then head for the Mako Reactor 5 interior. |
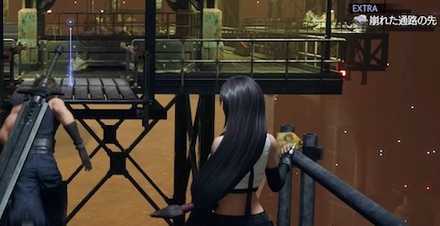
| ★ | Collapsed Passageway | The team detours around the collapsed passageway and recovers the materia in Section H-07. |
★This objective is labeled as a Discovery. It's unlocked after obtaining the Elemental Materia in the Sun Lamp 3 area.
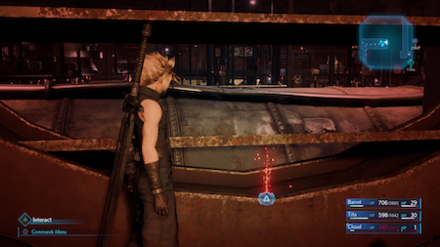
Chapter 6: Light the Way Walkthrough
Sector 4 Plate

| Objectives | |
|---|---|
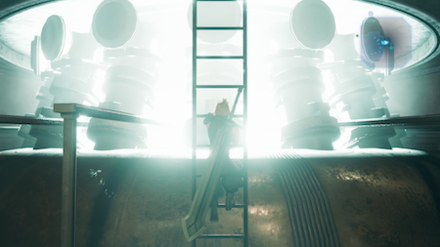
| 1 | Climb down the ladder. |
 At the bottom, open the chest on the right to get a Hi-Potion. At the bottom, open the chest on the right to get a Hi-Potion. |
|
| 2 | Continue down the path on the left. |
| 3 | Press the button on the right to try to open the gate. It will fail due to lack of power. |
| 4 | Head back and take the left path to get to the Control Room. |
| 5 | Climb the ladder into the Control Room. |
| 6 | After the cutscene, leave the Control Room and return to the area with the gate, and climb up the ladder on the left. |
| 7 | Pull the switch on the right just ahead of you. |
 Open the chest on the far left to get 3 Potions. Open the chest on the far left to get 3 Potions. |
|
| 8 | Go down the ladder and press the switch to open the gate. Go through and cross the bridge ahead of you. You'll fight two Grashtrikes on the other side. |
| 9 | Head around the path to the left, and take the bridge across to the next platform. |
 At the far end, you'll find a chest with Hazardous Material. At the far end, you'll find a chest with Hazardous Material. |
|
| 10 | Go down the stairs. Continue on the path. |
Section G - Lower Level
| Objectives | |
|---|---|
| 1 | Go straight ahead. Try to walk across the tattered bridge. It will collapse as you walk across it. Read on to the Section H - Sun Lamp 3 section to learn how to get the Elemental Materia on the other side. |
| 2 | Take the other path to the right. |
| 3 | Climb the set of stairs all the way up to the Upper Level. |
 Optional: Tread lightly across the tattered bridge. On the other side, you'll fight three Grashtrikes. Against the central pillar, open a chest to get a Remedy. Optional: Tread lightly across the tattered bridge. On the other side, you'll fight three Grashtrikes. Against the central pillar, open a chest to get a Remedy. |
Section G - Upper Level
| Objectives | |
|---|---|
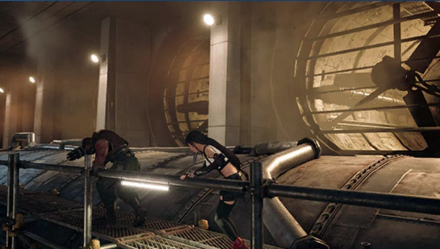
| 1 | Go up to Barret and Tifa and a cutscene will begin. After the cutscene, go across the bridge to the left. You'll fight with two Blugu and a Grashtrike. |
| 2 | Take the bridge on the opposite side and go down the stairs on the right end of the platform. |
| 3 | Continue ahead along the path. Climb up the ladder at the end. |
| 4 | Keep pushing ahead across the path against the gust of wind. |
Section H - Sun Lamp 1
| Objectives | |
|---|---|
| 1 | Go across the bridge ahead. Turn right to walk across the rickety bridge. |
| 2 | After the cutscene, go right across the bridge, then left across the next bridge. Climb up the stairs and you'll encounter three Grashtrikes. |
| 3 | Take the narrow bridge across to the left. |
| 4 | Flip the switch just to your right. |
 On the far right, you'll find a chest with a Phoenix Down. On the far right, you'll find a chest with a Phoenix Down. |
|
| 5 | Return to the platform you came from. Two Sentry Rays will appear. Take them out. |
| 6 | Press the button on the console ahead to move a catwalk. Move the catwalk to match the platform on the left to continue. |
 Alternately, move the catwalk all the way over to match the platform on the right. You'll find a chest with a Turbo Ether. Alternately, move the catwalk all the way over to match the platform on the right. You'll find a chest with a Turbo Ether. |
Section H - Sun Lamp 2
| Objectives | |
|---|---|
| 1 | On the next platform, you'll find two Terpsicolts and two Sentry Rays. |
| 2 | Go across the bridge to the Sun Lamp. Pull the switch to turn off the power. |
| 3 | Climb down the ladder. |
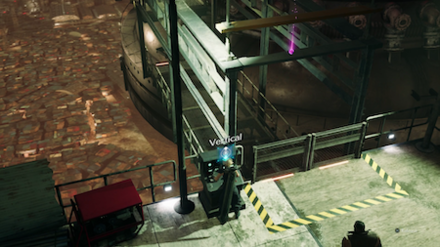
| 4 | Go across to the elevator and hit the switch to take the elevator across. |
| 5 | On the next platform, you'll fight four Sentry Gun Prototypes. |
| 6 | Walk across the bridge, then take the elevator on the left across. |
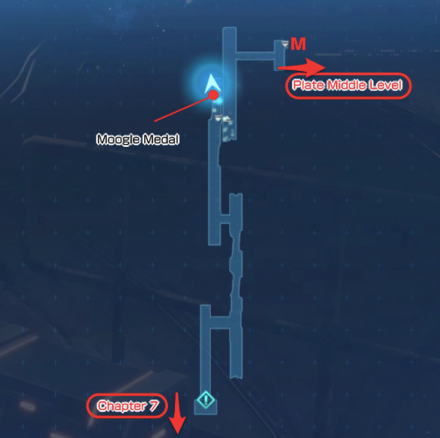
Section H - Sun Lamp 3

| Objectives | |
|---|---|
| 1 | Go across the platform toward the bridge. |
 Open the chest on the far side of the platform for a Moogle Medal. Open the chest on the far side of the platform for a Moogle Medal. |
|
| 2 | Optional: Climb down the ladder next to the Moogle Medal. Encounter two Queen Grashtrikes on the next platform. |
 After defeating the Queen Grashtrikes, check the console behind you to lower a bridge to another platform. At the end, you'll find an Elemental Materia. After defeating the Queen Grashtrikes, check the console behind you to lower a bridge to another platform. At the end, you'll find an Elemental Materia. |
|
 On the same console, lower the bridge all the way to its bottom possible extent. You'll be able to grab a MP Up Materia sitting on top of the bridge's i-beam. On the same console, lower the bridge all the way to its bottom possible extent. You'll be able to grab a MP Up Materia sitting on top of the bridge's i-beam. |
|
| 3 | Continue to the next platform. Turn right at the corner to access a console. |
| 4 | Move the catwalk with the console to place it at the end of the path on the left. |
| 5 | Go across the catwalk you placed. On the next platform, you'll fight to Terpsicolts and two Sentry Gun Prototypes. |
| 6 | Climb up the ladder to the Sun Lamp. Flip the switch to turn it off. |
 Go to the far right to get a Mesmeric Armlet. Go to the far right to get a Mesmeric Armlet. |
Section H - Sun Lamp 1 (2nd Time)
| Objectives | |
|---|---|
| 1 | Go back to the platform where you started. To get there from Sun Lamp 3, go straight until you reach the H-05 sign, then turn right, and take the elevator across the gap toward the H-01 sign. |
| 2 | Go up to the console to give power to the auxiliary platform. |
| 3 | After the cutscene, press the button to start the elevator across. Before you ride, if you didn't obtain the Chocobo & Moogle Materia yet, check the Optional section below to find out how. |
| 4 | Continue ahead to the next platform. You'll start battle with two Sentry Launchers, two Sentry Rays and a Sentry Gun Prototype. |
| 5 | Climb up the ladder at the far side. At the top, duck through the hole. |
Interplate Utility Access
| Objectives | |
|---|---|
| 1 | Climb the ladder. |
 Open the chest on the right to get a Moogle Medal. Open the chest on the right to get a Moogle Medal. |
|
| 2 | Continue ahead on the path. Take the stairs on the left, then take a right at the fork. |
| 3 | Go through the door and a cutscene will start. Biggs will give you a Light Machine Gun, 3 Hi-Potions and 3 Ethers. You'll also get a Grappling Gun. |
Optional: Get the Chocobo & Moogle Summon Materia
| Objectives | |
|---|---|
| 1 | After turning off all three Sun Lamps, return to the platform in the Sun Lamp 1 area with the console. |
| 2 | Instead of interacting with the console, take the elevator across. |
| 3 | Climb up the ladder on the far side. You can buy Electric de Chocobo from the Vending Machine here. |
| 4 | Access the console to stop the fans from turning. |
| 5 | Continue through the door. You'll have one minute to defeat a set group of enemies, which can include Grashtrikes, Queen Grashtrikes, and Sentry Rays. If you fail to complete the task in time, the loudspeaker will report an Error, and you'll have to do the challenge again. |
 Open the chest on the left side of the room to get a Hi-Potion. Open the chest on the left side of the room to get a Hi-Potion. |
|
| 6 | After completing the challenge, use the console to open the door. At the end of the tunnel, you'll find the Chocobo & Moogle Summon Materia. |
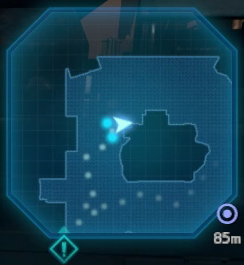
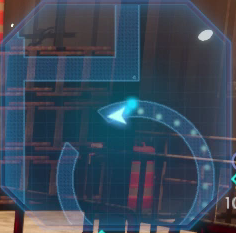
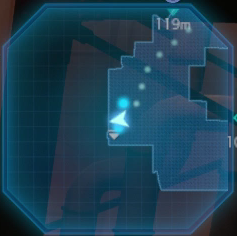
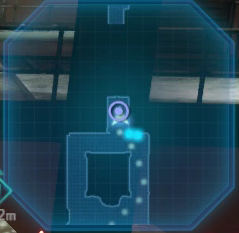
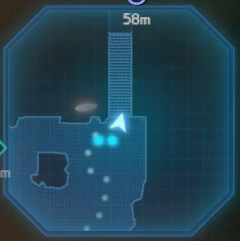
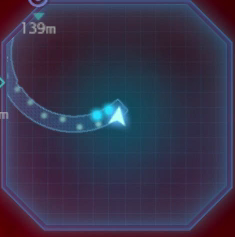
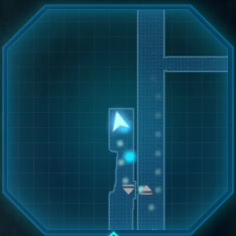
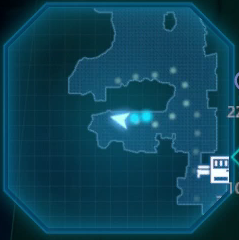
Maps and Obtainable Items
Maps
| List of Maps | |
|---|---|
 |
 |
 |
 |
Staircases and Elevators labeled with letters will connect to each other.
Obtainable Items
| Sector 4 Plate | ||
|---|---|---|
| Hi-Potion x1 | Potion x3 | Hazardous Material x1 |
| Section G - Lower Level | ||
| Remedy x1 | - | - |
| Section H - Sun Lamp 1 | ||
| Phoneix Down x1 | Turbo Ether x1 | Hi-Potion x1 |
| Electric de Chocobo | Chocobo & Moogle Materia x1 | - |
| Section H - Sun Lamp 3 | ||
| Moogle Medal x1 | Elemental Materia x1 | MP Up Materia x1 |
| Mesmeric Armlet x1 | - | - |
| Interplate Utility Access | ||
| Moogle Medal x1 | Light Machine Gun x1 | Hi-Potion x3 |
| Ether x3 | - | - |
Shops & Vending Machines
Vending Machine - Section F Cargo Platform
 |
 |
| Items | Price |
|---|---|
| Potion | 50 Gil |
| Phoenix Down | 300 Gil |
| Antidote | 80 Gil |
| Smelling Salts | 80 Gil |
| Weapons / Armor | Price |
|---|---|
| Iron Bangle | 1000 Gil |
| Star Bracelet | 1600 Gil |
| Leather Bracer | 1600 Gil |
| Accessories | Price |
|---|---|
| Power Wristguards | 800 Gil |
| Bulletproof Vest | 800 Gil |
| Earrings | 800 Gil |
| Talisman | 800 Gil |
| Revival Earrings | 500 Gil |
| Materia | Price |
|---|---|
| Healing Materia | 600 Gil |
| Cleansing Materia | 1500 Gil |
| Fire Materia | 500 Gil |
| Ice Materia | 500 Gil |
| Lightning Materia | 500 Gil |
| Poison Materia | 1500 Gil |
| Barrier Materia | 1500 Gil |
| Deadly Dodge Materia | 600 Gil |
Vending Machine - Section H Utility Access
 |
 |
| Items | Price |
|---|---|
| Potion | 50 Gil |
| Phoenix Down | 300 Gil |
| Antidote | 80 Gil |
| Smelling Salts | 80 Gil |
| Weapons / Armor | Price |
|---|---|
| Iron Bangle | 1000 Gil |
| Star Bracelet | 1600 Gil |
| Leather Bracer | 1600 Gil |
| Accessories | Price |
|---|---|
| Power Wristguards | 800 Gil |
| Bulletproof Vest | 800 Gil |
| Earrings | 800 Gil |
| Talisman | 800 Gil |
| Revival Earrings | 500 Gil |
| Materia | Price |
|---|---|
| Healing Materia | 600 Gil |
| Cleansing Materia | 1500 Gil |
| Fire Materia | 500 Gil |
| Ice Materia | 500 Gil |
| Lightning Materia | 500 Gil |
| Poison Materia | 1500 Gil |
| Barrier Materia | 1500 Gil |
| HP Up Materia | 2000 Gil |
| MP Up Materia | 2000 Gil |
| Deadly Dodge Materia | 600 Gil |
Vending Machine - Plate Ventilation Facilities - Control Room
 |
 |
| Items | Price |
|---|---|
| 18. Electric de Chocobo | 50 Gil |
| Potion | 50 Gil |
| Phoenix Down | 300 Gil |
| Antidote | 80 Gil |
| Smelling Salts | 80 Gil |
| Weapons / Armor | Price |
|---|---|
| Iron Bangle | 1000 Gil |
| Star Bracelet | 1600 Gil |
| Leather Bracer | 1600 Gil |
| Accessories | Price |
|---|---|
| Power Wristguards | 800 Gil |
| Bulletproof Vest | 800 Gil |
| Earrings | 800 Gil |
| Talisman | 800 Gil |
| Revival Earrings | 500 Gil |
| Materia | Price |
|---|---|
| Healing Materia | 600 Gil |
| Cleansing Materia | 1500 Gil |
| Fire Materia | 500 Gil |
| Ice Materia | 500 Gil |
| Lightning Materia | 500 Gil |
| Poison Materia | 1500 Gil |
| Barrier Materia | 1500 Gil |
| HP Up Materia | 2000 Gil |
| MP Up Materia | 2000 Gil |
| Deadly Dodge Materia | 600 Gil |
Tips and Strategies
Don't Miss the Rare Materia
Chapter 6 is host to the Elemental Materia, extremely rare and valuable throughout the game, as well as the Chocobo & Moogle Materia, which can only be obtained by completing an optional area within this chapter. Check the Story Walkthrough above for details on obtaining both of these Materia!
Buy Smelling Salts
In the first area of Sector 4 Plate, before climbing down the ladder, go to the Vending Machine. This is the first opportunity to buy Smelling Salts - you'll need these when fighting Blugu, as it can put your party members to Sleep.
Story Walkthrough Related Links
| Chapter 1 | The Destruction of Mako Reactor 1 |
|---|---|
| Chapter 2 | Fateful Encounters |
| Chapter 3 | Home Sweet Slum |
| Chapter 4 | Mad Dash |
| Chapter 5 | Dogged Pursuit |
| Chapter 6 | Light the Way |
| Chapter 7 | A Trap is Sprung |
| Chapter 8 | Budding Bodyguard |
| Chapter 9 | The Town That Never Sleeps |
| Chapter 10 | Rough Waters |
| Chapter 11 | Haunted |
| Chapter 12 | Fight for Survival |
| Chapter 13 | A Broken World |
| Chapter 14 | In Search of Hope |
| Chapter 15 | The Day Midgar Stood Still |
| Chapter 16 | The Belly of the Beast |
| Chapter 17 | Deliverance from Chaos |
| Chapter 18 | Destiny's Crossroads |
| INTERmission Chapters | |
|---|---|
| Chapter 1 | Wutai's Finest |
| Chapter 2 | Covert Ops |
Comment
You missed Antidote x 2 in the Obtainable items section. Map and the list don't match.
Author

Chapter 6: Light the Way Story Guide & Walkthrough
Rankings
- We could not find the message board you were looking for.
Gaming News
![Animal Crossing: New Horizons Review [Switch 2] | Needlessly Crossing Over to a New Generation](https://img.game8.co/4391759/47d0408b0b8a892e453a0b90f54beb8a.png/show)


Popular Games

Genshin Impact Walkthrough & Guides Wiki
Honkai: Star Rail Walkthrough & Guides Wiki
Arknights: Endfield Walkthrough & Guides Wiki
Umamusume: Pretty Derby Walkthrough & Guides Wiki
Wuthering Waves Walkthrough & Guides Wiki
Pokemon TCG Pocket (PTCGP) Strategies & Guides Wiki
Abyss Walkthrough & Guides Wiki
Zenless Zone Zero Walkthrough & Guides Wiki
Digimon Story: Time Stranger Walkthrough & Guides Wiki
Clair Obscur: Expedition 33 Walkthrough & Guides Wiki


Recommended Games
Fire Emblem Heroes (FEH) Walkthrough & Guides Wiki
Pokemon Brilliant Diamond and Shining Pearl (BDSP) Walkthrough & Guides Wiki
Diablo 4: Vessel of Hatred Walkthrough & Guides Wiki
Super Smash Bros. Ultimate Walkthrough & Guides Wiki
Yu-Gi-Oh! Master Duel Walkthrough & Guides Wiki
Elden Ring Shadow of the Erdtree Walkthrough & Guides Wiki
Monster Hunter World Walkthrough & Guides Wiki
The Legend of Zelda: Tears of the Kingdom Walkthrough & Guides Wiki
Persona 3 Reload Walkthrough & Guides Wiki
Cyberpunk 2077: Ultimate Edition Walkthrough & Guides Wiki


All rights reserved
© SQUARE ENIX CO., LTD. All Rights Reserved.
CHARACTER DESIGN:TETSUYA NOMURA/ROBERTO FERRARI
The copyrights of videos of games used in our content and other intellectual property rights belong to the provider of the game.
The contents we provide on this site were created personally by members of the Game8 editorial department.
We refuse the right to reuse or repost content taken without our permission such as data or images to other sites.
So does that mean that we are not able to have more than 2 elemental materias?