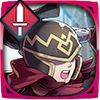
Legendary Hero Battle: Legendary Sakura Abyssal Guide and Recommended Team
★ Latest Banners: Harmonized CYL Hector & Celica
☆ New: Harmonized Brave Hector, Harmonized Brave Celica, Chosen Fjorm
★ Free Units: Griss
☆ State of the Meta (February 2026)

This is a guide to clearing the Infernal and Abyssal maps for Legendary Hero Battle: Legendary Sakura in Fire Emblem Heroes (FEH). To see strategy for defeating Legendary Hero Battle: Legendary Sakura, enemy information, as well as the best units and party to use, read on!
| Boss Unit for This Legendary Hero Battle |
|---|
|
[9.5/10] |
Table of Contents
- Legendary Hero Battle - Sakura Strategy Overview
- Unit Placement
- Abyssal Enemy Information
- Infernal Enemy Information
- Legendary Hero Battle - Sakura Strategy
- Recommended Units for Legendary Hero Battle - Sakura
- Legendary Hero Battle - Sakura Abyssal Strategy Example
- User Submitted Parties for Legendary Hero Battle - Sakura
- Related Guides
Legendary Hero Battle - Sakura Strategy Overview
| Featured Hero |
|
|---|---|
| First Clear Reward | Abyssal: Gold Sage's Ornament
Infernal:
Lunatic:
Hard:
Normal:
|
| Recommended Level | Lv.40 |
| Difficulty | Abyssal Infernal Lunatic Hard |
| Conditions | Condition 1: All units must survive Condition 2: Cannot use Light's Blessing |
| Dates Active | 02/27/2025 - 03/13/2025 |
Unit Placement
| Abyssal | Infernal |
|---|---|
|
|
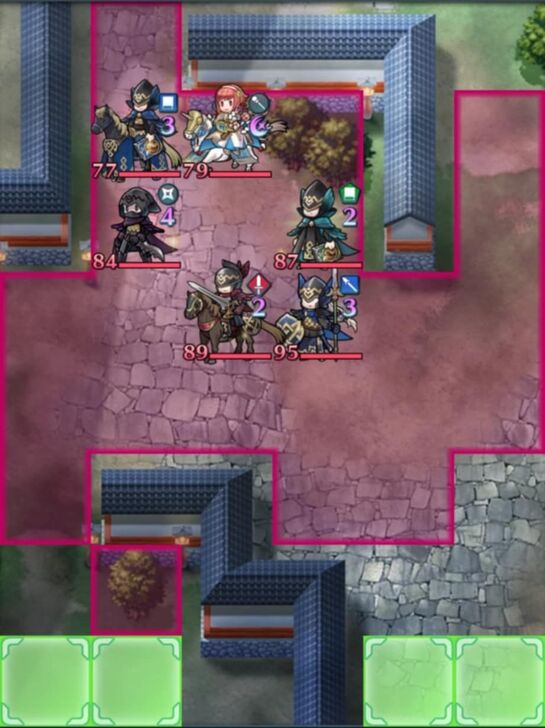
Abyssal Enemy Information
A
 Blue Cavalier Blue Cavalier
|
HP 77 |
Atk 64 |
Spd 37 |
Def 27 |
Res 47 |
||||||
|---|---|---|---|---|---|---|---|---|---|---|---|
|
|
|
||||||||||
| B
|
HP 79 |
Atk 76 |
Spd 59 |
Def 32 |
Res 36 |
||||||
|
|
|
||||||||||
C
 Thief Thief
|
HP 84 |
Atk 60 |
Spd 60 |
Def 27 |
Res 51 |
||||||
|
|
|
||||||||||
D
 Green Mage Green Mage
|
HP 87 |
Atk 63 |
Spd 51 |
Def 30 |
Res 43 |
||||||
|
|
|
||||||||||
E
 Sword Cavalier Sword Cavalier
|
HP 89 |
Atk 56 |
Spd 40 |
Def 47 |
Res 49 |
||||||
|
|
|
||||||||||
F
 Lance Fighter Lance Fighter
|
HP 95 |
Atk 61 |
Spd 48 |
Def 47 |
Res 37 |
||||||
|
|
|
||||||||||
Abyssal Reinforcements
Turn 2 Reinforcements
Reinforcements 1 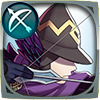 Bow Cavalier Bow Cavalier | HP 88 | Atk 66 | Spd 43 | Def 36 | Res 34 | ||||||
|---|---|---|---|---|---|---|---|---|---|---|---|
| | | ||||||||||
Reinforcements 1  Red Manakete Red Manakete | HP 95 | Atk 61 | Spd 46 | Def 45 | Res 48 | ||||||
| | | ||||||||||
Reinforcements 1 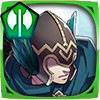 Axe Fighter Axe Fighter | HP 90 | Atk 70 | Spd 56 | Def 39 | Res 25 | ||||||
| | | ||||||||||
Turn 3 Reinforcements
Reinforcements 2  Green Bat Green Bat | HP 78 | Atk 60 | Spd 61 | Def 45 | Res 28 | ||||||
|---|---|---|---|---|---|---|---|---|---|---|---|
| | | ||||||||||
Reinforcements 2  Lance Flier Lance Flier | HP 85 | Atk 58 | Spd 49 | Def 36 | Res 49 | ||||||
| | | ||||||||||
Reinforcements 2  Sword Knight Sword Knight | HP 99 | Atk 69 | Spd 26 | Def 65 | Res 33 | ||||||
| | | ||||||||||
Turn 4 Reinforcements
Reinforcements 3  Green Flier Green Flier | HP 76 | Atk 57 | Spd 52 | Def 26 | Res 45 | ||||||
|---|---|---|---|---|---|---|---|---|---|---|---|
| | | ||||||||||
Reinforcements 3  Cleric Cleric | HP 76 | Atk 63 | Spd 44 | Def 29 | Res 58 | ||||||
| | |||||||||||
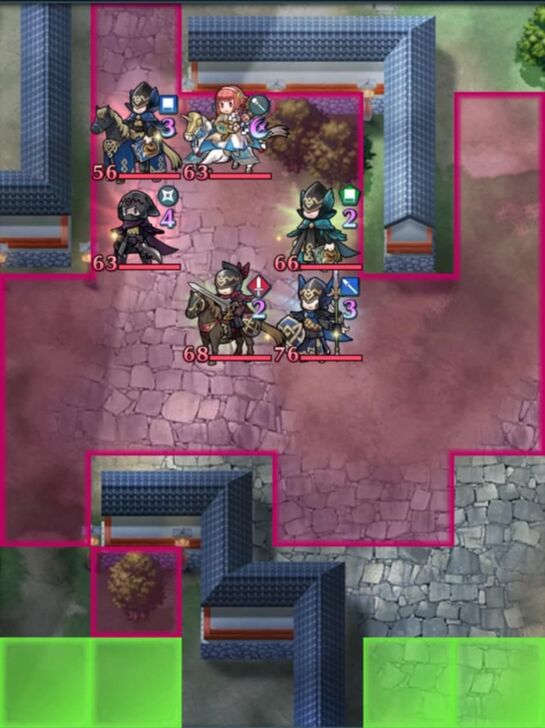
Infernal Enemy Information
| A
Blue Cavalier
|
HP 56 |
Atk 60 |
Spd 34 |
Def 24 |
Res 43 |
||||||
|---|---|---|---|---|---|---|---|---|---|---|---|
|
|
|
||||||||||
| B
|
HP 63 |
Atk 67 |
Spd 51 |
Def 25 |
Res 30 |
||||||
|
|
|
||||||||||
| C
Thief
|
HP 63 |
Atk 56 |
Spd 55 |
Def 24 |
Res 47 |
||||||
|
|
|
||||||||||
| D
Green Mage
|
HP 66 |
Atk 59 |
Spd 47 |
Def 28 |
Res 39 |
||||||
|
|
|
||||||||||
| E
Sword Cavalier
|
HP 68 |
Atk 52 |
Spd 37 |
Def 43 |
Res 45 |
||||||
|
|
|
||||||||||
| F
Lance Fighter
|
HP 76 |
Atk 57 |
Spd 44 |
Def 43 |
Res 35 |
||||||
|
|
|
||||||||||
Infernal Reinforcements
Turn 2 Reinforcements
| Reinforcements 1 Bow Cavalier | HP 68 | Atk 62 | Spd 39 | Def 33 | Res 32 | ||||||
|---|---|---|---|---|---|---|---|---|---|---|---|
| | | ||||||||||
| Reinforcements 1 Red Manakete | HP 76 | Atk 57 | Spd 42 | Def 41 | Res 44 | ||||||
| | | ||||||||||
| Reinforcements 1 Axe Fighter | HP 71 | Atk 66 | Spd 52 | Def 35 | Res 23 | ||||||
| | | ||||||||||
Turn 3 Reinforcements
| Reinforcements 2 Green Bat | HP 57 | Atk 56 | Spd 57 | Def 41 | Res 25 | ||||||
|---|---|---|---|---|---|---|---|---|---|---|---|
| | | ||||||||||
| Reinforcements 2 Lance Flier | HP 64 | Atk 54 | Spd 45 | Def 34 | Res 45 | ||||||
| | | ||||||||||
| Reinforcements 2 Sword Knight | HP 81 | Atk 65 | Spd 23 | Def 60 | Res 31 | ||||||
| | | ||||||||||
Turn 4 Reinforcements
| Reinforcements 3 Green Flier | HP 55 | Atk 53 | Spd 48 | Def 23 | Res 41 | ||||||
|---|---|---|---|---|---|---|---|---|---|---|---|
| | | ||||||||||
| Reinforcements 3 Cleric | HP 55 | Atk 54 | Spd 40 | Def 32 | Res 49 | ||||||
| | |||||||||||
Legendary Hero Battle - Sakura Strategy
Use Player Phase Units!
Using a player phase strategy is the best option on this map if you have the units to clear multiple enemies quickly in one turn. This strategy is used in order to avoid getting in range of any of the foes, especially since most of them will be buffed with warping and other movement effects from Legendary Sakura's Salvage.
The enemies will move on the first turn even if you did not step into the danger area.
The difficult part with this strategy is if you are unable to defeat Legendary Sakura on the first turn. She will be using Ice Lock+ to heal her allies, and more importantly, create Ice Terrain which will hinder your sweep.
If you cannot defeat Legendary Sakura on the first turn, we recommend an Enemy Phase strategy instead. However, if you can, using units like Emblem Sigurd or Brave Felix, then a quick player phase strategy works wonders on this map.
If you have Emblem Sigurd or Brave Felix, just kill as many enemies as you can on the first turn and retreat to safety afterwards, slowly picking off the enemies until the map is cleared. Be aware of two enemy reinforcements with Canto Control 3 and take them out first to avoid getting hindered in your retreat.
If you do not have either of those two units, the strategy is different.
To start, use a ranged cavalry unit to defeat the Lance Fighter on the right side, and then use refresher and movement effects to retreat to safety. The enemies will rush toward your units but be unable to reach. Legendary Sakura herself will use Ice Lock+ and then Canto backward, putting her out of range of your units, which is good for now as you want to focus on clearing the generic foes.
Simply pick off the units one at a time and retreat afterwards, ensuring you keep out of their range. Once you are able to attack Legendary Sakura, take her out first as she is the most dangerous enemy on this map.
Be careful with reinforcement foes that equip warping effects like Assault Troop 3 and Wings of Mercy 4, as their threat range can be deceptive.
An Enemy Phase strategy is also viable!
Using a tanking strategy is easier to pull off, but requires specific units and supports. The most important of which is having a tank unit that can neutralize effects that prevent counterattacks, as you want to be able to retaliate against Legendary Sakura.
A unit like Ice Tribe Fjorm or Emblem Ike works wonders on this map, as they have this effect built-in.
If you don't have a tank unit with this effect, we recommend balling up into a Savior Ball, with a healer support to keep your Far Save tank healthy from Legendary Sakura's attacks. The Mystic Boost 3 Sacred Seal will cut her damage in half and heal your tank unit at the same time, making it the perfect Sacred Seal for your Far Save tank.
You can either use only one tank unit and bait on the right side, or two tank units and bait from both the left and the right.
We suggest placing a tank and a healer on the right side, and an offensive unit and a refresher on the left side. Use the tank and support combo to bait units on the right side, keeping your tank healthy by healing them whenever you can.
As for the left side, use the offensive unit to pick off enemies on that side, and the refresher to give them an extra action to retreat to safety and use Reposition on the refresher to keep them safe as well.
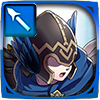
Recommended Units for Legendary Hero Battle - Sakura
Player Phase Units
| Unit Name | |
|---|---|
|
|
Lance Cavalry Holy-War Spear grants Emblem Sigurd +2 movement (5 total), 【Canto (3)】, and bonus true damage. Override is an area-of-effect Special that grants an extra action after use. |
|
|
Sword Infantry New Levin Sword accelerates Special by 2, opening up either area-of-effect spam or quick Galeforce. Lone Wolf can grant up to three actions in one turn. |
|
|
Lance Armored Black Yule Lance creates 【Divine Vein (Flame)】 tiles, grants Special cooldown charges pre-combat, and cuts the effectiveness of enemy damage reduction skills. Raging Tempest grants mobility and one additional action after combat. Inheriting Galeforce can grant a third action per turn. |
|
|
Sword Armored Regal Sunshade's brave effect can quickly eliminate enemies. Raging Storm can grant one additional action after combat. Inheriting Galeforce can grant a third action per turn. |
|
|
Lance Cavalry Incredibly mobile with United Bouquet granting movement+1 and Forever Yours granting 【Canto (Dist, +1; Max 4)】. Both Forever Yours and Duo Skill generate additional actions while refreshing Canto. |
|
|
Red Tome Cavalry Can act up to four times in one turn with Golden Sunlight, Time and Light, and her Duo Skill. Flared Sparrow leaves behind 【Divine Vein (Flame)】 terrain, softening up enemies for future engagements. |
|
|
Colorless Bow Cavalry Great nuking power with Ylisse Ninja Bow dealing up to +25 true damage. Future Focus is a Swap that also grants 【Future Witness】 and 【Null Follow-Up】 to multiple allies upon use. Duo Skill grants another action post-combat and refreshes Canto. |
|
|
Red Tome Cavalry Great nuking power with Radiant Scrolls. Flared Mirror creates Divine Veins that hinder movement for enemy ranged units and deal pre-combat damage to foes when they enter combat. Duo Skill grants another action post-combat. |
|
|
Green Tome Cavalry Ninjutsu Scrolls' brave effect can quickly defeat enemies. Duo Skill grants herself an additional action. |
|
|
Sword Cavalry Arcane Devourer grants bonus Special charges and Special cooldown acceleration, allowing an easy Galeforce trigger. Fate Unchanged... allows repositioning an ally to safety and using the extra action for Fallen Chrom to retreat to safety himself. |
|
|
Lance Cavalry Geirdriful grants bonus Special charges and Special cooldown acceleration, allowing an easy Galeforce trigger. A Fate Changed! allows repositioning an ally to safety and using the extra action for Brave Chrom to retreat to safety himself. |
|
|
Colorless Tome Cavalry Quietus Gullveig and Time is Light grant herself additional actions after combat. Flared Sparrow leaves behind 【Divine Vein (Flame)】 terrain, softening up enemies for future engagements. |
|
|
Sword Cavalry Lyngheiðr grants Canto for mobility. Seiðr Shell+ is pre-charged and can defeat an enemy quickly. |
Tank Units
| Unit Name | |
|---|---|
|
|
Sword Infantry Emblem Ragnell neutralizes multiple penalties that affect his combat. Laguz Friend 4 provides strong damage reduction. Great Aether provides extra damage reduction and sustain to keep him healthy throughout multiple combats. |
|
|
Lance Armored Ice-Crystal Spear provides multiple defensive effects and a Null C-Disrupt effect. Dual Ice Mirrors and Shield Fighter work together to heavily mitigate damage from multiple ranged attacks and then reflect the damage back onto the enemy. |
|
|
Sword Armored Fellowship Blade grants 【Bulwark】 to protect allies and grants Hector bonus true damage and true damage reduction. Oath of Ostia applies 【Divine Vein (Stone)】 and grants Hector Special skipping and damage reduction piercing. D Counter Echo allows counterattacks against ranged foes. |
|
|
Colorless Breath Armored Multiple damage reduction effects and the 【Divine Vein (Stone)】 effect paired with high Spd allow her to survive multiple engagements. |
|
|
Axe Armored A free-to-play unit available using Heroic Grails with a statline heavily focused on tanking. Praise-Piner Axe neutralizes foe's bonuses, grants damage reduction, and has post-combat healing to loop her built-in Miracle effect over and over again. |
|
|
Axe Armored High mobility for an armored unit. Incredibly sturdy with refined Flower Hauteclere and Black Eagle Rule granting multiple defensive effects. |
Support Units
| Unit Name | |
|---|---|
|
|
Staff Flying Grants damage reduction, healing, and can shut down "At start of turn" effects of foes in cardinal directions upon winning a Res check. |
|
|
Staff Cavalry Kitty-Cat Parasol grants Special cooldown charges, 30% damage reduction, and "neutralizes foe's bonuses to Atk" to nearby allies and can double as an offensive unit with high Atk and a guaranteed follow-up attack. |
|
|
Lance Flying Refined Spear of Assal grants Seteth and nearby allies bonus stats, true damage, true damage reduction, and neutralizes foe's bonuses. |
|
|
Staff Flying Grants Atk+6 and Special acceleration to nearby allies during combat. |
Refresher Units
| Unit Name | |
|---|---|
|
|
Green Tome Flying Grants additional Atk to allies in similar cardinal directions. Can use her Duo Skill to grant another action to an adjacent ally. |
|
|
Blue Tome Flying Grants additional Atk and Spd to allies in similar cardinal directions. |
|
|
Blue Tome Flying Grants additional bonuses equal to highest bonus on unit and +1 movement. |
|
|
Green Tome Cavalry Grants +6 to all stats and +1 movement to target unit and all adjacent allies. Can use Harmonized Skill to grant extra actions to allies. |
List of All Dancers | Heroes with Refresher Skills
Legendary Hero Battle - Sakura Abyssal Strategy Example
Currently Unavailable!
An Abyssal strategy example for Legendary Hero Battle - Sakura is currently unavailable. Stay tuned!
User Submitted Parties for Legendary Hero Battle - Sakura
We are looking for user submitted clears!
Let us know about your party and how you cleared the maps in the comments below, via a picture of your team and their skills.
If you have uploaded the walkthrough video on Twitter etc., please enter the URL as well!
FEH Related Guides
Legendary Hero Battle Walkthroughs
Legendary Hero Battle Walkthroughs and Schedule
List of Legendary Hero Battles
 Diamant: Fortified King
 Black Knight: Mortal Legend
 Legendary Ayra and Mythic Athos
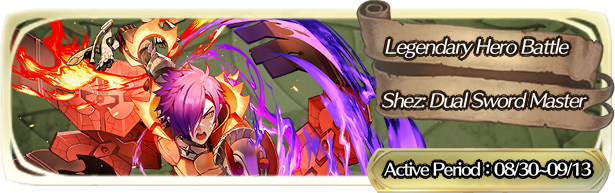 Shez: Dual Sword Master
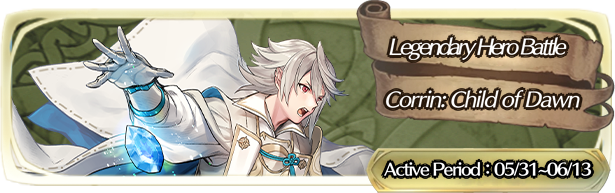 Corrin: Child of Dawn
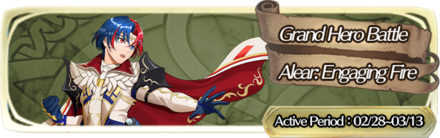 Alear: Engaging Fire
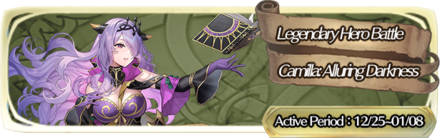 Camilla: Alluring Darkness
 Elincia: Undaunted Queen
 Alear: Awoken Divinity
 Guinivere: Queen of Bern
 Hinoka: Thundering Wings
 Yuri: Underground Lord
 Robin: Exalt's Other Half
 Shez: Sharpest Blades
 Ninian: Ice-Dragon Oracle
 Deirdre: Fated Saint
 Xander: Gallant King
 Myrrh: Guardian Dragon
 Nanna: Beloved Princess
 Caeda: Beloved Queen
 Byleth: The Fódlan Light
 Fae: Childlike Dragon
 Micaiah: Radiant Queen
 Byleth: the Fódlan Star
 Sigurd: Fated Holy Knight
 Claude: King of Unification
 Lilina: Firelight Leader
 Dimitri: Savior King
 Corrin: Child of Dusk
 Seliph: Scion of Light
 Edelgard: Flame Emperor
 Chrom: Crowned Exalt
 Celica: Queen of Valentia
 Leif: Unifier of Thracia
 Julia: Crusader of Light
 Eliwood: Blazing Knight
 Alm: Saint-King
 Roy: Blazing Lion
 Azura: Vallite Songstress
 Hríd: Icy Blade
 Eirika: Graceful Resolve
 Tiki: Legendary Dragon
 Marth: Hero-King
 Lucina: Glorious Archer
 Hector: Marquess of Ostia
 Ryoma: Supreme Samurai
 Lyn: Lady of the Wind
 Robin: Fell Vessel
Author

Legendary Hero Battle: Legendary Sakura Abyssal Guide and Recommended Team
Premium Articles
Rankings
- We could not find the message board you were looking for.
Gaming News


Popular Games

Genshin Impact Walkthrough & Guides Wiki
Honkai: Star Rail Walkthrough & Guides Wiki
Arknights: Endfield Walkthrough & Guides Wiki
Umamusume: Pretty Derby Walkthrough & Guides Wiki
Wuthering Waves Walkthrough & Guides Wiki
Pokemon TCG Pocket (PTCGP) Strategies & Guides Wiki
Abyss Walkthrough & Guides Wiki
Zenless Zone Zero Walkthrough & Guides Wiki
Digimon Story: Time Stranger Walkthrough & Guides Wiki
Clair Obscur: Expedition 33 Walkthrough & Guides Wiki


Recommended Games
Fire Emblem Heroes (FEH) Walkthrough & Guides Wiki
Pokemon Brilliant Diamond and Shining Pearl (BDSP) Walkthrough & Guides Wiki
Diablo 4: Vessel of Hatred Walkthrough & Guides Wiki
Super Smash Bros. Ultimate Walkthrough & Guides Wiki
Yu-Gi-Oh! Master Duel Walkthrough & Guides Wiki
Elden Ring Shadow of the Erdtree Walkthrough & Guides Wiki
Monster Hunter World Walkthrough & Guides Wiki
The Legend of Zelda: Tears of the Kingdom Walkthrough & Guides Wiki
Persona 3 Reload Walkthrough & Guides Wiki
Cyberpunk 2077: Ultimate Edition Walkthrough & Guides Wiki


All rights reserved
© 2025 Nintendo / INTELLIGENT SYSTEMS
The copyrights of videos of games used in our content and other intellectual property rights belong to the provider of the game.
The contents we provide on this site were created personally by members of the Game8 editorial department.
We refuse the right to reuse or repost content taken without our permission such as data or images to other sites.
It's a bit of a premium team but I managed to roll all three house lords on the 2025 Valintine's banner. Using all three of them (plus any dancer) you can clear Sakura: Full Bloom Abyssal in 1 turn. https://youtu.be/_kzJTYasEZ0?si=gJrzzzgJ4LwBQe3V