 Diamant: Fortified King
 Black Knight: Mortal Legend
 Sakura: In Full Bloom
 Legendary Ayra and Mythic Athos
 Shez: Dual Sword Master
 Corrin: Child of Dawn
 Alear: Engaging Fire
 Camilla: Alluring Darkness
 Elincia: Undaunted Queen
 Guinivere: Queen of Bern
 Hinoka: Thundering Wings
 Yuri: Underground Lord
 Robin: Exalt's Other Half
 Shez: Sharpest Blades
 Ninian: Ice-Dragon Oracle
 Deirdre: Fated Saint
 Xander: Gallant King
 Myrrh: Guardian Dragon
 Nanna: Beloved Princess
 Caeda: Beloved Queen
 Byleth: The Fódlan Light
 Fae: Childlike Dragon
 Micaiah: Radiant Queen
 Byleth: the Fódlan Star
 Sigurd: Fated Holy Knight
 Claude: King of Unification
 Lilina: Firelight Leader
 Dimitri: Savior King
 Corrin: Child of Dusk
 Seliph: Scion of Light
 Edelgard: Flame Emperor
 Chrom: Crowned Exalt
 Celica: Queen of Valentia
 Leif: Unifier of Thracia
 Julia: Crusader of Light
 Eliwood: Blazing Knight
 Alm: Saint-King
 Roy: Blazing Lion
 Azura: Vallite Songstress
 Hríd: Icy Blade
 Eirika: Graceful Resolve
 Tiki: Legendary Dragon
 Marth: Hero-King
 Lucina: Glorious Archer
 Hector: Marquess of Ostia
 Ryoma: Supreme Samurai
 Lyn: Lady of the Wind
 Robin: Fell Vessel
This survey will take about 1 minute.
Your answers will help us to improve our website.
Fire Emblem Heroes (FEH)
Legendary Hero Battle - Alear (F) Abyssal Guide and Recommended Team
★ Latest Banners: Tiki: Everlasting Voice | Springtime Sisters
☆ New: Mythic Tiki (Adult) | Spring Thórr, Spring Dorothea, Spring Sothe, Spring Eirika
★ Free Units: Spring Bernadetta
☆ State of the Meta (February 2026)
This is a guide to clearing the Infernal and Abyssal maps for Legendary Hero Battle - Alear (F) in Fire Emblem Heroes (FEH). To see strategy for defeating Legendary Hero Battle - Alear (F), enemy information, as well as the best units and party to use, read on!
| Boss Unit for This Legendary Hero Battle |
|---|
|
[8.5/10] |
Table of Contents
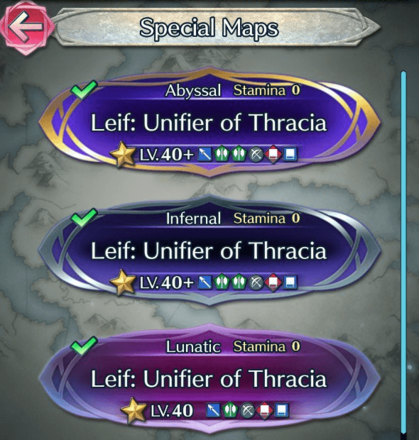
- Legendary Hero Battle - Alear (F) Strategy Overview
- Unit Placement
- Abyssal Enemy Information
- Infernal Enemy Information
- Legendary Hero Battle - Alear (F) Strategy
- Recommended Units for Legendary Hero Battle - Alear (F)
- Legendary Hero Battle - Alear (F) Abyssal Strategy Example
- User Submitted Parties for Legendary Hero Battle - Alear (F)
- Related Guides
Legendary Hero Battle - Alear (F) Strategy Overview
| Featured Hero |
|
|---|---|
| First Clear Reward | Abyssal: Gold Lion Insignia
Infernal:
Lunatic:
Hard:
Normal:
|
| Recommended Level | Lv.40 |
| Difficulty | Abyssal Infernal Lunatic Hard |
| Conditions | Condition 1: All units must survive Condition 2: Cannot use Light's Blessing |
| Dates Active | 08/31/2023 - 09/14/2023 |
Unit Placement
| Abyssal | Infernal |
|---|---|

|

|
Abyssal Enemy Information
| A
|
HP 81 |
Atk 64 |
Spd 60 |
Def 45 |
Res 49 |
||||||
|---|---|---|---|---|---|---|---|---|---|---|---|
|
|
|
||||||||||
B
 Bow Cavalier Bow Cavalier
|
HP 76 |
Atk 68 |
Spd 42 |
Def 19 |
Res 18 |
||||||
|
|
|
||||||||||
C
 Blue Fáfnir Blue Fáfnir
|
HP 83 |
Atk 52 |
Spd 44 |
Def 41 |
Res 35 |
||||||
|
|
|
||||||||||
D
 Sword Fighter Sword Fighter
|
HP 89 |
Atk 56 |
Spd 41 |
Def 39 |
Res 27 |
||||||
|
|
|
||||||||||
E
 Green Mage Green Mage
|
HP 75 |
Atk 53 |
Spd 44 |
Def 24 |
Res 36 |
||||||
|
|
|
||||||||||
F
 Lance Cavalier Lance Cavalier
|
HP 82 |
Atk 55 |
Spd 29 |
Def 37 |
Res 35 |
||||||
|
|
|
||||||||||
Abyssal Reinforcements
Turn 2 Reinforcements
Reinforcements 1  Cleric Cleric | HP 70 | Atk 55 | Spd 37 | Def 23 | Res 53 | ||||||
|---|---|---|---|---|---|---|---|---|---|---|---|
| | | ||||||||||
Reinforcements 1  Red Manakete Red Manakete | HP 88 | Atk 55 | Spd 39 | Def 37 | Res 40 | ||||||
| | | ||||||||||
Reinforcements 1  Axe Dragon Axe Dragon | HP 82 | Atk 61 | Spd 32 | Def 43 | Res 26 | ||||||
| | | ||||||||||
Turn 3 Reinforcements
Reinforcements 2  Blue Manakete Blue Manakete | HP 88 | Atk 55 | Spd 39 | Def 41 | Res 36 | ||||||
|---|---|---|---|---|---|---|---|---|---|---|---|
| | | ||||||||||
| Reinforcements 2 Sword Fighter | HP 87 | Atk 54 | Spd 41 | Def 39 | Res 27 | ||||||
| | | ||||||||||
Reinforcements 2  Green Thief Green Thief | HP 77 | Atk 50 | Spd 49 | Def 20 | Res 41 | ||||||
| | | ||||||||||
Turn 4 Reinforcements
| Reinforcements 3 Blue Fáfnir | HP 83 | Atk 57 | Spd 47 | Def 44 | Res 38 | ||||||
|---|---|---|---|---|---|---|---|---|---|---|---|
| | | ||||||||||
Reinforcements 3  Blue Mage Blue Mage | HP 75 | Atk 53 | Spd 44 | Def 24 | Res 36 | ||||||
| | | ||||||||||
Infernal Enemy Information
| A
|
HP 64 |
Atk 56 |
Spd 52 |
Def 37 |
Res 41 |
||||||
|---|---|---|---|---|---|---|---|---|---|---|---|
|
|
|
||||||||||
| B
Bow Cavalier
|
HP 55 |
Atk 59 |
Spd 35 |
Def 22 |
Res 20 |
||||||
|
|
|
||||||||||
| C
Blue Fáfnir
|
HP 62 |
Atk 49 |
Spd 40 |
Def 37 |
Res 32 |
||||||
|
|
|
||||||||||
| D
Sword Fighter
|
HP 68 |
Atk 52 |
Spd 37 |
Def 36 |
Res 24 |
||||||
|
|
|
||||||||||
| E
Green Mage
|
HP 54 |
Atk 49 |
Spd 40 |
Def 22 |
Res 33 |
||||||
|
|
|
||||||||||
| F
Lance Cavalier
|
HP 62 |
Atk 51 |
Spd 27 |
Def 35 |
Res 33 |
||||||
|
|
|
||||||||||
Infernal Reinforcements
Turn 2 Reinforcements
| Reinforcements 1 Cleric | HP 46 | Atk 52 | Spd 34 | Def 20 | Res 49 | ||||||
|---|---|---|---|---|---|---|---|---|---|---|---|
| | | ||||||||||
| Reinforcements 1 Red Manakete | HP 67 | Atk 51 | Spd 36 | Def 34 | Res 37 | ||||||
| | | ||||||||||
| Reinforcements 1 Axe Dragon | HP 62 | Atk 57 | Spd 30 | Def 39 | Res 23 | ||||||
| | | ||||||||||
Turn 3 Reinforcements
| Reinforcements 2 Blue Manakete | HP 67 | Atk 51 | Spd 36 | Def 38 | Res 33 | ||||||
|---|---|---|---|---|---|---|---|---|---|---|---|
| | | ||||||||||
| Reinforcements 2 Sword Fighter | HP 66 | Atk 50 | Spd 37 | Def 36 | Res 24 | ||||||
| | | ||||||||||
| Reinforcements 2 Green Thief | HP 56 | Atk 47 | Spd 45 | Def 18 | Res 37 | ||||||
| | | ||||||||||
Turn 4 Reinforcements
| Reinforcements 3 Blue Fáfnir | HP 62 | Atk 54 | Spd 43 | Def 40 | Res 35 | ||||||
|---|---|---|---|---|---|---|---|---|---|---|---|
| | | ||||||||||
| Reinforcements 3 Blue Mage | HP 54 | Atk 49 | Spd 40 | Def 22 | Res 33 | ||||||
| | | ||||||||||
Legendary Hero Battle - Alear (F) Strategy
Use Player Phase Units!
Using player phase units with multiple actions, usually through Galeforce or the use of Duo/Harmonized Skills, is a legitimate strategy in this map, since the enemies approach on the first turn even if you do not step into their threat range.
Use the first turn to position your units, and then clear as many as you can while keeping or moving yourself out of threat range using movement assists like Reposition.
The key generic units to remember are the Red Manakete and Axe Dragon on turn 2, and the Sword Fighter on turn 3. The Red Manakete and Axe Dragon have Even Tempest 3; keep this in mind and do not rely on the default danger area being shown. The Sword Fighter has Canto Control 3 to restrict post-combat movement; kill him first if possible.
The most dangerous enemy on this map, predictably, is Legendary Alear (F). With Null C-Disrupt 4 and Distant Counter (D), it is not safe to attack her with ranged units as she will defeat them on retaliation. Her damage reduction effects will keep her alive and then the brave attack and adaptive damage from Dragon's Fist will easily defeat any ranged units you send to attack her.
If you have a unit that can pierce damage reduction using skills like Special Spiral 4, Lethality or Deadeye, we recommend using those units. Rearmed Ophelia is great here with her high Atk and repeatable Special thanks to Special Spiral 4. Try to have her Special trigger on her first attack to have Special Spiral 4 bypass Alear's damage reduction effects.
Otherwise, we recommend using a Red melee unit with high Res to slowly whittle down Alear.
Fallen Julia gets a special mention here with her color advantage, high Res, and Light and Dark disabling adaptive damage. She will be an excellent unit to use against Legendary Alear (F).
You can even bring your own Legendary Alear (F) and provide ally support to have both units bypass the enemy Alear's damage reduction effects!
A Tanking Strategy is also viable!
It is also possible to form up into a ball and use Savior Tanks to enemy phase the entire map, but it requires significant support to keep the tank units alive.
Due to the enemy units approaching on the first turn, use your first turn to set up your formation immediately. Place the tank unit in range of a handful of foes, but not all of them at once. With enough support, your tank unit should survive and retaliate back for knockouts.
There are multiple debuffing effects on the enemy units such as the the Blue Fafnir's and Sword Fighter's Panic Ploy 3 and the Cleric's Sabotage Res 3. To counter these, we recommend either avoiding visible bonuses altogether, or using Unity effects from skills like Atk/Res Unity or even Legendary Robin (M)'s Master's Tactics providing the 【Grand Strategy】 status effect to turn the debuffs into bonuses.
The Green Thief reinforcement on turn 3 carries Lethality and Windsweep 3. Keep her in mind as she can punch through your tank units if her Special triggers.
Finally, for Legendary Alear (F) herself, we recommend using a Red melee tank unit with decent/high Res to withstand her attacks and slowly whittle her down, keeping the tank unit alive with your supports. Alternatively, if you have a unit that can pierce damage reduction, use them to deal significant damage against Alear.
Recommended Units for Legendary Hero Battle - Alear (F)
[Player Phase Units]
| Unit Name | |
|---|---|
|
|
Sword Armored Regal Sunshade's brave effect can quickly eliminate enemies. Raging Storm can grant one additional action after combat. Inheriting Galeforce can grant a third action per turn. |
|
|
Green Tome Cavalry Ninjutsu Scrolls' brave effect can quickly defeat enemies. Duo Skill grants herself an additional action. |
|
|
Colorless Dagger Flying Tailwind Shuriken's brave effect can quickly defeat enemies. Duo Skill grants herself an additional action. |
|
|
Blue Bow Flying Flamefrost Bow's brave effect can quickly defeat enemies. Duo Skill grants herself an additional action. |
|
|
Lance Cavalry Geirdriful has armor-effectiveness to bust through Savior Tanks and speeds up Special charges, especially effective if given Galeforce through inheritance. A Fate Changed! allows a Reposition effect while granting another action to himself and copying any bonuses on target ally. |
|
|
Green Breath Infantry Dragon's Fist attacks twice and can easily defeat most enemies on this map. Dragon Blast allows both herself and her support partner to bypass the enemy Alear's damage reduction effects. |
|
|
Red Tome Infantry Special Spiral 4 pre-charges her Special and bypasses non-Special damage reduction to heavily damage Legendary Alear (F). |
|
|
Red Tome Infantry High Res and Light and Dark can tank Legendary Alear (F) through disabling adaptive damage. |
[Savior Tank Units]
| Unit Name | |
|---|---|
|
|
Sword Armored Regal Sunshade's brave effect can quickly eliminate enemies. Using a defensive build allows her to tank multiple enemies in this map. |
|
|
Colorless Breath Armored Multiple damage reduction effects and the 【Divine Vein (Stone)】 effect paired with high Spd allow her to survive multiple engagements. |
|
|
Lance Armored The king of blue tank units. Can counterattack at a distance, deny enemy follow-ups, and has his own follow-up attack. |
|
|
Axe Armored Can heal post-combat with Nifl's Bite and mitigate damage with Ice Mirror and Hardy Fighter 3. Nifl's Bite allows a counterattack against sweep effects. |
|
|
Axe Armored High mobility for an armored unit. Incredibly sturdy with refined Flower Hauteclere and Black Eagle Rule granting multiple defensive effects. |
|
|
Colorless Beast Armored Refined Lion King Fang grants multiple defensive effects and guaranteed follow-up attacks on both phases. Nullifies buffs from ranged units. |
[Support Units]
| Unit Name | |
|---|---|
|
|
Staff Flying Grants damage reduction, healing, and can shut down "At start of turn" effects of foes in cardinal directions. |
|
|
Staff Flying Grants damage reduction and healing. |
|
|
Lance Infantry Grants bonus stats and Special acceleration to nearby allies. Can double as an offensive unit with refined Geirskögul dealing effective damage against dragon foes. |
|
|
Sword Infantry Grants bonus stats to his Ally Support during combat. |
|
|
Staff Flying Grants Atk+6 and Special acceleration to nearby allies during combat. |
[Refresher Unit]
| Unit Name | |
|---|---|
|
|
Green Tome Flying Grants additional Atk to allies in similar cardinal directions Can use her Duo Skill to grant another action to an adjacent ally. |
|
|
Blue Tome Flying Grants additional Atk and Spd to allies in similar cardinal directions. |
|
|
Blue Tome Flying Grants additional bonuses equal to highest bonus on unit and +1 movement. |
|
|
Green Tome Cavalry Grants +6 to all stats and +1 movement to target unit and all adjacent allies Can use Harmonized Skill to grant extra actions to allies. |
List of Refresher-Assist Units
Legendary Hero Battle - Alear (F) Abyssal Strategy Example
Currently Unavailable!
An Abyssal strategy example for Legendary Hero Battle - Alear (F) is currently unavailable. Stay tuned!
User Submitted Parties for Legendary Hero Battle - Alear (F)
We are looking for user submitted clears!
Let us know about your party and how you cleared the maps in the comments below, via a picture of your team and their skills.
If you have uploaded the walkthrough video on Twitter etc., please enter the URL as well!
FEH Related Guides
Legendary Hero Battle Walkthroughs
Legendary Hero Battle Walkthroughs and Schedule
List of Legendary Hero Battles
Comment
Author

Legendary Hero Battle - Alear (F) Abyssal Guide and Recommended Team
Please participate in our site
improvement survey
03/2026
improvement survey
03/2026
Would you assist in
improving Game8's site?
improving Game8's site?

×
We are listening to our users' valuable opinions and discussing how to act on them.
The information collected through this survey will be used for the purpose of improving our services. In addition, the information will only be disclosed a part of a statistic in a format that will not allow identification of personal information.
Begin Survey
Not Now
×
Please rate each item regarding Game8.co's Advertisements.
Amount of Ads
Very Dissatisfied
Somewhat Dissatisfied
Fine
Somewhat Satisfied
Highly Satisfied
Placement of Ads
Timing of Ad Display
Ad Loading Speed
Safeness of Ads
Content of Ads
×
Please rate each item regarding Game8.co's Quality of Articles.
Amount of information
Very Dissatisfied
Somewhat Dissatisfied
Fine
Somewhat Satisfied
Highly Satisfied
Frequency of updates
Speed of new information
Accuracy of articles
Understandibility of articles
Readability of sentences
×
Please rate each item regarding Game8.co's Usability of the Site.
Ease of finding information
Very Dissatisfied
Somewhat Dissatisfied
Fine
Somewhat Satisfied
Highly Satisfied
Loading Speed
Use of Color
Font Size
Visibility of Images
Easy to Understand Layout
×
Please rate each item regarding Game8.co's Message Boards, Comments.
Ease of Writing
Very Dissatisfied
Somewhat Dissatisfied
Fine
Somewhat Satisfied
Highly Satisfied
Readability
Ease in Finding Information
Comment Quality
Comment Quantity
Admin Response
×
Please rate each item regarding Game8.co's Site's new design.
Please rate our site's new design
Very Dissatisfied
Somewhat Dissatisfied
Fine
Somewhat Satisfied
Highly Satisfied
Do you think that the website's design change makes the site easier to use?
Has the new design made it easier for you to find information on the site?
Has the new design improved the overall visual appeal of the site?
How would you rate your overall satisfaction with the new design of the site?
×
How likely are you to recommend Game8 to someone you know?
Very Unlikely
0
1
2
3
4
5
6
7
8
9
10
Very Likely
If you have other opinions regarding potential improvement to the website, please share them with us. We would appreciate your honest opinion.
Note: This is a free response section, so you can proceed without entering anything.
Note: Please be sure not to enter any kind of personal information into your response.
Note: Please be sure not to enter any kind of personal information into your response.
×
Thank You
×
Thank you for participating in our survey! Your answers will help us to improve the quality of our website and services.
We hope you continue to make use of Game8.
We hope you continue to make use of Game8.
Close
Premium Articles
Rankings
- We could not find the message board you were looking for.
Gaming News


![Monster Hunter Stories 3 Review [First Impressions] | Simply Rejuvenating](https://img.game8.co/4438641/2a31b7702bd70e78ec8efd24661dacda.jpeg/thumb)
Popular Games

Genshin Impact Walkthrough & Guides Wiki
Honkai: Star Rail Walkthrough & Guides Wiki
Umamusume: Pretty Derby Walkthrough & Guides Wiki
Pokemon Pokopia Walkthrough & Guides Wiki
Resident Evil Requiem (RE9) Walkthrough & Guides Wiki
Monster Hunter Wilds Walkthrough & Guides Wiki
Wuthering Waves Walkthrough & Guides Wiki
Arknights: Endfield Walkthrough & Guides Wiki
Pokemon FireRed and LeafGreen (FRLG) Walkthrough & Guides Wiki
Pokemon TCG Pocket (PTCGP) Strategies & Guides Wiki


Recommended Games
Diablo 4: Vessel of Hatred Walkthrough & Guides Wiki
Cyberpunk 2077: Ultimate Edition Walkthrough & Guides Wiki
Fire Emblem Heroes (FEH) Walkthrough & Guides Wiki
Yu-Gi-Oh! Master Duel Walkthrough & Guides Wiki
Super Smash Bros. Ultimate Walkthrough & Guides Wiki
Pokemon Brilliant Diamond and Shining Pearl (BDSP) Walkthrough & Guides Wiki
Elden Ring Shadow of the Erdtree Walkthrough & Guides Wiki
Monster Hunter World Walkthrough & Guides Wiki
The Legend of Zelda: Tears of the Kingdom Walkthrough & Guides Wiki
Persona 3 Reload Walkthrough & Guides Wiki


All rights reserved
© 2025 Nintendo / INTELLIGENT SYSTEMS
The copyrights of videos of games used in our content and other intellectual property rights belong to the provider of the game.
The contents we provide on this site were created personally by members of the Game8 editorial department.
We refuse the right to reuse or repost content taken without our permission such as data or images to other sites.