This survey will take about 1 minute.
Your answers will help us to improve our website.
Modern Warfare 2 (MW2)
Zarqwa Hydroelectric Map Guide
☆ Camo Challenges | List of Blueprints
★ DMZ Key Locations and Map
☆ Ashika Island: DMZ Keys | Weapon Cases | Map Guide
★ How to Get Weapon Cases
Zarqwa Hydroelectric is a 6v6 map in Call of Duty: Modern Warfare 2 (MW2 2022). Read on to see the full interactive map and all locations, and all game mode objectives for Zarqwa Hydroelectric.
Zarqwa Hydroelectric Interactive Map
Click on the filters to toggle info
Zarqwa Hydroelectric Crossing Map Overview
 Zarqwa Hydroelectric Zarqwa Hydroelectric
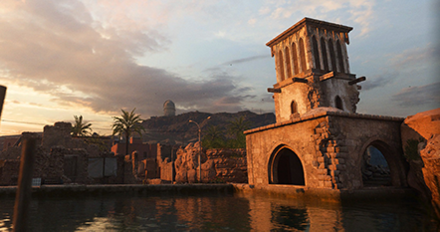
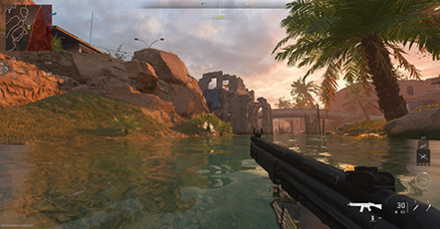
Desert Waterworks : Day 14, 17:54 An old water supply factory. Fight through the harsh conditions of the desert oasis. |
|
| Map | Basic Info |
|---|---|
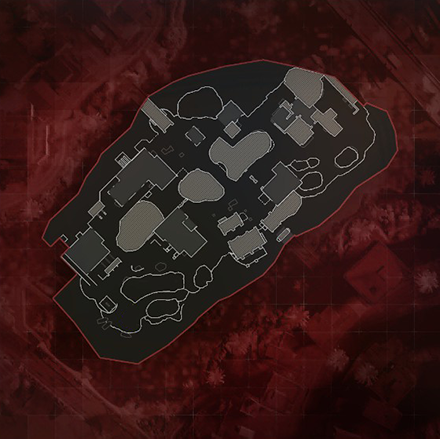 |
Game Modes: Team Deathmatch, Domination, Prisoner Rescue, Knock Out, Hardpoint, Search and Destroy, Control, Cyber Attack, Bounty, Grind, Drop Zone Players: 6v6 Location: United Republic of Adal Factions Deployed: SpecGru & KorTac Map Size: Medium |
Zarqwa Hydroelectric Strategies
Avoid Passing Through the Middle Wooden Path
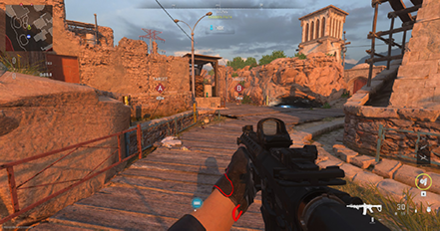
Running through the wooden path in the middle of the map will leave you vulnerable to enemy fire from different angles. As an alternative, you can pass through either the destroyed building or the tower to avoid being exposed to a lot of enemies.
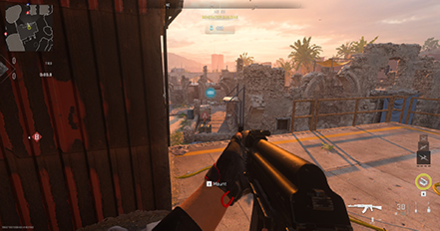
Use the Waterways to Sneak Around
The waterways found at the edges of the map are swimmable and can be used to sneak behind enemies to launch a surprise attack!
Take note that this will leave you exposed and vulnerable to gunshots. In addition, swimming will affect your aim and recoil so it might be best to stay undetected by staying underwater until you reach the surface.
Linger Around the Second Floor of the Control Point Building
The Control Point area is a two story building that houses the B Site area in Search and Destroy located across the information booth. The second floor is a good defensive position as you have vision over the first floor of the building.
You can stay at the stairwell to fight any enemies attacking the site and then reposition to the outside balcony where you can drop down to the first floor of the building to launch a surprise attack on unsuspecting opponents.
Setup a Defensive Perimeter at the Generator Building
There is a second floor balcony at the Generator Building with a clear line of sight of Target A while playing the Search and Destroy game mode. You can setup claymores by the door and the barrels nearby to prevent anyone from entering.
This building is flexible to use across all game modes as this is an excellent position to camp as you will only need to worry about two key entry points which are easy to defend.
Recommended Gun Loadouts
| Primary | Secondary |
|---|---|
| Kastov 762 | X13 Auto |
| Analysis | |
| Kastov 762 is recommended as this map is best played aggressively as you'll be passing by numerous areas that are lacking cover. Having the X13 Auto as a backup weapon is a good alternative as the automated pistol provides opportunites for aggressive plays as well. | |
Kastov 762 Best Loadout and Attachments
Call of Duty: Modern Warfare 2 (MW2) Related Guides

All Multiplayer Maps
| 6v6 Map Guides | ||
|---|---|---|
| Farm 18 | Al Bagra Fortress | Mercado Las Almas |
| Breenbergh Hotel | Crown Raceway | El Asilo |
| Embassy | Santa Sena Border Crossing | Zarqwa Hydroelectric |
| Taraq | Shipment | Shoot House |
| Ground War Map Guides | ||
| Taraq (Ground War) | Sariff Bay (Ground War) | Santa Seña |
| Sa'id (Ground War) | Guijarro (Ground War) | - |
| Invasion Map Guides | Taraq (Invasion) | - | - |
Author

Call of Duty: Modern Warfare 2 (MW2) Walkthrough & Guides Wiki
Zarqwa Hydroelectric Map Guide
Please participate in our site
improvement survey
03/2026
improvement survey
03/2026
Would you assist in
improving Game8's site?
improving Game8's site?

×
We are listening to our users' valuable opinions and discussing how to act on them.
The information collected through this survey will be used for the purpose of improving our services. In addition, the information will only be disclosed a part of a statistic in a format that will not allow identification of personal information.
Begin Survey
Not Now
×
Please rate each item regarding Game8.co's Advertisements.
Amount of Ads
Very Dissatisfied
Somewhat Dissatisfied
Fine
Somewhat Satisfied
Highly Satisfied
Placement of Ads
Timing of Ad Display
Ad Loading Speed
Safeness of Ads
Content of Ads
×
Please rate each item regarding Game8.co's Quality of Articles.
Amount of information
Very Dissatisfied
Somewhat Dissatisfied
Fine
Somewhat Satisfied
Highly Satisfied
Frequency of updates
Speed of new information
Accuracy of articles
Understandibility of articles
Readability of sentences
×
Please rate each item regarding Game8.co's Usability of the Site.
Ease of finding information
Very Dissatisfied
Somewhat Dissatisfied
Fine
Somewhat Satisfied
Highly Satisfied
Loading Speed
Use of Color
Font Size
Visibility of Images
Easy to Understand Layout
×
Please rate each item regarding Game8.co's Message Boards, Comments.
Ease of Writing
Very Dissatisfied
Somewhat Dissatisfied
Fine
Somewhat Satisfied
Highly Satisfied
Readability
Ease in Finding Information
Comment Quality
Comment Quantity
Admin Response
×
Please rate each item regarding Game8.co's Site's new design.
Please rate our site's new design
Very Dissatisfied
Somewhat Dissatisfied
Fine
Somewhat Satisfied
Highly Satisfied
Do you think that the website's design change makes the site easier to use?
Has the new design made it easier for you to find information on the site?
Has the new design improved the overall visual appeal of the site?
How would you rate your overall satisfaction with the new design of the site?
×
How likely are you to recommend Game8 to someone you know?
Very Unlikely
0
1
2
3
4
5
6
7
8
9
10
Very Likely
If you have other opinions regarding potential improvement to the website, please share them with us. We would appreciate your honest opinion.
Note: This is a free response section, so you can proceed without entering anything.
Note: Please be sure not to enter any kind of personal information into your response.
Note: Please be sure not to enter any kind of personal information into your response.
×
Thank You
×
Thank you for participating in our survey! Your answers will help us to improve the quality of our website and services.
We hope you continue to make use of Game8.
We hope you continue to make use of Game8.
Close
Rankings
- We could not find the message board you were looking for.
Gaming News


![Everwind Review [Early Access] | The Shaky First Step to A Very Long Journey](https://img.game8.co/4440226/ab079b1153298a042633dd1ef51e878e.png/thumb)

![Monster Hunter Stories 3 Review [First Impressions] | Simply Rejuvenating](https://img.game8.co/4438641/2a31b7702bd70e78ec8efd24661dacda.jpeg/thumb)
Popular Games

Genshin Impact Walkthrough & Guides Wiki
Honkai: Star Rail Walkthrough & Guides Wiki
Umamusume: Pretty Derby Walkthrough & Guides Wiki
Pokemon Pokopia Walkthrough & Guides Wiki
Resident Evil Requiem (RE9) Walkthrough & Guides Wiki
Monster Hunter Wilds Walkthrough & Guides Wiki
Wuthering Waves Walkthrough & Guides Wiki
Arknights: Endfield Walkthrough & Guides Wiki
Pokemon FireRed and LeafGreen (FRLG) Walkthrough & Guides Wiki
Pokemon TCG Pocket (PTCGP) Strategies & Guides Wiki


Recommended Games
Diablo 4: Vessel of Hatred Walkthrough & Guides Wiki
Fire Emblem Heroes (FEH) Walkthrough & Guides Wiki
Yu-Gi-Oh! Master Duel Walkthrough & Guides Wiki
Super Smash Bros. Ultimate Walkthrough & Guides Wiki
Pokemon Brilliant Diamond and Shining Pearl (BDSP) Walkthrough & Guides Wiki
Elden Ring Shadow of the Erdtree Walkthrough & Guides Wiki
Monster Hunter World Walkthrough & Guides Wiki
The Legend of Zelda: Tears of the Kingdom Walkthrough & Guides Wiki
Persona 3 Reload Walkthrough & Guides Wiki
Cyberpunk 2077: Ultimate Edition Walkthrough & Guides Wiki


All rights reserved
© 2021-2022 Activision Publishing, Inc. ACTIVISION, CALL OF DUTY, CALL OF DUTY VANGUARD, CALL OF DUTY WARZONE, WARZONE, and RICOCHET ANTI-CHEAT are trademarks of Activision Publishing, Inc. All other trademarks and trade names are the property of their respective owners.
The copyrights of videos of games used in our content and other intellectual property rights belong to the provider of the game.
The contents we provide on this site were created personally by members of the Game8 editorial department.
We refuse the right to reuse or repost content taken without our permission such as data or images to other sites.