How to Beat Someone's Mausoleum in Unknowable Domain
★ Exclusive: Check out the State of Meta in 4.0!
♦ Latest: 4.0 Redeem Codes
♦ Phase 2: Sparkxie, Sparkle, Cerydra, Rappa
♦ Upcoming: Ashveil, Silver Wolf Lv.999, Evanescia
♦ Events: Cosmicon, Roll On!, Ding! Arcadia Fun-Time Clock-In Essentials
Check out how to beat Someone's Mausoleum, also known as Difficulty 5 in Honkai: Star Rail's Unknowable Domain. We have the best Alignments, teams, Scepters, Components, and how to beat Conundrum Level 3 in this Simulated Universe guide!
List of Contents
Best Alignment for Someone's Mausoleum
Break Alignment for Someone's Mausoleum
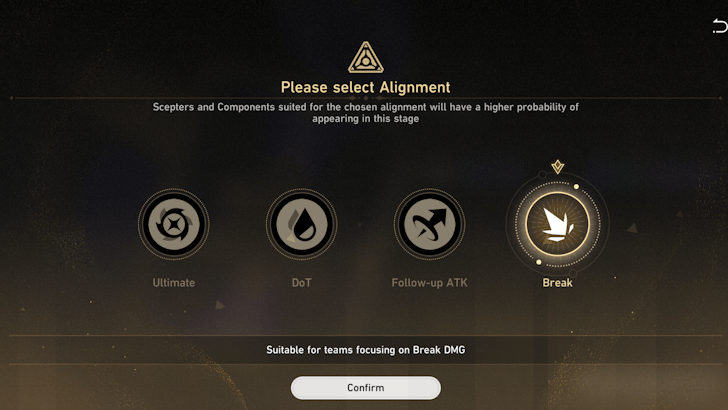
The Break Alignment is the best alignment for Someone's Mausoleum thanks to the ability of its Scepters to quickly whittle down enemy Toughness, while also dealing a lot of Break DMG.
This is important as breaking the enemy's Toughness delays their turn, allowing you to take more turns without fear of being attacked.
Follow-Up and Ultimate Teams Are Viable
Although the Break Alignment is the best alignment for Unknowable Domain, you can still make good progress by using the Follow-Up and Ultimate Alignment.
Follow-up and Ultimate focused teams will be able to charge their Scepters easily. This will in turn allow them to deal the damage needed to clear Someone's Mausoleum.
DoT Alignment is Not Advised
While there are some Scepters that DoT teams can reliably charge fast, the damage output is not enough for higher difficulties. As such, it is not advised to use the DoT Alignment when trying to clear Someone's Mausoleum.
Best Teams for Someone's Mausoleum
Best Team for Break Alignment
| DPS | Support | Support | Sustain |
|---|---|---|---|
 Firefly Firefly
|
 Trailblazer (Imaginary) Trailblazer (Imaginary)
|
 Ruan Mei Ruan Mei
|
 Lingsha Lingsha
|
As you will be running Break Alignment, using a Super Break team is ideal as it will synergize well with the Scepters you will be getting. Trailblazer (Imaginary) is an important unit for the Break Alignment thanks to Super Break.
Any Break DPS can work, but those that can attack multiple enemies like Firefly or Rappa are ideal as they can help charge your Scepters faster. Having Break Effect supports will also help during the early stages.
| Alternative | Explanation |
|---|---|
 Boothill Boothill | DPS Replacement Boothill is a better Break DPS when up against multiple Elite enemies. |
 Rappa Rappa | DPS Replacement Rappa is a better Break DPS when up against more than three enemies. |
 Asta Asta | Support Replacement Asta can provide ATK and SPD buffs which can benefit Firefly's kit. |
 Pela Pela | Support Replacement Provides DEF reduction, which increases Super Break damage. |
 Silver Wolf Silver Wolf | Support Replacement Provides DEF reduction, which increases Super Break damage. |
 Bronya Bronya | Support Replacement Bronya can provide an extra turn for the DPS during her Combustion state. |
 Gallagher Gallagher | Sustain Replacement Gallagher's healing scales on the Break Effect and his Ultimate can inflict the Besotted debuff, which increases the Break DMG dealt on an enemy. |
 Huohuo Huohuo | Sustain Replacement Huohuo can use her Ultimate to restore the party's Energy and provide ATK buffs. |
 Luocha Luocha | Sustain Replacement Luocha is best used in scenarios where you need to remove enemy buffs. |
 Aventurine Aventurine | Sustain Replacement Aventurine's offense-oriented Kit can help shred the toughness bar of enemies with an Imaginary element weakness. |
Best Team Comps for Someone's Mausoleum
F2P Break Team
| DPS | Support | Support | Sustain |
|---|---|---|---|
 March 7th (Imaginary) March 7th (Imaginary)
|
 Trailblazer (Imaginary) Trailblazer (Imaginary)
|
 Asta Asta
|
 Gallagher Gallagher
|
Since March 7th (Imaginary) can be built as a Break DPS, she can serve as the DPS for a F2P team. The Trailblazer will increase March 7th's Break Effect and allow the team to deal Super Break DMG, while Asta will provide the team with SPD and ATK buffs.
Gallagher will help keep the team alive while also applying debuffs to the enemy, allowing March 7th (Imaginary) to deal more damage.
Follow-Up Alignment Team
| DPS | Sub-DPS | Support | Sustain |
|---|---|---|---|
 Feixiao Feixiao
|
 Topaz Topaz
|
 Robin Robin
|
 Aventurine Aventurine
|
A Follow-Up team revolving around Feixiao is the best team you can run as her numerous Follow-Up attacks can help take down enemies and charge up Scepters.
Bringing another Follow-Up character as a Sub-DPS is required to help maximize Feixiao's DMG with Robin and Aventurine bringing up the rear.
| Alternative | Explanation |
|---|---|
 Dr. Ratio Dr. Ratio | DPS Replacement Dr. Ratio can unleash a lot of Follow-up attacks with his Skill and Ultimate. |
 Yunli Yunli | DPS Replacement Most of Yunli's DMG comes from her Follow-up attacks. Use Lynx to increase Yunli's chances of getting hit and trigger her Follow-up Attacks. |
 Clara Clara | DPS Replacement Most of Clara's DMG comes from her Follow-up attacks. Use Lynx to increase Clara's chances of getting hit and trigger her Follow-up Attacks. |
 Xueyi Xueyi | DPS Replacement Xueyi is a free-to-play option who can deal Follow-up attacks when she deals Toughness DMG Alignment. |
 Moze Moze | Sub-DPS Replacement Moze uses Follow-Up Attacks frequently and can chain attacks with the DPS thanks to his Prey mechanic. |
 March 7th (Imaginary) March 7th (Imaginary) | Sub-DPS Replacement March 7th (Hunt) at Eidolon Level 2 can unleash Follow-up attacks. |
 Jiaoqiu Jiaoqiu | Support Replacement Jiaoqiu increases Ultimate DMG and DMG taken by enemies, which can greatly increase the DPS unit's overall damage. |
 Ruan Mei Ruan Mei | Support Replacement Ruan Mei provides a lot of offensive buffs and extends enemies' Weakness Broken state through her Ultimate. |
 Pela Pela | Support Replacement Pela reduces the DEF of enemies with her Ultimate which allows the DPS to deal more damage against them. |
| Anyone from Abundance or Preservation | Sustain Replacement Anyone who can keep Feixiao and the team will work fine except Huohuo since Feixiao can't benefit from the Energy Regen. |
Ultimate Alignment Team
| DPS | Sub-DPS | Support | Sustain |
|---|---|---|---|
 Acheron Acheron
|
 Jiaoqiu Jiaoqiu
|
 Pela Pela
|
 Aventurine Aventurine
|
Acheron is the best DPS for the Ultimate Alignment thanks to her absurd Ultimate DMG. Jiaoqiu and Pela can help apply debuffs on an enemy and stack up Acheron's Slashed Dream.
| Alternative | Explanation |
|---|---|
 Argenti Argenti | DPS Replacement Argenti also has a strong DPS who can deal a lot of DMG with his Ultimate. He is best paired with Tingyun and Huohuo. |
 Silver Wolf Silver Wolf | Support Replacement Silver Wolf can apply debuffs simply by attacking and can implant a missing Elemental Weakness on an enemy. |
 Guinaifen Guinaifen | Support Replacement Guinafen's Burn DoT and Firekiss can help stack up Acheron's Slashed Dream. |
 Luka Luka | Support Replacement Luka's Bleed DoT and Ultimate adds stacks for Acheron's Slashed Dream. |
 Fu Xuan Fu Xuan | Sustain Replacement Fu Xuan provides a CRIT Rate buff to the entire party and decrease the DMG taken by other party members. |
 Gepard Gepard | Sustain Replacement Gepard can provide Shields and can apply the Frozen debuff on an enemy using his Skill. |
 Trailblazer (Fire) Trailblazer (Fire) | Sustain Replacement The Fire Trailblazer can Taunt, which counts as a debuff. |
 Gallagher Gallagher | Sustain Replacement Gallagher is a great healer for Acheron's team since he can apply two debuffs, one from his Ultimate and another from his Enhanced Basic Attacks. |
Best Scepters for Someone's Mausoleum
Extrapolation Alter: Sealing, Reversal, and Open
| Scepter | Effect |
|---|---|
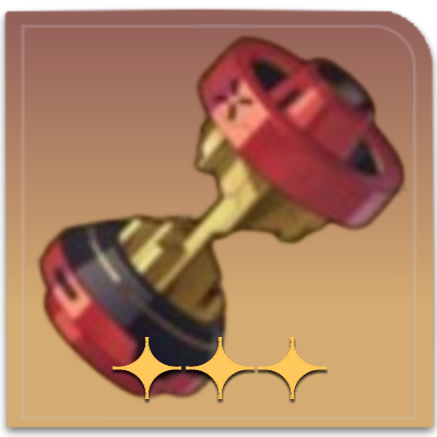 Extrapolation Alter: Sealing Extrapolation Alter: Sealing |
If ally targets dealt Break DMG during their attack, this unit regenerates 15 Charge(s) after the attack and attacks when its Charge reaches 120. "Focus" deals 3 instance(s) of Physical DMG equal to 800% base DMG to the enemy target with the highest Max Toughness, and reduces 30 Toughness regardless of Weakness. If the target is Weakness Broken, deals Break DMG equal to 400% of this unit's Physical Break DMG. When Breaking enemy target Weakness, triggers the Weakness Break effects of all ally characters' Types at a rate of 400%. |
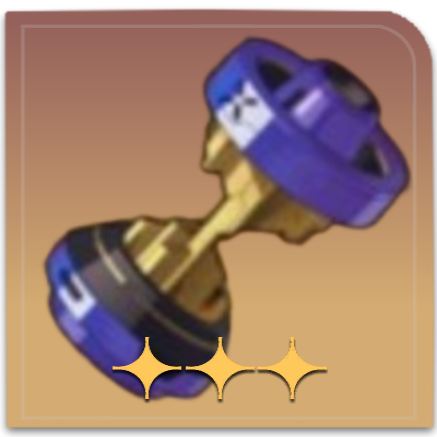 Extrapolation Alter: Reversal Extrapolation Alter: Reversal |
When an enemy target is defeated or is Weakness Broken, restores 15 Charge. Attacks when Charge reaches 120. "Focus" deals 3 instance(s) of Imaginary DMG equal to 600% base DMG to the enemy target who currently has the lowest Toughness, and reduces 30 Toughness regardless of Weakness. If the target is Weakness Broken, deals Break DMG equal to 1,600% of this unit's Imaginary Break DMG. When attacking, applies to the target "Summation": After taking Break DMG, all other Weakness Broken enemy targets take DMG equal to 25% of the original DMG, lasting for 2 turn(s). |
 Extrapolation Alter: Open Extrapolation Alter: Open |
Summons a Scepter with 100 SPD. Attacks when taking action. "Bounce" deals Fire DMG equal to 150% base DMG to random enemy targets, repeating 16 time(s). This DMG reduces 8 Toughness regardless of Weakness, and if the target is Weakness Broken, deals Break DMG equal to 100% of this unit's Fire Break DMG to the target. For every different enemy target receiving this DMG, applies 1 stack(s) of "Prophet" to all ally targets, which increases SPD by 15%, staking up to 10 time(s) and lasting for 2 turn(s). After this unit takes action, removes 5 stack(s) of "Prophet." |
Getting these Scepters is important as once you reach higher Conundrum levels, your team will start dealing less and less damage, as the enemy HP pool will be in the millions. As such, having the proper Scepters will help whittle down their large HP pools.
We recommend using the Extrapolation Alter: Sealing, Extrapolation Alter: Reversal, and Extrapolation Alter: Open Scepters for Break teams as these three scepters synergize really well.
Sealing and Open are both capable of reducing the Toughness of enemies, which in turn helps charge Reversal. This allows the Scepters to bounce off of each other, dealing huge bursts of damage whenever they activate.
Get Similar Scepters for Follow-Up and Ultimate
A good Scepter combination is two Charge Scepters and one Speed Scepter. This build allows players to quickly charge up their Scepters and set them up for Cast Looping, especially with the right Components.
Best Components for Someone's Mausoleum
Components That Help Scepters Cast Loop
| Best Components for Cast Looping | ||
|---|---|---|
 Extinction Program Extinction Program |
 Field of Binding Field of Binding |
 Distortion Vortex Distortion Vortex |
These Components are needed as they allow your Scepters to continuously cast, effectively causing a Cast Loop.
Extinction Program charges Charge Scepters whenever a SPD one goes off, while Distortion Vortex immediately casts SPD Scepters when a Charge one goes off. Field of Binding lets Charge Scepters charge other Charge Scepters, so it is also a good choice.
Components That Buff Break DMG
| Best Components for Break DMG | ||
|---|---|---|
 Inertial Countdown Inertial Countdown |
 Rupture Countdown Rupture Countdown |
 Deterioration Countdown Deterioration Countdown |
These Components are important as they either increase the Break and Super Break DMG that Scepters and the team deals, or increase your team's Break effectiveness.
Try to get multiple copies of these Components to add to all of your Scepters.
Change Components for Follow-Up and Ulltimate Teams
As the above components are for Break teams, change what components you get if you are running a Follow-Up or Ultimate Team.
For Follow-Up Alignment teams, get the Components that buff your team's Follow-Up attacks, or those that debuff the enemy whenever a Follow-Up attack is used.
For Ultimate Alignment teams, get the Components that help your team charge their Ultimates, as you will need to cast those often.
Components That Provide Charging Efficiency and Amplification
| Best Components for Efficiency and Amplification | ||
|---|---|---|
 Kinetic Reduction Kinetic Reduction |
 Oscillating Rollover Oscillating Rollover |
 Scattered Extraction Scattered Extraction |
It's important to make sure that your Scepters can perform their attacks quicker and harder, so Components that provide Charging Efficiency and Amplification are important.
Although some of these Components have downsides, the benefits that your Scepters will get from charging faster or hitting harder outweigh the disadvantages.
How to Beat Someone's Mausoleum
Get the Scepters You Need
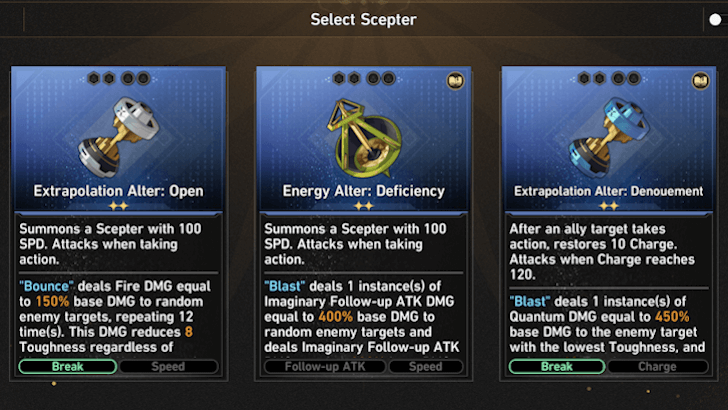
Scepters are the backbone of your Unknowable Domain run, and as such getting the correct ones mean the difference between a clear and a failure.
You can get Scepters either from defeating Bosses, from Occurrences, or from the Shop. Use these opportunities to look for the Scepters you need. It is okay to get a placeholder Scepter first before replacing it with a one that you need.
Upgrade Your Components FIrst

Although it is it is important to upgrade your Scepters, you should prioritize getting the Components you need first. You can do this by either Overwriting Components, or by using Component Synthesis in a Workbench of Creation.
Overwriting Components allows you to reroll Components into others of the same level. Overwrite your extra components to try and get duplicates for leveling up.
Component Synthesis allows you to burn four Components and convert them into one of a higher level. This allows you to get access to higher-level Components, which you can then overwrite to get the ones you need.
Change Your Team As Needed

As Scepters will be your primary source of damage in the later parts of the run, you can switch out members of your team to match the Weakness of whatever it is you are facing.
Start a run with your strongest team so that you can easily take down the first few stages, then swap characters as needed in the later stages.
How to Beat Conundrum Level 3

After completing Someone's Mausoleum for the first time, you will have the option to increase your Conundrum Level, making your Torturous Difficulty run harder. You can get Stellar Jades for completing Conundrum Levels 1 to 3, specifically up to Plane 4 of Conundrum Level 3.
Beating Conundrum Level 3 and up remains the same in that you will need a good combination of Scepters and Components. Your Scepter and Component choices matter more in higher Conundrum Levels, as most damage will come from them.
Honkai: Star Rail Related Guides

Simulated Universe Stage Guides
| Simulated Universe Guides | |||
|---|---|---|---|
Paths and Blessing Guides
| All Simulated Universe Paths | ||
|---|---|---|
 Propagation Propagation |
 Preservation Preservation |
 Abundance Abundance |
 Nihility Nihility |
 The Hunt The Hunt |
 Remembrance Remembrance |
 Destruction Destruction |
 Elation Elation |
 Erudition Erudition |
Swarm Disaster Guides
| Simulated Universe: The Swarm Disaster Guides | |
|---|---|
| The Swarm Disaster Guide | How to Unlock All Chapters |
| Communing Trail and Pathstrider Guide | Exploration Guide |
| How to Clear Difficulty 5 | |
Gold and Gears Guides
| Simulated Universe: Gold and Gears Guides | |
|---|---|
| Gold and Gears Guide | How to Unlock All Trailblaze and Aeon Secrets |
| Neural Network Guide | Dice Customization and All Dice Faces |
| How to Beat Difficulty 5 | |
Divergent Universe Guides
Unknowable Domain Guides
| Simulated Universe: Unknowable Domain | |
|---|---|
| Unknowable Domain Guide | How to Beat Someone's Mausoleum |
Other Simulated Universe Guides
| Simulated Universe Guides | |
|---|---|
| List of All Paths | Simulated Universe Events |
| List of All Curios | Resonance Interplay Guide |
| Herta Store Event Light Cones | |
Comment
This game mode is actually unfair tbh. Why is cirrus a boss??? It's so hard. Break teams are the only thing that can allow you to cleat
Author
How to Beat Someone's Mausoleum in Unknowable Domain
improvement survey
03/2026
improving Game8's site?

Your answers will help us to improve our website.
Note: Please be sure not to enter any kind of personal information into your response.

We hope you continue to make use of Game8.
Premium Articles
Rankings
- We could not find the message board you were looking for.
Gaming News
Popular Games

Genshin Impact Walkthrough & Guides Wiki

Honkai: Star Rail Walkthrough & Guides Wiki

Umamusume: Pretty Derby Walkthrough & Guides Wiki

Pokemon Pokopia Walkthrough & Guides Wiki

Resident Evil Requiem (RE9) Walkthrough & Guides Wiki

Monster Hunter Wilds Walkthrough & Guides Wiki

Wuthering Waves Walkthrough & Guides Wiki

Arknights: Endfield Walkthrough & Guides Wiki

Pokemon FireRed and LeafGreen (FRLG) Walkthrough & Guides Wiki

Pokemon TCG Pocket (PTCGP) Strategies & Guides Wiki
Recommended Games

Fire Emblem Heroes (FEH) Walkthrough & Guides Wiki

Diablo 4: Vessel of Hatred Walkthrough & Guides Wiki

Yu-Gi-Oh! Master Duel Walkthrough & Guides Wiki

Super Smash Bros. Ultimate Walkthrough & Guides Wiki

Pokemon Brilliant Diamond and Shining Pearl (BDSP) Walkthrough & Guides Wiki

Elden Ring Shadow of the Erdtree Walkthrough & Guides Wiki

Monster Hunter World Walkthrough & Guides Wiki

The Legend of Zelda: Tears of the Kingdom Walkthrough & Guides Wiki

Persona 3 Reload Walkthrough & Guides Wiki

Cyberpunk 2077: Ultimate Edition Walkthrough & Guides Wiki
All rights reserved
Copyright © 2024 HoYoverse, COGNOSPHERE. All Rights Reserved.
The copyrights of videos of games used in our content and other intellectual property rights belong to the provider of the game.
The contents we provide on this site were created personally by members of the Game8 editorial department.
We refuse the right to reuse or repost content taken without our permission such as data or images to other sites.


![Slay the Spire 2 Review [Early Access] | Still the Deckbuilder to Beat](https://img.game8.co/4433115/44e19e1fb0b4755466b9e516ec7ffb1e.png/thumb)

![Resident Evil Village Review [Switch 2] | Almost Flawless Port](https://img.game8.co/4432790/e1859f64830960ce4248d898f8cd38d9.jpeg/thumb)


what no, i cleared with JY follow up alignment and one break scepter. That gamemode really isn't about your characters, its all about scepters