Eishin Flash (Meisterschaft) Build Guide and Character Info
This is a build guide for Eishin Flash (Meisterschaft) in Umamusume: Pretty Derby. Find out how to build Eishin Flash (Meisterschaft), her preferred tracks, distances, and style, as well as her basic character information, here!
| Eishin Flash Related Guides | |
|---|---|
|
|
|
List of Contents
Eishin Flash (Meisterschaft) Character Info
Eishin Flash Stats
| Eishin Flash (Meisterschaft) | |||||||||||||||||||
|---|---|---|---|---|---|---|---|---|---|---|---|---|---|---|---|---|---|---|---|

|
|||||||||||||||||||
| Overall | Ease (TB) | T.Trials | CM11 | ||||||||||||||||
|
|
|
|
| ||||||||||||||||
| Track Aptitude | |||||||||||||||||||
| Turf: A | Dirt: G | ||||||||||||||||||
| Distance Aptitude | |||||||||||||||||||
| Sprint: G | Mile: F | Med: A | Long: A | ||||||||||||||||
| Pace Aptitude | |||||||||||||||||||
| Front: G | Pace: B | Late: A | End: C | ||||||||||||||||
| Stat Growth | |||||||||||||||||||
| SPD: 0% | STA: 0% | POW: 10% | GUT: 0% | WIT: 20% | |||||||||||||||
Eishin Flash Unique Skill
|
|
Increase velocity in a dash for the lead after running calmly and according to plan up until the final straight. |
|---|
Schwarzes Schwert Unique and Adjustment
| Original |
|---|
| To activate, you must have raced flawlessly (no Rushed) and be 3rd or further back by the homestretch. |
| After Adjustment (JP 2nd Anniversary) |
| For an added velocity boost, you must have maintained the positions around the middle of the pack (4th-7th positions in Champions Meeting standard) on top of its original conditions. |
Her unique Schwarzes Schwert is a velocity skill with varying triggers. The original condition can certainly be met as long as she runs in a toward-the-back style: Late Surger or End Closer.
In the JP client, it was not until their 2nd Anniversary that she has the additional condition for an extra speed boost.
Eishin Flash Innate Skills
| All Innate Skills |
|---|
Eishin Flash Potential Skills
| Skill Per Potential Level |
|---|
| Potential 2: Potential 3: Potential 4: Potential 5: |
Eishin Flash Career Skills
| All Career Event Skills |
|---|
Is Eishin Flash Worth It?
Pickup as a Favorite or Team Trials Uma
Eishin Flash works best as a Late Surger, which means she's on a gambling strategy like every other Late Surger in the roster such as Mejiro Ryan. Eishin Flash's unique skill doesn't help make the odds any better since it requires her to also run flawlessly (no Rushed state) to activate.
If you're looking for an Uma with strong skills, however, she has them: Medium Corners ◯ and In Body and Mind. Though, she lacks in some critical areas: no inherent stamina recovery skills and no Stamina growth rate to help her in Medium-Long distances.
On the PvP side, you'll get more mileage out of having Eishin Flash in Team Trials rather than Champions Meeting due to her abundance of easy-to-activate speed skills.
Eishin Flash (Meisterschaft) Career Training Tips
| Training Tips |
|---|
|
|
Train in the Unity Cup Scenario

When training Eishin Flash, use the brand new Unity Cup scenario to take advantage of the new Spirit Burst mechanic. This not only lets you gain more stats than normal, but can also provide useful Skill Hints.
Focus on Late Surger and Aptitudes
Eishin Flash is best suited to the Late Surger position given her unique skill along with her skill kit. For distances, we recommend you focus on having her for Medium and Long races. Running her in other distances will require sparks to improve her initial aptitudes.
Upgrade her Medium Aptitude
Since you will be using her as a Medium runner for Team Trials, raise her aptitude from A to S to maximize her performance in that distance.
Unlock up to Potential Level 5
At Potential Level 5, Eishin Flash unlocks In Body and Mind, the gold version of the well-renowned Homestretch Haste. Getting to Potential Level 5 is a lot of work; if you can't make it there yet, then Potential Level 2 is alright for having Homestretch Haste at the start of her career.
Get Her Secret Event Der Rekord
Through the Der Rekord hidden event, Eishin Flash can get bonus stats and hint levels by winning a number of G1 races at the Tokyo Racecourse during her career. This event will occur during Senior Year Late December, which is the last month where the Arima Kinen is held.
You Can Restrict Training for a Stat Boost (Event)
| Flash's Plan Put to the Test | |
|---|---|
| Choice 1 | ・Mood +1
・Training is restricted to 1 facility for 1 turn. Choosing that facility leads to The Outcome of Flash's Plan. |
| Choice 2 | ・Nothing occurs. |
| The Outcome of Flash's Plan | |
| Result | ・Energy +10
・Stat +20 from unrestricted Training Facility (This may also result in no bonus) |
Eishin Flash has a random choice event called Flash's Plan Put to the Test which allows you to restrict 4 random Training Facilities. Selecting the non-restricted training will then lead to The Outcome of Flash's Plan which, if successful, will reward you with extra energy and stats. Note that, on the turn where training is restricted, choosing any action besides training does not give the event stat boost.
Generally, the 1st option to restrict training is a good pick for the Mood up and stat boost, but you'll want to check first if there is a risk of having low energy/high Failure rate, as well as the possibility of missing out on Friendship Training.
Eishin Flash (Meisterschaft) Build
Recommended Stats
| 1200 | 800 | 900 | 400 | 400 |
Stats above follow a Team Trials baseline. For Champions Meeting stats, increasing them is recommended.
Eishin Flash will run in your Medium team as a Late Surger for Team Trials. She'll just need enough Stamina at least to survive Medium-Long distances, but will want a lot of Speed and Power to get herself into the lead in the last spurt.
Aim to have the following Stamina for three Long races in her career:
- Arima Kinen (Classic Year) - Having at least 400 Stamina will suffice to clear this race.
- Tenno Sho (Spring) (Senior Year) - Having 500 Stamina is a must as this race is known for its long distance and difficult competition.
- Arima Kinen (Senior Year) - At least 500 Stamia could secure you a win for this race, especially if you've won the previous Tenno Sho (Spring) race.
If you plan to use Eishin Flash in for any shorter distance, you will need to adjust and get more Speed and Power to better beat out faster Umamusume.
Recommended Support Cards
Unity Cup Build


A deck of 3 Speed, 2 Power, and 1 Pal would give Eishin Flash the needed Power and Speed as a Late Surger. Her Stamina stat can come from Power training and Riko Kashimoto's card events.
Budget Build


This deck is for players who are starting out and are still trying to get a feel of the game's mechanics and intricacies. This deck can help you get the needed stats to clear the career, while also providing important skills.
Take advantage of the game's borrowing feature to borrow a powerful MLB SSR, like Kitasan Black. Additionally, if you do not have an MLB copy of Riko Kashimoto (Tracen Academy), it would be better to use another SR Stamina card instead.
Alternative Support Cards
| Recommended Alternative Support Cards | |
|---|---|
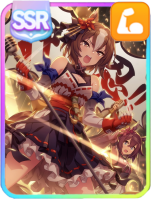
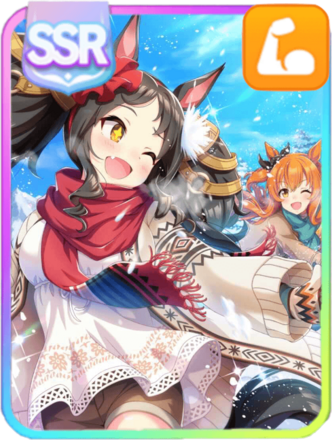
| Speed |  Biko Pegasus Rarity: SSR Type: Speed  Tokai Teio Rarity: SSR Type: Speed  Kawakami Princess Rarity: SSR Type: Speed  Narita Brian Rarity: SSR Type: Speed  Nishino Flower Rarity: SSR Type: Speed  Zenno Rob Roy Rarity: SSR Type: Speed 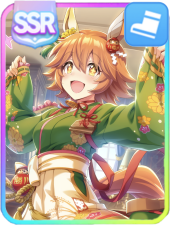 Matikane Fukukitaru Rarity: SSR Type: Speed  Narita Top Road Rarity: SSR Type: Speed  Eishin Flash Rarity: SR Type: Speed  Narita Taishin Rarity: SR Type: Speed |
| Stamina | |
| Power |


These cards will help Eishin Flash level her needed Stats (especially with Rainbow/Friendship Training), as well as provide some needed skills.
URA Finale Build
For the URA Finale deck, we recommend a 4 Speed and 2 Stamina setup as Eishin Flash will need sufficient stamina to keep up with her races.
If Eishin Flash needs more Power to overtake the competition, then a 3 Speed, 3 Power deck is also viable.
Recommended Legacy Sparks
For Legacy Sparks, we recommend trying to find Stamina and Power sparks to help with Eishin Flash's races. As for pink sparks, we recommend improving Distance aptitudes first, then Turf and lastly Style aptitudes.
You can use either your own Veterans, or borrow the ones from your friends. If you do not have Veterans with full sparks, you can go with whatever you have access to.
Recommended Skills
 Uma Stan
 Fighter
 Professor of Curvature
 Swinging Maestro
 No Stopping Me!
 Triumphant Pulse
 Let's Pump Some Iron
Eishin Flash requires a gold recovery skill for both her career and when running her for Team Trials, such as Swinging Maestro which is an accessible and reliable recovery skill to have.
Speed skills are also crucial for Eishin Flash to give her a boost in different areas of the track, such as Professor of Curvature, On Your Left, and Position Pilfer.
- Behold Thine Emperor's Divine Might easy to activate as a Late Surger, only needing to overtake at least 3 times.
- Let's Pump Some Iron a Late Surger's ultimate acceleration gamble skill. Requires being in a specific position (6th for CM, 8th for TT) in the late-race to activate.
- Triumphant Pulse is a straightforward velocity skill. Must be between 2nd-5th position and have at most 200m left to cover to activate.
Eishin Flash (Meisterschaft) Events
Honor at Stake
| Choice | Outcome |
|---|---|
|
Choice 1
(If anyone can beat her, it's you!) |
・ 20 Guts |
|
Choice 2
(Avenge... me!) |
・ 20 Wit |
Shadows in the Darkness
| Choice | Outcome |
|---|---|
|
Choice 1
(Run for your life!) |
・ 10 Speed ・ 10 Guts |
|
Choice 2
(We have to stand and fight...) |
・ 20 Stamina |
Worthy of Wearing Pride
| Choice | Outcome |
|---|---|
|
Choice 1
(Let's have you run in it so you can get used to it.) |
・ 20 Power |
|
Choice 2
(I think you're due a baking session!) |
・ 40 Skill Pts |
Acclimating
| Choice | Outcome |
|---|---|
| Choice 1 | ・ 10 Power |
| Choice 2 | ・ 10 Guts |
| Choice 3 | ・ 10 Stamina |
Chasing Trends
| Choice | Outcome |
|---|---|
| Choice 1 | ・ 10 Wit |
| Choice 2 | ・ 10 Stamina |
Conveying Sincerity
| Choice | Outcome |
|---|---|
| Choice 1 | ・ 10 Speed |
| Choice 2 | ・ 10 Wit |
Immersing in Japanese Tradition
| Choice | Outcome |
|---|---|
| Choice 1 | ・ 10 Guts |
| Choice 2 | ・ 10 Speed |
Reminiscing at the Freizeitpark
| Choice | Outcome |
|---|---|
| Choice 1 | ・ 10 Power |
| Choice 2 | ・ 10 Stamina |
Dance Lesson (Eishin Flash)
| Choice | Outcome |
|---|---|
| Choice 1 | ・ 10 Speed |
| Choice 2 | ・ 10 Wit |
Flash's Plan Put to the Test
| Choice | Outcome |
|---|---|
| Choice 1 |
・ 1 Mood ・ Restricts training to one. Enables The Outcome of Flash's Plan (+20 of stat & +10 Energy or No Effect). |
| Choice 2 | ・ Nothing happens. |
Fried, Crispy, and Fresh!
| Choice | Outcome |
|---|---|
|
Choice 1
(Why don't we share one together?) |
・ 10 Energy ・ 5 Skill Pts |
|
Choice 2
(Success)
(There's no need to hold back after all that walking today!) |
・ 30 Energy ・ 10 Skill Pts |
|
Choice 2
(Fail)
(There's no need to hold back after all that walking today!) |
・ 30 Energy ・ -5 Speed ・ 5 Power ・ 10 Skill Pts ・ Slow Metabolism |
Guardians of Nature
| Choice | Outcome |
|---|---|
|
Choice 1
(I don't know if I have the energy...) |
・ 10 Stamina |
|
Choice 2
(If you really think I can help, sure!) |
・ 10 Power |
How to Educate Effectively
| Choice | Outcome |
|---|---|
| Choice 1 | ・ 10 Speed |
| Choice 2 | ・ 10 Guts |
Inspiration to Fly
| Choice | Outcome |
|---|---|
|
Choice 1
(Why not let her observe you for a day?) |
・ 5 Speed ・ 5 Stamina ・ 5 Power |
|
Choice 2
(Why not give her some pointers?) |
・ Standard Distance +1 Skill Hint |
At Summer Camp (Year 2) (Eishin Flash)
| Choice | Outcome |
|---|---|
|
Choice 1
(How do you build strength?) |
・ 10 Power |
|
Choice 2
(How do you hold out during races?) |
・ 10 Guts |
New Year's Resolutions (Eishin Flash)
| Choice | Outcome |
|---|---|
|
Choice 1
(Flying a kite for growth!) |
・ 10 Speed |
|
Choice 2
(Eating New Year's food for health!) |
・ 20 Energy |
|
Choice 3
(Doing calligraphy to declare your resolution!) |
・ 20 Skill Pts |
New Year's Shrine Visit (Eishin Flash)
| Choice | Outcome |
|---|---|
|
Choice 1
(Let's laze around for New Year!) |
・ 30 Energy |
|
Choice 2
(Let's go write down our wishes!) |
・ 5 All Stats |
|
Choice 3
(Let's exchange New Year's cards!) |
・ 35 Skill Pts |
Don't Overdo It! (Eishin Flash)
| Choice | Outcome |
|---|---|
| Choice 1 |
・ 10 Energy ・ -2 Mood ・ Last trained stat and two other random stat -10 ・ Practice Poor (random) |
| Choice 2 (Success) | ・ Practice Perfect ◯ |
| Choice 2 (Fail) |
・ -3 Mood ・ 3 Random stat -10 ・ Practice Poor |
Extra Training (Eishin Flash)
| Choice | Outcome |
|---|---|
|
Choice 1
(Go right ahead!) |
・ -5 Energy ・ Last trained stat +5 ・ 5 Friendship with Director |
|
Choice 2
(You need to rest now.) |
・ 5 Energy |
Get Well Soon! (Eishin Flash)
| Choice | Outcome |
|---|---|
|
Choice 1
(Make her take a proper rest.) |
・ -1 Mood ・ Last trained stat -5 ・ Practice Poor (random) |
|
Choice 2
(Success)
(Encourage her to keep going.) |
・ Practice Perfect ◯ |
|
Choice 2
(Fail)
(Encourage her to keep going.) |
・ -1 Mood ・ Last trained stat -10 ・ Practice Poor (random) |
Defeat (G1) (Eishin Flash)
| Choice | Outcome |
|---|---|
|
Choice 1
(Your methods are fine, Flash.) |
・ -25 Energy ・ 25 Skill Pts ・ Random Stat +4 |
|
Choice 2
(Success)
(Because you're not strong enough yet.) |
・ -15 Energy ・ 25 Skill Pts ・ Random Stat +4 |
|
Choice 2
(Fail)
(Because you're not strong enough yet.) |
・ -35 Energy ・ 25 Skill Pts ・ Random Stat +4 |
Defeat (G2) (Eishin Flash)
| Choice | Outcome |
|---|---|
|
Choice 1
(Your methods are fine, Flash.) |
・ -25 Energy ・ 20 Skill Pts ・ Random Stat +3 |
|
Choice 2
(Success)
(Because you're not strong enough yet.) |
・ -15 Energy ・ 20 Skill Pts ・ Random Stat +3 |
|
Choice 2
(Fail)
(Because you're not strong enough yet.) |
・ -35 Energy ・ 20 Skill Pts ・ Random Stat +3 |
Defeat (G3) (Eishin Flash)
| Choice | Outcome |
|---|---|
|
Choice 1
(Your methods are fine, Flash.) |
・ -25 Energy ・ 20 Skill Pts ・ Random Stat +3 |
|
Choice 2
(Success)
(Because you're not strong enough yet.) |
・ -15 Energy ・ 20 Skill Pts ・ Random Stat +3 |
|
Choice 2
(Fail)
(Because you're not strong enough yet.) |
・ -35 Energy ・ 20 Skill Pts ・ Random Stat +3 |
Defeat (OP and Pre-OP) (Eishin Flash)
| Choice | Outcome |
|---|---|
|
Choice 1
(Your methods are fine, Flash.) |
・ -25 Energy ・ 10 Skill Pts |
|
Choice 2
(Fail)
(Because you're not strong enough yet.) |
・ -35 Energy ・ 10 Skill Pts |
|
Choice 2
(Success)
(Because you're not strong enough yet.) |
・ -15 Energy ・ 10 Skill Pts |
Solid Showing (G1) (Eishin Flash)
| Choice | Outcome |
|---|---|
|
Choice 1
(You did your best, and that's what counts!) |
・ -20 Energy ・ 45 Skill Pts ・ Random Stat +8 |
|
Choice 2
(Success)
(Let's aim even higher next time!) |
・ -10 Energy ・ 45 Skill Pts ・ Random Stat +8 |
|
Choice 2
(Fail)
(Let's aim even higher next time!) |
・ -30 Energy ・ 45 Skill Pts ・ Random Stat +8 |
Solid Showing (G2) (Eishin Flash)
| Choice | Outcome |
|---|---|
|
Choice 1
(You did your best, and that's what counts!) |
・ -20 Energy ・ 35 Skill Pts ・ Random Stat +5 |
|
Choice 2
(Success)
(Let's aim even higher next time!) |
・ -10 Energy ・ 35 Skill Pts ・ Random Stat +5 |
|
Choice 2
(Fail)
(Let's aim even higher next time!) |
・ -30 Energy ・ 35 Skill Pts ・ Random Stat +5 |
Solid Showing (G3) (Eishin Flash)
| Choice | Outcome |
|---|---|
|
Choice 1
(You did your best, and that's what counts!) |
・ -20 Energy ・ 35 Skill Pts ・ Random Stat +5 |
|
Choice 2
(Success)
(Let's aim even higher next time!) |
・ -10 Energy ・ 35 Skill Pts ・ Random Stat +5 |
|
Choice 2
(Fail)
(Let's aim even higher next time!) |
・ -30 Energy ・ 35 Skill Pts ・ Random Stat +5 |
Solid Showing (OP and Pre-OP) (Eishin Flash)
| Choice | Outcome |
|---|---|
|
Choice 1
(You did your best, and that's what counts!) |
・ -20 Energy ・ 30 Skill Pts ・ Random Stat +3 |
|
Choice 2
(Success)
(Let's aim even higher next time!) |
・ -10 Energy ・ 30 Skill Pts ・ Random Stat +3 |
|
Choice 2
(Fail)
(Let's aim even higher next time!) |
・ -30 Energy ・ 30 Skill Pts ・ Random Stat +3 |
Victory! (G1) (Eishin Flash)
| Choice | Outcome |
|---|---|
| Choice 1 |
・ -15 Energy ・ 45 Skill Pts ・ Random Stat +10 |
| Choice 2 (Success) |
・ -5 Energy ・ 45 Skill Pts ・ Random Stat +10 |
| Choice 2 (Fail) |
・ -20 Energy ・ 45 Skill Pts ・ Random Stat +10 |
Victory! (G2) (Eishin Flash)
| Choice | Outcome |
|---|---|
| Choice 1 |
・ -15 Energy ・ 35 Skill Pts ・ Random Stat +8 |
| Choice 2 (Success) |
・ -5 Energy ・ 35 Skill Pts ・ Random Stat +8 |
| Choice 2 (Fail) |
・ -20 Energy ・ 35 Skill Pts ・ Random Stat +8 |
Victory! (G3) (Eishin Flash)
| Choice | Outcome |
|---|---|
| Choice 1 |
・ -15 Energy ・ 35 Skill Pts ・ Random Stat +8 |
| Choice 2 (Success) |
・ -5 Energy ・ 35 Skill Pts ・ Random Stat +8 |
| Choice 2 (Fail) |
・ -20 Energy ・ 35 Skill Pts ・ Random Stat +8 |
Victory! (OP and Pre-OP) (Eishin Flash)
| Choice | Outcome |
|---|---|
| Choice 1 |
・ -15 Energy ・ 30 Skill Pts ・ Random Stat +5 |
| Choice 2 (Success) |
・ -5 Energy ・ 30 Skill Pts ・ Random Stat +5 |
| Choice 2 (Fail) |
・ -20 Energy ・ 30 Skill Pts ・ Random Stat +5 |
Eishin Flash Hidden Events
Der Rekord
| Event Conditions | Event Effects |
|---|---|
| Der Rekord 5+ G1 race wins on Tokyo Racecourse. |
Standard Distance ◯ +2 |
| Erinnerung an den Sieg 3+ G1 race wins on Tokyo Racecourse. |
|
| Erinnerung an Tokyo 2 G1 race wins on Tokyo Racecourse. |
|
Three of Eishin Flash's secret events are obtained by achieving the above event conditions. Bonuses will depend the number of G1 races won on the Tokyo Racecourse. You can see the recommended races below.
Recommended G1 Races for Der Rekord
| Race | Information |
|---|---|
 |
Time: Classic - Late May Track: Turf Distance: Medium - 2400 Direction: Left |
 |
Time: Classic/Senior - Late Oct Track: Turf Distance: Medium - 2000 Direction: Left |
 |
Time: Classic/Senior - Late Nov Track: Turf Distance: Medium - 2400 Direction: Left |
Above are the recommended G1 races for accomplishing Eishin's Flash Der Rekord event. Note the following with regards to these races:
- Japanese Derby (Tokyo Yushun) is a goal race in Classic Year.
- Tenno Sho (Autumn) is an off-goal race in Classic Year but is a goal race in Senior Year.
- Japan Cup is a goal race in Classic Year but is an off-goal race in Senior Year.
This means that there are 3 potential races for the Der Rekord event, so you'll just want to take the two off-goal races: Tenno Sho (Autumn) and Japan Cup in their respective off-goal years.
After the Japanese Derby: Der Sieg
| Condition | Win the Japanese Derby |
|---|---|
| Event Time | Classic Year Late May |
| Event Rewards |
・ Regular race rewards ・ Fighter +1 |
| Race(s) to Win | |
|
Japanese Derby (Tokyo Yushun) (Classic Year)
| 2400m (Medium)
Late May, Classic Year |
|
After the Kikuka Sho: Blick nach vorn
| Condition | Win the Kikuka Sho |
|---|---|
| Event Time | Classic Year Late Oct |
| Event Rewards |
・ Energy -15 ・ 1 random stat +10 ・ Skill points +45 |
| Race(s) to Win | |
|
Kikuka Sho (Classic Year)
| 3000m (Long)
Late Oct, Classic Year |
|
Eishin Flash (Meisterschaft) Career Goals
| Goal | Race/Goal |
|---|---|
| Run in Junior Make Debut | Junior Make Debut |
| Place top 5 in Keisei Hai |
 Keisei Hai Keisei Hai
(Medium - 2000m) Classic Year Early Jan |
| Place top 5 in Satsuki Sho |
 Satsuki Sho Satsuki Sho
(Medium - 2000m) Classic Year Early Apr |
| Place top 5 in Japanese Derby |
Japanese Derby (Tokyo Yushun)
(Medium - 2400m) Classic Year Late May |
| Run in Japan Cup |
Japan Cup
(Medium - 2400m) Classic Year Late Nov |
| Run in Arima Kinen |
 Arima Kinen Arima Kinen
(Long - 2500m) Classic Year Late Dec |
| Place top 3 in Osaka Hai |
 Osaka Hai Osaka Hai
(Medium - 2000m) Senior Year Late Mar |
| Place top 3 in Tenno Sho (Spring) |
 Tenno Sho (Spring) Tenno Sho (Spring)
(Long - 3200m) Senior Year Late Apr |
| Place 1st in Tenno Sho (Autumn) |
Tenno Sho (Autumn)
(Medium - 2000m) Senior Year Late Oct |
| Place 1st in Arima Kinen |
Arima Kinen
(Long - 2500m) Senior Year Late Dec |
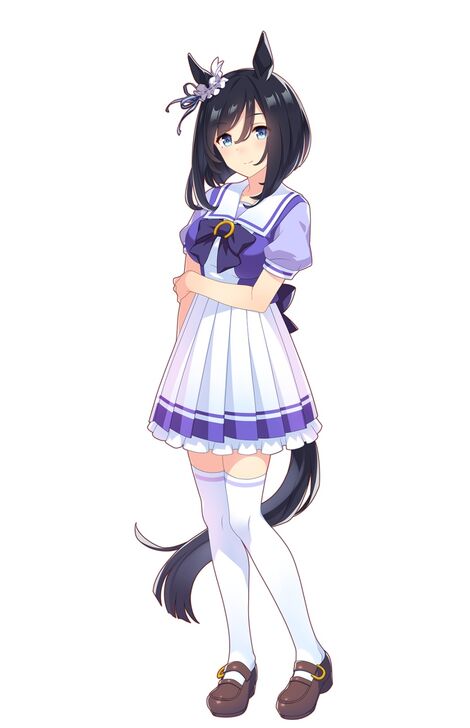
Eishin Flash Profile
Basic Information
 Eishin Flash Eishin Flash"Remain rigorous and exact in all that you do, and never stray from the recipe." | Voice Actress | Ayami Fujino |
|---|---|---|
| Height | 160cm / 5'2" | |
| Weight | No change, not even by a gram! | |
| Birthday | Mar 27 | |
| Three Sizes | B 88 | W 58 | H 86 | |
| A diligent and methodical exchange student from Germany. Everything she does is planned and scheduled down to the second. She likes to bake sweets as a hobby, and her precise nature may have arisen due to the unforgiving nature of measuring errors in baking. However, this same meticulousness makes her quick to panic when unexpected events or issues arise. | ||
Costumes
| Uniform | Racewear |
|---|---|
 |
 |
Umamusume: Pretty Derby Related Guides

Character Guides
| Height and Weight | Voice Actors | Three Sizes | List of Birthdays |
Characters (Trainees) by Rarity
| 3-Star Characters | 2-Star Characters | 1-Star Characters |
Current Uma Musume Characters (Trainees)
 Matikane Tannhauser (Clippety Tippety Clop)
 Kitasan Black (Gilded Shrine to Glory)
 Admire Vega (Starry Nocturne)
 Mejiro Ardan (Crystalline)
 Eishin Flash (Precise Chocolatier)
 Mihono Bourbon (CODE: ICING)
 Sakura Chiyono O (Strength in Full Bloom)
 T.M. Opera O (New Year, Same Radiance!)
 Haru Urara (New Year ♪ New Urara!)
 Tamamo Cross (Fast as Lightning)
 Fine Motion (Noble Seamair)
 Biwa Hayahide (Rouge Caroler)
 Oguri Cap (Ashen Miracle)
 Mejiro Dober (Off the Line)
 Tosen Jordan (Jokester ☆ Vibes)
 Gold City (Autumn Cosmos)
 Symboli Rudolf (Archer by Moonlight)
 Manhattan Cafe (Creeping Shadow)
 Kawakami Princess (Princess of Pink)
 Super Creek (Chiffon-Wrapped Mummy)
 Rice Shower (Vampire Makeover!)
 Agnes Digital (Full-Color Fangirling)
 Hishi Akebono (Buono☆Alla Moda)
 Matikane Fukukitaru (Lucky Tidings)
 Meisho Doto (Turbulent Blue)
 Maruzensky (Hot☆Summer Night)
 Special Week (Hopp'n♪Happy Heart)
 Gold City (Authentic / 1928)
 Fuji Kiseki (Shooting Star Revue)
 Grass Wonder (Saintly Jade Cleric)
 El Condor Pasa (Kukulkan Warrior)
 Hishi Amazon (Azure Amazon)
 Seiun Sky (Reeling in the Big One)
 Air Groove (Quercus Civilis)
 Mayano Top Gun (Sunlight Bouquet)
 Narita Brian (Maverick)
 Smart Falcon (LOVE☆4EVER)
 Narita Taishin (Nevertheless)
 Curren Chan (Fille Éclair)
 Tokai Teio (Beyond the Horizon)
 Mejiro McQueen (End of the Skies)
 Biwa Hayahide (pf. Winning Equation...)
 Mihono Bourbon (MB-19890425)
 T.M. Opera O (O Sole Suo!)
 Rice Shower (Rosy Dreams)
 Symboli Rudolf (Emperor's Path)
 Mejiro McQueen (Frontline Elegance)
 Taiki Shuttle (Wild Frontier)
 Oguri Cap (Starlight Beat)
 Maruzensky (Formula R)
 Tokai Teio (Peak Joy)
 Silence Suzuka (Innocent Silence)
 Special Week (Special Dreamer)
 Super Creek (Murmuring Stream)
 Mayano Top Gun (Scramble Zone)
 Air Groove (Empress Road)
 El Condor Pasa (El Numero 1)
 Grass Wonder (Stone-Piercing Blue)
 Daiwa Scarlet (Peak Blue)
 Vodka (Wild Top Gear)
 Gold Ship (Red Strife)
 King Halo (King of Emeralds)
 Nice Nature (Poinsettia Ribbon)
 Matikane Fukukitaru (Rising Fortune)
 Haru Urara (Bestest Prize)
 Sakura Bakushin O (Blossom in Learning)
 Winning Ticket (Get to Winning!)
 Agnes Tachyon (Tach-nology)
 Mejiro Ryan (Down the Line)
Comment
Thank you for pointing this out! We have corrected that part to recommend Late Surger sparks instead.
Author

Eishin Flash (Meisterschaft) Build Guide and Character Info
Premium Articles
Rankings
- We could not find the message board you were looking for.

Gaming News


Popular Games

Genshin Impact Walkthrough & Guides Wiki
Umamusume: Pretty Derby Walkthrough & Guides Wiki
Crimson Desert Walkthrough & Guides Wiki
Monster Hunter Stories 3: Twisted Reflection Walkthrough & Guides Wiki
Honkai: Star Rail Walkthrough & Guides Wiki
Pokemon Pokopia Walkthrough & Guides Wiki
The Seven Deadly Sins: Origin Walkthrough & Guides Wiki
Wuthering Waves Walkthrough & Guides Wiki
Zenless Zone Zero Walkthrough & Guides Wiki
Arknights: Endfield Walkthrough & Guides Wiki


Recommended Games
Fire Emblem Heroes (FEH) Walkthrough & Guides Wiki
Diablo 4: Vessel of Hatred Walkthrough & Guides Wiki
Cyberpunk 2077: Ultimate Edition Walkthrough & Guides Wiki
Yu-Gi-Oh! Master Duel Walkthrough & Guides Wiki
Super Smash Bros. Ultimate Walkthrough & Guides Wiki
Pokemon Brilliant Diamond and Shining Pearl (BDSP) Walkthrough & Guides Wiki
Elden Ring Shadow of the Erdtree Walkthrough & Guides Wiki
Monster Hunter World Walkthrough & Guides Wiki
The Legend of Zelda: Tears of the Kingdom Walkthrough & Guides Wiki
Persona 3 Reload Walkthrough & Guides Wiki


All rights reserved
© Cygames, Inc.
The copyrights of videos of games used in our content and other intellectual property rights belong to the provider of the game.
The contents we provide on this site were created personally by members of the Game8 editorial department.
We refuse the right to reuse or repost content taken without our permission such as data or images to other sites.
Thank you for the guide! Are the support cards more based around the unity cup? I just notice they have Biko and King who are more sprint based, though I know King is a late surger too.