The Blade of House Meillet Walkthrough
☆Get to know Alain and the other characters
★Choices | Gammel | Mandrin
☆Farm Divine Shards for Ochlys!
★Classes | How to Promote and How to Change Class
☆Let us know who you'll marry in our Romance guide!
This is a walkthrough and guide for The Blade of House Meillet in Unicorn Overlord. See a walkthrough guide for The Blade of House Meillet, its location and rewards, the stage's objectives, recommended units and formations, item locations, and battle strategies!
| The Blade of House Meillet Guides | |
|---|---|
| The Blade of House Meillet Walkthrough | Should you Recruit or Execute Melisandre Melisandre Guide |
| Announce Yourself or Ignore Melisandre? | Should you Bolt the Gate? |
List of Contents
The Blade of House Meillet Location and Rewards
Location
| Map Location | Overworld Location |
|---|---|
 |
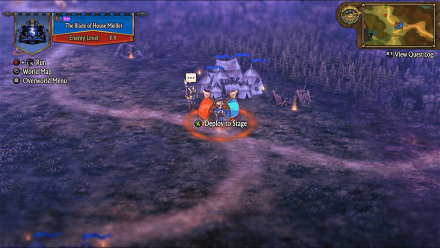 |
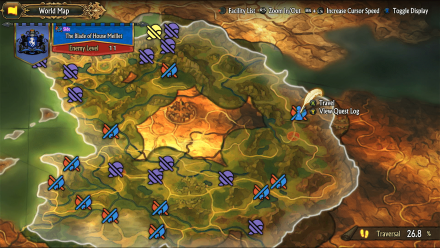
| Region: Cornia Location: North of Walled City of Eucuit |
|
Rewards
| Rewards |
|---|
|
・Black Iron Sword x1 ・Camping Set (S) x1 ・House Meillet x1 |
The Blade of House Meillet Recruitable Characters
| Recruitable Characters | ||
|---|---|---|
 Melisandre Melisandre
|
 Colm Colm
|
|
The Blade of House Meillet marks the first stage where Melisandre and Colm will join you after the end of the battle only if Alain battles in this stage.
List of All Recruitable Characters
The Blade of House Meillet Recommended Units
| Recommended Unit Leaders | ||||
|---|---|---|---|---|
 Josef
Josef |
 Rolf
Rolf |
 Auch
Auch |
 Alain
Alain |
 Travis
 |
Before doing this quest, make sure that you have expanded your units from 4 to 5 and three of your party's unit slots from 3 to 4. Additionally, hiring a Hunter mercenary is recommended for this battle. You can expand your units, and hire Mercenaries by spending Honor in Forts you own.
The Blade of House Meillet lets you use up to 6 units but having only five will suffice in this stage. We recommend the Unit Leaders listed above. Click on the leader's name to see our recommended Unit Formation for that leader in this stage.
Josef's Unit
| Josef's Unit | ||
|---|---|---|
 Adel Adel (Knight) |
 Selvie Selvie (Shaman) |
 Clive Clive (Knight) |
| - |
 Josef Josef (Paladin) |
- |
Josef's Unit is overall the best to utilize in this stage as they are strong against Swordfighters and they make sure that they attack multiple times using Josef's Pursuit and Clive and Adel's Assaulting Lance.
Selvie will make sure that the Swordfighters will have no PP at the beginning of the battle with her Passive Curse, rendering them less efficient in battle.
Rolf's Unit
| Rolf's Unit | ||
|---|---|---|
 Rolf Rolf (Hunter) |
 Yahna Yahna (Witch) |
Any Hunter Mercenary |
| - |
 Hodrick Hodrick (Hoplite) |
- |
Rolf's Unit will be your go-to in defeating Gryphon Knights and Witches. Having Yahna in this unit will amplify Rolf's and the other Hunter's attacks by using her Magick Conferral passive, all the while Hodrick takes all the damage with only a minimal decrease from his health.
Auch's Unit
| Auch's Unit | ||
|---|---|---|
 Aubin Aubin (Housecarl) |
 Sharon Sharon (Cleric) |
 Auch Auch (Wizard) |
| - |
 Bruno Bruno (Gladiator) |
- |
Auch's Unit is a reliable team when fighting Swordfighters. Have Bruno defend the team as he has the highest HP and he has his Bulk Up passive ready, and he can attack rows of enemies with his Wide Smash skill.
Aubin and Auch will be fighting in the back row, equipped with useful passives such as Aubin's Parting Blow where he can attack once more at the end of battle, and Auch's Magick Counter where he can counter an enemy's attack with Magick. Have Sharon here to heal these two as they tend to have low HP.
Recruiting Auch
Auch is a recruitable character and will join the Liberation after successfully finishing the The Self-Effacing Sorcerer side quest should you choose to spare him.
Recruiting Auch before starting this quest is recommended as he will be effective in this battle.
The Self-Effacing Sorcerer Walkthrough
Alain's Unit
| Alain's Unit | ||
|---|---|---|
 Berenice Berenice (Sellsword) |
- |
 Ochlys Ochlys (Feathersword) |
| - |
 Alain Alain (Lord) |
- |
Alain will be joining Travis on the sidelines. In this stage, the enemy will summon reinforcements on the leftmost part of the map. This is where you will get Alain's Unit to fight.
His unit is composed of sword bearers, including himself. This allows for an easy counter when battling Swordmasters and it can also deal lots of damage to other enemy classes as Alain, Berenice, and Ochlys are three of the best damagers with high DEF to boot.
Travis's Unit
| Travis's Unit | ||
|---|---|---|
 Nina Nina (Warrior) |
- |
 Mordon Mordon (Warrior) |
| - |
 Travis Travis (Thief) |
- |
Travis's Unit will only be utilized for the Ballista at this stage. Swordfighters have truestrike thus rendering Travis's Evade passive useless.
Nina and Mordon can serve as his backup whenever approached by the enemy since they both are high damagers. But it is best to remove this team from harm's way as they have no healers in the party.
The Blade of House Meillet Walkthrough
| # | Step by Step Guide |
|---|---|
| 1 |
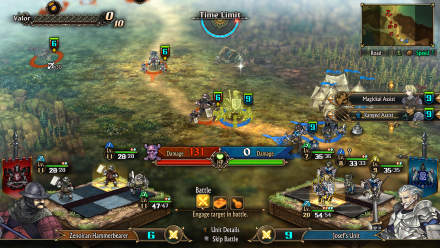 Deploy and Set Destination Deploy Josef, Travis, and Rolf's Team. Josef and Rolf make up two-thirds of your core team, the other one is Auch, but right now you can only deploy three. Send Travis to the Ballista location and have him stationed here for the rest of the battle. Use Josef's team to fight incoming enemy units while making Rolf collect the treasure nearby and get a Wind Faerie's Charm. Feel free to use Rolf's Ranged Assist when necessary. |
| 2 |
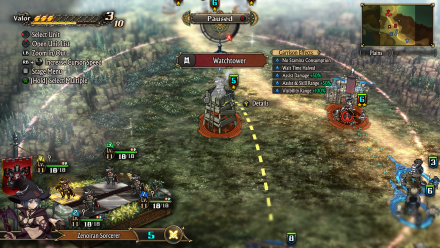 Destroy the Watch Tower Using the Ballista Having been stationed at the Ballista, have Travis's team destroy the Watch Tower nearby since it is within their range. |
| 3 |
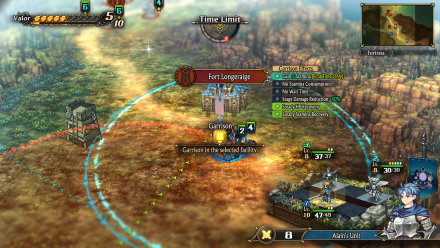 Garrison in Fort Longeraige
By fighting the enemies on the way to the Fort, you will have enough Valor Points to deploy Auch's team. Deploy it and have it tail the two leading units. While still traveling towards the fort, feel free to switch between your units depending on the enemy class of your opponent. Defeat the enemy stationed at Fort Longeraige, this might not be done in one battle, especially since there is a Shaman present in the enemy unit. Garrison in the fort to get Valor Points and deploy Alain's Unit. |
| 4 |
Deploy Alain's Unit With enough Valor Points, you can now deploy your last unit, which is Alain's. Position himself beside the Ballista and wait for the reinforcements to come on this side of the map. While waiting, you can get the treasure on the ground near the Watch Tower and collect a Beckoning Bell and have him fight enemy units as Alain needs to battle at least twice to successfully recruit Melisandre and Colm at the end of the battle. Have him fall back and get back to position afterward, beside Travis. |
| 5 |
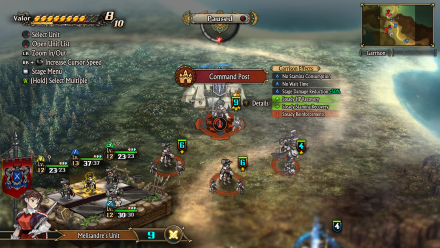 Head for the Command Post While on the way to the enemy command post, Melisandre will be summoning reinforcements on the left side of the map where Travis and Alain's units are. Battle nearby enemy units on the way to the command post. Utilize Ranged Assist and Magickal Assist effectively. You can have a unit collect the treasure on the ground nearby to get a Light Tailfeather. |
| 6 |
Help Travis with the Reinforcements This step depends on if you bolt the gate shut or not in this area before starting this quest as enemy reinforcements will come through here. If you have not bolted the gate shut, have Alain and Travis hold down the fort here as the core team focuses on defeating Melisandre. Otherwise, if you have bolted the gate shut before starting this quest, reinforcements will not be able to enter and the battle will be much easier. |
| 7 |
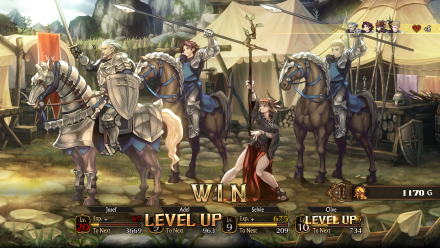 Defeat Melisandre Use Josef's mobility to your advantage and ignore the surrounding enemy units. Head to the command post while avoiding other enemies as much as possible as the only goal is to defeat Melisandre. Use his team to defeat Melisandre and use Ranged Assist. Once you defeat Melisandre, you will obtain Stingray. |
The Blade of House Meillet Stage Info
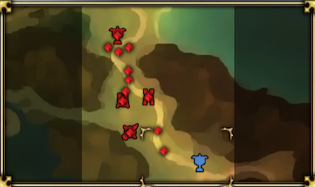
| The Blade of House Meillet Stage Map | ||
|---|---|---|
 |
||
| Enemy Level | 11 | |
| Victory Condition | ・Defeat Melisandre | |
| Defeat Condition |
・The Liberation's command post is captured ・The time limit expires |
|
Unicorn Overlord Related Guides
All Main Quest Stages
All Side Quest Stages
All Overworld Quests
| Overworld Quests | |
|---|---|
| An Angel's Request | Palevia's Escaped Chickens |
| Carved of Cornia Stone | Cemeteries of Cornia |
| Carved of Drakenhold Stone | Cemeteries of Drakenhold |
| Drakenhold's Escaped Chickens | - |
All Liberation Quests
Comment
Author
The Blade of House Meillet Walkthrough
Rankings
- We could not find the message board you were looking for.
Gaming News
Popular Games

Genshin Impact Walkthrough & Guides Wiki

Umamusume: Pretty Derby Walkthrough & Guides Wiki

Crimson Desert Walkthrough & Guides Wiki

Monster Hunter Stories 3: Twisted Reflection Walkthrough & Guides Wiki

Honkai: Star Rail Walkthrough & Guides Wiki

Pokemon Pokopia Walkthrough & Guides Wiki

The Seven Deadly Sins: Origin Walkthrough & Guides Wiki

Wuthering Waves Walkthrough & Guides Wiki

Zenless Zone Zero Walkthrough & Guides Wiki

Arknights: Endfield Walkthrough & Guides Wiki
Recommended Games

Fire Emblem Heroes (FEH) Walkthrough & Guides Wiki

Diablo 4: Vessel of Hatred Walkthrough & Guides Wiki

Cyberpunk 2077: Ultimate Edition Walkthrough & Guides Wiki

Yu-Gi-Oh! Master Duel Walkthrough & Guides Wiki

Super Smash Bros. Ultimate Walkthrough & Guides Wiki

Pokemon Brilliant Diamond and Shining Pearl (BDSP) Walkthrough & Guides Wiki

Elden Ring Shadow of the Erdtree Walkthrough & Guides Wiki

Monster Hunter World Walkthrough & Guides Wiki

The Legend of Zelda: Tears of the Kingdom Walkthrough & Guides Wiki

Persona 3 Reload Walkthrough & Guides Wiki
All rights reserved
©ATLUS. ©SEGA. All rights reserved. SEGA is registered in the U.S. Patent and Trademark Office. ATLUS and the ATLUS logo are registered trademarks or trademarks of ATLUS Co., Ltd. SEGA, the SEGA logo and UNICORN OVERLORD are registered trademarks or trademarks of SEGA CORPORATION.
The copyrights of videos of games used in our content and other intellectual property rights belong to the provider of the game.
The contents we provide on this site were created personally by members of the Game8 editorial department.
We refuse the right to reuse or repost content taken without our permission such as data or images to other sites.


![Star Savior Review [First Impressions] | Engaging, Entertaining, and Expensive](https://img.game8.co/4447603/8f500e9bf666bdb8adb1af478e9dfdbd.png/show)

![Death Stranding 2: On The Beach Review [PC] | A Port That Delivers](https://img.game8.co/4447392/15310a0c9aa1b6843bb713b2ea216930.jpeg/thumb)


