The Mercenary's Trial Walkthrough
☆Get to know Alain and the other characters
★Choices | Gammel | Mandrin
☆Farm Divine Shards for Ochlys!
★Classes | How to Promote and How to Change Class
☆Let us know who you'll marry in our Romance guide!
This is a walkthrough and guide for The Mercenary's Trial in Unicorn Overlord. See a walkthrough guide for The Mercenary's Trial, its location and rewards, the stage's objectives, recommended units and formations, item locations, and battle strategies!
| Recruitment & Related Quest | |
|---|---|
| Berenice | The Mercenary's Trial |
List of Contents
The Mercenary's Trial Location and Rewards
Location
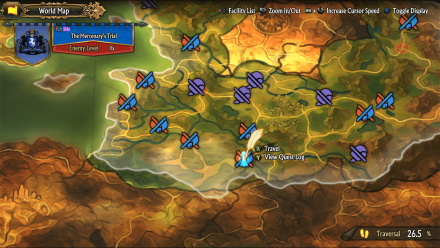
| Map Location | Overworld Location |
|---|---|
 |
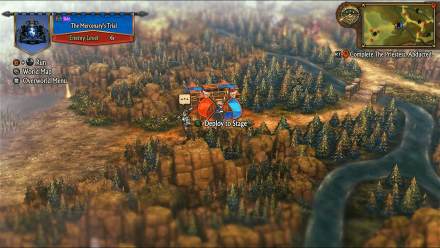 |
| Region: Cornia Location: In front of Fort Colmare |
|
Rewards
| Rewards |
|---|
|
・Baroque Sword x 1 ・Free Mining Pass x1 ・Heavenswolf Mercenaries x1 |
The Mercenary's Trial Recruitable Characters
| Recruitable Characters | ||
|---|---|---|
 Berenice Berenice
|
||
The Mercenary's Trial marks the first stage where Berenice will be available for recruitment once you defeat her in battle.
List of All Recruitable Characters
The Mercenary's Trial Recommended Units
| Recommended Unit Leaders | ||||
|---|---|---|---|---|
 Travis
 |
 Rolf
Rolf |
 Sharon
 |
||
The Mercenary's Trial lets you use up to 5 units, but this stage can be finished using only three.
We recommend the Unit Leaders listed above. Click on the leader's name to see our recommended Unit Formation for that leader in this stage.
Travis's Unit
| Travis's Unit | ||
|---|---|---|
 Bruno Bruno (Gladiator) |
- |
 Mordon Mordon (Warrior) |
| - |
 Travis Travis (Thief) |
- |
Travis' Unit along with Rolf's will be dealing with the enemies in this stage. Have Travis' team battle enemy units that are mainly composed of Sellswords as they will be eliminated quickly with this lineup.
Mordon and Bruno are both brutes that deal heavy Physickal DMG to enemies, plus Bruno can finish off rows of Sellswords with his Wide Smash. Travis on the other hand will be untouchable in this battle as his Evade skill will be fully utilized.
Rolf's Unit
| Rolf's Unit | ||
|---|---|---|
 Nina Nina (Warrior) |
- |
 Rolf Rolf (Hunter) |
| - |
 Josef Josef (Paladin) |
- |
Having Rolf in this party is quite excellent against enemies with high Accuracy such as Clerics and Thieves, which will be encountered in this stage along with Sellswords. Josef will be in charge of defense and healing in this unit, he can also attack multiple times using his Pursuit passive for maximum damage.
Having another Warrior with high ATK such as Nina in this unit will be great for defeating enemies fast and unabling Sellswords to utilize their Following Slashh passive.
Recruiting Nina
Nina is a recruitable character available after finishing the Uprooting the Rock Rats side quest.
Having Nina in this stage is great but not really recommended as her side quest requires you to be at least a bit stronger to finish. If you do not have Nina yet, you can replace her with any hired Gladiator or Warrior mercenary. You can hire mercenaries at any nearby Forts you have by spending Honor.
Uprooting the Rock Rats Walkthrough
Sharon's Unit
| Sharon's Unit | ||
|---|---|---|
 Sharon Sharon (Cleric) |
- |
 Alain Alain (Lord) |
| - | Any Hired Thief Mercenary | - |
Sharon will be responsible for treasure collecting and healing only in this stage by using her Healing Assist. Protect Sharon by having another untouchable Thief on the front lines while having someone to protect her such as Alain.
You can interchange Alain with another character of your choice, as long as they deal damage. Since Sharon will only be tailing the first two teams, her unit is less likely to fight in this stage.
Recruiting Sharon
Sharon is a recruitable character accessible by finishing the The Winged Knight side quest.
After defeating Mandrin, you will have the option to recruit Sharon or not. It is advisable to recruit her as she will be a great healer for the party.
The Mercenary's Trial Walkthrough
| # | Step by Step Guide |
|---|---|
| 1 |
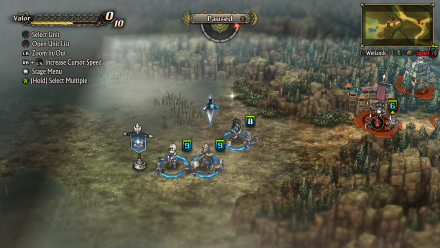 Deploy All Units Deploying all your units is the first thing to do. Have Sharon go to the treasure near Fort Colmare and get a Barricade Kit, the other two units will charge through Fort Colmare while defeating the wandering enemy nearby. Use Rolf's or Travis' team to battle and have Sharon use Healing Assist. |
| 2 |
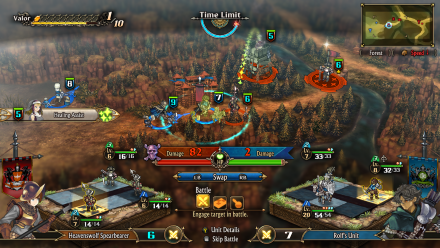 Garrison in Fort Colmare The next step will be to garrison in Fort Colmare and get enough Valor Points to deploy another unit. Deploying another unit is optional but feel free to do so. |
| 3 |
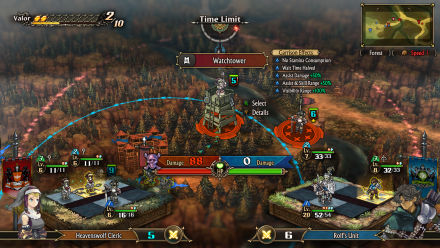 Clear Out the Watch Tower There will be a Watch Tower nearby guarded by Clerics and a single Sellsword. Clerics have a high Evasion rate so it is best that you use Rolf's team to deal with these enemies. |
| 4 |
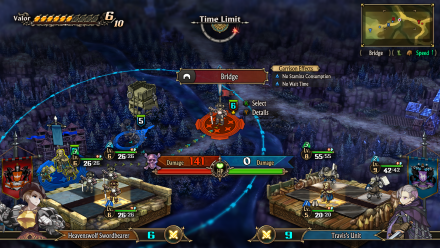 Advance to the Bridge Use either Rolf or Travis' Team to take control of the Bridge and defeat the enemy, and have Sharon continue tailing. Garrison at the Bridge and get a nearby ally to pick up the treasure above it to collect Smoked Nuts. |
| 5 |
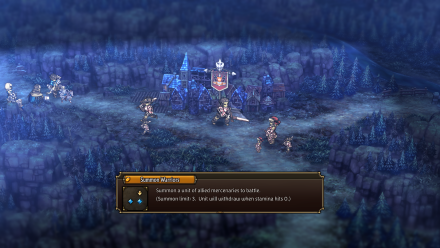 Head Towards Berenice As you get closer to Berenice, she will use Summon Warriors to deploy additional reinforcements, battling the enemy unit summoned by her using either Travis or Rolf's team would not be enough so the optimal way to deal with this is to have Travis' unit engage in battle while using Rolf's Ranged Assist leader effect. Mordon will take care of the Hoplite. |
| 6 |
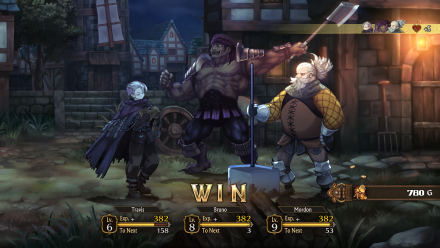 Defeat Berenice After defeating the enemy units summoned by Berenice, another set of Cleric units will be going towards you, use Rolf's team to battle them, Berenice will be defenseless afterward. Travis will take the helm and battle Berenice while Rolf offers Ranged Assist. The enemy might not get defeated in one battle due to their high evasion, you can use Valor Skills or fight the enemy again if this happens. Once defeated, you will get a Brown Beret. |
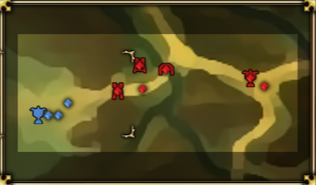
The Mercenary's Trial Stage Info
| The Mercenary's Trial Stage Map | ||
|---|---|---|
 |
||
| Enemy Level | 6 | |
| Victory Condition | ・Defeat Berenice | |
| Defeat Condition |
・The Liberation's command post is captured ・The time limit expires |
|
Unicorn Overlord Related Guides
All Main Quest Stages
All Side Quest Stages
All Overworld Quests
| Overworld Quests | |
|---|---|
| An Angel's Request | Palevia's Escaped Chickens |
| Carved of Cornia Stone | Cemeteries of Cornia |
| Carved of Drakenhold Stone | Cemeteries of Drakenhold |
| Drakenhold's Escaped Chickens | - |
All Liberation Quests
Comment
Author
The Mercenary's Trial Walkthrough
improvement survey
03/2026
improving Game8's site?

Your answers will help us to improve our website.
Note: Please be sure not to enter any kind of personal information into your response.

We hope you continue to make use of Game8.
Rankings
- We could not find the message board you were looking for.
Gaming News
Popular Games

Genshin Impact Walkthrough & Guides Wiki

Honkai: Star Rail Walkthrough & Guides Wiki

Umamusume: Pretty Derby Walkthrough & Guides Wiki

Pokemon Pokopia Walkthrough & Guides Wiki

Resident Evil Requiem (RE9) Walkthrough & Guides Wiki

Monster Hunter Wilds Walkthrough & Guides Wiki

Wuthering Waves Walkthrough & Guides Wiki

Arknights: Endfield Walkthrough & Guides Wiki

Pokemon FireRed and LeafGreen (FRLG) Walkthrough & Guides Wiki

Pokemon TCG Pocket (PTCGP) Strategies & Guides Wiki
Recommended Games

Diablo 4: Vessel of Hatred Walkthrough & Guides Wiki

Cyberpunk 2077: Ultimate Edition Walkthrough & Guides Wiki

Fire Emblem Heroes (FEH) Walkthrough & Guides Wiki

Yu-Gi-Oh! Master Duel Walkthrough & Guides Wiki

Super Smash Bros. Ultimate Walkthrough & Guides Wiki

Pokemon Brilliant Diamond and Shining Pearl (BDSP) Walkthrough & Guides Wiki

Elden Ring Shadow of the Erdtree Walkthrough & Guides Wiki

Monster Hunter World Walkthrough & Guides Wiki

The Legend of Zelda: Tears of the Kingdom Walkthrough & Guides Wiki

Persona 3 Reload Walkthrough & Guides Wiki
All rights reserved
©ATLUS. ©SEGA. All rights reserved. SEGA is registered in the U.S. Patent and Trademark Office. ATLUS and the ATLUS logo are registered trademarks or trademarks of ATLUS Co., Ltd. SEGA, the SEGA logo and UNICORN OVERLORD are registered trademarks or trademarks of SEGA CORPORATION.
The copyrights of videos of games used in our content and other intellectual property rights belong to the provider of the game.
The contents we provide on this site were created personally by members of the Game8 editorial department.
We refuse the right to reuse or repost content taken without our permission such as data or images to other sites.


![Monster Hunter Stories 3 Review [First Impressions] | Simply Rejuvenating](https://img.game8.co/4438641/2a31b7702bd70e78ec8efd24661dacda.jpeg/thumb)


