This survey will take about 1 minute.
Your answers will help us to improve our website.
Unicorn Overlord
The Ravaged Swamp Walkthrough
☆Get to know Alain and the other characters
★Choices | Gammel | Mandrin
☆Farm Divine Shards for Ochlys!
★Classes | How to Promote and How to Change Class
☆Let us know who you'll marry in our Romance guide!

This is a walkthrough and guide for The Ravaged Swamp in Unicorn Overlord. See a walkthrough guide for The Ravaged Swamp, its location and rewards, the stage's objectives, recommended units and formations, item locations, and battle strategies!
| Recruitment & Related Quest | |
|---|---|
| Yahna | The Ravaged Swamp |
List of Contents
The Ravaged Swamp Location and Rewards
Location
| Map Location | Overworld Location |
|---|---|
 |
 |
| Region: Cornia Location: Across the bridge Southeast of Treyes Village |
|
Rewards
| Rewards |
|---|
|
・Leaf Broach x1 ・Silver Hourglass x1 ・Witches of the Swamp x1 |
The Ravaged Swamp Recruitable Characters
| Recruitable Characters | ||
|---|---|---|
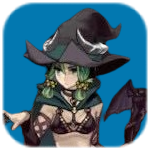 Yahna Yahna
|
||
The Ravaged Swamp marks the first stage where Yahna can be playable. Yahna will immediately join during the beginning of the battle.
List of All Recruitable Characters
The Ravaged Swamp Recommended Units
| Recommended Unit Leaders | ||||
|---|---|---|---|---|
 Auch
Auch |
 Aubin
Aubin |
 Bruno
Bruno |
 Sharon
 |
|
Before doing this quest, make sure that you are able to hire a Wizard Mercenary as they are the most effective in this battle. Hiring this type of mercenary becomes available after finishing the The Self-Effacing Sorcerer side quest. You can hire mercenaries by accessing any Forts that you own, each fort will have different mercenaries for hire.
The Ravaged Swamp lets you use up to 5 units, but this battle can easily be defeated using only 4. We recommend the Unit Leaders listed above. Click on the leader's name to see our recommended Unit Formation for that leader in this stage.
Auch's Unit
| Auch's Unit | ||
|---|---|---|
|
Auch (Wizard) |
- | Any Hired Wizard Mercenary |
| - |
 Clive Clive (Knight) |
- |
In this quest, you will mostly be dealing with Hoplites and Housecarls. This team is customized so that it will be strong against both sets of enemies and will be taking the least damage as well since Clive has extremely high defense and has the Quick Guard passive.
Hoplites are weak against Wizards, and Housecarls are weak against Cavalries. This team is even stronger than Yahna's team, but feel free to switch between fights to conserve stamina.
Recruiting Auch
Auch is a recruitable character and will join the Liberation after successfully finishing the The Self-Effacing Sorcerer side quest should you choose to spare him.
Recruiting Auch before starting this quest is recommended as the main enemies in this battle will be Hoplites and Housecarls.
The Self-Effacing Sorcerer Walkthrough
Aubin's Unit
| Aubin's Unit | ||
|---|---|---|
|
Aubin (Housecarl) |
- |
 Josef Josef (Paladin) |
| - |
 Alain Alain (Lord) |
- |
This unit will be dealing with the barricades and the Watch Towers on the right side of the map along with Bruno's team. The unit can pretty much take care of itself as Josef can use his Heal passive when taking damage, especially when the Watch Tower units use Arrow Rain.
Aubin's leader effect makes breaking barricades more easily, use this to your advantage.
Bruno's Unit
| Bruno's Unit | ||
|---|---|---|
 Lex Lex (Fighter) |
- |
 Chloe Chloe (Soldier) |
| - |
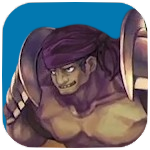
Bruno (Gladiator) |
- |
Bruno's Unit will be helping Aubin's Unit fend off the barricades as he has the same leader effect as Aubin.
Having pure offense, this unit is effective against wandering Soldier Units and Bruno can hit an entire row of enemies in one attack.
Sharon's Unit
| Sharon's Unit | ||
|---|---|---|
|
Sharon (Cleric) |
- |
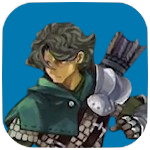 Rolf Rolf (Hunter) |
| - |
 Hodrick Hodrick (Hoplite) |
- |
Sharon's Unit will be here for Healing Assist and will tail Aubin and Bruno's Units on the right side of the map.
Having Hodrick in this unit will protect them against Arrow Rains cast by enemy Hunter units garrisoned in the Watch Towers. Be aware, however, that Hodrick is weak against Housecarls, so avoiding these enemy units is a must.
Recruiting Sharon
Sharon is a recruitable character accessible by finishing the The Winged Knight sidequest.
After defeating Mandrin, you will have the option to recruit Sharon or not. It is advisable to recruit her as she will be a great healer for the party.
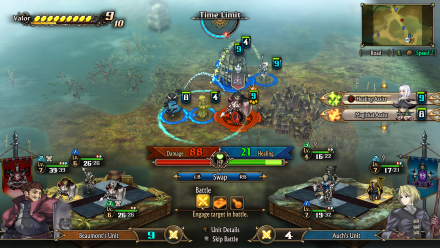
The Ravaged Swamp Walkthrough
| # | Step by Step Guide |
|---|---|
| 1 |
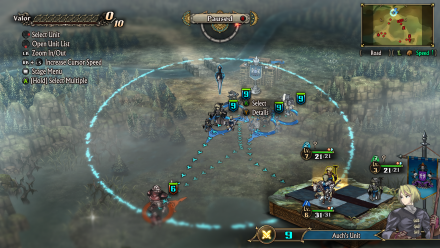 Deploy Auch, Aubin, and Bruno's Unit Deploy Auch, Aubin, and Bruno's Unit. You will be joined by Yahna's Unit in this battle. Have Yahna and Auch go to the left and Bruno and Aubin go to the right. |
| 2 |
 Auch Joins Yahna Defeat Incoming Units Auch will join Yahna's Unit as they push through and defeat enemy units they encounter. Have Auch's team lead the way as his team is well suited against both Hoplites and Housecarls but feel free to switch between Auch and Yahna's teams to preserve stamina. |
| 3 |
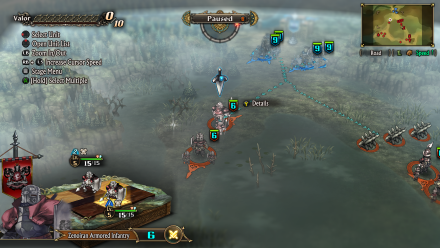
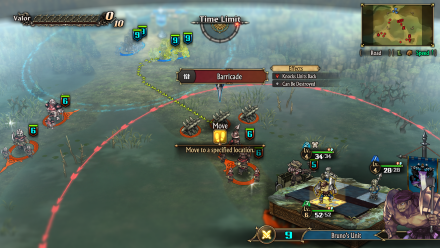 Bruno Join Aubin, Destroy the Barricades Enemies in this lane are mainly composed of Housecarls, Soldiers, and Hunters guarding the Watch Towers. Have Bruno and Aubin's team head towards the Barricades. Be wary of the enemy units moving towards you and be prepared to fight. You can switch between Aubin and Bruno's teams for battle according to which enemy unit class you will face. |
| 4 |
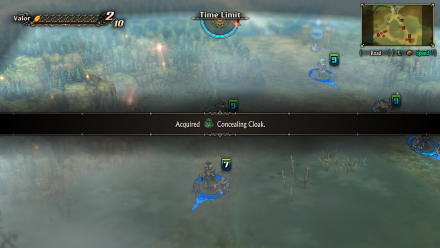 Get a Nearby Unit to Claim Concealing Cloak Back to the left side of the map, on the way to Lebouge Hamlet there will be a treasure lying on the ground, have either Auch or Yahna's unit pick it up and get a Concealing Cloak. |
| 5 |
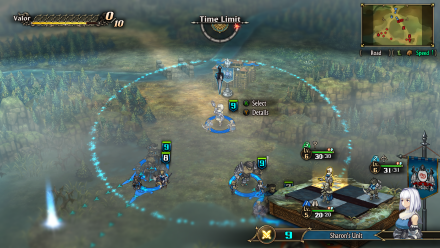 Deploy Sharon's Unit and Tail Bruno and Aubin You may now deploy Sharon's Unit once you reach 1 Valor Point. Deploy her unit and tail Bruno and Aubin's unit on the Barricades. |
| 6 |
 Clear out the First Watch Tower Once the Barricade has been destroyed, you can clear out the enemies in this lane, Aubin's unit will be the most effective in defeating the Watch Tower enemy units as they can defeat them with only one battle. Watch out, however, for incoming Arrow Rains cast upon by the Watch Tower enemy units. You will be automatically picking up an Empowering Draught on the ground as you move forward. |
| 7 |
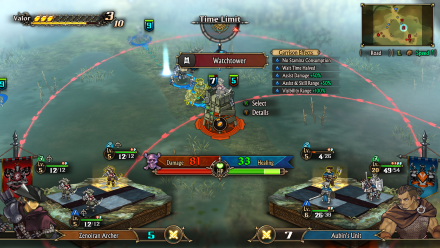
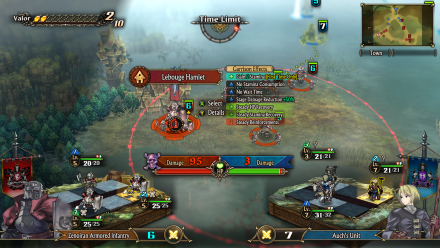 Garrison in Lebouge Hamlet While on the way to Lebouge Hamlet, enemies will be going your way continuously, they are mainly composed of Hoplites and Housecarls. You can either choose Yahna or Auch's Unit to battle these enemies but Auch's will be most effective as his unit can defeat these enemies in one battle. Once garrisoned at the hamlet, an NPC will provide you with a Conveyance Stone. |
| 8 |
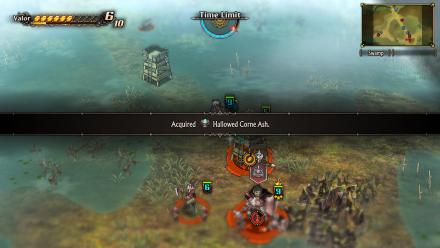 Clear Out the Second Watch Tower Going back to the other teams, once the first Watch Tower has been cleared out, you can now proceed and clear out the second Watch Tower. You will be picking up a Hallowed Corne Ash lying on the ground on the way to the tower. |
| 8 |
Wait for the Other Teams or Battle Beaumont Now After clearing it out, the next step is to either just wait for the other teams to get to Beaumont's Post or battle Beaumont's Unit using your available teams. Choosing the option to wait will make Beaumont send enemy units your way, defeating these enemies is fairly easy and will grant you EXP. Battling Beaumont now using the available units you have will most likely damage and cripple your teams, this is not recommended. |
| 9 |
 Defeat Beaumont's Unit Auch's Unit is the optimal choice in battling Beaumont not only for their formidable strength against Hoplites but also for their capacity to endure minimal damage. You can also utilize Yahna's Magickal Assist and Sharon's Healing Assist leader effects. After Beaumont's defeat, you will get the Azure Crest Greatshield. |
The Ravaged Swamp Stage Info
| The Ravaged Swamp Stage Map | ||
|---|---|---|
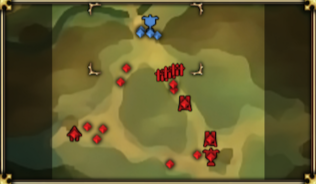 |
||
| Enemy Level | 5 | |
| Victory Condition | ・Defeat Beaumont | |
| Defeat Condition |
・The Liberation's command post is captured ・The time limit expires |
|
Unicorn Overlord Related Guides
All Main Quest Stages
All Side Quest Stages
All Overworld Quests
| Overworld Quests | |
|---|---|
| An Angel's Request | Palevia's Escaped Chickens |
| Carved of Cornia Stone | Cemeteries of Cornia |
| Carved of Drakenhold Stone | Cemeteries of Drakenhold |
| Drakenhold's Escaped Chickens | - |
All Liberation Quests
Comment
Author

The Ravaged Swamp Walkthrough
Please participate in our site
improvement survey
03/2026
improvement survey
03/2026
Would you assist in
improving Game8's site?
improving Game8's site?

×
We are listening to our users' valuable opinions and discussing how to act on them.
The information collected through this survey will be used for the purpose of improving our services. In addition, the information will only be disclosed a part of a statistic in a format that will not allow identification of personal information.
Begin Survey
Not Now
×
Please rate each item regarding Game8.co's Advertisements.
Amount of Ads
Very Dissatisfied
Somewhat Dissatisfied
Fine
Somewhat Satisfied
Highly Satisfied
Placement of Ads
Timing of Ad Display
Ad Loading Speed
Safeness of Ads
Content of Ads
×
Please rate each item regarding Game8.co's Quality of Articles.
Amount of information
Very Dissatisfied
Somewhat Dissatisfied
Fine
Somewhat Satisfied
Highly Satisfied
Frequency of updates
Speed of new information
Accuracy of articles
Understandibility of articles
Readability of sentences
×
Please rate each item regarding Game8.co's Usability of the Site.
Ease of finding information
Very Dissatisfied
Somewhat Dissatisfied
Fine
Somewhat Satisfied
Highly Satisfied
Loading Speed
Use of Color
Font Size
Visibility of Images
Easy to Understand Layout
×
Please rate each item regarding Game8.co's Message Boards, Comments.
Ease of Writing
Very Dissatisfied
Somewhat Dissatisfied
Fine
Somewhat Satisfied
Highly Satisfied
Readability
Ease in Finding Information
Comment Quality
Comment Quantity
Admin Response
×
Please rate each item regarding Game8.co's Site's new design.
Please rate our site's new design
Very Dissatisfied
Somewhat Dissatisfied
Fine
Somewhat Satisfied
Highly Satisfied
Do you think that the website's design change makes the site easier to use?
Has the new design made it easier for you to find information on the site?
Has the new design improved the overall visual appeal of the site?
How would you rate your overall satisfaction with the new design of the site?
×
How likely are you to recommend Game8 to someone you know?
Very Unlikely
0
1
2
3
4
5
6
7
8
9
10
Very Likely
If you have other opinions regarding potential improvement to the website, please share them with us. We would appreciate your honest opinion.
Note: This is a free response section, so you can proceed without entering anything.
Note: Please be sure not to enter any kind of personal information into your response.
Note: Please be sure not to enter any kind of personal information into your response.
×
Thank You
×
Thank you for participating in our survey! Your answers will help us to improve the quality of our website and services.
We hope you continue to make use of Game8.
We hope you continue to make use of Game8.
Close
Rankings
- We could not find the message board you were looking for.
Gaming News


![Monster Hunter Stories 3 Review [First Impressions] | Simply Rejuvenating](https://img.game8.co/4438641/2a31b7702bd70e78ec8efd24661dacda.jpeg/thumb)
Popular Games

Genshin Impact Walkthrough & Guides Wiki
Honkai: Star Rail Walkthrough & Guides Wiki
Umamusume: Pretty Derby Walkthrough & Guides Wiki
Pokemon Pokopia Walkthrough & Guides Wiki
Resident Evil Requiem (RE9) Walkthrough & Guides Wiki
Monster Hunter Wilds Walkthrough & Guides Wiki
Wuthering Waves Walkthrough & Guides Wiki
Arknights: Endfield Walkthrough & Guides Wiki
Pokemon FireRed and LeafGreen (FRLG) Walkthrough & Guides Wiki
Pokemon TCG Pocket (PTCGP) Strategies & Guides Wiki


Recommended Games
Diablo 4: Vessel of Hatred Walkthrough & Guides Wiki
Cyberpunk 2077: Ultimate Edition Walkthrough & Guides Wiki
Fire Emblem Heroes (FEH) Walkthrough & Guides Wiki
Yu-Gi-Oh! Master Duel Walkthrough & Guides Wiki
Super Smash Bros. Ultimate Walkthrough & Guides Wiki
Pokemon Brilliant Diamond and Shining Pearl (BDSP) Walkthrough & Guides Wiki
Elden Ring Shadow of the Erdtree Walkthrough & Guides Wiki
Monster Hunter World Walkthrough & Guides Wiki
The Legend of Zelda: Tears of the Kingdom Walkthrough & Guides Wiki
Persona 3 Reload Walkthrough & Guides Wiki


All rights reserved
©ATLUS. ©SEGA. All rights reserved. SEGA is registered in the U.S. Patent and Trademark Office. ATLUS and the ATLUS logo are registered trademarks or trademarks of ATLUS Co., Ltd. SEGA, the SEGA logo and UNICORN OVERLORD are registered trademarks or trademarks of SEGA CORPORATION.
The copyrights of videos of games used in our content and other intellectual property rights belong to the provider of the game.
The contents we provide on this site were created personally by members of the Game8 editorial department.
We refuse the right to reuse or repost content taken without our permission such as data or images to other sites.