The Winged Knight Walkthrough
☆Get to know Alain and the other characters
★Choices | Gammel | Mandrin
☆Farm Divine Shards for Ochlys!
★Classes | How to Promote and How to Change Class
☆Let us know who you'll marry in our Romance guide!
This is a walkthrough and guide for The Winged Knight in Unicorn Overlord. See a walkthrough guide for The Winged Knight, its location and rewards, the stage's objectives, recommended units and formations, item locations, and battle strategies!
| The Winged Knight Guides | |
|---|---|
| Mandrin Choice: Free or Execute? |
The Winged Knight Walkthrough |
List of Contents
The Winged Knight Location and Rewards
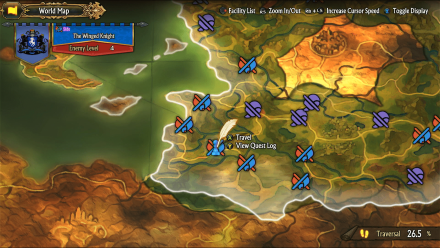
Location
| Map Location | Overworld Location |
|---|---|
 |
 |
| Region: Cornia Location: East of Fort Mainteneaut |
|
Rewards
| Rewards |
|---|
|
・Bronze Bangle x1 ・Holy Herb x1 ・ Palevian Orthodoxy 1 |
The Winged Knight Recruitable Characters
| Recruitable Characters | ||
|---|---|---|
 Sharon Sharon
|
||
The Winged Knight marks the first stage where Sharon will be recruited. During the battle, you will be joined by Ochlys and her unit. Ochlys's Unit will be useful for targeting the Watch Towers.
List of All Recruitable Characters
The Winged Knight Recommended Units
| Recommended Unit Leaders | ||||
|---|---|---|---|---|
 Alain
Alain |
 Rolf
Rolf |
 Clive
Clive |
 Lex
Lex |
|
Before doing this quest, make sure that you have expanded your units from 3 to 4, Additionally, hiring a mercenary is now available, and putting them on a unit is optimal. You can expand your units and unit slots by spending Honor.
The Winged Knight lets you use up to 4 units. We recommend the Unit Leaders listed above. Click on the leader's name to see our recommended Unit Formation for that leader in this stage.
Alain's Unit
| Alain's Unit | ||
|---|---|---|
 Aubin Aubin (Housecarl) |
- |
 Chloe Chloe (Soldier) |
| - |
Alain (Lord) |
- |
Alain's unit will be your go-to unit for defeating Soldier and Hunter units. All three party members carry high offense and a bonus healing ability from Chloe.
This and Rolf's Unit must move closely together as Rolf offers Ranged Assist when fighting enemies, granting additional offense.
Rolf's Unit
| Rolf's Unit | ||
|---|---|---|
|
Rolf (Hunter) |
- |
Clive (Knight) |
| - |
 Hodrick Hodrick (Hoplite) |
- |
Rolf's Unit is the Anti-Thief Unit. Having Hodrick in the front row will ensure that no damage will be taken by Rold and Clive as they pummel through enemies.
In this stage you will most likely face Thief, Hunter, and Soldier Units so being in close proximity with Alain's Unit will be advantageous as you can switch which unit fights which enemy depending on the situation.
Lex's Unit
| Lex's Unit | ||
|---|---|---|
| - | - | - |
|
Lex (Fighter) |
- |
 Travis Travis (Thief) |
Lex's Unit will only be here for Base Protection. They will face Thieves and Soldier Units that will spawn from the lower left entrance of the stage. Having a Thief and a Fighter solves this problem.
Josef's Unit
| Josef's Unit | ||
|---|---|---|
| - |
 Josef Josef (Paladin) |
- |
 Bruno Bruno (Gladiator) |
- | - |
Josef's Unit will only serve as a treasure collector for this quest. Having Bruno for Josef's defense is advisable while having Josef as the party leader is best for movement speed.
The Winged Knight Walkthrough
| # | Step by Step Guide |
|---|---|
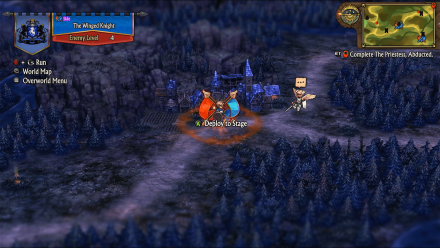
| 1 |
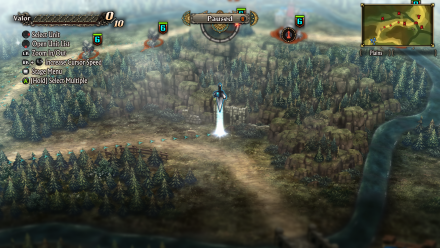
 Deploy Three Units Deploy Rolf's, Alain's, and Clive's Unit. Lex's Unit will be deployed later as some thieves will appear and try to plunder your base during the middle part of the battle. |
| 2 |
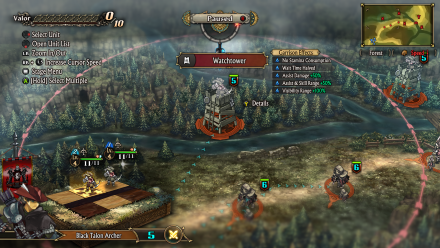 Assign Ochlys' Team to the Watch Tower You will be joined by Ochlys' Team in this battle. Utilize her in clearing the Watch Towers, there are three in total. Set her first destination towards the first watch tower up north. |
| 3 |
 Move Josef's Team and Get the Treasure In the area where you deploy your units, there is a treasure found in the leftmost part of the battle stage, have Josef's team collect this treasure and gain War Funds 3000G |
| 4 |
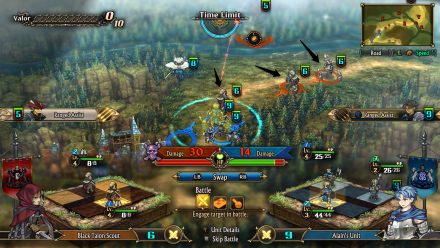 Have Rolf and Alain's Team Defeat Wandering Enemies Let their units move forward but out of range from the Watch Tower to avoid Ranged Assists from it. Have them stay in place as Ochlys's Team clears the first Watch Tower. Get Rolf's Unit to battle the Thieves' units and Alain's to battle the Soldiers and the Hunters that will be coming your way. Feel free to use the Switch option. |
| 5 |
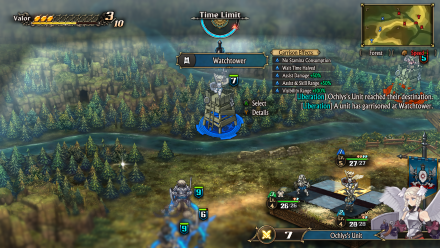 Garrison at the Watch Tower and Move Forward When the first Watch Tower is destroyed and has been garrisoned, the next step is to destroy the second tower. Have Ochlys' Team reach the second tower. In the meantime, you can have Josef's team gather the treasure found near the first watch tower to get a Healing Tonic (S). |
| 6 |
Deploy Lex's Unit A small cutscene will then trigger, which spawns two Thief Units below. Their main goal is to plunder from the base. Deploy Lex's Unit to guard the base but do not get aggressive toward them. Wait for them to come. |
| 7 |
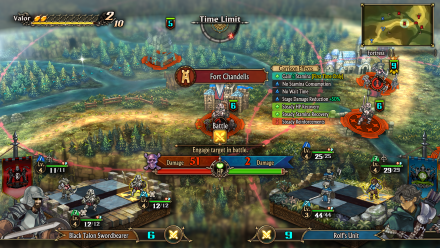 Have Rolf and Alain's Unit Garrison in Fort Chandelis When Ochlys's Unit has cleared the second Watch Tower, you may then assign Rolf and Alain's unit to head to Fort Chandelis. The enemy unit guarding the Fort may use Provoke on either Rolf or Alain but this doesn't matter as this will be their destination anyways. |
| 8 |
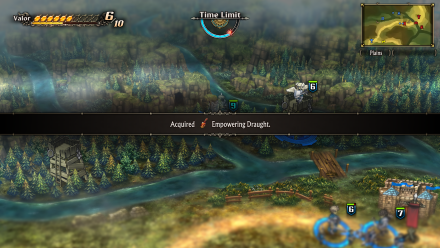 Assign Josef's Unit to Collect the Treasure Near the Second Watch Tower There is another treasure on the ground near the second Watch Tower have Josef's team pick it up to obtain an Empowering Draught. |
| 9 |
Have Ochlys' Team Destroy the Third Watch Tower and Wait The final watch tower still stands and still proves to be a danger for Rolf and Alain's unit to move forward. Have Ochlys's Team clear out the third Watch Tower while you Garrison in Fort Chandelis. Do not however pass through the bridge as it will trigger to battle Ochlys's Team. The enemy post might deploy Units in the meantime, but you will have Rolf and Alain's team for these. |
| 10 |
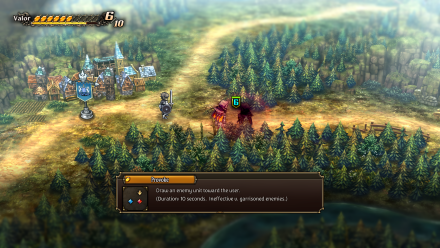 Back to the base, the Thief Units are now close to the base and will use Plunder on Lex's team. The units will try to turn back and run, use Lex's Valor Skill, Provoke to lure these enemy units into battle. |
| 11 |
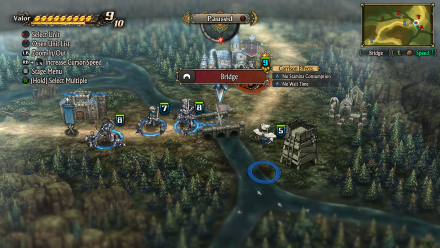 Charge Through the Bridge Now that the third Watch Tower has been cleared out. Alain and Rolf's team can now charge through the bridge and defeat the enemy unit stationed here. Do be wary however, that the enemy post nearby will use Ranged Assist at the beginning of battle. Make Alain's team take the helm on defeating the enemy unit on the bridge and utilize Rolf's Ranged Assist Valor Skill for support. |
| 12 |
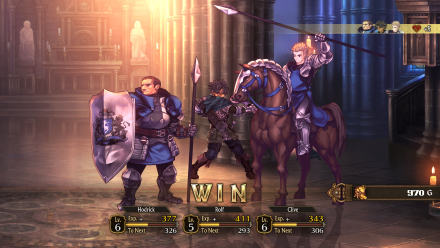 Use Rolf's Unit to Defeat Mandrin Rolf's Unit is the most effective option to deal with Mandrin's team. Get Rolf's Unit to battle Mandrin. Hodrick will take all of the damage but watch out for burning damage that Mandrin can inflict as it might cripple Hodrick. After defeating Mandrin, you will receive a Flame Bow as a reward. |
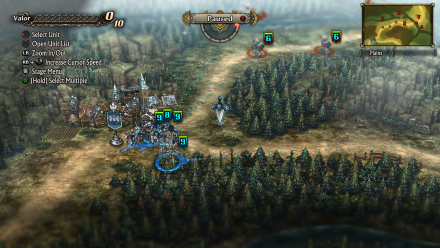
The Winged Knight Stage Info
| The Winged Knight Stage Map | ||
|---|---|---|
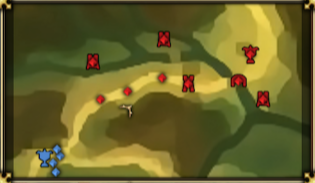 |
||
| Enemy Level | 4 | |
| Victory Condition | ・Defeat Mandrin | |
| Defeat Condition | ・The Liberation's command post is captured. | |
Unicorn Overlord Related Guides

All Main Quest Stages
All Side Quest Stages
All Overworld Quests
| Overworld Quests | |
|---|---|
| An Angel's Request | Palevia's Escaped Chickens |
| Carved of Cornia Stone | Cemeteries of Cornia |
| Carved of Drakenhold Stone | Cemeteries of Drakenhold |
| Drakenhold's Escaped Chickens | - |
All Liberation Quests
Comment
Author

The Winged Knight Walkthrough
Rankings
- We could not find the message board you were looking for.
Gaming News


![Death Stranding 2: On The Beach Review [PC] | A Port That Delivers](https://img.game8.co/4447392/15310a0c9aa1b6843bb713b2ea216930.jpeg/thumb)

Popular Games

Genshin Impact Walkthrough & Guides Wiki
Umamusume: Pretty Derby Walkthrough & Guides Wiki
Crimson Desert Walkthrough & Guides Wiki
Monster Hunter Stories 3: Twisted Reflection Walkthrough & Guides Wiki
Honkai: Star Rail Walkthrough & Guides Wiki
Pokemon Pokopia Walkthrough & Guides Wiki
The Seven Deadly Sins: Origin Walkthrough & Guides Wiki
Wuthering Waves Walkthrough & Guides Wiki
Zenless Zone Zero Walkthrough & Guides Wiki
Arknights: Endfield Walkthrough & Guides Wiki


Recommended Games
Fire Emblem Heroes (FEH) Walkthrough & Guides Wiki
Diablo 4: Vessel of Hatred Walkthrough & Guides Wiki
Cyberpunk 2077: Ultimate Edition Walkthrough & Guides Wiki
Yu-Gi-Oh! Master Duel Walkthrough & Guides Wiki
Super Smash Bros. Ultimate Walkthrough & Guides Wiki
Pokemon Brilliant Diamond and Shining Pearl (BDSP) Walkthrough & Guides Wiki
Elden Ring Shadow of the Erdtree Walkthrough & Guides Wiki
Monster Hunter World Walkthrough & Guides Wiki
The Legend of Zelda: Tears of the Kingdom Walkthrough & Guides Wiki
Persona 3 Reload Walkthrough & Guides Wiki


All rights reserved
©ATLUS. ©SEGA. All rights reserved. SEGA is registered in the U.S. Patent and Trademark Office. ATLUS and the ATLUS logo are registered trademarks or trademarks of ATLUS Co., Ltd. SEGA, the SEGA logo and UNICORN OVERLORD are registered trademarks or trademarks of SEGA CORPORATION.
The copyrights of videos of games used in our content and other intellectual property rights belong to the provider of the game.
The contents we provide on this site were created personally by members of the Game8 editorial department.
We refuse the right to reuse or repost content taken without our permission such as data or images to other sites.