The Battle for Lonteria Walkthrough
☆Get to know Alain and the other characters
★Choices | Gammel | Mandrin
☆Farm Divine Shards for Ochlys!
★Classes | How to Promote and How to Change Class
☆Let us know who you'll marry in our Romance guide!
This is a walkthrough and guide for The Battle for Lonteria in Unicorn Overlord. See a walkthrough guide for The Battle for Lonteria, its location and rewards, the stage's objectives, recommended units and formations, item locations, and battle strategies!
List of Contents
The Battle for Lonteria Location and Rewards
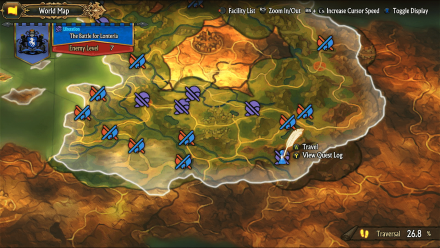
Location
| Map Location | Overworld Location |
|---|---|
 |
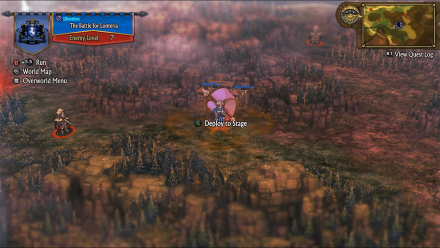 |
| Region: Cornia Location: In front of Fort Lonteria |
|
Rewards
| Rewards |
|---|
|
・Honors x4 ・Blancmange x1 ・War Funds 500G |
The Battle for Lonteria Recruitable Characters
| There are no known characters that can be recruited in this stage. |
There are no recruitable characters available for this Liberation Quest.
List of All Recruitable Characters
The Battle for Lonteria Recommended Units
| Recommended Unit Leaders | ||||
|---|---|---|---|---|
 Rolf
Rolf |
 Auch
Auch |
|||
Before doing this quest, make sure that you are able to hire a Hunter Mercenary as they are the most effective in this battle. You can hire mercenaries by accessing any Forts that you own and spending Honor, each fort will have different mercenaries for hire.
The Battle for Lonteria lets you use up to 5 units. But this can easily be done using two. We recommend the Unit Leaders listed above. Click on the leader's name to see our recommended Unit Formation for that leader in this stage.
Rolf's Unit
| Rolf's Unit | ||
|---|---|---|
 Rolf Rolf (Hunter) |
- |
 Yahna Yahna (Witch) |
| - |
 Hodrick Hodrick (Hoplite) |
- |
With Hodrick holding down the fort in the frontlines, Rolf will terminate the Gryphon Knights quickly and effectively and Yahna will use Magick Conferral on Rolf when he initiates his attack for maximum damage.
Having Rolf as the leader will make the Ranged Assist leader effect accessible so the two units should be within each other's range.
Auch's Unit
| Auch's Unit | ||
|---|---|---|
 Auch Auch (Wizard) |
- | Any Hired Hunter Mercenary |
| - |
 Bruno Bruno (Gladiator) |
- |
Auch's unit will be the best option to defeat the enemy command post. After the Hunter Mercenary ensures that the thief in the front is eliminated using Eagle Eye, Bruno will attack the whole back row with one hit with his Wide Swing. Auch will be here for backup in case one of the back rows parries the attack.
Having Auch as the leader will make the Magickal Assist leader effect usable. Have Auch be near Rolf's team during battles.
Recruiting Auch
Auch is a recruitable character and will join the Liberation after successfully finishing the The Self-Effacing Sorcerer side quest should you choose to spare him.
Recruiting Auch before starting this quest is recommended as there will be a need for his Magickal Assist leader effect in this battle.
The Self-Effacing Sorcerer Walkthrough
The Battle for Lonteria Walkthrough
| # | Step by Step Guide |
|---|---|
| 1 |
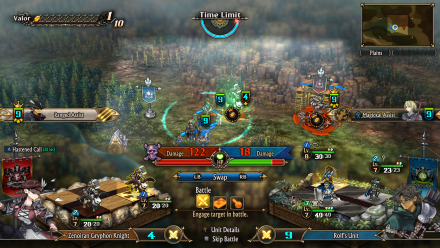 Rolf's Unit vs Gryphon Knights There are only two enemy units in this stage, Rolf's team will be responsible for defeating the Gryphon Knight units. You can utilize Auch's Magickal Assist if necessary, but Rolf's unit can handle this alone. |
| 2 |
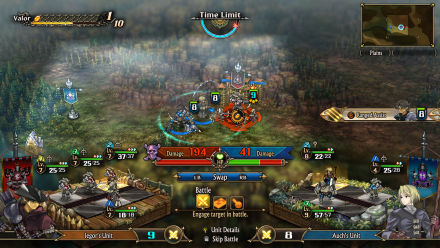 Use Auch's Unit to Win Lastly, have Auch's Unit go straight to the enemy command post. They will have a Thief in their frontline and three Hunters at the back. Your Hunter Mercenary will make sure that the thief is eliminated before Bruno destroys the whole back row with one swing, should one of these backrow enemies miss the attack, Auch will be here to finish the battle. You can also utilize Rolf's Ranged Assist for maximum damage. |
The Battle for Lonteria Stage Info
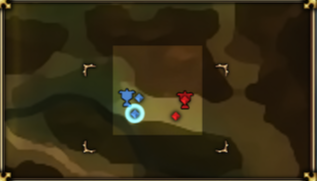
| The Battle for Lonteria Stage Map | ||
|---|---|---|
 |
||
| Enemy Level | 7 | |
| Victory Condition | ・Capture the Enemy Command Post | |
| Defeat Condition |
・The Liberation's command post is captured ・The time limit expires |
|
Unicorn Overlord Related Guides
All Main Quest Stages
All Side Quest Stages
All Overworld Quests
| Overworld Quests | |
|---|---|
| An Angel's Request | Palevia's Escaped Chickens |
| Carved of Cornia Stone | Cemeteries of Cornia |
| Carved of Drakenhold Stone | Cemeteries of Drakenhold |
| Drakenhold's Escaped Chickens | - |
All Liberation Quests
Comment
Author
The Battle for Lonteria Walkthrough
Rankings
- We could not find the message board you were looking for.
Gaming News
Popular Games

Genshin Impact Walkthrough & Guides Wiki

Honkai: Star Rail Walkthrough & Guides Wiki

Umamusume: Pretty Derby Walkthrough & Guides Wiki

Pokemon Pokopia Walkthrough & Guides Wiki

Resident Evil Requiem (RE9) Walkthrough & Guides Wiki

Monster Hunter Wilds Walkthrough & Guides Wiki

Wuthering Waves Walkthrough & Guides Wiki

Arknights: Endfield Walkthrough & Guides Wiki

Pokemon FireRed and LeafGreen (FRLG) Walkthrough & Guides Wiki

Pokemon TCG Pocket (PTCGP) Strategies & Guides Wiki
Recommended Games

Diablo 4: Vessel of Hatred Walkthrough & Guides Wiki

Cyberpunk 2077: Ultimate Edition Walkthrough & Guides Wiki

Fire Emblem Heroes (FEH) Walkthrough & Guides Wiki

Yu-Gi-Oh! Master Duel Walkthrough & Guides Wiki

Super Smash Bros. Ultimate Walkthrough & Guides Wiki

Pokemon Brilliant Diamond and Shining Pearl (BDSP) Walkthrough & Guides Wiki

Elden Ring Shadow of the Erdtree Walkthrough & Guides Wiki

Monster Hunter World Walkthrough & Guides Wiki

The Legend of Zelda: Tears of the Kingdom Walkthrough & Guides Wiki

Persona 3 Reload Walkthrough & Guides Wiki
All rights reserved
©ATLUS. ©SEGA. All rights reserved. SEGA is registered in the U.S. Patent and Trademark Office. ATLUS and the ATLUS logo are registered trademarks or trademarks of ATLUS Co., Ltd. SEGA, the SEGA logo and UNICORN OVERLORD are registered trademarks or trademarks of SEGA CORPORATION.
The copyrights of videos of games used in our content and other intellectual property rights belong to the provider of the game.
The contents we provide on this site were created personally by members of the Game8 editorial department.
We refuse the right to reuse or repost content taken without our permission such as data or images to other sites.


![Monster Hunter Stories 3 Review [First Impressions] | Simply Rejuvenating](https://img.game8.co/4438641/2a31b7702bd70e78ec8efd24661dacda.jpeg/thumb)


