The Unyielding Shield Walkthrough
☆Get to know Alain and the other characters
★Choices | Gammel | Mandrin
☆Farm Divine Shards for Ochlys!
★Classes | How to Promote and How to Change Class
☆Let us know who you'll marry in our Romance guide!
This is a walkthrough and guide for The Unyielding Shield in Unicorn Overlord. See a walkthrough guide for The Unyielding Shield, its location and rewards, the stage's objectives, recommended units and formations, item locations, and battle strategies!
| Recruitment & Related Quest | |
|---|---|
| Monica | The Unyielding Shield |
List of Contents
The Unyielding Shield Location and Rewards
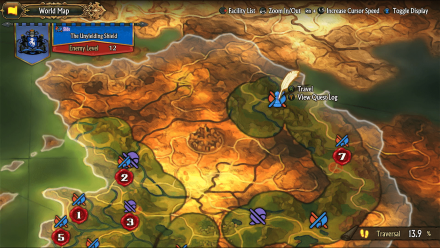
Location
| Map Location | Overworld Location |
|---|---|
 |
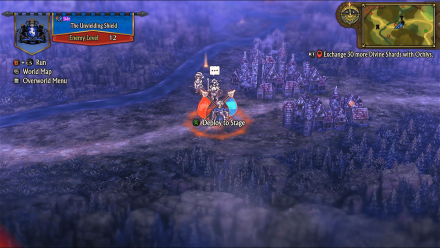 |
| Region: Cornia Location: Beside Saint le Riche Town |
|
Rewards
| Rewards |
|---|
|
・Baroque Shield x1 ・Mantlet Kit x1 ・House Nordheim x1 |
The Unyielding Shield Recruitable Characters
| Recruitable Characters | ||
|---|---|---|
 Monica Monica
|
||
The Unyielding Shield marks the first stage where Monica can be recruited after defeating her. You have to ask her to Fight by Our Side to recruit her.
List of All Recruitable Characters
The Unyielding Shield Recommended Units
| Recommended Unit Leaders | ||||
|---|---|---|---|---|
 Ochlys
 |
 Clive
Clive |
 Rolf
Rolf |
 Sharon
 |
 Alain
Alain |
Before doing this quest, make sure that you have expanded your units from 4 to 5 and three of your party's unit slots from 3 to 4. Additionally, hiring a Hunter mercenary and a Gryphon Knight mercenary is recommended for this battle. You can expand your units, and hire Mercenaries by spending Honor in Forts you own.
The Unyielding Shield lets you use up to 6 units but using five will be sufficient in this stage. We recommend the Unit Leaders listed above. Click on the leader's name to see our recommended Unit Formation for that leader in this stage.
Ochlys' Unit
| Ochlys's Unit | ||
|---|---|---|
 Ochlys Ochlys (Feathersword) |
 Chloe Chloe (Soldier) |
Any Hired Gryphon Knight Mercenary |
| - |
 Hodrick Hodrick (Hoplite) |
- |
Ochlys' unit is the Anti-Radiant Knight team. With all of the back row being very effective against Cavalries, this will be a breeze especially since you will have Hodrick as your main defender.
Hodrick will make sure that no harm will be done to any of your allies, Chloe will make sure that Hodrick is healed at the end of the battle with her First Aid, should Hodrick take damage.
Recruiting Ochlys
Ochlys can be recruited in the overworld after finishing the The Winged Knight side quest. After doing so, she will appear in the overworld with her shop, talk to her, and start An Angel's Request side quest, complete this quest and she will join you afterward.
Having Ochlys is useful since you will be dealing with Radiant Knights in this stage. It is recommended that you first recruit her before starting this quest.
Rolf's Unit
| Rolf's Unit | ||
|---|---|---|
 Rolf Rolf (Hunter) |
- | Any Hired Hunter Mercenary |
| - |
 Travis Travis (Thief) |
- |
Rolf's unit is a simple yet highly effective team against Gryphon Knights. With Travis' Evade skill, your unit will be untouchable.
Rolf will have been level 10 or more by now and thus have his Dual Shot active skill acquired. This active skill is very useful and it is recommended that you get Rolf to at least Level 10 before starting this quest.
Clive's Unit
| Clive's Unit | ||
|---|---|---|
 Adel Adel (Knight) |
 Selvie Selvie (Shaman) |
 Clive Clive (Knight) |
| - |
 Josef Josef (Paladin) |
- |
Clive's Unit boasts mobility and is good at fighting any enemy unit in this stage. However, having a concentrated team to battle each class such as Rolf's and Ochlys' will be better as they deal more damage.
Take advantage of this unit's mobility so you can get to the Catapult and the Ballista faster and execute enemies earlier.
Sharon's Unit
| Sharon's Unit | ||
|---|---|---|
 Nina Nina (Warrior) |
 Sharon Sharon (Cleric) |
 Mordon Mordon (Warrior) |
| - |
 Bruno Bruno (Gladiator) |
- |
Having Sharon in this stage is optimal for maximum healing. Surround Sharon with your heavy hitters for protection. You will utilize her Healing Assist a lot in this battle.
Have her tail Alain's unit since they will both be deployed at the same time.
Recruiting Sharon
Sharon is a recruitable character accessible by finishing the The Winged Knight sidequest.
After defeating Mandrin, you will have the option to recruit Sharon or not. It is advisable to recruit her as she will be a great healer for the party.
Alain's Unit
| Alain's Unit | ||
|---|---|---|
 Berenice Berenice (Sellsword) |
- |
 Melisandre Melisandre (Swordfighter) |
| - |
 Alain Alain (Lord) |
- |
Alain's unit will be deployed mid-game along with Sharon's when the reinforcements appear, this unit will deal with the Wizard enemy unit that will spawn near the bridge.
This unit is composed of Sword bearers, which have both high ATK and DEF. However, the team lacks a dedicated healer, this is where Sharon's Unit comes into play.
The Unyielding Shield Walkthrough
| # | Step by Step Guide |
|---|---|
| 1 |
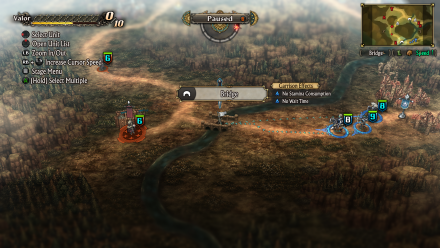 Deploy Your Units Deploy Ochlys, Clive, and Rolf's Unit. Have Ochlys' unit clear out the Watchtower above, after doing so, you can collect the treasure on the ground below and get a Wind Faerie's Charm. After this, you can proceed and take over Pasteau Le Mont Garrison and gain Valor Points. Clive and Rolf's destination will be to head to the bridge as they defeat approaching enemies. |
| 2 |
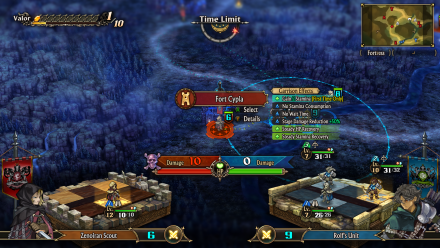 Garrison into Nearby Areas You can have Ochlys return and rendezvous with the two units. As you proceed near the bridge, there will be two areas where you can garrison in. Take over Fort Cypla to gain Valor Points and Sudd Town to get a Concealing Cloak from an NPC. |
| 3 |
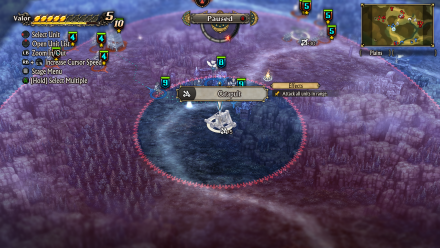 Take Them Down! As you approach the enemy command post, reinforcements will arrive and you will be surrounded. From here, each unit will be facing different enemies, Have Rolf battle the Gryphon Knight units near the Watchtower, have Ochlys's Unit fight the Radiant Knights near the Barricades, Have Clive use the catapult and destroy the Watchtower for Rolf's protection, make sure that Rolf's unit is out of range when doing so as this can damage friendly units as well. |
| 4 |
 Deploy Alain and Sharon There will be Wizard enemy units spawning near Fort Cypla and will head towards your base. This is the time to deploy Alain and Sharon, have Alain deal with these enemies, and use Sharon's Healing Assist when necessary. |
| 5 |
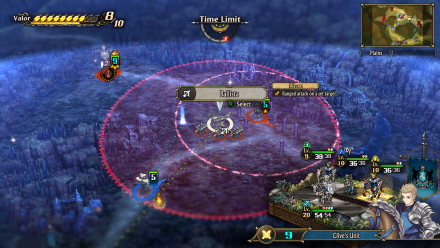 Employ the Ballista While waiting for Rolf's Unit to diminish every Gryphon Knight, Get any nearby unit to use the Ballista and target the approaching enemies. Have the other unit get the treasure beside the ballista to get Beckoning Bell. After defeating all the Gryphon knights, have Rolf collect the treasure beside the Watchtower and get Healing Tonic (S). From here, you can ignore the enemies and defeat Monica now. |
| 6 |
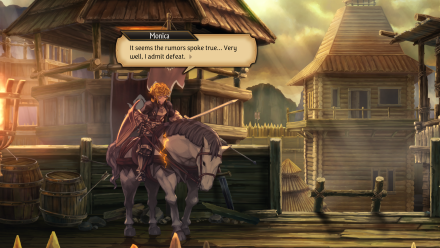 Defeat Monica Since Ochlys' unit is best suited against Radiant Knights, have her team battle Monica. Before the battle, Monica will use her Guard Call Valor Skill so this battle might take time to finish. Luckily, Rolf's and Sharon's units are nearby. Utilize Ranged Assist and Healing Assist effectively and win the battle. After defeating Monica, you will receive a White Knight's Shield. |
The Unyielding Shield Stage Info
| The Unyielding Shield Stage Map | ||
|---|---|---|
 |
||
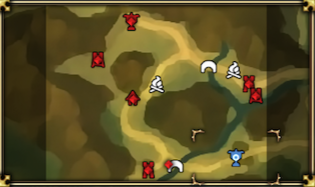
| Enemy Level | 12 | |
| Victory Condition | ・Defeat Monica | |
| Defeat Condition |
・The Liberation's command post is captured ・The time limit expires |
|
Unicorn Overlord Related Guides
All Main Quest Stages
All Side Quest Stages
All Overworld Quests
| Overworld Quests | |
|---|---|
| An Angel's Request | Palevia's Escaped Chickens |
| Carved of Cornia Stone | Cemeteries of Cornia |
| Carved of Drakenhold Stone | Cemeteries of Drakenhold |
| Drakenhold's Escaped Chickens | - |
All Liberation Quests
Author
The Unyielding Shield Walkthrough
Rankings
- We could not find the message board you were looking for.
Gaming News
Popular Games

Genshin Impact Walkthrough & Guides Wiki

Honkai: Star Rail Walkthrough & Guides Wiki

Umamusume: Pretty Derby Walkthrough & Guides Wiki

Pokemon Pokopia Walkthrough & Guides Wiki

Resident Evil Requiem (RE9) Walkthrough & Guides Wiki

Monster Hunter Wilds Walkthrough & Guides Wiki

Wuthering Waves Walkthrough & Guides Wiki

Arknights: Endfield Walkthrough & Guides Wiki

Pokemon FireRed and LeafGreen (FRLG) Walkthrough & Guides Wiki

Pokemon TCG Pocket (PTCGP) Strategies & Guides Wiki
Recommended Games

Diablo 4: Vessel of Hatred Walkthrough & Guides Wiki

Cyberpunk 2077: Ultimate Edition Walkthrough & Guides Wiki

Fire Emblem Heroes (FEH) Walkthrough & Guides Wiki

Yu-Gi-Oh! Master Duel Walkthrough & Guides Wiki

Super Smash Bros. Ultimate Walkthrough & Guides Wiki

Pokemon Brilliant Diamond and Shining Pearl (BDSP) Walkthrough & Guides Wiki

Elden Ring Shadow of the Erdtree Walkthrough & Guides Wiki

Monster Hunter World Walkthrough & Guides Wiki

The Legend of Zelda: Tears of the Kingdom Walkthrough & Guides Wiki

Persona 3 Reload Walkthrough & Guides Wiki
All rights reserved
©ATLUS. ©SEGA. All rights reserved. SEGA is registered in the U.S. Patent and Trademark Office. ATLUS and the ATLUS logo are registered trademarks or trademarks of ATLUS Co., Ltd. SEGA, the SEGA logo and UNICORN OVERLORD are registered trademarks or trademarks of SEGA CORPORATION.
The copyrights of videos of games used in our content and other intellectual property rights belong to the provider of the game.
The contents we provide on this site were created personally by members of the Game8 editorial department.
We refuse the right to reuse or repost content taken without our permission such as data or images to other sites.


![Monster Hunter Stories 3 Review [First Impressions] | Simply Rejuvenating](https://img.game8.co/4438641/2a31b7702bd70e78ec8efd24661dacda.jpeg/thumb)


Mage units in this fight are not accounted for. Go after the watch towers with Ochlys unit with Hodrick in front is a bad strat. Please consider changing this guide to better consider that fact. Also every other site has already been updating Unicorn Overlord guides like crazy, this site has the best amongst them but is not being updated since lanuch as of 3/21/24