Chapter 19S: The Fortress That Is Faith Story Walkthrough, Dialogue Choices, and Item Locations
★ Follow along with our Story Walkthrough.
┗ Want the Golden Route? Check out our Endings Guide!
┗ Strengthen Serenoa's Conviction as you pursue your path.
★ Learn about the best units to use in your battles!
┗ Find out how to recruit all of the characters to your party.
This is a walkthrough and guide for Chapter 19S: The Fortress That Is Faith in Triangle Strategy. Read on to learn more about the Chapter's objectives, dialogue choices, item locations, and battle strategies!
| Previous Chapter | Next Chapter |
|---|---|
| Chapter 18S3: For Freedom |
Chapter 20S: No Turning Back |
List of Contents
Chapter 19S Objectives
The Fortress That Is Faith Objectives
| The Fortress That Is Faith Objectives | |
|---|---|
| 1 | After exposing the truth behind the statues in Hyzante, the Roselle rise up to gain their freedom. House Wolffort reunites after succeeding in their own respective missions. Exploration Phase unlocked: Hyzantian Sands |
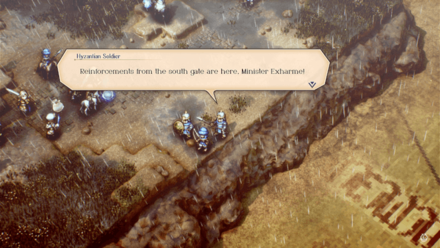
| 2 | With their morales boosted, House Wolffort marches on to Hyzante's gates only to meet an angry Exharme. Battle unlocked: Piercing the Goddess' Shield |
| 3 | Serenoa defeats Exharme's forces. Meanwhile, Svarog readies the Deathsknell and fires it at Hyzante's gate, giving House Wolffort an opening to enter the streets of Hyzante. End of Chapter 19S: The Fortress That Is Faith |
Chapter 19S Exploration Phase
Notes Locations
| All Notes Locations | |
|---|---|
 Enlarge Enlarge |
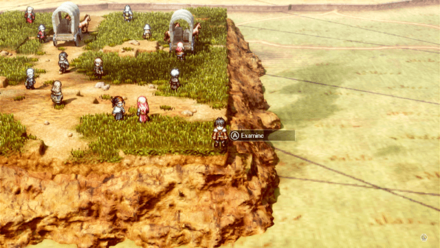
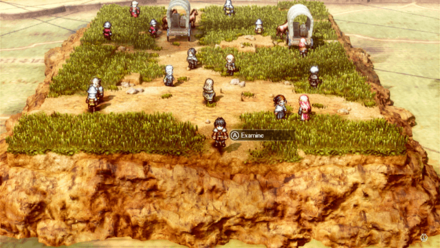
Unfinished Letter At the corner of the map near Geela and Frederica |
Item Locations
| All Item Locations | |
|---|---|
 Enlarge Enlarge |
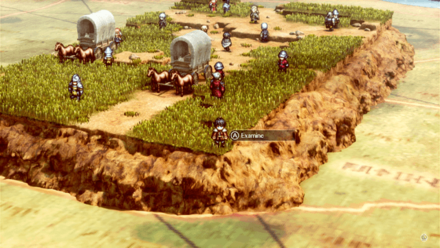
Cure-All Pellet Behind Svarog |
 Enlarge Enlarge |
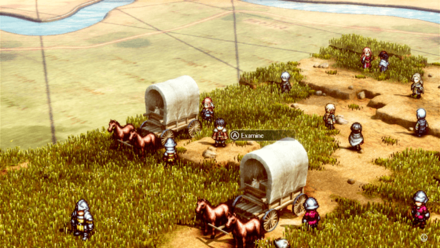
Panacea Pellet By the Glenbrook Soldier in front of the horses near the edge of the map |
 Enlarge Enlarge |
3300 Coins Beside the carriage near Jerrom |
 Enlarge Enlarge |
Large Ranged HP Recovery Pellet By the patch of grass behind Benedict |
 Enlarge Enlarge |
2700 Coins At the corner of the map behind Erador and a Glenbrook Soldier |
 Enlarge Enlarge |
3000 Coins At the edge of the map behind Clarus |
Chapter 19S Battle and Strategies
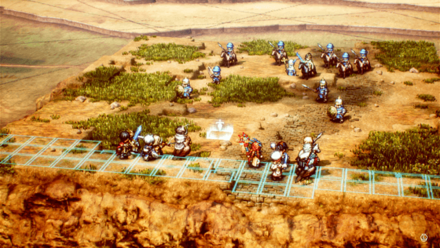
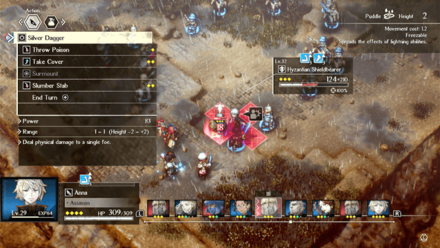
Piercing the Goddess' Shield Map and Battle Information
 Enlarge
| Recommended Level: 31 | Enemy Units: 11 | ||
| Weather: | Clear | Wind: | Breezy |
|---|---|---|---|
| Victory Conditions: | Decimate the enemy forces. | ||
| Defeat Conditions: | Lose all allied forces. | ||
| Battle Spoils: |
・Stone x15 ・Fiber x10 ・Oil Jug x1 ・Quality Fiber x8 ・Enchanting Spice x1 ・Medal of Valor x2 ・Panacea Pellet x1 |
||
Recommended Deployed Units
 Serenoa Serenoa Required |
 Avlora Avlora Reco. |
 Frederica Frederica Reco. |
 Medina Medina Reco. |
 Roland Roland Reco. |
 Maxwell Maxwell Reco. |
 Erador Erador Reco. |
 Hossabara Hossabara Reco. |
Maximum # of Deployed Units is 10
Battle Strategies
More enemy units will appear
As you progress through the battle, more enemy units will appear at the rear and side of the map. Keep this in mind if you plan on sending units in these locations, as they might face more than they can handle later on!
Use high damage abilities on Exharme

Exharme will also throw himself and charge towards your party. As the enemy unit with the highest level he has more health than others, so it is recommended to use high damage abilities to quickly get rid of him.
Use Temptation Recovery Pellets
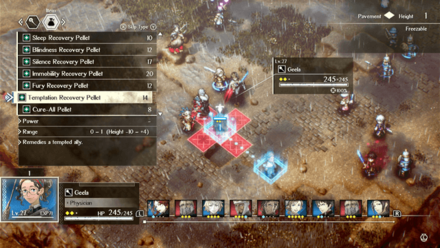
Exharme has an ability to tempt of one of your units which will make it turn against you and attack your other units for a few turns. Use Temptation Recovery Pellets on units affected by temptation to regain control over them.
Chapter 19S General Tips
Play Defensively
This battle takes place on flat terrain. Your opponent will not have a hard time traversing the field as there are no cliifs or hills to go through and will focus on sending units to your side of the map.
Since you are outnumbered, it can be a good idea to play defensively in this battle. Let the enemy approach your units and strike back. Take advantage of back strikes if an enemy unit goes in too deep.
Take Advantage of Quietuses
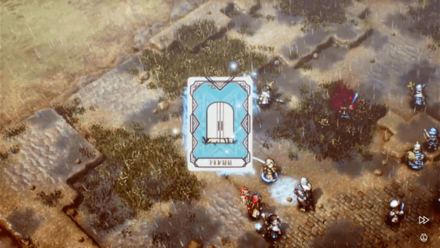
Quietuses are an extremely helpful set of commands that can help your units in a multitude of ways. To name a few, certain Quitetuses can influence turn count, damage dealt, unit positioning, and more.
For this battle, you can reposition units from one side of the map to the other with Lightwave. You can also use Restore to regain control of tempted units if you do not have Temptation Recovery Pellets.
Provided that you have the Quietus Points for them, using these commands will make Serenoa and his allies a force to be reckoned with.
Quietuses Guide: List and How to Use
Triangle Strategy Related Guides
Previous and Next Chapters
| Previous Chapter | Next Chapter |
|---|---|
| Chapter 18S3: For Freedom |
Chapter 20S: No Turning Back |

Author

Chapter 19S: The Fortress That Is Faith Story Walkthrough, Dialogue Choices, and Item Locations
Rankings
- We could not find the message board you were looking for.
Gaming News


![Monster Hunter Stories 3 Review [First Impressions] | Simply Rejuvenating](https://img.game8.co/4438641/2a31b7702bd70e78ec8efd24661dacda.jpeg/thumb)
Popular Games

Genshin Impact Walkthrough & Guides Wiki
Honkai: Star Rail Walkthrough & Guides Wiki
Umamusume: Pretty Derby Walkthrough & Guides Wiki
Pokemon Pokopia Walkthrough & Guides Wiki
Resident Evil Requiem (RE9) Walkthrough & Guides Wiki
Monster Hunter Wilds Walkthrough & Guides Wiki
Wuthering Waves Walkthrough & Guides Wiki
Arknights: Endfield Walkthrough & Guides Wiki
Pokemon FireRed and LeafGreen (FRLG) Walkthrough & Guides Wiki
Pokemon TCG Pocket (PTCGP) Strategies & Guides Wiki


Recommended Games
Diablo 4: Vessel of Hatred Walkthrough & Guides Wiki
Cyberpunk 2077: Ultimate Edition Walkthrough & Guides Wiki
Fire Emblem Heroes (FEH) Walkthrough & Guides Wiki
Yu-Gi-Oh! Master Duel Walkthrough & Guides Wiki
Super Smash Bros. Ultimate Walkthrough & Guides Wiki
Pokemon Brilliant Diamond and Shining Pearl (BDSP) Walkthrough & Guides Wiki
Elden Ring Shadow of the Erdtree Walkthrough & Guides Wiki
Monster Hunter World Walkthrough & Guides Wiki
The Legend of Zelda: Tears of the Kingdom Walkthrough & Guides Wiki
Persona 3 Reload Walkthrough & Guides Wiki


All rights reserved
©2022 SQUARE ENIX CO., LTD. All Rights Reserved. Nintendo Switch is a trademark of Nintendo. © Nintendo.
The copyrights of videos of games used in our content and other intellectual property rights belong to the provider of the game.
The contents we provide on this site were created personally by members of the Game8 editorial department.
We refuse the right to reuse or repost content taken without our permission such as data or images to other sites.