Chapter 6: Remember Me Story Walkthrough, Dialogue Choices, and Item Locations
★ Follow along with our Story Walkthrough.
┗ Want the Golden Route? Check out our Endings Guide!
┗ Strengthen Serenoa's Conviction as you pursue your path.
★ Learn about the best units to use in your battles!
┗ Find out how to recruit all of the characters to your party.
This is a walkthrough and guide for Chapter 6: Remember Me in Triangle Strategy. Read on to learn more about the Chapter's objectives, dialogue choices, item locations, and battle strategies!
| Previous Chapter | Next Chapter |
|---|---|
| Chapter 5: Encroaching Darkness |
Chapter 7: A Soul Upon the Scales |
Chapter 6 Objectives
Remember Me Objectives
| Remember Me Objectives | |
|---|---|
| 1 | The chapter begins with Roland and the rest of Serenoa's party heading to Whiteholm Castle. |
| 2 | Following his instructions, Serenoa and his party heads out to wait for Ser Maxwell. Exploration Phase unlocked: Whiteholm Castle |
| 3 | You will be sent back to the World Map after the Exploration Phase. Main Story unlocked: Whiteholm Castle Side Story unlocked: Falkes Streets |
| 4 | Head to Whiteholm Castle and prepare yourself for battle! Battle unlocked: Escape from Whiteholm Castle |
| 5 | Secure the bridge and escape using the boat Ser Maxwell has prepared for Roland and Serenoa's party. End of Chapter 6: Remember Me |
Chapter 6 Exploration Phase
Key Interactions
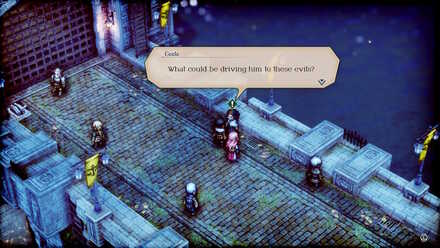
Geela Interaction
 Enlarge
| Where to Find | In front of Frederica |
|---|---|
| Prompt | Choices and Effects |
| What could be driving him to these evils? | Regardless of his motivations, he attacked us under the guise of an ally. Such an act is unforgivable.
(Increases Morality) |
| We cannot know the reasons for his actions, but you needn't suffer his wrath on our account. Return to Aesfrost, we shall make do somehow.
(Increases Liberty) |
|
| Hyzante will not stand idly by while the joint mining venture flounders. What could Aesfrost hope to gain by making two enemies?
(Increases Utility) |
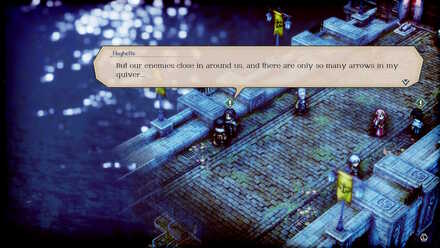
Hughette Interaction
 Enlarge
| Where to Find | Beside Benedict |
|---|---|
| Prompt | Choices and Effects |
| But our enemies close in around us, and there are only so many arrows in my quiver... | Could Roland not flee on your hawk? That may be his best chance for survival.
(Increases Liberty) |
| Circumstances aren't as dire as they seem. We only need survive tonight, and then we can seek out allies to rally around Roland.
(Increases Utility) |
|
| Such a dour outlook does not suit a Kingsguard. Keep heart - we fight for the royal family together.
(Increases Morality) |
Item Locations
| All Item Locations | |
|---|---|
 Enlarge Enlarge |
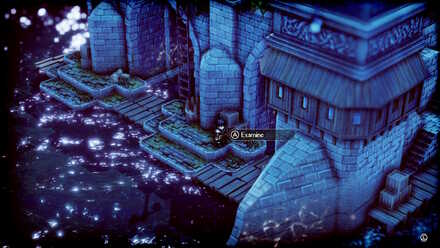
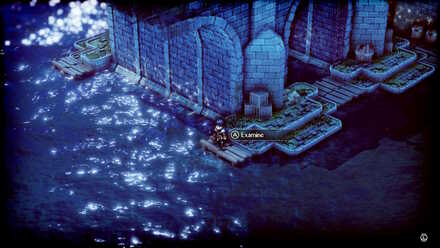
Fiber Go down the ladder behind Geela and examine the wooden boxes |
 Enlarge Enlarge |
800 Coin Go down the ladder behind Geela then walk to the east from the ladder |
 Enlarge Enlarge |
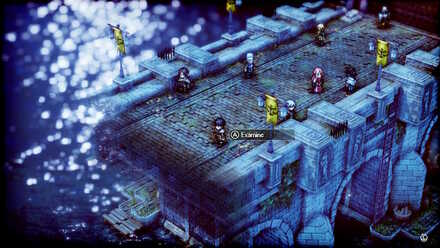
Ranged HP Recovery Pellet Right of Anna |
 Enlarge Enlarge |
Large HP Recovery Pellet On top of the ladder behind Erador |
 Enlarge Enlarge |
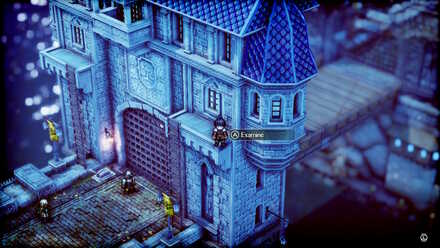
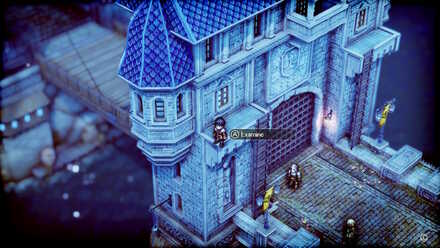
400 Coin On top of the ladder next to the bridge gate lever |
Chapter 6 Battle and Strategies
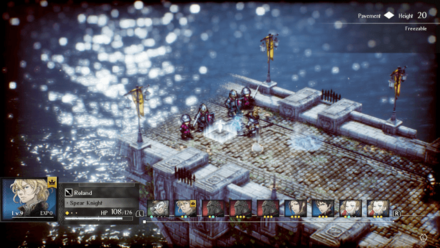
Escape from Whiteholm Castle Map and Battle Information
 Enlarge
| Recommended Level: 9 | Enemy Units: 10 | ||
| Weather: | Clear | Wind: | Breezy |
|---|---|---|---|
| Victory Conditions: | Ssecure the drawbridge. | ||
| Defeat Conditions: | Allow Roland to fall. | ||
| Battle Spoils: |
・Large HP Recovery Pellet x1 ・Iron x1 ・Stone x1 ・Disenchanting Spice x1 |
||
Recommended Deployed Units
 Serenoa Serenoa Required |
 Roland Roland Required |
 Anna Anna Reco. |
 Frederica Frederica Reco. |
 Corentin Corentin Reco. |
 Erador Erador Reco. |
Maximum # of Deployed Units is 9
Battle Strategies
Leave the Rear to Ser Maxwell
There should at least be two enemy reinforcements deployed in the rear.
While players can engage them, it is much better to leave them to Ser Maxwell. Most of his attack defeat enemy units in one-shot.
It is recommended to leave a unit of a lower level and a healer behind to help Ser Maxwell will help your units level up much quicker.
In addition, units left behind can also collect spoils from defeated units.
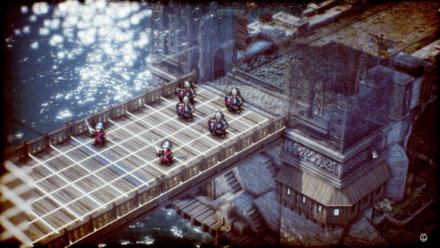
Do Not Mind the Archers

The goal of the battle is to defeat all enemies on the bridge itself.
If the party rushes onto the bridge, the two archers on top the ladders will not be able to attack.
It is not recommended to defeat these archers as it takes much more time to go up each ladder just to take out a single unit.
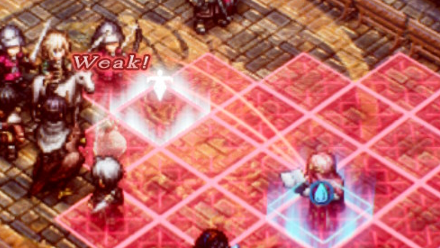
Be Ready for Reinforcements
Once a unit opens the gate to the bridge, four Aesfrosti Shieldbearers will be deployed.
These Shieldbearers are weak against Frederica's Fire Magic. If you could get the Aesfrosti Shieldbearers to stand next to each other, you could use Frederica's Scorch spell to deal massive damage to multiple enemy units.
Chapter 6 General Tips
Exploit Enemy Weaknesses
Aesfrosti Shieldbearers and Bowmen are weak to Frederica's Fire spells!
Taking advantage of enemy weaknesses is a good way to deal massive damage against your foes.
It is recommended to check for the enemy unit's resistances during Unit Placement in order to know which members of your party should you bring along to the battle.
Weaknesses and Resistances Explained
Triangle Strategy Related Guides
Previous and Next Chapters
| Previous Chapter | Next Chapter |
|---|---|
| Chapter 5: Encroaching Darkness |
Chapter 7: A Soul Upon the Scales |

Author

Chapter 6: Remember Me Story Walkthrough, Dialogue Choices, and Item Locations
Rankings
- We could not find the message board you were looking for.
Gaming News


![Monster Hunter Stories 3 Review [First Impressions] | Simply Rejuvenating](https://img.game8.co/4438641/2a31b7702bd70e78ec8efd24661dacda.jpeg/thumb)
Popular Games

Genshin Impact Walkthrough & Guides Wiki
Honkai: Star Rail Walkthrough & Guides Wiki
Umamusume: Pretty Derby Walkthrough & Guides Wiki
Pokemon Pokopia Walkthrough & Guides Wiki
Resident Evil Requiem (RE9) Walkthrough & Guides Wiki
Monster Hunter Wilds Walkthrough & Guides Wiki
Wuthering Waves Walkthrough & Guides Wiki
Arknights: Endfield Walkthrough & Guides Wiki
Pokemon FireRed and LeafGreen (FRLG) Walkthrough & Guides Wiki
Pokemon TCG Pocket (PTCGP) Strategies & Guides Wiki


Recommended Games
Diablo 4: Vessel of Hatred Walkthrough & Guides Wiki
Cyberpunk 2077: Ultimate Edition Walkthrough & Guides Wiki
Fire Emblem Heroes (FEH) Walkthrough & Guides Wiki
Yu-Gi-Oh! Master Duel Walkthrough & Guides Wiki
Super Smash Bros. Ultimate Walkthrough & Guides Wiki
Pokemon Brilliant Diamond and Shining Pearl (BDSP) Walkthrough & Guides Wiki
Elden Ring Shadow of the Erdtree Walkthrough & Guides Wiki
Monster Hunter World Walkthrough & Guides Wiki
The Legend of Zelda: Tears of the Kingdom Walkthrough & Guides Wiki
Persona 3 Reload Walkthrough & Guides Wiki


All rights reserved
©2022 SQUARE ENIX CO., LTD. All Rights Reserved. Nintendo Switch is a trademark of Nintendo. © Nintendo.
The copyrights of videos of games used in our content and other intellectual property rights belong to the provider of the game.
The contents we provide on this site were created personally by members of the Game8 editorial department.
We refuse the right to reuse or repost content taken without our permission such as data or images to other sites.