Chapter 8a2: Parting Ways Story Walkthrough, Dialogue Choices, and Item Locations
★ Follow along with our Story Walkthrough.
┗ Want the Golden Route? Check out our Endings Guide!
┗ Strengthen Serenoa's Conviction as you pursue your path.
★ Learn about the best units to use in your battles!
┗ Find out how to recruit all of the characters to your party.
This is a walkthrough and guide for Chapter 8a2: Parting Ways in Triangle Strategy. Read on to learn more about the Chapter's objectives, dialogue choices, item locations, and battle strategies!
| Previous Chapter | Next Chapter |
|---|---|
| Chapter 8a: The Weather Vane |
Chapter 8a3: Light and Shadow |
Chapter 8a2 Objectives
Parting Ways Objectives
| Parting Ways Objectives | |
|---|---|
| 1 | The chapter opens with a quick cutscene before you get sent to the World Map. Main Story unlocked: Castle Wolffort Side Stories unlocked: Wolffort Harbor, Whiteholm Castle |
| 2 | Proceed to Castle Wolffort and hear information from Anna about the Telliore army entering the Wolffort demesne. Main Story unlocked: Castle Wolffort Side Stories unlocked: Wolffort Harbor, Whiteholm Castle |
| 3 | Proceed to Castle Wolffort and discuss amongst your party about Telliore's betrayal. Exploration Phase unlocked: Wolffort Castle Entrance |
| 4 | After the Exploration Phase, you will be sent to the World Map. Main Story unlocked: Wolffort Streets Side Stories unlocked: Wolffort Harbor, Falkes Streets, Whiteholm Castle |
| 5 | Make the necessary preparations at the Encampment before heading to Wolffort Streets. Battle Unlocked: House Telliore's Treachery |
| 6 | Watch a quick cutscene after defeating Silvio's men. End of Chapter 8a2: Parting Ways |
Chapter 8a2 Exploration Phase
Key Interactions
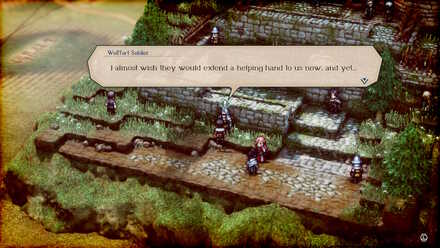
Wolffort Soldier Interaction
 Enlarge
| Where to Find | Beside Frederica and Geela |
|---|---|
| Prompt | Choices and Effects |
| I almost wish they would extend a helping hand to us now, and yet... | We may need all the help we can get, but asking Hyzante for aid might result in a war unlike that of thirty years ago...
(Increases Morality) |
| The alliance has been shattered and House Telliore has turned against us. It seems almost foolish to rely on the good will of others now...
(Increases Liberty) |
|
| We share a common enemy with Hyzante. To that end, I surmise the Holy State is waiting to see if we would make a formidable ally.
(Increases Utility) |
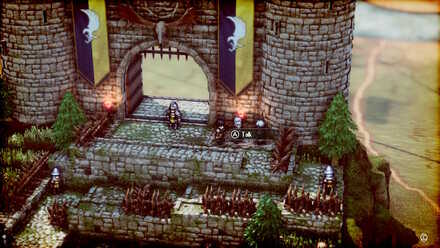
Benedict Interaction
 Enlarge
| Where to Find | By the Castle entrance |
|---|---|
| Prompt | Choices and Effects |
| I can only surmise House Telliore now cowers in fear of the duchy's strength. | The fear is understandable. Even so, I imagine they will retreat if they find themselves fighting a losing battle.
(Increases Utility) |
| The Telliore demesne is closer to Aesfrost than our own. It stands to reason that their fear would be greater as well.
(Increases Liberty) |
|
| House Telliore's hands are yet clean, unlike our own. It makes me wonder if Lord Silvio is the greater ruler between us...
(Increases Morality) |
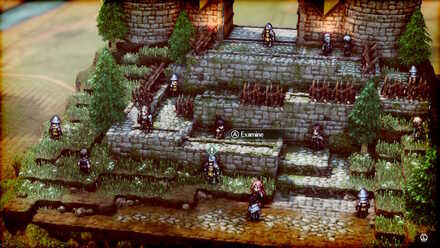
Notes Locations
| All Notes Locations | |
|---|---|
 Enlarge Enlarge |
Letter from Kin Right of Hughette |
Item Locations
| All Item Locations | |
|---|---|
 Enlarge Enlarge |
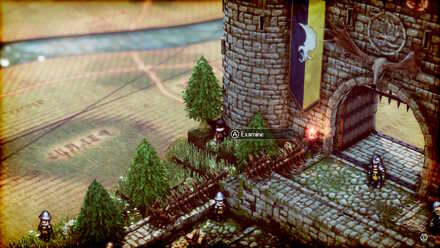
1100 Coin Rightmost tree by the Castle gates |
 Enlarge Enlarge |
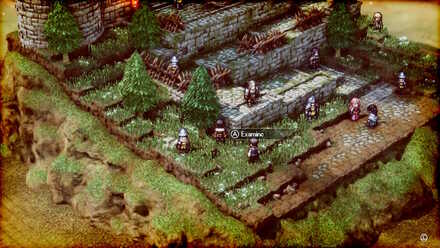
Ranged Icestone Tree right of Erador |
 Enlarge Enlarge |
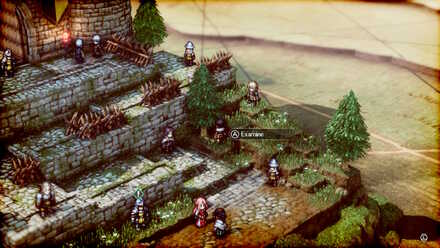
Iron Tree left of Roland |
 Enlarge Enlarge |
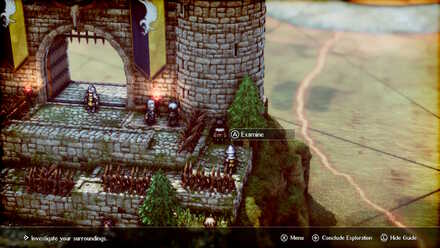
500 Coin Tree left of Hughette |
 Enlarge Enlarge |
Invigorating Spice Tree behind Anna |
Chapter 8a2 Battle and Strategies
House Telliore's Treachery Map and Battle Information
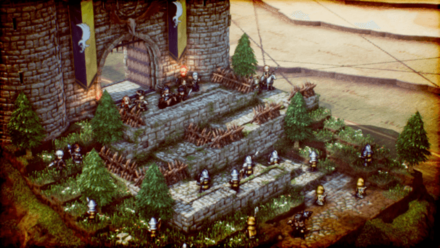 Enlarge
| Recommended Level: 12 | Enemy Units: 13 | ||
| Weather: | Clear | Wind: | Breezy |
|---|---|---|---|
| Victory Conditions: | Defeat Rufus | ||
| Defeat Conditions: | Lose all allied forces. | ||
| Battle Spoils: |
・Iron x1 ・Timber x4 ・Firestone x2 ・Medal of Bravery x1 |
||
Recommended Deployed Units
 Serenoa Serenoa Required |
 Hughette Hughette Reco. |
 Frederica Frederica Reco. |
 Corentin Corentin Reco. |
Maximum # of Deployed Units is 10
Battle Strategies
Teleport Straight to Rufus

Rufus is by no means a weak boss. However, this battle's victory condition is his sole loss.
To defeat him quickly and without taking too much damage, teleport your strongest unit behind Rufus using the Quietus Lightwave.
Quietuses Guide: List and How to Use
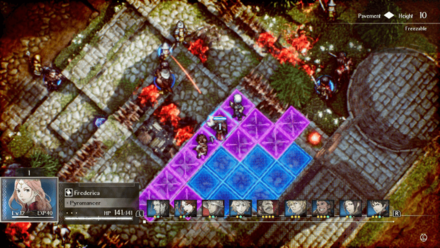
Place Support Units on Top of the Ledge

With the enemies fighting an uphill battle, your party can stand on the very top of the ledge while firing projectiles from a safe distance.
Enemy mages and archers are all fire-based so Corentin's ice magic is a great counter.
| Set a trap on a selected square. Any enemy who steps on it will be knocked back 5 squares. Up to 3 traps can be set. Power: - Range: 1-4 (Height -10 - +10) |
The narrow halls leading up to the castle gate is also great for setting up traps.
Use Jens ' ability Spring Trap is recommended to prevent enemies from staying too close to your units.
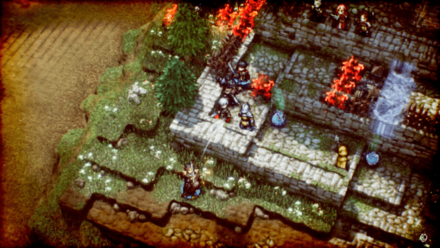
Burn Barricades
Some barricades can hinder even our own forces or prolong the battle entirely. Though burning barricades will let enemies through, it will give them a bit of damage.
Let enemies advance just enough for them to get into the range of your mages.
Use Hughette's Mobility
Among all party members, Hughette is the only unit that can freely move in this map.
Once enemies have advanced just enough, Hughette can flank them and start picking them off with back attacks.
Barricade using Wall of Ice
| Create an obstacle across 3 horizontal squares. The obstacle will disappear over time. Power: - Range: 1-4 (Height -10 - +10) |
If the enemies are gettng a bit too tough, Corentin's Wall of Ice Ability can give players a bit of a breather.
This ability when used correctly can stall enemy units for at least a turn.
Chapter 8a2 General Tips
Take Advantage of Quietuses
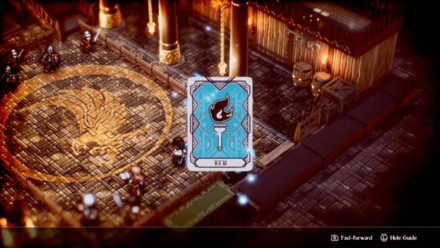
Quietuses are an extremely helpful set of commands that can help your units in a multitude of ways. To name a few, certain Quitetuses can influence turn count, damage dealt, unit positioning, and more.
While teleporting to Rufus is a good strategy to end the battle immediately, you can enhance that tactic further by using another Quietus command like Critical Blow.
Provided that you have the Quietus Points for them, using these commands will make Serenoa and his allies a force to be reckoned with.
Quietuses Guide: List and How to Use
Triangle Strategy Related Guides
Previous and Next Chapters
| Previous Chapter | Next Chapter |
|---|---|
| Chapter 8a: The Weather Vane |
Chapter 8a3: Light and Shadow |

Author

Chapter 8a2: Parting Ways Story Walkthrough, Dialogue Choices, and Item Locations
Rankings
- We could not find the message board you were looking for.
Gaming News

![Monster Hunter Stories 3 Review [First Impressions] | Simply Rejuvenating](https://img.game8.co/4438641/2a31b7702bd70e78ec8efd24661dacda.jpeg/show)


![Monster Hunter Stories 3 Review [First Impressions] | Simply Rejuvenating](https://img.game8.co/4438641/2a31b7702bd70e78ec8efd24661dacda.jpeg/thumb)
Popular Games

Genshin Impact Walkthrough & Guides Wiki
Honkai: Star Rail Walkthrough & Guides Wiki
Umamusume: Pretty Derby Walkthrough & Guides Wiki
Pokemon Pokopia Walkthrough & Guides Wiki
Resident Evil Requiem (RE9) Walkthrough & Guides Wiki
Monster Hunter Wilds Walkthrough & Guides Wiki
Wuthering Waves Walkthrough & Guides Wiki
Arknights: Endfield Walkthrough & Guides Wiki
Pokemon FireRed and LeafGreen (FRLG) Walkthrough & Guides Wiki
Pokemon TCG Pocket (PTCGP) Strategies & Guides Wiki


Recommended Games
Diablo 4: Vessel of Hatred Walkthrough & Guides Wiki
Cyberpunk 2077: Ultimate Edition Walkthrough & Guides Wiki
Fire Emblem Heroes (FEH) Walkthrough & Guides Wiki
Yu-Gi-Oh! Master Duel Walkthrough & Guides Wiki
Super Smash Bros. Ultimate Walkthrough & Guides Wiki
Pokemon Brilliant Diamond and Shining Pearl (BDSP) Walkthrough & Guides Wiki
Elden Ring Shadow of the Erdtree Walkthrough & Guides Wiki
Monster Hunter World Walkthrough & Guides Wiki
The Legend of Zelda: Tears of the Kingdom Walkthrough & Guides Wiki
Persona 3 Reload Walkthrough & Guides Wiki


All rights reserved
©2022 SQUARE ENIX CO., LTD. All Rights Reserved. Nintendo Switch is a trademark of Nintendo. © Nintendo.
The copyrights of videos of games used in our content and other intellectual property rights belong to the provider of the game.
The contents we provide on this site were created personally by members of the Game8 editorial department.
We refuse the right to reuse or repost content taken without our permission such as data or images to other sites.