Chapter 10b1: The Carelessness of Men Story Walkthrough, Dialogue Choices, and Item Locations
★ Follow along with our Story Walkthrough.
┗ Want the Golden Route? Check out our Endings Guide!
┗ Strengthen Serenoa's Conviction as you pursue your path.
★ Learn about the best units to use in your battles!
┗ Find out how to recruit all of the characters to your party.
This is a walkthrough and guide for Chapter 10b1: The Carelessness of Men in Triangle Strategy. Read on to learn more about the Chapter's objectives, dialogue choices, item locations, and battle strategies!
| Previous Chapter | Next Chapter |
|---|---|
| Chapter 10b: In the Shadows of Suspicion |
Chapter 10b3: The Reward for Betrayal |
List of Contents
Chapter 10b1 Objectives
The Carelessness of Men Objectives
| The Carelessness of Men Objectives | |
|---|---|
| 1 | Knowing where to find hard evidence, Serenoa and his allies head to Central Hyzante to uncover proof of Sorsley's clandestine dealings. Main Story unlocked: Central Hyzante Side Stories unlocked: Citadel of the Sands, Central Hyzante |
| 2 | Head to Central Hyzante to review the flow of the salt trade. Main Story unlocked: Central Hyzante |
| 3 | Before heading to the Ende Encampment at Central Hyzante, be sure to drop by the Encampment in order to prepare for battle Battle unlocked: The Battle of House Ende |
| 4 | After the battle, Kamsell and Exharme arrive upon Sorsley's desperate attempt to retrieve the Secret Ledger from Serenoa and Benedict. |
| 5 | The scene then moves to Hyzante's throne, with the Hierophant deciding what to do to Sorsley and his misdeeds as member of the Saintly Seven. End of Chapter 10b1: The Carelessness of Men |
Notes Locations
| All Notes Locations | |
|---|---|
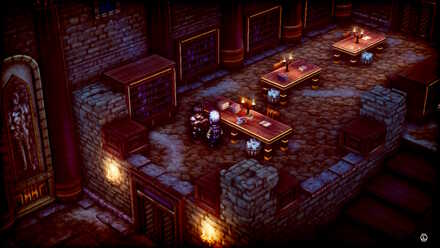 Enlarge Enlarge |
Secret Ledger Obtained in a cutscene before The Battle of House Ende |
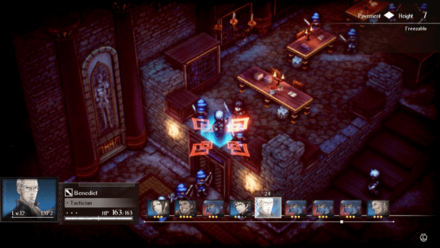
Chapter 10b1 Battle and Strategies
The Battle of House Ende Map and Battle Information
 Enlarge
| Recommended Level: 16 | Enemy Units: 12 | ||
| Weather: | - | Wind: | - |
|---|---|---|---|
| Victory Conditions: | Decimate the enemy forces. | ||
| Defeat Conditions: | Lose all allied forces. | ||
| Battle Spoils: |
・Iron x5 ・Fiber x3 ・Oak x1 ・Medal of Bravery x1 ・Evasion Spice x1 |
||
Recommended Deployed Units
 Serenoa Serenoa Required |
 Benedict Benedict Reco. |
 Anna Anna Reco. |
 Erador Erador Reco. |
 Piccoletta Piccoletta Reco. |
 Lionel Lionel Reco. |
Maximum # of Deployed Units is 10
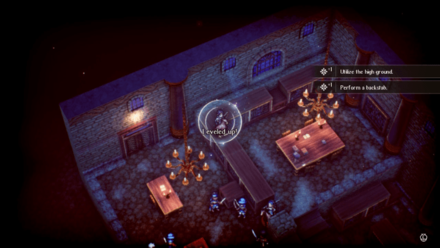
Battle Strategies
Use the Lightwave Quietus

Once the battle starts, a couple of enemy units will flank Serenoa and Benedict.
Send an ally to their area for some backup. Anna, with her high jump and speed, as well as decent attacking power and her Act Twice ability are all very useful.
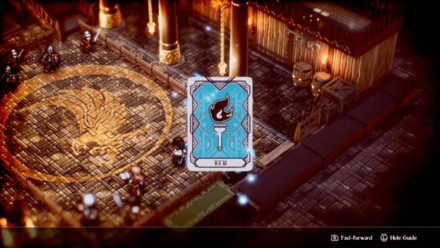
Quietuses Guide: List and How to Use
Double Serenoa's Turns
With Serenoa and Benedict alone at the 2nd floor of the library, it's easy to get overwhelmed with enemies.
Depending on Serenoa's strength, players can defeat the two flanking enemies coming from the bottom with ease.
| Move an ally's turn to directly after your own. Power: - Range: 1-4 (Height -10 - +10) |
Use Benedict's Now...! ability to give Serenoa an extra turn, giving him a chance to take down enemies faster!
Use the Height to Fire Arrows
There are only 3 units able to be deployed at the bottom floor so take care not to get overwhelmed.
The map is comparatively small compared to other battles so Hughette should be able to traverse the area with ease.
Place her atop bookshelves to damage enemies from a safe distance. In addition, flanking healers should also be a priority.
Bring Blindess Recovery Pellets
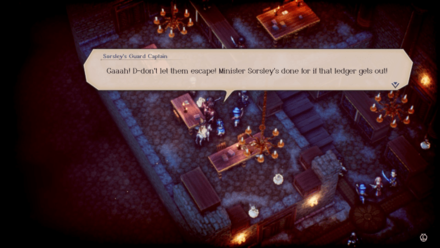
The Guard Captain, this battle's boss, is a dagger fighter than can use Blinding Stab. When it takes effect it has a chance to blind your units for 3 turns.
Bring enough Blindness Recovery Recovery Pellets keep your units from missing attacks.
| Use 2 items in quick succession. Power: - Range: 0-0 (Height -0 - +0) |
Additionally players can deploy Medina who can use items on ally units over long distances up to two times.
Chapter 10b1 General Tips
Take Advantage of Quietuses
Quietuses are an extremely helpful set of commands that can help your units in a multitude of ways. To name a few, certain Quitetuses can influence turn count, damage dealt, unit positioning, and more.
While teleporting to aid Serenoa and Benedict is a good strategy, you can enhance that tactic further by pairing the move with another Quietus command like Critical Blow to lessen surrounding enemy units.
Provided that you have the Quietus Points for them, using these commands will make Serenoa and his allies a force to be reckoned with.
Quietuses Guide: List and How to Use
Triangle Strategy Related Guides
Previous and Next Chapters
| Previous Chapter | Next Chapter |
|---|---|
| Chapter 10b: In the Shadows of Suspicion |
Chapter 10b3: The Reward for Betrayal |

Author

Chapter 10b1: The Carelessness of Men Story Walkthrough, Dialogue Choices, and Item Locations
Rankings
- We could not find the message board you were looking for.
Gaming News

![Monster Hunter Stories 3 Review [First Impressions] | Simply Rejuvenating](https://img.game8.co/4438641/2a31b7702bd70e78ec8efd24661dacda.jpeg/show)


![Monster Hunter Stories 3 Review [First Impressions] | Simply Rejuvenating](https://img.game8.co/4438641/2a31b7702bd70e78ec8efd24661dacda.jpeg/thumb)
Popular Games

Genshin Impact Walkthrough & Guides Wiki
Honkai: Star Rail Walkthrough & Guides Wiki
Umamusume: Pretty Derby Walkthrough & Guides Wiki
Pokemon Pokopia Walkthrough & Guides Wiki
Resident Evil Requiem (RE9) Walkthrough & Guides Wiki
Monster Hunter Wilds Walkthrough & Guides Wiki
Wuthering Waves Walkthrough & Guides Wiki
Arknights: Endfield Walkthrough & Guides Wiki
Pokemon FireRed and LeafGreen (FRLG) Walkthrough & Guides Wiki
Pokemon TCG Pocket (PTCGP) Strategies & Guides Wiki


Recommended Games
Diablo 4: Vessel of Hatred Walkthrough & Guides Wiki
Cyberpunk 2077: Ultimate Edition Walkthrough & Guides Wiki
Fire Emblem Heroes (FEH) Walkthrough & Guides Wiki
Yu-Gi-Oh! Master Duel Walkthrough & Guides Wiki
Super Smash Bros. Ultimate Walkthrough & Guides Wiki
Pokemon Brilliant Diamond and Shining Pearl (BDSP) Walkthrough & Guides Wiki
Elden Ring Shadow of the Erdtree Walkthrough & Guides Wiki
Monster Hunter World Walkthrough & Guides Wiki
The Legend of Zelda: Tears of the Kingdom Walkthrough & Guides Wiki
Persona 3 Reload Walkthrough & Guides Wiki


All rights reserved
©2022 SQUARE ENIX CO., LTD. All Rights Reserved. Nintendo Switch is a trademark of Nintendo. © Nintendo.
The copyrights of videos of games used in our content and other intellectual property rights belong to the provider of the game.
The contents we provide on this site were created personally by members of the Game8 editorial department.
We refuse the right to reuse or repost content taken without our permission such as data or images to other sites.