Chapter 10b2: Ask Me Naught Story Walkthrough, Dialogue Choices, and Item Locations
★ Follow along with our Story Walkthrough.
┗ Want the Golden Route? Check out our Endings Guide!
┗ Strengthen Serenoa's Conviction as you pursue your path.
★ Learn about the best units to use in your battles!
┗ Find out how to recruit all of the characters to your party.
This is a walkthrough and guide for Chapter 10b2: Ask Me Naught in Triangle Strategy. Read on to learn more about the Chapter's objectives, dialogue choices, item locations, and battle strategies!
| Previous Chapter | Next Chapter |
|---|---|
| Chapter 10b: In the Shadows of Suspicion |
Chapter 10b3: The Reward for Betrayal |
Chapter 10b2 Objectives
Ask Me Naught Objectives
| Ask Me Naught Objectives | |
|---|---|
| 1 | With incomplete evidence to back up the case against Sorsley, Serenoa will be called to appear at the palace for a trial. Main Story unlocked: Hierophant's Palace Side Story unlocked: Central Hyzante |
| 2 | Serenoa's trial will start inside the Hierophant's palace and the Saintly Seven will ask him questions regarding the illegal salt transport. |
| 2a | If you have all possible evidence against Sorsley but fail to make the correct deduction in the last part of the previous chapter, you will be able to select more options to prove his guilt and you will be proven innocent. |
| 2b | If you did not find any evidence, like from immediately skipping the exploration phase from the previous chapter, most of the choices will be locked and Sorsley will be proven innocent. |
| 3 | Sorsley or Serenoa will be found guilty or innocent, depending on your answers during the trial. The Saintly Seven then asks for a trial by combat between House Wolffort and Ende, with the winner being absolved of their errors. Battle unlocked: A Decisive Duel |
| 4 | After killing Sorsley and winning the trial by combat, the Saintly Seven will clear your name from the case regarding the illicit salt. End of Chapter 10b2: Ask Me Naught |
Serenoa Trial Answers
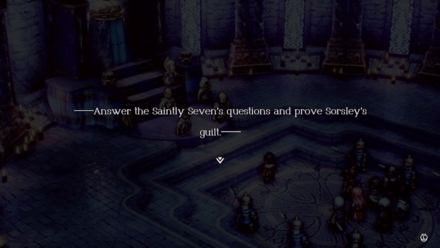
If you found proof to build your case against Sorsley in the previous chapter, you will be able to answer the Saintly Seven's questions during Serenoa's trial and prove his guilt. Select the following answers to prove your innocence:
| Question | Correct Answer |
|---|---|
| First Question | It is as I wrote in the documents I provided. |
| Second Question | I've a witness to the salt transport. |
| Third Question | Claurus told me Sorsley kept a secret ledger. |
| Fourth Question | Sorsley wanted to ensure the official's silence over the cargo vessel that disappeared in the middle of the night. |
| Fifth Question | In his encampment. |
Receive Grounding Amulet if you are proven innocent
If you are able to answer all questions correctly, you will be rewarded with the Grounding Amulet, which makes the wielder immune from getting knocked back.
This is useful against the upcoming trial by combat against Sorsley, as the location of the battle is an elevated platform surrounded by spiked tiles, and the enemy units will prioritize pushing your units off the platform.
Any Results Will Lead to Trial by Combat
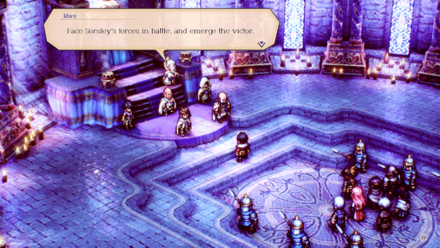
Whether Sorsley is proven guilty or innocent, both will still lead to a battle against him, although you will miss obtaining the Grounding Amulet if he is proven innocent.
Chapter 10b2 Battle and Strategies
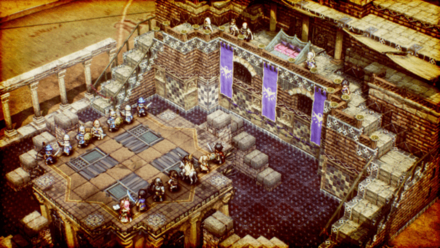
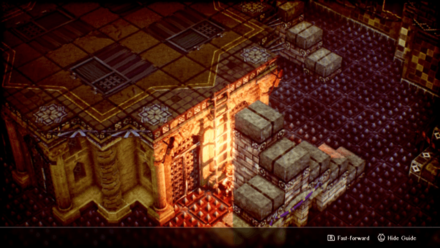
A Decisive Duel Map and Battle Information
 Enlarge
| Recommended Level: 16 | Enemy Units: 7 | ||
| Weather: | Clear | Wind: | Breezy |
|---|---|---|---|
| Victory Conditions: | Decimate the enemy forces. | ||
| Defeat Conditions: | Lose all allied forces. | ||
| Battle Spoils: |
・Iron x1 ・Stone x2 ・Timber x3 ・Oak x1 ・Medal of Bravery x1 ・Ranged Windstone x1 ・Disevasion Spice x1 |
||
Recommended Deployed Units
 Serenoa Serenoa Required |
 Roland Roland Reco. |
 Julio Julio Reco. |
 Jens Jens Reco. |
 Piccoletta Piccoletta Reco. |
 Erador Erador Reco. |
Maximum # of Deployed Units is 7
Battle Strategies
Push Enemy Units to the Bottom
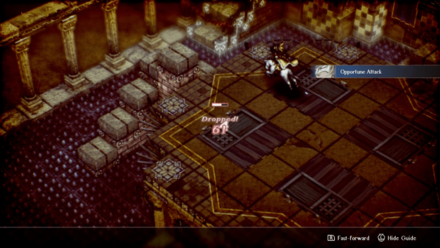
Conversely, try to push enemy units off the stage.
| Deal physical damage to a single enemy, knock them back 5 squares and move forward 1 square. Power: 62 Range: 1-1 (Height -2 - +2) |
Players can do this by using Erador's Ram Foe ability and Jens' Spring Trap ability.
Roland can also use his ability, Pushback, to knockback enemy units by 3 squares.
Pair Erador with Julio's ability Finish Them!, granting Erador more TP to use Ram Foe
Place Ladders to the Bottom
With the stage as small as it is, it's very likely that units will fall off the stage.
| Set a ladder on a selected square for easy access to other areas. Ladders previously set with this ability will disappear. Power: - Range: 1-1 (Height ±2 - ±10) |
Instead of taking a lot of time and health to get back up, use Jens' Ladder ability to make it easier for your units.
Try to build a ladder behind where most of the fighting takes place.
Defeat Enemies That Can Knockback
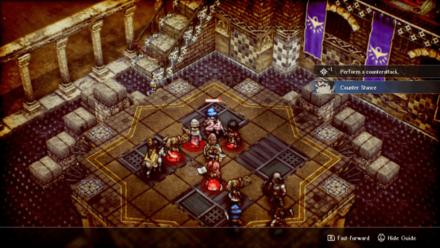
Shieldbearing enemies can use knockback abilities just like Erador's Ram Foe.
Be careful not to get too near a ledge or else your units may fall.
More dangerous than the shieldbearers are the battlemages that can use Fierce WInd to knock upto 3 units backwards.
| Deal wind-type magic damage to enemies across 3 horizontal squares, and knock them back 2 squares. Power: 83 Range: 1-4 (height -10 - +10) |
If the mages aren't taken care of first, players might see more than half of their units taking damage at the bottom.
Mages can easily be defeated by flanking them and using back attacks.
Beating Sorsley
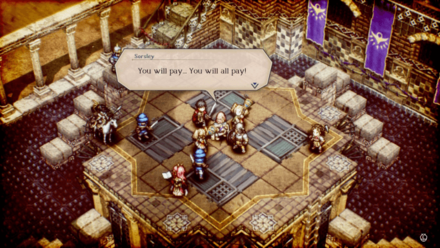
While Sorsley himself isn't the best fighter, he does have resistances to Paralysis, SIlence, Sleep, Temptation, and even Instant Death.
He can also lower the strength and magic attacks of enmies within his range, for upto 3 turns.
| Deal physical damage to an enemy, and have a chance to put them to sleep for 2 turn(s). Power: 21 Range: 1-1 (Height -2 - +2) |
Bring enough Sleep Recovery Pellets as well since Sorsley can use Slumber Stab to put your units to sleep.
Once he's alone, it should be easy enough to beat him regardless of his resistances.
Chapter 10b2 General Tips
Take Advantage of Spiked Tiles
The floor of the arena is filled with spiked tiles, which damages units on every turn while they are on top of these tiles. Try to push enemy units off the platform, not only for fall damage, but also to damage them while they are on the spikes.
Avoid staying on these spaces and prioritize returning to the main platform at the center of the arena if your unit falls down.
Triangle Strategy Related Guides
Previous and Next Chapters
| Previous Chapter | Next Chapter |
|---|---|
| Chapter 10b: In the Shadows of Suspicion |
Chapter 10b3: The Reward for Betrayal |

Author

Chapter 10b2: Ask Me Naught Story Walkthrough, Dialogue Choices, and Item Locations
Rankings
- We could not find the message board you were looking for.
Gaming News


![Monster Hunter Stories 3 Review [First Impressions] | Simply Rejuvenating](https://img.game8.co/4438641/2a31b7702bd70e78ec8efd24661dacda.jpeg/thumb)
Popular Games

Genshin Impact Walkthrough & Guides Wiki
Honkai: Star Rail Walkthrough & Guides Wiki
Umamusume: Pretty Derby Walkthrough & Guides Wiki
Pokemon Pokopia Walkthrough & Guides Wiki
Resident Evil Requiem (RE9) Walkthrough & Guides Wiki
Monster Hunter Wilds Walkthrough & Guides Wiki
Wuthering Waves Walkthrough & Guides Wiki
Arknights: Endfield Walkthrough & Guides Wiki
Pokemon FireRed and LeafGreen (FRLG) Walkthrough & Guides Wiki
Pokemon TCG Pocket (PTCGP) Strategies & Guides Wiki


Recommended Games
Diablo 4: Vessel of Hatred Walkthrough & Guides Wiki
Cyberpunk 2077: Ultimate Edition Walkthrough & Guides Wiki
Fire Emblem Heroes (FEH) Walkthrough & Guides Wiki
Yu-Gi-Oh! Master Duel Walkthrough & Guides Wiki
Super Smash Bros. Ultimate Walkthrough & Guides Wiki
Pokemon Brilliant Diamond and Shining Pearl (BDSP) Walkthrough & Guides Wiki
Elden Ring Shadow of the Erdtree Walkthrough & Guides Wiki
Monster Hunter World Walkthrough & Guides Wiki
The Legend of Zelda: Tears of the Kingdom Walkthrough & Guides Wiki
Persona 3 Reload Walkthrough & Guides Wiki


All rights reserved
©2022 SQUARE ENIX CO., LTD. All Rights Reserved. Nintendo Switch is a trademark of Nintendo. © Nintendo.
The copyrights of videos of games used in our content and other intellectual property rights belong to the provider of the game.
The contents we provide on this site were created personally by members of the Game8 editorial department.
We refuse the right to reuse or repost content taken without our permission such as data or images to other sites.
The correct answers for questions 3 and 4 are respectively answer 2 (witness to the bribery) and answer 2 (silence the destination of the shipment), not what the guide advised. Having only 3 out of 5 correct answers is enough to be found innocent though.