Chapter 19R: A Dream in Winter Story Walkthrough, Dialogue Choices, and Item Locations
★ Follow along with our Story Walkthrough.
┗ Want the Golden Route? Check out our Endings Guide!
┗ Strengthen Serenoa's Conviction as you pursue your path.
★ Learn about the best units to use in your battles!
┗ Find out how to recruit all of the characters to your party.
This is a walkthrough and guide for Chapter 19R: A Dream in Winter in Triangle Strategy. Read on to learn more about the Chapter's objectives, dialogue choices, and battle strategies!
| Previous Chapter | Next Chapter |
|---|---|
| Chapter 18R: Begone, Shadow of Sadness |
Chapter 20R: The Bell Tolls for No One |
List of Contents
Chapter 19R Objectives
A Dream in Winter Objectives
| A Dream in Winter Objectives | |
|---|---|
| 1 | With the Twinsgate entrance breached, Serenoa and his allies march forward to assault the center of Aesfrost. |
| 2 | After the cutscene of Gustadolph preparing for battle, you will be sent to the World Map. Main Story unlocked: Central Aesfrost |
| 3 | Before heading to Central Aesfrost, it is recommended to reach level 31 or higher first by doing Mock Battles at the Encampment as the battle will be quite challenging. |
| 4 | After making the necessary preparations, head to Central Aesfrost. Battle unlocked: Defeating the Archduke |
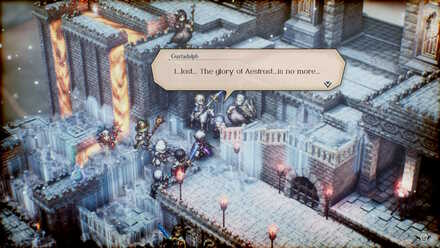
| 5 | As Serenoa and his allies defeat Gustadolph, he asks Benedict to see to it that all of Aesfrost is to be dealt with as peacefully as possible. |
| 6 | Before making any moves, the ground begins to shake as Gustadolph's secret weapon begins to take effect. End of Chapter 19R: A Dream in Winter |
Chapter 19R Battle and Strategies
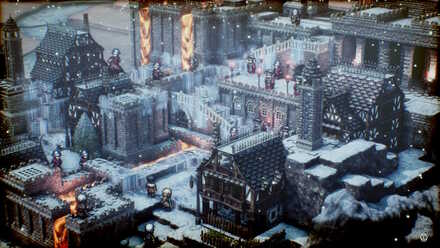
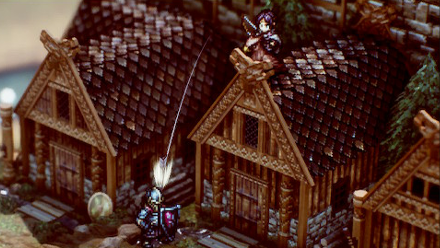
Defeating the Archduke Map and Battle Information
 Enlarge
| Recommended Level: 31 | Enemy Units: 16 | ||
| Weather: | Snow | Wind: | Tempest |
|---|---|---|---|
| Victory Conditions: | Decimate the enemy forces. | ||
| Defeat Conditions: | Lose all allied forces. | ||
| Battle Spoils: |
・Oil Jug x1 ・Quality Iron x4 ・Quality Timber x8 ・Quality Fiber x1 ・Ranged Icestone x2 ・Medal of Valor x1 ・Large Ranged HP Recovery Pellet x1 ・Extra Large HP Recovery Pellet x1 |
||
Recommended Deployed Units
 Serenoa Serenoa Required |
 Anna Anna Reco. |
 Roland Roland Reco. |
 Hughette Hughette Reco. |
 Narve Narve Reco. |
 Jens Jens Reco. |
 Piccoletta Piccoletta Reco. |
Maximum # of Deployed Units is 10
Battle Strategies
Prioritize Taking Down Ranged Units
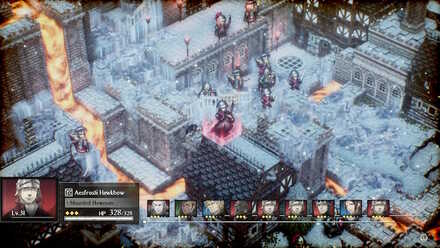
Much of the difficulty of this battle comes from the number of ranged enemy units attacking your party from a distance. Some of their attacks deal status changes like immobility and blindness.
In addition, there are healers that restore HP of melee enemy units, further prolonging the fight.
Use your high mobility units like Hughette to snipe ranged enemies one by one.
It is recommended as well to bring Panacea Pellets and Cure-All Pellets should your party be inflicted with status changes.
Exploit Enemy's Weakness to Fire

With Frederica leaving your party on this route, Narve will prove to be one of the best units to use for this battle due to his fire spell, Scorch, to which most of the enemies are weak to.
Furthermore, Gustadolph is also weak to fire, so using Narve's fire abilities will help out when taking the Archduke down!
As for units with no fire attacks, bringing Firestones and Ranged Firestones will help.
If you have Medina along, you can take advantage of her Aptitude by using a Firestone twice in a single turn!
Save Gustadolph for Last
The best strategy for taking down Gustadolph is to defeat all enemies first before proceeding to the Archduke himself.
That way, all your units can focus solely on attacking Gustadolph, making his health drop much faster without his healers and other distractions to worry about such as melee enemy units surrounding your party.
Chapter 19R General Tips
Maximize Ranged Units
The enemies from this battle are at an advantage in terms of terrain as they are situated at the elevated side of the map.
This is particularly helpful for the enemy healers, mages, and archers that could attack you from a distance, as they heal their allies from afar.
To counter this, be sure to take advantage of your ranged units to take ranged enemies down before your melee units get too close to them and take damage.
Triangle Strategy Related Guides
Previous and Next Chapters
| Previous Chapter | Next Chapter |
|---|---|
| Chapter 18R: Begone, Shadow of Sadness |
Chapter 20R: The Bell Tolls for No One |

Author

Chapter 19R: A Dream in Winter Story Walkthrough, Dialogue Choices, and Item Locations
Rankings
- We could not find the message board you were looking for.
Gaming News

![Monster Hunter Stories 3 Review [First Impressions] | Simply Rejuvenating](https://img.game8.co/4438641/2a31b7702bd70e78ec8efd24661dacda.jpeg/show)


![Monster Hunter Stories 3 Review [First Impressions] | Simply Rejuvenating](https://img.game8.co/4438641/2a31b7702bd70e78ec8efd24661dacda.jpeg/thumb)
Popular Games

Genshin Impact Walkthrough & Guides Wiki
Honkai: Star Rail Walkthrough & Guides Wiki
Umamusume: Pretty Derby Walkthrough & Guides Wiki
Pokemon Pokopia Walkthrough & Guides Wiki
Resident Evil Requiem (RE9) Walkthrough & Guides Wiki
Monster Hunter Wilds Walkthrough & Guides Wiki
Wuthering Waves Walkthrough & Guides Wiki
Arknights: Endfield Walkthrough & Guides Wiki
Pokemon FireRed and LeafGreen (FRLG) Walkthrough & Guides Wiki
Pokemon TCG Pocket (PTCGP) Strategies & Guides Wiki


Recommended Games
Diablo 4: Vessel of Hatred Walkthrough & Guides Wiki
Cyberpunk 2077: Ultimate Edition Walkthrough & Guides Wiki
Fire Emblem Heroes (FEH) Walkthrough & Guides Wiki
Yu-Gi-Oh! Master Duel Walkthrough & Guides Wiki
Super Smash Bros. Ultimate Walkthrough & Guides Wiki
Pokemon Brilliant Diamond and Shining Pearl (BDSP) Walkthrough & Guides Wiki
Elden Ring Shadow of the Erdtree Walkthrough & Guides Wiki
Monster Hunter World Walkthrough & Guides Wiki
The Legend of Zelda: Tears of the Kingdom Walkthrough & Guides Wiki
Persona 3 Reload Walkthrough & Guides Wiki


All rights reserved
©2022 SQUARE ENIX CO., LTD. All Rights Reserved. Nintendo Switch is a trademark of Nintendo. © Nintendo.
The copyrights of videos of games used in our content and other intellectual property rights belong to the provider of the game.
The contents we provide on this site were created personally by members of the Game8 editorial department.
We refuse the right to reuse or repost content taken without our permission such as data or images to other sites.