Chapter 20R: The Bell Tolls for No One Story Walkthrough, Dialogue Choices, and Item Locations
★ Follow along with our Story Walkthrough.
┗ Want the Golden Route? Check out our Endings Guide!
┗ Strengthen Serenoa's Conviction as you pursue your path.
★ Learn about the best units to use in your battles!
┗ Find out how to recruit all of the characters to your party.
This is a walkthrough and guide for Roland's Final Chapter: The Bell Tolls for No One in Triangle Strategy. Read on to learn more about the Chapter's objectives and battle strategies!
| Previous Chapter | Next Chapter |
|---|---|
| Chapter 19R: A Dream in Winter |
- |
List of Contents
Chapter 20R Objectives
The Bell Tolls for No One Objectives
| The Bell Tolls for No One Objectives | |
|---|---|
| 1 | The chapter begins with the detonation of the Deathsknell, destroying almost the entirety of the Aesfrost Castle. |
| 2 | Serenoa and his allies proceed to go after Svarog inside the Aesfrost Castle. Exharme, on the other hand, focuses on evacuating the Aesfrosti citizens. |
| 3 | After the cutscene, you will be sent to the World Map. Main Story unlocked: Central Aesfrost |
| 4 | Before heading to Central Aesfrost, it is recommended to reach level 33 or higher first by doing Mock Battles at the Encampment as the battle will be quite challenging. |
| 5 | After making the necessary preparations, head to Central Aesfrost. Battle unlocked: Battling the Embittered Svarog |
| 6 | After defeating Svarog, nothing gets in the way of Serenoa and Roland's plan, as they are now able to live out the Norzelia they have envisioned together. End of Roland's Final Chapter: The Bell Tolls for No One |
Chapter 20R Battle and Strategies
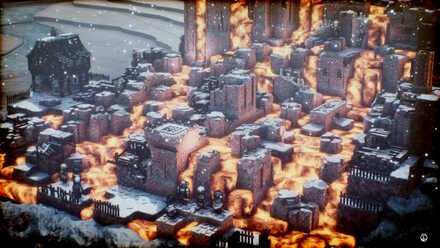
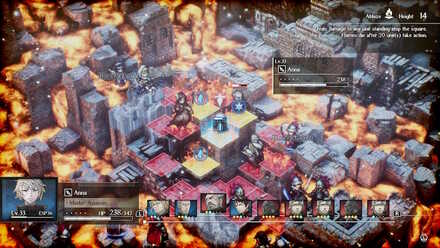
Battling the Embittered Svarog Map and Battle Information
 Enlarge
| Recommended Level: 33 | Enemy Units: 15 | ||
| Weather: | Snow | Wind: | Tempest |
|---|---|---|---|
| Victory Conditions: | Defeat Svarog. | ||
| Defeat Conditions: | Lose all allied forces. | ||
| Battle Spoils: |
・Quality Iron x4 ・Quality Stone x4 ・Defortifying Spice x1 ・Panacea Pellet x1 ・Extra Large HP Recovery Pellet x1 |
||
Recommended Deployed Units
 Serenoa Serenoa Required |
 Flanagan Flanagan Reco. |
 Hughette Hughette Reco. |
 Narve Narve Reco. |
 Travis Travis Reco. |
 Piccoletta Piccoletta Reco. |
 Corentin Corentin Reco. |
Maximum # of Deployed Units is 10
Battle Strategies
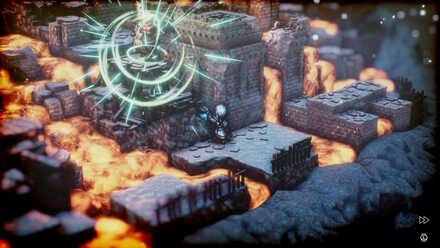
Teleport Straight to Svarog
Svarog does not have a lot of health compared to Gustadolph. Likewise, Svarog is not surrounded by healers to keep his health up at all times.
Since the victory condition is to defeat Svarog, it is recommended to teleport your strongest unit straight to Svarog using the Quietus Lightwave.
Should your character not reach Svarog despite the Quietus, make sure that the character is at least stepping on safe terrain to prevent damage inflicted by molten iron.
Speed Up Turns Using Benedict
If you have characters you wish to get from one place to the next immediately, use Benedict's ability Now...! in order to grant an ally unit to move directly after Benedict's turn.
| Move an ally's turn to directly after your own. Power: - Range: 1-4 (Height -10 - +10) |
This is recommended to use to your strongest units for them to get to Svarog as quickly as possible.
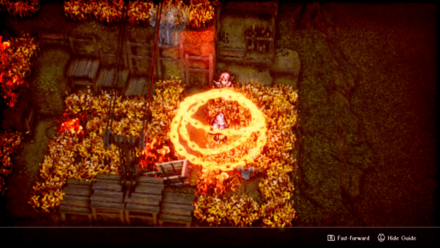
Put Out Flames Using Ice Abilities
One of Svarog's abilities is to cast the spell Eruption, which deals powerful, area of effect fire damage that also causes squares to be set ablaze.
Given that the squares that won't deal you damage are already limited, be sure to put out any squares set ablaze by using Ice abilities, either from Narve or Corentin.
Consider buying Icestones or Ranged Icestones for units who do not have access to Ice skills as well so anyone from your party can address this concern immediately!
Chapter 20R General Tips
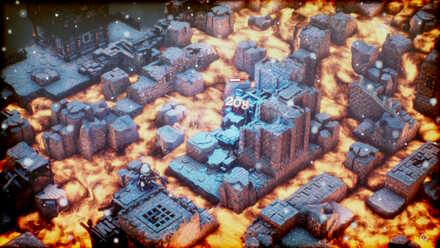
Take Note of Terrain Effects
Being familiar with the terrain for this map is vital as stepping on select squares could deal damage to your character without even being attacked by enemy units.
For this battle, avoid ending your turns standing on molten lava to keep your health up at all costs.
Be sure to hover over the squares to understand the type of terrain you are working with!
Take Advantage of Quietuses
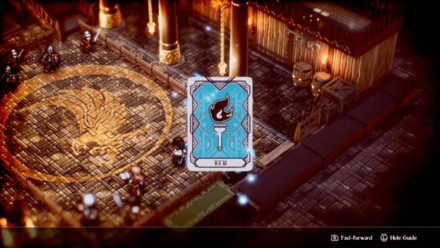
Quietuses are an extremely helpful set of commands that can help your units in a multitude of ways. To name a few, certain Quitetuses can influence turn count, damage dealt, unit positioning, and more.
In this case, you can have your strongest unit teleport close to Svarog using the Quietus Lightwave.
Take this strategy up a notch by using another Quietus like Critical Blow to deal more damage and to speed up battle.
Provided that you have the Quietus Points for them, using these commands will make Serenoa and his allies a force to be reckoned with.
Quietuses Guide: List and How to Use
Triangle Strategy Related Guides
Previous and Next Chapters
| Previous Chapter | Next Chapter |
|---|---|
| Chapter 19R: A Dream in Winter |
- |

Author

Chapter 20R: The Bell Tolls for No One Story Walkthrough, Dialogue Choices, and Item Locations
Rankings
- We could not find the message board you were looking for.
Gaming News


![Monster Hunter Stories 3 Review [First Impressions] | Simply Rejuvenating](https://img.game8.co/4438641/2a31b7702bd70e78ec8efd24661dacda.jpeg/thumb)
Popular Games

Genshin Impact Walkthrough & Guides Wiki
Honkai: Star Rail Walkthrough & Guides Wiki
Umamusume: Pretty Derby Walkthrough & Guides Wiki
Pokemon Pokopia Walkthrough & Guides Wiki
Resident Evil Requiem (RE9) Walkthrough & Guides Wiki
Monster Hunter Wilds Walkthrough & Guides Wiki
Wuthering Waves Walkthrough & Guides Wiki
Arknights: Endfield Walkthrough & Guides Wiki
Pokemon FireRed and LeafGreen (FRLG) Walkthrough & Guides Wiki
Pokemon TCG Pocket (PTCGP) Strategies & Guides Wiki


Recommended Games
Diablo 4: Vessel of Hatred Walkthrough & Guides Wiki
Cyberpunk 2077: Ultimate Edition Walkthrough & Guides Wiki
Fire Emblem Heroes (FEH) Walkthrough & Guides Wiki
Yu-Gi-Oh! Master Duel Walkthrough & Guides Wiki
Super Smash Bros. Ultimate Walkthrough & Guides Wiki
Pokemon Brilliant Diamond and Shining Pearl (BDSP) Walkthrough & Guides Wiki
Elden Ring Shadow of the Erdtree Walkthrough & Guides Wiki
Monster Hunter World Walkthrough & Guides Wiki
The Legend of Zelda: Tears of the Kingdom Walkthrough & Guides Wiki
Persona 3 Reload Walkthrough & Guides Wiki


All rights reserved
©2022 SQUARE ENIX CO., LTD. All Rights Reserved. Nintendo Switch is a trademark of Nintendo. © Nintendo.
The copyrights of videos of games used in our content and other intellectual property rights belong to the provider of the game.
The contents we provide on this site were created personally by members of the Game8 editorial department.
We refuse the right to reuse or repost content taken without our permission such as data or images to other sites.