Chapter 17S: Best Regiment and Party Members | Those of Aspiration Story Walkthrough
★ Follow along with our Story Walkthrough.
┗ Want the Golden Route? Check out our Endings Guide!
┗ Strengthen Serenoa's Conviction as you pursue your path.
★ Learn about the best units to use in your battles!
┗ Find out how to recruit all of the characters to your party.
This is a walkthrough and guide for Chapter 17S (Serenoa Route): Those of Aspiration in Triangle Strategy. Read on to learn more about the Chapter's objectives, tips, and the best regiment and party members to use!
| Previous Chapter | Next Chapter |
|---|---|
| Chapter 17: If Griefs Could Passions Move |
Chapter 18S1: Of Fire and Blood |
List of Contents
Chapter 17S Objectives
Those of Aspiration Objectives
| Those of Aspiration Objectives | |
|---|---|
| 1 | 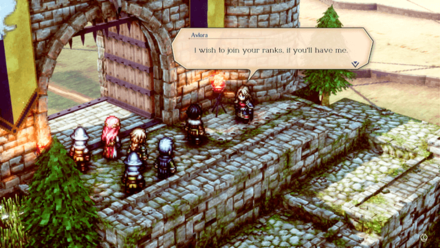 Serenoa makes his own decision instead of consulting his party and the Scales. House Wolffort will split into three regiments. Avlora will then reappear later and join your party. |
| 2 | 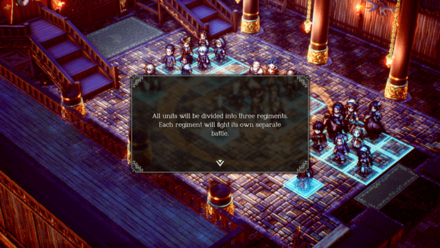 You will be asked to assign units to three separate parties led by Roland, Benedict, and Frederica. |
| 3 | House Wolffort will split up and head to their respective designated locations. End of Chapter 17S: Those of Aspiration |
Three Party Split
House Wolffort will split into three regiments, with each party having a specific goal in sight.
| Party Leader | Objective |
|---|---|
| Benedict | Lure the Hyzantian army at Castle Wolffort |
| Roland | Fight in Aesfrost with Svarog |
| Frederica | Lead a Rosellan rebellion in Hyzante |
Chapter 17S Best Regiment and Party Members
Benedict's Party
| Benedict's Party | |||
|---|---|---|---|
 Serenoa Serenoa
|
 Erador Erador
|
 Rudolph Rudolph
|
|
 Corentin Corentin
|
 Hossabara Hossabara
|
 Lionel Lionel
|
|
 Piccoletta Piccoletta
|
 Decimal Decimal
|
- | |
Lure enemies into fire traps
SInce you can use the fire traps found in the level to set an area ablaze and damage any units, you can use your units' abilities to lure or reroute enemies into the fire.
Use Piccoletta's Decoy, to lure enemies into the fire while you take them out from afar.
Cut enemy paths with traps/ice walls
You can force enemy units to change their planned routes with Rudolph's traps or Corentin's ice walls. Place these in areas where the Hyzantian units will be forced to go near fire traps.
Let enemies attack Erador and Lionel
Use Erador and Lionel's tankiness and their abilities to bait enemies into attacking while standing in tiles that are on fire. Use Hossabara's heals to keep them healthy.
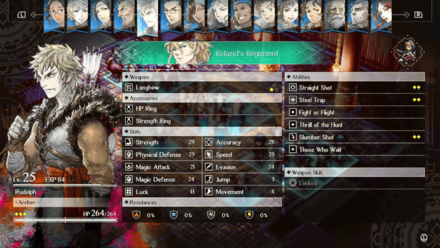
Roland's Party
| Roland's Party | ||
|---|---|---|
 Hughette Hughette
|
 Anna Anna
|
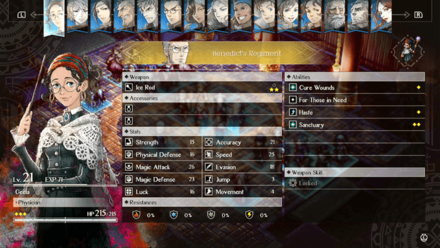
 Geela Geela
|
 Milo Milo
|
 Jens Jens
|
 Flanagan Flanagan
|
 Quahaug Quahaug
|
- | - |
Use Hughette and Flanagan to easily traverse the map
As hawkriders, Hughette and Flanagan can easily access elevated areas in the map. Use Hughette for offense and Flanagan to tank enemy attacks.
Use Jens' ladders and traps
Jens is vital in this map as you can set up ladders to easily climb and descend cliffs. Additionally, his traps can be used to bump enemy units into each other, or push any passing opponents off the cliff.
Frederica's Party
| Frederica's Party | ||
|---|---|---|
 Avlora Avlora
|
 Narve Narve
|
 Ezana Ezana
|
 Julio Julio
|
 Archibald Archibald
|
 Medina Medina
|
 Groma Groma
|
 Giovanna Giovanna
|
 Maxwell Maxwell
|
Supply TP with Julio's abilities
Since they will be spamming their lightning spells to electrocute enemies standing on water tiles in the map,.you can keep repleneshing your mages' TP with Julio's abilities.
Take advantage of Medina's versatility
You can use Medina in this battle by either healing/removing status conditions inflicted on your units or by using Thunderstones to deal electric damage on enemies standing on top of water tiles.
Pass through enemies with Groma
The pathways in the Source are narrow and movement might be difficult. Take advantage of Groma's skill to pass through enemy units and attack them from behind.
Chapter 17S General Tips
Beginning of Serenoa Route
This chapter, which is essentially the first chapter of the Golden Route, starts the Serenoa Route and will lead eventually lead to one of the game's endings.
How to Get the Golden Route | Endings Guide
Include a Tanky Unit in Benedict's Party
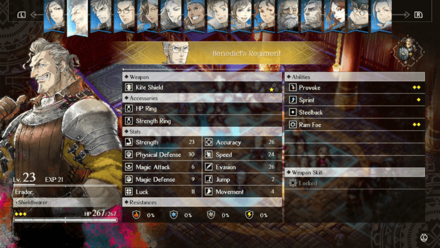
Benedict's battle will take place in the village, where you can use fire traps to set the area ablaze. You can include tanky characters like Erador to lure enemies into the flames and damage them. Do keep an eye on your unit's health though!
Include a Flying Unit in Roland's Party
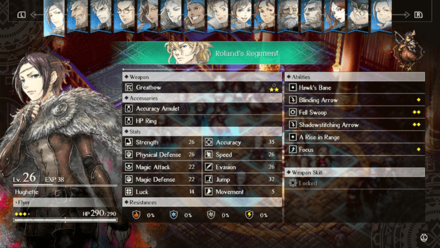
Roland's party will meet up with Svarog and fight in Twinsgates, which has elevated areas on either side of the map. Having a flying unit like Hughette or someone with high mobility stats can prove useful in this fight.
Include an Electric Mage in Frederica's Party
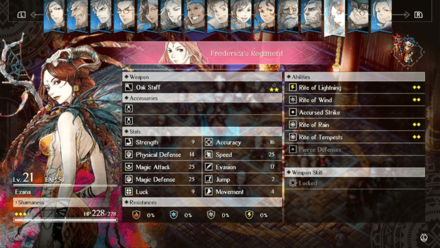
Frederica's battle will take place at the Source, which are filled with puddles. Use a unit that can cast electric spells like Ezana or Narve to to deal damage on all enemy units standing on water tiles.
Grind EXP in Mental Mock Battles to Level Up
If you have been using the same set of units in previous battles, chances are some of the units that you will be forced to use will be underleveled. You can make them catch up by doing Mental Mock Battles in the Encampment to gain some experience points and level up.
Parties Cannot Be Changed
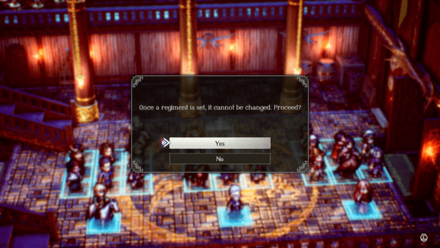
Once you lock in your party assignments, you cannot switch units between parties in future battles, so choose your units carefully.
Other Tips
Include One Support per Party
Since your entire party will be split into three from this chapter onwards, it is recommended to bring at least one support unit capable of providing heals and buffs per party.
You can leave Geela, Hossabara, and Narve in each to serve as your healer.
Include At Least One Bow User per Party
As most of the units available in the game use melee weapons, it is also recommended to include one Bow user per regiment. This will allow you to damage enemies from afar while your melee units can finish them.
You can assign Hughette, Rudolph, and Archibald on separate teams. If you were not able to get Rudolph in your save file, Corentin can be a great alternative with his area of effect spells that can hit multiple enemies in one move.
Spread out High-Leveled Units
Additionally, you should assign your high-leveled units in different parties so as to not fall short. High-leveled units have more stats and can last longer in battle, whereas low-leveled ones will be very vulnerable.
Triangle Strategy Related Guides
Previous and Next Chapters
| Previous Chapter | Next Chapter |
|---|---|
| Chapter 17: If Griefs Could Passions Move |
Chapter 18S1: Of Fire and Blood |

Author

Chapter 17S: Best Regiment and Party Members | Those of Aspiration Story Walkthrough
Rankings
- We could not find the message board you were looking for.
Gaming News


![Monster Hunter Stories 3 Review [First Impressions] | Simply Rejuvenating](https://img.game8.co/4438641/2a31b7702bd70e78ec8efd24661dacda.jpeg/thumb)
Popular Games

Genshin Impact Walkthrough & Guides Wiki
Honkai: Star Rail Walkthrough & Guides Wiki
Umamusume: Pretty Derby Walkthrough & Guides Wiki
Pokemon Pokopia Walkthrough & Guides Wiki
Resident Evil Requiem (RE9) Walkthrough & Guides Wiki
Monster Hunter Wilds Walkthrough & Guides Wiki
Wuthering Waves Walkthrough & Guides Wiki
Arknights: Endfield Walkthrough & Guides Wiki
Pokemon FireRed and LeafGreen (FRLG) Walkthrough & Guides Wiki
Pokemon TCG Pocket (PTCGP) Strategies & Guides Wiki


Recommended Games
Diablo 4: Vessel of Hatred Walkthrough & Guides Wiki
Cyberpunk 2077: Ultimate Edition Walkthrough & Guides Wiki
Fire Emblem Heroes (FEH) Walkthrough & Guides Wiki
Yu-Gi-Oh! Master Duel Walkthrough & Guides Wiki
Super Smash Bros. Ultimate Walkthrough & Guides Wiki
Pokemon Brilliant Diamond and Shining Pearl (BDSP) Walkthrough & Guides Wiki
Elden Ring Shadow of the Erdtree Walkthrough & Guides Wiki
Monster Hunter World Walkthrough & Guides Wiki
The Legend of Zelda: Tears of the Kingdom Walkthrough & Guides Wiki
Persona 3 Reload Walkthrough & Guides Wiki


All rights reserved
©2022 SQUARE ENIX CO., LTD. All Rights Reserved. Nintendo Switch is a trademark of Nintendo. © Nintendo.
The copyrights of videos of games used in our content and other intellectual property rights belong to the provider of the game.
The contents we provide on this site were created personally by members of the Game8 editorial department.
We refuse the right to reuse or repost content taken without our permission such as data or images to other sites.