Chapter 18S3: For Freedom Story Walkthrough, Dialogue Choices, and Item Locations
★ Follow along with our Story Walkthrough.
┗ Want the Golden Route? Check out our Endings Guide!
┗ Strengthen Serenoa's Conviction as you pursue your path.
★ Learn about the best units to use in your battles!
┗ Find out how to recruit all of the characters to your party.
This is a walkthrough and guide for Chapter 18S3: For Freedom in Triangle Strategy. Read on to learn more about the Chapter's objectives, dialogue choices, item locations, and battle strategies!
| Previous Chapter | Next Chapter |
|---|---|
| Chapter 18S2: Bound by Sorrow |
Chapter 19S: The Fortress That Is Faith |
List of Contents
Chapter 18S3 Objectives
For Freedom Objectives
| For Freedom Objectives | |
|---|---|
| 1 | After the battle at Twinsgate, Frederica's regiment continues their journey to the Source in Hyzante. Meanwhile, Jerrom rallies some of the Roselle and joins the battle at the Source. Exploration Phase unlocked: Hyzantian Castle Walls - West |
| 2 | Frederica speaks to the Roselle working in the Source, only to be confronted by Kamsell and his forces. Battle unlocked: Frederica's Battle |
| 3 | Frederica defeats the Hyzantian units, destroys the statue and reveals a huge salt crystal pillar in front of the Roselle. End of Chapter 18S3: For Freedom |
Chapter 18S3 Exploration Phase
Notes Locations
| All Notes Locations | |
|---|---|
 |
Casualties Among the Roselle Near the dead Roselle at the corner of the map |
Item Locations
| All Item Locations | |
|---|---|
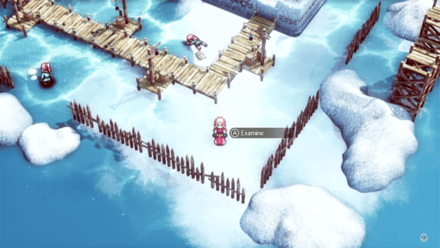
 |
2700 Coins Behind Frederica's starting position |
 |
Extra Large HP Recovery Pellet Below Frederica's starting position |
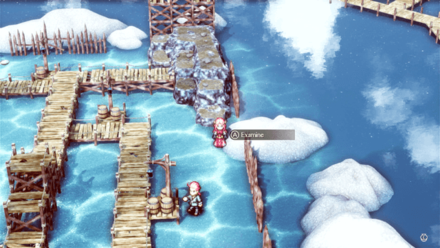
 |
3000 Coins By the barrel and lamppost at the walkway |
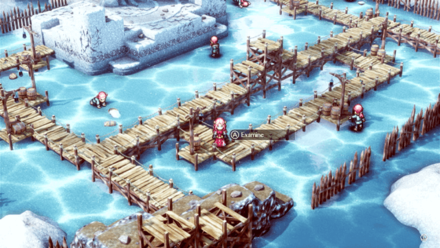
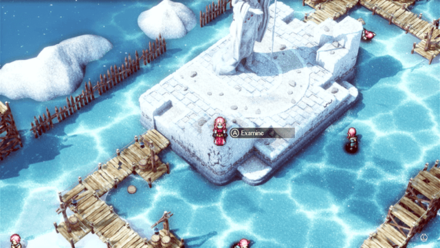 |
Panacea Pellet By the elevated tile near the statue |
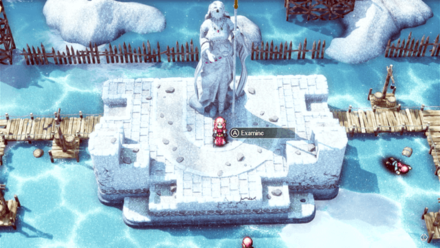 |
3300 Coins At the foot of the statue |
Chapter 18S3 Battle and Strategies
Frederica's Battle Map and Battle Information
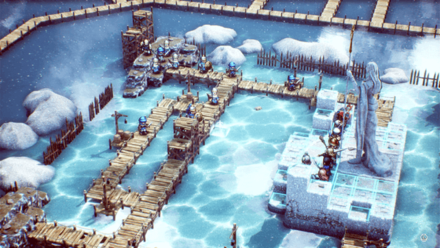
| Recommended Level: 28 | Enemy Units: 11 | ||
| Weather: | Clear | Wind: | Breezy |
|---|---|---|---|
| Victory Conditions: | Decimate the enemy forces. | ||
| Defeat Conditions: | Lose all allied forces. | ||
| Battle Spoils: |
・Iron x1 ・Medal of Valor x1 ・Panacea Pellet x1 |
||
Recommended Deployed Units
 Frederica Frederica Required |
 Ezana Ezana Reco. |
 Narve Narve Reco. |
 Julio Julio Reco. |
 Medina Medina Reco. |
Maximum # of Deployed Units is 10
Best Party to Use
| Frederica's Party | ||
|---|---|---|
 Avlora Avlora
|
 Narve Narve
|
 Ezana Ezana
|
 Julio Julio
|
 Archibald Archibald
|
 Medina Medina
|
 Groma Groma
|
 Giovanna Giovanna
|
 Maxwell Maxwell
|
Chapter 17S: Best Regiment and Party Members
Battle Strategies
Kamsell will be healed by electric attacks
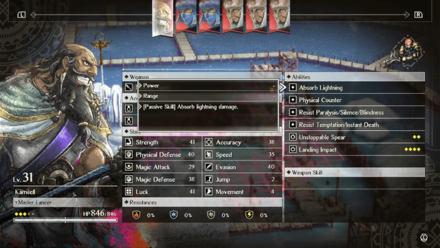
Kamsell has the Absorb Lightning ability, which makes him immune to electric attacks and will instead absorb the damage to heal himself.
If Kamsell is standing on a water or puddle tile, avoid using electric attacks for the meantime as this will only restore his HP.
Use Julio to recover TP
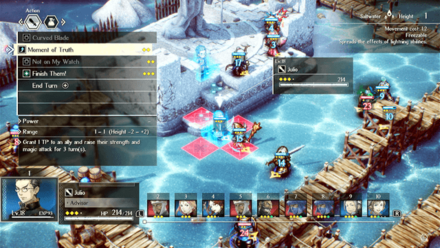
Since Ezana and Narve will most likely be spamming electric attacks, keep Julio close to provide them with a steady supply of TP.
| Grant 1 TP to an ally and raise their strength and magic attack for 3 turn(s). Power: - Range: 1-1 (Height -2 - +2) |
Summon rain with Ezana
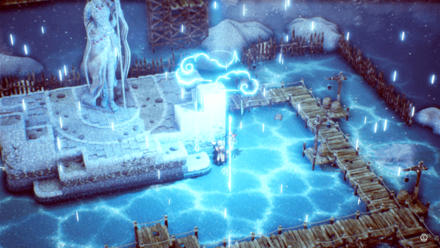
Ezana's Rite of Rain makes it rain in the field, which adds puddles to random tiles. This essentially extends the range of electric attacks done on water tiles, and can allow you to damage enemies even from afar.
| Summon a rainstorm for 5 turns. Extinguish squares that are set ablaze and create puddles at random. Power: - Range: 0-0 (Height -0 - +0) |
Stock up on Paralysis Recovery Pellets
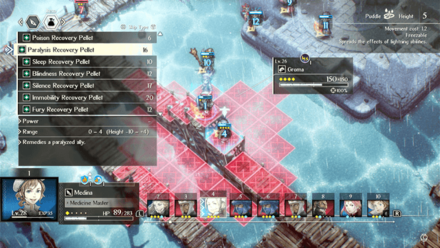
Enemy mages can also use electric spells which can paralyze your units when hit. Paralyzed units cannot move or do any commands on their turn, so make sure to heal any paralyzed units as soon as possible with Paralysis Recover Pellets as to not waste their turn.
Purchase these item at the shop in the Encampment before starting the battle.
Chapter 18S3 General Tips
Use Water Tiles to Damage Multiple Enemies
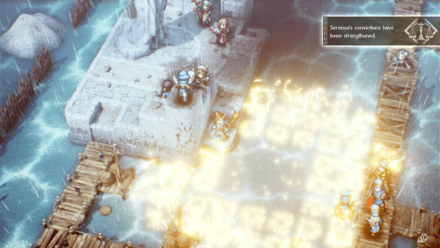
Majority of the tiles at the Source are water tiles. Electric attacks done within these tiles will deal residual damage to any connected water or puddle tiles, which is a great way to damage multiple enemy units in one attack.
Having Ezana and Narve in your party will guarantee at least two electric attacks via their spells. You can also let other units use Thunderstones for additional electric attacks.
Stay on the wooden platforms
Refrain from placing your units on water or puddle tiles as much as possible to avoid getting residual damage not just from the enemies but also to your own electric attacks.
Take Advantage of Quietuses
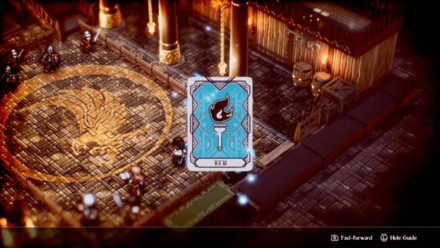
Quietuses are an extremely helpful set of commands that can help your units in a multitude of ways. To name a few, certain Quitetuses can influence turn count, damage dealt, unit positioning, and more.
For this battle, you can use Battle Cry to give Ezana or Narve more TP as they will be constantly using their electric spells. You can also use Lightwave to reposition any units, and Critical Blow if you want to deal as much damage as possible when you are about to attack Kamsell.
Provided that you have the Quietus Points for them, using these commands will make Serenoa and his allies a force to be reckoned with.
Quietuses Guide: List and How to Use
Triangle Strategy Related Guides
Previous and Next Chapters
| Previous Chapter | Next Chapter |
|---|---|
| Chapter 18S2: Bound by Sorrow |
Chapter 19S: The Fortress That Is Faith |

Author

Chapter 18S3: For Freedom Story Walkthrough, Dialogue Choices, and Item Locations
Rankings
- We could not find the message board you were looking for.
Gaming News


![Monster Hunter Stories 3 Review [First Impressions] | Simply Rejuvenating](https://img.game8.co/4438641/2a31b7702bd70e78ec8efd24661dacda.jpeg/thumb)
Popular Games

Genshin Impact Walkthrough & Guides Wiki
Honkai: Star Rail Walkthrough & Guides Wiki
Umamusume: Pretty Derby Walkthrough & Guides Wiki
Pokemon Pokopia Walkthrough & Guides Wiki
Resident Evil Requiem (RE9) Walkthrough & Guides Wiki
Monster Hunter Wilds Walkthrough & Guides Wiki
Wuthering Waves Walkthrough & Guides Wiki
Arknights: Endfield Walkthrough & Guides Wiki
Pokemon FireRed and LeafGreen (FRLG) Walkthrough & Guides Wiki
Pokemon TCG Pocket (PTCGP) Strategies & Guides Wiki


Recommended Games
Diablo 4: Vessel of Hatred Walkthrough & Guides Wiki
Cyberpunk 2077: Ultimate Edition Walkthrough & Guides Wiki
Fire Emblem Heroes (FEH) Walkthrough & Guides Wiki
Yu-Gi-Oh! Master Duel Walkthrough & Guides Wiki
Super Smash Bros. Ultimate Walkthrough & Guides Wiki
Pokemon Brilliant Diamond and Shining Pearl (BDSP) Walkthrough & Guides Wiki
Elden Ring Shadow of the Erdtree Walkthrough & Guides Wiki
Monster Hunter World Walkthrough & Guides Wiki
The Legend of Zelda: Tears of the Kingdom Walkthrough & Guides Wiki
Persona 3 Reload Walkthrough & Guides Wiki


All rights reserved
©2022 SQUARE ENIX CO., LTD. All Rights Reserved. Nintendo Switch is a trademark of Nintendo. © Nintendo.
The copyrights of videos of games used in our content and other intellectual property rights belong to the provider of the game.
The contents we provide on this site were created personally by members of the Game8 editorial department.
We refuse the right to reuse or repost content taken without our permission such as data or images to other sites.