Chapter 13a: Waves of Change Story Walkthrough, Dialogue Choices, and Item Locations
★ Follow along with our Story Walkthrough.
┗ Want the Golden Route? Check out our Endings Guide!
┗ Strengthen Serenoa's Conviction as you pursue your path.
★ Learn about the best units to use in your battles!
┗ Find out how to recruit all of the characters to your party.
This is a walkthrough and guide for Chapter 13a: Waves of Change in Triangle Strategy. Read on to learn more about the Chapter's objectives, dialogue choices, item locations, and battle strategies!
| Previous Chapter | Next Chapter |
|---|---|
| Chapter 13: Our Time Has Come |
Chapter 14a: A Steep Cost |
List of Contents
Chapter 13a Objectives
Waves of Change Objectives
| Waves of Change Objectives | |
|---|---|
| 1 | The chapter opens with a cutscene before you are sent to the World Map. Main Story unlocked: Wolffort Castle |
| 2 | Proceed to Wolffort Castle to watch another cutscene. It shows Serenoa and allies going to Telliore, while Hyzantian forces go to Glenbrook. |
| 3 | After the cutscene, you will be sent to the World Map. Main Story unlocked: Telliore Streets |
| 4 | From the World Map, proceed to Telliore Streets to start executing the plan on destroying the dam. A cutscene will play shortly after. |
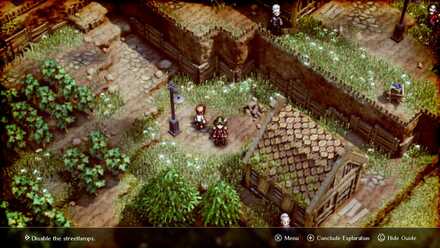
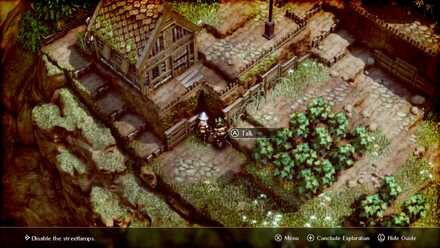
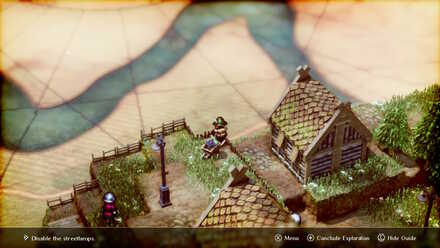
| 5 | The player will take control of Serenoa, disguised as a merchant, in Exploration Phase In addition to the usual elements in Exploration, you also need to disable the streetlamps to make the next battle easier. |
| 6 | A battle to destroy the dam will ensue. Upon completion, a cutscene will play. End of Chapter 13a: Waves of Change |
Chapter 13a Exploration Phase
Disabling the Streetlights
Mother and Son
To take out this streetlight, talk to the little boy beside it. Then, go to his house where his mother is currently in. The house is in the Northwest corner of the map. Enter it, and talk to the mother. Go back to to talk to the child. You can now take out the streetlight as there will be no witnesses.
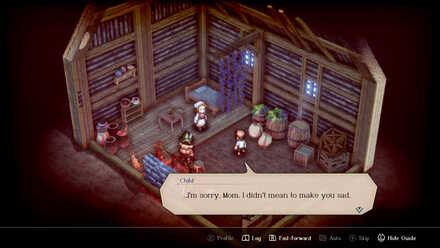
This cutscene should play once you have succesfully returned the child to his mother.
Milo's Distraction
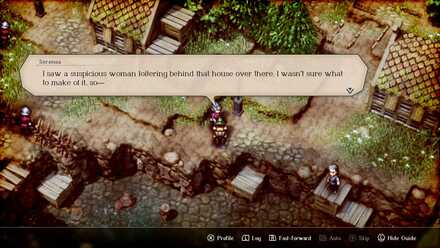
To lure out this guard from this streetlight. First talk to Milo. Then, talk to this guard near the lake and tell him about Milo being a suspicious figure. Go back to Milo, then finally take out the streetlight.
This mini-cutscene should play once you have successfully lured out the guard.
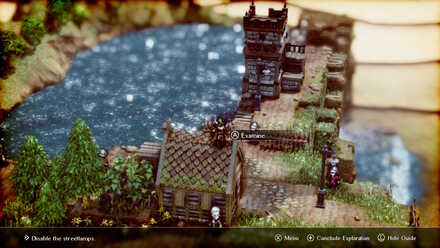
Unguarded Streetlight
For this unguarded streetlight North of the map, just take it out as there are no witnesses in this area.
Notes on Streetlights
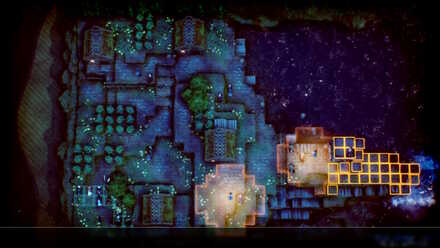
Taking out streetlights is not a requirement to take out the dam, but it is arguably easier to access the dam area if the lights are out.
In most situations, reinforcements will be alarmed anyway so do not worry if you have not taken out the lights. The reinforcements are not unlimited nor are they powerful. They are just hindrances so as long as you can rush the dam area and take out the opponents there, you will be fine!
Key Interactions
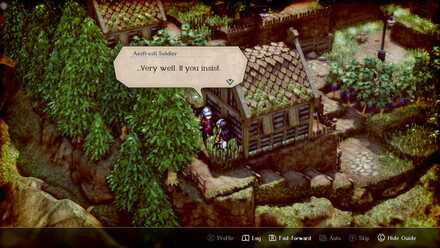
Tellioran Soldier Interaction
| Where to Find | Northwest corner of the map |
|---|---|
| Prompt | Choices and Effects |
| But is it really right for us to just bow our heads to our invaders? They even slayed our king... | What is right depends on the time and place. You needn't worry yourself about it.
(Increases Liberty) |
| A lone soldier can only achieve so much. I believe it right to bend the knee so you may live to fight another day.
(Increases Utility) |
|
| What Aesfrost did was wrong. A loyal soldier of Glenbrook owes them no obedience.
(Increases Morality) |
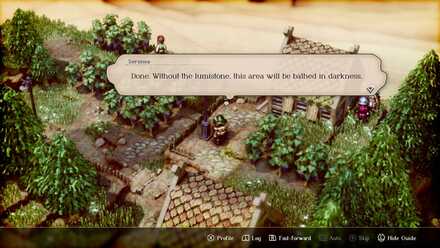
Tellioran Old Man Interaction
| Where to Find | East of the starting point of the Exploration Phase |
|---|---|
| Prompt | Choices and Effects |
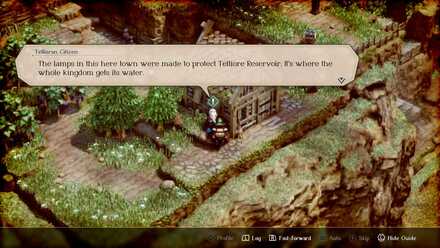
| The lumistones that give 'em their shine lose their glow after one night, so it's my job to replace 'em every morning. | House Telliore was right to make these lamps. It should keep unwanted guests and other beasts from drawing too close to the lake.
(Increases Utility) |
| Thanks to you, the people here can rest easy at night. You have my respect.
(Increases Morality) |
|
| You mean to say that you've been doing this every morning for decades. It's an incredible deal to say the least.
(Increases Liberty) |
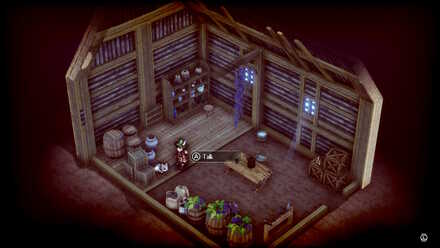
Item Locations
| All Item Locations | |
|---|---|
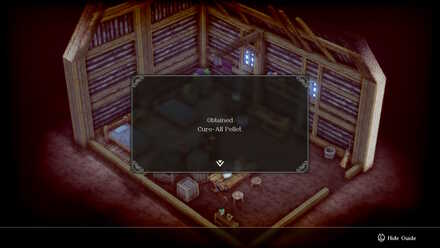 |
Cure-All Pellet In the crate inside a house where Benedict is beside of |
 |
1000 Coin On the roof of the house that is nearest to the watchtower |
 |
Extra Large HP Recovery Pellet By a fruit basket, in an elevated platform, East of the spawn area—Benedict's Gaze is directly towards said fruit basket |
 |
Luck Amulet By the lakeshore, in a wooden platform near the watchtower |
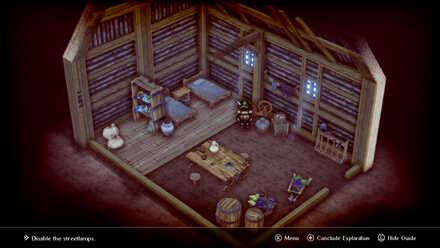 |
Quality Fiber In a pinwheel inside the small house, north of the map, next to the river |
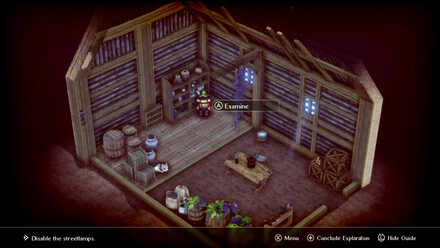 |
2300 Coin In a cupboard inside the house beside the Old Man |
Cat Location
| Where to Find | In the house next to the vineyard. |
|---|
You will encounter a number of cats scattered across Norzelia throughout your adventure.
These cats can be found during Exploration Phases, and interacting with all of the cats throughout the game will grant you a Secret Note.
It is not required to interact with the cat again if you have approached it from a previous Exploration Phase.
Chapter 13a Battle and Strategies
Securing Telliore Reservoir Map and Battle Information
| Recommended Level: 21 | Enemy Units: 16 | ||
| Weather: | Clear | Wind: | Breezy |
|---|---|---|---|
| Victory Conditions: | Capture the watchtower. | ||
| Defeat Conditions: | Lose all allied forces. | ||
| Battle Spoils: |
・Timber x3 ・Quality Timber x2 ・Azure Crystal x1 ・Large Ranged Icestone x1 ・Medal of Valor x1 |
||
Recommended Deployed Units
 Serenoa Serenoa Required |
 Hughette Hughette Reco. |
 Lionel Lionel Reco. |
 Jens Jens Reco. |
 Anna Anna Reco. |
Maximum # of Deployed Units is 10
Battle Strategies
Wait For the Right Time to Alert the Guards

The element of surprise is the party's strongest ally in this battle. Position your units at the right spots before attacking.
| Become invisible for 2 turns(s). Effect will be lost if you attack or stand directly in front of a foe. Power: - Range: 0-0 (Height -0 - +0) |
Even if some lamposts still work, Anna's Take Cover ability will let her go unnoticed. Prepare for a surprise attack.
Frederica and Corentin Easily Clears Guards
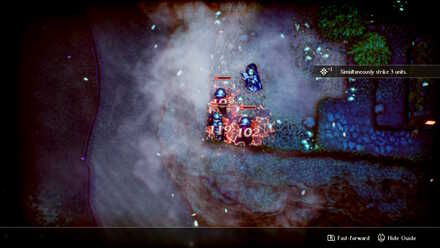
Corentin finishes off what Frederica started!
A tandem of Corentin's Icy Breath and Frederica's Scorch make quick work of guards. If guards are alerted early, they can easily clear the 3 foes that spawn near the start!
| Deal ice-type magic damage to all enemies within range and freeze the ground. Power: 34 Range: 0-4 (Height -10 - +10) |
| Deal fire-type magic damage to all enemies within range and set the ground ablaze. Power: 26 Range: 0-4 (Height -10 - +10) |
Rush the Cliffs
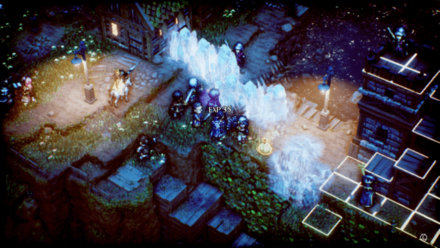
The battle ends in two ways, ether all enemy units are defeated or enemy units in the dam are defeated. A good way to easily win the battle is to head quickly to the dam as only 4 units including Syrcas, guards it.
Use the Lightwave Quietus to instantly transport your strongest unit behind enemy lines.
Quietuses Guide: List and How to Use
Use Jens' Ladder
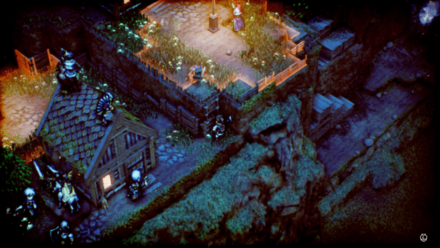
Since Quietuses can only be used once per battle, there's only one other option when going up the cliff without going through all the enemies. Use Jens' Ladder ability to get your units to the top fo the cliffs without going through all those enemy units.
| Set a ladder on a selected square for easy access to other areas. Ladders previously set with this ability will disappear. Power: - Range: 1-1 (Height ±2 - ±10) |
Prepare your the base of the beside the house near the deployment area so every goes smoothly.
Block the Way Using Wall of Ice

One way to fend off enemies is to use Corentin's Wall of Ice to stop enemies from reaching your position. Since the corridor is so narrow, Corentin can even stacktwo sets of walls side by side.
| Create an obstacle across 3 horizontal squares. The obstacle will disappear over time. Power: - Range: 1-4 (Height -10 - +10) |
Take note that Wall of Ice can easily be destroyed but acts well enough as a barrier for one or two turns.
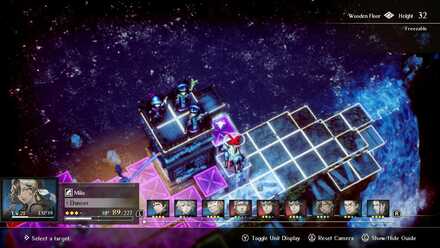
Swiftly Assault the Watchtower!
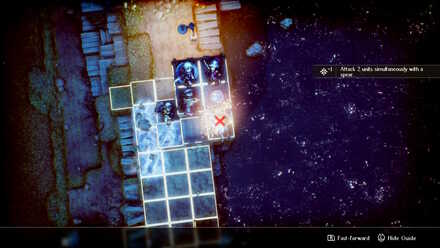
The main in this map are the units in the dam area. Take them out, and you win. However, because of the elevation difference, it will be difficult even for Hughette to take them out. We recommend positioning Anna so she can use Surmount to hop onto the tower, then swiftly following with a Bird of Prey or Twofold Turn boosted Roland and a Moon Jump from Milo. These three units can easily overwhelm the dam units.
Chapter 13a General Tips
Take Time to Deactivate Streetlights
Generally, the later you sound the alarm for reinforcements to come, the quicker you will be able to clear the map. Remember that you can just stall and ignore reinforcements and quickly rush the dam. It does not take much time to do so, so we encourage players to deactivate the lamps as you will save time in the long run.
Triangle Strategy Related Guides
Previous and Next Chapters
| Previous Chapter | Next Chapter |
|---|---|
| Chapter 13: Our Time Has Come |
Chapter 14a: A Steep Cost |

Author

Chapter 13a: Waves of Change Story Walkthrough, Dialogue Choices, and Item Locations
Rankings
- We could not find the message board you were looking for.
Gaming News


![Monster Hunter Stories 3 Review [First Impressions] | Simply Rejuvenating](https://img.game8.co/4438641/2a31b7702bd70e78ec8efd24661dacda.jpeg/thumb)
Popular Games

Genshin Impact Walkthrough & Guides Wiki
Honkai: Star Rail Walkthrough & Guides Wiki
Umamusume: Pretty Derby Walkthrough & Guides Wiki
Pokemon Pokopia Walkthrough & Guides Wiki
Resident Evil Requiem (RE9) Walkthrough & Guides Wiki
Monster Hunter Wilds Walkthrough & Guides Wiki
Wuthering Waves Walkthrough & Guides Wiki
Arknights: Endfield Walkthrough & Guides Wiki
Pokemon FireRed and LeafGreen (FRLG) Walkthrough & Guides Wiki
Pokemon TCG Pocket (PTCGP) Strategies & Guides Wiki


Recommended Games
Diablo 4: Vessel of Hatred Walkthrough & Guides Wiki
Cyberpunk 2077: Ultimate Edition Walkthrough & Guides Wiki
Fire Emblem Heroes (FEH) Walkthrough & Guides Wiki
Yu-Gi-Oh! Master Duel Walkthrough & Guides Wiki
Super Smash Bros. Ultimate Walkthrough & Guides Wiki
Pokemon Brilliant Diamond and Shining Pearl (BDSP) Walkthrough & Guides Wiki
Elden Ring Shadow of the Erdtree Walkthrough & Guides Wiki
Monster Hunter World Walkthrough & Guides Wiki
The Legend of Zelda: Tears of the Kingdom Walkthrough & Guides Wiki
Persona 3 Reload Walkthrough & Guides Wiki


All rights reserved
©2022 SQUARE ENIX CO., LTD. All Rights Reserved. Nintendo Switch is a trademark of Nintendo. © Nintendo.
The copyrights of videos of games used in our content and other intellectual property rights belong to the provider of the game.
The contents we provide on this site were created personally by members of the Game8 editorial department.
We refuse the right to reuse or repost content taken without our permission such as data or images to other sites.