Chapter 16: Sleep, My Friend Story Walkthrough, Dialogue Choices, and Item Locations
★ Follow along with our Story Walkthrough.
┗ Want the Golden Route? Check out our Endings Guide!
┗ Strengthen Serenoa's Conviction as you pursue your path.
★ Learn about the best units to use in your battles!
┗ Find out how to recruit all of the characters to your party.
This is a walkthrough and guide for Chapter 16: Sleep, My Friend in Triangle Strategy. Read on to learn more about the Chapter's objectives, dialogue choices, item locations, and battle strategies!
| Previous Chapter | Next Chapter |
|---|---|
| Chapter 15-3: Fate |
Chapter 17: If Griefs Could Passions Move |
Chapter 16 Objectives
Sleep, My Friend Objectives
| Sleep, My Friend Objectives | |
|---|---|
| 1 | Despite Roland and House Wolffort reclaiming Glenbrook, they remain uneasy due to the recent turn of events. |
| 2 | Unable to catch a breath, Roland, Serenoa, and the rest are informed that the survivors of the Aesfrosti army have gathered at the Grand Norzelian Mines. |
| 3 | After a quick cutscene, you will be brought to the World Map. Main Story unlocked: Hierophant's Palace |
| 4 | Proceed to the Hierophant's Palace to watch the Saintly Seven gather without the presence of the newly appointed saint, Serenoa. |
| 5 | You will be sent to the World Map afterwards. Main Story unlocked: Twinsgate |
| 6 | Proceed to Twinsgate to see Aesfrosti soldiers hauling cargo unbeknownst to Svarog, only being told that the soldiers are only following Gustadolph's orders. |
| 7 | Afterwards, head to the Grand Norzelian Mines to inspect and survey the area. Exploration Phase unlocked: Grand Norzelian Mines |
| 8 | End Exploration Phase and Serenoa and his allies notice the explosives surrounding the mines. |
| 9 | You will be sent to the World Map upon catching Aesfrosti soldiers in the mines. Take this time to prepare for battle at the Encampment! Main Story unlocked: Grand Norzelian Mines |
| 10 | Once preparations are complete, proceed once more to the Grand Norzelian Mines and face the remaining Aesfrosti army. Battle unlocked: Eliminating the Aesfrosti Soldiers |
| 11 | After the battle, Serenoa and his allies proceed to go deeper into the mines, curious about the Aesfrosti army's true goal. |
| 12 | As they go deeper into the mines, they discover multiple salt crystals, proving the claims of Frederica's mother to be true. |
| 13 | The following cutscene shows friction between Gustadolph and Svarog, with Svarog now aware of Gustadolph's true intentions and the truth behind Dragan's death. End of Chapter 16: Sleep, My Friend |
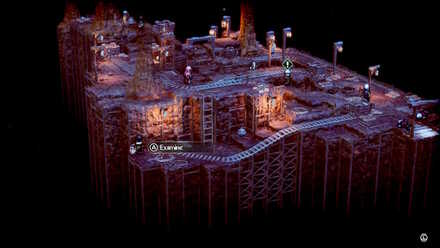
Chapter 16 Exploration Phase
Key Interactions
Roland Interaction
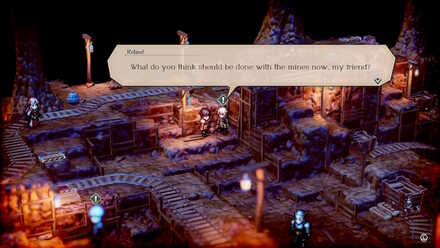
| Where to Find | Talk to Roland |
|---|---|
| Prompt | Choices and Effects |
| What do you think should be done with the mines now, my friend? | Why not leave them be for now? Someday the world will be at peace again and mining can resume.
(Increases Liberty) |
| The mines are located in our demesne within the kingdom of Glenbrook. Let us manage them together as one of the kingdom's assets.
(Increases Morality) |
|
| We can use it to rebuild the kingdom and as a place to work for those who have lost their jobs during the war.
(Increases Utility) |
Anna Interaction
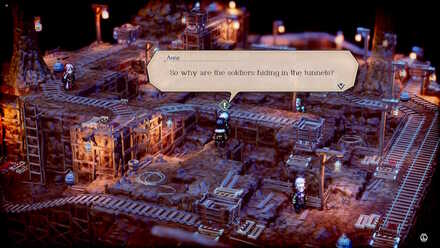
| Where to Find | Talk to Anna |
|---|---|
| Prompt | Choices and Effects |
| So why are the soldiers hiding in the tunnels? | They gain nothing by hiding in the tunnels. Perhaps they are luring us into some sort of trap...
(Increases Utility) |
| I doubt they do it on their own volition. It may be some tactic that they have been ordered to carry out.
(Increases Morality) |
|
| The burden of defeat would likely be thrust upon them if they returned to the duchy. They might just be hiding, knowing they have no place to return to.
(Increases Liberty) |
Item Locations
| All Item Locations | |
|---|---|
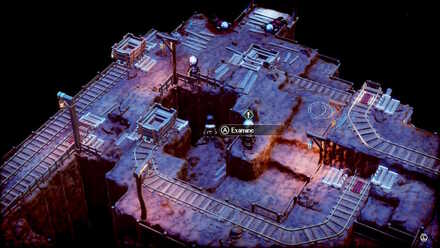 |
Quality Timber Left of Anna |
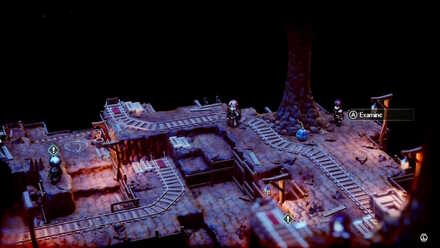 |
Cure-All Pellet Behind Frederica |
 |
Superior Fiber Left of Hughette |
 |
3500 Coin Behind Geela |
 |
Obsidian Anklet Northeast of Geela |
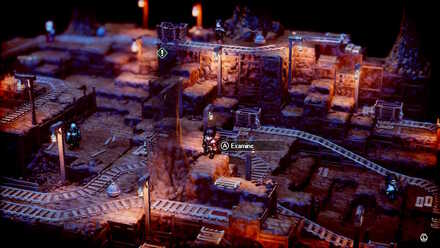 |
3500 Coin Next to the bomb behind Erador |
 |
Large Ranged HP Recovery Pellet Next to the ladder behind Frederica |
Chapter 16 Battle and Strategies
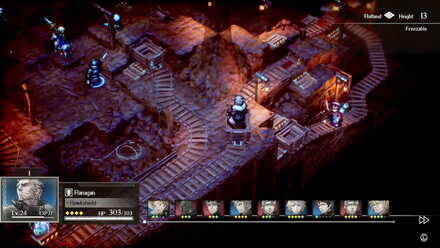
Eliminating the Aesfrosti Soldiers Map and Battle Information
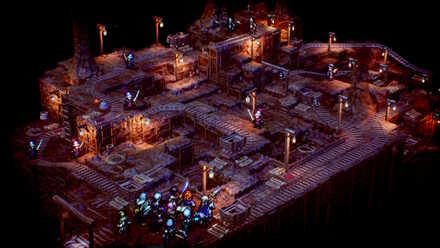
| Recommended Level: 26 | Enemy Units: 10 | ||
| Weather: | - | Wind: | - |
|---|---|---|---|
| Victory Conditions: | Decimate the enemy forces. | ||
| Defeat Conditions: | Allow even a single explosive to detonate. | ||
| Battle Spoils: |
・Stone x8 ・Timber x8 ・Quality Iron x8 ・Quality Timber x2 ・Quality Fiber x2 ・Ranged Icestone x1 ・Swift Spice x1 ・Extra Large HP Recovery Pellet x3 |
||
Recommended Deployed Units
 Serenoa Serenoa Required |
 Travis Travis Req. if Recruited |
 Trish Trish Req. if Recruited |
 Benedict Benedict Reco. |
 Anna Anna Reco. |
 Jens Jens Reco. |
Maximum # of Deployed Units is 10
Battle Strategies
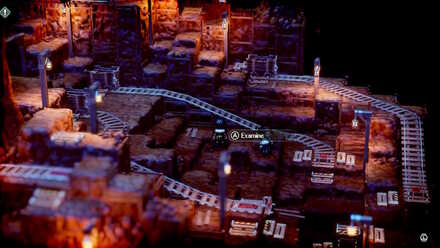
Diffuse Explosives Immediately
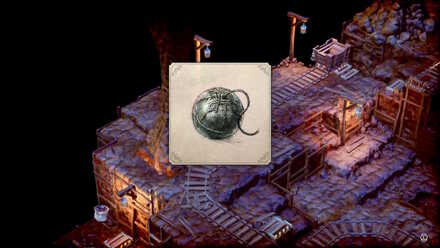
The biggest hurdle you need to clear for this battle is to diffuse the explosives as quickly as possible.
Allowing a single explosive to detonate will automatically result to a game over, so be sure to deal with them fast!
It is recommended to use the Quietus Lightwave to teleport to planted explosives far into the map, especially when they are close to detonating.
In addition, you can also use the Quietus Fleet-footed to raise the movement of all allies by 2 for 1 turn.
Quietuses Guide: List and How to Use
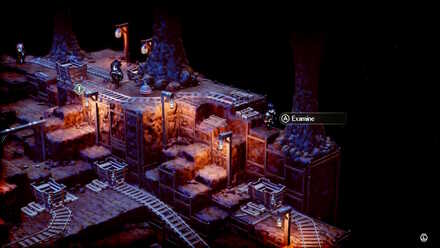
Move Swiftly Using the Carts

Given that the Quietus Lightwave is limited and should ideally be used to explosives close to detonating, players should consider using the carts spread out across the map instead.
Doing this will allow you to go back and forth from the map with ease should enemies from both ends of the map plant explosives.
In addition, units on the tracks of the cart will get damaged when the cart following that path is used. Use this to your advantage to deal damage to enemy units!
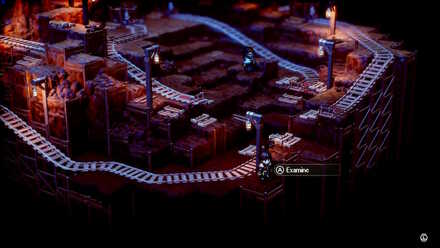
Get Ready for Reinforcements
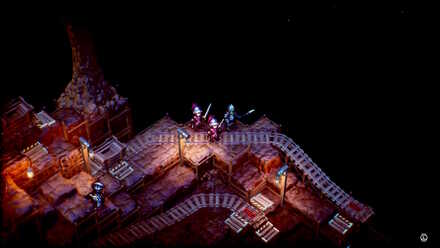
Enemy units in this battle are not that strong, but do expect reinforcements to arrive halfway into the battle.
Beating them should not be a problem, but always be prepared to wipe them out fast in case they plant explosives!
Chapter 16 General Tips
Make Use of the Map Features
This battle is unique as the map is highly interactive, as it features multiple carts that allow the player to traverse from one area to the next.
Since you're battling against time, it is highly recommended to use what the map offers to your advantage.
Triangle Strategy Related Guides
Previous and Next Chapters
| Previous Chapter | Next Chapter |
|---|---|
| Chapter 15-3: Fate |
Chapter 17: If Griefs Could Passions Move |

Author

Chapter 16: Sleep, My Friend Story Walkthrough, Dialogue Choices, and Item Locations
Rankings
- We could not find the message board you were looking for.
Gaming News


![Monster Hunter Stories 3 Review [First Impressions] | Simply Rejuvenating](https://img.game8.co/4438641/2a31b7702bd70e78ec8efd24661dacda.jpeg/thumb)
Popular Games

Genshin Impact Walkthrough & Guides Wiki
Honkai: Star Rail Walkthrough & Guides Wiki
Umamusume: Pretty Derby Walkthrough & Guides Wiki
Pokemon Pokopia Walkthrough & Guides Wiki
Resident Evil Requiem (RE9) Walkthrough & Guides Wiki
Monster Hunter Wilds Walkthrough & Guides Wiki
Wuthering Waves Walkthrough & Guides Wiki
Arknights: Endfield Walkthrough & Guides Wiki
Pokemon FireRed and LeafGreen (FRLG) Walkthrough & Guides Wiki
Pokemon TCG Pocket (PTCGP) Strategies & Guides Wiki


Recommended Games
Diablo 4: Vessel of Hatred Walkthrough & Guides Wiki
Cyberpunk 2077: Ultimate Edition Walkthrough & Guides Wiki
Fire Emblem Heroes (FEH) Walkthrough & Guides Wiki
Yu-Gi-Oh! Master Duel Walkthrough & Guides Wiki
Super Smash Bros. Ultimate Walkthrough & Guides Wiki
Pokemon Brilliant Diamond and Shining Pearl (BDSP) Walkthrough & Guides Wiki
Elden Ring Shadow of the Erdtree Walkthrough & Guides Wiki
Monster Hunter World Walkthrough & Guides Wiki
The Legend of Zelda: Tears of the Kingdom Walkthrough & Guides Wiki
Persona 3 Reload Walkthrough & Guides Wiki


All rights reserved
©2022 SQUARE ENIX CO., LTD. All Rights Reserved. Nintendo Switch is a trademark of Nintendo. © Nintendo.
The copyrights of videos of games used in our content and other intellectual property rights belong to the provider of the game.
The contents we provide on this site were created personally by members of the Game8 editorial department.
We refuse the right to reuse or repost content taken without our permission such as data or images to other sites.