This survey will take about 1 minute.
Your answers will help us to improve our website.
Super Smash Bros. Ultimate (SSBU)
Wario Guide: Matchup Chart and Combos
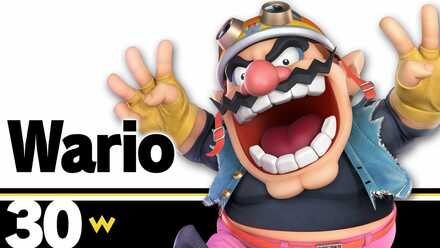
This is a guide to using Wario in Super Smash Bros. Ultimate. Wario's bread and butter combos, how to unlock, frame data, alt costumes and skins, as well as Wario's matchups, counters, and tier list placement can all be found here.
List of Contents
Wario Tier and Overview
Stats and General Info
| Wario | |
|---|---|
 |
|
| Game Series | Wario |
| Smash Bros. Debut | Super Smash Bros. Brawl |
| Fighter Number | 30 |
| Unlock Order | 24 |
| Number of Jumps | 2 |
| Weight | 107 Units (14/87) |
| Dash Speed | 1.65 (52/87) |
| Air Speed | 1.271 (8/87) |
| Fast Fall Speed | 2.576 (42/87) |
| Special Attributes | Crouch Walk |
Tier List Placement
 |
 Tier
Tier
|
A character with powerful hitboxes and an OHKO special
Smash Ultimate Wario has several long lasting aerial attacks that allow him to apply pressure and damage to opponents. His primary gameplan revolves around use of his aerials to tack on damage, finally comboing into Waft (down special), which can KO at extremely early percents. Waft can generally be used twice per match (if playing 3 stocks / 7 minutes).
Wario's primary means of recovery is his Side Special, which summons his bike. Compared to Smash 4, the time it takes before his bike can respawn has become longer, meaning that he will struggle to recover if he cannot gain access to it.
Wario's Strengths and Weaknesses
| Strengths | ・Being a heavyweight allows him to survive until high percents ・Extremely powerful down special, which can take stocks at very low percents and be comboed into ・Powerful aerial attacks ・Good at edgeguarding opponents (Nair, etc) ・Access to many powerful combos |
|---|---|
| Weaknesses | ・Being a heavyweight also means he gets comboed easily ・Rather slow movement speed ・Poor range, and struggles against characters who can zone him out ・Lacks a projectile |
Wario Matchup Chart
Matchup Chart
|
|
|
| -2 | |
|---|---|
| -1 | |
| 0 | |
| +1 | |
| +2 | |
Notes About Matchup Chart
1. -2 = Disadvantage. -1 = Slight Disadvantage or Even. 0 = Even. +1 = Slight Advantage or Even. +2 = Advantage.
2. The matchup chart was based around both the opinions of professional players of each character, as well as our own experience through playing Wario.
3. Characters within each tier are unordered
4. Pokemon Trainer's individual Pokemon (Squirtle, Ivysaur, and Charizard) as well as Echo fighters with no significant difference than their regular counterpart are not shown.
5. For other characters who are not shown here, we are still investigating the matchup.
Wario Combos
| Bread and Butter Combos |
|---|
| Up Air→Down Special Killing Combo (Only when Wario's fart is charged) |
| Up Throw→Up Air (Only when opponent is at low %) |
| Up Tilt→Up Tilt→Up Air |
| Advanced Combos |
| Nair→Nair→Up Air |
| Up Air→Up Tilt→Up Tilt→Nair→Up Air |
Bread and Butter Combos Explanation
Combo 1
Combo 2
Combo 3
| Up Air→Down Special |
|---|
| This combo can be used as a kill combo when an opponent's percent is middle or higher and Wario's fart is stored up. |
| Up Throw→Up Air |
|---|
| This combo can be used on opponents with lower percents. An easy combo that does around 25% damage. |
| Up Tilt→Up Tilt→Up Air |
|---|
| This combo can be used on opponents with lower percents. When your opponent comes in close, use this combo. |
Advanced Combos Explanation
Combo 4
Combo 5
| Nair→Nair→Up Air |
|---|
| This combo can be used on opponents with lower percents. Both hits of neutral air need to land for this combo to work. |
| Up Air→Up Tilt→Up Tilt→Nair→Up Air |
|---|
| This combo can be used on opponents with lower percents. You can rack up over 50% damage with this combo, so this complex combo is worth mastering. |
Wario Frame Data and Moveset
Best Out of Shield Options
| Move | Frames |
|---|---|
| Up B | 6 Frames |
| Neutral Air | 7 Frames |
| Forward Air | 8 Frames |
| Jump > Down B (Half-Waft) | 11 Frames |
| Up Smash | 11 Frames |
| Shield Grab | 12 Frames |
Wario's frame data and moveset gives him access to several good out of shield options, depending on the situation. His quickest out of shield option is his up special (Crokscrew), which will come out in only 6 frames, and can even KO opponents at higher percents. However, since this move doesn't have any follow-ups, and will leave him very vulnerable if whiffed, generally neutral air will be his go-to out of shield option, thanks to its quick startup and long lasting hitbox, although forward air is another good option, since it has quick startup as well and does more damage during the first active hitbox.
Another niche out of shield option Wario has is using his down special (Wario Waft) out of a jump. Note that the move's startup changes depending on how much charge it has, so only a half charged waft will allow him to use the move after a jump for a total of 11 frames. Up Smash can be used to hit opponents attacking from above Wario, coming out in 11 frames (although up special can be used for this as well). Shield grab is a somewhat slower option, and since Wario has limited follow-ups from his throws, generally an aerial will be a better option.
Jab (Neutral Attack)
| 1v1 Damage (%) | Startup Frames | |
|---|---|---|
| Jab 1 (A) |
4.8 | 8 |
| Jab 2 | 6 | 4 |
Jab
Wario's jab pushes opponents in front of you away. However, it's not a great get-off-me tool due to having a startup that is slower than most tilts, so it's not a very useful move overall.
Dash Attack / Tilts
| 1v1 Damage (%) | Startup Frames | |
|---|---|---|
| Dash Attack (Dash + A) |
13.2 | 5 |
| Dash Attack (Weak Hit) | 6 | 9 |
| Forward Tilt (← or → + A) |
15.6 | 12 |
| Up Tilt (↑ + A) |
7.2 | 8 |
| Up Tilt (Late Hit) |
6 | 11 |
| Down Tilt (↓ + A) |
4.8 | 5 |
Dash Attack
Wario's dash attack has a quick startup and is great for sending opponents away. The dash's speed and hitbox duration make it a decent approach tool as well, thanks to the fact that it can also cross-up shields. At higher percents, the move also has KO potential.
Forward Tilt
Wario's forward tilt is great for damage and knockback. However, it is not the best poking tool, due to the lengthy startup and cooldown. It can be angled up or down, and can KO at higher percents.
Up Tilt
Wario's up tilt has excellent vertical range, which makes it great as an anti-air attack or as a combo starter. Several of Wario's aerials can be comboed into from this move, as well as Wario Waft, which is an essential kill confirm.
Down Tilt
Wario's down tilt has a quicker startup than his Jab, so it's mainly used as an alternative over the Jab. It has good horizontal range, and is -7 on shield, making it a great poking tool. It also has follow-ups into dash attack or aerials, depending on the opponent's percent.
Smash Attacks
| 1v1 Damage (%) | Startup Frames | |
|---|---|---|
| Forward Smash (Smash ← or → + A) |
24 | 18 |
| Up Smash 1 (Smash ↑ + A) |
20.4 | 11 |
| Up Smash (delaye hit) | 15.6 | 13 |
| Down Smash (Smash ↓ + A) |
15.6 | 8 |
| Down Smash 1 (Strong Hit) | 15.6 | 8 |
| Down Smash (Sour Spot) | 12 | 18 |
| Down Smash 2 (last hit) | 6 | 28 |
Forward Smash
Wario's forward smash delivers a strong knockback, although, Wario has better KO moves, such as Forward Tilt, Dash Attack, and Down Special, so you won't need to resort to this particular move in most cases. It does have a large hitbox, but its endlag makes it punishable if whiffed.
Up Smash
Wario's up smash similarly delivers a strong vertical knockback. When attacking, Wario's head is intangible, which makes it good for anti-air attacks. His startup isn't as quick as Mario's Up Smash, and comes with a significant amount of endlag, so be careful about using it when you can easily be whiff punished.
Down Smash
Wario's down smash is a three-hit move with a quick startup. Because of the quick consecutive hits, it's good for covering a roll, but each hit successively decreases the knockback and damage dealt. It is Wario's fastest smash attack.
Aerials
| 1v1 Damage (%) | Startup Frames | |
|---|---|---|
| Neutral Air (A + no direction while airborne) |
7.2 | 4 |
| Neutral Air (2nd hit) |
4.8 | 20 |
| Forward Air (Hold ← or → in the direction you are facing + A while airborne) |
8.4 | 5 |
| Forward Air (Weak Hit) | 5.4 | 7 |
| Back Air (← or → Opposite of the direction you are facing + A while airborne) |
14.4 | 9 |
| Up Air 1 (↑ + A While Airborne) |
15.6 | 8 |
| Down Air (1st-6th hits) | 1.56 | 9/11/13/15/17/19 |
| Down Air (↓ + A While Airborne) |
4.8 | 21 |
Neutral Air
Wario's neutral air has a very quick startup, and its long lasting hitbox covers Wario's front and back. The two-hit attack can lead to some good aerial combos or serve as an effective get-off-me tool.
Forward Air
Wario's forward air similarly has a very quick startup. Since its attack range is greater than his neutral air's attack range, it's used when attacking from approaching from outside Nair's attack range. Additionally, its long lasting hitbox and knockback make it great for edgeguarding opponents offstage.
Back Air
Wario's back air is great for dealing damage and knockback, as it's the aerial with the most KO potential. However, Wario is very vulnerable during the attack's lengthy cooldown, so be careful not to miss and eat a punish.
Up Air
Wario's up air is excellent for vertical damage and knockback. It has a quick startup and is used for aerial combos or juggling an opponent. It can also combo into Waft, which is a very powerful KO confirm that will work at low to mid percents.
Down Air
Wario's down air is used to deal quick consecutive hits. The seven-hit attack can also be used as as quick way to get behind the opponent's shield while attacking. Wario is most vulnerable from his top and sides during the move, so be wary of attacks from those directions. At higher percents, it can KO an opponent.
Specials
| 1v1 Damage (%) | Startup Frames | |
|---|---|---|
| Neutral Special (B) |
- | 8 |
| Neutral Special (Bite) |
3.12 | 6 |
| Neutral Special (Release) |
6 | 11 |
| Neutral Special (eat) |
- | 10 |
| Neutral Special (large) |
- | 25.6 |
| Neutral Special (explosive) |
15.6 | 17 |
| Side Special (← or → + B) |
- | 20 |
| Side Special (Wheelie) |
- | 4 |
| Side Special (Wheelie hit) |
6 | 1 |
| Side Special (Exit Wheelie hit) |
15.6 | 10 |
| Side Special (turn, delayed) |
3.6 | - |
| Side Special (abandon) |
4.2/3 | 21 |
| Up Special (1st hit) |
6 | 6 |
| Up Special (2nd hit-4th hit) |
1.4/1.6/1.4/1.6 | 8/12/16/20 |
| Up Special (5th hit) |
4.8 | 29 |
| Down Special (Uncharged) |
0 | 16 |
| Down Special (1st charge) |
- | 10 |
| Down Special (Half Waft) |
- | 8 |
| Down Special (Full Waft) |
32.4 | 12 |
| Down Special (max charge, late hit) |
24 | 11 |
Neutral Special (Chomp)
Wario bites the opponent in his Neutral Special. Since it is a command grab, Wario's Chomp will work on shielded opponents. Chomp can also heal Wario. Eating items and projectiles (including Wario's Bike) can heal Wario, while eating explosives deal damage to Wario. Explosives do have a blast range, so others within the range get damaged as well.
Additionally, the charge of Wario's Down Special is affected by what he consumes with the Chomp.
| Item | Effect |
|---|---|
 Assist Trophy Assist Trophy | 1% recovery Does not summon. |
 Back Shield Back Shield | 1% recovery Does not equip. |
 Banana Gun Banana Gun | 1% recovery |
 Banana Peel Banana Peel | 1% recovery |
 Barrel Barrel | 1% recovery Takes longer to swallow. |
 Beam Sword Beam Sword | 1% recovery |
 Beastball Beastball | 1% recovery |
 Beehive Beehive | 1% recovery |
 Beetle Beetle | 1% recovery |
 Black Hole Black Hole | 1% recovery |
 Blast Box Blast Box | 3.6% damage to Wario 15.6% damage to opponents |
 Bob-omb Bob-omb | 3.6% damage to Wario 15.6% damage to opponents |
 Bombchu Bombchu | 3.6% damage to Wario 15.6% damage to opponents |
 Bomber Bomber | 3.6% damage to Wario 15.6% damage to opponents |
 Boomerang Boomerang | 1% recovery 0.2% recovery increase with each throw |
 Boss Galaga Boss Galaga | 1% recovery |
 Bullet Bill Bullet Bill | 1% recovery |
 Bumper Bumper | 1% recovery |
 Bunny Hood Bunny Hood | 1% recovery No change. |
 Capsule Capsule | 1% recovery |
 Crate Crate | 1% recovery Takes longer to swallow. |
 Cucco Cucco | Can't be eaten. |
 Daybreak Parts Daybreak Parts | 1% recovery Item effect when used will also take place. |
 Death's Scythe Death's Scythe | 1% recovery |
 Deku Nut Deku Nut | 1% recovery |
 Dragoon Parts Dragoon Parts | 1% recovery Item effect when used will also take place. |
 Drill Drill | 1% recovery |
 Fairy Bottle Fairy Bottle | 1% recovery if Wario is at less than 100% damage 100% recovery if 100% or above |
 Fake Smash Ball Fake Smash Ball | Can't be eaten. |
 Fire Bar Fire Bar | 1% recovery |
 Fire Flower Fire Flower | 1% recovery |
 Food Food | 1.5% recovery |
 Franklin Badge Franklin Badge | 1% recovery Does not equip. |
 Freezie Freezie | 1% recovery |
 Golden Hammer Golden Hammer | 1% recovery |
 Gooey Bomb Gooey Bomb | 3.6% damage to Wario 15.6% damage to opponents |
 Grass Grass | Can't be eaten. |
 Green Shell Green Shell | 1% recovery |
 Gust Bellows Gust Bellows | 1% recovery |
 Hammer Hammer | 1% recovery |
 Healing Field Healing Field | 1% recovery Can't be eaten after field deployment. |
 Healing Sprout Healing Sprout | 1% recovery No gradual heal. |
 Heart Container Heart Container | Same as when used. |
 Hocotate Bomb Hocotate Bomb | 3.6% damage to Wario 15.6% damage to opponents |
 Home-Run Bat Home-Run Bat | 1% recovery |
 Hothead Hothead | 1% recovery 1.2% recovery after installation |
 Killer Eye Killer Eye | 1% recovery |
 Killing Edge Killing Edge | 1% recovery |
 Lightning Lightning | 1% recovery Item effect when used will also take place. |
 Lip's Stick Lip's Stick | 1% recovery |
 Master Ball Master Ball | Can't be eaten. |
 Maxim Tomato Maxim Tomato | 1.5% recovery |
 Metal Box Metal Box | 1% recovery Item effect when used will also take place. |
 Motion-Sensor Bomb Motion-Sensor Bomb | 3.6% damage to Wario 15.6% damage to opponents Can still be eaten after installation. |
 Mr. Saturn Mr. Saturn | Can't be eaten. |
 Ore Club Ore Club | 1% recovery |
 Party Ball Party Ball | 1% recovery Takes longer to swallow. |
 Pitfall Pitfall | 1% recovery Can't be eaten after installation. |
 Poison Mushroom Poison Mushroom | 1% recovery Item effect when used will also take place. |
 Poké Ball Poké Ball | Can't be eaten. |
 POW Block POW Block | 1% recovery |
 Rage Blaster Rage Blaster | 1% recovery |
 Ramblin' Evil Mushroom Ramblin' Evil Mushroom | 1% recovery |
 Ray Gun Ray Gun | 1% recovery |
 Rocket Belt Rocket Belt | 1% recovery Does not equip. |
 Rolling Crate Rolling Crate | 1% recovery Takes longer to swallow. |
 Sandbag Sandbag | Wario will bite multiple times, like when used on an opponent. |
 Screw Attack Screw Attack | 1% recovery Does not equip. |
 Smart Bomb Smart Bomb | 3.6% damage to Wario 15.6% damage to opponents |
 Smash Ball Smash Ball | Can't be eaten. |
 Smoke Ball Smoke Ball | 1% recovery |
 Soccer Ball Soccer Ball | 1% recovery |
 Special Flag Special Flag | 1% recovery |
 Spiny Shell Spiny Shell | 1% recovery |
 Staff Staff | Can't be eaten. |
 Star Rod Star Rod | 1% recovery |
 Steel Diver Steel Diver | 1% recovery |
 Super Launch Star Super Launch Star | 1% recovery |
 Super Leaf Super Leaf | 1% recovery Does not equip. |
 Super Mushroom Super Mushroom | 1% recovery Item effect when used will also take place. |
 Super Scope Super Scope | 1% recovery |
 Super Star Super Star | 1% recovery Item effect when used will also take place. |
 Superspicy Curry Superspicy Curry | Same as when used. |
 Timer Timer | 1% recovery Item effect when used will also take place. |
 Unira Unira | 1% recovery |
 Warp Star Warp Star | No recovery Item effect when used will also take place. |
 X Bomb X Bomb | 3.6% damage to Wario 15.6% damage to opponents |
Side Special (Wario Bike)
Wario drives around the stage on his motorcycle during his Side Special. Pressing up makes Wario do a wheelie, and pressing down lowers the front wheel. Bringing down the wheel results in a powerful ground slam, but changing the position of the wheel, in general, changes the hitbox and knockback potential of the move.
Additionally, the bike can also be ridden in the air or thrown at opponents, to launch them back a decent distant. This makes it one of Wario's main recovery tools, as it can be used before a double jump, and it provides much better horizontal recovery than corkscrew does.
The bike is on screen for a limited amount of time. The bike can be dismounted, destroyed, or even eaten before it disappears. After this, Wario must touch the stage at least once, and have 6 seconds pass before being able to reuse it.
Up Special (Corkscrew)
Wario's Up Special launches straight up into the air while rotating his body. Since the special has hitboxes to its side, it could be used as a quick out of shield punish, in addition to a recovery. However, the vertical distance is fairly short, and he's vulnerable to attacks from above, so it's better to prioritize using the Wario Bike for recovery, and only use corkscrew when already near the ledge.
Down Special (Wario Waft)
Wario's Down Special is an attack using Wario's flatulence. The charge of the attack increases as time passes, and if Wario eats items with his neutral special. A higher charge results in greater damage and knockout. The charge cannot be depleted unless the move is utilized, meaning that it will stay with Wario even if he is KO'ed.
At no charge, the attack deals no damage. At low or half charge, the move deals moderate damage and knockback. At maximum charge, Wario will glow and be sent flying upwards with a powerful headbutt hitbox when the special is used. In a 7 minute match, Wario can usually get out a full waft twice, as it takes about two minutes to get out. It can be comboed into from an up aerial, resulting in a very early kill confirm.
Grabs and Throws
| 1v1 Damage (%) | Startup Frames | |
|---|---|---|
| Pummel | 1.92 | 2 |
| Grab (Normal) | - | 8 |
| Dash Grab | - | 11 |
| Pivot Grab | - | 12 |
| Forward Throw (Hitbox) (← or → While Grabbing) |
4.8 | 20 |
| Forward Throw (Throw) | 9.6 | 21 |
| Back Throw (Hitbox) (← or → While Grabbing) |
8.4 | 48 |
| Up Throw (Hitbox) (↑ While Grabbing) |
4.8 | 24 |
| Up Throw (Throw) | 4.8 | 26 |
| Down Throw (Hitbox) (↓ While Grabbing) |
4.8 | 22 |
| Down Throw (Throw) | 8.4 | 30 |
Forward Throw
Wario's forward throw is used for launching the opponent forward. The throw's lengthy cooldown makes it unsuitable for combos.
Back Throw
Conversely, Wario's back throw is used for launching the opponent backward. It similarly has a lengthy cooldown that's not suitable for combos.
Up Throw
Wario's up throw throws the opponent upwards. It could connect to an Uair if at a lower percentages, so it is Wario's go-to throw.
Down Throw
Wario's down throw slams on the opponent thrown to the ground. The throw's lengthy cooldown also makes it unsuitable for combos.
Final Smash
| Attack | How to Use | Effect |
|---|---|---|
| Wario Man | Press B after obtaining the Smash Ball | Wario eats garlic and transforms into Wario Man, then rushes forward and hits an opponent. The opponent will be hit by several Wario Man copies, resulting in a final powerful Wario Waft that deals heavy knockback and damage. |
Wario Balance Changes
Version 13.0.1 Balance Patch
| Change | |
|---|---|
| Neutral Attack 1 | Increased power. Reduced vulnerability. |
| Neutral Attack 2 | Increased attack power while maintaining launch distance. Reduced vulnerability. |
Version 11.0.0 Balance Patch
| Change | |
|---|---|
| Up Tilt | Decreased the amount of active frames. |
| Down Special | Increased startup frames on half waft. Increased startup frames on full waft. |
Version 3.0.0 Balance Patch
| Change | |
|---|---|
| Neutral Special | Made it easier to eat projectiles. |
Version 2.0.0 Balance Patch
| Change | |
|---|---|
| Down Air Attack | Shortened the amount of time you cannot grab edges after using the move. |
Major Changes From Smash 4
| Change | |
|---|---|
| Side Special (← or → + B) |
Longer cooldown to summon bike after it is destroyed or falls off the map. Nerf. |
| Neutral Special (B) |
Healing properties increased depending on damage of move eaten.Buff. |
| Down Special (↓ + B) |
Waft now charges up faster than before. Buff. |
How to Unlock Wario
| Unlocking Via Smash Mode |
|---|
| 24th Fighter Unlocked After unlocking Lucina, let 10 minutes pass OR play another battle in smash after soft-resetting OR return to the menu from World of Light |
| Unlocking via Classic Mode |
| Clear Classic Mode 7 times using Samus. |
| Unlocking via World of Light |
| Dracula's Castle |
There are three ways to unlock Wario. Completing any of these, then defeating Wario when they appear in the “a New Challenger Appears” screen will allow you to use them afterward.
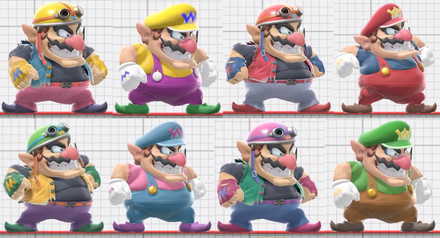
Wario Alt Costumes and Skins
Wario Reveal Trailer
Smash Ultimate Character Guides
 List of Fighters |
|
 Tier List |
 Unlocking Fighters |
Character Stat Lists
| Character Stats | |
|---|---|
| Weights of All Characters | Run Speeds of All Characters |
| Air Speeds of All Characters | Fast Fall Speeds of All Characters |
Comment
2  Anonymous about 4 years
Why does this chart have Olimar and Yoshi in both +1 and -1 at the same time?
Author

Wario Guide: Matchup Chart and Combos
Please participate in our site
improvement survey
03/2026
improvement survey
03/2026
Would you assist in
improving Game8's site?
improving Game8's site?

×
We are listening to our users' valuable opinions and discussing how to act on them.
The information collected through this survey will be used for the purpose of improving our services. In addition, the information will only be disclosed a part of a statistic in a format that will not allow identification of personal information.
Begin Survey
Not Now
×
Please rate each item regarding Game8.co's Advertisements.
Amount of Ads
Very Dissatisfied
Somewhat Dissatisfied
Fine
Somewhat Satisfied
Highly Satisfied
Placement of Ads
Timing of Ad Display
Ad Loading Speed
Safeness of Ads
Content of Ads
×
Please rate each item regarding Game8.co's Quality of Articles.
Amount of information
Very Dissatisfied
Somewhat Dissatisfied
Fine
Somewhat Satisfied
Highly Satisfied
Frequency of updates
Speed of new information
Accuracy of articles
Understandibility of articles
Readability of sentences
×
Please rate each item regarding Game8.co's Usability of the Site.
Ease of finding information
Very Dissatisfied
Somewhat Dissatisfied
Fine
Somewhat Satisfied
Highly Satisfied
Loading Speed
Use of Color
Font Size
Visibility of Images
Easy to Understand Layout
×
Please rate each item regarding Game8.co's Message Boards, Comments.
Ease of Writing
Very Dissatisfied
Somewhat Dissatisfied
Fine
Somewhat Satisfied
Highly Satisfied
Readability
Ease in Finding Information
Comment Quality
Comment Quantity
Admin Response
×
Please rate each item regarding Game8.co's Site's new design.
Please rate our site's new design
Very Dissatisfied
Somewhat Dissatisfied
Fine
Somewhat Satisfied
Highly Satisfied
Do you think that the website's design change makes the site easier to use?
Has the new design made it easier for you to find information on the site?
Has the new design improved the overall visual appeal of the site?
How would you rate your overall satisfaction with the new design of the site?
×
How likely are you to recommend Game8 to someone you know?
Very Unlikely
0
1
2
3
4
5
6
7
8
9
10
Very Likely
If you have other opinions regarding potential improvement to the website, please share them with us. We would appreciate your honest opinion.
Note: This is a free response section, so you can proceed without entering anything.
Note: Please be sure not to enter any kind of personal information into your response.
Note: Please be sure not to enter any kind of personal information into your response.
×
Thank You
×
Thank you for participating in our survey! Your answers will help us to improve the quality of our website and services.
We hope you continue to make use of Game8.
We hope you continue to make use of Game8.
Close
Rankings
- We could not find the message board you were looking for.
Gaming News


![Slay the Spire 2 Review [Early Access] | Still the Deckbuilder to Beat](https://img.game8.co/4433115/44e19e1fb0b4755466b9e516ec7ffb1e.png/thumb)

![Resident Evil Village Review [Switch 2] | Almost Flawless Port](https://img.game8.co/4432790/e1859f64830960ce4248d898f8cd38d9.jpeg/thumb)
Popular Games

Genshin Impact Walkthrough & Guides Wiki
Honkai: Star Rail Walkthrough & Guides Wiki
Umamusume: Pretty Derby Walkthrough & Guides Wiki
Pokemon Pokopia Walkthrough & Guides Wiki
Resident Evil Requiem (RE9) Walkthrough & Guides Wiki
Monster Hunter Wilds Walkthrough & Guides Wiki
Wuthering Waves Walkthrough & Guides Wiki
Arknights: Endfield Walkthrough & Guides Wiki
Pokemon FireRed and LeafGreen (FRLG) Walkthrough & Guides Wiki
Pokemon TCG Pocket (PTCGP) Strategies & Guides Wiki


Recommended Games
Fire Emblem Heroes (FEH) Walkthrough & Guides Wiki
Diablo 4: Vessel of Hatred Walkthrough & Guides Wiki
Yu-Gi-Oh! Master Duel Walkthrough & Guides Wiki
Super Smash Bros. Ultimate Walkthrough & Guides Wiki
Pokemon Brilliant Diamond and Shining Pearl (BDSP) Walkthrough & Guides Wiki
Elden Ring Shadow of the Erdtree Walkthrough & Guides Wiki
Monster Hunter World Walkthrough & Guides Wiki
The Legend of Zelda: Tears of the Kingdom Walkthrough & Guides Wiki
Persona 3 Reload Walkthrough & Guides Wiki
Cyberpunk 2077: Ultimate Edition Walkthrough & Guides Wiki


All rights reserved
© 2018 Nintendo
Original Game: © Nintendo / HAL Laboratory, Inc.
Characters: © Nintendo / HAL Laboratory, Inc. / Pokémon. / Creatures Inc. / GAME FREAK inc. / SHIGESATO ITOI / APE inc. / INTELLIGENT SYSTEMS /
SEGA / CAPCOM CO., LTD. / BANDAI NAMCO Games Inc. / MONOLITHSOFT / CAPCOM U.S.A., INC. / SQUARE ENIX CO., LTD.
The copyrights of videos of games used in our content and other intellectual property rights belong to the provider of the game.
The contents we provide on this site were created personally by members of the Game8 editorial department.
We refuse the right to reuse or repost content taken without our permission such as data or images to other sites.
I have no idea lol