This survey will take about 1 minute.
Your answers will help us to improve our website.
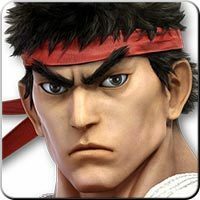
Super Smash Bros. Ultimate (SSBU)
Ryu Guide: Matchup Chart and Combos | List of Ryu Command Inputs

This is a guide to using Ryu in Super Smash Bros. Ultimate. Ryu's bread and butter combos, how to unlock, frame data, alt costumes and skins, as well as Ryu's matchups, counters, and tier list placement can all be found here.
List of Contents
Ryu Tier and Overview
Stats and General Info
| Ryu | |
|---|---|
 |
|
| Game Series | Street Fighter |
| Smash Bros. Debut | Super Smash Bros. for WiiU/3DS |
| Fighter Number | 60 |
| Unlock Order | 13 |
| Number of Jumps | 2 |
| Weight | 103 Units (27/87) |
| Dash Speed | 1.6 (59/87) |
| Air Speed | 1.12 (30/87) |
| Fast Fall Speed | 2.24 (66/87) |
| Special Attributes | None |
Tier List Placement
 |
 Tier
Tier
|
A close range brawler with explosive kill power
Smash Ultimate Ryu has the unique mechanic (shared with Ken and Terry), which allows him to always face an opponent in 1 vs 1 battles. Ryu has very potent combos and powerful moves like Shoryuken (Command Input) and Down Aerial that are great for KOing. Ryu also has the Shakunetsu Hadoken, a fire-based Hadoken projectile. His deadly combo game and powerful finishers allow him to deal devastating damage to opponents after finding an opening.
Ryu has somewhat underwhelming mobility, as well as a poor recovery. His attacks also lack range, and thus he struggles against swordies and characters with projectiles. This also makes it a bit difficult for Ryu to approach opponents in order to start combos. Ryu players will need to be careful not to get edgeguarded and be creative with their approachーif they can find an opening and take advantage of it, they can be rewarded greatly!
Ryu's Strengths and Weaknesses
| Strengths | ・When using the command-input, Shryuken KOs foes very early ・Super Armor on Down Special ・Has a good projectile (neutral special and Shakunetsu Hadoken) ・Will auto-turn to face 1 vs 1 opponents, making it easy to hit his moves ・Extremely deadly combo game |
|---|---|
| Weaknesses | ・Always faces the opponent, and thus cannot use Bair easily ・Poor recovery makes him easy to edgeguard ・Somewhat high execution (getting used to command inputs and auto-turn) ・Focus Attack is easy to counter ・Struggles to land when put in disadvantage |
Ryu Matchup Chart
Matchup Chart
|
|
|
| -2 | |
|---|---|
| -1 | |
| 0 | |
| +1 | |
| +2 | |
Notes About Matchup Chart
1. -2 = Disadvantage. -1 = Slight Disadvantage or Even. 0 = Even. +1 = Slight Advantage or Even. +2 = Advantage.
2. The matchup chart was based around both the opinions of professional players of each character, as well as our own experience through playing Ryu.
3. Characters within each tier are unordered
4. Pokemon Trainer's individual Pokemon (Squirtle, Ivysaur, and Charizard) as well as Echo fighters with no significant difference than their regular counterpart are not shown.
5. For other characters who are not shown here, we are still investigating the matchup.
List of Ryu's Command Inputs
Command-Input Moves
| Command Name | Description |
|---|---|
| Hadoken (↓↘→+AorB) |
Deals 1.25 more damage than the regular Hadoken. |
| Shakunetsu (←↙↓↘→+AorB) |
A stronger Hadoken that deals multiple hit at the enemy. |
| Tatsumaki Senpuu Kyaku (↓↙←+AorB) |
Deals 1.16 times more damage than the regular input. |
| Shoryuken (→↓↘+AorB) |
Grants increased invulnerability (Iframes) and more damage than the standard input. |
Easy Commands
These commands can be used to execute these moves without relying on the regular input that was listed on the command list.
| Command Name | Description |
|---|---|
| Shakunetsu (↙↓↘→+AorB) |
A shorter input for Shakunetsu that doesn't force Ryu into performing a back step. |
| Shoryuken (↘↓↘+AorB) or (→↘→+AorB) |
An alternate input to Shoryuken. This can be used easily after performing Ftilts or Downtilts. |
Ryu Combos
| Bread And Butter Combo Guides |
|---|
| Jab → Jab → Shoryuken (→↓↘+AorB) |
| Up Tilt → Shoryuken(→↘→+AorB) |
| DTilt→Shoryuken(↘↓↘+AorB) |
| Advanced Combo Guides |
| Short Hop → Dair → Short Hop → Dair |
| Focus Attack → Backstep (Cancel Focus Attack's Animation)→Short Hop→Nair→DTilt→DTilt→Shoryuken(↘↓↘+AorB) |
Bread And Butter Combo Guides
Combo 1
Combo 2
Combo 3
| Jab → Jab → Shoryuken (→↓↘+AorB) |
|---|
| A full 1-2 combo that can kill high percentage enemies. Make sure to quickly input Shoryuken after the second input. |
| Up Tilt → Shoryuken(→↘→+AorB) |
|---|
| A quick combo that can kill enemies at high percentages. Up tilt has short frames and can be used to punish enemies. |
| DTilt→Shoryuken(↘↓↘+AorB) |
|---|
| A low combo that can kill enemies at high percentages. It also uses down tilt first so it can potentially go through enemies that are turtling if their shield gets smaller. |
Advanced Combo Guides
Combo 4
Combo 5
| Short Hop→Dair→Short Hop→Dair |
|---|
| A short hop falling down air into a fast short hop down air against enemies will easily allow you to execute a combo with a meteor effect. It can also effectively surprise enemies that are near the ledge for a quick KO. |
| Focus Attack→Backstep(Cancel Focus Attack's Animation)→Short Hop→Nair→DTilt→DTilt→Shoryuken(↘↓↘+AorB) |
|---|
| This combo requires precise inputs into canceling the full animation of Ryu's Focus Attack and executing a short hop. Do not wait for Focus Attack's ending animation, cancel it quickly with a backstep then go for a short hop then execute the rest of the combo. |
Ryu Frame Data and Moveset
Best Out of Shield Options
| Move | Frames |
|---|---|
| Up B | 6 Frames |
| Neutral Air | 7 Frames |
| Up Smash | 9 Frames |
| Up Air | 9 Frames |
| Shield Grab | 10 Frames |
| Foward Air | 11 Frames |
| Back Air | 11 Frames |
Ryu has quick startup on his aerials, as well as a very fast up special and decently quick grab. Up special (Shoryuken) is the go-to out of shield option, since it comes out so quickly, and can KO opponents reliably. Any of his aerials, such as neutral air, can be used as well, and are less committal. His shield grab has decent startup, but short range and limited follow-ups, so it is usually not the best option.
Jab (Neutral Attack)
| 1v1 Damage (%) | Startup Frames | |
|---|---|---|
| Jab 1 - Light (A) |
1.8 | 2 |
| Jab 1 - Heavy, Close | 14.4/9.6 | 7/8 |
| Jab 1 - Heavy, Far | 12.0 | 9 |
| Jab 2 | 1.8 | 3 |
| Jab 3 | 6.0 | 8 |
Jab
Ryu's jab can be comboed into a Shoryuken. Jabs can be used as a counter to approaching opponents. Depending on how close Ryu is to an opponent when using the move, the startup and damage will differ.
Dash Attack / Tilts
| 1v1 Damage (%) | Startup Frames | |
|---|---|---|
| Dash Attack (Dash + A) |
14.4 | 7 |
| Dash Attack (Weak Hit) | 9.6 | 10 |
| Forward Tilt - Heavy (← or → + A) |
3.6/7.2 | 16/18 |
| Forward Tilt - Light | 7.2/8.16 | 3/8 |
| Up Tilt - Heavy (↑ + A) |
14.4/9.6 | 7/8 |
| Up Tilt - Light | 2.4 | 3 |
| Down Tilt - Heavy (↓ + A) |
8.4 | 6 |
| Down Tilt - Light | 1.92 | 2 |
Dash Attack
Ryu's Dash Attack has a quick startup and long-lasting hitbox. It can be used to whiff punish, and to catch an opponent in landing lag.
Forward Tilt
Ryu's heavy Forward Tilt is a downward punch that can break shields when the A button is held. This is move is great to use after conditioning your opponent to shield a lot. Additionally, the light far forward tilt has good range, and is a good poking tool.
Up Tilt
Ryu's Forward Tilt releases a quick elbow attack by pressing the Attack button briefly. This can be used as a starting point for a combo that links into a Shoryuken, so use it to KO opponents with high percents. It's very potent when used to punish an opponent's ledge jump.
Down Tilt
Ryu's Down Tilt can activate a short kick by pressing attack briefly. This move can also start a combo that leads into Shoryuken.
If you hold attack for a long time, you can perform a long-reaching sweep. SInce your opponent gets launched lightly, you can combo this into Hadouken.
Smash Attacks
| 1v1 Damage (%) | Startup Frames | |
|---|---|---|
| Forward Smash (Smash ← or → + A) |
19.2/21.0 | 15 |
| Up Smash 1 (Smash ↑ + A) |
20.4 | 9 |
| Up Smash (Weak Hit) | 16.2 | 10 |
| Down Smash (Smash ↓ + A) |
19.2/14.4 | 5 |
Forward Smash
Ryu's Forward Smash is a kick that has him advance slightly when he performs it, so its hitbox has good range. It's mostly used to hit opponents recovering at the ledge.
Up Smash
Ryu's Up Smash comes out quickly and can be used out of shield, so use it to counter your opponent's big moves with long end lag.
Down Smash
Ryu's Down Smash comes out quickly and has good range. You can hit opponents on the ledge, so use this move out of a dash for a quick punish.
Aerials
| 1v1 Damage (%) | Startup Frames | |
|---|---|---|
| Neutral Air (A + no direction while airborne) |
9.6 | 4 |
| Neutral Air (Weak Hit) | 5.4 | 7 |
| Forward Air (Hold ← or → in the direction you are facing + A while airborne) |
16.8/10.8 | 8 |
| Forward Air (Weak Hit) | 14.4/9.6 | 10 |
| Back Air (← or → Opposite of the direction you are facing + A while airborne) |
19.2/15.6 | 8 |
| Up Air Hit 1 (↑ + A While Airborne) |
6.0 | 6 |
| Up Air Hit 2 | 7.2 | 10 |
| Down Air (↓ + A While Airborne) |
14.4 | 8 |
Neutral Air
Ryu's Neutral Air has a long lasting hitbox, so it's easy to hit approaching opponents with it. It's a good landing option for opponents that try and catch your landing.
Forward Air
Ryu's Forward Air has a long lasting hitbox and deals excellent damage. Additionally, you can connect it to Shoryuken depending on how you hit it.
Back Air
Ryu's Back Air is a technique that comes out quickly and has high damage. However, it is difficult to pull off because Ryu automatically faces his opponent in 1v1 battles. In order to be able to pull this off, you'll need to become very good at using a RAR back air (reverse aerial rush).
Up Air
Ryu's Up Air is a two-hit uppercut in the air. If it connects, you can Shoryuken straight out of it for a combo.
Down Air
Ryu's Down Air can meteor smash diagonally. Do this by the ledge to try and land an edgeguard, but beware that Ryu has a poor recovery.
Specials
| 1v1 Damage (%) | Startup Frames | |
|---|---|---|
| Neutral Special - Hadouken (B) |
7.2 | 12 |
| Neutral Special - Hadouken, Long Press 1 | 7.8 | 12 |
| Neutral Special - Hadouken, Long Press 2 | 8.4 | 12 |
| Neutral Special - Shakunetsu Hadouken | 1.32 | 12 |
| Neutral Special - Shakunetsu Hadouken (Finisher) | 6.0 | 4 |
| Side Special - Common, Start (← or → + B) |
10.8 | 8 |
| Side Special - Ground, Late Hit, Normal | 10.8/9.6 | 8 |
| Side Special - Ground, Late Hit, Long Press 1 | ? | 8 |
| Side Special - Ground, Late Hit, Long Press 2 | 13.2 | 8 |
| Side Special - Air, Late Hit, Normal | 9.6/8.4 | 8 |
| Side Special - Air, Late Hit, Long Press 1 | 10.8/10.2 | 8 |
| Side Special - Air, Late Hit, Long Press 2 | 12.0 | 8 |
| Up Special - Ground, Start, Normal (↑ + B) |
15.6 | 6 |
| Up Special - Ground, Long Press 1 | 16.8 | 6 |
| Up Special - Ground, Long Press 2 | 18.0 | 6 |
| Up Special - Ground, Late Hit 1 | 14.4 | 7 |
| Up Special - Ground, Late Hit 2 | 8.4 | 9 |
| Up Special - Aerial, Start, Normal (↑ + B) |
14.4 | 6 |
| Up Special - Aerial, Long Press 1 | 15.6 | 6 |
| Up Special - Aerial, Long Press 2 | 16.8 | 6 |
| Up Special - Aerial, Late Hit 1 | 12.0 | 7 |
| Up Special - Aerial, Late Hit 2 | 8.4 | 9 |
| Down Special - Charge 1, Fastest (↓ + B) |
14.4 | 32 |
| Down Special - Charge 2, Fastest | 12.0 | 42 |
| Down Special - Charge 3 | 20.4 | 70 |
Neutral Special (Hadouken)
The Hadouken is a ranged projectile that can control the opponent's movements and limit their options, so it is a very important tool to Ryu, since it is one of his best poking tools, and can deal great damage (especially when the ← ↙ ↓ ↘ → +A/B command input is used).
Side Special (Tatsumaki Senpukyaku)
Ryu's Side Special is the Tatsumaki, which can travel farther the longer you press the button. Use this for horizontal recovery, or for reading an opponent's roll. Be careful as you can only use this once in the air.
Thanks to the move's intangibility, it is a great approach tool, especially for closing the gap on zoners, and at high percents, it can KO.
Up Special (Shoryuken)
Ryu's Up Special is the Shoryuken, which is used both as a recovery move and a combo finisher. To use it more effectively as a KO move, make sure to use its command input, as it will deal more damage and knockback.
Down Special (Focus Attack)
Ryu's Down Special is Focus Attack, which grants a super armor effect that can take one attack and follow up with a counter. If charged fully, the opponent will get stunned on hit, opening them up for further attacks.
How to Cancel a Special Attack
You can cancel special attack by flicking the stick twice either left and right either during Ryu's charge up pose or immediately after the attack hits.
Grab / Throws
| 1v1 Damage (%) | Startup Frames | |
|---|---|---|
| Pummel | 1.56 | 1 |
| Grab (Normal) | - | 6 |
| Dash Grab | - | 9 |
| Pivot Grab | - | 10 |
| Forward Throw (Throw) (← or → While Grabbing) |
10.8 | 16 |
| Back Throw (Throw) (← or → While Grabbing) |
14.4 | 23 |
| Up Throw (Hitbox) (↑ While Grabbing) |
18.0 | 25 |
| Up Throw (Throw) | 9.6 | 18 |
| Down Throw (Hitbox) (↓ While Grabbing) |
3.6 | 18 |
| Down Throw (Throw) | 7.2 | 19 |
Forward Throw
Forward Throw has a strong knockback angle so try to use it to put opponents over the ledge then prevent them from recovering.
Back Throw
Back Throw has a strong knockback angle so try to use it to put opponents off the stage, and prevent them from recovering.
Up Throw
The opponent is launched slightly upwards. This will connect with up air at low percentages.
Down Throw
The opponent is pummeled downwards then launched slightly upwards. This will connect with up air at low percentages, and is Ryu's go to throw at early percents.
Final Smash
| Attack | How to Use | Effect |
|---|---|---|
| Shin Shoryuken / Shinku Hadoken | Press B after obtaining the Smash Ball | Ryu's Final Smash changes based on how close he is to the opponent. At long range, he uses a powerful Hadoken, which can hit multiple enemies. At close range, he will perform a super powerful uppercut attack. |
Ryu Balance Changes
Version 13.0.1 Balance Patch
| Change | |
|---|---|
| Tilt Attack (Strong) | Increased attack speed.v |
| Neutral Special | Increased attack power while maintaining launch distance for light, medium, heavy, and command-input attacks. |
| Side Special | Reduced vulnerability for light, medium, heavy, and command-input attacks when used on the ground. |
Version 12.0.0 Balance Patch
| Change | |
|---|---|
| Neutral Special | Made it easier to hit multiple times when hitting an opponent on the ground with Shakunetsu Hadoken. |
Version 7.0.0 Balance Patch
| Change | |
|---|---|
| Down Tilt Attack (Heavy) |
Adjusted launch angle. |
| Down Smash Attack | Now possible on hit to cancel the attack animation into a special move. Reduced the power against shields. |
| Neutral Special | Increased the opponent’s downtime when shielding against Hadoken. Made it easier for Shakunetsu Hadoken to hit multiple times. |
| Side Special | Made the pivoting leg invincible while rotating when used on the ground. Increased power. Extended launch distance when hit in the high-damage range. |
| Other | Increased shield size. |
Version 4.0.0 Balance Patch
| Change | |
|---|---|
| Basic Movements | The attack after a perfect shield will be unleashed after facing the opponent. |
Version 3.1.0 Balance Patch
| Change | |
|---|---|
| Neutral Attack 1 | Increased the amount of time you can cancel with a special move. |
| Neutral Attack 2 | Increased the amount of time you can cancel with a special move. |
| Neutral Attack (Strong, Close Range) |
Adjusted launch angle and distance. |
| Side Tilt Attack (Weak, Close Range) |
Increased the amount of time you can cancel with a special move. |
| Side Tilt Attack (Weak, Long Range) |
Increased attack range for the tip. |
| Up Tilt Attack (Strong) |
Adjusted launch angle when hitting an airborne opponent. |
| Down Tilt Attack (Weak) |
Increased the amount of time opponents will be in the damage animation when the move hits. |
| Down Tilt Attack (Strong) |
Shortened launch distance. |
| Up Air Attack | Increased the amount of time hit detection lasts. Increased attack range. |
| Neutral Special | Decreased the speed for light Hadoken and light Shakunetsu Hadoken, and increased speed for heavy Hadoken and heavy Shakunetsu Hadoken. Increased attack speed and power of Hadoken and Shakunetsu Hadoken. Increased the range Hadoken will hit opponents on the ground. |
| Side Special | Increased the first attack’s range when the move is performed on the ground. |
Version 3.0.0 Balance Patch
| Change | |
|---|---|
| Edge Attack | Shortened hitstun time. |
Version 2.0.0 Balance Patch
| Change | |
|---|---|
| Neutral Attack | Opponents hit in the air will be launched, making it easier to hit them with the next hit. |
| Forward Air Attack | Shortened the landing time after using the move. |
| Down Tilt Attack | Can no longer jump immediately after using the move. |
Major Changes From Smash 4
| Change | |
|---|---|
| General | During 1 Vs 1 battles, Ryu now has an auto-turn feature so that he will always face his opponent. |
How to Unlock Ryu
| Unlocking Via Smash Mode |
|---|
| 13th Fighter Unlocked After unlocking Peach, let 10 minutes pass OR play another battle in smash after soft-resetting OR return to the menu from World of Light |
| Unlocking via Classic Mode |
| Clear Classing Mode 3 times using Yoshi. |
| Unlocking via World of Light |
| World Tour |
There are three ways to unlock Ryu. Completing any of these, then defeating Ryu when they appear in the “a New Challenger Appears” screen will allow you to use them afterward.
Ryu Alt Costumes and Skins

Ryu Reveal Trailer
Smash Ultimate Character Guides
 List of Fighters |
|
 Tier List |
 Unlocking Fighters |
Character Stat Lists
| Character Stats | |
|---|---|
| Weights of All Characters | Run Speeds of All Characters |
| Air Speeds of All Characters | Fast Fall Speeds of All Characters |
Comment
Author

Ryu Guide: Matchup Chart and Combos | List of Ryu Command Inputs
Please participate in our site
improvement survey
03/2026
improvement survey
03/2026
Would you assist in
improving Game8's site?
improving Game8's site?

×
We are listening to our users' valuable opinions and discussing how to act on them.
The information collected through this survey will be used for the purpose of improving our services. In addition, the information will only be disclosed a part of a statistic in a format that will not allow identification of personal information.
Begin Survey
Not Now
×
Please rate each item regarding Game8.co's Advertisements.
Amount of Ads
Very Dissatisfied
Somewhat Dissatisfied
Fine
Somewhat Satisfied
Highly Satisfied
Placement of Ads
Timing of Ad Display
Ad Loading Speed
Safeness of Ads
Content of Ads
×
Please rate each item regarding Game8.co's Quality of Articles.
Amount of information
Very Dissatisfied
Somewhat Dissatisfied
Fine
Somewhat Satisfied
Highly Satisfied
Frequency of updates
Speed of new information
Accuracy of articles
Understandibility of articles
Readability of sentences
×
Please rate each item regarding Game8.co's Usability of the Site.
Ease of finding information
Very Dissatisfied
Somewhat Dissatisfied
Fine
Somewhat Satisfied
Highly Satisfied
Loading Speed
Use of Color
Font Size
Visibility of Images
Easy to Understand Layout
×
Please rate each item regarding Game8.co's Message Boards, Comments.
Ease of Writing
Very Dissatisfied
Somewhat Dissatisfied
Fine
Somewhat Satisfied
Highly Satisfied
Readability
Ease in Finding Information
Comment Quality
Comment Quantity
Admin Response
×
Please rate each item regarding Game8.co's Site's new design.
Please rate our site's new design
Very Dissatisfied
Somewhat Dissatisfied
Fine
Somewhat Satisfied
Highly Satisfied
Do you think that the website's design change makes the site easier to use?
Has the new design made it easier for you to find information on the site?
Has the new design improved the overall visual appeal of the site?
How would you rate your overall satisfaction with the new design of the site?
×
How likely are you to recommend Game8 to someone you know?
Very Unlikely
0
1
2
3
4
5
6
7
8
9
10
Very Likely
If you have other opinions regarding potential improvement to the website, please share them with us. We would appreciate your honest opinion.
Note: This is a free response section, so you can proceed without entering anything.
Note: Please be sure not to enter any kind of personal information into your response.
Note: Please be sure not to enter any kind of personal information into your response.
×
Thank You
×
Thank you for participating in our survey! Your answers will help us to improve the quality of our website and services.
We hope you continue to make use of Game8.
We hope you continue to make use of Game8.
Close
Rankings
- We could not find the message board you were looking for.
Gaming News


![Slay the Spire 2 Review [Early Access] | Still the Deckbuilder to Beat](https://img.game8.co/4433115/44e19e1fb0b4755466b9e516ec7ffb1e.png/thumb)

![Resident Evil Village Review [Switch 2] | Almost Flawless Port](https://img.game8.co/4432790/e1859f64830960ce4248d898f8cd38d9.jpeg/thumb)
Popular Games

Genshin Impact Walkthrough & Guides Wiki
Honkai: Star Rail Walkthrough & Guides Wiki
Umamusume: Pretty Derby Walkthrough & Guides Wiki
Pokemon Pokopia Walkthrough & Guides Wiki
Resident Evil Requiem (RE9) Walkthrough & Guides Wiki
Monster Hunter Wilds Walkthrough & Guides Wiki
Wuthering Waves Walkthrough & Guides Wiki
Arknights: Endfield Walkthrough & Guides Wiki
Pokemon FireRed and LeafGreen (FRLG) Walkthrough & Guides Wiki
Pokemon TCG Pocket (PTCGP) Strategies & Guides Wiki


Recommended Games
Fire Emblem Heroes (FEH) Walkthrough & Guides Wiki
Diablo 4: Vessel of Hatred Walkthrough & Guides Wiki
Yu-Gi-Oh! Master Duel Walkthrough & Guides Wiki
Super Smash Bros. Ultimate Walkthrough & Guides Wiki
Pokemon Brilliant Diamond and Shining Pearl (BDSP) Walkthrough & Guides Wiki
Elden Ring Shadow of the Erdtree Walkthrough & Guides Wiki
Monster Hunter World Walkthrough & Guides Wiki
The Legend of Zelda: Tears of the Kingdom Walkthrough & Guides Wiki
Persona 3 Reload Walkthrough & Guides Wiki
Cyberpunk 2077: Ultimate Edition Walkthrough & Guides Wiki


All rights reserved
© 2018 Nintendo
Original Game: © Nintendo / HAL Laboratory, Inc.
Characters: © Nintendo / HAL Laboratory, Inc. / Pokémon. / Creatures Inc. / GAME FREAK inc. / SHIGESATO ITOI / APE inc. / INTELLIGENT SYSTEMS /
SEGA / CAPCOM CO., LTD. / BANDAI NAMCO Games Inc. / MONOLITHSOFT / CAPCOM U.S.A., INC. / SQUARE ENIX CO., LTD.
The copyrights of videos of games used in our content and other intellectual property rights belong to the provider of the game.
The contents we provide on this site were created personally by members of the Game8 editorial department.
We refuse the right to reuse or repost content taken without our permission such as data or images to other sites.