How to Get Garangolm and Weaknesses
The Garangolm is a Fanged Beast monstie in Monster Hunter Stories 3 (MHS3). Learn how to get a/an Garangolm, plus their weaknesses, skills, stats, and locations.
| Variants |
 Garangolm |
|---|
How to Get Garangolm
Acquire Their Eggs in their Habitats
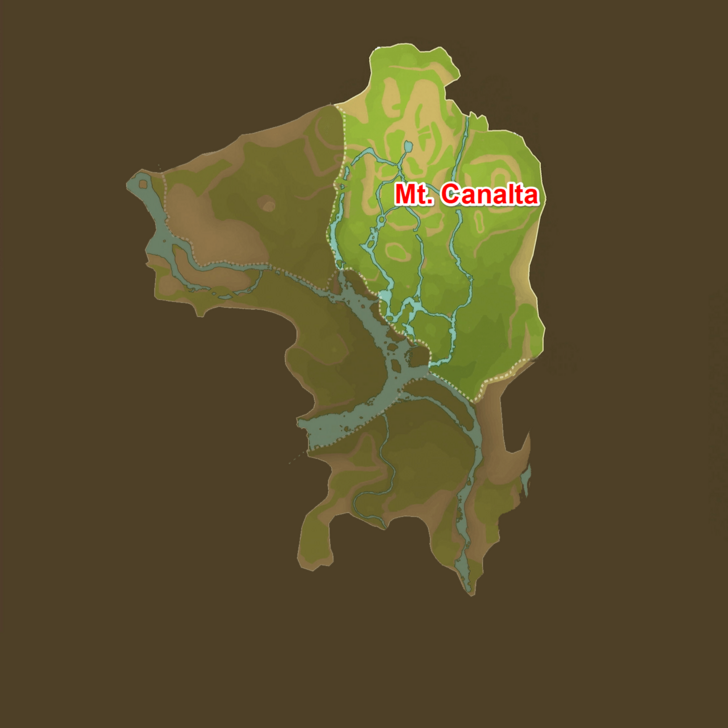 Mt. Canalta, Canalta Timberland |
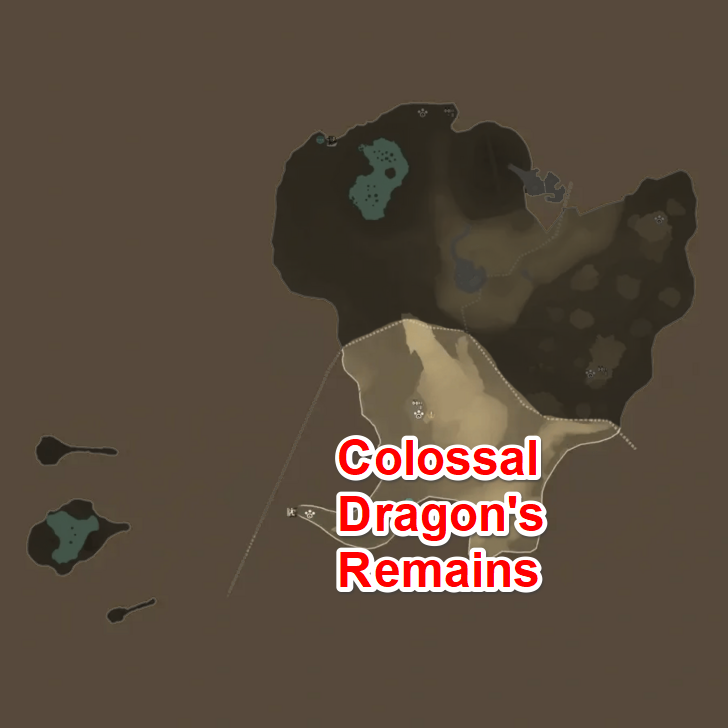 Colossal Dragon's Remains, Tarkuan |
You can acquire Garangolm eggs by raiding monster dens in their habitats in the locations above. Acquired eggs can then be hatched in the stable to acquire the monster.
However, eggs in monster dens are random, so there's a chance the egg you're looking for won't always spawn.
Fight the Monster and Force it to Retreat to Get a Specific Egg
You can force a monster to retreat to its den either by getting a high score during battle or using a paintball on it.
If a monster retreats, it will go back to its den. During this time, all of the eggs in the den will be specifically of the same species.
You can find and fight monsters in their habitats indicated in the images above.
Garangolm Overview
Garangolm Basic Info
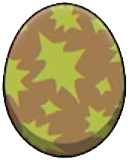
| Icon | Egg Image |
|---|---|
|
|
|
| Monstie Rank | Riding Actions |
| 4★ |
・Jump ・Melee Attack ・Wall Climb ・Roar |
| Genus | |
| Fanged Beast | |
| Monstie Attack Type and Element | |
| Description | |
| A giant Fanged Beast often mistaken for a pile of boulders. Its bodily fluids can promote plant growth, forming a unique symbiotic relationship with the flora that grows on its body. | |
| Baby Monstie Image | |
 |
|
Garangolm Enemy Transformations, Attack Types, and Elements
| Transformation | Attack Type and Element |
|---|---|
| Normal |
|
| Lava Mantle | |
| Moss Mantle |
Garangolm Skills
Garangolm Innate Skills
| Skill | Level Unlocked | Details |
|---|---|---|
| Steam Burst
(Kinship Skill) |
1 |
Target: All Enemies Effect: Deals non-elemental damage to all enemies. |
| Aqua Dunk | 1 |
Type: Active Target: Single Enemy Effect: Deals water damage to one enemy. |
| Steam Break | 50 |
Type: Active Target: All Enemies Effect: Deals water damage to all enemies. |
| Pump Up | 60 |
Type: Active Target: User Effect: Grants Attack Up and Wyvernfell Up to the user, but also inflicts Defense Down. |
These are skills that the Garangolm will always have.
Garangolm Weaknesses and Resistances
Note that some monsters change weaknesses and resistances when they transform.
| Ailment Resistances | |||||||||||||||||||||||||||||||||||||||||
|---|---|---|---|---|---|---|---|---|---|---|---|---|---|---|---|---|---|---|---|---|---|---|---|---|---|---|---|---|---|---|---|---|---|---|---|---|---|---|---|---|---|
| Elemental Resistances | |||||||||||||||||||||||||||||||||||||||||
Garangolm Parts
| Main Body |  |
|---|---|
| Head |  |
| Tail |  |
| Main Body | |
|---|---|
| Head | |
| Tail | |
| Moss Arm | |
| Lava Arm |  |
| Main Body | |
|---|---|
| Head | |
| Tail | |
| Moss Arm | |
| Lava Arm | |
These determine which weapon type will be most effective in breaking the specific targetable parts of the monster.
Garangolm Stat Trends
| HP | 7 |
|---|---|
| Attack | 5 |
| Speed | 4 |
| Defense | 4 |
Monster Hunter Stories 3 (MHS3) Related Guides
Monstie Guides
| Endangered Monsties | Mutated Monsties |
List of Monsties
 Ajarakan
 Aknosom
 Almudron
 Anjanath
 Arkveld
 Arzuros
 Astalos
 Aurora Somnacanth
 Azure Rathalos
 Barioth
 Barroth
 Bishaten
 Black Diablos
 Black Gravios
 Blangonga
 Blood Orange Bishaten
 Bloodbath Diablos
 Blue Yian Kut-Ku
 Boltreaver Astalos
 Brachydios
 Brute Tigrex
 Canyne
 Chatacabra
 Deadeye Yian Garuga
 Deviljho
 Diablos
 Dreadking Rathalos
 Dreadqueen Rathian
 Ebony Odogaron
 Espinas
 Fulgur Anjanath
 Glavenus
 Goss Harag
 Gravios
 Great Izuchi
 Green Nargacuga
 Green Plesioth
 Grimclaw Tigrex
 Gypceros
 Hellblade Glavenus
 Ivory Lagiacrus
 Jade Barroth
 Khezu
Khezu Kulu-Ya-Ku
 Lagiacrus
 Legiana
 Lunagaron
 Magnamalo
 Malzeno
 Mizutsune
 Namielle
 Nargacuga
 Nerscylla
 Odogaron
 Paolumu
 Pink Rathian
 Plesioth
 Pukei-Pukei
 Purple Gypceros
 Purple Ludroth
 Rakna-Kadaki
 Ratha
Ratha
 Rathalos
 Rathian
 Red Khezu
 Rey Dau
 Royal Ludroth
 Sand Barioth
 Seregios
 Shogun Ceanataur
 Shrouded Nerscylla
 Silverwind Nargacuga
 Somnacanth
 Soulseer Mizutsune
 Stygian Zinogre
 Tetranadon
 Thunderlord Zinogre
 Tigrex
 Tobi-Kadachi
 Velkhana
 Velocidrome
 Yian Garuga
 Yian Kut-Ku
 Zinogre
Other Monsters
 Aptonoth Aptonoth
|
 Barrel Felyne Barrel Felyne
|
 Blango Blango
|
 Bnahabra Bnahabra
|
 Bound Azure Rathalos Bound Azure Rathalos
|
 Ceanataur Ceanataur
|
 Cephalos Cephalos
|
 Final Boss Final Boss
|
 Gargwa Gargwa
|
 Great Barrel Felyne Great Barrel Felyne
|
 Great Dracophage Bug Great Dracophage Bug
|
 Great Thunderbug Great Thunderbug
|
 Izuchi Izuchi
|
 Kelbi Kelbi
|
 Ludroth Ludroth
|
 Nibelsnarf Nibelsnarf
|
 Rachnoid Rachnoid
|
 Remobra Remobra
|
 Slagtoth Slagtoth
|
 Thunder Serpent Narwa Thunder Serpent Narwa
|
 Velociprey Velociprey
|
 Wind Serpent Ibushi Wind Serpent Ibushi
|
 Yama Tsukami Yama Tsukami
|
 Yama Tsukami (Green) Yama Tsukami (Green)
|
Comment
Author

Monster Hunter Stories 3: Twisted Reflection Walkthrough & Guides Wiki
How to Get Garangolm and Weaknesses
Rankings
- We could not find the message board you were looking for.
Gaming News


Popular Games

Genshin Impact Walkthrough & Guides Wiki
Umamusume: Pretty Derby Walkthrough & Guides Wiki
Crimson Desert Walkthrough & Guides Wiki
Monster Hunter Stories 3: Twisted Reflection Walkthrough & Guides Wiki
Honkai: Star Rail Walkthrough & Guides Wiki
Pokemon Pokopia Walkthrough & Guides Wiki
The Seven Deadly Sins: Origin Walkthrough & Guides Wiki
Wuthering Waves Walkthrough & Guides Wiki
Zenless Zone Zero Walkthrough & Guides Wiki
Arknights: Endfield Walkthrough & Guides Wiki


Recommended Games
Fire Emblem Heroes (FEH) Walkthrough & Guides Wiki
Diablo 4: Vessel of Hatred Walkthrough & Guides Wiki
Cyberpunk 2077: Ultimate Edition Walkthrough & Guides Wiki
Yu-Gi-Oh! Master Duel Walkthrough & Guides Wiki
Super Smash Bros. Ultimate Walkthrough & Guides Wiki
Pokemon Brilliant Diamond and Shining Pearl (BDSP) Walkthrough & Guides Wiki
Elden Ring Shadow of the Erdtree Walkthrough & Guides Wiki
Monster Hunter World Walkthrough & Guides Wiki
The Legend of Zelda: Tears of the Kingdom Walkthrough & Guides Wiki
Persona 3 Reload Walkthrough & Guides Wiki


All rights reserved
©CAPCOM CO., LTD, and CAPCOM CO. logos are trademarks or registered trademarks of CAPCOM. All rights reserved.
The copyrights of videos of games used in our content and other intellectual property rights belong to the provider of the game.
The contents we provide on this site were created personally by members of the Game8 editorial department.
We refuse the right to reuse or repost content taken without our permission such as data or images to other sites.