Malzeno Weaknesses, Patterns, and How to Beat
This is a guide to the Malzeno Boss Fight in Monster Hunter Stories 3 (MHS3). Learn how to beat Malzeno its weaknesses, behaviour, and attack pattern, and the best strategy to beat Malzeno.
List of Contents
Malzeno Boss Weaknesses and Resistances
Malzeno Weakness
| - | ↓ | ↑ | |||
| ↑↑ | ↓ | ↓↓ |
| ↓↓ | - | ↑↑ | |||
| ↑↑ | - | ↓ |
Malzeno Damage Type Weaknesses
| Body Part | | | |
|---|---|---|---|
| Main Body | ◯ | ◯ | ◯ |
| Head | ✕ | ✕ | ◯ |
| Tail | ◯ | ✕ | ✕ |
| Body Part | | | |
|---|---|---|---|
| Main Body | ◯ | ◯ | ◯ |
| Head | ✕ | ✕ | ◯ |
| Chest (Qurio) | ✕ | ✕ | ◯ |
| Right Foreleg (Qurio) | ✕ | ◯ | ✕ |
| Left Foreleg (Qurio) | ✕ | ◯ | ✕ |
| Tail | ◯ | ✕ | ✕ |
Status Ailment Resistance and Weaknesses
| ↓ | ↓ | ↓↓ | ↑ | ||||||||
| ↓ | ↑ | ↑ | |||||||||
Malzeno Pattern and Behaviour
| Jump to a Section |
|---|
|
2. Normal State |
Attack Behaviour
| Normal State | |
|---|---|
| Blood Rite Active | |
| Exposed | |
Malzeno has three phases, which are its Normal State, Blood Rite Active state, and Exposed state. During its exposed state, it will still have the attack stats for the Blood Rite Active state, but have the weaknesses of the Normal state.
Normal State
| Turn Count | Move |
|---|---|
| Turn 1 | Speed Attack |
| Turn 2 | Qurio Release |
| Turn 3 | Speed Attack |
Malzeno starts off in a Normal state and opens with a Speed Attack on its first turn; this can be countered with a Technical attack. It will use Qurio Release on its 2nd turn, and this applies Blood Rite to the target. At the end of the 2nd turn, Malzeno will use Bloody Banquet to heal its HP, and will continue to do this after every turn until the Blood Rite finishes. On its third turn, it will do another Speed Attack.
| Blood Rite Grants Attack Up and drains enemy HP relative to damage dealt, but HP decreases every turn. |
| Bloody Banquet Heals Malzeno after every turn when Blood Rite is Active. |
Blood Rite Active State
| Turn Count | Move |
|---|---|
| Turn 0 | Bloodbath Transforms Malzeno into its Blood Rite Active State |
| Turn 1 | Technical Attack |
| Turn 2 | Party AOE Attack |
| Last Turn | Nightmare Cradle Reverts back to Normal State |
After transforming into its Blood Rite Active State, on its first turn, it will do a technical attack. On its second turn, it will use a devastating party-wide attack. It will continue to alternate between normal attacks and a Party Wide AOE until you break it out of its Blood Rite State. Possible AOE attacks are Bloodrush, Dragonfire Blast, and Vorpal Wings, which all deal devastating party-wide damage. If Blood Rite expires during this state, Malzeno will take a turn to try and reapply it, which will allow it to heal after every turn.
On the last turn before it reverts to its Normal state, it will use Nightmare Cradle, which will deal devastating damage to the party before reverting to its normal state.
Recommended Monsties for Malzeno
 Deviljho Deviljho
|
 Dreadqueen Rathian Dreadqueen Rathian
|
Our recommended Monsties to bring against Malzeno are Deviljho and Dreadqueen Rathian. Deviljho deals a large amount of dragon-type damage that is effective against Malzeno. It will also give him an advantage on Head-to-Head since power overcomes technical when it is in its Blood Rite Active State. You can get it in the Serathis Area.
Dreadqueen Rathian is also good to bring along for its ability to inflict Severe Poison for damage over time and burn. You can get thi Monstie in Azuria once you have the Sunpetal Plains Habitat at Rank S.
How to Beat Malzeno
| Jump to a Section |
|---|
|
|
Level up to 50
Malzeno will be at Level 54 when you fight it so level up yourself and your party to be at least Level 50. It is doable to do it at around Level 45 but it will be difficult.
Use Kinship Skills to Skip Malzeno's Turn

Take advantage of Kinship Skills to skip Malzeno's AOE attack. Skills such as Solar Cry or passives like Soul Kinship help fill your Kinship gauge faster. These are extremely helpful in battle as it allows for players to reliably use the Kinship Gauge to skip Malzeno's Turn.
Use this skill during turn 2 of both the Normal State and the Blood Rite Active State to skip the Qurio Release, preventing Malzeno from self healing and stop it from casting AOE attacks.
Raise Your Defense
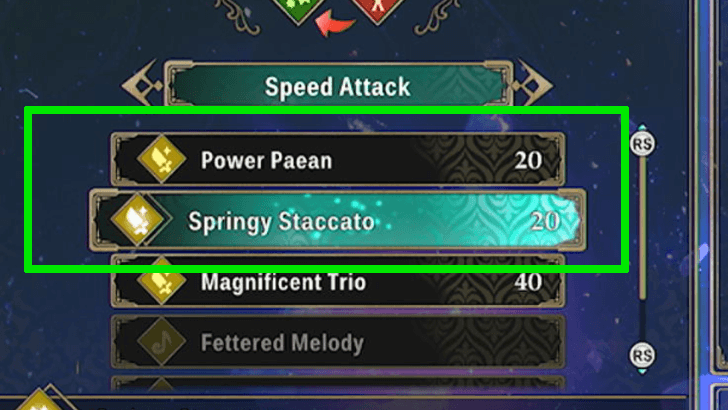
Malzeno deals a lot of damage when it does its AOE attacks, a good way to mitigate this is by raising your defense as high as you can. Use Springy Stacatto to get Defense (S). On the next turn, use Power Paean to further raise the buff to Defense (M). The weapon Veldian Sibilus will carry both buffs.
If you have Ogden on your team, he can use Defensive Ditty to further upgrade your defense to Defense (L). Watch for his next move above his icon on the battle screen to time the execution of the skills.
List of All Hunting Horns
Eat a Strategically Conquer the Battlefield! Meal
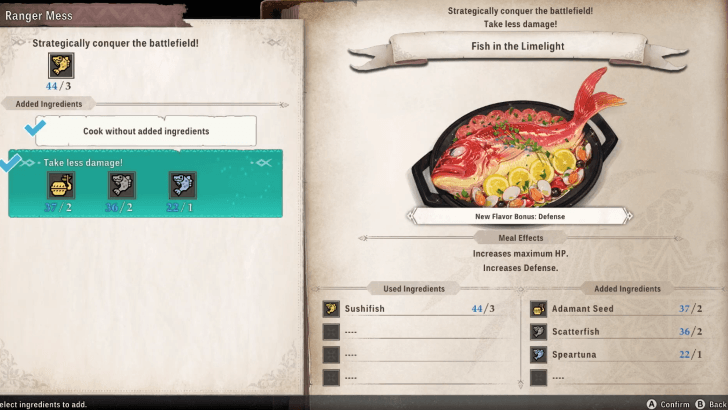
Before the battle, prepare by having a meal in the Ranger's Mess. Choose Strategically Conquer the Battlefield! with an added ingredient to increase Defense and the Maximum HP.
List of Food: How to Cook
Choose Ogden as an Ally
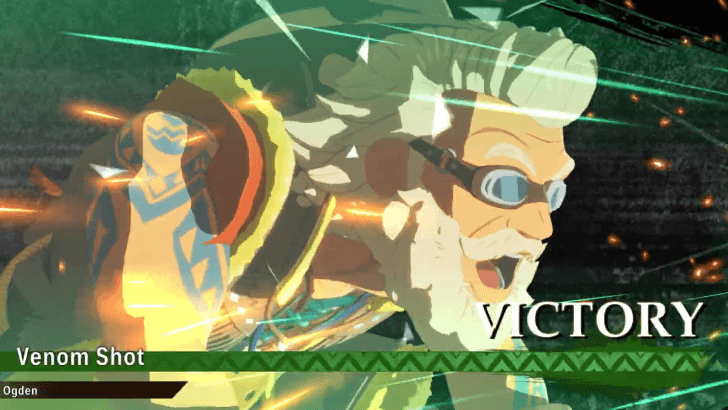
Bring Ogden for this battle; he provides good assistance by buffing and sustaining your team.
Ogden Partner Profile: Stats and Skills
Status Ailments are Effective Against Malzeno

Malzeno is vulnerable to a lot of Ailment Statuses, mainly Burn, Poison, Paralysis, and blastblight. Bring Monsties that can deal critical Ailment statuses like Dreadqueen Rathian, to deal damage over time.
Use Armors That Protect Against Dragon Type Damage
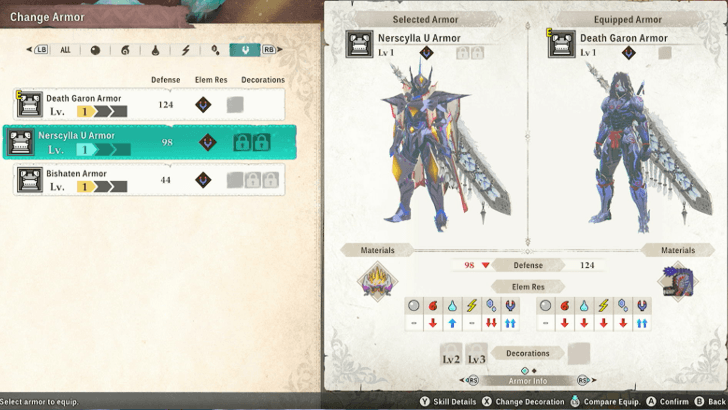
All of Malzeno's attacks deal Dragon-type damage; use armors that protect against this. Narscylla U Armor is highly recommended for armors that you can get earlier in the game, but if you want the best defense against Dragon attacks, farm for materials in the final area and craft the Death Garon Armor.
How to Fight Malzeno
Fought During the Sacrosanctum Main Quest
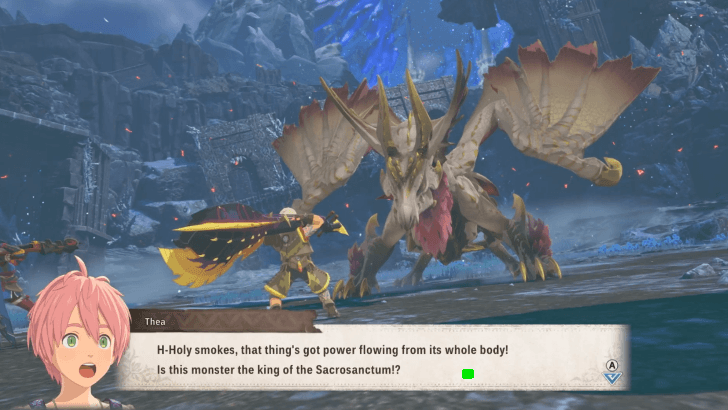
You will face Malzeno in the chapter The Sacrosanctum, as soon as you enter the Old Capital Lazlion, proceeding further will start a cutscene that will initiate the battle.
The Sacrosanctum Story Walkthrough
Monster Hunter Stories 3 (MHS 3) Related Guides
Main Mission Bosses
| All Main Mission Bosses | |
|---|---|
| Azuria (Chapter 1) | |
 Honed Glavenus |
 Invasive Yian Garuga Invasive Yian Garuga |
 Dual Feral Velocidromes |
 Feral Gypceros Feral Gypceros |
 Magnamalo |
- | Cataracts (Chapter 2) |
 Feral Great Izuchi Feral Great Izuchi
|
 Invasive Arzuros Invasive Arzuros |
 Feral Somnacanth |
 Feral Aknosom |
 Yama Tsukami |
- |
| Galyad (Chapter 3) | |
 Feral Ajarakan |
 Feral Rakna-Kadaki |
 Rey Dau Rey Dau |
- |
| Seranthis (Chapter 4) | |
 Feral Blangonga |
 Goss Harag Goss Harag |
 Malzeno |
 Arkveld |
 Bound Azure Rathalos |
 Bound Lunagaron |
 Aenshin Aenshin |
|
Invasive Monster Bosses
| All Invasive Monster Bosses | |
|---|---|
| Invasive Yian Garuga |
 Invasive Seregios Invasive Seregios |
 Invasive Plesioth Invasive Plesioth |
Invasive Arzuros |
 Invasive Nerscylla Invasive Nerscylla |
 Invasive Shogun Ceanataur Invasive Shogun Ceanataur |
 Invasive Diablos Invasive Diablos |
 Invasive Odogaron Invasive Odogaron |
 Invasive Khezu Invasive Khezu |
- |
Feral Monster Bosses
| List of All Feral Monsters | |
|---|---|
 Feral Nerscylla Feral Nerscylla |
 Feral Brachydios Feral Brachydios |
 Feral Tobi-Kadachi Feral Tobi-Kadachi |
 Feral Glavenus Feral Glavenus |
 Feral Bishaten Feral Bishaten |
 Feral Espinas Feral Espinas |
 Feral Paolumu Feral Paolumu |
- |
Elder Dragon Bosses
| List of All Elder Dragon Bosses | |
|---|---|
 Namielle |
  |
 Yama Tsukami (Green) Yama Tsukami (Green) |
 Velkhana Velkhana |
| Aenshin |
- |
Exotic Monster Bosses
| List of All Exotic Monster Bosses | |
|---|---|
 Exotic Seregios |
 Exotic Velocidrome Exotic Velocidrome |
Optional Bosses
| List of All Optional Bosses | |
|---|---|
 Espinas Espinas
|
- |
Comment
Author

Monster Hunter Stories 3: Twisted Reflection Walkthrough & Guides Wiki
Malzeno Weaknesses, Patterns, and How to Beat
Rankings
- We could not find the message board you were looking for.
Gaming News


Popular Games

Genshin Impact Walkthrough & Guides Wiki
Umamusume: Pretty Derby Walkthrough & Guides Wiki
Crimson Desert Walkthrough & Guides Wiki
Monster Hunter Stories 3: Twisted Reflection Walkthrough & Guides Wiki
Honkai: Star Rail Walkthrough & Guides Wiki
Pokemon Pokopia Walkthrough & Guides Wiki
The Seven Deadly Sins: Origin Walkthrough & Guides Wiki
Wuthering Waves Walkthrough & Guides Wiki
Zenless Zone Zero Walkthrough & Guides Wiki
Arknights: Endfield Walkthrough & Guides Wiki


Recommended Games
Fire Emblem Heroes (FEH) Walkthrough & Guides Wiki
Diablo 4: Vessel of Hatred Walkthrough & Guides Wiki
Cyberpunk 2077: Ultimate Edition Walkthrough & Guides Wiki
Yu-Gi-Oh! Master Duel Walkthrough & Guides Wiki
Super Smash Bros. Ultimate Walkthrough & Guides Wiki
Pokemon Brilliant Diamond and Shining Pearl (BDSP) Walkthrough & Guides Wiki
Elden Ring Shadow of the Erdtree Walkthrough & Guides Wiki
Monster Hunter World Walkthrough & Guides Wiki
The Legend of Zelda: Tears of the Kingdom Walkthrough & Guides Wiki
Persona 3 Reload Walkthrough & Guides Wiki


All rights reserved
©CAPCOM CO., LTD, and CAPCOM CO. logos are trademarks or registered trademarks of CAPCOM. All rights reserved.
The copyrights of videos of games used in our content and other intellectual property rights belong to the provider of the game.
The contents we provide on this site were created personally by members of the Game8 editorial department.
We refuse the right to reuse or repost content taken without our permission such as data or images to other sites.