Goss Harag Weaknesses, Patterns, and How to Beat
This is a guide to the Goss Harag Boss Fight in Azuria in Monster Hunter Stories 3 (MHS3). Learn where to find Goss Harag, how to beat it, its weaknesses, behaviour and attack pattern, and the best strategy to beat Goss Harag.
| Goss Harag Guides | |
|---|---|
| Monstie Guide | Boss Guide |
| Variants |
 Goss Harag |
|---|
List of Contents
Goss Harag Boss Weaknesses and Resistances
Goss Harag Weakness
| - | ↓↓ | ↑ | |||
| ↓ | ↑↑ | - |
Goss Harag Damage Type Weaknesses
| Body Part | |||
|---|---|---|---|
| Main Body | ◯ | ◯ | ◯ |
| Head | ✕ | ✕ | ◯ |
| Back | ✕ | ◯ | ✕ |
| Forelegs | ◯ | ✕ | ✕ |
| Forelegs (Frost Knuckles) | ✕ | ✕ | ◯ |
| Forelegs (Frost Blade) | ◯ | ✕ | ✕ |
Status Ailment Resistance and Weaknesses
| ↓ | ↓↓ | ↓ | ↑ | ||||||||
| ↓ | ↓ | ↓↓ | |||||||||
| ↓ | ↓↓ | ↑↑ | ↑↑ | ||||||||
| ↓ | ↓ | ↓↓ | |||||||||
Goss Harag Pattern and Behaviour
| Jump to a Section |
|---|
|
2. Normal State |
Attack Behavior
| Normal State | |
|---|---|
| Enraged (Frost Blade) | |
| Enraged (Frost Knuckles) |
Goss Harag has 3 states which are its Normal, Enraged (Frost Knuckles) and Enraged (Frost Blade).
Normal State
| Turn Count | Move |
|---|---|
| Turn 1 | Power Attack |
| Turn 2 Will transition to Enraged Frost Knuckles state at turn end after using Cold Snap |
Devil's Hammer (Single-Target Skill) or Cold Snap (AoE Skill) It will always use Cold Snap on its second turn after going back from Frost Knuckles or Frost Blade state. |
| Turn 3 Will transition to Enraged Frost Blade state at turn end after using Cold Snap |
Cold Snap (AoE Skill) |
Goss Harag starts in the Normal state and primarily uses Power attacks therefore, make sure to counter it with a Speed attack of your own. At the start of the battle, it will do 2 turns of attacks then ends with an unskippable AoE skill. It means that if it cannot execute that skill it will try again in the next turn until it is able to use it then switching to the Frost Blades state.
However, if Goss Harag came from an enraged state in a previous turn, it will only take 1 turn of attack before it does its Cold Snap attack again but it will go to the Frost Knuckles state instead.
Enraged (Frost Blade) State
| Turn Count | Move |
|---|---|
| Turn 1 | Frosty Flayer (AoE Skill) |
| Turn 2 | Ice Saw (Single-Target Skill) |
| Turn 3 | Frosty Flayer (AoE Skill) |
| Turn 4 | Chilling Dance (AoE Skill) Will transition to Normal state at turn end |
Goss Harag covers its hands with ice forming a blade in this state and it mainly uses skills. Despite having an attack power type shown, it will not do any head-to-head attacks in this state so make sure to ready yourself with defenses and ways to skip its attacks.
After 4 turns in this state, it will automatically go back to the normal state.
Enraged (Frost Knuckles) State
| Turn Count | Move |
|---|---|
| Turn 1 | Ice Lariat (Single-Target Skill) |
| Turn 2 | Technical Attack |
| Turn 3 | Chilling Dance (AoE Skill) |
In this state, Goss Harag covers its hands with ice forming a punching glove while dealing Technical attacks so make sure to counter it with Power attacks. The attacks it deals will be much potent but you can still skip both of its skills.
After 3 turns in this state, it will automatically go back to the normal state.
Recommended Monsties for Goss Harag
 Espinas Espinas
|
 Silverwind Nargacuga Silverwind Nargacuga
|
The best monstie you can bring in this fight is Espinas and Silverwind Nargacuga. Goss Harag is weak against fire attacks and susceptible to paralysis, poison, burn and darkness therefore, Espinas inclusion is great as it can inflict Severe Poison and Paralysis while dealing fire damage.
If you cannot avoid its attack or you need speed attacks, you can switch to Silverwind Nargacuga to resist ice attacks. It can also deal high non-elemental damage to close out the fight earlier.
How to Beat Goss Harag
| Jump to a Section |
|---|
|
|
Level Up to at Least Level 45
In this fight, Goss Harag is at level 50. If you can resist ice attacks, it is enough to fight it at levels 45-50 so that you can survive attacks and heal it back.
EXP Guide: How to Level Up Fast
Use Fire Weapons and Ice Resist Armor
Goss Harag is weak to fire while dealing ice attacks. Make sure to bring fire weapons and ice resist armor such as the Nargacuga Armor made from materials dropped by a Nargacuga.
Invite Gaul or Eleanor as a Battle Ally
You can partner up with Gaul to help inflict status ailments to disrupt Goss Harag's attacks while dealing damage and resisting ice attacks or use Eleanor to help deal heavy fire damage against it.
Aim to Inflict Paralysis or Darkness
Goss Harag is highly vulnerable against paralysis and darkness. These two status ailments are essential in this fight because of how Goss Harag likes to attack the party often and if it is successfull, it will give you a free turn to heal, apply buffs and debuffs or deal damage to it.
Increase Your Defenses With Buffs and Debuffs
Applying defense buffs or attack down debuffs to Goss Harag helps mitigate damage and survive attacks because it will relentlessly attack your party so surviving a fatal hit will help you stabilize the battle.
Cold Snap Is Unskippable
All of its attacks can be skipped with head-to-heads, kinship, status ailments, traps or topple except for Cold Snap. When you try to disrupt Goss Harag when it is about to use Cold Snap and are successful, it will try to use Cold Snap again in the next turn until it can. You can use this to your advantage to delay it from changing states or to prepare to take the damage that will not kill your party.
Goss Harag Location
Fought During The Sacrosanctum Main Story Quest
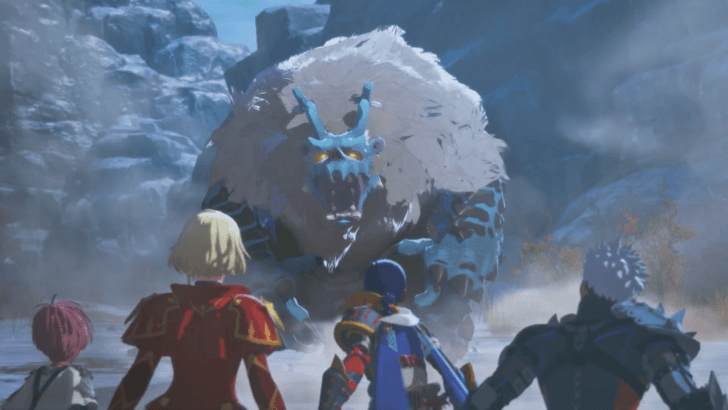
Once you arrive in the new region, Serathis, you will encounter Goss Harag after defeating Feral Blangonga in The Glacier Caps as part of the The Sacrosanctum main story quest.
Monster Hunter Stories 3 (MHS 3) Related Guides
Main Mission Bosses
| All Main Mission Bosses | |
|---|---|
| Azuria (Chapter 1) | |
 Honed Glavenus |
 Invasive Yian Garuga Invasive Yian Garuga |
 Dual Feral Velocidromes |
 Feral Gypceros Feral Gypceros |
 Magnamalo |
- | Cataracts (Chapter 2) |
 Feral Great Izuchi Feral Great Izuchi
|
 Invasive Arzuros Invasive Arzuros |
 Feral Somnacanth |
 Feral Aknosom |
 Yama Tsukami |
- |
| Galyad (Chapter 3) | |
 Feral Ajarakan |
 Feral Rakna-Kadaki |
 Rey Dau Rey Dau |
- |
| Seranthis (Chapter 4) | |
 Feral Blangonga |
Goss Harag |
 Malzeno |
 Arkveld |
 Bound Azure Rathalos |
 Bound Lunagaron |
 Aenshin Aenshin |
|
Invasive Monster Bosses
| All Invasive Monster Bosses | |
|---|---|
| Invasive Yian Garuga |
 Invasive Seregios Invasive Seregios |
 Invasive Plesioth Invasive Plesioth |
Invasive Arzuros |
 Invasive Nerscylla Invasive Nerscylla |
 Invasive Shogun Ceanataur Invasive Shogun Ceanataur |
 Invasive Diablos Invasive Diablos |
 Invasive Odogaron Invasive Odogaron |
 Invasive Khezu Invasive Khezu |
- |
Feral Monster Bosses
| List of All Feral Monsters | |
|---|---|
 Feral Nerscylla Feral Nerscylla |
 Feral Brachydios Feral Brachydios |
 Feral Tobi-Kadachi Feral Tobi-Kadachi |
 Feral Glavenus Feral Glavenus |
 Feral Bishaten Feral Bishaten |
 Feral Espinas Feral Espinas |
 Feral Paolumu Feral Paolumu |
- |
Elder Dragon Bosses
| List of All Elder Dragon Bosses | |
|---|---|
 Namielle |
  |
 Yama Tsukami (Green) Yama Tsukami (Green) |
 Velkhana Velkhana |
| Aenshin |
- |
Exotic Monster Bosses
| List of All Exotic Monster Bosses | |
|---|---|
 Exotic Seregios |
 Exotic Velocidrome Exotic Velocidrome |
Optional Bosses
| List of All Optional Bosses | |
|---|---|
| Espinas
|
- |
Comment
Author

Monster Hunter Stories 3: Twisted Reflection Walkthrough & Guides Wiki
Goss Harag Weaknesses, Patterns, and How to Beat
Rankings
- We could not find the message board you were looking for.
Gaming News

![Star Savior Review [First Impressions] | Engaging, Entertaining, and Expensive](https://img.game8.co/4447603/8f500e9bf666bdb8adb1af478e9dfdbd.png/show)


Popular Games

Genshin Impact Walkthrough & Guides Wiki
Umamusume: Pretty Derby Walkthrough & Guides Wiki
Crimson Desert Walkthrough & Guides Wiki
Monster Hunter Stories 3: Twisted Reflection Walkthrough & Guides Wiki
Honkai: Star Rail Walkthrough & Guides Wiki
Pokemon Pokopia Walkthrough & Guides Wiki
The Seven Deadly Sins: Origin Walkthrough & Guides Wiki
Wuthering Waves Walkthrough & Guides Wiki
Zenless Zone Zero Walkthrough & Guides Wiki
Arknights: Endfield Walkthrough & Guides Wiki


Recommended Games
Fire Emblem Heroes (FEH) Walkthrough & Guides Wiki
Diablo 4: Vessel of Hatred Walkthrough & Guides Wiki
Cyberpunk 2077: Ultimate Edition Walkthrough & Guides Wiki
Yu-Gi-Oh! Master Duel Walkthrough & Guides Wiki
Super Smash Bros. Ultimate Walkthrough & Guides Wiki
Pokemon Brilliant Diamond and Shining Pearl (BDSP) Walkthrough & Guides Wiki
Elden Ring Shadow of the Erdtree Walkthrough & Guides Wiki
Monster Hunter World Walkthrough & Guides Wiki
The Legend of Zelda: Tears of the Kingdom Walkthrough & Guides Wiki
Persona 3 Reload Walkthrough & Guides Wiki


All rights reserved
©CAPCOM CO., LTD, and CAPCOM CO. logos are trademarks or registered trademarks of CAPCOM. All rights reserved.
The copyrights of videos of games used in our content and other intellectual property rights belong to the provider of the game.
The contents we provide on this site were created personally by members of the Game8 editorial department.
We refuse the right to reuse or repost content taken without our permission such as data or images to other sites.