Tarkuan Map and Exploration Guide
Tarkuan is the third region in Monster Hunter Stories 3 (MHS3). Check this guide to see the Tarkuan map, all monsties by habitat, chest locations, track item locations, and how to unlock Tarkuan!
 Attention! Attention! |
We are currently rushing out guides as quickly as possible. More details will be added here soon! |
|---|
 under the page's title to be notified of any updates!
List of Contents
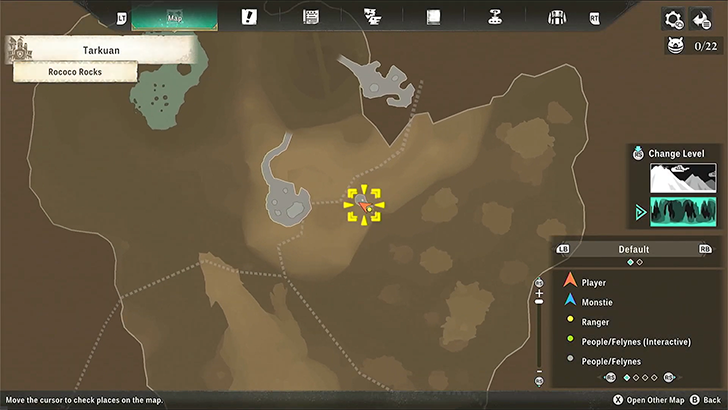
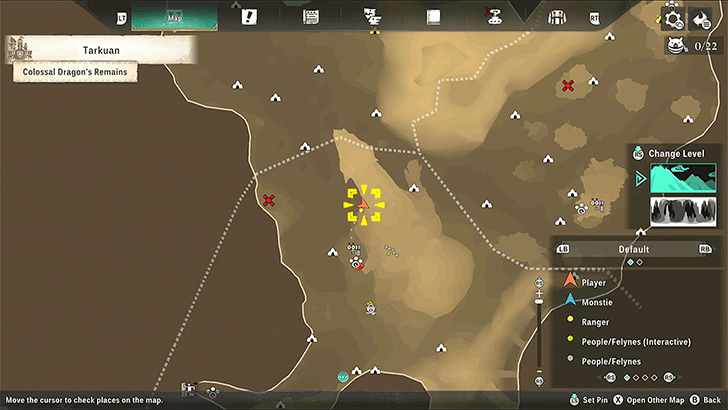
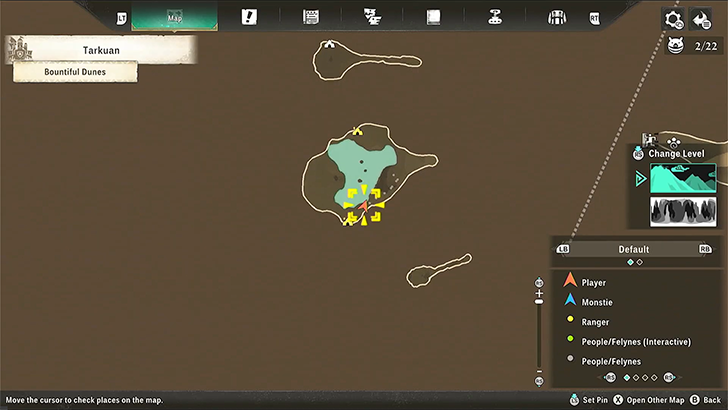
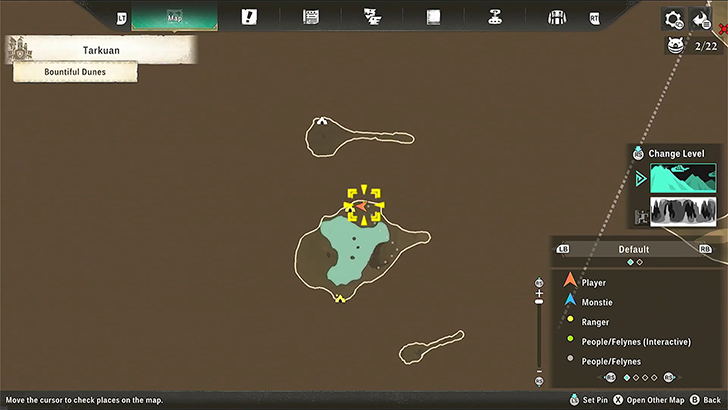
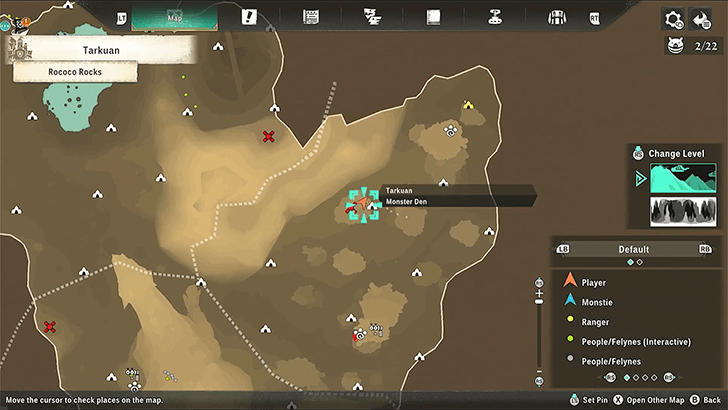
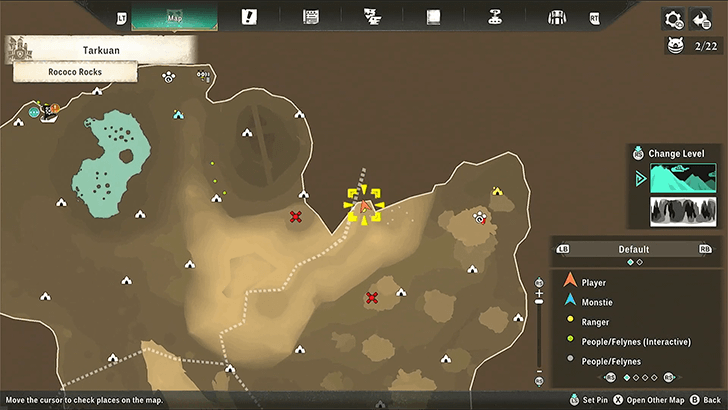
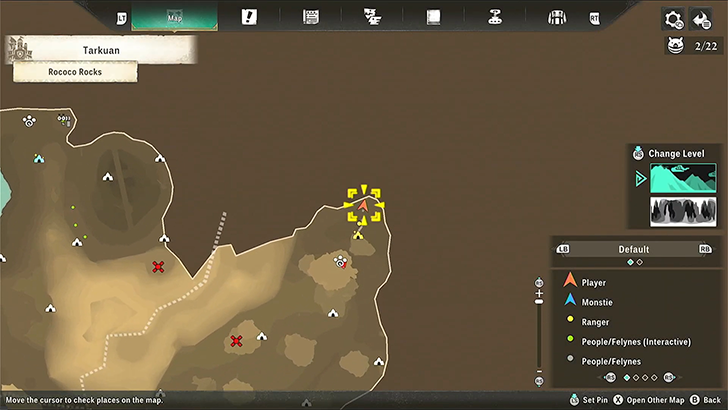
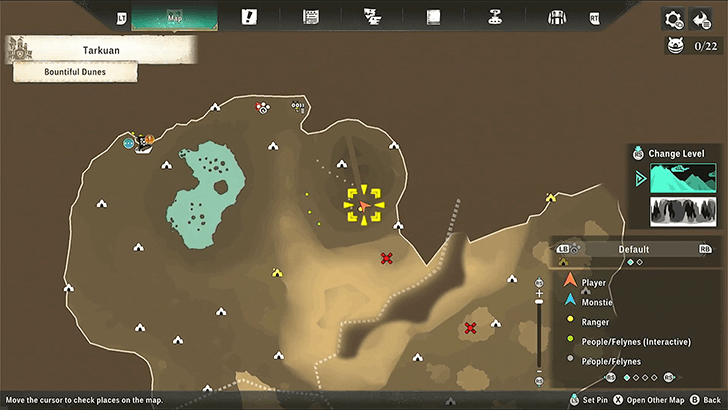
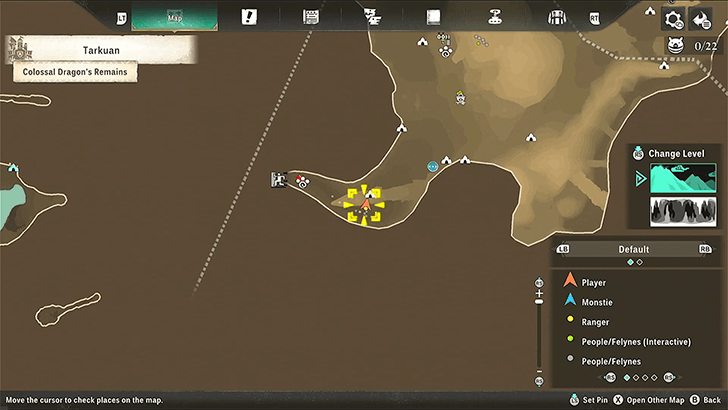
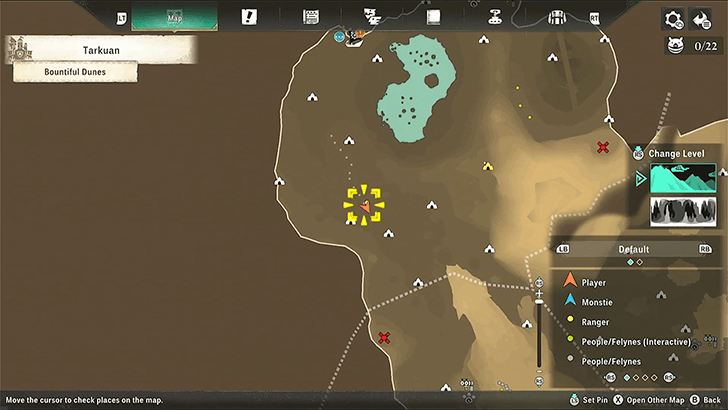
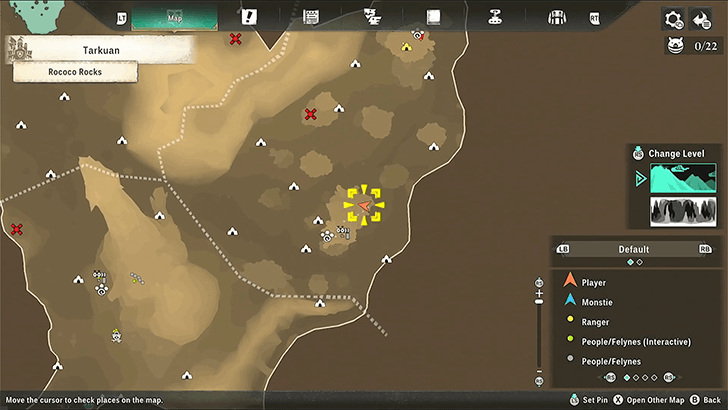
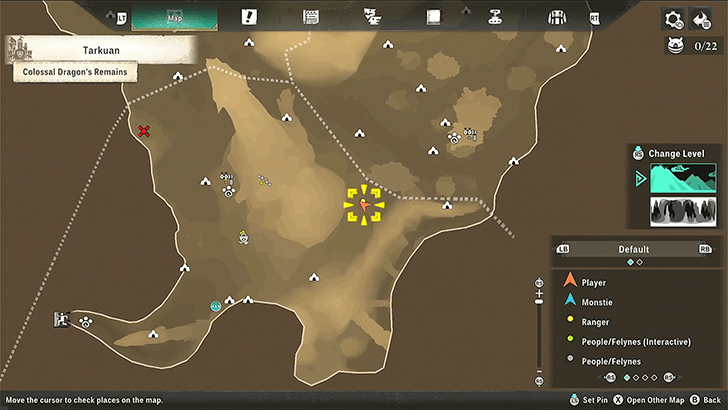
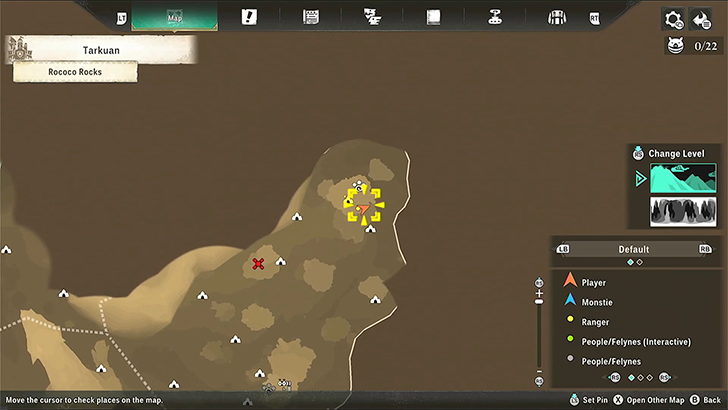
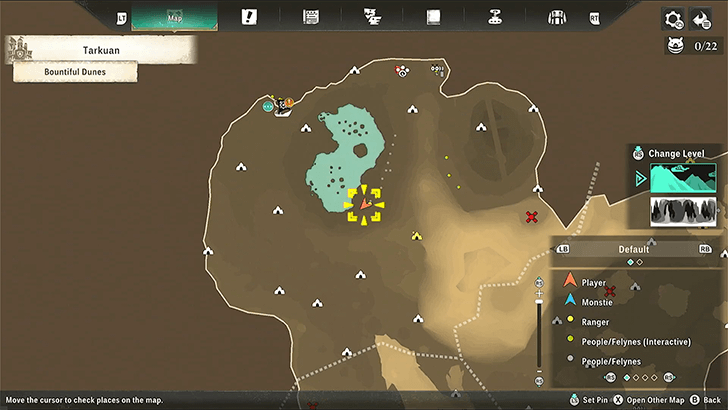
Tarkuan Interactive Map
|
・Click the arrow on the upper left corner to access the sidebar menu to show the list of points of interests available. ・Use the dropdown menus to select a region and a specific area of the selected region. ・Click the Expand icon on the bottom right to see a full view of the map. |
Map Icon Legend
| Points of Interest | |||||
|---|---|---|---|---|---|
 Poogies Poogies |
 Chests Chests |
 Track Items Track Items |
|||
 Catavan Stands Catavan Stands |
 Lookout Points Lookout Points |
 Camps Camps |
|||
 Feral Monsters Feral Monsters |
 Invasive Monsters Invasive Monsters |
 Side Quests Side Quests |
|||
| Base Landmarks | |||||
 Stable Stable |
 Smithy Smithy |
 Melynx Emporium Melynx Emporium |
|||
 Ranger Mess Ranger Mess |
 Player Chest Player Chest |
- | |||
All Monsties in Tarkuan
| Jump to a Habitat! | |||
|---|---|---|---|
| Colossal Dragon's Remains | Rococo Rocks | Bountiful Dunes | Death's Maw |
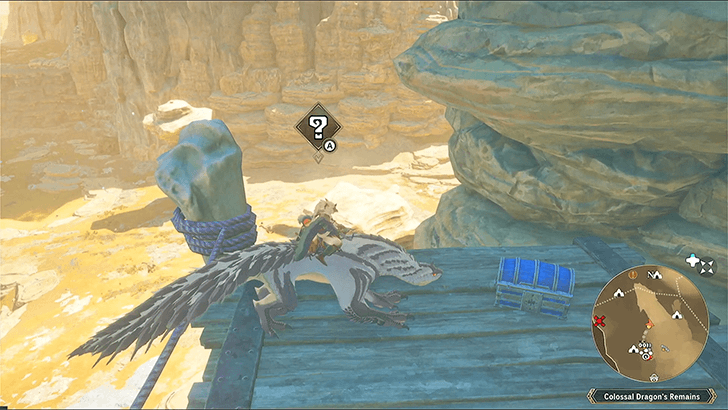
Colossal Dragon's Remains Monsties
 Almudron Almudron
|
 Barroth Barroth
|
 Garangolm Garangolm
|
 Kulu-Ya-Ku Kulu-Ya-Ku
|
 Shogun Ceanataur Shogun Ceanataur
|
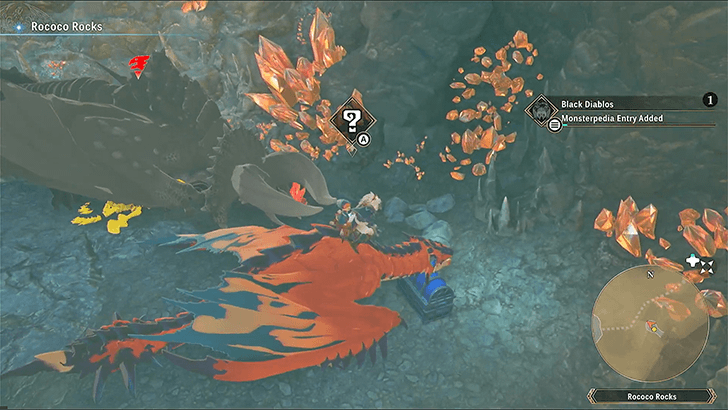
Rococo Rocks Monsties
 Black Diablos Black Diablos
|
 Diablos Diablos
|
 Glavenus Glavenus
|
 Gravios Gravios
|
 Shrouded Nerscylla Shrouded Nerscylla
|
Bountiful Dunes Monsties
 Ajarakan Ajarakan
|
Black Diablos
|
 Black Gravios Black Gravios
|
 Blood Orange Bishaten Blood Orange Bishaten
|
 Green Plesioth Green Plesioth
|
Death's Maw Monsties
 Odogaron Odogaron
|
 Rakna-Kadaki Rakna-Kadaki
|
List of All Monsties (Monster List)
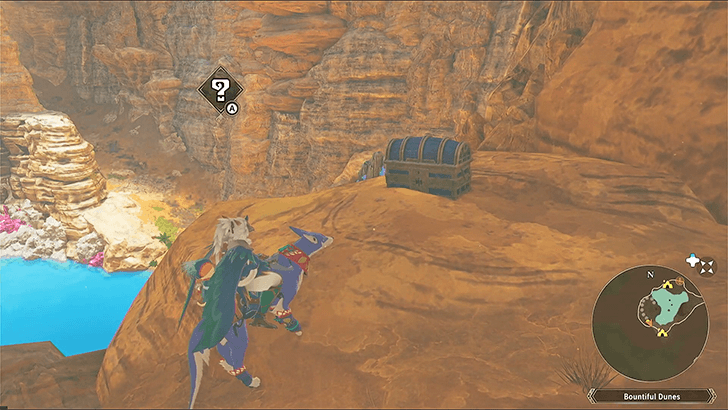
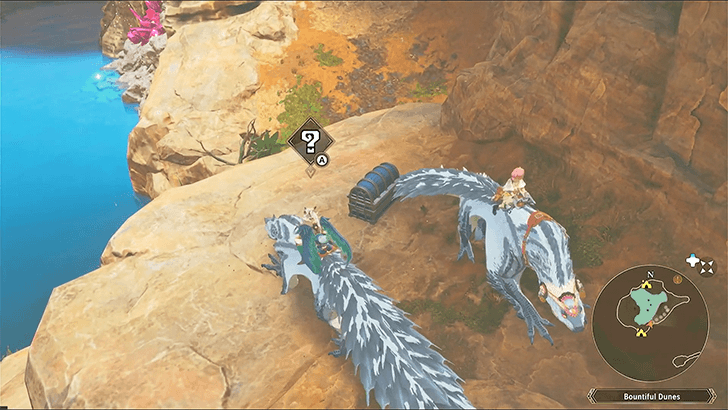
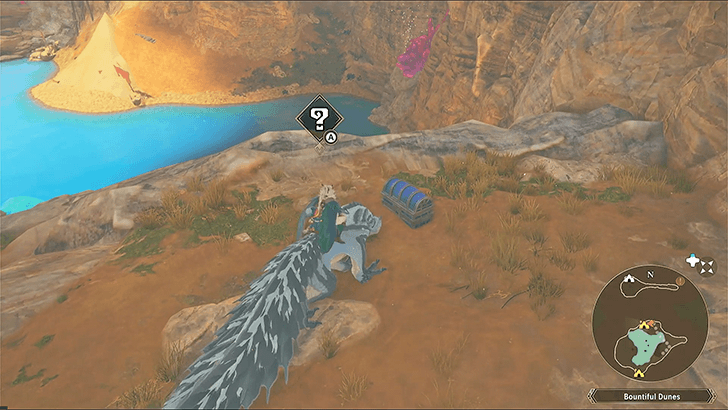
Tarkuan Chests Locations
Tarkuan Region
| ✔️ | Chest | World View | Map View |
|---|---|---|---|
|
Antiburn (S)
|
 |
 |
|
|
Cheese Knife Recipe
|
 |
 |
|
|
Cornpopper Recipe
|
 |
 |
|
|
Dragon Def Boost (S)
|
 |
 |
|
|
Health Boost (S)
|
 |
 |
|
|
Ice Def Boost (S)
|
 |
 |
|
|
Inflict Rate up (S)
|
 |
 |
|
|
Frozen Core Recipe
|
 |
 |
|
|
HtH Master (S)
|
 |
 |
|
|
Potential (S)
|
 |
 |
|
|
Kamak Gunlance Recipe
|
 |
 |
|
|
Non-Elem Def Boost (S)
|
 |
 |
|
|
Panacea (S)
|
 |
 |
|
|
Sealbreaker (S)
|
 |
 |
|
|
Thunder Def Boost (S)
|
 |
 |
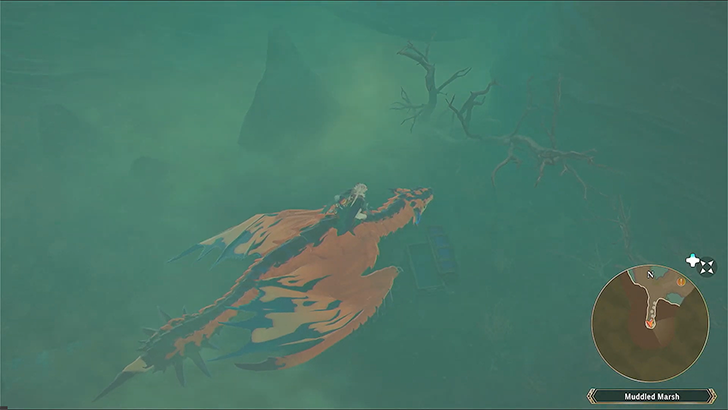
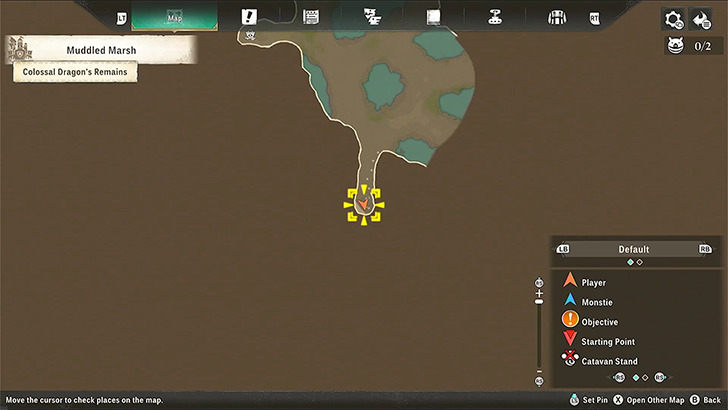
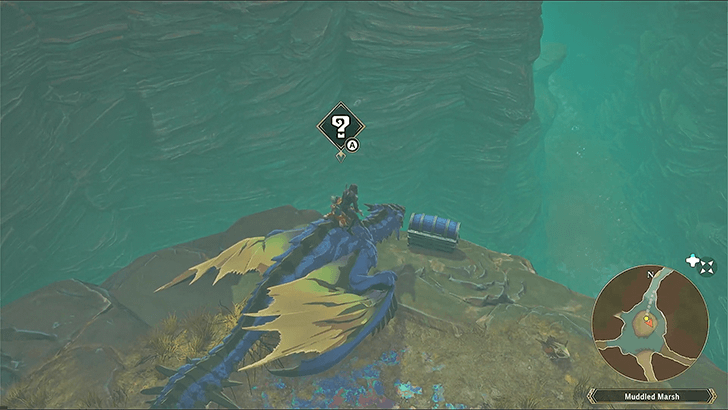
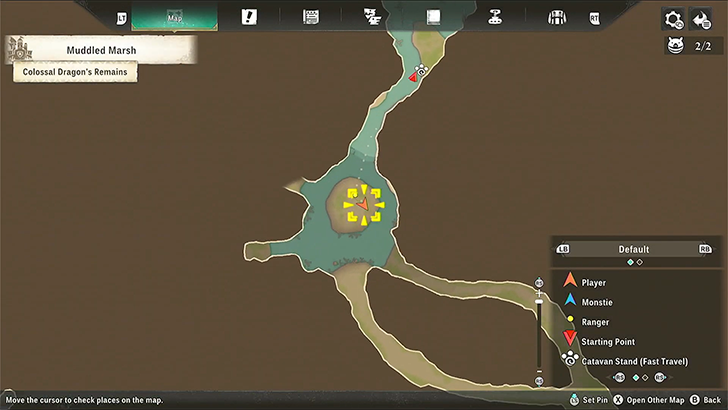
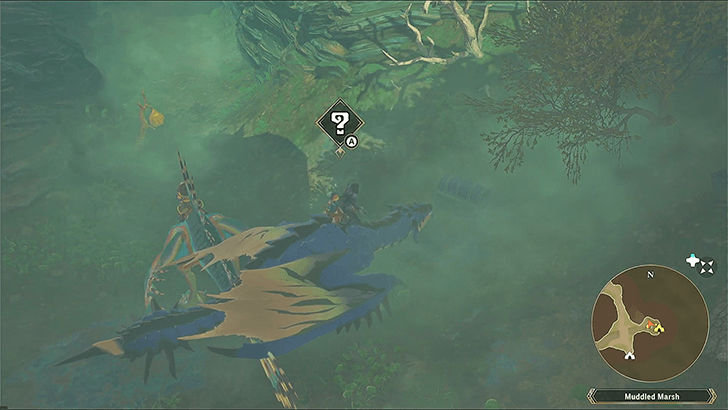
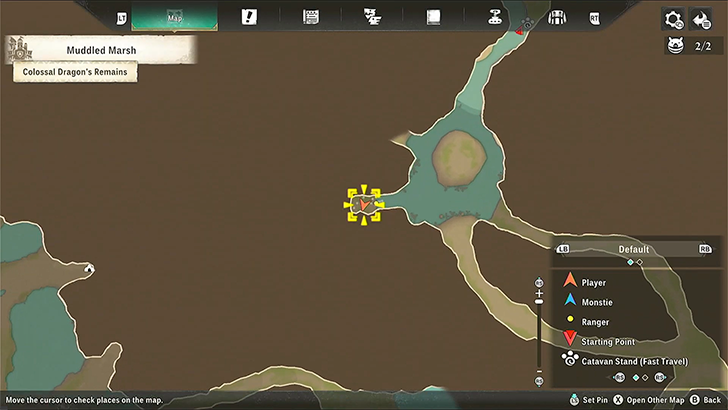
Muddled Marsh
| ✔️ | Chest | World View | Map View |
|---|---|---|---|
|
Crystalline Flower Recipe
|
 |
 |
|
|
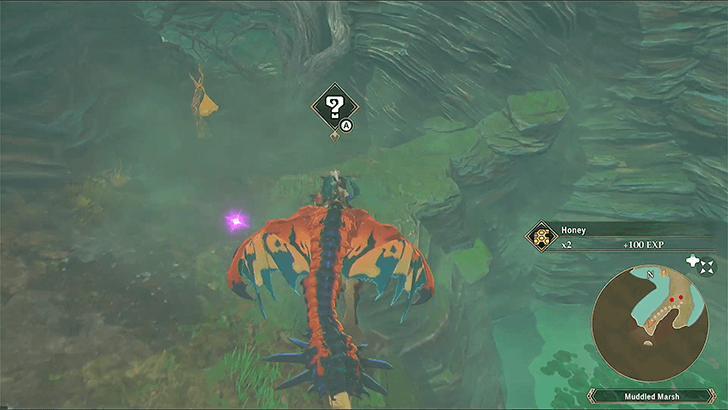
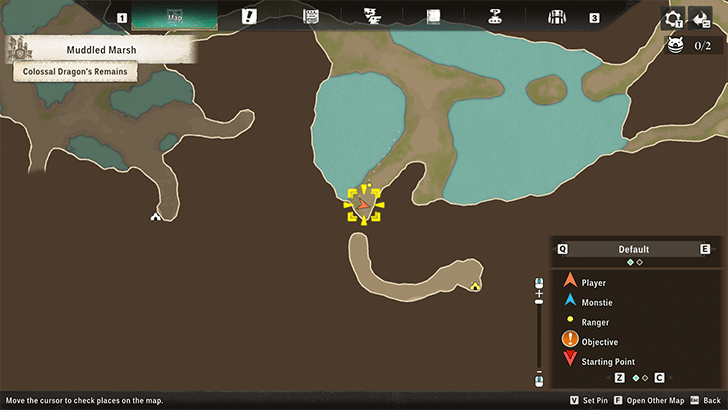
Nulberry Elixir x2
|
 |
 |
|
|
Partbreaker (S)
|
 |
 |
|
|
Self-Heal (S)
|
 |
 |
|
|
Artian Armor Recipe
|
 |
 |
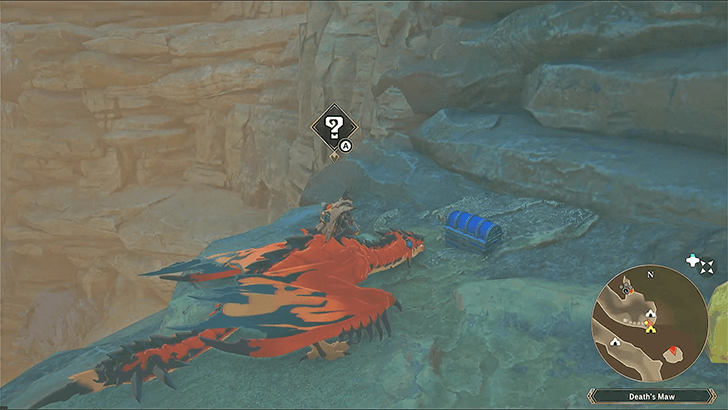
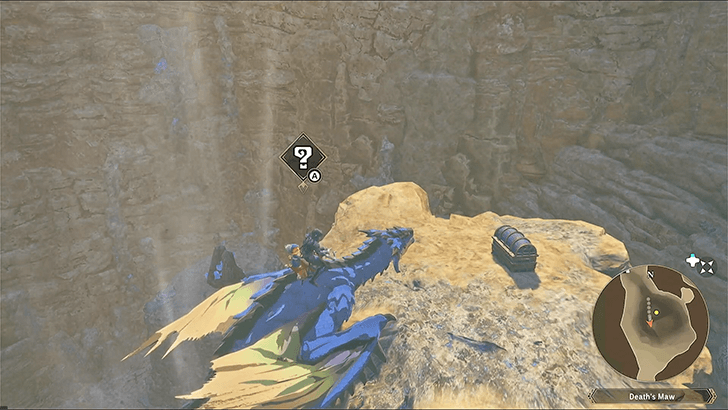
Death's Maw
| ✔️ | Chest | World View | Map View |
|---|---|---|---|
|
Antibleed (S)
|
 |
 |
|
|
Dancer (S)
|
 |
 |
|
|
Burn Ointment x5
|
 |
 |
|
|
Bombardier (S)
|
 |
 |
|
|
Evasion Instinct (S)
|
 |
 |
|
|
Vital Essence x1
|
 |
 |
Tarkuan Track Items Locations
Tarkuan Region
| ✔️ | Track Item | World and Map View | |
|---|---|---|---|
|
Beautiful Blue Scale
(Cephalos) |
 |
 |
|
| How to Get: South of the Galyad ship dock near the west edge of the map | |||
|
Dazzling Fluid
(Nibelsnarf) |
 |
 |
|
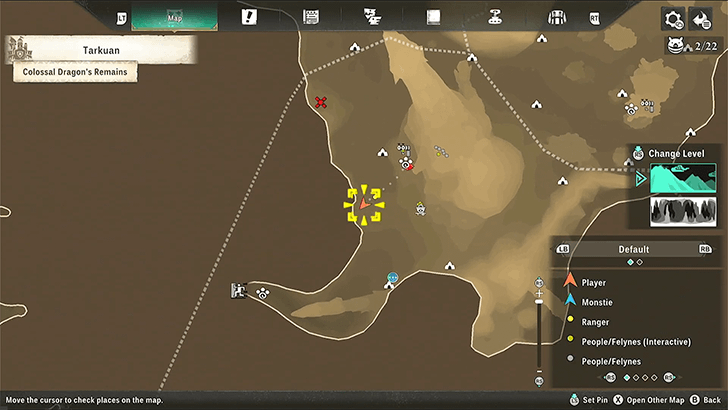
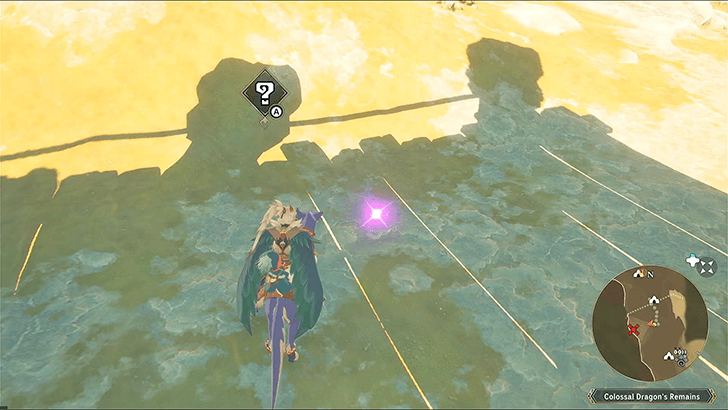
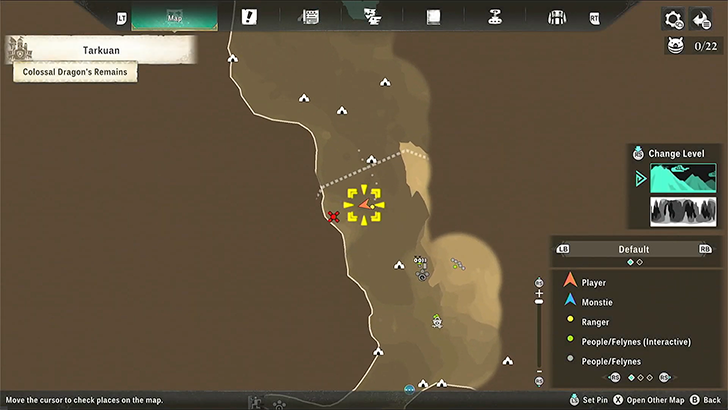
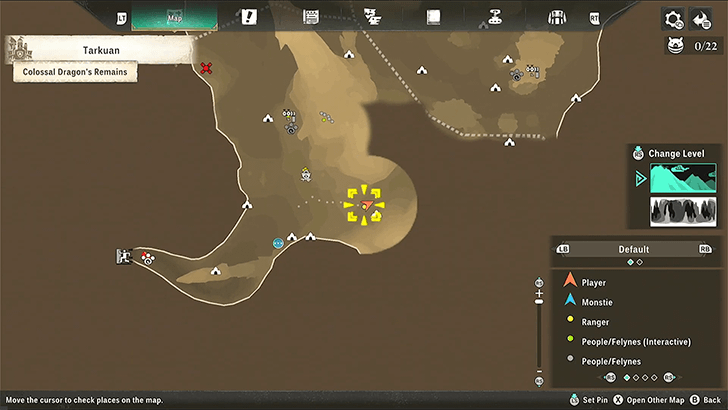
| How to Get: West of the head of the Colossal Dragon’s Remains | |||
|
Double Sac
(Gravios) |
 |
 |
|
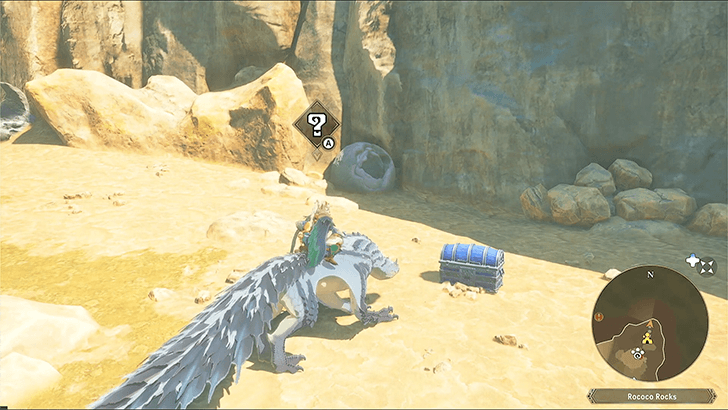
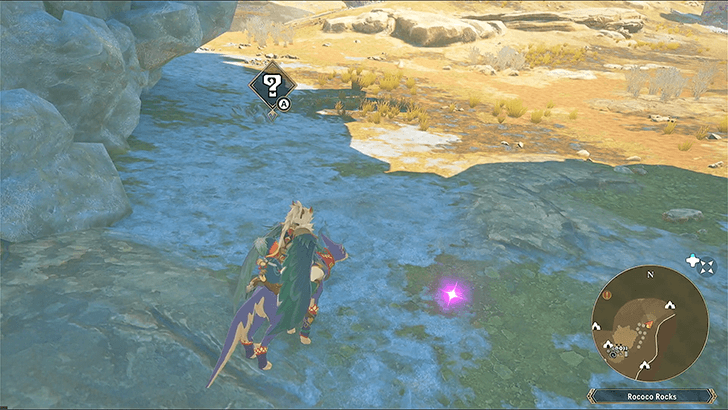
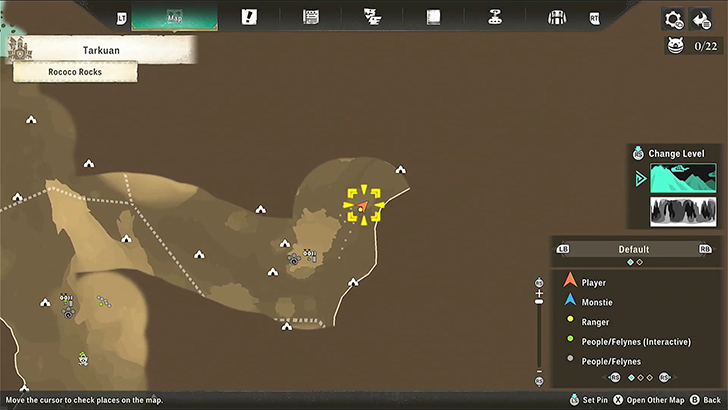
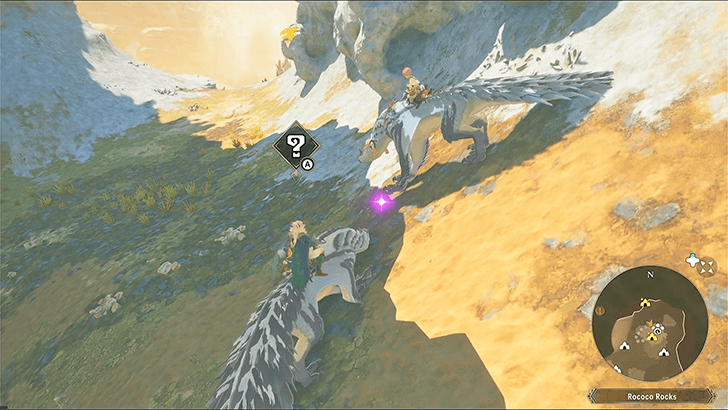
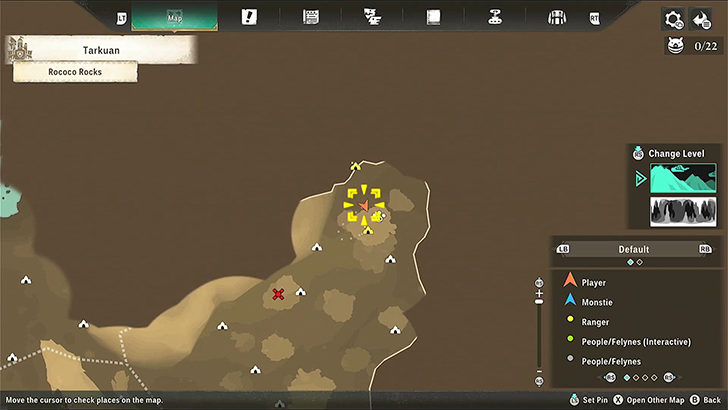
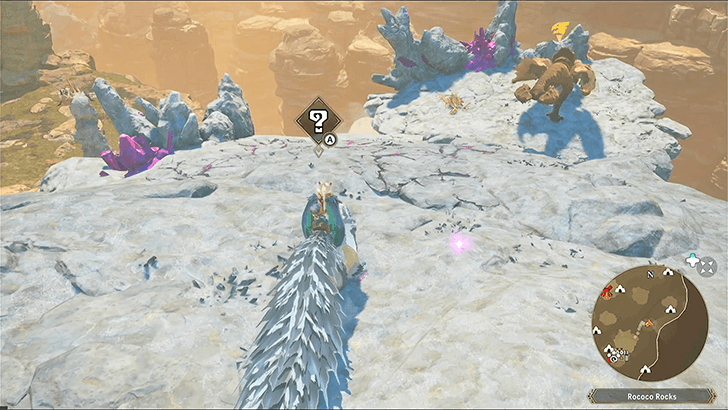
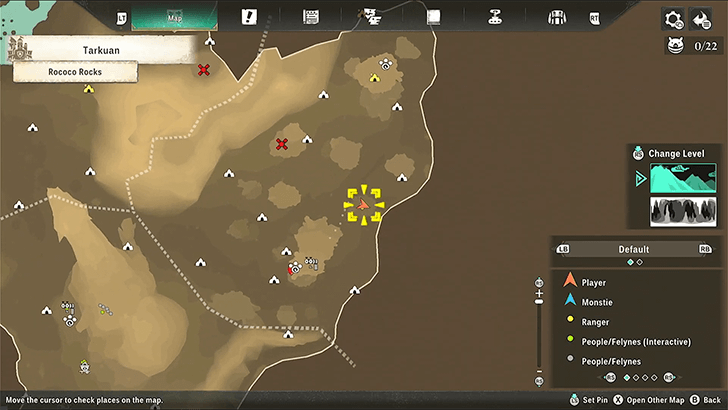
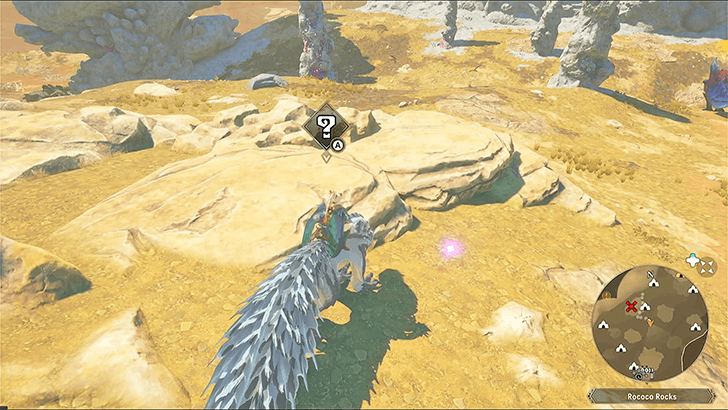
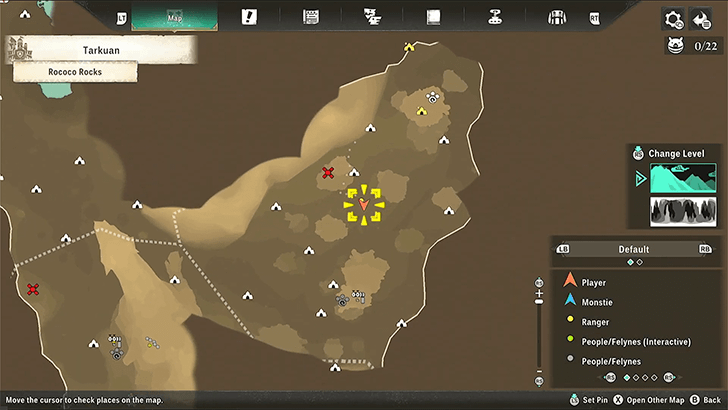
| How to Get: Northwest of the Rococo Rocks Lookout Point next to a Diablos | |||
|
Egg Shell
(Kulu-Ya-Ku) |
 |
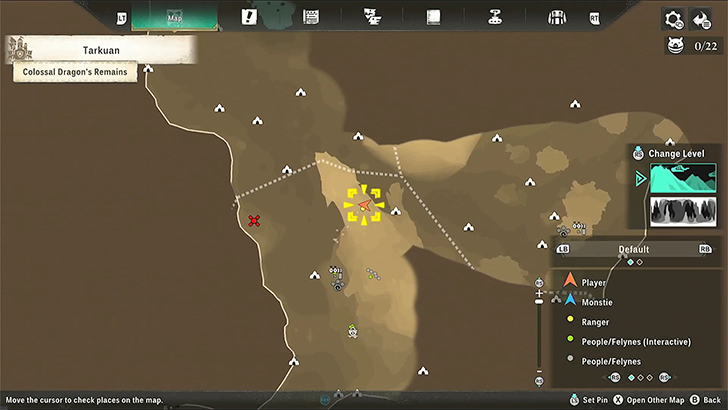 |
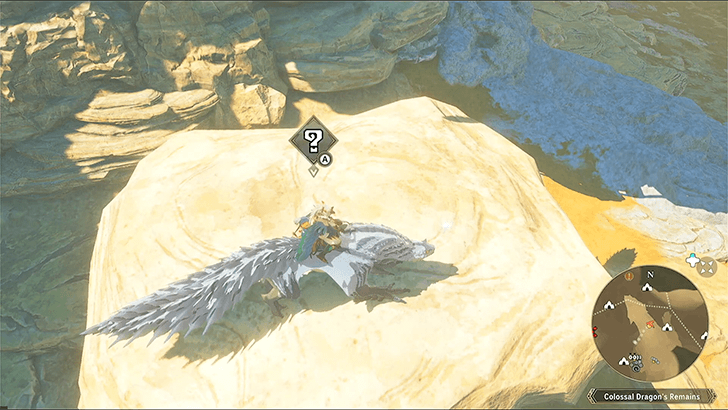
|
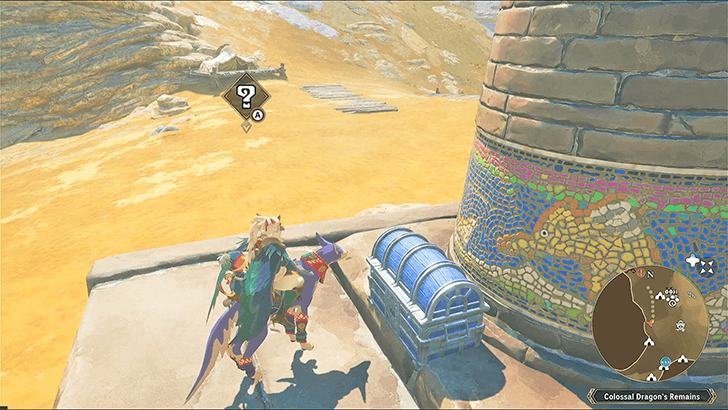
| How to Get: On a rock pillar under the neck of the Colossal Dragon’s Remains | |||
|
Flame-Like Shell
(Ajarakan) |
 |
 |
|
| How to Get: On the bottom of the pillar where the Rococo Rock Catavan Stand is located | |||
|
Flying Wyvern Shell
(Shogun Ceanataur) |
 |
 |
|
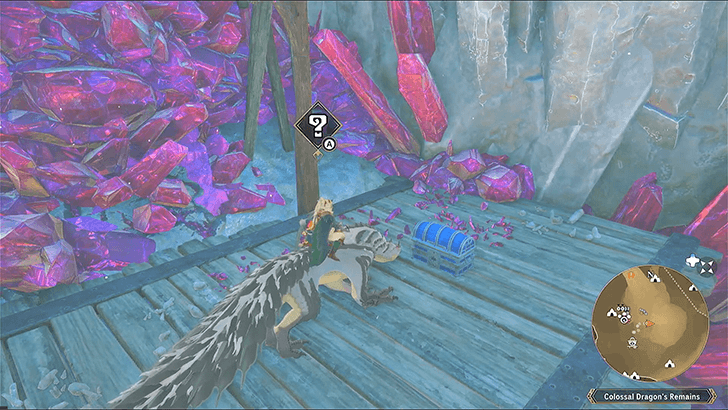
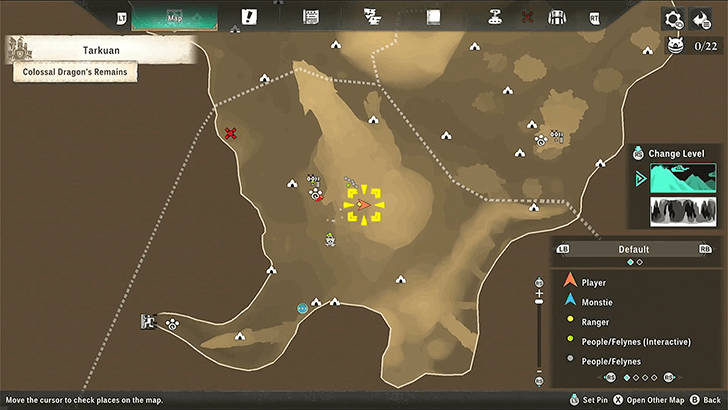
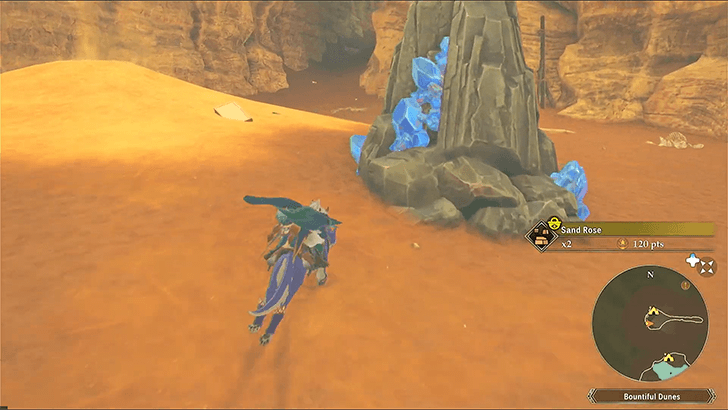
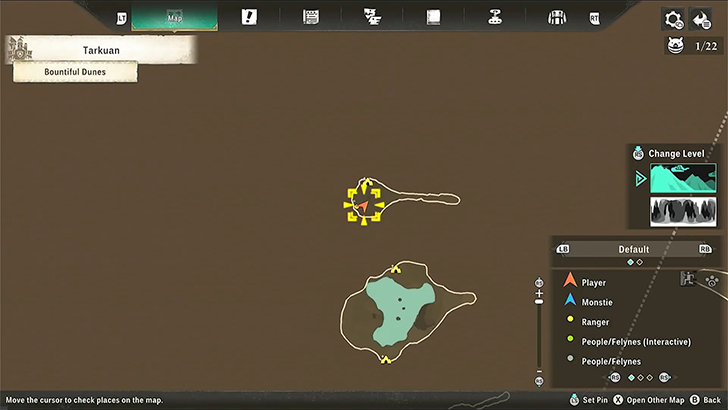
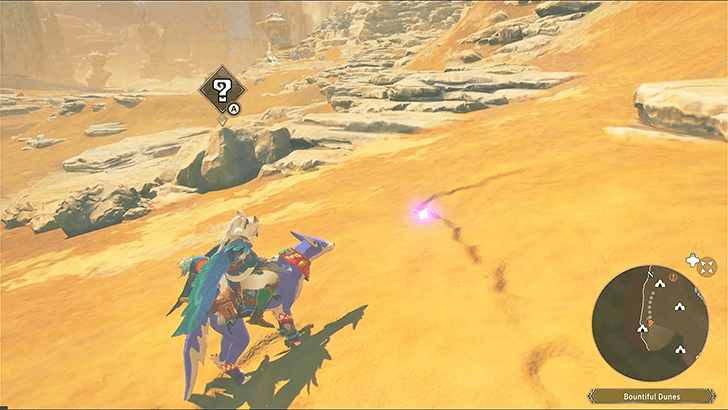
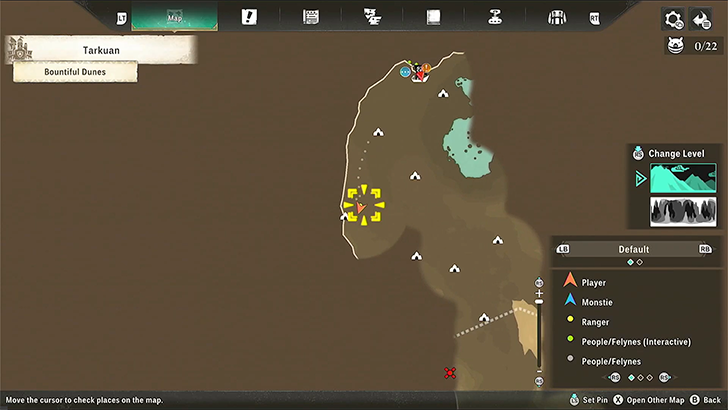
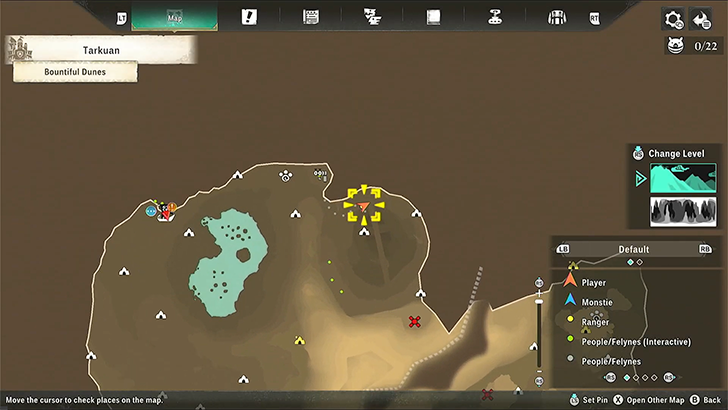
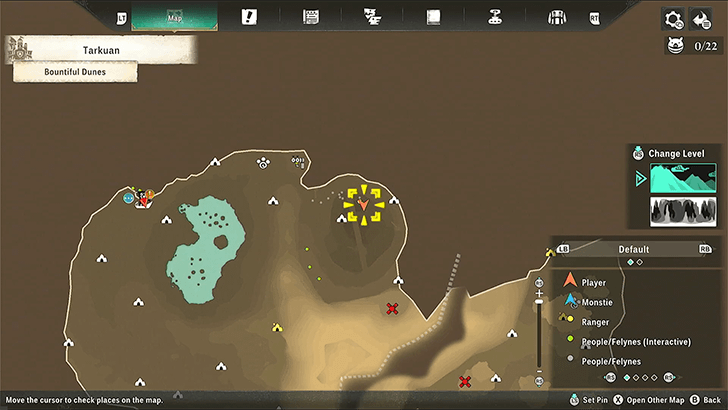
| How to Get: At the bottom of the mining site in the Bountiful Dunes | |||
|
Gnawed-On Carcass
(Remobra) |
 |
 |
|
| How to Get: East of the Merchant in Colossal Dragon’s Remains | |||
|
Heavy Shell
(Gravios) |
 |
 |
|
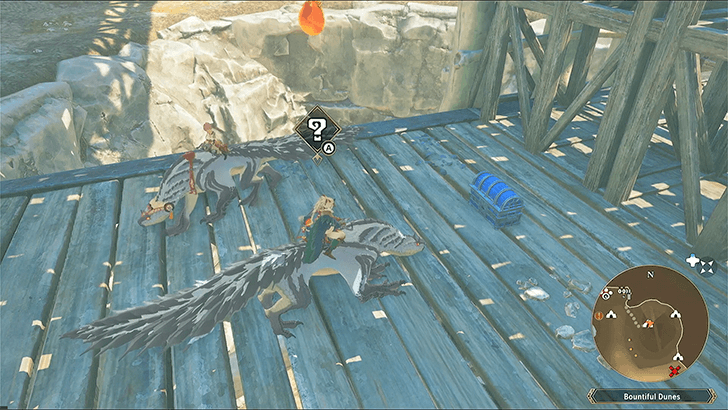
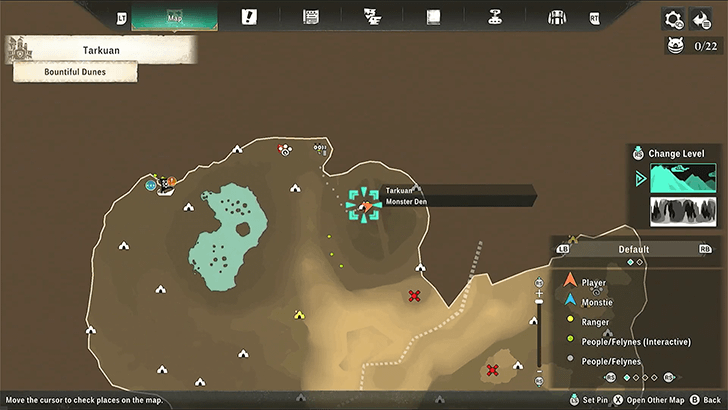
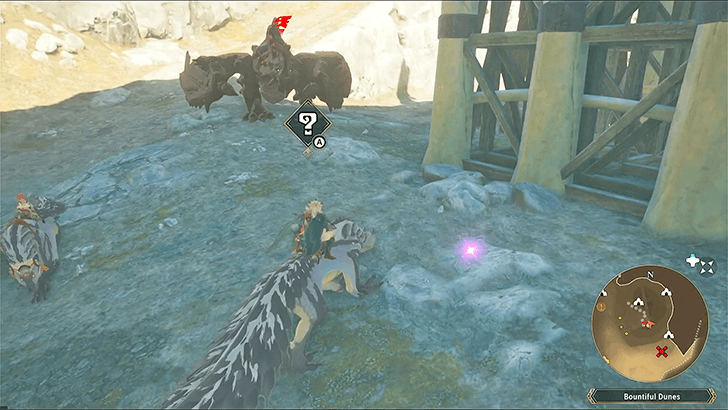
| How to Get: On the second highest level near an ore pile at the northern side of the mining site in Bountiful Dunes | |||
|
High-Quality Brain
(Ceanataur) |
 |
 |
|
| How to Get: On a wooden platform on the second highest level at the northern side of the mining site in Bountiful Dunes | |||
|
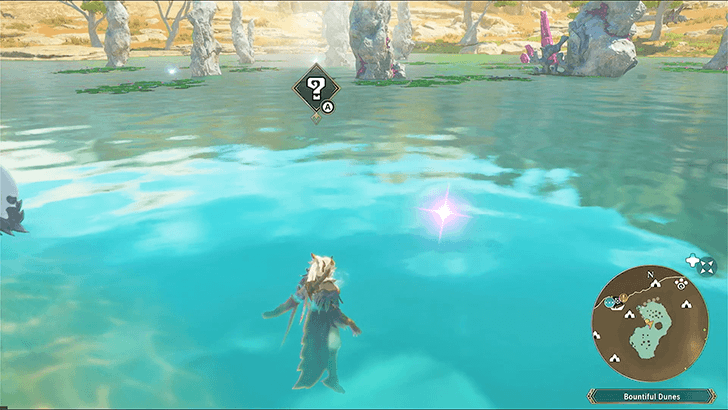
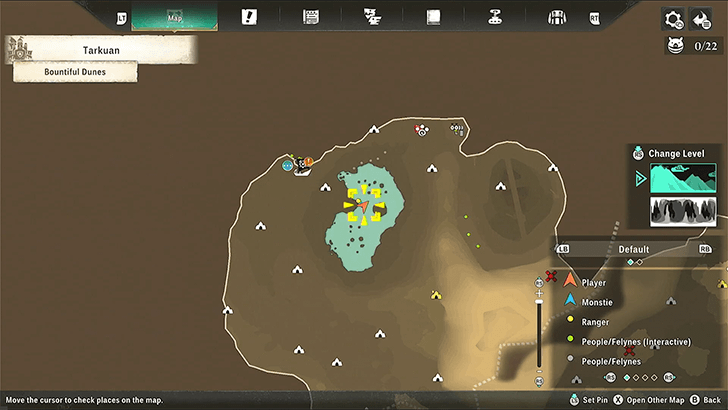
Jade-Green Scale
(Green Plesioth) |
 |
 |
|
| How to Get: Floating on the surface of the water in the Oasis | |||
|
Jet-Black Shell
(Black Gravios) |
 |
 |
|
| How to Get: On the second level at the southern side of the mining site in Bountiful Dunes near a Black Gravios | |||
|
Long Red Whisker
(Almudron) |
 |
 |
|
| How to Get: Climb the wall east of the Muddled Marsh: Exit Catavan Stand | |||
|
Mass of Sand
(Nibelsnarf) |
 |
 |
|
| How to Get: Along the subtle dirt path between the Colossal Dragon’s Remains and the Galyad ship dock | |||
|
Melted Metal
(Ajarakan) |
 |
 |
|
| How to Get: On the lower platform northeast of the Rococo Lookout Point near and Ajarakan | |||
|
Monster Egg
(Kulu-Ya-Ku) |
 |
 |
|
| How to Get: Beside an egg-like rock at the lower end of the Colossal Dragon’s Remains | |||
|
Pearl Coat
(Shrouded Nerscylla) |
 |
 |
|
| How to Get: On a platform under the Rococo Rocks Catavan Stand near a Shrouded Nerscylla | |||
|
Poisonous Blood
(Espinas) |
 |
 |
|
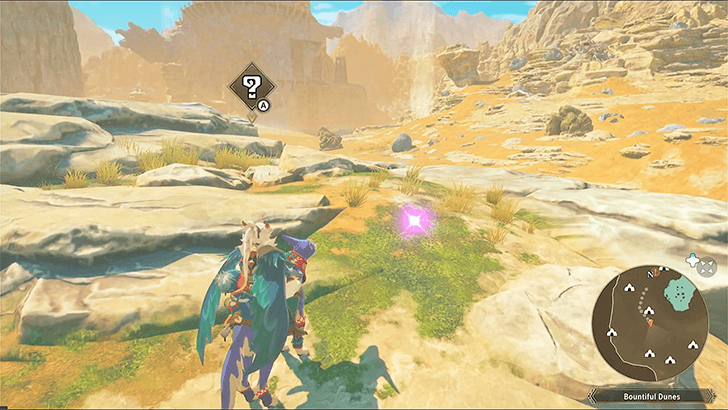
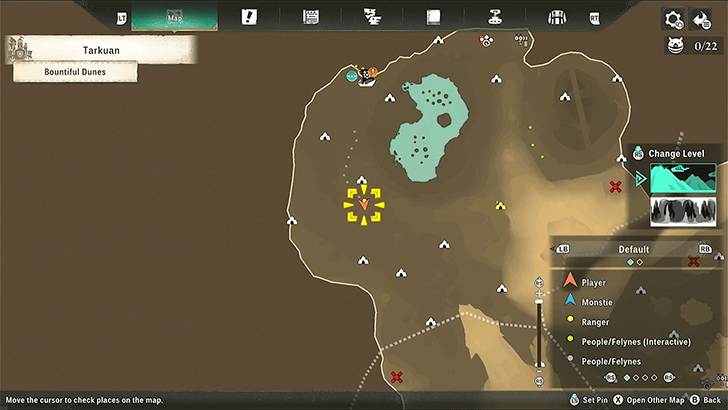
| How to Get: At the southern edge of the oasis in Bountiful Dunes near an Espinas | |||
|
Red Arm Feather
(Blood Orange Bishaten) |
 |
 |
|
| How to Get: Between the Colossal Dragon’s Remains and the Rococo Rock Lookout Point | |||
|
Red-Hot Sac
(Glavenus) |
 |
 |
|
| How to Get: Under the Rococo Rocks Catavan Stand near a Glavenus | |||
|
Singed Pinecone
(Blood Orange Bishaten) |
 |
 |
|
| How to Get: South of the Galyad ship dock on the west side of the oasis | |||
|
Sonic Bomb Fragment
(Cephalos) |
 |
 |
|
| How to Get: West of the tip of the head of the Colossal Dragon’s Remains | |||
|
Stony Flesh
(Barroth) |
 |
 |
|
| How to Get: West of the bottom of the pillar where the Rococo Rocks Lookout Point is located | |||
|
Twisted Horn
(Diablos) |
 |
 |
|
| How to Get: On top of the platform northeast of the Rococo Rocks Lookout Point near a Diablos | |||
|
Well-Hydrated Cactus
(Diablos) |
 |
 |
|
| How to Get: On the hill south of the oasis and the Galyad ship dock | |||
|
Red-Hot Tail
(Glavenus) |
 |
 |
|
| How to Get: In the open space north of the Rococo Rocks Lookout Point | |||
Muddled Marsh
| ✔️ | Track Item | World and Map View | |
|---|---|---|---|
|
Small Claws
(Ceanataur) |
 |
 |
|
| How to Get: At the south side of Muddled Marsh next to a path that has been covered by branches | |||
|
Mud Flakes
(Barroth) |
 |
 |
|
| How to Get: In the middle of the big mud pond in the southwest corner of the Muddled Marsh | |||
|
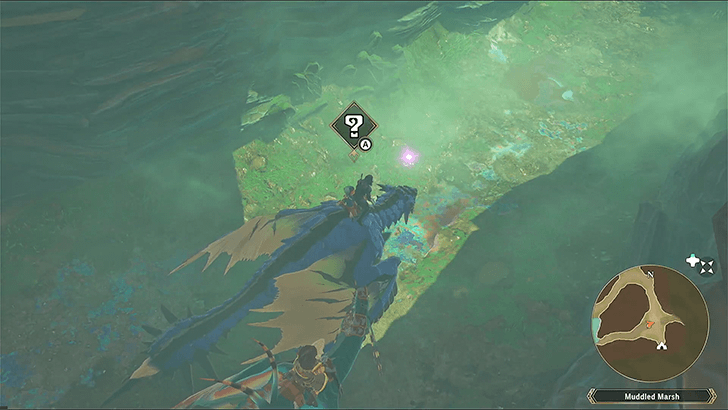
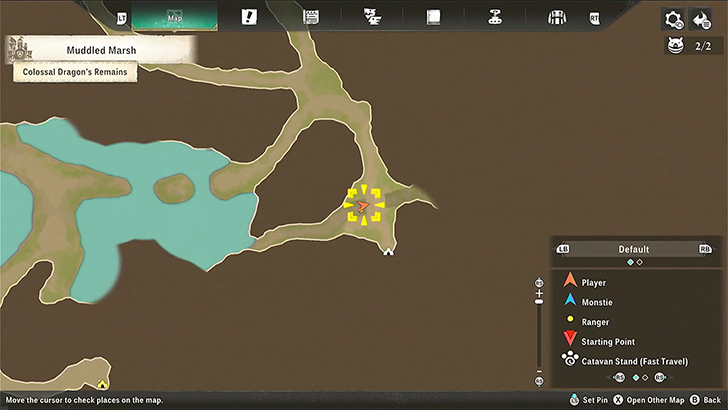
Delicate Shell
(Bnahbara) |
 |
 |
|
| How to Get: Where the path splits into three routes in the southwest part of the Muddled Marsh | |||
|
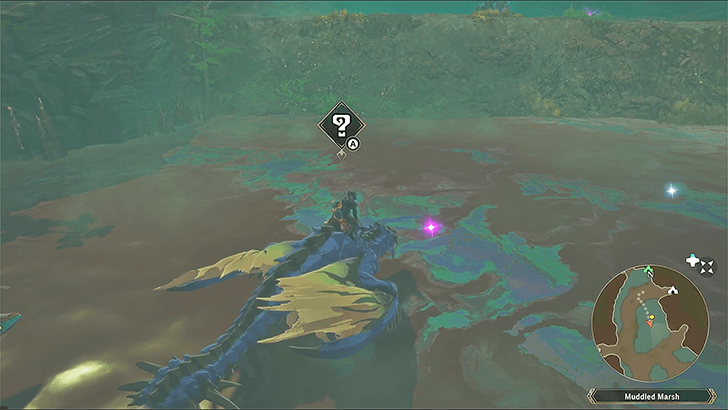
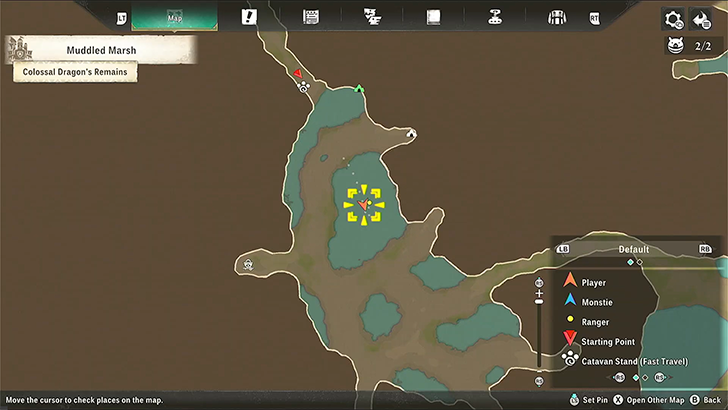
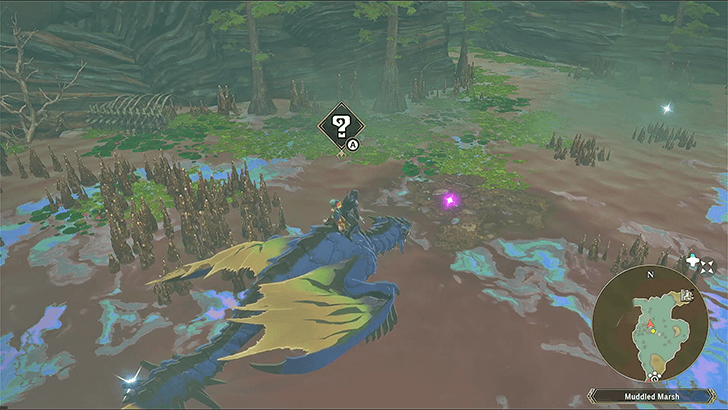
Golden Muck
(Almudron) |
 |
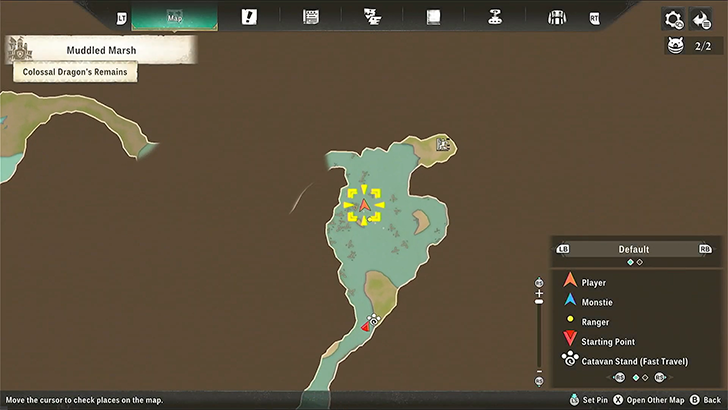 |
|
| How to Get: North of the Muddled Marsh:Bog Catavan Stand, where you first fight the Almudron during the main quest | |||
|
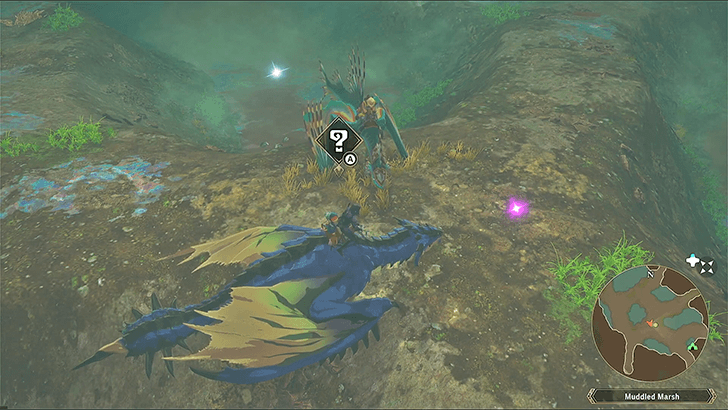
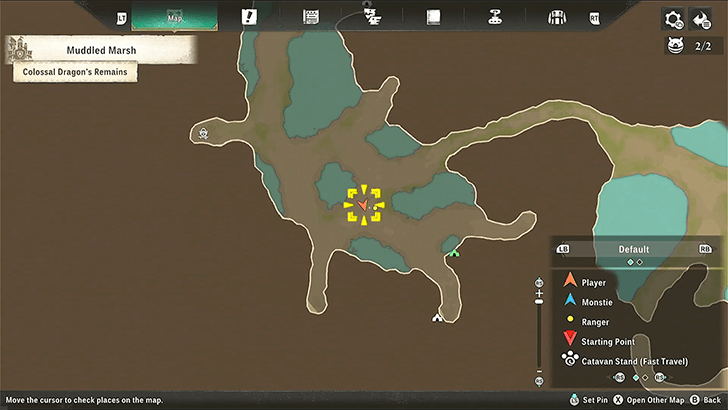
Sharpened Claw
(Shogun Ceanataur) |
 |
 |
|
| How to Get: In the southeastern corner of Muddled Marsh where the paths merge near a Shogun Ceanataur | |||
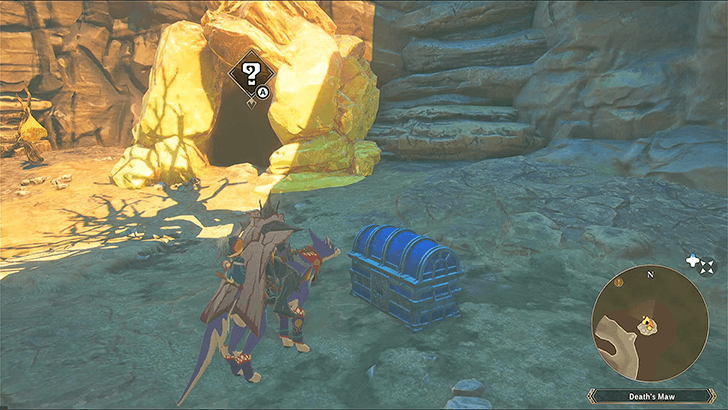
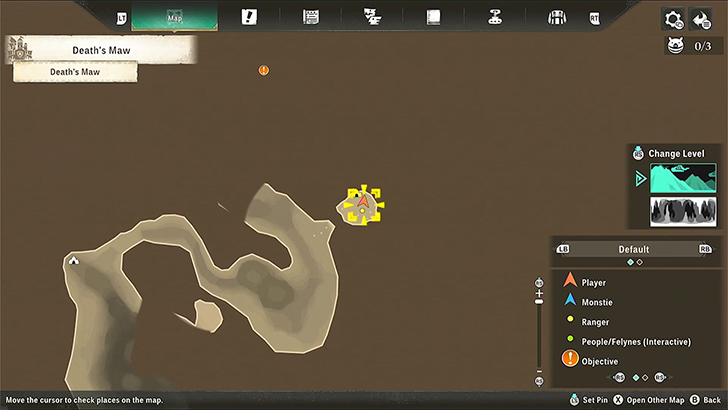
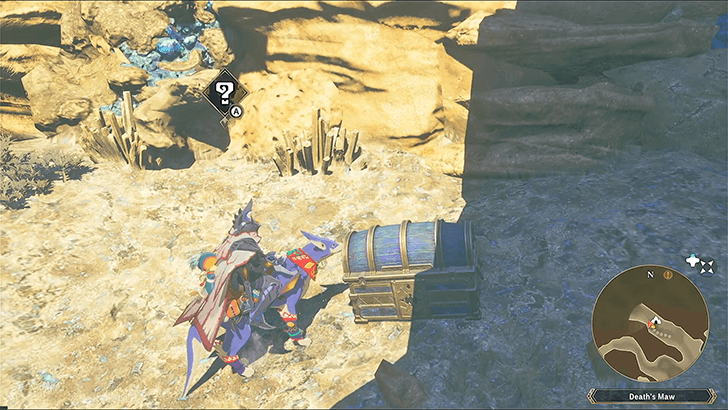
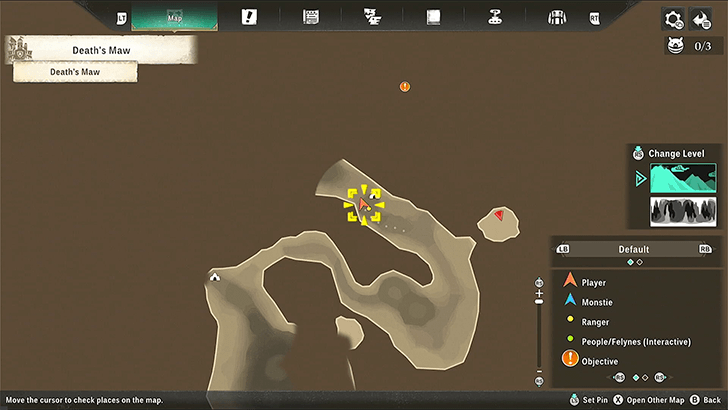
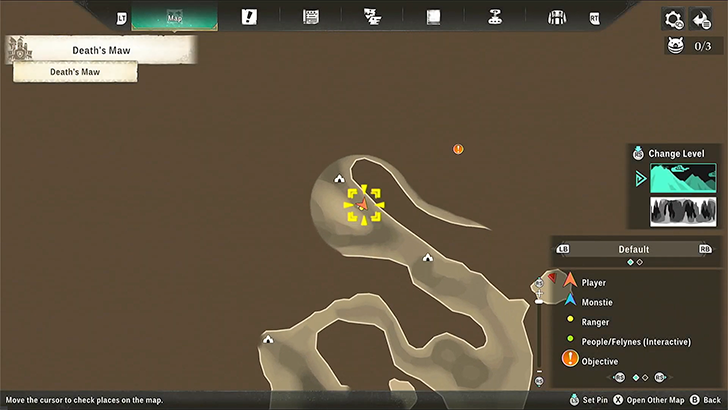
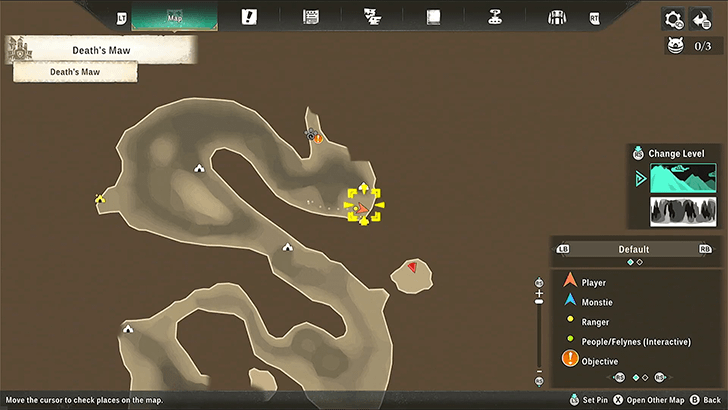
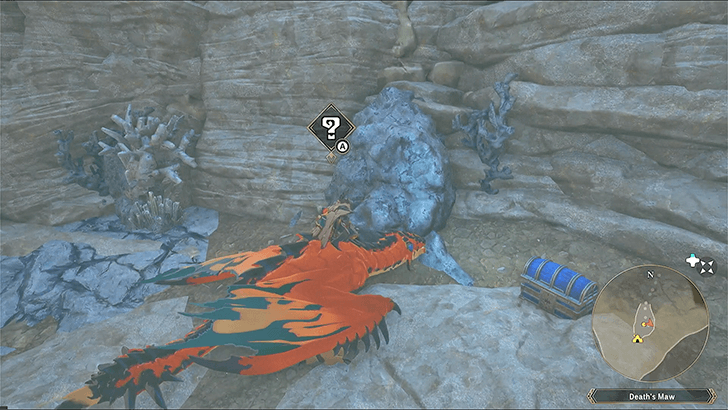
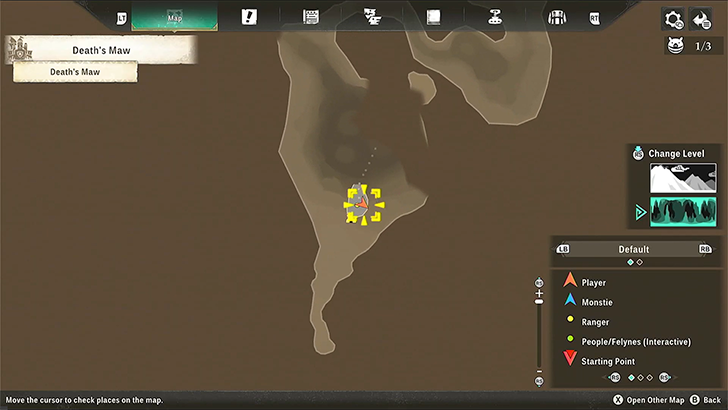
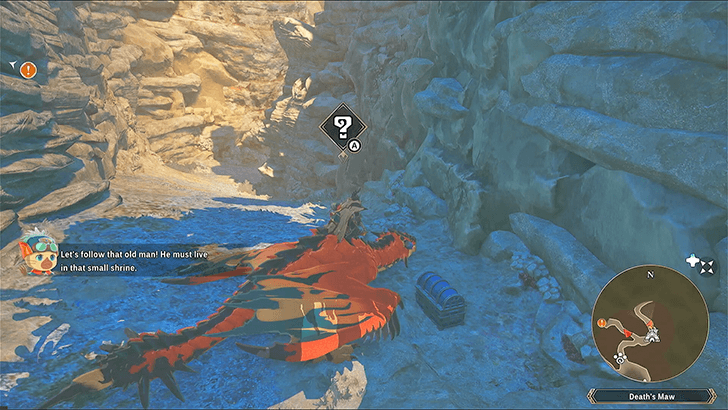
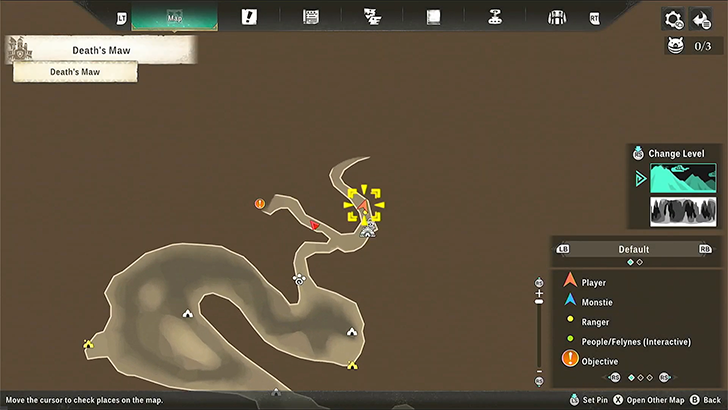
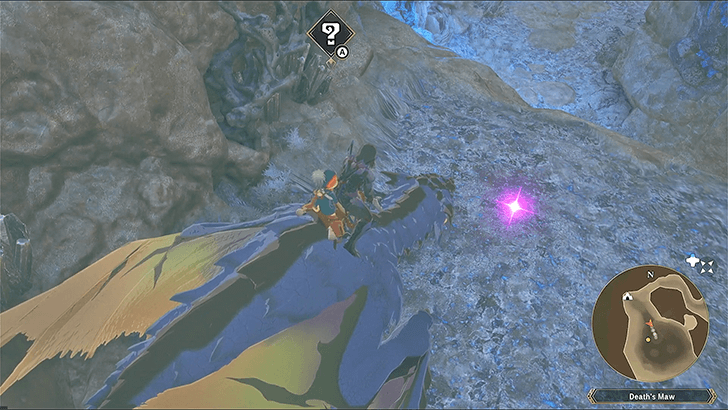
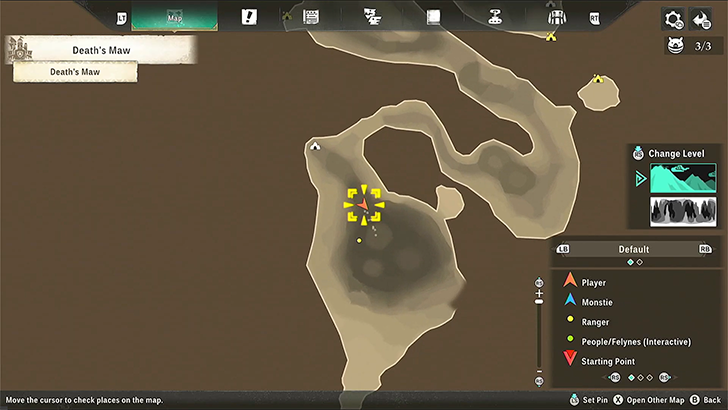
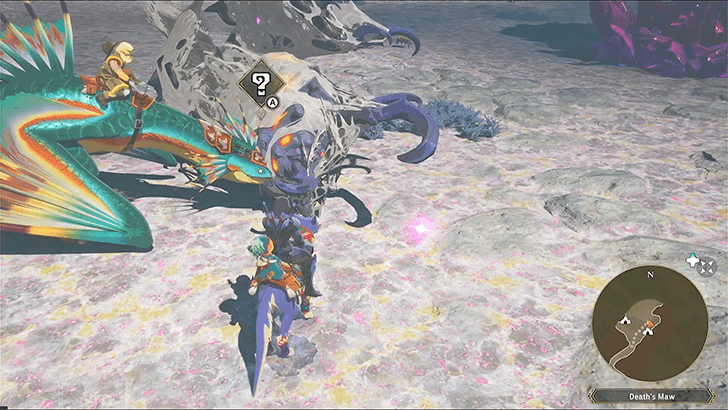
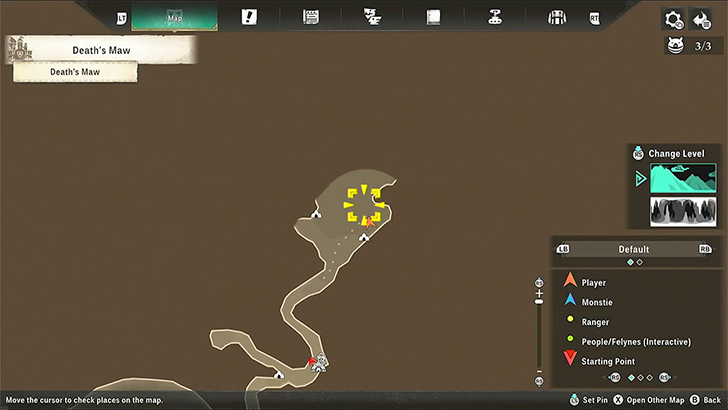
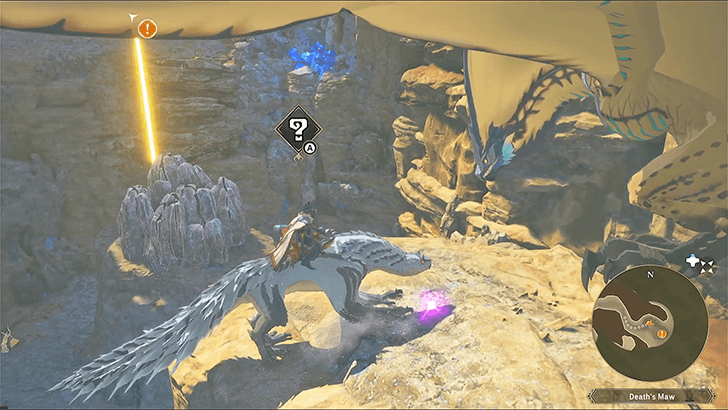
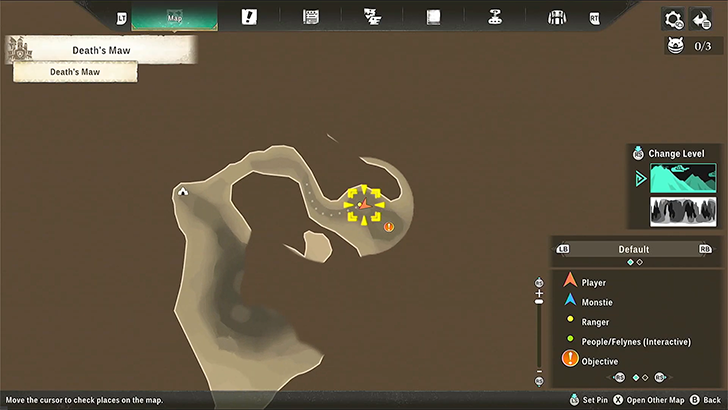
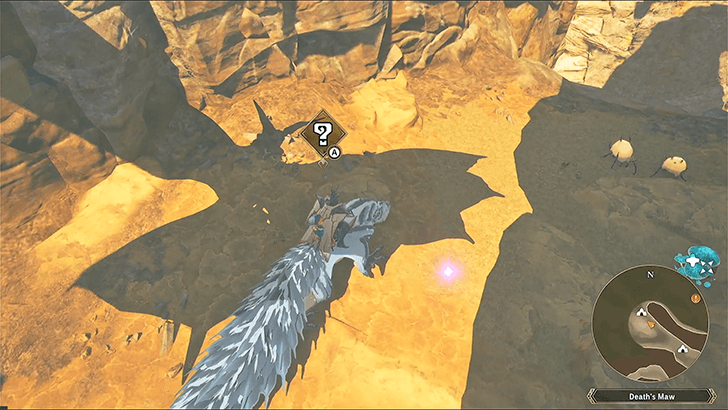
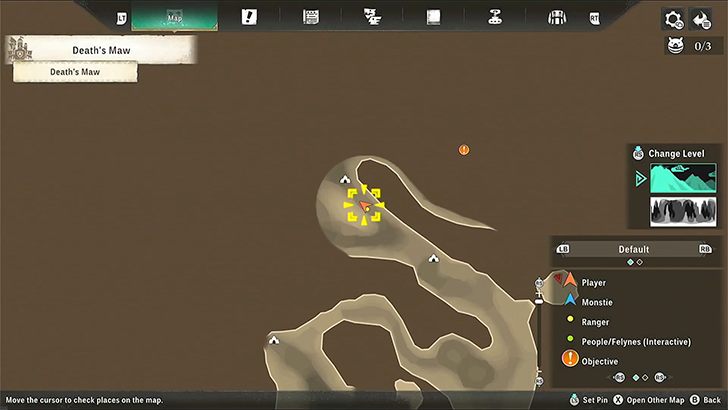
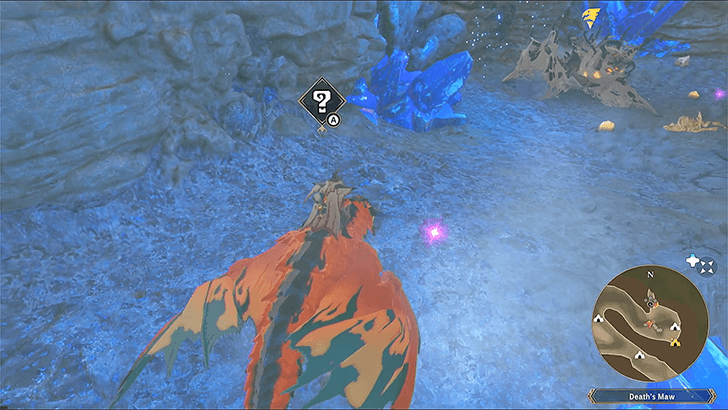
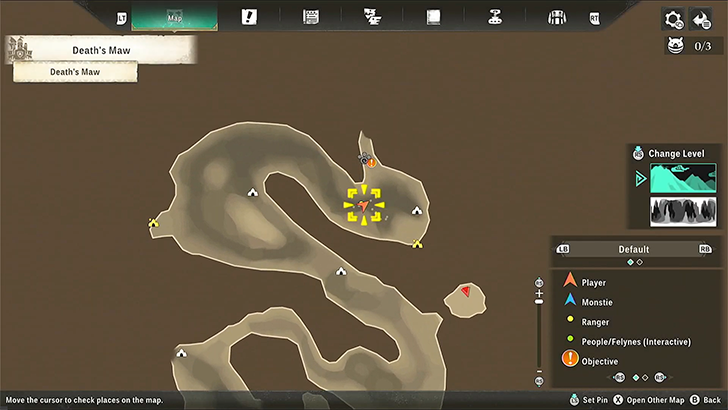
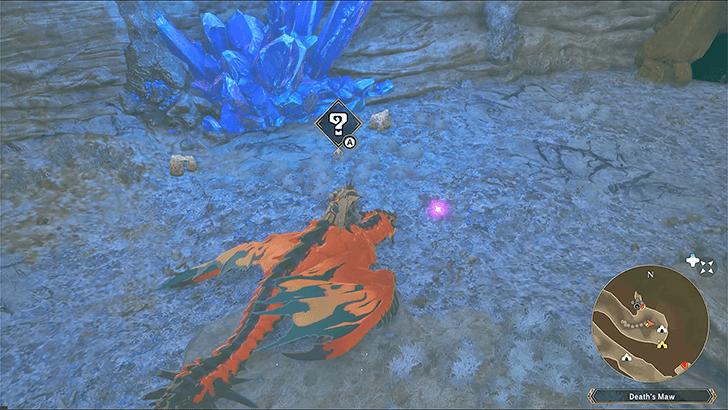
Death's Maw
| ✔️ | Track Item | World and Map View | |
|---|---|---|---|
|
Jet-Black Scalp
(Black Gravios) |
 |
 |
|
| How to Get: North of the Death’s Maw entrance after crossing the chasm | |||
|
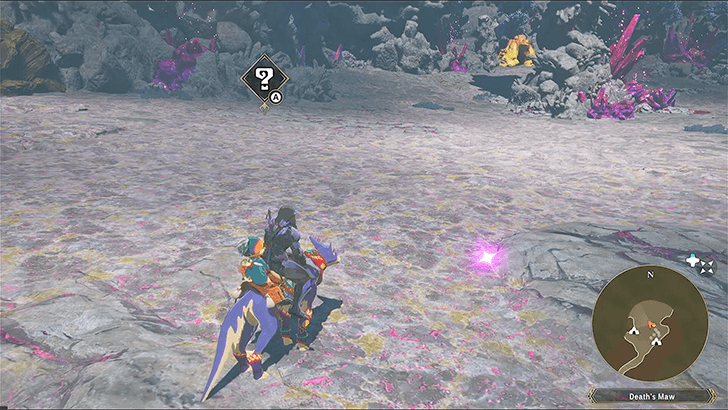
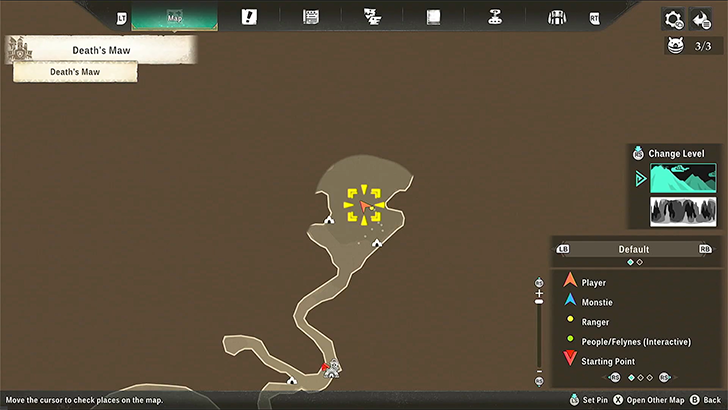
Striped Hide
(Remobra) |
 |
 |
|
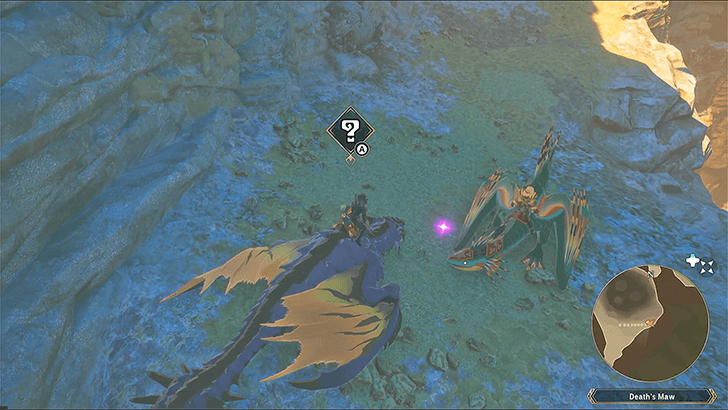
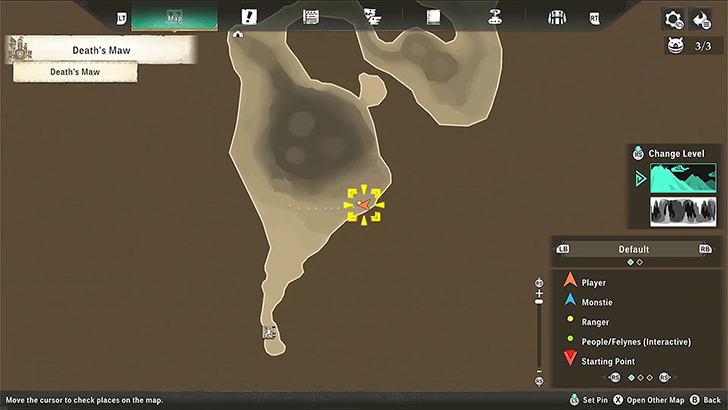
| How to Get: Along the east ledge of the chasm near Death’s Maw entrance | |||
|
Rachnoid-Like Body
(Rakna-Kadaki) |
 |
 |
|
| How to Get: After exiting the path to the open area north of the Camp: Death’s Maw | |||
|
Barbed Scale
(Rey Dau) |
 |
 |
|
| How to Get: In the middle of the open area north of the Camp: Death’s Maw | |||
|
Ink-Black Cortex
(Black Diablos) |
 |
 |
|
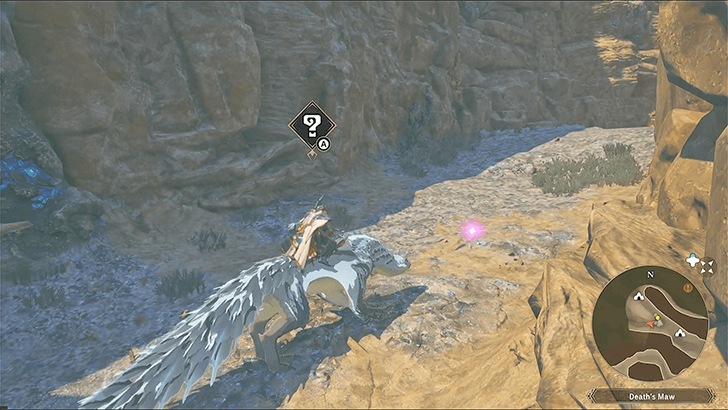
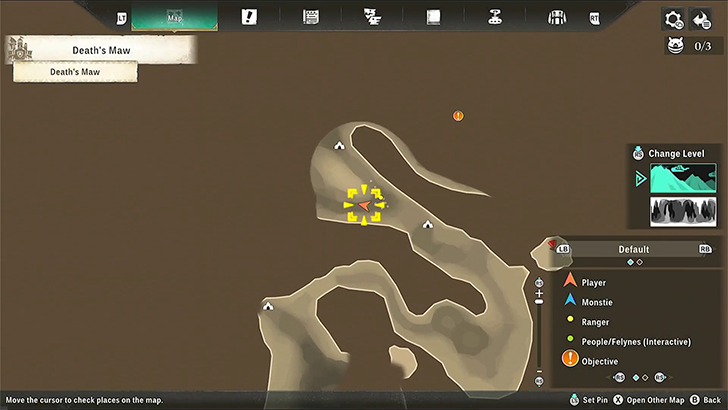
| How to Get: On top of a rock pillar at the bottom curve of the big S-like cavern in Death’s Maw | |||
|
Warm Glowgut
(Rachnoid) |
 |
 |
|
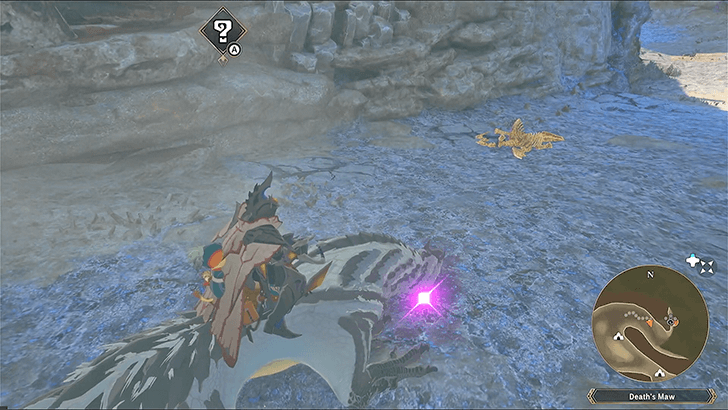
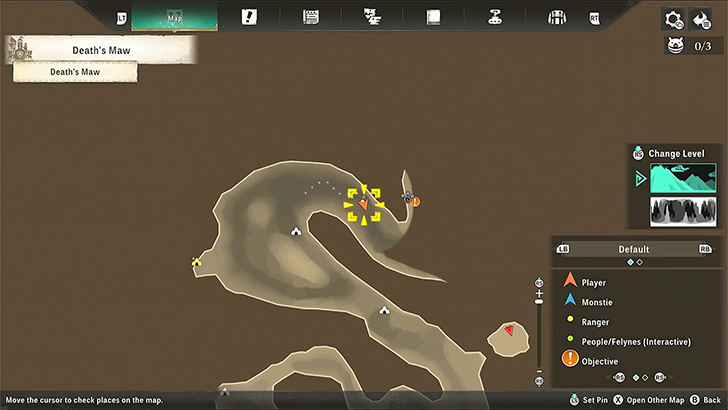
| How to Get: On a rock platform nearing the top curve of the big S-like cavern in Death’s Maw | |||
|
Half-Eaten Carrion
(Odogaron) |
 |
 |
|
| How to Get: At the bottom of the cavern nearing the top curve of the big S-like cavern in Death’s Maw | |||
|
Sawtooth Claw
(Odogaron) |
 |
 |
|
| How to Get: At the end of the top curve of the big S-like cavern in Death’s Maw near the Catavan Stand | |||
|
Sturdy Silk
(Rachnoid) |
 |
 |
|
| How to Get: South of the Death’s Maw Catavan Stand at the bottom of the cavern next to a Rakna-Kadaki | |||
|
Unhatched Egg
(Rakna-Kadaki) |
 |
 |
|
| How to Get: Slightly south of the Death’s Maw Catavan Stand at the bottom of the cavern next to a Rakna-Kadaki | |||
How to Unlock Tarkuan
After Quelling the Threat to Canalta Timberland
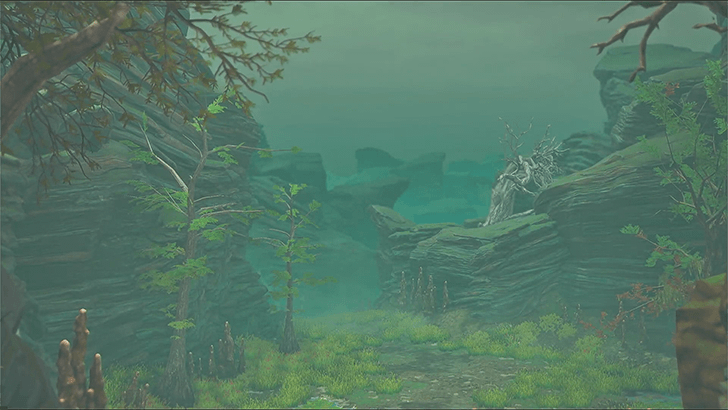
You will unlock the Muddled Marsh in Tarkuan first after completing A Valuable Encounter main story quest. Defeat Yama Tsukami and finish the cutscenes to arrive at the Muddled Marsh.
A Valuable Encounter Walkthrough
Monster Hunter Stories 3 (MHS3) Related Guides
Region Guides
 Azuria Azuria |
 Canalta Timberland Canalta Timberland |
| Tarkuan |
 Serathis Serathis |
Points of Interest
 All Poogie Locations All Poogie Locations |
 All Feral Monsters All Feral Monsters |
All Invasive Monsters |
 All Side Quests All Side Quests |
 All Chest Locations All Chest Locations |
Habitat Monster Lists
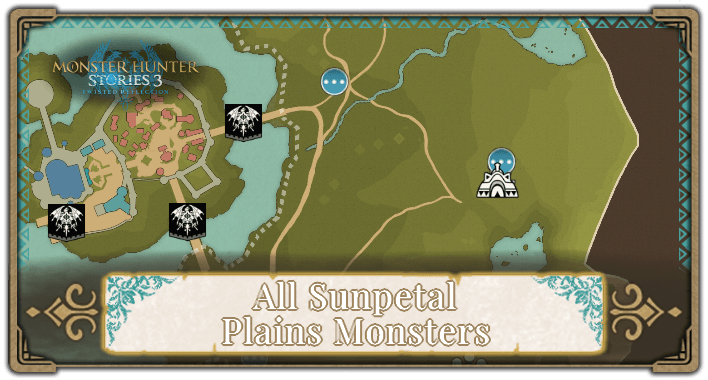 All Sunpetal Plains Monsters
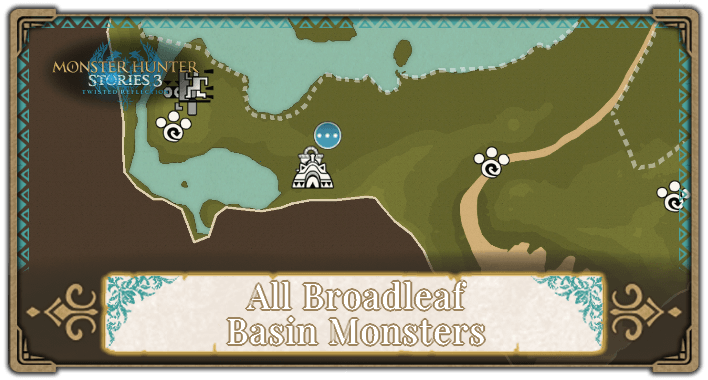 All Broadleaf Basin Monsters
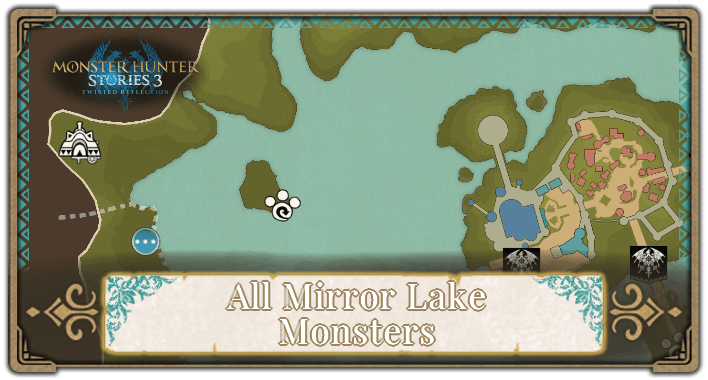 All Mirror Lake Monsters
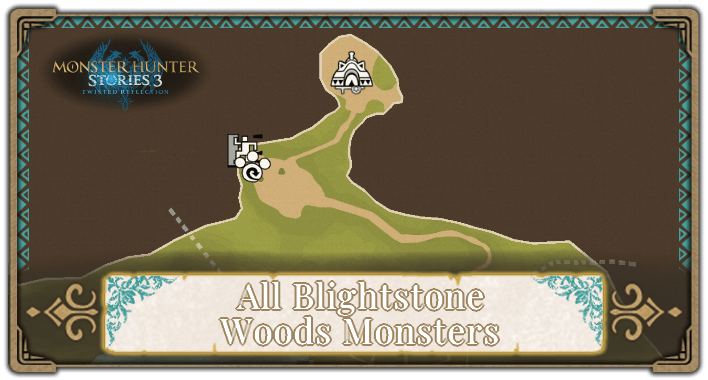 All Blightstone Woods Monsters
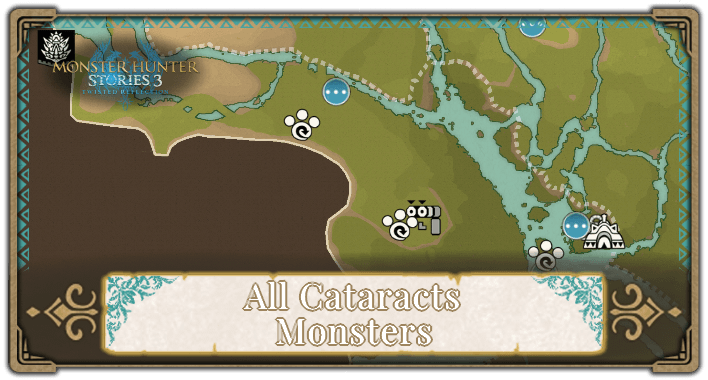 All Cataracts Monsters
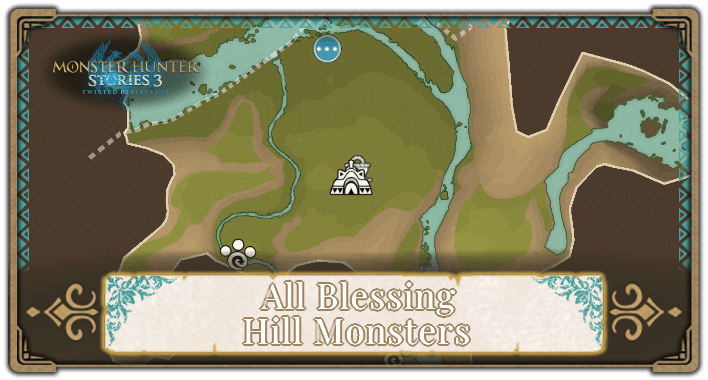 All Blessing Hill Monsters
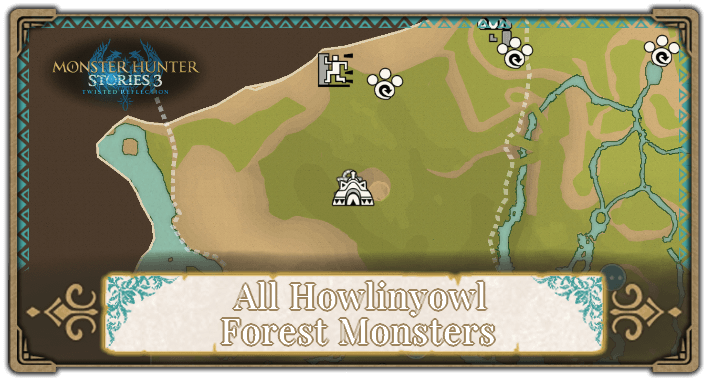 All Howlinyowl Forest Monsters
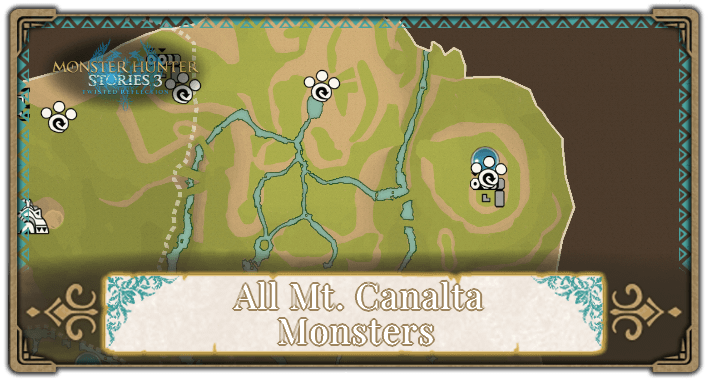 All Mt. Canalta Monsters
 All Frozen Grotto Monsters
Comment
Author

Monster Hunter Stories 3: Twisted Reflection Walkthrough & Guides Wiki
Tarkuan Map and Exploration Guide
Rankings
- We could not find the message board you were looking for.
Gaming News


Popular Games

Genshin Impact Walkthrough & Guides Wiki
Umamusume: Pretty Derby Walkthrough & Guides Wiki
Crimson Desert Walkthrough & Guides Wiki
Monster Hunter Stories 3: Twisted Reflection Walkthrough & Guides Wiki
Honkai: Star Rail Walkthrough & Guides Wiki
Pokemon Pokopia Walkthrough & Guides Wiki
The Seven Deadly Sins: Origin Walkthrough & Guides Wiki
Wuthering Waves Walkthrough & Guides Wiki
Zenless Zone Zero Walkthrough & Guides Wiki
Arknights: Endfield Walkthrough & Guides Wiki


Recommended Games
Fire Emblem Heroes (FEH) Walkthrough & Guides Wiki
Diablo 4: Vessel of Hatred Walkthrough & Guides Wiki
Cyberpunk 2077: Ultimate Edition Walkthrough & Guides Wiki
Yu-Gi-Oh! Master Duel Walkthrough & Guides Wiki
Super Smash Bros. Ultimate Walkthrough & Guides Wiki
Pokemon Brilliant Diamond and Shining Pearl (BDSP) Walkthrough & Guides Wiki
Elden Ring Shadow of the Erdtree Walkthrough & Guides Wiki
Monster Hunter World Walkthrough & Guides Wiki
The Legend of Zelda: Tears of the Kingdom Walkthrough & Guides Wiki
Persona 3 Reload Walkthrough & Guides Wiki


All rights reserved
©CAPCOM CO., LTD, and CAPCOM CO. logos are trademarks or registered trademarks of CAPCOM. All rights reserved.
The copyrights of videos of games used in our content and other intellectual property rights belong to the provider of the game.
The contents we provide on this site were created personally by members of the Game8 editorial department.
We refuse the right to reuse or repost content taken without our permission such as data or images to other sites.